1
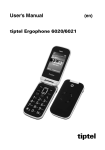
User's Manual (en) tiptel Ergophone 6030 tiptel Important notice This manual is about all functions of the phone. When using the phone with factory default settings and at the same time reading this manual you will notice that not all of the functions referred to in this manual are shown in the main menu. With this phone nearly all menu items in the main menu can be hidden in order to have only those items in the main menu that you are really using. The phone has been pre-configured before shipment so that you can immediately start using it. That's why we have hidden less frequently used functions in the main menu. I order to see all functions or to adapt the phone to your needs you will have to change these settings. This can be done in “Settings” main menu. Contents Contents Important notice ....................................................................... 1 Contents .................................................................................... 3 Safety notes .............................................................................. 7 First time operation .................................................................. 8 Checking gift box contents....................................................8 Install SIM card, memory card(s) and batteries ....................8 Switching the phone on ........................................................9 Setting of date and time ........................................................10 Charging the battery ..............................................................10 Phone controls ......................................................................... 11 Keypad controls ....................................................................11 Controls on the backside ......................................................12 Controls on the left side ........................................................12 Controls on the top side ........................................................12 Controls at the bottom side ...................................................13 General ..................................................................................13 Key assignment in stand-by ..................................................13 Icons in the display ................................................................14 Telephoning .............................................................................. 15 Taking a call ..........................................................................15 Rejecting calls .......................................................................15 Direct dialling .........................................................................15 Using re-dial ..........................................................................16 Speed-dialling........................................................................16 Dialling from phonebook .......................................................17 Functions while having a call ................................................17 Hands free mode ................................................................17 Mute ....................................................................................17 Call screening .....................................................................18 3 Contents Contacts .................................................................................... 19 Options ..................................................................................19 New .....................................................................................19 Write message ....................................................................20 Dial ......................................................................................20 Delete ..................................................................................20 Copy ...................................................................................21 Copy all ...............................................................................21 Others .................................................................................21 Messages (SMS) ...................................................................... 22 Read incoming SMS ..............................................................22 Write message .......................................................................22 Writing a message text ..........................................................23 SMS settings .......................................................................23 Call logs .................................................................................... 25 Displaying calls in absence ...................................................25 Camera ...................................................................................... 26 Storage ..................................................................................26 Gallery ...................................................................................26 Magnifier glass function .......................................................... 28 Radio ......................................................................................... 29 Radio options ........................................................................29 Auto search and save .........................................................29 Channel list .........................................................................30 Alarm clock ............................................................................... 31 Calculator.................................................................................. 32 Recorder ................................................................................... 33 Tools.......................................................................................... 34 4 Contents Settings ..................................................................................... 35 Profiles ...................................................................................35 Profile settings ....................................................................35 Call settings ...........................................................................37 Speed dial settings .............................................................37 Dual SIM settings ................................................................37 Network selection ...............................................................38 Call divert ............................................................................38 Call barring .........................................................................38 Call waiting .........................................................................39 Hide ID ................................................................................39 Phone settings .......................................................................40 Time and date .....................................................................40 Select language ..................................................................40 Talking keys setting ............................................................40 Restore settings ..................................................................40 Main menu .............................................................................40 Display settings .....................................................................41 Wallpaper settings ..............................................................41 Contrast ..............................................................................42 Back light ............................................................................42 Keypad light ........................................................................42 SOS setting............................................................................42 Security settings ....................................................................42 Emergency call ......................................................................... 44 Blocking of the emergency call function through an answering machine.............................................45 Testing the emergency function ............................................45 Setting up the emergency call ..............................................46 SOS status ..........................................................................46 SOS numbers .....................................................................46 SOS message .....................................................................47 Cancelling an emergency call ...............................................47 Important notes on the emergency call functions.................48 5 Contents Addendum................................................................................. 49 Service ...................................................................................49 Warranty ................................................................................50 CE Sign ..................................................................................52 6 Safety notes Safety notes You may only use this phone in locations where this is allowed. Usually you may not use a mobile phone in hospitals, planes, or at petrol stations. Do not open the phone and do not try to repair it. Repair work may only be carried out by qualified personnel. Avoid exposing the phone to smoke, chemicals, humidity, or excessive heat (direct sunlight). Keep the phone and its accessories away from children. The loudspeaker of this phone can be set to very high volumes. Check the volume before use to avoid damage to your hearing. While driving use this phone only with an approved hands free device. Obey country specific regulations. Keep a distance of at least 20 cm to an implanted heart pace maker. The phone must be turned off immediately in case you suspect any influence. Only use the attached AC adapter. Only use original accessories and batteries. The phone is not water proof. Avoid contact with any fluids. You must not rely on the emergency call function of the phone alone. Due to technical restrictions settings up an emergency connection cannot be guaranteed. Disposal of phone and batteries must be carried out properly. Do not put the phone in your general waste and do not throw it into a fire. Disposal of packaging parts must be carried out according to local regulations. 7 First time operation First time operation Checking gift box contents Scope of delivery: Mobile phone tiptel Ergophone 6030 AC adapter Charger cradle Battery pack Li-Ion 3.7 V/900mAh User's manual Install SIM card, memory card(s) and batteries Before you can use the phone you will have to install SIM card, battery, and eventually memory card. SIM card and memory card are not part of the scope of delivery. A SIM card you will receive from your provider. Ergophone 6030 supports micro SD memory cards up to 4 GB. To install a SIM card and eventually a memory card the cabinet cover on the backside of your phone must be removed. Slide this cover downward until you can lift it. Install the SIM card carefully in the SIM 1 slot, if you wish to use two SIM cards use SIM 2 slot for the second card. 8 First time operation If you wish to use a memory card please install this card to the small card holder below the camera. To install the cards slide the metal bracket to the rear. Then it can be lifted. After installing the card, slide the metal bracket to the front again so that it secures the card. Please proceed carefully. When the bracket cannot be moved easily probably the card has not been inserted properly. Now the battery has to be installed which is only possible in the correct positioning. Finally refit the cabinet cover and slid towards the red SOS button until it snaps in. Note: The phone can be operated without memory card. But then the memory is limited and files cannot be transferred to a PC. When you frequently want to take pictures or record voice messages we recommend using a memory card. The phone supports cards up to 4 GB. Switching the phone on To switch it on press the red hang-up key for 3 - 5 seconds. Then - if applicable - the phone PIN and after this - if activated on SIM card - the SIM PIN will be queried. Enter the PIN via the key pad and then press the OK key. Note: More information on the PINs please find in chapter “Settings” → “Safety Settings.” There you can change the phone's and the SIM card's PIN and activate/deactivate the SIM query. 9 First time operation Setting of date and time After switching the phone on for the first time or when the battery was removed for a longer period of time date and time must be set. The phone will automatically ask you for time and date which must be entered via the keypad. Then confirm your setting by pressing the OK key. The date must be entered in international format: year, month, day. The LCD then should show correct date and time. Charging the battery The phone comes along with a charger cradle and an AC adapter which must be connected with the cradle using the small plug while the large plug has to be inserted in a mains wall outlet. Put the phone in the charger cradle. The battery will now be charged. While charging the right bar segment in the battery status field will flash. As soon as charging has been completed all segments are filled. There is no flashing anymore. Note: Instead of using the charger cradle you can also connect the connector of the AC adapter directly to the jack at the bottom of the phone. And the battery can also be charge via the USB connector of a PC. Before putting the phone into operation for the first time charge the battery completely. For a long life of your battery put the phone only in the cradle when the battery is nearly depleted (only 1 or 2 bars left in the battery indicator). Batteries have a limited life time. If you have to charge your phone more often replace the battery. 10 Telephone controls Phone controls On top and bottom side as well as on the left and the right side and when opened a number of controls. Keypad controls Left display key Confirms settings on the LCD Right display key Confirms settings on the LCD Camera key Pops up camera function Magnifier glass key Activates magnifier glass function OK key To confirm selections made Cursor keys Keys up , down , left and right for menu selection. Dial key Dialling and taking a call, Shows call list Hang-up key Terminate or reject a call, Getting back to standby mode, On-/Off Key 1 Press long for answering machine Hash key Memory M2 when pressing long Asterisk key Memory M1 when pressing long 0 key Blank, e.g. when typing SMS 11 Telephone controls Controls on the backside Here you will find the emergency call button (SOS) and the camera. Pressing the SOS button for 3 seconds an emergency call will be made. For details please see chapter "Emergency Call". When using the camera or the magnifier glass function make sure not to cover the camera with your hand. Controls on the left side Here you find the +/- rocker. During a call you can use it for adjusting the volume. It also acts as volume control for the integrated radio. Above this rocker there is a 2.5 mm jack for a headset which is not part of the scope of delivery. But you can order this as optional accessory. Controls on the top side On the top side, there are switches for operating some of the functions when the phone has been collapsed. The "flash light switch" on the right side turns the integrated flash light on or off when being pressed for some 1 second. The "FM switch" on the left side is used to switch the integrated radio on/off. The two middle keys are used to change radio stations. 12 Telephone controls Controls at the bottom side At the bottom side there are the contacts for the charge cradle on the left and the right hand side. Between them there is a micro USB connector to charge the batteries with the AC adapter or a Computer and there is another charger jack for a Nokia compatible charger. General The left and the right display keys are assigned to different functions depending on the status of the device. The function assigned for the time being you will see in the display above each of the two keys. In menus the right display key usually is for exiting or going one step back. With the left display key you confirm functions or open the options menu. Alternatively, you may use the OK key (silver in the centre of the cursor cross). The red hang-up key will key exit a function completely. and are used for selecting entries from the menu Cursor keys lists, cursor keys and partly for selecting submenu items. Key assignment in stand-by In stand-by mode the left display key is for going to the main menu, the left key is for going to the contacts list. In the cursor cross in stand-by mode the OK key opens the main menu. Key activates silent mode. Key activates standard mode. Key opens the SMS menu; key turns on the integrated radio. When you press the green dial key in stand-by mode the list of recently dialled numbers for re-dial will pop up. 13 Telephone controls Icons in the display In the left upper corner the signal strength and on the right upper corner the battery charging status will be shown. In addition, icons for new SMS, missed calls, silent mode, or alarm clock and headset connected can be shown. Icon Meaning Signal strength Battery status New unread text messages (SMS) Call(s) in absence Silent mode active Alarm clock on Headset connected 14 Telephoning Telephoning Taking a call With an incoming call the phone rings provided that profile "Silent" has not been activated and the phone vibrates provided that "Vibration" has been activated in the "Standard" profile. The display will show you the caller's number. When the caller has been saved to the phone register instead of the number the name will be shown. You can take the call by pressing the green dial key . Alternatively, you may press the left display key. The right display key can be used to disable the ringing tone during the call. Rejecting calls With an incoming call press the hang-up key caller will hear the busy signal. to reject the call. The Direct dialling For direct dialling use the digit keys for the number and then press the green dial key . The call will be placed. Note: Please note that with mobile phones you always will have to dial the area code. Via the main menu → “Settings” → “Phone settings” → “Talking keys setting” you can activate a function having each digit being announced. 15 Telephoning Using re-dial If you press the green dial key without entering a number first the call list will pop up. It shows you the numbers you recently dialled. Keys and can be used to toggle between received or missed calls. and can be used to browse the call list up or down. PressKeys ing the green dial key once again will result in calling the selected number. Speed-dialling This phone provides you with speed-dial keys for storing frequently used number. You can speed-dial from stand-by mode by pressing one of the digit keys -, , and for some 2 seconds. The stored number will be dialled. Key carries the icon of a female head, key the icon of a male head. These two keys can be used as speed-dial keys e.g. for daughter and son. Note: To be able to use the speed-dial keys you will have to define them first in “Settings” → “Call settings” → “Speed dial settings.” 16 Telephoning Dialling from phonebook When pressing the right display key in stand-by mode (LCD shows "Pbook", contacts will be displayed starting with the first entry. Keys and can be used to browse up or down. When you press a digit key more than once in a row, the first entry starting with the corresponding letter will be shown. E.g. to have the first entry starting with "L" being displayed, you will have to press key three times in a row within a short period of time. Pressing the green dial key will have you call the selected number. Functions while having a call During a call you can use the right display key to toggle between handset and hands free mode. The left display key provides you with the options menu for more functions. Hands free mode During a call you can use the right display key to toggle between hands held and hands free mode. You will hear your conversational partner from the large loudspeaker on the backside of your phone. Mute When pressing the left display key during a call and selecting the issue "Mute" and then pressing the OK key, the microphone will be switched off. You may then talk to other people in the room and your conversational partner cannot hear what you are saying. 17 Telephoning Pressing the left display key once again, selecting the issue "Unmute" will reactivate the microphone. Call screening Ergophone 6030 allows you to record parts of phone calls. This can be useful in case your conversational partner wants to give you information you cannot remember and/or you cannot write it down. Examples would be shopping lists, routes to drive, or complete contact details. During a call press the left display key and select the item "Start to record" then press the OK key. Now the call is being recorded. Pressing that key once again and selecting the item "Stop recording" and then pressing the OK key stops recording. Screening is made via the recorder function of your phone. Screening will be stored same as voice messages and can be played back using the recorder function. Please read chapter "Recorder". Note: Since the phone's memory is not that large, screening can only be carried out when there is a memory card installed. Screening is only allowed when you advise the caller on this before activating the screening function and the caller agrees. 18 Contacts Contacts Each contact is a name and the phone number belonging to that name. “Contacts” is your phone book for calling other subscribers or sending them SMS text messages. Your phone comprises an integrated memory for contacts. But contacts may also be saved to the SIM card. To review your contacts in stand-by mode press the right display key. Contacts will then pop up directly. You can also open the contacts list via the main menu and select the item "Contacts". All stored contacts will be shown with the first contact being selected. and can be used to select any contact in the list. Keys When pressing a digit key (where applicable several times in a row) the contact starting with the corresponding letter will be selected from the list. If you press e.g. digit key 6 once the first contact starting with "M" will be selected. If you press 6 three times on a row the first contact starting with "O" will be selected. When pressing the OK key details of the selected contact (name, number, memory location) will be shown. Pressing the green dial key will result in calling this contact. Options Pressing the left display key while in the contact list will open the options menu. New Use "New" to create a new entry. A selection for "Name" and "Mobile" will pop up. 19 Contacts key and then press the OK key. Enter First, select "Mobile" with the the number with the digit keys and confirm it with the left display key. To make sure that dialling also works when in another country you should store the numbers always in international format with country code. Number 02102 4280 should therefore be entered as +4921024280, with +49 as country code for Germany followed by the area code without the leading zero. + can be entered by pressing twice in a row. Then select "Name" and press the OK key. Now you should use the digit keys to enter the name of the subscriber. Pressing a digit key once selects the first letter above that key, pressing it twice selects the second letter above that key, and so on. To enter "Space" press . will toggle between upper case and lower case and first letter of a word upper case and all other letters lower case (ABC, abc, Abc). Once you have finished entering the name press the left display key. Now the list with name and number of your entries will be shown. Press the left display key to store this contact. Write message Select "Write message" from the options menu to write an SMS to the contact. Dial Dials the number of a contact. Instead of selecting this menu item you can simply press the green dial key with the contact selected. Delete Deletes the selected contact. 20 Contacts Copy Here you can copy the selected contact from phone to SIM card or vice versa. Copy all Here you can copy all entries from SIM to phone or vice versa or with two SIM cards between those cards. Others Here you can perform settings on your contacts. Storage settings Here you configure whether new contacts will be saved to the SIM card or to the phone's memory. Memory status Here you can see how many contacts have been saved to the SIM card(s) and how many have been saved to the phone. Single line display/double line display In the contacts list next to the name you will also find the number. Here you can configure whether you want to see name and number in one row or in two rows. 21 Messages Messages (SMS) You can use your phone to receive and send SMS text messages. Read incoming SMS When you have received a new SMS this will be shown to you in large letters in the display. By pressing the left display key the SMS will be shown. When you now press the left display key you will see the options allowing you to delete the message, to answer the sender or to call the sender. As long as you have not deleted a message you can review it via the main menu item "Message" under the sub menu "Inbox". Here you see a list of all saved messages. After selecting a message it will be shown and you have the same options as above. Write message Besides answering to a message you can also write your own message and send it. From the main menu select "Message" and the "Write message". A window will pop up in which you can write your message via the keypad. A short press of the left display key will delete the last character entered; a long press will delete the whole text. When you are ready with your message press the left display key to go to options and there select the item "Send." The receiver window will pop up in which you can enter the number. Pressing the left display key will have the contacts popping up. Select 22 Messages the contact you wish to send the message to and then press the left display key to confirm the number as receiver for the message. To send one message to more than one subscriber you can select the contacts and pres the OK key for each contact. The selected contact will then be marked as receiver. By pressing the left display key all marked contacts will be added to the receiver list. Then from the receiver list press the OK key to send the message. Tip: If you wish to send a message to a receiver who is saved in the contacts list you can also go to “Contacts”, select the contact and then select "Write message" from the options menu using the left display key. Writing a message text The actual message text is written by using the digit keys through with three to four letters written above them. Pressing a key once will write the first letter, pressing it twice will write the second letter, and so on. For "Hello" you must press twice, then twice, then three times key , again three times key and then three times key . To enter "Space" press . will switch the current letter to upper case. SMS settings From the main menu select the item "Message" and then press the left display key to open SMS settings. Item "Memory capacity" shows you the number of SMS saved to the phone and the SIM card(s). 23 Messages In SMS settings enter the number of the SMS centre of your telephony provider. Usually this will automatically be taken over from the SIM card. In settings on the SMS validity you define how long your provider shall try to deliver the SMS. We recommend keeping the maximum setting. Under status report you can configure whether or not you wish to receive a confirmation on a successfully sent SMS. In general you should not activate this function because these confirmations are often not free of charge and they are not always supported. 24 Call logs Call logs When pressing the green dial key in stand-by mode the call log will be shown. The last dialled numbers will be shown. With and you can toggle between received and missed calls. Alternatively, you can get to the call list via the item "Call logs" in the main menu. Keys and can be used to browse through the call lists. Pressing the green dial key places a call to the selected number. Pressing the left display key will open the options of the call list. Besides calling the number, you can also send a message, save the number as contact, or delete the selected or all entries of the current call list. Displaying calls in absence In case you have received a call in absence you will be notified by a large info in the display. Use the right display key to close this info. Use the left display key to see calls in absence in the list of calls in absence. 25 Camera Camera You can go to the camera function either via the main menu item "Camera" or directly by pressing the camera key on the keypad. Now you see the picture on the display. Make sure not to cover the lens on the backside of the phone when using this function. The integrated camera comprises a zoom function to zoom the object shown. Press for zooming in and for zooming out. In the upper right corner of the display you will see the zoom factor (1X - 5X). Press the OK key to take a picture which will then be shown to you on the display for verification. Press the left display key for saving the picture or the right one for cancel without saving. When you press the left display key in camera mode you come to the selection "Gallery" and "Storage". Storage Here you configure whether pictures will be saved to the internal memory of the camera or to the memory card installed. If you take pictures frequently a memory card must be installed. Ergophone 6030 supports Micro SD memory cards up to 4 GB. Gallery When you select "Gallery" all saved pictures with file name, file size, and preview will be shown. Use the OK key to show the picture in full screen mode. To exit this mode press the right display key. Keys and select the previous or the next picture for display. Pressing the OK key will start a slide show. 26 Camera Pressing the left display key gives you the option to delete the selected picture or to use it as wallpaper. When using a picture as wallpaper it will be shown on the display in stand-by mode. Please note that a wallpaper might have impact on the readability of display information. 27 Magnifier glass function Magnifier glass function Your phone comprises an integrated magnifier glass which can be activated by pressing the magnifier glass key on the keypad. Hold the camera on the phone's backside close to the object you wish to magnify. Make sure not to cover the camera’s lens. Use keys and to zoom in or out on the object. Exit the magnifier glass function by pressing the red hang-up key 28 . Radio Radio Your phone comprises an integrated FM radio. You can open the radio via the item "Radio" in the main menu. Alternatively, you can press the FM key at the top of the collapsed phone for some 3 seconds. You can listen to the radio via the integrated speaker or the headset (not scope of delivery). When using a headset, this will act as an additional antenna resulting in better signal quality. When you turn the radio on the last used station will be played. Keys or select the previous or the next station stored. In collapsed state the same function is assigned to the two middle keys at the top of the phone. The +/- rocker on the left side of the phone is used to adjust the radio volume. The OK key toggles between playback via loudspeaker or headset. You can exit radio operation by pressing the left display key or the red hang-up key , when collapsed you may press the FM key for an extended period of time. The left display key is used to access radio options. Radio options The left display key is used to access radio options. Auto search and save This function searches for radio stations and stores them automatically to the station list. 29 Radio Note: Automatic search will overwrite the station list. Channel list Shows stored radio stations and allows you to define channels manually or to change them after automatic search. 30 Alarm clock Alarm clock To use your phone as alarm clock select "Alarm" from the main menu. You will see three alarm clocks you can activate or deactivate with the left display key. Pressing the OK key will show you the settings of the selected alarm clock. “Settings” allows you to assign names to the alarm clocks, enter the alarm time, and to select the ringing signal for the alarm. As soon as one alarm clock has been activated you will see an alarm clock icon in the upper left corner of the LCD. At the alarm time the phone will ring and show you the name of the alarm clock in the display. Also you will see "Off" and "Delay" to be operated with the left or right display key. "Off" will end the alarm function. "Delay" will delay the alarm by round about 5 minutes. 31 Calculator Calculator To use your phone as a calculator select "Calculator" from the main menu. The figures you wish to perform calculations with you can enter via the digit keys. The separator can be entered by pressing key for point. Operations +, -, x, and / you can select with the cursor keys. OK gives you the result. Pressing the right display key first deletes the result and pressing it once again exits the calculator. 32 Recorder Recorder The recorder allows you to record memos saved to the internal phone memory or to the memory card. Select "Recorder" from the main menu. After starting the recorder you will see 3 icons at the bottom of the display. From left to right these are playback (arrow to the right), Stop (square) and record (circle). On start of the recorder only key record is available, after recording a message also playback and stop are available. Switching between the functions is done by using the the function is started by pressing the OK key. and keys, Options will allow you to start a recording, to look the record file list, and to select the memory for your recordings. Tip: The internal memory can only store a few short recordings. If you wish to use the recording function more frequently it is recommended to use a memory card. 33 Tools Tools This main menu item is about services of your telephony provider. Which services are available is defined by the provider. The provider can supply you with information on the functionality and the prices of services offered. 34 Settings Settings This menu item is on the largest number of settings for your phone. The settings menu has many sub folders which again have their own sub folders. We have already pre-set useful functions for you so that you will only have to modify only a few particular functions if needed. Profiles Your phone operates with two profiles: "Standard" and "Silent". In a profile all tones of the phones will be defined. In this menu you can select the profile and also configure it. To activate a profile select it and then press OK. Tip: In stand-by mode key can be used to activate the "Silent" profile and key to activate the "Standard" profile. When in the profile list press the left display key for options. Here you can activate the selected profile or modify its settings. Profile settings We recommend only to modify the "Standard" profile settings and to modify the tones and volumes suiting your need. Profile "Silent" has been pre-set in such a way that the phone is set to "silent mode" in order not to disturb anybody, e.g. in a conference. These settings should not be changed. But you should configure whether or not you want the phone to vibrate on an incoming call. 35 Settings Ring settings Here you select the tones for SIM 1 and SIM which the phone will play with an incoming call or SMS. You can choose among fixed and your own ringing tones. Fixed tones are already integrated, for your own tones you can use audio files which you have copied to the memory card before. Without memory card only fixed tones can be used. Adjust volume Here you can set the volumes for ringing tone, SMS tone, and loudspeaker during a call, alarm clock, and the tone sounding when turning the phone on or off. Call alert Here you can define how the phone signals incoming calls for SIM 1 an SIM 2. You can choose among Ringing only Vibrating only Silent Vibrate first and then ring Ringing and vibrating at the same time Message alert Here you can define how the phone signals incoming SMS. You can choose among Ringing only Vibrating only Silent Ringing and vibrating at the same time 36 Settings Key tone Here you can define how the phone signals key actuations. You can chose among two tones and silent mode. Battery low alert Here you can define if the phone shall notify you about low battery status before the battery has been completely depleted. Power on/off volume Here you can define whether or not the phone shall playback a melody when turned on or off. Call settings This menu is on settings in connection with calling and dialling. Speed dial settings Here you can assign speed-dial numbers for the digits through and keys and . When pressing the corresponding key for some 2 seconds the stored number will be dialled. Next to the key you will see a female face, next to the key you will see a male face. These keys are especially suitable to store the number of your son or daughter. Dual SIM settings This menu item is only available when two SIM cards have been installed. Here you can define how the phone should behave with outgoing calls and SMS in case there are two SIM cards. Factory default setting will prompt you which SIM card to use. When there are two SIM cards installed you will always see a selection with all relevant settings for which SIM card this setting shall be performed. 37 Settings Network selection Here you can configure whether the phone shall automatically search for networks or whether you wish to select the network manually. With automatic search in your home country the phone will automatically register with the network of your provider, in other countries it will always use the network with the best signal strength. Manual selection only makes sense in other countries in case you wish to use a particular network, because e.g. you know that the rates are cheap. Call divert Here you can define whether or not the phone shall divert calls. Call divert can be activated for all calls. In this case the phone will never ring the caller will always be redirected to the target you configured. Alternatively, you can configure the phone that calls will only be redirected when your phone is busy, when you cannot take the call, or when your phone is not available (no signal). When you activate these deflections you can chose to redirect them to your provider's voice mailbox or to any other number. With each type of call deflection you have the option to turn it on or off or to get information on the current status. The item "Deactivate all deflections" will deactivate al deflections. Call barring Here you have the option to bar outgoing/incoming calls. This is a function of your provider, which is not supported by every telephony provider. With "All Outgoing calls" or "All Incoming calls" you would block your SIM card for all calls outgoing or incoming. 38 Settings With "Incoming Calls when Roaming" or "Dial when INTL Roaming" you will block such calls when your phone is not registered with your provider. Roaming means that your phone has been registered with another provider in another country and that provider would transfer your calls. You will also be charged for incoming calls then. With blocking/barring you will avoid such charges but on the other hand you are not available on the phone then and you cannot place any calls. With "International calling" you can block your phone regarding outgoing calls to foreign countries. Note: For barring you need PIN2 received from your provider. This PIN must be set in the phone's security settings. Call waiting Here you can activate/deactivate call waiting and query the current status. When call waiting has been activated you will hear a call waiting signal while you are talking on the phone in case there is a second caller. Then you can toggle between those two calls. The caller will hear the ringing signal. With call waiting deactivated the caller will hear the busy signal. Hide ID Here you can configure whether or not your phone number will be shown on the called party's phone. "Hide ID" means that your number will not be shown. "Display own ID" means that the caller can see it. “Display ID by network" means that the provider defines whether or not your number will be shown. 39 Settings Phone settings In this menu you can set date, time, and language and you can restore factory default settings. Time and date Here you can enter time and date and select the format. Date has to be entered in international format: Year - Month - Day, even when the format shown later will be Day - Month -Year. Select language Here you can select the menu language. Talking keys setting Here you can activate/deactivate the talking keys. When activated the phone will "say" each individual digit you dialled. Restore settings Here you can restore factory default settings. When selecting this item enter the password 1234. Stored contacts, saved photos or recordings and other personal data will not be affected Main menu Here you can define which menu items of the main menu are visible. You can adapt the main menu to your needs and hide functions not needed. 40 Settings When going to this menu you will see a list of all items of the main menu. You will see a check box in front of each item. Only when the box has been checked this item will be shown. Functions directly accessible through the keypad are also available when this function has been hidden in the main menu. Also when you have hidden the item "Camera" in the main menu you can still use the camera key on the keypad. and are used to select items from the main menu. The left Keys and right display key change the display status. Your change will be accepted automatically. Use the right display key to exit the main menu settings. Note: In factory default settings some main menu items are hidden. Display settings Here you configure display (screen) settings. Wallpaper settings Here you can select the wallpaper for stand-by mode. You can choose among "Default" (white factory preset background) and your own wallpaper. When you choose "More Wallpapers" you can select a picture from your photo gallery. Please note that elements on the display may be harder to read when you have a wallpaper defined. Tip: After taking a picture with the integrated camera you can select it directly as wallpaper. 41 Settings Contrast You can change the contrast using the and keys. Use a setting with good readability. The left display key saves your settings the right one cancels the settings. Back light Here you can define how long the display back light shall be on after the last actuation of a key. The longer it is on the shorter is the battery life. Keypad light Here you can define how long the keypad back light shall be on after the last actuation of a key. The longer it is on the shorter is the battery life. SOS setting Here you configure the settings for the integrated emergency call function. Please read the chapter "Emergency call". Security settings Here you can protect your SIM card(s) and your phone by a PIN which must be at least 4 and at most 8 digits. Here you can switch on or off the PIN and PIN 2 prompt for the SIM card and the PIN for the telephone. And you can also change the PIN. The provider who delivered the SIM card also provided you with PIN and PIN 2 on that SIM card. You will need these PINs as previous PIN and PIN 2 in case you want to change them on the SIM card via the phone. 42 Settings When the PIN prompt for the SIM card(s) has been activated you will have to enter the PIN every time when you switch on the phone. This prompt is connected to the SIM card. Also when you insert the SIM card into another phone you would receive the SIM prompt. So the PIN protects the SIM card against unauthorized use. Switching this prompt off, however, is more comfortable, because you do not have to remember the PIN and enter it every time. Without PIN prompt e.g. in case of loss there is no protection against unauthorized use which may result in high costs. PIN 2 is being used for some functions of your provider, e.g. blocking certain numbers. As this PIN is not being used frequently it is not really necessary to save it in your phone. The phone PIN is connected to the phone itself. Has this PIN been activated you will have to enter it every time you switch on the phone. So, this is a protection for the phone. Full security, however, is only there when both PIN prompts are activated. In case of loss the person who found your phone can neither use the phone nor the SIM card. In this case - when turning on the phone - you will have to enter both PINs. 43 Emergency call Emergency call Your phone comprises an emergency call function which can be executed when pressing the SOS key on the phone's backside for some 2 seconds. When at least one emergency phone number was programmed and the emergency call key is activated, the phone will execute an emergency call once the SOS key has been pressed for some 2 seconds. The phone will then sound an alarm tone and send an individual SMS to up to five programmed emergency numbers. The help text can be edited. Then the phone will call the first emergency number. In case that the call is taken the phone automatically will go to hands free mode. If the called party hangs up the emergency function will continue, dialling the next emergency number. To end this function you will have to short press the red hang-up key several times. When the call is not being taken it will call the next programmed number. When none of the called parties takes the call or the emergency call function is not terminated after a call the phone will repeat the call sequence three times. During the emergency call the display will show the called number and the call is being made in hands free mode, so you can hear if the called party takes the call. While sending the SMSs and during the dial attempts the phone will continue to sound an alarm. Once the connection has been set up or it rings or the called party has taken the call the alarm will stop but it will start with each new dialling attempt. After an emergency call has been executed (no matter if it was successful or not) the phone will take all following calls automatically and will go to hands free mode. So, contact to a helpless person is still possible even if the emergency call procedure has already been terminated. To exit this function the phone has to be turned off and then on again. 44 Emergency call Blocking of the emergency call function through an answering machine The phone cannot detect whether the call was taken by an answering machine, a fax machine, or a person. In case the call was taken e.g. by an answering machine the current call can be terminated by pressing the red hang-up key . Then the phone will immediately start dialling the next emergency number. Since the phone will continue the emergency call sequence even if there has been a connection the second call will even be placed when an answering machine had answered the first call - even when the helpless person could not press the hang-up key . Answering machines usually hang up after a few seconds when there is no clear voice message. However, this is not a reliable protection. That's why you should make sure that with emergency numbers there is no answering machine or fax machine connected. Testing the emergency function Test this function thoroughly once it has been set up. You should do this together with those persons whose phone numbers were programmed for the emergency calls. Please note that the phone user when executing the emergency call function is in a stress situation. So, also those persons who should take the call should be familiar with the operation of the emergency call function to give instructions such as terminating the emergency call sequence e.g. 45 Emergency call Setting up the emergency call For setting up the emergency call you will have to activate it first and then you will have to enter the emergency message text and the emergency numbers to call. From stand-by mode press the left display key, then - in the main menu - select "Settings" and then "SOS settings". Here you will find all settings needed for configuring the emergency call. SOS status Here you define whether the emergency call key on the backside of the phone is activated or not. When activated the emergency function is active as described above. If it is not activated the emergency call function is not available even if you entered the text messages and the numbers to dial. SOS numbers Under "SOS numbers" you can enter up to five numbers. First the first number is being dialled, then the second number, and so on. When going to this menu item you will see five memories for five numbers. Press the left display key or the OK key and then select "Edit". In case a number has already been programmed you will also see the option "Delete". You can enter the emergency call number via the keypad. You can also use the left display key to go to contacts in order to select any number from your contacts as emergency number. After selecting a number you will be asked if there should also be an SMS transmission to that number. With a mobile phone number, just confirm this. With fixed net numbers you should only confirm this in case that phone can receive SMS messages. 46 Emergency call Note: When you activate the SMS with numbers of phones that are not SMS compatible, the provider will call that phone and read the SMS to it. This call would occupy the line in the moment the emergency call is being placed. SOS message Here you enter the text that will be sent as SMS in a case of emergency. You can edit this text. Cancelling an emergency call In case you executed an emergency call accidently, you can terminate it by pressing the red hang-up key several times short. To exit the emergency call function completely the phone has to be switched off and then on again. 47 Emergency call Important notes on the emergency call functions Never rely only on this emergency call function. In certain situations (e.g. no net or no credit for outgoing calls) the emergency call function cannot be activated. There should be no answering machines at emergency call numbers set up. Advise the owner of an emergency call number thoroughly on what this emergency call function is about, so that they know how to react in a case of emergency. The general emergency number 112 may not be used as an emergency call number. Same applies to other official emergency numbers. Perform a complete test after set-up to fix any possible mistakes you might have made. Please note that the emergency call can also be executed through contact with objects, e.g. in the bag you carry the phone in. So store the phone with care when the emergency call function is activated. 48 Addendum Addendum Service You have purchased a modern product of Tiptel.com GmbH Business Solutions. Our high-tech manufacturing facilities grant a continuous level of highest quality. If, however, problems occur or you have any questions on operating the device please contact your local dealer. During the warranty period this is your contact partner. For technical support of specialist dealers Tiptel.com GmbH Business Solutions has set up a special phone number so that they can provide you with high quality consulting service. In case your dealer is not able to help you, you can contact Tiptel.com GmbH Business Solutions directly. First information you will find on our internet pages as shown below. In addition to that you can contact our experienced technical support staff by telephone at the times shown below: In Germany In Austria In Switzerland www.tiptel.de www.tiptel.at www.tiptel-online.ch 08.00 to 17.00 (Mo - Fr) 08.00 to 17.00 (Mo - Th), Fr until 15.00 08.00 to 17.00 (Mo - Fr) Telephone 0900 100 - 84 78 35* Vanity Tel. 0900 100 - TIPTEL* *subject to charges Telephone 02236 677 464-0, Fax 02236 677 464-21 Telephone 044 884 01 80 Fax 044 843 13 23 For questions regarding your telephone or DSL connection please contact your service provider. 49 Addendum Warranty Your contact partner for any warranty issues is the specialist dealer you purchased the device from. Tiptel.com GmbH will grant a warranty of 2 years from the date of handover for the material and for the manufacturing of the device. Initially, the purchaser shall have only the right of subsequent performance. Subsequent performance entails either repair or the supply of an alternative product. Exchanged devices or parts shall become the property of the dealer. If the subsequent performance fails, the purchaser can either demand a reduction in the purchase price or withdraw from the contract. The purchaser shall notify the dealer immediately of any defects found. Proof of the warranty entitlement shall be furnished by standard proof of purchase (receipt or invoice). The warranty entitlement shall expire if the purchaser or an unauthorised third party interferes with the device. Damage caused by inappropriate handling, operation, storage or by force majeure or other external influences shall not be covered by the warranty. The warranty shall not cover any consumable material (e.g. batteries) or defects that only slightly impair the value or the usability of the device. Claims for damage caused by transport shall be asserted to the delivery company. 50 Addendum Notes on settlement: Repairs can only be conducted by the Service Department of Tiptel.com GmbH Business Solutions. We offer a 48 hours repair service which makes sure that you will usually receive your repaired device or a replacement back after 2 days plus standard shipment time. A warranty repair does not prolong the warranty period - neither for the replaced parts nor for the device. This warranty is not transferable and shall expire if the device is sold on to another party. It shall also expire if the device is interfered with by third parties or if the serial number on the device has been removed or made illegible. There is a warranty seal on the device. Please do not damage or remove this seal because otherwise your warranty will expire. The General Terms and Conditions of Tiptel.com GmbH Business Solutions, which are part of the contract for a dealer, shall also apply. In the event of a complaint, the defective product shall be sent to the relevant Tiptel subsidiary, the importer or dealer along with a description of the defect and the proof of purchase. For warranty handling please contact your specialist dealer or send the device directly to the following address: In Germany Tiptel.com GmbH Business Solutions Service Halskestraße 1 40880 Ratingen In Austria In Switzerland Tiptel GmbH Service Ricoweg 30/B1 2351 Wiener Neudorf Tiptel AG Service Bahnstrasse 46 8105 Regensdorf 51 Addendum CE Sign This device is approved for the connection and use within the analogue public telephone networks in all EC countries – according to the European Requirements. Due to technical deviations in individual countries, we cannot grant an unlimited guarantee for the successful operation at all types of telephone accesses. Tiptel hereby declares that the device complies with all fundamental requirements of the European directive 1999/5/EC. This conformity is confirmed by the CE sign on the device. Further details on the declaration of conformity can be found under the following internet address: http://www.tiptel.com 52 Tiptel.com GmbH Business Solutions Halskestraße 1 40880 Ratingen Deutschland Tel.: 0900 100–84 78 35* Vanity Tel.: 0900 100–TIPTEL* Internet: www.tiptel.de International: Internet: www.tiptel.com *(1,49 Euro/Min. aus dem Festnetz der Deutschen Telekom, abweichende Mobilfunkpreise möglich) Tiptel GmbH Ricoweg 30/B1 2351 Wiener Neudorf Österreich Tel.: 02236 677 464-0 Fax: 02236 677 464-22 E-Mail: [email protected] Internet: www.tiptel.at Tiptel AG Bahnstrasse 46 8105 Regensdorf Schweiz/Suisse/Svizzera Tel.: 044 843 13 13 Fax: 044 843 13 23 E-Mail: [email protected] Internet: www.tiptel-online.ch Tiptel B.V. Camerastraat 2 1322 BC Almere Nederlands Tel.: Fax: E-Mail: Internet: 0900–BELTIPTEL of 0900–2358478 (niet gratis) 036 53 678 81 [email protected] www.tiptel.nl Tiptel NV Leuvensesteenweg 510 bus 4 1930 Zaventem Belgique/België Tel.: 0903 99 333 (1,12 Euro /Min.) Fax: 02 714 93 34 E-Mail: [email protected] Internet: www.tiptel.be Tiptel s.a.r.l. 23, avenue René Duguay-Trouin 78960 Voisins-Le-Bretonneux France Tel.: 01 39 44 63 30 Fax: 01 30 57 00 29 E-Mail: [email protected] Internet: www.tiptel.fr (en) 09/2011 EDV: 4935421