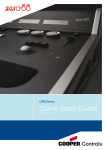
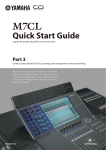
Download FLX Quick Start Guide
Transcript
Lighting Controls – FLX lighting console FLX Quick Start Guide Version 1.3 (Correct for ZerOS release 7.8.2) Please visit zero88.com/software to update your console free of charge. Zero 88 Series Usk House, Lakeside, Llantarnam Park, Cwmbran, NP44 3HD. UK Tel: +44 (0)1633 838088 Fax: +44 (0)1633 867880 Email: [email protected] Web: www.zero88.com Zero 88 FLX Quick Start Guide v1.3 – Stock Code: 9850-000492-00 – Page 1 of 20 Lighting Controls – FLX lighting console Your new FLX console runs ZerOS software! ZerOS is regularly updated to bring new features and to keep your console stable and secure. Software updates are free of charge and can be downloaded from zero88.com/software The release of software your console is currently running will be displayed as it’s turning on. It is strongly recommended to always be running the latest release of software. This product must be earthed Apparatets stikprop skal tilsluttes en stikkontakt med jord, som giver forbindelse til stikproppens jord. Laite on liitettävä suojakoskettimilla varustettuun pistorasiaan Apparatet må tilkoples jordet stikkontakt Apparaten skall anslutas till jordat uttag Zero 88 Series Usk House, Lakeside, Llantarnam Park, Cwmbran, NP44 3HD. UK Tel: +44 (0)1633 838088 Fax: +44 (0)1633 867880 Email: [email protected] Web: www.zero88.com Zero 88 FLX Quick Start Guide v1.3 – Stock Code: 9850-000492-00 – Page 2 of 20 Lighting Controls – FLX lighting console Introduction Quick start guide The FLX lighting console is a portable control system, running the ZerOS Operating System to control up to 2048 channels. This ‘Quick Start Guide’ is designed to get you up and running with the console, but is not a substitute for the whole manual. For more detail on each function, the full manual is divided into chapters, one for each major area of control. From design to manufacture, the FLX lighting console has been developed to work in a wide range of demanding situations, with specific considerations for live events & hire, touring productions, multipurpose venues, theatres and educational applications. Experience is the best way of fully learning the console. Through time you will develop your own operating style. Throughout this guide, references to front panel controls and buttons appear within a solid border, for example: Grand Master , Colour , UDK 3 . Soft buttons, which appear on the monitor, are displayed in italics, within a dotted border, as follows: Next , Picker . Front panel The front panel is split into the following areas, each of which are described on the next pages (along with some key terminology). User Definable Keys (UDKs) Function Keys Multi-Touch Monitor Attribute Keys USB Grand Master & Blackout MultiFunction Faders (MFFs) Encoder Wheels “Z” key Master Playback Numeric keypad & Command Keys Arrow Keys Zero 88 Series Usk House, Lakeside, Llantarnam Park, Cwmbran, NP44 3HD. UK Tel: +44 (0)1633 838088 Fax: +44 (0)1633 867880 Email: [email protected] Web: www.zero88.com Zero 88 FLX Quick Start Guide v1.3 – Stock Code: 9850-000492-00 – Page 3 of 20 Lighting Controls – FLX lighting console Terminology & key features Multi-Function Faders (MFFs) Internal, external & remote monitors The FLX lighting console is equipped with 24 MultiFunction Faders. These can quickly and easily be switched between their two functions (“Channels” and “Playbacks”) by using the Fader Funct. button: The internal multi-touch screen, and an optional external DVI-D monitor, displays the graphical interface for the FLX lighting console. Multiple mobile devices, such as smart phones, tablets and laptops, can also be connected simultaneously to show additional information or to add remote control functionality. Channels When set to “Channels”, the 24 faders directly control each light (or “fixture”) in the rig (this is often referred to as “Channel per Fader”). Each fixture, no matter what it is, will have a single “Channel Number”, and so will take up a single channel fader. When more than 24 channels are present, the Page Up and Page Down buttons can be used to navigate through all the channels in multiples of 24. The buttons below the faders are “select” buttons. Playbacks (cues, stacks & submasters) Lighting “states” (or “scenes”) can be pre-recorded, ready to be recalled later. They are called “cues”, and are recorded onto “playbacks”. Each playback can store a single cue, or multiple cues. The FLX Lighting Console has 240 playbacks, and can store a total of 10,000 cues. Traditionally, playbacks with a single cue have often been referred to as “submasters” whereas playbacks with multiple cues have often been referred to as “cue stacks”. This manual will simply call them playbacks. The button below the fades are “Go” buttons when in playback mode. Master Playback For many shows, especially theatrical, a single playback is often used with a long list of pre-recorded cues. For these situations, an additional “Master Playback” is provided, with double-width ► (play/go) button, and a dedicated ▌▌ (pause) button. User Definable Keys (UDKs) Grand Master & Blackout The Grand Master fader allows you to temporarily decrease the overall intensity of all fixtures. In normal operation, the Grand Master should be at 100%. The Black Out button takes all intensities to 0%, and the LED within the button flashes when enabled. Encoder wheels Four encoder wheels are provided, and used for accurate control of various settings. The settings currently being controlled by the four encoders are displayed in the four boxes along the bottom of the touch screen, just above the encoders. Numeric keypad & command keys The main keypad area is made up of a standard numeric keypad and a range of “command keys”, such as Record , Update and Delete . Channels can be controlled using either the keypad or via the faders. Command line Any commands that are typed into the console are displayed in the “Command Line”. This is displayed along the bottom of the external monitor (if present) or on the internal display (if external monitor is not present). Suggested commands bar Above the command line is a “Suggested Commands Bar” which indicates which commands are currently available. This can be turned off if not required. Four UDKs are provided, and can be assigned to a range of functionality including recalling lighting states, Groups, Palettes, and Effects, or accessing advanced functionality such as RemDim or Highlight. “Z” key Function keys DMX channels & universes The five function keys to the left of the touchscreen either perform functions themselves (like Home and View ), or change the functionality of other buttons when pressed at the same time (like Setup and Shift ). The Z Key places a range of quick access settings & functions on the internal display and encoder wheels. The FLX lighting console can control 2048 DMX Channels. These are divided into four “universes”, each with 512 DMX Channels. Two of these universes can be sent out over DMX and / or all four can be distributed over Ethernet. Zero 88 Series Usk House, Lakeside, Llantarnam Park, Cwmbran, NP44 3HD. UK Tel: +44 (0)1633 838088 Fax: +44 (0)1633 867880 Email: [email protected] Web: www.zero88.com Zero 88 FLX Quick Start Guide v1.3 – Stock Code: 9850-000492-00 – Page 4 of 20 Lighting Controls – FLX lighting console Fixtures Every device controlled by a FLX lighting console is known as a “Fixture”, and is assigned a “Channel Number”. Fixtures can be a simple generic dimmer channel, or a more complex DMX device such as a colour scroller, LED fixture, moving head, strobe light, smoke machine or media server. Any item controllable via a DMX signal can be assigned as a fixture on the console. Fixtures can be “patched” to any channel (1- 512) on any universes (1- 4). The below examples show how a fixture’s parameters would be split up into the four attributes. ETC Source 4 LED Lustr+ Fixture Patch Info DMX Address 100, Channel Number 50 Beam Attributes Colour Strobe Fan Fixture Patch Info DMX Address 106, Channel Number 51 Pan / Tilt Speed Tilt Position Pan Shutter Colour 1 Beam CTC White Blue Green Red Dimmer Colour Function Fixtures that are used together regularly (such as a colour wash, or all the moving lights on a specific truss) can be stored together into a “group”. The desk provides 240 groups. FLX can automatically create groups if required. Dimmer channels are simple fixtures with one parameter the “intensity”. More complex DMX devices (such as moving lights, LEDs etc) are fixtures with multiple parameters (for example “pan”, “tilt”, “red”, “green”, “blue”, “strobe” or “focus”). Parameters Robe Robin 100 LEDBeam Groups Parameters Blue Green Red The DMX Patch (or “patching”) is a required process where the FLX lighting console is told which fixtures are being used, which DMX channels each fixture uses (referred to as the “DMX address”) and what Channel Number each fixture should be assigned. Dimmer DMX patch Attributes Parameters Clay Paky Alpha Spot 300 DMX Address 118, Channel Number 52 The “Shape” attribute is coming soon in a free software update. Until then, “Shape” and “Beam” will be combined together under “Beam”. Macros Macros are used for fixture settings such as “Lamp On” or “Reset”. Which Macros are available depend on the fixtures patched. Tilt Pan Reset Position Lamp Shutter Focus Prism Rotation Beam Prism Gobo Rotation Shape Gobo Wheel 2 Colour Wheel 2 Colour Wheel 1 Dimmer Parameters are grouped together into four attributes for easy access and control. These attributes are called “Colour”, “Beam”, “Shape” and “Position”. A fifth attribute, called “Effect”, manipulates parameters to create effects such as “Circle”, “Ballyhoo” and “Rainbow”. These five attribute buttons can be found along the right hand side of the internal touchscreen. Colour Gobo Wheel 1 Attributes Palettes Palettes can quickly recall parameter settings that are used regularly, such as a range of colours for LED fixtures, or a range of positions for moving lights. 240 palettes are available for each of the five attributes (Colour, Beam, Shape, Position and Effects). FLX can automatically create palettes if required. Zero 88 Series Usk House, Lakeside, Llantarnam Park, Cwmbran, NP44 3HD. UK Tel: +44 (0)1633 838088 Fax: +44 (0)1633 867880 Email: [email protected] Web: www.zero88.com Zero 88 FLX Quick Start Guide v1.3 – Stock Code: 9850-000492-00 – Page 5 of 20 Lighting Controls – FLX lighting console Getting started Adding dimmers The mains cable should be connected to the FLX before any other cables are connected. A safety earth is provided through this connection to help protect both the user and the product if there’s a fault with anything plugged into the console. Before you can control any fixtures, you need to “patch” them into the console. When you first turn on your console, FLX will offer to patch any number of basic dimmers for you automatically (fig. 3). These will be patched as a “1-to1 patch”, meaning if you choose 48 dimmers, they will be patched as Channels 1 - 48, on DMX addresses 1 - 48, on Universe 1. If you are using an external monitor, plug this in prior to powering up the console. Once done, power on the console using the switch on the rear panel. When you power on the console, FLX will run through its power up routine and after a short while you will be presented with the console software in its default configuration. External monitor The optional external monitor can view one of two different desktops – “Programming” or “Palettes”. Which one is currently being viewed can be switched using the two buttons in the bottom right corner of the monitor (or by pressing Shift and View together). The Programming desktop (fig. 1) shows the Output Window in the top half of the screen, and either the Playback window or the Playbacks Summary window in the bottom half. Which one is being viewed can be switched by tapping the View button. Figure 3 – Selecting how many dimmers to patch automatically The Palettes desktop (fig. 2) shows the four attribute windows (Colour, Beam, Position and Shape) in each corner. When viewing this desktop, the internal monitor automatically switches to the groups window. Figure 1 – External monitor viewing “Programming” desktop Figure 2 – External monitor viewing “Palettes” desktop Zero 88 Series Usk House, Lakeside, Llantarnam Park, Cwmbran, NP44 3HD. UK Tel: +44 (0)1633 838088 Fax: +44 (0)1633 867880 Email: [email protected] Web: www.zero88.com Zero 88 FLX Quick Start Guide v1.3 – Stock Code: 9850-000492-00 – Page 6 of 20 Lighting Controls – FLX lighting console Adding other fixtures (patching) If you have other fixtures, such as LEDs, moving lights, effect machines etc, these need to be patched too. This is done within the Setup window, which is displayed on the internal monitor by pressing Setup . Once in Setup, press Patch Wizard on the left hand side of the display. The Patch Wizard window will appear and guide you through adding additional fixtures. First, the wizard asks you to select the fixture’s manufacturer. Scroll down (or use the curser keys) to select the required manufacturer (eg Clay Paky). If you have a keyboard connected, you can press the C key to jump straight to manufacturers beginning with C. Press the Next button to be shown a list of fixtures from your chosen manufacturer. Select the fixture type required (eg “A.leda Wash K5” – fig. 4) and press the Next button. Please note – fixture types If the fixture type you require is not in the library, you can import it - see zero88.com/software/library for more info. If the fixture has multiple “modes”, the next screen will allow you to select the fixture’s mode. It is important that the mode set here matches the mode set on the fixture - if in doubt, consult the fixture’s operating manual for details. It is important here to ensure that the correct DMX universe is selected. Once the address is configured, press the Next button and enter the quantity of the fixture required. The monitor screen will tell you the number of fixtures and DMX channels remaining to ensure you do not exceed these limits. The final step in the Patch Wizard is to assign a channel number to the fixtures. The channel number is the number you will refer to the fixture as within the desk software, and defines where that fixture will be located on the faders. Enter the number and press Finish . The Patch Wizard is now complete and your fixtures have been assigned. The fixtures should now have moved to their “Home positions”. You can repeat the Patch Wizard for every group of fixtures you have. Once you have finished making changes to the setup, press the Setup button to leave Setup. The indicator LED on the button will go out to inform you that you have exited Setup mode. Once the mode has been selected, press the Next button to move on and enter the DMX address for the fixture. If you have not yet set this on the fixtures themselves, press the Next Address button and the desk will calculate a DMX address for you based on the existing patch (fig. 5). Figure 4 – Selecting a fixture to add Figure 5 – Setting the DMX address Zero 88 Series Usk House, Lakeside, Llantarnam Park, Cwmbran, NP44 3HD. UK Tel: +44 (0)1633 838088 Fax: +44 (0)1633 867880 Email: [email protected] Web: www.zero88.com Zero 88 FLX Quick Start Guide v1.3 – Stock Code: 9850-000492-00 – Page 7 of 20 Lighting Controls – FLX lighting console Controlling intensities On FLX, all intensities can be controlled in exactly the same way – no matter if the fixture is a basic dimmer, an LED, a moving light or any other type of fixture. There are three possible ways to control an intensity: - using the Multi-Function Faders, - using one of the encoder wheels, - entering commands directly via the numeric keypad. Commands Multi-Functional Faders … 1 @ 1 0 0 Enter … First, ensure that the MFFs are in channel mode by pressing the Fader Funct. button. This sets the intensity of channel 1 to 100%. Channels can now be adjusted by moving the appropriate fader. The Page Up and Page Down buttons can switch through all the channels patched on the console, and grey boxes in the Output Window show which set of 24 channels are currently being controlled on the MFFs. To control the intensity of a fixture(s) via the numeric keypad, commands must be typed like this: … Channel No(s). @ Intensity % Enter … Examples of valid commands are below: … 2 And 3 @ 7 5 Enter … This sets the intensity of channels 2 and 3 to 75%. … 5 Thru 1 0 @ 5 0 Enter … This sets the intensity of channels 5 through to 10 to 50%. … 5 Thru 1 0 Except 7 @ 6 5 Enter … This sets the intensity of channels 5, 6, 8, 9 and 10 to 65% If a channel already has a level, for example set through commands, then you must ‘grab’ the level by moving the fader up to the present value. Once that value is grabbed, the fader gains control. Encoder wheels To change the intensity of a fixture via an encoder wheel, first select the fixture(s) required. This can be done using the buttons under the faders (MFFs must be in “channel” mode) or by using similar commands described to the right (just press Enter after the selection, in place of @ …). … 1 Thru 6 And 9 Enter … … 3 Thru 9 Except 5 Except 6 @ 0 Enter … This sets the intensity of channels 3, 4, 7, 8 and 9 to 0%. Note how Except is used twice to exclude two different channels from the range. … 1 Thru 3 And 7 Thru 9 @ 2 5 Enter … This sets the intensity of channels 1, 2, 3, 7, 8, and 9 to 25%. … 1 And 7 Thru 1 2 Except 9 @ 5 Enter … This sets the intensity of channels 1, 7, 8, 10, 11 and 12 to 5%. There are also some shortcuts available: …1 @ @ … @@ is a shortcut which quickly sets the intensity to 100%. When the channel is selected, the LED in the button under the fader will turn on, and an orange box will be drawn around the channel number in the Output Window. You can select multiple channels on the faders at the same time by pressing and holding the first button, and then tapping the last button. Once selected, press the Z key and then use the encoder wheel marked on the internal monitor as “intensity” to adjust the level. The output value is shown above the corresponding encoder wheel and in the Output Window. … 1 @ . … @. (at dot) is a shortcut which quickly sets the intensity to 0%. … Enter Enter @ . … Enter Enter is a shortcut which quickly selects all the channels that are currently on (above 0%). In this example, it then takes them to 0% using the @. shortcut (resulting in a blackout). … Group Group @ 1 0 Enter … Group Group is a shortcut which quickly selects all channels, no matter what intensity they are. In this example, it then takes them all to 10% (useful for a rig check). Zero 88 Series Usk House, Lakeside, Llantarnam Park, Cwmbran, NP44 3HD. UK Tel: +44 (0)1633 838088 Fax: +44 (0)1633 867880 Email: [email protected] Web: www.zero88.com Zero 88 FLX Quick Start Guide v1.3 – Stock Code: 9850-000492-00 – Page 8 of 20 Lighting Controls – FLX lighting console Controlling other parameters The intensity of all fixtures, no matter what they are, is controlled in the same way – as described on the previous page. Controlling all other parameters is described below. Selecting a fixture(s) Fixtures can be selected using the buttons under the faders (MFFs must be in “channel” mode for this to work) or by using the commands described on the previous page (just press Enter after typing the last channel, in place of typing @ …). When the channel is selected, the LED in the button under the fader will turn on, and an orange box will be drawn around the channel number in the Output Window. You can select multiple channels on the faders at the same time by pressing and holding the first button, and then tapping the last button). Home If you are unsure which fixture is which, the easiest way to see which fixtures you are controlling is to “home” them. This will set their position (Pan and Tilt) to 50%, the intensity to 100%, and the beam to open white (no colour, gobos or effects). The home values can be customised by going into Setup and choosing Edit Fixtures . After selecting a fixture(s), press the Home key. This will send the fixture(s) to its ‘home’ values. Figure 6 – The colour window and parameters Choosing an attribute Each fixture has its own set of parameters (eg Intensity, Colour, Gobo, Pan, Tilt etc.), which are grouped together into four attributes (Position, Colour, Beam and Shape). See the “Terminology & Key Features” section for more information, including examples (page 4 & 5). Once a fixture, or group of fixtures, have been selected, choose an attribute by pressing one of the attribute buttons to the right of the internal display. This will open that attribute’s window on the internal display (fig. 6), and put the attribute’s parameters onto the four encoder wheels ready to be controlled. Controlling a parameter Parameters can be controlled directly by the four encoder wheels. The parameters currently being controlled by the encoders are displayed in the four boxes along the bottom of the touch screen, just above the encoders. Remember that each fixture will have a different range of parameters available, depending on its feature set. Consult the fixture’s operating manual for details. If the fixture has more than four parameters in the attribute, pressing the attribute key again selects the next group of parameters. Automatic Palettes FLX can automatically create palettes, which can be a quicker method of controlling parameters than via the encoders (fig. 7). If palettes are available for your fixtures, an “Automatically create palettes” button will be displayed. Figure 7 – After automatically creating Colour palettes Zero 88 Series Usk House, Lakeside, Llantarnam Park, Cwmbran, NP44 3HD. UK Tel: +44 (0)1633 838088 Fax: +44 (0)1633 867880 Email: [email protected] Web: www.zero88.com Zero 88 FLX Quick Start Guide v1.3 – Stock Code: 9850-000492-00 – Page 9 of 20 Lighting Controls – FLX lighting console Playbacks and cues Once you have set up a scene that you like, you can then record that onto a cue. Cues can be recorded into any of the 240 playbacks, or the Master Playback. There’s nothing special or different about the Master Playback compared to the other playbacks, apart from the doublewidth GO button and dedicated Pause button for convenience. When dealing with cues, we suggest viewing the “Programmers” desktop. If you do not have an external monitor, the two windows discussed below will appear on the internal monitor when you press View . Pressing View will switch between the two windows. Playback window The Playback window (fig. 9) shows all the cues within a single playback, with each cue being a different row. The columns show the various fade times and settings for each of those cues. To change which playback you’re viewing, hold View and tap the Go button of the playback you wish to view – this could be any of the 24 MFFs, or the Master Go button. Playback Summary window The Playback Summary window (fig. 8) lists the current page’s 24 playbacks, each on their own row. The columns show the playback’s name, and then information about the currently active cue within each playback. Recording a cue To record a cue, there are four possible methods: … Record Enter … This will record the next available cue, within the playback you are currently viewing. … Record 5 Enter … This will record cue 5 within the playback you are currently viewing. … Record Go … This will record the next available cue, within the playback of the Go button you press (this could be one of the MFFs, or the Master Go button) … Record 5 Go … This will record cue 5 within the playback of the Go button you press. Subsequent cues can then be set up and recorded using the same method. Adjusting fade times Each cue can have a Fade Up, Fade Down, Colour, Beam, Shape and Position fade time. Within Setup > Defaults the default fade times are defined, and can be adjusted if required prior to programming cues. Cue 1 will always have a default of 0 seconds, but can be altered once recorded if desired. Once a cue has been programmed, its times can be adjusted in a similar format to a spreadsheet on a computer, with each time being in a separate “cell”. Choose the time you wish to change by either touching it or selecting it using the arrow keys, press Enter and then type the new fade time. Press Enter to confirm. Naming cues Naming cues can be helpful in remembering what changes, or when the cue happens. Use the following command to name a cue: … Name 5 Enter … Figure 8 – Playback Summary window An onscreen keyboard will then be displayed to type the cue’s name. Press Enter or OK to confirm. Zero 88 Series Usk House, Lakeside, Llantarnam Park, Cwmbran, NP44 3HD. UK Tel: +44 (0)1633 838088 Fax: +44 (0)1633 867880 Email: [email protected] Web: www.zero88.com Zero 88 FLX Quick Start Guide v1.3 – Stock Code: 9850-000492-00 – Page 10 of 20 Lighting Controls – FLX lighting console Playing back cues Updating cues Before playing back the programmed cues, it’s suggested to remove any unrecorded commands from the command line by pressing the Clear button twice. In order to update a cue, the first thing to do is to ensure that the cue is outputting (with a green bar) and you are viewing the playback. Raising the playback’s fader to full will automatically trigger the first cue within the playback. Once the cue is outputting, make the changes required (using the MFFs, encoder wheels, touchscreen or number pad). To output the next memory in the playback, simply press the Go button. Each time you press it, the console will continue down the list one cue at a time. To record the changes to the current cue, type: … Update Enter … Within the Playback window, the green bar shows you the currently active cue, while the yellow bar highlights the next cue (which will become active if you press Go ). You can change which cue is next by simply selecting it (using either the touch screen or the arrow keys). The cue will go yellow, and become active when Go is pressed. Once the end of the playback is reached, the first cue will be selected as the next cue, resulting in a loop. Releasing playbacks Once you have finished playing back cues it is important to release the playback. This stops the playback having any further control over the channels. When you lower a fader, the playback is automatically released, but you can also manually do this by holding Clear and pressing the Go button of the playback. The cue will inherit the new information and the update will be complete. Tagging Sometimes, you only want a specific parameter (such as “strobe”) to be controlled by a cue, palette or UDK. To do this, you “tag” the parameters you want recorded, and “untag” those you don’t want recorded. Changing a parameter on the encoder wheels automatically tags it. When tagged, the parameter will be shown on the internal touchscreen with a bright background, whereas when it’s untagged it will be shown with a dark background (fig. 10). To manually tag or untag a parameter, just tap it’s box on the touchscreen above the encoder wheel, or hold down the Clear key whilst moving the encoder wheel. Tracking There are two tracking modes that the FLX supports Tracking and Non Tracking. By default, FLX is in NonTracking mode. More information about tracking is available in the full manual. It is strongly recommended to only using Tracking Mode if you are familiar with its functionality. Figure 9 – Playback window Figure 10 – Showing tagged & untagged parameters Zero 88 Series Usk House, Lakeside, Llantarnam Park, Cwmbran, NP44 3HD. UK Tel: +44 (0)1633 838088 Fax: +44 (0)1633 867880 Email: [email protected] Web: www.zero88.com Zero 88 FLX Quick Start Guide v1.3 – Stock Code: 9850-000492-00 – Page 11 of 20 Lighting Controls – FLX lighting console Palettes Each attribute on the FLX lighting console has 240 palettes (Colour, Beam, Shape, Position and Effect). A palette stores all the values of a fixture (or group of fixtures) required to create a particular effect on stage. For example, a palette can be stored for the colour Red which details the values required for each fixture to create a red colour. Likewise a palette can be stored for a position on the stage, with the relevant Pan & Tilt information for each fixture in the rig. Using palettes When using palettes, only the selected fixtures will move to the values stored within that palette. This means you can have a single palette of everything red, but then only select a small number of fixtures to actually go red. To use a palette, first select a fixture or group of fixtures. Then, either choose a palette on the internal touchscreen, or enter the command: … Colour 2 0 Enter … Recording palettes To record a colour palette, set up the fixtures as required (all red for example) and enter the following command: The fixture(s) will change to the colour they were in when the palette was stored. … Record Colour 2 0 Enter … If any of the selected fixtures are not actually programmed in the applied palette, but there are one or more fixtures of the same type that are programmed, the fixture will use the values programmed for the first fixture of the same type. If the Colour Palettes are already displayed on the internal monitor, instead of typing a number (such as 20 in the example above), just press one of the empty palettes on the display. To record the data as a different kind of palette, simply replace Colour with Beam , Shape , Position or Effect . Naming palettes Referencing palettes If you use palettes, and then record a cue or UDK, the console will record the palette reference rather than the actual parameter data. This means if you update the palette, all the cues which used that palette will automatically be updated. This is especially useful for touring shows when using positions, to save updating each cue individually when you move venue. Palettes can be named by typing: … Name Colour 2 0 Enter … An onscreen keyboard will then be displayed to type the cue’s name. Press Enter or OK to confirm. In the same way as when recording, if the Colour Palettes are displayed on the internal monitor, just tap a palette after pressing the Name button to name that palette. Automatic palettes FLX can automatically create palettes for all five of the attributes. If palettes are available, an “Automatically create palettes” button will be displayed within the window of each attributes window. Automatic palettes are created based on the fixtures you have patched, so it’s recommended to fully patch your console before choosing ”Automatically create palettes”. Zero 88 Series Usk House, Lakeside, Llantarnam Park, Cwmbran, NP44 3HD. UK Tel: +44 (0)1633 838088 Fax: +44 (0)1633 867880 Email: [email protected] Web: www.zero88.com Zero 88 FLX Quick Start Guide v1.3 – Stock Code: 9850-000492-00 – Page 12 of 20 Lighting Controls – FLX lighting console Groups User Definable Keys Groups are selections of fixtures that are used together regularly (such as a colour wash, or all the moving lights on a specific truss). A group can hold any number of fixtures, and a fixture can be in many different groups. FLX can hold up to 240 groups of fixtures. The console provides four User Definable Keys (UDKs). There are three things you can do with a UDK: - Record a lighting state onto them - Create a shortcut to Groups, Palettes or Macros - Assign the UDK to an advanced function Group window The Group window is automatically displayed on the internal display when the Group button is pressed. Groups can be selected directly within this window. Automatic groups The FLX lighting console can automatically generate a group for each type of fixture you have, plus ‘odd’ and ‘even’ groups for each different fixture type. To create the automatic groups, view the Groups window (press Group ) and choose “Automatically create groups”. Recording onto an UDK Set up the fixtures as required. To record this onto a User Defined Key, enter the following command: … Record UDK1 … You can delete a UDK by typing: … Delete UDK1 … Using a UDK as a shortcut Recording groups You can create your own groups of fixtures, eg Blinders, FOH movers, PARs on LX3 etc. Simply select the fixtures that you wish to be in the group and then type: … Record Group 1 5 Enter … As with palettes, if the Group window is already displayed on the internal monitor, instead of typing a number, just press an empty group on the display. Naming groups Groups can be named in the same way as palettes, using commands or by pressing Name and touching the group. Using groups to control intensities All the commands explained within the “controlling intensities” section can also be used with groups. Here are two examples: A UDK can work as a shortcut to a Group, Palette or Macro. To do this, make sure the item is recorded first and then type one of the following: … Group 1 Record UDK2 … This records a shortcut to Group 1 onto the second UDK. … Colour 2 0 Record UDK3 … This records a shortcut to Colour 20 onto the third UDK. Assigning advanced functions to a UDK To assign an advanced function to a UDK, first make sure the UDK is blank (using the delete command listed above) and then hold down Setup and press one of the UDKs. This will open a window on the internal display where the function you wish to use can be selected. Please see the full manual for details of each of the functions. … Group 1 @ 4 5 Enter … This sets all the intensity of the channels within group 1 to 45% … Group 1 And Group 3 @ 8 0 Enter … This sets all the intensity of channels within group 1 and group 3 to 80% Zero 88 Series Usk House, Lakeside, Llantarnam Park, Cwmbran, NP44 3HD. UK Tel: +44 (0)1633 838088 Fax: +44 (0)1633 867880 Email: [email protected] Web: www.zero88.com Zero 88 FLX Quick Start Guide v1.3 – Stock Code: 9850-000492-00 – Page 13 of 20 Lighting Controls – FLX lighting console Saving shows Loading shows The FLX Lighting Console will save the show automatically to its internal memory at regular intervals. Any ZerOS Showfile can be loaded onto the FLX from a USB Storage Device. External backups of the show data can be made to a USB Storage Device. It is highly recommended to make external backups regularly – especially when leaving the console unattended for any amount of time. To load a show, press Setup and then choose Load File on the left hand side of the display. If you have more than one USB Storage Device connected, select the required device on the top dropdown. If the device does not appear straight away, wait a few seconds and then click Refresh . To save the show, press Setup and then choose Save Show on the left hand side of the display. If you have more than one USB Storage Device connected, select the required device on the top dropdown. If the device does not appear straight away, wait a few seconds and then click Refresh . Type the show name in the Filename box using the onscreen keyboard and press Enter or OK . After a few seconds, the show will be saved. Press Setup to exit Setup mode. A list of show files on the currently selected storage device appears on the touch screen. Select the show file you wish and press OK to load the show. The console will load the show into its memory and you will automatically leave Setup. Loading a show brings the console back to the same settings that were defined when the show was stored Patch information, Cue Information, UDKs, Palettes, Groups, Macros, Desk Setup and Network settings will all be restored. Saving the show takes all of the available information in the console, including setup options, patch, cue and palette data and stores it all into a single file on your storage device. This file can then be reloaded at a later date to return the console to the same state as it was in when you saved it. Saved files can be loaded onto any lighting console running the ZerOS Operating System. For ultimate compatibility, it is suggested that both consoles are running the same software version. This ends the quick start tutorial. Please take time to experiment with the console as the best way of learning is through exploring. In the full User Manual we will go into a lot more detail about each section of the console. Zero 88 Series Usk House, Lakeside, Llantarnam Park, Cwmbran, NP44 3HD. UK Tel: +44 (0)1633 838088 Fax: +44 (0)1633 867880 Email: [email protected] Web: www.zero88.com Zero 88 FLX Quick Start Guide v1.3 – Stock Code: 9850-000492-00 – Page 14 of 20 Lighting Controls – FLX lighting console User notes Zero 88 Series Usk House, Lakeside, Llantarnam Park, Cwmbran, NP44 3HD. UK Tel: +44 (0)1633 838088 Fax: +44 (0)1633 867880 Email: [email protected] Web: www.zero88.com Zero 88 FLX Quick Start Guide v1.3 – Stock Code: 9850-000492-00 – Page 15 of 20 Lighting Controls – FLX lighting console User notes Zero 88 Series Usk House, Lakeside, Llantarnam Park, Cwmbran, NP44 3HD. UK Tel: +44 (0)1633 838088 Fax: +44 (0)1633 867880 Email: [email protected] Web: www.zero88.com Zero 88 FLX Quick Start Guide v1.3 – Stock Code: 9850-000492-00 – Page 16 of 20 Lighting Controls – FLX lighting console Troubleshooting No DMX output? Front panel not responding? If your fixtures and dimmers indicate that there is no DMX output, check the following: - - - The green DMX1 and DMX2 LEDs are flickering The dimmers and fixtures have been patched correctly on the console and that the DMX address and mode on the fixture itself match the settings on the console Setup > Inputs & Outputs has been correctly configured The DMX cabling for cable faults, and ensure that a DMX terminator is present at the end of the chain - External Touch Screen not responding? - Fixtures not responding? If your fixtures and dimmers are not responding to the desk, check: - The dimmers and fixtures are patched correctly on the desk The green DMX1 and DMX2 LEDs are flickering Setup > Inputs & Outputs and/or Art-Net / sACN has been correctly configured No intensity output? If the intensity output levels do not change when you adjust it (via a playback, UDK or the programmer), check: - Is the Grand Master fader is at full The Black Out button is off If the selected fixture(s) have a Shutter parameter, check that the shutter is open. Some fixtures also have control of the lamp remotely – try sending the Lamp On Macro command to the fixture, if supported. Console does not boot? - - Remove all USB storage devices from the console Check internal monitor for any error messages or warning information Hold SHIFT on a USB keyboard to get to diagnostic mode. Perform a Backup Desk State and email this to Zero 88 Hold SHIFT on a USB keyboard then “clear show data” If all else fails, reinstall the software as a last resort Forgotten passcode? If you forget the passcode you’ve set, please send the serial number of your console to [email protected] Is the console fully booted (check internal monitor for any errors which may have halted the boot)? Are the LEDs in the buttons responding correctly? Power on the console with SETUP held down to enter panel test mode. Hold F9 on an external USB keyboard if holding SETUP on the panel does not work. External Touch Screens require both the USB and DVI-D cables to be connected. Have you calibrated the external touchscreen in Setup > System Settings ? MIDI Show Control not working? We’ve found that cheaper USB – MIDI devices (often sold as a single cable with USB on one side, two MIDI ports on the other, and a plastic box in the middle) are not designed to the MIDI specification. Although these sometimes work with MIDI Timecode, they do not work with Show Control. Remote App not connecting? If the remote app is not connecting to the console, check one of the following things: - - Is the Remote enabled in Setup > Remote? Is there a password set in Setup > Remote? Are you using a dedicated network, or plugging into a much larger network? On larger networks, firewalls can sometimes block the communications. Is the IP address of the console in the same range as the IP address of your remote device? For simple setups where nothing else is using the network apart from the remote, we suggest either enabling DHCP on both devices (which will set the IP address automatically) or use the IP addresses 192.168.1.10 and 192.168.1.20 on your console and remote. Want more training? Flexible product training opportunities are available around the world. In the UK, these are held at the Zero 88 offices, and internationally these courses are usually held at specific venues in conjunction with one of our international dealers. For information about training in your area please contact your local Sales Representative or visit zero88.com/training Zero 88 Series Usk House, Lakeside, Llantarnam Park, Cwmbran, NP44 3HD. UK Tel: +44 (0)1633 838088 Fax: +44 (0)1633 867880 Email: [email protected] Web: www.zero88.com Zero 88 FLX Quick Start Guide v1.3 – Stock Code: 9850-000492-00 – Page 17 of 20 Lighting Controls – FLX lighting console Basic maintenance Reporting a problem FLX is designed to be relatively maintenance free, however a few simple steps can prolong the life of your hardware. Before reporting a problem to Zero 88, please obtain as many of the following pieces of information as possible: WARNING! - NO USER SERVICEABLE PARTS INSIDE - The console’s current software version A copy of the current showfile Details of what you were doing at the time, or which playback / palette etc is affected. If the system has crashed, the console will offer you a debug file the next time you turn it on. Internal battery - The internal battery keeps the console’s time & date correct, and requires replacing every 3 - 5 years. The console should give you a warning at startup if the battery is running low, however it is good practice to replace it after this length of time anyway. Please contact a Zero 88 support agent for details on servicing the console. Support requests can be submitted through our support forum at zero88.com/forum or via email to [email protected] Cleaning the surface Every month or so, gently wipe down the front panel with a nonabrasive, non-corrosive surface cleaner applied with a soft cloth. Cleaning the faders A can of compressed air can be used to clear our dust from the fader tracks. Do NOT use an oil based lubricant (such as WD-40) on faders as this will cause irreparable damage to your FLX. For more urgent requests, please contact Zero 88 by telephone on +44 (0)1633 838088 – 24 hour answer service available. If you have reported a problem by email or on the forum, please bear with us as our response may take a few days if your problem is complex. It is also worth checking other posts on the forum to see if the fault is already reported / fixed before contacting Zero 88. If you suspect that your problem is software related, please always check that you are running the latest software version. This can be found at zero88.com/software Transportation & storage Care should be taken when transporting FLX. Zero 88 are able to supply flight cases for the transportation of their consoles – the cardboard box which FLX is supplied in is intended only for one or two journeys, and should not be relied upon to keep the console safe for prolonged use. Operating environments Always observe the operating environment information in the Technical Specification. If this environment is exceeded, it is likely that damage will occur to your FLX. Zero 88 Series Usk House, Lakeside, Llantarnam Park, Cwmbran, NP44 3HD. UK Tel: +44 (0)1633 838088 Fax: +44 (0)1633 867880 Email: [email protected] Web: www.zero88.com Zero 88 FLX Quick Start Guide v1.3 – Stock Code: 9850-000492-00 – Page 18 of 20 Lighting Controls – FLX lighting console Technical information Mains inlet FLX is fitted with a Neutrik powerCON TRUE1 (NAC3MPX) mains inlet on the back panel, and power on/off switch. 100 - 240V AC; MAX 1A 50 - 60Hz, 60W DMX output Two female Neutrik 5 pin XLR, isolated, with voltage protection and data output indicator. Data on channels 1 – 512 only. RDM Ready. INTERNALLY FUSED. A GOOD EARTH CONNECTION IS ESSENTIAL. DMX Input Connector The internal fuse is not user replaceable, contact an authorized service agent if the desk does not power up and you suspect that the fuse has failed. Pin Desc. 1 Signal Ground (0V) 2 DMX Drive Complement (1-) 3 DMX Drive True (1+) 4 Not Connected 5 Not Connected Video output 1 x DVI-I connector, but DVI-D output only. MIDI USB ports Five external USB ports are fitted on the FLX. Two located on the rear of the console, one on the front panel, and one on either side. These support the USB 2.0 standard. These can be used for: - Wings - Keyboard & Mouse - External Touchscreen (DVI-D also required) - External Storage Devices (such as Memory Sticks) 2 x 5 pin DIN connectors providing MIDI input and MIDI thru. MIDI Connector Pin In Output/Thru 1 Not Used 2 Not Used 3 Not Used Opto Isolated Input Opto Isolated Input Not Used Signal Ground Not Used 4 5 Output Output Ethernet The FLX Lighting Console is fitted with a Neutrik etherCON RJ45 Ethernet port and is capable of supporting various Ethernet protocols. Kensington Lock A Kensington-style lock slot is provided on FLX for securing the console to an operating location, using a standard laptop lock cable. Remote input A 9 pin D-sub connector providing 8 remote switches (common ground). Short pin 1-8 to pin 9 (common) to simulate a button push. Pin Remote Switch 1 Switch 1 2 Switch 2 Sound to Light 3 Switch 3 A stereo ¼” jack socket provides basic Sound to Light functionality. Left and right channels are mixed internally. 4 Switch 4 5 Switch 5 6 Switch 6 7 Switch 7 8 Switch 8 9 Common Audio Connector Remote Input Connector Area Tip Ring Sleeve Desc. Left Channel Right Channel 0V Signal Ground Zero 88 Series Usk House, Lakeside, Llantarnam Park, Cwmbran, NP44 3HD. UK Tel: +44 (0)1633 838088 Fax: +44 (0)1633 867880 Email: [email protected] Web: www.zero88.com Zero 88 FLX Quick Start Guide v1.3 – Stock Code: 9850-000492-00 – Page 19 of 20 Lighting Controls – FLX lighting console Mechanical information Dimensions 90mm (H) x 660mm (W) x 340mm (D) Weight 7.5 kg Operating temperature range +5 to +40 °C Humidity 5% to 95% non-condensing Notes Cooper Controls Ltd reserves the right to make changes to the equipment described in this manual without prior notice. This equipment is designed for professional stage lighting control, and is unsuitable for any other purpose. It should be used by, or under the supervision of, an appropriately qualified or trained person. E&OE. Cooper Controls Ltd reserves the right to change the specification without prior notice. © Cooper Controls Ltd Zero 88 Series Usk House, Lakeside, Llantarnam Park, Cwmbran, NP44 3HD. UK Tel: +44 (0)1633 838088 Fax: +44 (0)1633 867880 Email: [email protected] Web: www.zero88.com Zero 88 FLX Quick Start Guide v1.3 – Stock Code: 9850-000492-00 – Page 20 of 20


