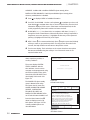
1
FIREFINDER-XLS CONTROL PANEL Installation, Operation and Maintenance Manual P/N 315-033744-3 Siemens Building Tec hnologies echnologies Fire S afety Safety CAUTION ALL WIRING MUST BE DONE AS DESCRIBED BELOW TO OBTAIN SAFE AND PROPER SYSTEM OPERATION. For additional wiring information, refer to this manual or call Siemens Building Technologies, Inc. Technical Support Department at 1-800-248-7976. 1. Earth ground the FireFinder-XLS enclosure properly; see the latest edition of the National Electrical Code or CAN/ULC-S524-01 Canadian Electrical Code for approved methods. Conduit ground is NOT adequate. 2. To wire the System in compliance with NEC Article 760, refer to the Power Limited Wiring Instructions for the CAB1 Enclosure, P/N 315-033007, or the CAB2-BB/CAB3-BB, P/N 315-033009, as applicable. 3. INSULATE ALL CABLE DRAIN WIRES from any conduit or earth grounded electrical box, including those in the FireFinder-XLS enclosure. 4. Connect shield cable drain wire ONLY inside the FireFinder-XLS enclosure. 5. No wiring used for any of the following can run outside the building: • a DLC loop • an RS-485 network • a NAC circuit used for audibles, audio, and telephone risers TABLE OF CONTENTS 1 DESCRIPTION ............................................................................................ 1-1 Introduction ................................................................................................ 1-1 Configuration .............................................................................................. 1-2 Basic System .............................................................................................. 1-3 Optional Modules ....................................................................................... 1-6 Voice System Modules............................................................................... 1-9 Intelligent Analog Devices ......................................................................... 1-11 2 INSTALLATION ........................................................................................... 2-1 Introduction ................................................................................................ 2-1 Installation Guidelines ................................................................................ 2-1 3 OPERATION ............................................................................................... 3-1 Introduction ................................................................................................ 3-1 Normal Mode ............................................................................................. 3-2 Alert Mode ................................................................................................. 3-3 Report Mode .............................................................................................. 3-5 Maintenance Mode .................................................................................... 3-6 4 VOICE SYSTEM .......................................................................................... 4-1 Introduction ................................................................................................ 4-1 Equipment .................................................................................................. 4-1 Command Sations ...................................................................................... 4-1 System Operation ...................................................................................... 4-2 System Priorities ........................................................................................ 4-3 CONTENTS i FIREFINDER-XLS INSTALLATION, OPERATION AND MAINTENANCE MANUAL | TABLE OF CONTENTS Operation Procedure .................................................................................. 4-4 Manual Operation....................................................................................... 4-4 Emergency Page ................................................................................ 4-4 Evacuation .......................................................................................... 4-9 Convenience Page ............................................................................ 4-10 Background Music ............................................................................ 4-12 Speaker Groups ................................................................................ 4-13 Audible Silence/Unsilence ................................................................ 4-13 Speaker Group Non-Silence .............................................................. 4-14 Display .............................................................................................. 4-14 Audio to Local Speaker ......................................................................4-17 Audio Volume Control ....................................................................... 4-18 Command Station Access ................................................................ 4-20 Lamp Test ......................................................................................... 4-20 Clear Manual..................................................................................... 4-21 Firefighters’ Telephone System ................................................................ 4-21 Phone Group .................................................................................... 4-21 Phone Page ...................................................................................... 4-22 Warden’s Page .................................................................................. 4-22 APPENDIX A Alarm Verification ..................................................................... Appendix 1 B Application Specific Detection................................................. Appendix 3 C Intelligent Enviromnental Compensation ................................. Appendix 5 D Security Point Installation ........................................................ Appendix 7 E Silent Knight Model 5129 ........................................................ Appendix 9 F ii CONTENTS Testing / Maintenance ........................................................... Appendix 11 1 INTRODUCTION The Siemens Fire Safety FireFinder-XLS TM Control System is a powerful intelligent fire alarm control system. FireFinder-XLS utilizes FirePrint—the most advanced fire detection technology in the world. FireFinder-XLS is designed to provide the most reliable life safety and property protection at the lowest system life cycle cost available anywhere. FireFinder-XLS has been architected to be easy to install, commission and operate. The FireFinder-XLS System is totally modular to satisfy any size building fire alarm needs. A basic FireFinder-XLS control system consists of the PMI operator interface and central processor, a PSC-12 power supply and battery charger, a PTB power termination board, a DLC intelligent device loop controller, and ZIC-4A zone indicating card. This basic two loop system can monitor up to 252 intelligent detectors and devices and provides up to 12 Amps of 24VDC power for use in driving the basic 4 notification appliance circuits. These supervised notification appliance circuits can be software configured for a wide variety of functions— such as standard NAC operation (bells, horns, chimes), strobes (synchronized or non- synchronized), coded audibles (Temporal Code 3, Marchtime, Zone Coded, etc), Municipal Tie, Leased Line, Extinguishing agent releasing (FM-200 or Halon) or sprinkler pre-action and deluge applications. The PMI’s large easy-to-read ¼ VGA display simplifies system operator control. By adding intelligent loop controller cards, FireFinder-XLS can be expanded to support up to 2500 intelligent detectors and devices spread across a flexible number of DLC loops. The system can also be expanded by adding additional CC-5 cardcages and power supplies to support conventional Form C relay modules, network interface cards for remote enclosure communication, conventional detectors and devices and solid state output modules—typically for use in driving graphic annunciators. The FireFinder-XLS system’s operator interface is designed to make status information presentation clear and system control functions simple to operate. Through the use of soft function buttons on the systems display—prompted by lighted physical buttons—the user can easily “Acknowledge” events, “Silence” or “Unsilence” building audibles, or “Reset” the system. The system status presentation is structured to allow the different types of system events (Alarms, Supervisory, Security, Trouble) to be viewed independently. Each system event presents the user with a custom message describing the location of the alarm report and the type of event (manual alarm, smoke, heat or waterflow). If additional details need to be learned about the nature of the alarm report or its location – the user can depress the illuminated “More Info” button. Additional text messages, device specific details and simple graphic maps tell the user where they are in the building relative to the alarm report for ease in locating the alarm. For fire fighters responding to the system, standard NFPA Fire Service icons are presented to alert fire fighters to the availability of fire service equipment (stand pipe locations, sprinklers, building fire hoses, fire hydrants, etc). Standard HazMat icons are also presented to notify responding officials of possible DESCRIPTION 1-1 FIREFINDER-XLS INSTALLATION, OPERATION AND MAINTENANCE MANUAL | CHAPTER 1 hazards or people in that area of the building. Standard NFPA 704 Hazard rating icons can also be used. The 32-bit microprocessor CPU at the heart of FireFinder-XLS rapidly processes logical decisions based on the status of the smoke detection and other initiating devices to control the system outputs. The object oriented software configuration tool, Zeus, is used to configure the FireFinder-XLS system’s operation based on the customer specified operating requirements. The System continuously checks all software and hardware for proper operation. It checks all System memory components, control panel electronic hardware, and the System program. A hardware watchdog circuit is provided to ensure that System programs are functioning properly. If a problem develops with the program or processor, the watchdog circuit places the System into a trouble condition and resets it. Each module in the FireFinder-XLS System has its own microprocessor. To ensure reliable operation, if the main panel’s central processing unit stops, these modules, operating in degrade, still annunciate any alarm or trouble through common lines called Any Alarm and A ny Trouble. All of the modules communicate with the main FireFinder-XLS central processor through an RS-485 network communications system. While FireFinder-XLS is designed for multiple applications, such as security point monitoring, the fire alarm operation is always processed as the highest priority over all other operating modes. CONFIGURATION The table below presents the minimum configuration necessary to meet NFPA 72 Local, Municipal Tie, Remote Station, Proprietary and Central Station, UL 1076, and NFPA 12A, 13 and 2001. MINIMUM FIREFINDER-XLS CONFIGURATION TO MEET NFPA 72, UL1076, NFPA 12A, 13, 2001, AND ULC S527 NFPA Minimum Quantity Remote Station Central Station9 UL 10761,10 Module Description Local Auxiliary Proprietary PMI2 Person Machi ne Interface 1 1 1 1 1 1 PSC-12 Power Suppl y 1 1 1 1 1 1 P TB Power Termi nati on Board 1 1 1 1 1 1 R PM Remote Pri nter Interface X X X 1 X 1 CC-5 Card Cage 1 1 1 1 1 1 ZIC-4A3 Zone Indi cati ng Card 1 1 14 1 1 1 D LC Devi ce Loop Card 1 1 1 1 1 1 — Batteri es5,6,7 1 1 1 1 1 1 HTSW-1 Tamper Swi tch X X X X X 1 NIC-C Network Interface Card X8 X8 X8 X8 X8 X8 DAC-NET Di gi tal Audi o Card - DNET X X X X X` X LP B Local Page Board X X X X X X LVM Li ve Voi ce Modul e X X X X X X ZAC-40 Zone Ampl i fi er Card X X X X X` X ZAM-180 Zone Ampl i fi er Modul e X X X X X` X X=Not requi red §=Refer to system cl assi fi cati on col umn for ei ther NFPA or Canada mi ni mum quanti ty. 1-2 DESCRIPTION 12A, 13, or 2001 1 1 1 X 1 111 1 1 X X8 X X X X X Voice US and Canada Canada § § § § § § § § § § 1 1 1 16 16 1 1 1 X 1 1 1 1 X X8 X X X X X ULC S527 CHAPTER 1 | FIREFINDER-XLS INSTALLATION, OPERATION AND MAINTENANCE MANUAL 1 Only HTRI-S, HTRI-D and HTRI-R can be used as security initiating devices. 2. The PMI must be programmed by the Zeus Programming Tool for all System configurations (See the Zeus Quick Start Manual, P/N 315-033875). 3. Caution: Disarm all ZIC-4A circuits configured for Releasing Device Service prior to system maintenance. 4 One ZIC-4A circuit must be configured for alarm transmission. In addition, depending on the local authority having jurisdiction, additional circuits may be required for Supervisory or Trouble transmission. 5. Reference the System Label, P/N 575-234411, for battery maintenance and replacement schedule. 6. The batteries available are BP-61, BTX-1, BTX-2 and BTX-3. The BP-61 is a 24V 15 AH battery. The BTX-1 batteries are a pair of 12V, 33 AH batteries. The BTX-2 are a pair of 12V, 75 AH batteries. The BTX-3 are a pair of 12V, 100 AH batteries. Actual battery size depends on System configuration. 7. See the PSC-12 Installation Instructions, P/N 315-033060, for Battery Calculations. 8. For multi-enclosure systems, one NIC-C is required in each enclosure. 9. For Central Station, see Appendix E. 10. UL 1076 requires a Model HTSW-1 Tamper Switch and an RPM Remote Printer Module. 11. Refer to the ZIC-4A Installation Instructions (P/N 315-033170) for programming. BASIC SYSTEM PMI Interface The basic FireFinder-XLS Control Panel consists of the following components: • PMI Person Machine Interface • PSC-12 Power Supply and Charger • PTB Power Termination Board • CC-5 Card Cage • DLC Device Loop Card • ZIC-4A Zone Indicating Card • RPM Remote Printer Module (NFPA 72 Proprietary and UL 1076 configurations) • CAB1 Enclosure • HTSW-1 Tamper Switch (UL 1076 configuration only) • BP-61, BTX-1, BTX-2 or BTX-3 Batteries The PMI Person Machine Interface has the following features: • 32-bit central processing unit (CPU) • “Soft Function Button” operator interface • 1 • 8x8 matrix touch screen and surrounding keys for menu navigation and system control • Discrete LEDs for Alarm, Trouble, Security, and Supervisory event indication and state of audibles /4 VGA LCD display DESCRIPTION 1-3 FIREFINDER-XLS INSTALLATION, OPERATION AND MAINTENANCE MANUAL | CHAPTER 1 The PMI is the primary user interface for the FireFinder-XLS system. It includes a 1/ 4 VGA monochrome LCD display with a 8x8 matrix touch screen and surrounding keys used for menu navigation and system control. There are also LEDs for indication of the Alarm, Trouble, Security and Supervisory events as well as the state of the Audibles. The PMI display continuously updates information about the System status. If there are more events in the system than can be displayed on a single screen, a scroll bar appears to the right of the event list. Pressing the up and down navigation buttons to the right of the LCD allows the operator to move throught the list. ALARM SUPERVISORY SECURITY TROUBLE .... POWER ON AUDIBLES 10:32:05 04/15/01 SYSTEM STATUS: NORMAL HERACLES Siemens - Cerberus Division SILENCED More Info + _ We Can Do That! Along the top and bottom of the LCD are rows of four soft keys. The use of these keys is controlled by software and backlit with a green LED which guides the operator to the next action. PARTIAL SYSTEM DISABLED ? On the right hand side of the LCD are four navigation buttons. These buttons allow scrolling up or down or entering in and out of event detail screens. Also on the right are three function-specific buttons: one for help, one for menu access, and one for selecting the highlighted item on the LCD. PSC-12 Power Supply The PSC-12 is a high current power supply that provides the FireFinder-XLS system with primary regulated 24VDC. It is rated at 12A and has a built-in charger that is capable of charging up to100AH batteries. It also has a microprocessor-controlled transfer circuit that allows the PSC-12 to switch the system power to stand-by batteries during loss or reduction of the AC power. The PSC-12 incorporates an 18A circuit breaker on the battery input. It provides connection to a tamper switch and terminal tie points for system signals. The PSC-12 communicates directly to the PMI to report fault conditions and allows the PMI to query the status of the power supply. It has four programmable single pole double throw relays. Two relays are defaulted to activate when the degrade ALARM bus or degrade TROUBLE bus is asserted. CC-5 Card Cage 1-4 DESCRIPTION The CC-5 provides a central point for mounting up to five circuit card assemblies. If a card requires power, it is applied through the removable terminal block at the bottom of the cardcage. All external devices for the card are connected to the card through the two removable terminal blocks at the top of the cardcage. CHAPTER 1 | FIREFINDER-XLS INSTALLATION, OPERATION AND MAINTENANCE MANUAL CC-2 Card Cage The CC-2 provides a central point for mounting up to two circuit card assemblies. If a card requires power, it is applied through the removable terminal block at the bottom of the cardcage. All external devices for the card are connected to the card through the two removable terminal blocks at the top of the cardcage. DLC Device Loop Card The DLC supports one loop (two isolated parallel zones) of up to 252 FireFinder-XLS intelligent field devices as well as device accessories (relay bases, audible bases, and remote lamps) in any combination. The DLC initializes, operates, and maintains all devices residing on the loop and communicates all relevant device and event information, such as alarms and troubles, to the System CPU. The DLC allows the System polarity insensitive devices to be connected without generating errors. DLC RESET POWER CARD FAIL HNET FAIL GND FAULT ALARM TROUBLE ZONES STATUS Z O N E 1 CLASS A OPEN CLASS A RETURN SHORT Z O N E 2 CLASS A OPEN CLASS A RETURN SHORT 1 The microprocessor controls the on-board isolator to isolate either zone from the loop if one of them is shorted. When one zone is isolated from the loop, the other zone will still work.The on-board microprocessor provides the DLC with the ability to function and initiate alarm conditions even if the main FireFinderXLS CPU fails. PTB Power Termination Board 2 3 HNET The PTB filters the power from the incoming AC mains and distributes it to the PSC-12 power supply and the optional PSX-12 power supply extender. ZIC-4A Zone Indicating Card The Model ZIC-4A is a zone indicating card that provides notification appliance circuits. It has 4 outputs that can be configured for Class A or Class B and control of audible and visual notifcation appliances such as horns, speakers, bells, strobes, etc. Its outputs can also be configured as connection to Municipal Tie, Releasing Service per NFPA 12A, 13, and 2001 or as a connection to a Leased Line remote monitoring circuit. ZIC-4A RESET POWER CARD FAIL CAN FAIL HNET FAIL GND FAULT ZONE 1 ACTIVE TRBL ZONE 2 ACTIVE TRBL ZONE 3 ACTIVE TRBL ZONE 4 ACTIVE TRBL Each zone can be configured independently for different usages as programmed in the Zeus tool and can be controlled automatically by program logic or manually using the PMI. + 1 - + + 2 3 - - HNET The ZIC-4A supports synchronized and non-synchronized strobes. This selection is available in the Zeus tool under the detail properties for each ZIC-4A circuit. Synchronization across multiple ZIC-4A cards is automatic as a part of the FireFinder-XLS operating characteristics. Refer to document P/N 315-096363 for a list of strobes that support synchronization. DESCRIPTION 1-5 FIREFINDER-XLS INSTALLATION, OPERATION AND MAINTENANCE MANUAL RPM Printer Interface The RPM Printer Interface provides a parallel port to the FireFinder-XLS system. The RPM is compatible with the PAL-1 printer. CAB Enclosures The FireFinder-XLS system can be housed in one of three enclosures: CAB1, CAB2, or CAB3. The CAB1 is a single-row enclosure that consists of a backbox, front door and inner door that is shipped assembled. The CAB2 and CAB3 are two-row and three-row enclosures respectively with the backbox and doors (inner and outer) shipped separately. | CHAPTER 1 BACKBOX OUTER DOOR MOUNTING PLATE INNER DOOR HTSW-1 Tamper Switch The HTSW-1 Tamper Switch is a three-position switch that monitors the opening of the FireFinder-XLS enclosure and reports a security condition. Closing the door automatically returns the switch to its normal operating position. The switch can be pulled out to indicate a closed position for maintenance purposes. Batteries The BP-61 is a 24V 15 AH battery. The BP-61 is recommended for the NFPA 72 Local and 72 Proprietary and the UL 1076 Systems. Actual battery size depends on System configuration. See the Battery Calculation section of the PSC-12 Installation Instructions, P/N 315-033060, for further information. The BTX-1 batteries are a pair of 12V, 33 AH batteries that are housed in the bottom of the CAB enclosure. The BTX-2 batteries are a pair of 12V, 75 AH batteries. The BTX-3 batteries are a pair of 12V, 100 AH batteries. Actual battery size depends on System configuration. See the Battery Calculation section of the PSC-12 Installation Instructions, P/N 315-033060, for further information. OPTIONAL MODULES The modules listed below are available as options to the FireFinder-XLS system. CRC-6 Relay Module Each CRC-6 module provides six fully programmable relays. Each relay contains one set of SPDT contacts rated at 4A, 30 VDC/120 VAC resistive and 3.5A, 120 VAC (0.6 PF) inductive. All relay coils are supervised to ensure proper operation. Individual relays can be automatically activated or deactivated through control by event and time based logic contained in FireFinder-XLS. Each relay may also be either manually controlled or may be disarmed through the PMI. CRC-6 RESET POWER CARD FAIL HNET FAIL 24V FAIL RELAY 1 RELAY 2 RELAY 3 RELAY 4 RELAY 5 RELAY 6 + 1 - + 1-6 DESCRIPTION + 2 3 - - HNET CHAPTER 1 | FIREFINDER-XLS INSTALLATION, OPERATION AND MAINTENANCE MANUAL CSB CAN Sounder Board FCM-6 Control Module HLIM Loop Isolator Module The CSB is a module that contains a sounder (buzzer) that can be used with the SCM-8 or FCM-6 to provide audible feedback to indicate that a switch closed properly and communication was successful. The CSB requires no programming. Buzzer The FCM-6 contains six sets of three pushbutton switches and their corresponding LEDs. The ON and AUTO switches both have one bi-color (red/green) LED while the OFF switch has one bi-color and one yellow LED. The functions of the switches and LEDs are programmed using the Zeus Tool (Refer to the Zeus Quick Start Guide, P/N 315-033875). All LEDs can be programmed ON, OFF, or FLASHING. The HLIM Loop Isolator Module isolates short circuits on FireFinder-XLS intelligent loops. By placing devices between HLIMs during installation, a short in the wiring within that group is disconnected from the rest of the loop. The remainder of the devices continue to operate. The HLIM operates in both Style 6 (Class A) and Style 4 (Class B) circuits. TRBL TRBL TRBL TRBL TRBL TRBL IN - LINE 1 IN - LINE 2 OUT - LINE 1 OUT - LINE 2 LCM-8 LED Control Module The LCM-8 contains eight pairs of LEDs. Each pair contains one bi-color (red/green) and one yellow LED. The functions of the LEDs are programmed using the Zeus Tool (Refer to the Zeus Quick Start Guide, P/N 315-033875). All LEDs can be programmed ON, OFF, or FLASHING. These LEDs are used for fire system status annunciation. NIC-C Network Interface Card The NIC-C is a card that provides HNET or XNET and CAN network communication. The HNET/XNET network can be wired either Style 4 or Style 7. For HNET one NIC-C is required in each enclosure. For XNET one NIC-C is required per system. This NIC-C must be installed in the same enxlosure as the PMI. Each NIC-C occupies one HNET address. NIC-C RESET POWER CARD FAIL CAN FAIL HNET FAIL XNET FAIL GND FAULT LOOP A FAIL LOOP B FAIL ACTIVE NETWORKS CAN HNET XNET HNET/XNET STYLE STYLE 7 STYLE 4 GROUND FAULT ENABLED DISABLED The CAN network can be isolated within a given enclosure or extended external to the enclosure. External CAN networks require either an RNI, OCM-16 or SIM-16 in the remote enclosure. The CAN address of the NIC-C does not need to be set. NETWORK PORT + + + 1 2 3 - - - HNET The NIC-C supervises the network to insure proper operation. Any faults that are detected by the NIC-C are reported to the PMI for annunciation. In addition, the NIC-C has diagnostic LEDs that indicate which faults have been found. Individual LEDs are included for Loop A and Loop B faults, as well as an LED for complete failure of the network. The NIC-C can also be configured to perform ground fault detection on the network. DESCRIPTION 1-7 | CHAPTER 1 OCM-16 TB1 1 9 3 4 5 6 11 12 13 14 1 2 3 4 5 6 7 8 8 15 16 1 2 3 4 5 6 7 8 S1 456 78 23 456 23 S2 78 The OCM-16 is a remotely located, general purpose output module. It provides sixteen open collector outputs to drive LEDs, incandescent lamps, or external relays. There is an additional output for a local audible and two inputs for momentary lamp test and local audible silence switches. 7 P3 P2 9 01 OCM-16 Output Control Module 2 10 9 01 FIREFINDER-XLS INSTALLATION, OPERATION AND MAINTENANCE MANUAL TB3 PMI-REM Remote PMI The PMI-REM is a remotely located PMI that is mounts to the rear of the inner door in the REMBOX2 or REMBOX4 enclosures. The PMI-REM is identical to the PMI in all other aspects. PSX-12 Power Supply Extender The PSX-12 is a high current power supply extender. The power supply extender works in conjunction with the PSC-12 power supply to provide an additional 12A of regulated 24VDC for internal or external system use. 17 18 19 20 21 22 23 24 TB2 Up to three PSX-12 modules may be connected to one PSC-12 power supply and one set of batteries. The PSX-12 has a microprocessor-controlled transfer circuit that allows it to switch the system power to stand-by batteries during loss or reduction of the AC power. REMBOX 2/4 Remote System Enclosure The REMBOX2 and REMBOX4 Enclosures are used to house a Remote Person Machine Interface (PMI-REM) or CAN modules (FCM/LCM/SCM/OCM/SIM). The Rembox consists of an outer door, an inner door, and a backbox. The outer door and inner door are permanently hinged left. The REMBOX has a 3/4 inch flange on all four sides of the enclosure which is used for flush mounting applications. BACKBOX OUTER DOOR INNER DOOR 6 P4 3 1 4 3 6 P5 X H P3 1 4 TB6 OFF ON JP1 P7 1-8 DESCRIPTION 1 TB2 RNI TB3 P1 10 9 2 DO NOT USE TB1 24 V S1 The RNI mounts in the rear of either the REMBOX2 or REMBOX4 enclosures. The RNI provides terminal blocks for all field wiring connections. Internal connections are made to plug in connectors specifically provided for each of the installed modules. 1 TB4 2 The RNI allows for the remote installation of the PMI-REM (on HNET) and the LCM-8/SCM-8/FCM-6/SIM-16/OCM-16 (on CAN) modules. The HNET can be wired either Style 4 or Style 7. The RNI may be placed in the middle or at the end of either the HNET or CAN networks. TB5 RNI Remote Network Interface P6 The backbox is mounted on a flat surface with four user-supplied bolts that are a maximum of ¼ inch in diameter. FIREFINDER-XLS INSTALLATION, OPERATION AND MAINTENANCE MANUAL SIM-16 TB1 1 9 2 3 4 5 6 10 11 12 13 14 16 23 23 78 78 9 01 9 01 S1 S2 TB4 6 TB3 6 1 1 2 11 3 13 12 5 4 15 14 7 6 16 8 The SIM-16 is a remotely located, general purpose input module. It provides sixteen input circuits for remote system monitoring. Each input can be individually programmed as supervised (dry contacts only) or unsupervised (general-purpose input). The SIM-16 has two Form C relays. The relays and the inputs are programmable using the Zeus Programming Tool. 8 15 456 456 SIM-16 Supervised Input 7 P3 P2 10 The SCM-8 contains eight switches and eight pairs of LEDs. Each pair contains one bi-color (red/green) and one yellow LED. The functions of the switches and LEDs are programmed using the Zeus Tool (Refer to the Zeus Quick Start Guide, P/N 315-033875). All LEDs can be programmed ON, OFF, or FLASHING. The SCM is used for manual control of the fire systems. 9 SCM-8 Switch Control 1 CHAPTER 1 | TB2 SSD System Status Display The SSD displays the event status of a system remotely from the PMI. It has four 40 character alphanumeric LCD character lines, backlit upon status change or display toggling. This module is supervised by the main panel and also has LEDs and an optional sounder to indicate the status of the system. The SSD has the capability to store up to 1500 event messages and has pushbuttons to scroll through these events. Its display is independent from the display on the PMI and during the SSD initial power up, it is configured as a Display Only module. ALARM SUPERVISORY SECURITY TROUBLE ON AUDIBLES SILENCED LOCAL ACK VOICE SYSTEM MODULES AIC Audio Input Card The AIC (Audio Input Card) is a card that provides two external isolated analog audio inputs to the voice system. External audio sources can be any of the following: tape recorder, CD player, radio, PBX interface (for convenience paging through the telephone system) and other. AIC RESET POWER CARD FAIL CAN FAIL ASI FAIL ZONE 1 ACT ZONE 1 TRBL ZONE 2 ACT ZONE 2 TRBL OVERLOAD The AIC contains two dry contact inputs to activate the two audio inputs separately. Each input can be configured independently for different usages via the Zeus Programming tool. Each input can be controlled automatically via system logic dependant on its individual configuration or manually by using the voice control panel. The input levels can be adjusted via the Zeus tool or manually with push buttons at the AIC front panel. During the initial power-up condition, each input is shut off. NORMAL LOW ZONE 1 OVERLOAD NORMAL LOW ZONE 2 + + 1 2 - - DESCRIPTION CAN 1-9 FIREFINDER-XLS INSTALLATION, OPERATION AND MAINTENANCE MANUAL DAC-NET (D-NET) | CHAPTER 1 The DAC-NET is the CAN-BUS master for all CAN modules. One DAC-NET is required in each enclosure. It is the source point for eight digital audio channels and communicates audio data via the ASI-BUS to all digital audio cards. It communicates all instructions and messages directly with the PMI. DAC - NET RESET POWER CARD FAIL CAN FAIL ASI FAIL CPC -DAC FAIL ALARM EXT ALARM TRBL LPB The DAC-NET contains an optional LPB (Local Page Interface Board) which has to be mounted piggyback. This CAN module with a fixed CAN address provides the microphone input from the LVM, the telephone riser input from the FMT, and an output for the monitor speaker on the LVM. RESET POWER CARD FAIL CAN FAIL ASI FAIL MIC ACT MIC TRBL PHONE ACT SPEAK ACT DNET ADDRESS + + + 1 2 3 - - - —MAIN IN RETURN OUT GND FAULT TRBL TRBL —MAIN OUT RETURN IN GND FAULT It provides network communication (D-NET) between enclosures (nodes). The network can be wired either Style 4 or Style 7. Each DAC-NET occupies one D-NET address. The DAC-NET contains various on-board tones and audio messages. FMT Fireman’s Master Telephone The FMT Fireman’s Master Telephone provides firefighters with an emergency telephone system for communication with remote locations. The FMT is located in the main FireFinder-XLS enclosure and includes a handset for the operator of the telephone system. FTS Series Firefighter’s Telephone Stations The FTS Series of FireFighter’s Telephone Stations consists of the FTS, FTS-P, FTS-C, FTS-CL and FTS-PCL models. Any of the models in the FTS Series can mount into either the FB-300 flush backbox or the FB-301S surface backbox. The backboxes are mounted on the wall of the facility in accordance with local mounting codes in locations that provide easy access. LPB Local Page Board The LPB (Local Page Board) is used to connect the alarm microphone, mounted in the LVM (Live Voice Microphone), and the voice system internal telephone system. The LPB converts the two analog input signals into the system’s internal digital format. Additionally the LPB provides one analog output to connect the monitor speaker, mounted in the LVM. This output signal is one of the eight internal voice audio channels selectable at the voice control panel. DAC - NET RESET POWER CARD FAIL CAN FAIL ASI FAIL CPC -DAC FAIL ALARM EXT ALARM TRBL LPB RESET POWER CARD FAIL CAN FAIL ASI FAIL MIC ACT The microphone signal wiring between LVM and LPB is supervised. The microphone audio input of the LPB is not transformer isolated (each LVM microphone output is transformer isolated). The audio input from the telephone riser is transformer isolated. Each of the three audio channels can be configured independently via the Zeus tool. Each audio channel can be controlled automatically via system logic, dependant on its individual configuration or manually by using the voice control panel. 1-10 DESCRIPTION MIC TRBL PHONE ACT SPEAK ACT DNET ADDRESS + + + 1 2 3 - - - —MAIN IN RETURN OUT GND FAULT TRBL TRBL —MAIN OUT RETURN IN GND FAULT CHAPTER 1 | FIREFINDER-XLS INSTALLATION, OPERATION AND MAINTENANCE MANUAL LVM Live Voice Module The LVM Live Voice Module provides firefighters with a means of sending live voice messages to specified audio zones. The LVM has a push-to-talk switch on the microphone, as well as a retractable coiled cord. Both the push-to talk switch and the microphone are supervised. The LVM has a built-in speaker to preview active tones and messages. PFT Series The PFT Series FireFighters’ Telephones include models PFT and PFT-P. Both models have a jack at the end of the phone that plugs into either an FJ-303(SS) or FJ-304(SS) plate. Model PFT-P has a “push-to-talk” button. TZC-8B Telephone Zone Card The TZC-8B Telephone Zone Card provides a way for emergency response personnel located throughout a building to speak with one another during emergency situations. The card is located in any FireFinder-XLS enclosure and is connected to jacks or Fire Fighter’s Telephone Stations located throughout the building. Portable phones (Models PFT and PFT-P) that plug into these jacks or Fire Fighter’s Telphone Stations (Model FTS) can communicate to the FMT Fireman’s Master Telephone located at the main enclosure or to telephones connected to the system. TZC-8B RESET POWER CARD FAIL CAN FAIL GND FAULT ZONE 1 ACTIVE TRBL ZONE 2 ACTIVE TRBL ZONE 3 ACTIVE TRBL ZONE 4 ACTIVE TRBL ZONE 5 ACTIVE TRBL ZONE 6 ACTIVE TRBL ZONE 7 ACTIVE TRBL ZONE 8 ACTIVE TRBL + 1 - + 2 - CAN ZAC-40 Zone Amplifier Card The ZAC-40 is a CAN data bus card that contains two speaker zones and one 40 Watt audio amplifier capable of operating at 25, 70 or 100 VRMS. The two speaker zones can be wired to operate as either a single Class A zone, a single Class B zone, or as two Class B zones independently protected to provide split zone or interleaved speaker zones. ZAC-40 RESET POWER CARD FAIL CAN FAIL ASI FAIL ZONE ACTIVE ZONE TROUBLE ZONE GNDFAULT The ZAC-40 can also be used as a backup amplifier to serve as a backup for other ZAC-40 amplifiers in a one to one backup or one to many backup. OVERLOAD NORMAL LOW ZONE The ZAC-40 contains a local external audio input circuit (0 dB) and a dry contact input to switch on the amplifier and activate the two zones as configured in the Zeus programmimg tool. The ZAC-40 is capable of amplifying any one of the 8 audio channels that transmit from the DAC-NET (Digital Audio Card-NET) via the internal digital audio ASI bus (Audio Serial Interface). DESCRIPTION + + 1 2 - - CAN 1-11 FIREFINDER-XLS INSTALLATION, OPERATION AND MAINTENANCE MANUAL ZAM180 Zone Amplifier Module | CHAPTER 1 The ZAM-180 is a CAN data bus module that contains two speaker zones and one 180 Watt audio amplifier capable of operating at 25, 70 or 100 VRMS. The two speaker zones can be wired to operate as either a single Class A zone, a single Class B zone, or as two Class B zones independently protected to provide split zone or interleaved speaker zones. The ZAM-180 can also be used as a backup amplifier to serve as a backup for other ZAM-180 amplifiers in a one to one backup or one to many backup. The ZAM-180 contains a local external audio input circuit (0 dB) and a dry contact input to switch on the amplifier and activate the zones as configured via the Zeus programming tool. The ZAM-180 is capable of amplifying any one of the eight audio channels that transmit from the DAC (Digital Audio Card) via the internal digital audio ASI bus (Audio Serial Interface). The ZAM-180 mounts on a CAB-MP Mounting Plate and occupies one space. INTELLIGENT ANALOG DEVICES The intelligent devices described below are available for use with the FireFinder-XLS System. The UL identifiers for compatibility are the same as the model names specified below. HFP-11 Intelligent/Analog Photoelectric Detector The HFP-11 is an intelligent photoelectric detector with 135O fixed temperature thermal assist that can be used as an area or duct detector [HFP-11(d)]. The HFP-11 is also a combination photo/thermal detector using our exclusive FirePrintTM technology. It uses either a DB-11 low profile mounting base, a DB-HR mounting base with relay, an ADBH-11 audible base, or an AD-11P or AD-HR air duct housing. HFPT-11 Intelligent Thermal Detector The HFPT-11 is an intelligent fixed-temperature or fixed temperature /rate-of-rise thermal detector. It can only be used as an area detector. It uses either a DB-11 low profile mounting base, a DB-HR mounting base with relay or an ADBH-11 audible base. HLIM Loop Isolator Module The HLIM isolates short circuits on FireFinder-XLS analog loops. By placing devices between HLIMs during installation, a short in the wiring within that group is disconnected from the rest of the loop. The remainder of the devices continue to operate. The HLIM operates in both Class A and Class B circuits. 1-12 DESCRIPTION CHAPTER 1 | FIREFINDER-XLS INSTALLATION, OPERATION AND MAINTENANCE MANUAL A yellow LED flashes when the HLIM detects a short circuit. The HLIM then isolates that part of the loop. When the short is removed, the HLIM automatically restores the loop to normal operation. The HLIM does not have a loop address and therefore does not require address programming nor does it reduce the loop capacity below 252 devices. HMS-2S and HMS-SA Intelligent Manual Station The HMS-2S/-SA is an intelligent manual station designed to interface with a DLC loop. The HMS-2S/-SA manual station housing has a pull down lever that locks in position after releasing a spring loaded switch. To indicate the manual station is activated, the pull down lever remains down and locked until the station is physically reset. The HMS-SA manual station has a set of normally closed auxiliary contacts which are available for releasing door holders and magnetic door locks. The HMS-2S has a keyswitch which can activate a second address. HMS-S/-D Intelligent Manual Station The HMS-S/-D is an intelligent manual station designed to interface with a DLC loop. The HMS-S is a single-action station; the HMS-D is a double-action station. The HMS can be flush mounted or surface mounted using the SB-5R mounting box. HMS-M Intelligent Manual Station with Metal Housing The HMS-M is an intelligent metal manual station designed to interface with a DLC loop. The HMS-M is a single action station; when used with the Model HMS-FD Adapter, the HMS-M is double action. HTRI-M Intelligent Interface Module The HTRI-M intelligent interface module interfaces direct shorting contact devices with the DLC loops.The HTRI-M can monitor a normally open or closed dry contact and it can report the status of the contact. HTRI-S, HTRI-R and HTRI-D Intelligent Interface Modules The HTRI-S/-R/-D series modules are intelligent interface modules that interface direct shorting contact devices with the DLC loops.The HTRI-S is a single-input module; the HTRI-R is a single-input module with an independently controllable Form C relay; the HTRI-D is a dual-input module. HZM Remote Conventional Zone Module The HZM is a FireFinder-XLS intelligent device that connects a single zone of conventional devices to a DLC device loop card. The HZM can power up to fifteen compatible 2-wire, ionization or photoelectric smoke detectors or it can power one PB-1191 Beam Detector. It can also monitor an unlimited number of shorting devices such as waterflow switches, thermal detectors, manual stations, etc. The HZM supports Class A and Class B wiring. The module uses one address on the device loop. It does not require any mechanical address programming. Use the DPU Device Programming Unit to program and test the module. DESCRIPTION 1-13 FIREFINDER-XLS INSTALLATION, OPERATION AND MAINTENANCE MANUAL | CHAPTER 1 1-14 DESCRIPTION 6 9 2 5 1 8 0 4 7 C The DPU is used to program and test detectors and devices for MXL and FireFinder-XLS systems. In a FireFinder-XLS installation, the DPU may be used to check wiring loops for ground faults and short circuits as well as to check communication of the installed devices by displaying the device types and addresses of all devices on the loop. 3 DPU Device Programming Unit 2 INTRODUCTION This section provides general instructions for mounting and wiring the FireFinder-XLS Control Panel. Read this section before installing the equipment to ensure proper installation. If you are not familiar with the FireFinder-XLS System, also read the first section of the manual. Be sure to ask Siemens Building Technologies, Inc. Technical Support or an authorized Representative if you have any questions. Install and use the FireFinder-XLS System in accordance with the appropriate Local, NFPA and NEC Code requirements. INSTALLATION GUIDELINES Alw ays remo ve power (battery and AC) and wait at least 10 seconds to allow the Alwa remove supply voltages to decay before installing or removing any module, cable or wiring. Follow Steps 1 through 25 for installation. Each step is thoroughly explained in the referenced installation instructions. A description of all compatible FireFinder-XLS system modules and devices can be found in the FireFinder-XLS Installation Instructions Index, P/N 315-034242. 1. Install the desired enclosure; CAB1, CAB2 or CAB3. Refer to the CAB Enclosure Components table on page 2-2 to select the appropriate installation instructions. Refer also to Figure 2-1 on page 2-3 for information on CAB rows and module placement. 2. Install the HTSW-1 Tamper Switch where required (Refer to the HTSW-1 Installation Instructions, P/N 315-033350). 3. Pull the field wiring into the backbox and dress it to approximately where it will go. 4. Install the PMI on the inner door (Refer to the PMI Installation Instructions, P/N 315-033070). 5. Install the CC-5/CC-2 on a CAB-MP mounting plate (Refer to the CC-5/CC-2 Installation Instructions, P/N 315-033035). Do not install the card guides in the CC-5/CC-2 at this time. The Mounting Plate may be located either “IN” or “OUT” of the enclosure to perform this installation procedure. If the Mounting Plate is located “IN” the INSTALLATION 2-1 FIREFINDER-XLS INSTALLATION, OPERATION AND MAINTENANCE MANUAL | CHAPTER 2 FIREFINDER-XLS ENCLOSURE COMPONENTS Installation Instruction Component Description / Color Part Number CAB1 CAB1R Complete CAB1 Single Row* Enclosure - Black Complete CAB1 Single Row Enclosure - Red 315-033007 CAB2-BB CAB3-BB CAB2 Two Row Backbox - Black CAB3 Three Row Backbox - Black 315-033009 CAB2-BD CAB2-RD CAB3-BD CAB3-RD CAB2 Two Row Inner and Outer Doors - Black CAB2 Two Row Inner and Outer Doors - Red CAB3 Three Row Inner and Outer Doors - Black CAB3 Three Row Inner and Outer Doors - Red 315-033008 CAB2-XBD CAB3-XBD CAB2 Transponder Door for Two Row Backbox - Black CAB3 Transponder Door for Three Row Backbox - Black 315-033768 CAB-BATT Battery Box for BTX-2 or BTX-3 batteries 315-033917 CAB-MP Mounting Plate for CAB enclosures -Silver (One CAB-MP is required for each CAB Row) 315-033012 CAB1-TK CAB1R-TK CAB2-TK CAB2R-TK CAB3-TK CAB3R-TK Flush Trim Flush Trim Flush Trim Flush Trim Flush Trim Flush Trim 315-033013 OD-LP OD-BP OD-GP Outer Door Full Row Clear Lens Outer Door Full Row Blank Plate - Black Outer Door Full Row Grill Plate (Louvered Door Vents) - Black 315-033008 ID-FP ID-SP Inner Door Full Row Blank Plate - Black Inner Door Single Module Position Blank Plate - Black 315-033008 ID-MP BCM Inner Door Mounting Plate Control Module Blank Plate 315-033040 REMBOX2 REMBOX4 Remote Enclosures - Black 315-033772 REMBOX2-MP REMBOX4-MP Mounting Plate for REMBOX2 - Black Mounting Plate for REMBOX4 - Black 315-034211 Kit for CAB1 - Black Kit for CAB1R - Red Kit for CAB2 - Black KIt for CAB2R - Red Kit for CAB3 - Black Kit for CAB3R - Red *A Single Row has the capacity to mount up to 4 modules using the CAB-MP Mounting Plate. enclosure you will have to gain access to it by opening the enclosure Inner and Outer doors. If the Mounting Plate is located outside of the enclosure, place it in front of you so that the word “TOP” is at the top and away from you. 2-2 INSTALLATION 6. Install the PSC-12 on a CAB-MP mounting plate (Refer to the PSC-12 Installation Instructions, P/N 315-033060). 7. Install the PTB in the bottom of the CAB enclosure (Refer to the PTB Installation Instructions, P/N 315-033390). CHAPTER 2 | FIREFINDER-XLS INSTALLATION, OPERATION AND MAINTENANCE MANUAL Outer Door CAB3-BD Inner Door CAB3-BD Backbox CAB3-BB One “Row” Two Module Positions PMI One “Row” One Module Position PSC-12 Full “Row” ID-FP OD-LP OD-BP OD-GP One Module position ID-SP Two Module Positions CC-5 Each CAB Backbox “Row” requires a CAB-MP in order to mount modules CC-5 Cards: DLC ZIC-4A CRC-6 NIC-C Figure 2-1 Graphic Representation Of CAB3 Enclosure Showing Row And Module Positions 8. Install Field Wiring. Dress the field wiring that will be going to the CC-5. Strip the insulation from the wiring, but do not connect the wires to the screw terminals. 9. Check Field Wiring. Initiating Devices–Install all initiating device bases and end-of-line devices where applicable. Install all initiating devices. Refer to the specific installation instructions provided with each device. Connect the DPU to initiating devices and test FireFinder-XLS loops. The DPU checks that all of the devices are communicating and also checks for ground faults and short circuits. Refer to the DPU User’s Manual, P/N 315-033260, for further information. Notification Appliances–Install all notification appliances (bells, strobes, etc.) Refer to the specific installation instructions provided with each device. 10. If the PSC-12 and CC-5/CC-2 were installed on the CAB-MP “OUT” of the enclosure, mount the complete assembly in the CAB row. INSTALLATION 2-3 FIREFINDER-XLS INSTALLATION, OPERATION AND MAINTENANCE MANUAL 11. | CHAPTER 2 Connect Field Wiring to CC-5/CC-2 screw terminals, as appropriate. 12. Install card guides in CC-5/CC-2. 13. Install the DLC in a CC-5/CC-2 (Refer to the DLC Installation Instructions, P/N 315-033090). 14. Install the ZIC-4A in a CC-5/CC-2 (Refer to the ZIC-4A Installation Instructions, P/N 315-033050). 15. Install the RPM, if applicable (Refer to the RPM Installation Instructions, P/N 315-033270). 16. Install the NIC-C in a CC-5, if applicable (Refer to the NIC-C Installation Instructions, P/N 315-033240). 17. Install the CRC-6 in a CC-5, if applicable (Refer to the CRC-6 Installation Instructions, P/N 315-033250). 18. Install the SSD, if applicable (Refer to the SSD Installation Instructions, P/N 315-034170). 19. On the PSC-12, set the circuit breaker for the battery to the OFF position. Verify that the AC dedicated circuit breaker is turned off at the mains. 20. Connect the AC mains and battery wiring to the PTB. 21. Connect the PTB output to the PSC-12. 22. Turn on the dedicated circuit breaker. 23. Turn on the PSC-12 circuit breaker for the battery. 24. The System will initialize in default mode. 25. Using the Zeus programming tool, transfer the site-specific program to the FireFinder-XLS system. Refer to the Zeus Quick Start Manual, P/N 315033875, for further information. Upon completion, the system will automatically initialize. FireFinder-XLS will interrogate the system and verify that the system agrees with the Zeus configuration. 26. Any problem found will be reported in the PMI. Identify all discrepancies and correct them until the system reports SYSTEM STATUS: NORMAL. 2-4 INSTALLATION 3 INTRODUCTION The PMI is the primary user interface for the FireFinder-XLS system. From the PMI the operator can acknowledge events, control the system notification appliance circuits and reset the system. Detailed information about the nature and location of events can also be displayed. The PMI contains the site specific program as developed in the Zeus programming tool. All system logic and supervision is provided by the controller in the PMI. ALARM SUPERVISORY SECURITY TROUBLE .... POWER Alarm(s) # Security(s) # Trouble(s) # Super(s) # FIRE ALARM LIST ON ! Device custom message 10:53 (Currently not used) 4 Device custom message AUDIBLES 10:57 11:00 SILENCED More Info (Currently not used) Event Category 4 Device custom message Event Category _ (Currently not used) 4 Device custom message 11:03 Event Category + (Currently not used) 4 Device custom message 11:06 PARTIAL SYSTEM DISABLED Event Category Acknowledge Alarms (Currently not used) Silence Audibles Unsilence Audibles Reset System ? Figure 3-1 PMI User Interface The PMI contains a ¼ VGA monochrome LCD, Touch Screen and LEDs for displaying system status. An audible sounds when there are unacknowledged events on the PMI. This screen is surrounded by keys that are used to control the displayed information and to navigate through these screens. If more items are present than can be displayed on a single screen, a scroll bar appears to the right of the list. Press the up and down navigation buttons to the right of the LCD to move through the list. The selected listing is highlighted in the display. Buttons are also provided to obtain help and to enter into the menu features of the PMI. (Refer to Figure 3-1.) Interface Overview ! LEDs blink when an event is reported and unacknowledged (ALARM: red, SUPERVISORY: yellow, SECURITY: yellow, TROUBLE: yellow). The LEDs glow steady if all events in the class/queue are acknowledged. An internal audible alarm sounds steady when there is an unacknowledged fire alarm. It pulses if all alarms are acknowledged, but there is at least one supervisory, trouble or security condition. " Along the top and bottom of the LCD are rows of four soft keys. These soft keys have no specific function assigned to them. Each of the soft keys is backlit with a green triangular LED that is used to guide the operator to the available actions. # POWER - Power LED glows steady green to indicate that the AC power is on; blinks when the System is on battery backup. OPERATION 3-1 FIREFINDER-XLS INSTALLATION, OPERATION AND MAINTENANCE MANUAL | CHAPTER 3 AUDIBLES - Audibles ON or Audibles SILENCED glows steady yellow. PARTIAL SYSTEM DISABLED - Partial System Disabled glows steady yellow when any module/device is disabled. NORMAL MODE $ Press .... to display a MENU of available information. % Scroll UP / Scroll DOWN - Use the scroll up button to navigate up or the scroll down button to navigate down a list to choose a specific entry from the list of information displayed on the screen. If the button remains depressed, the list scrolls progressively faster until it reaches ten items at a time. & MORE INFO (+ / —) - Use More Info/+/- to navigate or drill down (+) or up (—) through the levels of detail about a selected entry. When viewing a report that is longer than one screen, pressing (—) highlights the last entry of the report and pressing (+) highlights the first entry of the report. ' HELP - Press ? for context-sensitive help. Press ? again or press the Exit Help soft key to return to your previous position. If no key presses are made for 60 seconds, the help will time out and return to the previous screen. ( Touch screen display - Touch selections on the screen when there are options that are not selectable using the soft keys. Use of the touch screen is not required in Alert mode. Normal mode is the absence of any alarm, supervisory, trouble, or security conditions. 10:26:12 07/12/02 SYSTEM STATUS: NORMAL The screen displays SYSTEM STATUS: NORMAL with the time and date. A node custom message can be programmed using the Zeus tool (refer to Zeus Quick Start Guide, P/N 315-033875) and also displays in this mode. See Figure 3-2. The POWER LED glows steady green in Normal mode when the System has AC power. The ALARM, AUDIBLE ON, AUDIBLE SILENCE, SUPERVISORY, TROUBLE, SECURITY, and PARTIAL SYSTEM DISABLE LEDs are off and the internal audible is off. Press the Menu button (see $ above) to display a menu of all PMI options. See Figure 3-3. The currently available options are described below. Menu CUSTOM MESSAGE FireFinder - XLS System Figure 3-2 Normal Mode Display Alert Report OPERATION Function Keys Press any lit green arrow key to continue. 10:53 Category text information Press “?” for more help information. ALERT: Firefighter’s Mode, view events. REPORT: View/Print event and system info. MAINT: Control devices and inputs/outputs. FUNCTION KEYS: Execute logic commands. LOGOUT: Leave password protected area. DIAGNOSTICS: For factory use only. LAMP TEST: 30 second PMI LED test. Logout Diagnostics Figure 3-3 PMI Menu Screen 3-2 Maint Menu FireFighter@1 Lamp Test CHAPTER 3 | ALERT MODE FIREFINDER-XLS INSTALLATION, OPERATION AND MAINTENANCE MANUAL When an Alarm, Security, Supervisory or Trouble event occurs in the system, the display enters the Alert or Firefighter’s mode automatically. The events are displayed in priority order (Alarm, Supervisory, Security, Trouble), the local audible sounds and the appropriate LED blinks. If the event caused notification appliances to sound, the Audibles On indicator lights. At the bottom of the screen an Acknowledge soft key is displayed if the highest unacknowledged queue is selected. Pressing this key acknowledges the event and silences the local audible. Once all events are acknowledged and audibles are silenced, a Reset System soft key becomes available in the lower right side of the display. If notification appliances were active, two additional soft keys become available at the bottom of the screen. These allow the operator to silence or unsilence the notification appliances (audibles). When the notification appliances are silenced the Audibles Silenced LED lights. Press the More Info/+ button to display a screen showing details relating to the selected event. Additional soft keys appear at the bottom of this screen, including one that displays a map of the area in which the event occurred, provided this information has been programmed using the Zeus tool. The operator can return to the previous screen by pressing the (–) button, which is adjacent to the More Info/+ button. Event counts in PMIs and SSDs may differ because SSDs currently display only “primitive” (individual) events, while a group PMI whose devices are programmed into groups in Zeus will display only one queue event per group. Alarm When an alarm is detected, ACTIVE Alarms 1 Securities 1 Supers 1 the red Alarm LED blinks, the System’s internal First Floor Reception Area audible sounds steady, the Audibles On LED glows ACK’D steady, and the alarm event displays on the screen with a blinking exclamation mark (!) See Figure 3-4. The event listing displays the Event Acknowledge Unsilence Silence Alarms Audibles Audibles Custom Message, the Time of the event occurrence and the Figure 3-4 Alarm Event Category (refer to Alarm Event Screen the Alarm Event: Category Cross Reference Table below). Troubles 1 FIRE ALARM LIST 10:53 Alarm Event CATEGORY ALARM IN IN (This Area Currently Not Used) IN Reset System ALARM EVENT: CAT EGORY CROSS-REFERENCE Category Physical Device SMOKE HFP-11, HZM or CDC Zone HEAT HFPT-11, HTRI, HZM, SIM-16 Input or CDC Zone MANUAL HMS, HTRI, SIM-16 Input, HZM or CDC Zone CONV. ZONE CDC Zone or HZM (for mixed device usage on a conventional zone) WATERFLOW HTRI, HZM, SIM-16 NOTE: Categories are fixed for some devices and selectable for others, based on the Zeus tool programming. (i.e., HMS is always MANUAL, but HTRI is selectable.) OPERATION 3-3 FIREFINDER-XLS INSTALLATION, OPERATION AND MAINTENANCE MANUAL | CHAPTER 3 In addition, the System responds to alarms with other output functions (as programmed in the Zeus tool) such as other audible signals. An Acknowledge Alarms soft key displays in the bottom left corner of the screen. Press this key to acknowledge each alarm and to silence the local audible. The blinking exclamation point (!) then changes to a check mark ()). See Figure 3-4. (If the system is programmed as NFPA 72D in the Zeus tool, it is necessary to individually acknowledge each alarm.) Highlight an event and press the More Info/+ button to go to the Devices screen, as shown in Figure 3-5. If the selected item is part of a group, the device list will show the primitive (individual) devices currently off-normal in the event queue. All events in a group of the same type (i.e., Alarm, Trouble) display together in the devices screen. Primitive devices that are not part of a group display by themselves. Depending on how the system is programmed in Zeus, the top event can be a device or a group. First Floor Reception Area HFP-11@address 3:15 HFP11 ! 10:56 :3-15 Smoke Photoelectric sensor HFP-11@address 3:16 HFP11 ! 10:57 :3-16 Smoke Photoelectric sensor HFP-11@address 3:17 HFP11 10:58 :3-17 DETAILS Smoke MAP Photoelectric sensor DEVICES BACK Figure 3-5 Alarm Devices Screen WHERE: First Floor Reception Area is the Group Message ! is an active event; ) is an acknowledged event HFP-11 @ address 3:15 is the device custom message HFP11 is the event device 10:56 is the event time 3:15 is the event device address Smoke is the component category Photoelectric sensor is the event device component Pressing the Details soft key takes you to the Details screen as shown in Figure 3-6. The Details screen contains information that has been entered using the Zeus programming tool, such as additional information about the alarm location, the number of devices in alarm (this number can be more than one when the device is part of a group), the alarm types, the name and phone number of a contact person, icons showing the fire equipment in the area and icons showing special conditions. First Floor Reception Area AREA FIRE EQUIP: ALARM LOCATION: 1st Floor Reception Area - Lobby entrance AREA CONTAINS: # Devices in ALARM: 3 ALARM TYPES: Smoke, Heat, Flow Contact: John Sample Phone #: 973.555.1234 DETAILS MAP DEVICES BACK Figure 3-6 Alarm Details Screen Press the Map soft key to display a map showing the location of the event, provided the information has been programmed using the Zeus tool. Refer to Figure 3-7. Maps can be programmed to provide icons showing the event type. These icons are the 3-4 OPERATION FIREFINDER-XLS INSTALLATION, OPERATION AND MAINTENANCE MANUAL Supervisory First Floor Reception Area When a supervisory is detected, the yellow Supervisory LED blinks, the DETAILS MAP DEVICES System’s internal audible pulses, and the event(s) display on the screen Figure 3-7 with a blinking exclamation mark (!). Sample Map Screen This event listing displays the Event Custom Message, the Time of the event occurrence and the Supervisory Event Category (i.e., Security, Sprinkler, etc.). RECEPTION SHOP MAIN STREET HALL LAV SHIPPING same ones that represent Alarm, Security, Supervisory and Trouble on the PMI panel. The map can also be programmed to show the location of the PMI (“You are here”). All members of a group will display the same map. LOADING DOCK CHAPTER 3 | BACK In addition, the System responds to supervisories with other output functions (as programmed in the Zeus tool). An Acknowledge Supervisory soft key displays in the bottom left corner of the screen. Press this key to acknowledge each supervisory and to silence the local audible. The blinking exclamation point (!) then changes to a check mark ()). Security When a security is detected, the yellow Security LED blinks, the System’s internal audible pulses, and the event(s) display on the screen with a blinking exclamation mark (!). This event listing displays the Event Custom Message, the Time of the event occurrence and the Security Event Category (i.e., Door, Monitor Point, etc.). In addition, the System responds to securities with other output functions (as programmed in the Zeus tool). An Acknowledge Security soft key displays in the bottom left corner of the screen. Press this key to acknowledge each security and to silence the local audible. The blinking exclamation point (!) then changes to a check mark ()). See Figure 3-4. Trouble When a trouble is detected, the yellow Trouble LED blinks, the System’s internal audible pulses, and the event(s) display on the screen with a blinking exclamation mark (!). This event listing displays the Event Custom Message, the Time of the event occurrence and the Trouble Event Category (refer to the Trouble Event: Category Cross Reference Table below). T ROUBLE EVENT: CAT EGORY CROSS-REFERENCE Category Physical Device DEVICE Any supervised input device or zone/circuit trouble report: HFP-11, HTRI Series, HMS Series, SIM-16 individually supervised circuits. ZONE ZIC zones, CDC Zones, ZAC Zones, ZAM Zones, HZM or HCP. MODULE Any supervised module trouble - PMI, DLC, ZIC, CRC, CDC, PSC, PSX or NIC. SY STEM Any System-related trouble/failures that are not pinpointed to a specific module, zone or device. NETWORK Any Network related trouble/failure that is not pinpointed to a specific module, zone or device. NOTE: All of these categories are pre-defined by the factory and are not field selectable. OPERATION 3-5 FIREFINDER-XLS INSTALLATION, OPERATION AND MAINTENANCE MANUAL | CHAPTER 3 In addition, the System responds to troubles with other output functions (as programmed in the Zeus tool). An Acknowledge Trouble soft key displays in the bottom left corner of the screen. Press this key to acknowledge each trouble and to silence the local audible. The blinking exclamation point (!) then changes to a check mark ()). See Figure 3-4. If acknowledged troubles remain in the queue, the system will sound the local audible every 24 hours as a reminder. A message will appear on the PMI and the sounder will remain on until it is silenced. Reset Procedures There are two types of reset procedures that can be performed on the FireFinder-XLS System: Hard Reset and Soft Reset. Hard Reset Other terms for Hard Reset are Power-up, Initialization, and Cold Reset. Applying power to the system performs a Hard Reset. Doing so initializes the entire system. What Is Lost: • Alarm, supervisory, trouble, and security conditions (provided they have returned to the normal state). • Arm/disarm. • Manual sensitivity adjustment. What Is Not Lost: • Zeus program. Soft Reset • Time and date. • History log. • Time-based control. A Soft Reset is performed by pressing the Reset System soft key. The system can only be reset when all events (alarms, supervisories, securities and troubles) are acknowledged and the notification appliances are silenced. What Is Lost: • Alarm, supervisory, trouble, and security conditions (provided they have returned to the normal state). What Is Not Lost: • Any user entries such as time and date. • Arm/disarm. • Zeus program. • Manual sensitivity adjustment. • Time-based control. REPORT MODE (Reporting Detector Sensitivities) Press the Menu button on the PMI (upper right) and select the Report option by pressing the key with the lit green triangle pointing to the Report label. Press the More Info/+ button on the PMI to navigate to the desired loop or specific device. When More Info is pressed once it displays the FireFinder-XLS node. 3-6 OPERATION CHAPTER 3 | Report - Status FIREFINDER-XLS INSTALLATION, OPERATION AND MAINTENANCE MANUAL • Press the More Info/+ button again to display a list of FireFinder-XLS modules; use the up and down buttons to select the desired module. • Press the More Info/+ button again to display a list of FireFinder-XLS submodules (provided your system has sub-modules installed); use the up and down buttons to select the desired sub-module. • Press the More Info/+ button again to display a list of FireFinder-XLS devices; use the up and down buttons to select the desired device. There are four options that can be selected in the Report Mode: Configuration, Status, Queue and History. Once at the desired module/ loop or device, select the Status option by pressing the Status soft key. A screen displays with all the possible Status Report selections: Disarmed, ASD, Status Sw(itch), Sensitivity, Threshold and Temperature. See Figure 3-8. “Touch” the desired option to select it and the Report Screen appears for that option. To view a list of detector sensitivities, “Touch” the box labeled Sensitivity. The Sensitivity Report screen will display as shown in Figure 3-9. Press the View soft key to display the list of detector sensitivities. As the system reads all device sensitivities for the module/loop or device it might display the message Acquiring Data. When the data is received, it displays on the PMI screen. See Figure 3-10. The information in the Sensitivity report is not dynamic. It displays the detector sensitivities at the moment the report was requested. If the report list exceeds what can be displayed on the screen, a scroll bar appears with an arrow on the bottom indicating the list continues. To view the remaining items on the list, press the DOWN arrow button. If the down arrow button remains Menu:Report:Status FireFinder@1 Disarmed ASD Status Sw Sensitivity Threshold Temperature Cancel Figure 3-8 Menu: Report: Status Screen Menu:Report:Status:Sensitivity FireFinder@1, DLC@1 Sensitivity Report AT: FireFinder@1, DLC@1 SETTINGS: Node: None Module: None SubModule: None Device: Smoke Cancel Settings View Figure 3-9 Sensitivity Report Settings Screen Menu:Report:Status:Sensitivity:View FireFinder@1, DLC@1 Sensitivity Report Address Device Sensitivity(%/Foot) 25% :1-3 HFP11 :1-4 HFP11 10:53 Category text information :1-5 HFP11 :1-6 HFP11 :1-7 HFP11 :1-8 HFP11 :1-9 HFP11 :1-10 HFP11 :1-11 HFP11 :1-12 HFP11 Cancel 1.9 1.9 1.9 1.9 1.9 1.9 1.9 1.9 Acquiring Data Acquiring Data Print Figure 3-10 Sensitivity Report Screen OPERATION 3-7 FIREFINDER-XLS INSTALLATION, OPERATION AND MAINTENANCE MANUAL | CHAPTER 3 depressed, the list scrolls progressively faster until it reaches ten items at a time. When viewing a report that is longer than one screen, pressing (—) highlights the last entry of the report and pressing (+) highlights the first entry of the report. This sensitivity report can then be printed by selecting the Print option if the system has a report logging printer. 3-8 OPERATION 4 INTRODUCTION The eight-channel digital evacuation FireFinder-XLS Voice system can be added to the basic FireFinder-XLS fire alarm system. This is accomplished with the addition of the DAC-NET Digital Audio card and its accompanying submodules (ZAC, LVM/ LPB, SCM-8, ZIC, FMT, TZC) and zone-installed equipment (speakers, strobes, telephones). The system is capable of automatically or manually signaling to its installed speaker zone circuits (ZAC). The signal can be up to eight channels of prerecorded messages and/or tones including up to two simultaneous channels of live paging. The tones and prerecorded messages are configurable in the Zeus programming tool and are available for upload to each installed DAC-NET. A maximum of 32 DAC-NET modules can be installed in each FireFinder-XLS system. Each DAC-NET may input either its own tone/message to a channel, or it may be programmed to use a tone/message from another DAC-NET in the system. Individual zone circuits (speaker, strobe, telephone) are bundled into geographic groups during system configuration. These groups are either automatically controlled by pre-programmed system logic, or manually controlled by the switches located on one or more Command Stations. Paging, manual control, or monitoring of the speaker or telephone groups can be performed from any location where an LVM/LPB microphone, SCM switch control module, or PMI is installed. EQUIPMENT COMMAND STATIONS The Control and Indicating equipment of a FinderFinder-XLS Voice system consists of the following components: • LED Control Module (LCM) • Switch Control Module (SCM) • Live Voice Microphone (LVM) • Firefighters Master Telephone (FMT) • Telephone Zone Card (TZC) • Person Machine Interface (PMI) Each FireFinder-XLS Command Station configuration is unique. The requirements of the project determine the modules needed to achieve the desired functionality. The Control view of the Zeus Programming tool is used to configure the Command stations. Each switch on the LVM, SCM and FCM may be configured for any of the manual operations (See page 4-4). VOICE SYSTEM 4-1 FIREFINDER-XLS INSTALLATION, OPERATION AND MAINTENANCE MANUAL | CHAPTER 4 Figure 4-1 Typical FireFinder-XLS Command Stations A voice system may have one or many different locations of control over the same, or differing, geographically installed equipment. Each control station will generally use Request/Grant/Deny Access switches for managing controls in differing emergency scenarios, but access restrictions are Zeus-programmable to the degree allowed by the authority having jurisdiction (AHJ). A location of voice system control (command station) consists of the following: 1. A list of Speaker Groups to be controlled/monitored. 2. A set of Voice Applications to be performed on the Speaker Groups (for example, ALL CALL, SELECT EVAC, DISPLAY ALERT, etc.). 3. An LVM microphone. 4. An optional list of telephone groups and an FMT master phone. 5. Request/Grant/Deny access. SYSTEM OPERATION System Indication All voice system faults are reported at the PMI, and at the programmed speaker group control switch. The operator at the PMI is able to ACK, SILENCE/UNSILENCE and RESET voice system events. For example, in the event of an ALL EVAC, the Audibles LED on the PMI comes on and the Silence Audibles button displays on the PMI so the system can be silenced from the PMI. Automatic Operation The voice system interfaces automatically to the fire alarm system using the speaker functions in the Function view of the Zeus Programming tool. In reaction to events from the fire alarm system (DLC devices), the voice alarm system activates its pre-programmed alarm procedures. Typically, the voice alarm system broadcasts an alarm signal, which is immediately followed with a prerecorded message on the fire floor, the floor above and the floor below. It is common to have two stage alarms, with evacuation in some areas and alert in others. LEDs indicate the current system status and the floors in which the evacuation or alert signal is sounding. Since this sequence has occurred automatically, only the events that were predetermined in the original system evacuation plan and programmed into the system configuration program will occur. 4-2 VOICE SYSTEM CHAPTER 4 | FIREFINDER-XLS INSTALLATION, OPERATION AND MAINTENANCE MANUAL Evacuation Signal (EVAC) A steady red LED indicates that an evacuation signal (tone or message) is being sent to the entire building or to selected areas of the building requesting the occupants to evacuate. It is possible to have two different evacuation signals, EVAC 1 and EVAC 2. EVAC 2 will be overridden by EVAC 1 to the same speaker group. Alert Signal A flashing red LED indicates that an ALERT signal (tone or message) is being sent to the entire building or selected areas to alert occupants. It is possible to have two different alert signals, ALERT 1 and ALERT 2. ALERT 2 will be overridden by ALERT 1 to the same speaker group. Manual Operation Once the first few minutes have been dealt with automatically, the voice alarm system can be taken over manually by authorized personnel. Manual voice operation functions such as emergency paging, evacuation or alert signal activation, firefighters' telephone operation, multiple voice system command center operation, as well as convenience page or background music operation are possible at any time. Emergency Page Emergency Page allows a live voice page from the emergency microphone to all or selected speaker groups in the building. An optional preannouncement tone preceeds emergency pages for a duration of time set in the Zeus programming tool. Evacuation Signal (EVAC) EVAC sends the evacuation tone or message (predetermined in system design) to all or selected speaker groups in the building. The EVAC signal will be overridden by an emergency page to the same speaker group. It is possible to have two different evacuation signals, EVAC 1 and EVAC 2. EVAC 2 will be overridden by EVAC 1 to the same speaker group. Alert Signal Alert signal sends the alert tone or message (predetermined in system design) to all or selected speaker groups in the building. The alert signal will be overridden by an emergency page or an evacuation signal to the same speaker group. It is possible to have two different alert signals, ALERT 1 and ALERT 2. ALERT 2 will be overridden by ALERT 1 to the same speaker group. Convenience Page Convenience Page allows a live voice page from the convenience page microphone to all or selected speaker groups in the building. Convenience pages are a low priority function and will be overridden by an emergency page, an evacuation or an alert signal to the same speaker group. Background Music Background Music sends background music from an external audio input to all or selected speaker groups in the building. Background Music is the lowest priority and will be overridden by an emergency page, an evacuation or alert signal and a convenience page to the same speaker group. SYSTEM PRIORITIES The priority of requests to a speaker group in the case that multiple signals (audio channels) are requested at the same time are as follows: 1. Emergency Page (highest priority) 2. Warden‘s (Phone) Page 3. Evacuation Signal 1 (EVAC 1) 4. Evacuation Signal 2 (EVAC 2) 5. Alert Signal 1 (ALERT 1) 6. Alert Signal 2 (ALERT 2) 7. Convenience Page 8. Background Music (lowest priority) VOICE SYSTEM 4-3 FIREFINDER-XLS INSTALLATION, OPERATION AND MAINTENANCE MANUAL | CHAPTER 4 OPERATION PROCEDURE Switch Control Module The SCM Switch Control Module is used for manual control of the fire system. The SCM-8 contains eight switches and eight pairs of LEDs. Each LED pair contains one bi-color (red/green) and one yellow LED. The functions of the switches and LEDs are programmed using the Zeus programming tool. All LEDs can be programmed ON, OFF, or FLASHING. An “Acknowledge Tone“ sounds on a local sounder for any switch press when a CAN Sounder Board is installed. An “Invalid Tone” from the LVM or CAN Sounder Board sounds on a local sounder for an invalid switch press. For example, a switch press at a non-active control station produces an invalid tone. Live Voice Microphone The LVM Live Voice Module provides firefighters with a means of sending live voice messages to specified audio zones. The LVM has a push-to-talk switch on the microphone, as well as a retractable coiled cord. Both the push-to talk switch and the microphone are supervised. The LVM has a built-in speaker to preview active tones and messages at any speaker group. Each of the six switches is programmable in the Zeus tool. LED Colors LED COLORS Emergency Page Steady green or flashing green (based on the state of paging function) Evacuation Signal (EVAC) Steady red Alert Signal (ALERT) Flashing red Convenience Page Steady green or flashing green (based on the state of paging function) Background Music Steady green (present only when Select Background Music is active) Steady yellow indicates a trouble exists in system that is associated with functionality of switch next to LED Flashing yellow is used for display functions MANUAL OPERATION Emergency Page The Emergency page operation consists of the following functions which are described below: All Page, Select Page, Page to Evacuation, Page to Alert, and Page to Background Music. All Page All Page sends the emergency page message from the Live Voice Microphone (LVM) to all speaker groups in the system with a single switch press. Selecting All Page cancels All Evacuation, All Alert, All Convenience Page and All Background Music. 4-4 VOICE SYSTEM CHAPTER 4 | FIREFINDER-XLS INSTALLATION, OPERATION AND MAINTENANCE MANUAL To select All Page, follow the steps listed below. 1. Pick up the Live Voice Microphone. 2. Depress the All Page switch. 3. The All Page switch and All Speaker Group switch LEDs flash green. 4. Depress the key on the Live Voice Microphone 5. The All Speaker Group switch LEDs turn steady green, indicating that all speaker groups are now turned on. 6. Once the microphone is keyed, a preannouncement tone sounds on all speaker groups for approximately 3 seconds (0-10 seconds is programmable in Zeus). 7. While the preannouncement tone is sounding, the Pre-Announce Tone LED is on steady to give visual indication tol the operator of what is currently sounding. 8. When the preannouncement tone ends, the Pre-Announce Tone LED turns off and the Ready to Page LED turns on telling the operator to proceed with the page. 9. The operator can now speak and make the page to all speaker groups. 10. During the page, the operator can briefly (for up to 5 seconds) unkey and then re-key the microphone (for example, to cough) - without re-initiating the pre-announce tone. 11. To end the page, the operator simply unkeys and replaces the microphone. The Ready to Page LED turns off. 12. All Speaker Group switch LEDs turn from steady green to flashing green. 13. To return the system to normal, the operator depresses the All Page switch; otherwise, the system will automatically return to normal in approximately 1-2 minutes and turn off the All Page and Speaker Group LEDs. This sequence of operation assumes the system is normal and no alarms exist. If there were alarms in the system, the All Page would operate the exact same way - except that the speaker groups that were receiving an evacuation or alert signal would be overridden by the Page. Once the Page ends, the previously sounding evacuation or alert signals would resume on the floors/groups that were sounding before the page. Select Page Select Page sends the emergency page message from the Live Voice Microphone (LVM) to selected speaker groups in the system. Choosing Select Page cancels Select Evacuation, Select Alert, Select Convenience Page and Select Background Music. To select Select Page, follow the steps listed below. 1. Pick up the Live Voice Microphone. 2. Depress the Select Page switch and then the switch for the desired individual speaker group. 3. The Select Page switch and the selected Speaker Group switch LEDs flash green. VOICE SYSTEM 4-5 FIREFINDER-XLS INSTALLATION, OPERATION AND MAINTENANCE MANUAL | CHAPTER 4 4. If no Speaker Group switches are pressed for 120 seconds, the system automatically returns to normal. 5. Depress the key on the Live Voice Microphone. 6. The LED on the selected Speaker Group switch turns steady green indicating that the speaker group is now turned on. 7. Once the microphone is keyed, a preannouncement tone sounds on the speaker group for approximately 3 seconds (0-10 seconds is programmable in Zeus). 8. While the preannouncement tone is sounding, the Pre-Announce Tone LED is on steady to give the operator a visual indication of what is sounding. 9. When the preannouncement tone ends, the Pre-Announce Tone LED turns off and the Ready to Page LED turns on telling the operator to proceed with the page. 10. The operator can now speak and make the page to the selected speaker groups. 11. During the page, the operator can briefly (for up to 5 seconds) unkey and then re-key the microphone (for example, to cough) - without re-initiating the pre-announce tone. 12. To end the page the operator simply unkeys and replaces the microphone. The Ready to Page LED turns off. 13. The Select Page and the selected Speaker Group switch LEDs turn from steady green to flashing green. 14. To return the system to normal the operator depresses Select Page and the selected Speaker Group switches; otherwise, the system will return to normal automatically in approximately 1-2 minutes and turn off the Select Page and selected Speaker Group LEDs. This sequence of operation assumes the system is normal and no alarms exist. If there were alarms in the system, the Select Page would operate the exact same way - except that the speaker groups that were receiving an evacuation or alert signal would be overridden by the page. Once the page ends, the previously sounding evacuation or alert signals would resume on the floors/groups that were sounding before the page. Page to Evacuation Page to Evacuation sends the emergency page message with a single switch press from the Live Voice Microphone (LVM) to all speaker groups in the system that are receiving an evacuation signal. To select Page to Evacuation, follow the steps listed below. 4-6 VOICE SYSTEM 1. The LEDs of the selected speaker groups receiving an evacuation signal are steady red. 2. Pick up the Live Voice Microphone. 3. Depress the Page to Evacuation switch. 4. The Page to Evacuation switch LED and the LEDs of the selected Speaker Groups receiving an EVAC signal flash green. 5. Depress the key on the Live Voice Microphone. CHAPTER 4 | FIREFINDER-XLS INSTALLATION, OPERATION AND MAINTENANCE MANUAL 6. The selected Speaker Group switch LEDs turn steady green indicating that the speaker groups are now turned on. 7. Once the microphone is keyed, a preannouncement tone sounds on the speaker groups for approximately 3 seconds (0-10 seconds is programmable in Zeus). 8. While the preannouncement tone is sounding, the Pre-Announce Tone LED is on steady to give the operator a visual indication of what is sounding. 9. When the preannouncement tone ends, the Pre-Announce Tone LED turns off and the Ready to Page LED turns on telling the operator to proceed with the page. 10. The operator can now speak and make the page. 11. During the page the operator can briefly (for up to 5 seconds) unkey and then re-key the microphone (for example, to cough) without re-initiating the pre-announce tone. 12. To end the page, the operator can simply unkey and replace the microphone, the Ready to Page LED turns off. 13. The Page to Evacuation and the Speaker Group switch LEDs turn from steady green to flashing green. 14. To cancel Page to Evacuation, the operator depresses the Page to Evacuation switch; otherwise, the system will return to its previous state automatically in approximately 1-2 minutes and turn off the Page to Evacuation LED. 15. The selected speaker groups resume receiving an evacuation signal. Page to Alert Page to Alert sends the emergency page message, with a single switch press, from the Live Voice Microphone (LVM) to all speaker groups in the system currently receiving an alert signal. To select Page to Alert, follow the steps listed below. 1. The LEDs of the selected speaker groups receiving an alert signal are flashing red. 2. Pick up the Live Voice Microphone. 3. Depress the Page to Alert switch. 4. The Page to Alert switch and selected Speaker Group switch LEDs flash green. 5. Depress the key on the Live Voice Microphone. 6. The selected Speaker Group switch LEDs turn steady green indicating that the speaker groups are now turned on. 7. Once the microphone is keyed, a preannouncement tone sounds on the speaker groups for approximately 3 seconds (0-10 seconds is programmable in Zeus)). 8. While the preannouncement tone is sounding the Pre-Announce Tone LED is on steady to give the operator a visual indication of what is sounding. 9. When the preannouncement tone ends, the Pre-Announce Tone LED turns off and the Ready to Page LED turns on telling the operator to proceed with the page. VOICE SYSTEM 4-7 FIREFINDER-XLS INSTALLATION, OPERATION AND MAINTENANCE MANUAL | CHAPTER 4 10. The operator can now speak and make the page. 11. During the page, the operator can briefly ( for up to 5 seconds) unkey and then re-key the microphone (for example, to cough) without re-initiating the pre-announce tone. 12. To end the page, the operator simply unkeys and replaces the microphone, the Ready to Page LED turns off. 13. The Page to Alert and the Speaker Group switch LEDs turn from steady green to flashing green. 14. To return the system to normal, the operator depresses the Page to Alert switch; otherwise, the system will return to normal automatically in approximately 1-2 minutes and turn off the Page to Alert LED. 15. The selected speaker groups resume receiving an Alert signal. Page to Background Music Page to Background Music sends the emergency page message with a single switch press from the Live Voice Microphone (LVM) to all speaker groups in the system currently receiving background music. To select Page to Background Music, follow the steps listed below. 1. The LEDs of the selected speaker groups receiving background music are normally off. 2. Pick up the Live Voice Microphone. 3. Depress the Page to Background Music switch. 4. The Page to Background Music switch and selected Speaker Group switch LEDs flash green. 5. Depress the key on the Live Voice Microphone. 6. The selected Speaker Group switch LEDs turn steady green indicating that the speaker groups are now turned on. 7. Once the microphone is keyed, a preannouncement tone sounds on the speaker groups for approximately 3 seconds (0-10 seconds is programmable in Zeus). 8. While the preannouncement tone is sounding, the Pre-Announce Tone LED is on steady to give the operator a visual indication of what is sounding. 9. When the preannouncement tone ends, the Pre-Announce Tone LED turns off and the Ready to Page LED turns on telling the operator to proceed with the page. 10. The operator can now speak and make the page. 11. During the page, the operator can briefly (for up to 5 seconds) unkey and then re-key the microphone (for example, to cough) without re-initiating the pre-announce tone. 12. To end the page, the operator simply unkeys and replaces the microphone. The Ready to Page LED turns off. 13. The Page to Background Music and the Speaker Group switch LEDs turn from steady green to flashing green. 4-8 VOICE SYSTEM CHAPTER 4 | FIREFINDER-XLS INSTALLATION, OPERATION AND MAINTENANCE MANUAL 14. To return the system to normal, the operator depresses the Page to Background Music switch; otherwise, the system will return to normal automatically in approximately 1-2 minutes and turn off the Page to Background Music LED. 15. The selected speaker groups resume receiving background music. Evacuation (EVAC) The Evacuation operation consists of the following functions which are described below: All Evacuation and Select Evacuation. All Evacuation All Evacuation sends, with a single switch press, the evacuation tone or message (predetermined in the system design) to all speaker groups in the system. Selecting All Evacuation cancels All Alert, All Convenience Page and All Background Music. To select All Evacuation, follow the steps listed below. 1. Depress the All Evacuation switch. 2. The All Evacuation, Display Evacuation and all Speaker Group switch LEDs turn on steady red. 3. All speaker groups sound the evacuation tone or message. 4. To end All Evacuation, depress the All Evacuation switch again. 5. The evacuation signal turns off (assuming no automatic alarms exist). 6. The All Evacuation, Display Evacuation and all Speaker Group switch LEDs turn off. Select Evacuation Select Evacuation sends the evacuation tone or message (predetermined in the system design) to selected speaker groups in the system. Choosing Select Evacuation cancels Select Alert, Select Convenience Page and Select Background Music. To select Select Evacuation, follow the steps listed below. 1. Depress the Select Evacuation switch, the LED turns on steady red. 2. Depress the individual Speaker Group switches. 3. The selected Speaker Group and the Display Evacuation switch LEDs turn on steady red. 4. If no Speaker Group switches are pressed for 120 seconds, the system automatically returns to normal. 5. The selected speaker groups sound the evacuation tone or message. 6. To end Select Evacuation, depress the Select Evacuation and the selected Speaker Group switches again. 7. The evacuation signal turns off (assuming no automatic alarms exist). 8. The Select Evacuation, Display Evacuation and all Speaker Group switch LEDs turn off. VOICE SYSTEM 4-9 FIREFINDER-XLS INSTALLATION, OPERATION AND MAINTENANCE MANUAL Alert | CHAPTER 4 The Alert operation consists of the following functions which are described below: All Alert and Select Alert. All Alert All Alert sends, with a single switch press, the alert tone or message (predetermined in the system design) to all speaker groups in the system. Selecting All Alert cancels All Convenience Page and All Background Music. To select All Alert, follow the steps listed below. 1. Depress the All Alert switch. 2. The All Alert, Display Alert and all Speaker Group switch LEDs turn on flashing red. 3. All speaker groups sound the alert tone or message. 4. To end All Alert, depress the All Alert switch again. 5. The alert signal turns off (assuming no automatic alarms exist). 6. The All Alert, Display Alert and all Speaker Group switch LEDs turn off. Select Alert Select Alert sends the alert tone or message (predetermined in the system design) to selected speaker groups in the system. Choosing Select Alert cancels Select Convenience Page and Select Background Music. To select Select Alert, follow the steps listed below. Convenience Page 1. Depress the Select Alert switch, the LED flashes red. 2. Depress the desired individual Speaker Group switches. 3. The selected Speaker Group and Display Alert switch LEDs flash red. 4. If no Speaker Group switches are pressed for 120 seconds, the system automatically returns to normal. 5. The selected speaker groups sound the alert tone or message. 6. To end Select Alert, depress the Select Alert and the selected Speaker Group switches again. 7. The alert signal turns off (assuming no automatic alarms exist). 8. The Select Alert, Display Alert and all Speaker Group switch LEDs turn off. The Convenience Page operation consists of the following functions which are described below: All Convenience Page and Select Convenience Page. All Convenience Page All Convenience Page sends the page message, with a single switch press, from the convenience page microphone (e.g. external microphone) to all speaker groups in the system. Selecting All Convenience Page cancels All Background Music. 4-10 VOICE SYSTEM CHAPTER 4 | FIREFINDER-XLS INSTALLATION, OPERATION AND MAINTENANCE MANUAL To select All Convenience Page, follow the steps listed below. 1. Pick up the convenience page microphone. 2. Depress the All Convenience Page switch. 3. The All Convenience Page switch, all Speaker Group switch and the Display Convenience Page switch LEDs flash green. 4. Depress the key on the convenience page microphone. 5. All Speaker Group switch LEDs turn steady green indicating that all speaker groups are now turned on. 6. The operator can now speak and make the page. 7. During the page, the operator can briefly (for up to 5 seconds) unkey and then re-key the microphone (for example, to cough) - without re-initiating the pre-announce tone. 8. To end the convenience page, the operator simply unkeys and replaces the microphone. The Ready to Page LED turns off. 9. All Speaker Group switch LEDs turn from steady green to flashing green. 10. To return the system to normal, the operator depresses the All Convenience Page switch; otherwise, the system will automatically return to normal in approximately 1-2 minutes and turn off the All Convenience Page and Speaker Group LEDs. Select Convenience Page Select Convenience Page sends the page message from the convenience page microphone (e.g. external microphone) to selected speaker groups in the system. Selecting Select Convenience Page cancels Select Background Music. To select Select Convenience Page, follow the steps listed below. 1. Pick up the convenience page microphone. 2. Depress the Select Convenience Page switch. The LED flashes green. 3. Depress the individual Speaker Group switches. 4. The selected Speaker Group and Display Convenience Page switch LEDs flash green. 5. If no Speaker Group switches are pressed for 120 seconds, the system automatically returns to normal. 6. Depress the key on the convenience page microphone. 7. The LED on the selected Speaker Group switch turns steady green indicating that the speaker group is now turned on. 8. The operator can now speak and make the page to the selected speaker groups. 9. During the page, the operator can briefly (for up to 5 seconds) unkey and then re-key the microphone (for example, to cough) - without re-initiating the pre-announce tone. 10. To end the convenience page, the operator simply unkeys and replaces the microphone. The Ready to Page LED turns off. VOICE SYSTEM 4-11 FIREFINDER-XLS INSTALLATION, OPERATION AND MAINTENANCE MANUAL 11. | CHAPTER 4 All Speaker Group switch LEDs turn from steady green to flashing green. 12. To return the system to normal, the operator depresses the Select Convenience Page and the selected Speaker Group switches; otherwise, the system will automatically return to normal in approximately 1-2 minutes and turn off the Select Convenience Page and Speaker Group LEDs. Background Music The Background Music operation consists of the following functions which are described below: All Background Music and Select Background Music. All Background Music All Background Music sends the background music, with a single switch press, from an audio source (CD player, tuner or tape recorder, etc.) to all speaker groups in the system. To select All Background Music, follow the steps listed below. 1. Turn on the background music source. 2. Depress the All Background Music switch. 3. The All Background Music, Display Background Music, Select Background Music and the Speaker Group switch LEDs turn on steady green. 4. All speaker groups sound background music. 5. After 120 seconds the Speaker Group switch LEDs turn off and the Display Background Music switch LED automatically turns on. 6. To end the background music depress the All Background Music switch again. 7. The All Background Music, the Display Background Music, Select Background Music and the Speaker Group switch LEDs turn off. Select Background Music Select Background Music sends the background music from an audio source (CD player, tuner or tape recorder, etc.) to selected speaker groups in the system. To select Select Background Music, follow the steps listed below. 4-12 VOICE SYSTEM 1. Turn on the background music source. 2. Depress the Select Background Music switch. The LED turns on steady green. 3. Depress the desired individual Speaker Group switches. 4. If no Speaker Group switches are pressed for 120 seconds, the system automatically returns to normal. 5. The Display Background Music and the selected Speaker Group LEDs are on steady green. 6. The selected Speaker Groups sound background music. 7. After 120 seconds the Select Background Music and Speaker Group switch LEDs turn off and Display Background Music switch LED automatically turns on. CHAPTER 4 | Speaker Groups FIREFINDER-XLS INSTALLATION, OPERATION AND MAINTENANCE MANUAL 8. To end the background music, depress the Select Background Music and the selected Speaker Group switches again. 9. The Select Background Music, the Display Background Music and the Speaker Group switch LEDs turn off. Speaker Groups are formed in the Geographic View of the Zeus Programming tool and consist of all voice equipment (e.g. amplifiers, strobes, telephones) descending from a group. A Speaker Group is a switch comprised of one or more speaker and/or strobe circuits in an area of a building. These loudspeaker and/or strobe circuits can be activated and deactivated with a switch press. Pressing the Speaker Group switch when the speaker group is normal and a SELECT function switch is active places the speaker group into the current SELECT state. If the current SELECT state is EVAC1, it sends the EVAC1 message to that zone. Setting a speaker group to a higher priority state places the speaker group in the new state. Pressing the switch again removes the speaker group from the state. If a lower priority state is still active, the switch reverts to that state. If the speaker group was automatically activated, pressing the switch silences the speaker group. Audible Silence/Unsilence Audible Silence Audible Silence allows the user to silence all active speaker groups by pressing the Audible Silence switch. To enable Audible Silence, follow the steps listed below. 1. Speaker groups are in an active state. 2. Depress the Audible Silence switch (the Audible Silence switch LED glows steady yellow). 3. All silenced Speaker Group switch LEDs turn off. 4. All active speaker groups are silenced. Audible Unsilence Audible Unsilence allows the user to unsilence all silenced active speaker groups by pressing the Audible Silence button again. (The Audible Silence button toggles between silence and unsilence with each repeated press.) To enable Audible Unsilence, follow the steps listed below. 1. Speaker groups are in a silenced state. 2. Depress the Audible Silence button. 3. The Audible Silence button LED and all silenced active Speaker Group switch LEDs turn off. 4. All silenced active speaker groups are active again. VOICE SYSTEM 4-13 FIREFINDER-XLS INSTALLATION, OPERATION AND MAINTENANCE MANUAL | CHAPTER 4 Silence Individual Silence Individual allows the user to silence an individual active speaker group by pressing the individual Speaker Group switch, whether it is manually or automatically activated. To enable Silence Individual, follow the steps listed below. 1. The individual speaker group is in an active state. 2. Depress the individual Speaker Group switch. 3. The Speaker Group switch LED turns off. 4. The individual Speaker Group is silenced. Cancel Silence Individual A new automatic event or a manual switch press to an individual Speaker Group that cancels the individual silence for that speaker group (i.e., toggles silence individual from silence to unsilence). Speaker Group Non-Silence A speaker group programmed as non-silenceable cannot be silenced by a switch press of either the speaker group (when in Alert or Evacuation) or the PMI Audible Silence switch. Display If there are several audio signals sounding on different speaker groups in the system, it can be beneficial to indicate which audio signal is sounding on which individual speaker group. The Display switches provide more detailed information about the state of the group than the primary red/green LEDs. They annunciate additional information about speaker group display functions. Display Auto Display Auto allows the user to visually determine the speaker groups that are currently in automatic mode, both silenced and unsilenced. To enable Display Auto, follow the steps listed below. 4-14 VOICE SYSTEM 1. The speaker groups are in automatic mode. 2. Depress the Display Auto switch. 3. The Display Auto switch LEDs and all Speaker Group switch LEDs that are currently in automatic mode flash yellow. 4. To deactivate Display Auto, depress the Display Auto switch again or select one of the other Display switches. 5. The Display Auto switch LEDs and all Speaker Group switch LEDs that are currently in automatic mode (yellow) turn off. CHAPTER 4 | FIREFINDER-XLS INSTALLATION, OPERATION AND MAINTENANCE MANUAL Display Silenced Display Silenced allows the user to visually determine the speaker groups that are silenced and in automatic mode. To enable Display Silenced, follow the steps listed below. 1. The speaker groups are silenced and in automatic mode. 2. Depress the Display Silenced switch. 3. The Display Silenced switch LED and all Speaker Group switch LEDs that are currently in automatic mode and silenced flash yellow. 4. To deactivate Display Silenced, depress the Display Silenced switch again or select one of the other Display switches. 5. The Display Silenced LED and all Speaker Group switch LEDs that are currently in automatic mode and silenced turn off yellow. Display Evacuation Display Evacuation allows the user to visually determine the speaker groups sounding an evacuation signal. 1. Speaker groups are sounding an Evacuation signal. 2. Depress the Display Evacuation switch. 3. The Display Evacuation switch LED and all Speaker Group switch LEDs currently sounding an Evacuation signal flash yellow. 4. To deactivate Display Evacuation, depress the Display Evacuation switch again or select one of the other Display switches. 5. The Display Evacuation switch LED and all Speaker Group switch LEDs currently sounding an Evacuation signal turn off yellow. Display Alert Display Alert allows the user to visually determine the speaker groups sounding an Alert signal. 1. Speaker groups are sounding an alert signal. 2. Depress the Display Alert switch. 3. The Display Alert switch LED and all Speaker Group switch LEDs currently sounding an Alert signal flash yellow. 4. To deactivate Display Alert, depress the Display Alert switch again or select one of the other Display switches. 5. The Display Alert switch LED and all Speaker Group switch LEDs currently sounding an Alert signal turn off yellow. VOICE SYSTEM 4-15 FIREFINDER-XLS INSTALLATION, OPERATION AND MAINTENANCE MANUAL | CHAPTER 4 Display Convenience Page Display Convenience Page allows the user to visually determine the speaker groups that are sounding a convenience page. 1. Speaker groups are sounding a Convenience Page. 2. Depress the Display Convenience Page switch. 3. The Display Convenience Page switch LED and all Speaker Group switch LEDs currently sounding a convenience page flash yellow. 4. To deactivate Display Convenience Page, depress the Display Convenience Page switch again or select one of the other Display switches. 5. The Display Convenience Page switch LED and all Speaker Group switch LEDs currently sounding a convenience page turn off yellow. Display Background Music Display Background Music allows the user to visually determine the speaker groups that are sounding background music. Speaker group switch LEDs are normally off. 1. Speaker groups are sounding Background Music. 2. Depress the Display Background Music switch. 3. The Display Background Music switch LED and all Speaker Group switch LEDs currently sounding background music flash yellow. 4. To deactivate Display Background Music, depress the Display Background Music switch again or select one of the other Display switches. 5. The Display Background Music switch LED and all Speaker Group switch LEDs currently sounding background music turn off yellow. Select Audio Preview Select Audio Preview allows the user to listen to the audio signal currently sounding on a speaker group on the local internal speaker of the LVM. This feature does not affect the audio signal currently sounding on the speaker group. Selecting Audio Preview cancels Select Evacuation, Select Alert, Select Convenience Page and Select Background Music without affecting any speaker group. 4-16 VOICE SYSTEM 1. Depress the Select Audio Preview and then the individual Speaker Group switch. 2. The Audio Preview switch LED and the selected Speaker Group switch LEDs flash yellow. 3. The current audio signal of the selected speaker group sounds on the local speaker. 4. The system automatically returns to normal in approximately 1-2 minutes. 5. To deactivate, depress the Select Audio Preview switch. 6. The Audio Preview switch LED and the selected Speaker Group switch LEDs turn off. CHAPTER 4 | Audio to Local Speaker FIREFINDER-XLS INSTALLATION, OPERATION AND MAINTENANCE MANUAL The Audio to Local Speaker operation consists of the following functions which are described below: Page to Local Speaker, Evacuation to Local Speaker, Alert to Local Speaker, Convenience Page to Local Speaker and Background Music to Local Speaker. Page to Local Speaker Page to Local Speaker allows the user to preview the audio of the Emergency Page to the local internal speaker of the LVM. 1. Depress the Page to Local Speaker switch. 2. The Page to Local Speaker switch LED is on steady green. 3. The Emergency Page is sounding on the local speaker. 4. To deactivate Page to Local Speaker, depress the Page to Local Speaker switch again or select one of the other Audio to Local Speaker switches. 5. The Page to Local Speaker switch LED turns off. Evacuation to Local Speaker Evacuation to Local Speaker allows the user to preview the audio of the Evacuation signal to the local internal speaker of the LVM. 1. Depress the Evacuation to Local Speaker switch. 2. The Page to Local Speaker switch LED is on steady red. 3. The Evacuation signal is sounding on the local speaker. 4. To deactivate Evacuation to Local Speaker, depress the Evacuation to Local Speaker switch again or select one of the other Audio to Local Speaker switches. 5. The Page to Local Speaker switch LED turns off. Alert to Local Speaker Alert to Local Speaker allows the user to preview the audio of the alert signal to the local internal speaker. 1. Depress the Alert to Local Speaker switch. 2. The Alert to Local Speaker switch LED flashes red. 3. The Alert signal is sounding on the local speaker. 4. To deactivate Alert to Local Speaker, depress the Alert to Local Speaker switch again or select one of the other Audio to Local Speaker switches. 5. The Alert to Local Speaker switch LED turns off. VOICE SYSTEM 4-17 FIREFINDER-XLS INSTALLATION, OPERATION AND MAINTENANCE MANUAL | CHAPTER 4 Convenience Page to Local Speaker Convenience Page to Local Speaker allows the user to preview the audio of the Convenience Page to the local internal speaker of the LVM. 1. Depress the Convenience Page to Local Speaker switch. 2. The Convenience Page to Local Speaker switch LED is on steady green. 3. The Convenience Page is sounding on the local speaker. 4. To deactivate Convenience Page to Local Speaker, depress the Convenience Page to Local Speaker switch again or select one of the other Audio to Local Speaker switches. 5. The Convenience Page to Local Speaker switch LED turns off. Background Music to Local Speaker Background Music to Local Speaker allows the user to preview the audio of the Background Music to the local internal speaker of the LVM. Audio Volume Control 1. Depress the Background Music to Local Speaker switch. 2. The Background Music to Local Speaker switch LED is on steady green. 3. The Background Music is sounding on the local speaker. 4. To deactivate Background Music to Local Speaker, depress the Background Music to Local Speaker switch again or select one of the other Audio to Local Speaker switches. 5. The Background Music to Local Speaker switch LED turns off. The Audio Volume Control operation consists of the following functions which are described below: Convenience Page Volume Up, Convenience Page Volume Down, Background Music Volume Up, and Background Music Volume Down. Convenience Page Volume Up Convenience Page Volume Up or Down allows the user to increase or decrease the volume of the Convenience Page until the maximum or minimum volume level is reached. The Speaker Group switch’s LED will light green for volume up or red for volume down for one second when the volume change occurs. When the speaker group reaches the minimum or maximum volume, additional presses of the group switch have no effect. Selecting Convenience Page Volume Up / Down cancels Select Page, Select Evacuation, Select Alert, Select Convenience Page, Select Background Music, Select Audio Preview and Background Music Volume Up / Down. To select Convenience Page Volume Up, follow the steps listed below. 4-18 VOICE SYSTEM 1. Depress the Convenience Page Volume Up switch, the switch’s LED flashes green. 2. Depress the selected Speaker Group switch. The switch’s LED flashes green for one second. CHAPTER 4 | FIREFINDER-XLS INSTALLATION, OPERATION AND MAINTENANCE MANUAL 3. The audio volume increases on the selected speaker group. 4. If no Speaker Group switch is pressed for 120 seconds, the system automatically returns to normal. 5. To end Convenience Page Volume Up, depress the Convenience Page Volume Up switch again. 6. The Convenience Page Volume Up switch LED turns off. Convenience Page Volume Down To select Convenience Page Volume Down, follow the steps listed below. 1. Depress the Convenience Page Volume Down switch. The switch’s LED flashes green. 2. Depress the selected Speaker Group switch. The switch’s LED flashes red for one second. 3. The audio volume decreases on the selected speaker group. 4. If no Speaker Group switch is pressed for 120 seconds, the system automatically returns to normal. 5. To end Convenience Page Volume Down, depress the Convenience Page Volume Down switch again. 6. The Convenience Page Volume Down switch LED turns off. Background Music Volume Up Background Music Volume Up or Down allows the user to increase or decrease the volume of the Background Music until the maximum or minimum volume level is reached. The Speaker Group switch’s LED will light green for volume up or red for volume down for one second when the volume change occurs. When the speaker group reaches the minimum or maximum volume, additional presses of the group switch have no effect. Selecting Background Music Volume Up / Down cancels Select Page, Select Evacuation, Select Alert, Select Convenience Page, Select Background Music, Select Audio Preview and Convenience Page Volume Up / Down. To select Background Music Volume Up, follow the steps listed below. 1. Depress the Background Music Volume Up switch, the switch’s LED lights steady green. 2. Depress the selected Speaker Group switch, the switch’s LED flashes green for one second. 3. The audio volume increases on the selected speaker group. 4. If no Speaker Group switch is pressed for 120 seconds, the system automatically returns to normal. 5. To end Background Music Volume Up, depress the Background Music Volume Up switch again. 6. The Background Music Volume Up switch LED turns off. VOICE SYSTEM 4-19 FIREFINDER-XLS INSTALLATION, OPERATION AND MAINTENANCE MANUAL | CHAPTER 4 Background Music Volume Down To select Background Music Volume Down, follow the steps listed below. Command Station Access 1. Depress the Background Music Volume Down switch, the switch’s LED lights steady green. 2. Depress the selected Speaker Group switch, the switch’s LED flashes red for one second. 3. The audio volume decreases on the selected speaker group. 4. If no Speaker Group switch is pressed for 120 seconds, the system automatically returns to normal. 5. To end Background Music Volume Down, depress the Background Music Volume Down switch again. 6. The Background Music Volume Down switch’s LED will turn off. Command Station Access has three modes—Request, Grant, Deny—and status display. A description of each follows. Request Access—Request access from a command station. When the command station has access, the LED is steady green. When requesting access from another command station, the LED flashes Green. Grant Access—Grant access to a command station. When a command station requests control, the Grant Access LED in the command station with control flashes green. Pressing the switch will grant access to the caller command station. Deny Access—Deny access to a command station. When a command station requests control, the Deny Access LED in the command station with control flashes red. Pressing the switch will deny access to the caller and control will remain with the current command station. When a command station is denied access, the Deny LED in the command station requesting control will light red for 5 seconds to indicate that access was denied. Access Status—Displays the Access status of Command Station X. Access Status allows the state of Command Station X to be displayed in any command station. For example, Command Station 2 may include a Command Station 1 Access Status switch/LED. The operator at Command Station 2 is able to determine if Command Station 1 has control or is requesting control. The LED is steady green for the command station in control and flashing green if the command station is requesting control. The switch is not used for Command Station Access Status. 4-20 VOICE SYSTEM CHAPTER 4 | Lamp Test FIREFINDER-XLS INSTALLATION, OPERATION AND MAINTENANCE MANUAL Lamp Test allows the user to test all visible terminal indications. To perform a Lamp Test, follow the steps listed below. Clear Manual 1. Depress the Lamp Test switch. 2. All LEDs will be on steady red, then steady green followed by steady yellow, each for approximately 3 seconds. 3. The Lamp Test automatically shuts off after cycling through the LED colors. Clear Manual allows the user to cancel all manually activated functions with a single switch press. To clear all manually activated functions, follow the steps listed below. 1. Depress the Clear Manual switch. 2. The Emergency Page, Evacuation, Alert, Convenience Page and Background Music will be canceled. 3. All activated LEDs turn off. FIREFIGHTERS’ TELEPHONE SYSTEM Phone Group Phone Group allows the user to add or delete remote firefighter telephones calling into the firefighters’ party line. To add or remove remote firefighter telephones, follow the steps listed below. 1. A remote firefighters’ telephone is calling in; the Phone Group switch’s LED flashes green and the buzzer sounds. 2. Depress the Phone Group switch to add the remote firefighters’ telephone to the party line. 3. The Phone Group switch’s LED changes to steady green. 4. The operator can now talk to the caller. 5. If a second firefighter in another area of the building calls in, he will hear a busy signal which indicates that the call-in is going through, but someone is already talking. 6. The LED next to the new Phone Group that is calling in starts to flash green. 7. The operator will hear the buzzer sounding which indicates the new telephone group call-in. 8. When the operator answers the second firefighter call-in, the second firefighter will be connected to the operator and the first firefighter on a party line connection. 9. All three firefighters can now carry on a conversation. 10. Pressing the Phone Group switch again removes the remote phone from the party line. 11. Phone Group switch LED changes to flashing green. 12. If the remote phone hangs up, the LED turns off. VOICE SYSTEM 4-21 FIREFINDER-XLS INSTALLATION, OPERATION AND MAINTENANCE MANUAL Phone Page | CHAPTER 4 Phone Page allows the user to send the emergency page message from the firefighters’ party line to all speaker groups in the system. Keying the microphone on the Emergency Page microphone will shut off the Phone Page. To perform a Phone Page, follow the steps listed below. Warden’s Page 1. Depress the All Page switch (or depress Select Page and selected Speaker Group switches). 2. The All Page and all Speaker Group switch LEDs flash green. 3. Depress the Phone Page switch. 4. The Phone Page, All Page and Speaker Group switch LEDs turn on steady green. 5. The operator now can speak and make the page to the speaker groups. 6. To end Phone Page, depress the Phone Page and the All Page switch again. 7. The Phone Page, All Page and Speaker Group switch LEDs turn off. Warden’s Page allows a remote firefighter located anywhere in the building to make a live voice page. Keying the microphone on the Emergency Page microphone will shut off the Warden’s Page. To perform a Warden’s Page, follow the steps listed below. 1. A remote firefighter lifts a Warden’s Telephone Station telephone off-hook or plugs in a Portable Firefighter’s Telephone. 2. The Firefighter’s Master Telephone (FMT) handset starts to beep indicating a call-in. 3. The LED next to the Phone Group switch flashes green. 4. The remote firefighter calling in hears a dial tone. 5. The operator picks up the firefighter’s master telephone handset. 6. The operator depresses the Phone Group switch that is calling in. 7. The operator and the remote firefighter can now talk to each other. 8. The remote firefighter requests that the operator patch the phone group he is calling in from onto the speaker group serving the area of the building the firefighter is calling from. 9. The operator depresses the Select Page switch and the Speaker Group switch. 10. The operator depresses the Warden’s Page switch—the LED turns on steady green. 11. The remote firefighter can now make his live voice page to the speaker group. 12. The operator can monitor the page from the local internal speaker. 13. The operator can interrupt, override or stop the Warden’s Page. 14. To end the Warden’s page, de-select all depressed switches. 15. The Warden’s Page and the Speaker Group switch LEDs turn off. 16. The firefighter that called in can hang up or unplug his remote telephone. 17. 4-22 VOICE SYSTEM The Phone Group switch LED turns off. A ALARM VERIFICATION Alarm verification provides FireFinder-XLS with a way to verify an alarm from area type addressable smoke detectors connected to intelligent loops (DLC or HZM). This feature reduces the incidence of false alarms. Only detectors that do not contain an integral alarm verification feature can be used. Addressable detectors connected to DLCs indicate that an alarm condition has been detected. If the device is subject to alarm verification, the DLC alerts the control panel that the device has entered verification but is not yet considered to be in alarm. The DLC starts a timer using the FireFinder-XLS system Retard-Reset Period programmed in the Zeus tool allowing conditions at the device to stabilize. When the timer expires, the DLC begins the fixed 60-second confirmation period. If the device is no longer in alarm during the confirmation period, the verification cycle is considered complete and detection of a subsequent alarm from that device results in the verification cycle restarting. If the device still reports in the alarm state during this confirmation period, the alarm condition is reported to the control panel and the system annunciates the alarm condition. See the figure below for a graphic illustration of Alarm Verification. For devices connected to the DLC, the Detector Restart period is 0 seconds. ALARM VERIFICATION TIMING DIAGRAM ALARM VERIFICATION PERIOD RETARD-RESET-RESTART PERIOD -- MAXIMUM 60 SECONDS* CONFIRMATION PERIOD -- 60 SECONDS OPTIONAL NO ALARM AT CONTROL UNIT ALARM REQUIRED AT CONTROL UNIT REGION CONTROL UNIT DETECTOR RESTART RETARD-RESET PERIOD (POWER-UP) PERIOD A B t=0 Seconds C E D *For installations in Canada this time must not exceed 30 seconds. t=n Seconds A – Smoke detector goes into alarm. AB – RETARD-RESET PERIOD (Control Unit) – Control unit senses detector in alarm and retards (delays) alarm signal, usually by deenergizing power to the detector. Length of time vaires with design. (11-55 seconds) BC – RESTART PERIOD (Detector Power-up Time) – Power to the detector is reapplied and time is allowed for detector to become operational for alarm. Time varies with detector design. AC – RETARD-RESET-RESTART PERIOD – No alarm obtained from control unit. Maximum permissible time is 60 seconds. CD– CONFIRMATION PERIOD – Detector is operational for alarm at point C. If detector is still in alarm at point C, control unit will alarm. If detector is not in alarm, system returns to standby. If the detector re-alarms at any time during the confirmation period the control unit will alarm. DE – OPTIONAL REGION – Either an alarm can occur at control unit or restart of the alarm verification cycle can occur. AD – ALARM VERIFICATION PERIOD – Consists of the retard-reset-restart and confirmation periods. APPENDIX 1 FIREFINDER-XLS INSTALLATION AND MAINTENANCE MANUAL 2 APPENDIX | APPENDIX A B APPLICATION SPECIFIC DETECTION Application Specific Detection (ASD) allows the system designer (and anyone with Control menu access) to program an HFP-11 detector’s sensitivity, pre-alarm threshold, and other alarm-related parameters using English descriptions of the detector's environment (application). This eliminates the need for detailed knowledge of smoke detector terminology and operation. The designer can set all of the critical detector parameters by simply selecting an application description that closely fits the one where the detector is to be installed. For example, to use ASD to select the optimal parameters for a detector in a hotel lobby, select the LOBBY application in the Zeus tool for that device. The system will automatically transmit the factory determined sensitivity, pre-alarm threshold, and detection algorithm (R-algorithm) to the corresponding device. This eliminates the guesswork of selecting these parameters for different environments. ASD APPLICAT IONS Zeus ASD Application ASD Description Disable No Applications (Standard Photo/thermal Detector) Office (Retail) Reasonably clean, climate controlled atmosphere Warehouse (Light Manufacturing) Airborne dust, equipment, fork truck and light to medium dock area exhaust fumes Lobby Relatively clean area, temperature changes, cellular phones, smoking Computer Room Very controlled environment, clean, temperature closely regulated, high cost clean machinery operating, no smoking, high air velocity Dormitory Airborne dust and temperature changes, living quarters, cooking fumes, smoking Healthcare Higher level risk, relatively clean, electronic equipment Parking Garage Airborne dust, car and diesel fumes, temperature swings Utility (Transformer) Room Normal to somewhat dirty environment, heat from running equipment Precious Storage (Sensitive Environment) Sensitive materials or equipment storage, clean dust-free environment, earliest warning desired Hostile Environment Dirty, dusty, humid, operating equipment, RF present, wide temperature swings Duct (Open air or duct housing) Dirty, dusty, humid, wide temperature swings, high air velocity APPENDIX 3 FIREFINDER-XLS INSTALLATION, OPERATION AND MAINTENANCE MANUAL 4 APPENDIX | APPENDIX B C INTELLIGENT ENVIRONMENTAL COMPENSATION (IEC) Intelligent Environmental Compensation (IEC) is an optional feature that permits the FireFinder-XLS system to compensate automatically for environmental changes (such as dirt and dust buildup) in the analog voltage of an HFP-11 detector. The selection of IEC devices is made in the Zeus programming tool. Once a detector is chosen to be covered by IEC, FireFinder-XLS stores and analyzes the analog readings of the smoke detector and adjusts the detector’s threshold upward or downward, as necessary, to maintain a constant sensitivity. As the analog voltage increases due to environmental factors, an equivalent increase in the detector’s alarm threshold prevents factors other than smoke from causing an alarm. This method maintains the selected detector’s sensitivity. Typically, the analog voltage changes slowly over long periods of time for environmental factors, but changes quickly over short periods of time for actual smoke. Initial System Power-Up When a new or modified Zeus configuration is loaded into a system, the FireFinder-XLS PMI goes through an initial system power-up. FireFinder-XLS does not keep the IEC option where it was formerly applied when this new system powers up. The IEC memory re-initializes, and then FireFinder-XLS begins adjusting the alarm thresholds wherever IEC is selected in the new Zeus configuration. SENSITIVITY VOLTAGE Alarm Threshold Voltage Analog Voltage 0 Volts APPENDIX 5 FIREFINDER-XLS INSTALLATION, OPERATION AND MAINTENANCE MANUAL Adjusting the Alarm Threshold When a New Zeus is Uploaded | APPENDIX C After FireFinder-XLS checks that the actual ID of a device with IEC agrees with Zeus, it adjusts the detector’s alarm threshold according to the data stored. The first adjustment occurs after 100 hours of data accumulation. In the case of power cycling or resetting, adjustments begin within 90 seconds. If a detector with IEC reports an alarm condition before the detector’s alarm threshold is adjusted, the alarm delays until the alarm threshold is adjusted. If the device continues to report an alarm condition once its alarm threshold is adjusted, the alarm reports. If the Zeus and the device ID do not agree, the IEC for that device does not activate until the trouble condition is removed from the system and the panel is reset. Ongoing Adjustments of the Alarm Threshold IEC Trouble Conditions Environmental conditions usually cause a small change in the analog voltage over a long period of time. At regular intervals FireFinder-XLS collects analog data for each detector with IEC and adjusts the alarm threshold accordingly. FireFinder-XLS adjusts for both up and down changes in the analog voltage. In addition, if system power is lost, FireFinder-XLS adjusts the alarm thresholds as needed by using stored data. A trouble condition involving the IEC may be annunciated by the FireFinder-XLS PMI as: PRE-DIRTY ANALOG VOLT. REACHED OR IEC LIMIT REACHED. SERVICE REQ The trouble conditions shown above are annunciated on a detector-by-detector basis as each detector is checked. FireFinder-XLS annunciates a trouble condition for a detector when its alarm threshold reaches a predetermined limit. The operator should acknowledge the trouble, clean the detector if possible, and reset the control panel. If the detector is not cleaned, the control panel annunciates this trouble condition after every panel reset until the detector is cleaned. 6 APPENDIX D SECURITY POINT INSTALLATION These circuits are intended for 24 hour alarm monitoring only. UL 1076 requires an HTSW-1 tamper switch as well as a PAL-1 printer. Only Models HTRI-S/-D/-R may be used as security points. A COMMUNICATION FAILURE with an HTRI device configured for SECURITY results in a SECURITY EVENT as well as a communication trouble. When installing an HTRI device in the Zeus tool, be sure to set the device usage to security; otherwise, the device usage defaults to fire alarm. • When setting the device address using the DPU, select the normally closed alarm causing input. • Connect only one switch per HTRI input. • Use an HTSW-1 tamper switch to monitor the main enclosure. • Monitor each HTRI-S/-D/-R related to this application for 24 hours by using a listed motion detector (to prevent tampering). • Monitoring of security points is performed at the PMI. The PMI is suitable for installation at either the protected premises or remotely as a receiving unit. For proprietary burglary application (UL 1076): APPENDIX 7 FIREFINDER-XLS INSTALLATION, OPERATION AND MAINTENANCE MANUAL NOTES: 1. All supervised switches must be held closed and/or open for at least a quarter of a second to guarantee detection. 2. Use ULI listed EOL Model EL-33 with 3.6K, ¼W resistor, P/N 140-820185. Order Model EL-33 separately. 3. HTRI is polarity insensitive. Line 1 and Line 2 can be either line of the loop. 4. Electrical ratings: Voltage maximum: 30 VDC Current maximum: 1mA during polling 5. Supervised switch ratings: Voltage maximum: 27 VDC Current maximum: 3.5mA during polling Contact resistance maximum: 10 ohms Maximum cable length: 200 feet (18 AWG) CLine to line: 0.02uF CLine to shield: 0.04uF Max line size: 14 AWG Min line size: 18 AWG 6. Relay contact ratings: 4A, 125 VAC resistive 4A, 30 VDC resistive Inductive: 3.5A, 120 VAC (0.6P.F.) 3.0A, 30 VDC (0.6 P.F.) 2.0A, 120 VAC (0.4 P.F.) 2.0A, 120 VAC (0.35 P.F.) 2.0A, 30 VDC (0.35 P.F.) The relay is shown in standby condition. | APPENDIX D 7. Terminal 5 must be connected to earth ground. a. Use wire nuts to pass the shield wire through the electrical box with NO connection to the device terminal block or to local ground. b. Use shielded wire to connect the switch wiring. c. Tie the switch wiring shield to the DLC wiring shield. Do not connect shield to terminal 5 or the local earth ground. 8. For proprietary burglary application: a. Use an HTSW-1 tamper switch to monitor the main enclosure. b. Monitor each HTRI-S/-R/-D related to this application continuously by using a listed motion detector (to prevent tampering). 9. In supervisory: HTRI-S/-R draws 1mA HTRI-D draws 1mA TO NEXT ADDRESSABLE DEVICE FROM CONTROL PANEL OR FROM PREVIOUS ADDRESSABLE DEVICE LINE 1 LINE 2 LINE 1 LINE 2 HTRI-S/-R 1 2 NOTE: WITH HTRI-S, TERMINALS 5 AND 6 ARE NOT USED. 3 END OF LINE DEVICE SEE NOTES 2 AND 8 4 SUPERVISED SWITCH SEE NOTES 1, 5, 8 AND 9 8 5 RELAY CONTACTS SEE NOTE 6 7 SEE NOTE 7 6 TO NEXT ADDRESSABLE DEVICE FROM CONTROL PANEL OR FROM PREVIOUS ADDRESSABLE DEVICE LINE 1 LINE 2 LINE 1 1 LINE 2 2 END OF LINE DEVICE SEE NOTES 2 AND 8 SUPERVISED SWITCH SEE NOTES 1, 5, 8 AND 9 SEE NOTE 7 HTRI-D 3 4 5 8 NOT USED 7 END OF LINE DEVICE SEE NOTES 2 AND 8 6 SUPERVISED SWITCH SEE NOTES 1, 5, 8 AND 9 Terminal 5 of the HTRI-S/-D/-R must be connected to a known good earth ground for proper operation. 8 APPENDIX E SILENT KNIGHT MODEL 5129 Electrical Connections The FireFinder-XLS system connects to the Silent Knight Model 5129 Digital Fire Communicator using the Alarm, Trouble, and Supervisory dry contacts on the PSC-12. Refer to the Silent Knight 5129 Fire Slave Communicator Installation Manual, P/N 150805, provided with Silent Knight Model 5129 for dialer instructions. The Silent Knight Model 5129 monitors all System troubles through the PSC-12 trouble relay. FireFinder-XLS delays the AC fail trouble signal in accordance with NFPA and UL requirements. In NFPA 72 Remote Station install batteries to provide 60 hour standby capacity. For signalling service DACT wire according to the diagram on the following page. In NFPA 72 Central Station connections AC fail reporting is delayed. The delay is 6 hours (25% of 24 hours) for NFPA, Local and Proprietary, and 15 hours (25% of 60 hours) for NFPA Remote Station. Only the reporting of the trouble is delayed. AC power must be present for a full minute before the system switches back to AC power from the battery. Using the optional AC monitor input, the Silent Knight Model 5129 monitors AC fail trouble. When the FireFinder-XLS system reports an AC fail trouble, the Silent Knight Model 5129 sends a specific code to the Central Station that identifies the trouble as AC fail. Mounting The Silent Knight Model 5129 is shipped with an enclosure. Mount the 5129 within 20 feet of the enclosure containing the PSC-12 and connect it with rigid condiut. Electrical Ratings Supervisory 18-40 VDC 60mA Alarm 18-40 VDC 130mA APPENDIX 9 APPENDIX P5 1 + _ TB1 6 1 P4 4 3 2 1 2 1 TB3 7 12 CHASSIS NOT SUPERVISED (RED) (BLK) (YLW) (ORN) PSC-12 _ 2 P10 P9 TB2 * 19 24 1 1 13 18 _ * + 2 TB4 + 1 2 H N GND TB5 3 1 2 H N GND * UL LISTED EOL DEVICE 4.7K, 1/2W, 5% (P/N 140-820388) (RED) P1 - DC POWER TELCO 1 RING (GREEN) SUPERVISED P4 SILENT KNIGHT 5230 (PROGRAMMING) (BRN) TELCO 1 TIP (RED) HOUSE 1 TIP (GRAY) (GRY) 3 TO RJ31X (VIO) HOUSE 1 RING (BROWN) (BLU) (GRN) * (YLW) P2 - CHANNEL INPUTS HOUSE 2 RING (BROWN) (ORN) SUPERVISED HOUSE 2 TIP (GRAY) (RED) * (BRN) (WHT) (BLK) RELAY NC RELAY C RELAY NO TELCO 2 RING (GREEN) SILENT KNIGHT MODEL NO. 5129 1 2 3 TELCO 2 TIP (RED) TO RJ31X 4 5 8 7 HTRI-R 6 | APPENDIX E NOTES 1. HTRI-R input must be programmed in Zeus as trouble causing. 2. HTRI-R output must be programmed in Zeus to transfer on loss of AC Mains. 3. All wiring supervised except as noted. 4. For Remote Station, provide 60 hour battery capacity. 5. In Zeus, program PSC-12 User Relay 1 to activate on any supervisory. 6. All wiring Power Limited to NFPA 70 per NEC 760. UL LISTED EOL DEVICE 3.6K, 1/4W (P/N 140-820185) P3 - AC MONITOR (SEE NOTE 2) FIREFINDER-XLS INSTALLATION, OPERATION AND MAINTENANCE MANUAL 10 + F TESTING / MAINTENANCE If the system is connected to the fire department, etc., or actuates an internal system, disarm the appropriate outputs before servicing to prevent actuation. (See PMI Operation for procedures.) Notify the fire department and personnel at your facility that a System test is being performed so that any alarm sounding can be ignored during the test. Notify the fire department before resetting the system. Inspection, Testing, and Maintenance of the fire alarm system should be peformed in accordance with NFPA 72, The National Fire Alarm Code and all applicable local codes. APPENDIX 11 FIREFINDER-XLS INSTALLATION, OPERATION AND MAINTENANCE MANUAL 12 APPENDIX | APPENDIX F G TROUBLE MESSAGES The trouble messages for the FireFInder-XLS system will be displayed on the PMI. Up to five trouble messages may be displayed on the screen at one time. Each trouble message will show the TIME that the trouble occured, the SOURCE of the trouble and the TYPE of trouble. The trouble LED will flash whenever new troubles are reported and will turn steady when the troubles have been acknowledged by pressing the appropriate button on the PMI. MESSAGE DESCRIPTION 24V 12amp Supply Shutdown Indicates that the 24 volt 12 amp non-power limited output has shut down due to overload. 24V 4amp Supply Shutdown Indicates that the 24 volt 4 amp supply that supplies the power limited output has shut down due to overload. AC Brownout Detected Indicates that the AC mains feeding the PSC or PSX have fallen below the brownout threshold. AC Fail Indicates that the AC mains feeding the PSC or PSX are disconnected. Backplane Power Shutdown Indicates that the 6.2 volt supply that supplies the backplane has shut down due to overload. Battery Fuse/Wiring Open The circuit breaker connecting to the battery is open. Class A Fault A fault has been detected on a Class A loop. Communications Error Indicates a fault on the ASI or CAN bus or DNET Disarmed This message is generated as a reminder to the operator that an input or an output has been disarmed. Ground Fault Indicates a ground fault on the wiring to the module. Ground Fault Minus A connection to ground on the minus side of the power supply. Ground Fault Plus A connection to ground in the plus side of the power supply. Incorrect ID Is displayed when the incorrect module is placed at an address. Input Voltage Too Low The voltage on the input of the ZIC is too low. Low Battery Voltage Indicates that the voltage on the battery is low. MIC Input Trouble Indicates that the supervision of the microphone has failed or has been disconnected. APPENDIX 13 FIREFINDER-XLS INSTALLATION, OPERATION AND MAINTENANCE MANUAL MESSAGE | APPENDIX G DESCRIPTION Module Not Responding The module at the specified address is not responding. Module RAM Fail Indicates that the RAM test has failed. Module ROM Fail Indicates that the checksum of the ROM is incorrect. Network A Pair Failure HNET communication has failed on the A pair. Network B Pair Failure HNET communication has failed on the B pair. No Battery Detected Indiates that the charger could not detect a battery connected. Not Responding This message indicates that a module in the configuration is not responding at the address that it was expected. Open Circuit Indicates that the module identified in the message has detected and open circuit on it's input or on it's output. Overcurrent Indicates that an excessive current has been detected on the output of the ZIC. Panel Tamper A trouble caused by the door being open on the cabinet when the tamper switch is installed. Printer Off Line The printer on the RPM is off line. Printer Out Of Paper The printer connected to the RPM is out of paper. Short Circuit Indicates that the module identified in the message has detected a short circuit on it's input or on it's output. Submodule Multiple Response Indicates that there is more than one CAN bus submodule responding at the same address. SubModule Not Responding Indicates that one of the submodules on the CAN bus is not responding. Submodule Unspecified Responding Indicates that there is a submodule on the CAN bus that is responding which is not in the configuration. Unspecified Module Responding A module which has not been included in the configuration is responding. 14 APPENDIX INDEX | FIREFINDER-XLS INSTALLATION, OPERATION AND MAINTENANCE MANUAL Inde x Index A C Acknowledge 3-3 Acknowledge supervisory 3-5 Acknowledge trouble 3-6 AIC audio input card 1-9 Alarm 3-3 Alarm verification Appendix-1 Alert mode 3-3 to 3-6, 4-10 Alarm 3-3 All Alert 4-10 display 4-15 preview 4-17 Security 3-5 Select Alert 4-10 Supervisory 3-5 Trouble 3-5 Alert signal 4-3 All Alert 4-10 All Background Music 4-12 All Convenience Page 4-11 All Evacuation 4-9 All Page 4-4 Application Specific Detection. See ASD ASD Appendix-3 audible silence 4-13 audible unsilence 4-13 audio volume control 4-18 background music volume down 4-20 background music volume up 4-19 convenience page volume down 4-19 convenience page volume up 4-18 CAB-MP mounting plate 2-1 CAB1 enclosure 1-3, 1-6 CAB2 enclosure 1-6 CAB3 enclosure 1-6, 2-3 CAN-BUS 1-10 CC-2 card cage 1-5, 2-1 CC-5 card cage 1-1, 1-3, 1-4, 2-1 clear manual 4-21 command station access 4-20 deny 4-20 grant 4-20 request 4-20 status 4-20 command stations 4-1 convenience page 4-3, 4-10 to 4-12 All Convenience Page 4-11 display 4-16 preview 4-18 Select Convenience Page 4-11 volume 4-18 CRC-6 relay module 1-6, 2-4 CSB CAN sounder board 1-7 B background music 4-3, 4-12 to 4-13 All Background Music 4-12 display 4-16 preview 4-18 Select Background Music 4-12 volume 4-19 basic FireFinder-XLS system 1-1, 1-3 Batteries 1-3, 1-6 BP-61 battery 1-3, 1-6 BTX-1 batteries 1-3, 1-6 BTX-2 batteries 1-3, 1-6 BTX-3 batteries 1-3, 1-6 D DAC-NET 1-10, 4-1 detector sensitivities. See sensitivity report detectors. See intelligent analog devices DLC device loop card 1-1, 1-3, 1-5, 2-4, Appendix-1 DPU device programming unit 1-14, 2-3 E emergency page 4-3, 4-4 to 4-9 All Page 4-4 Page to Alert 4-7 Page to Background Music 4-8 Page to Evacuation 4-6 Select Page 4-5 enclosures 1-6, 2-1, 2-2 CAB1 1-3, 1-6 CAB2 1-6 CAB3 1-6, 2-3 REMBOX 2/4 1-8 Index - 1 FIREFINDER-XLS INSTALLATION, OPERATION AND MAINTENANCE MANUAL evacuation signal (EVAC) 4-3, 4-9 to 4-10 All Evacuation 4-9 display 4-15 preview 4-17 Select Evacuation 4-9 F FCM-6 control module 1-7 Firefighter's mode. See Alert mode Firefighters' telephone system phone group 4-21 phone page 4-22 warden's page 4-22 FMT fireman's master telephone 1-10, 4-1 FTS Series Firefighter's Telephone Stations 1-10 G groups 3-4 H hard reset 3-6 help 3-2 HFP-11 intelligent/analog photoelectric detector 1-12 HFPT-11 intelligent thermal detector 1-12 HLIM loop isolator module 1-7, 1-12 HMS-2S/-SA intelligent manual station 1-13 HMS-M intelligent manual station (metal) 1-13 HMS-S/-D intelligent manual station 1-13 HTRI-M intelligent interface module 1-13 HTRI-S/-R/-D intelligent interface modules 1-13, Appendix-7 HTSW-1 tamper switch 1-3, 1-6, 2-1, Appendix-7 HZM remote conventional zone module 1-13 I IEC Appendix-5 intelligent analog devices 1-12 to 1-13 HFP-11 intelligent/analog photoelectric detector 1-12 HFPT-11 intelligent thermal detector 1-12 HLIM loop isolator module 1-12 HMS-2S/-SA intelligent manual station 1-13 HMS-M intelligent manual station (metal) 1-13 HMS-S/-D intelligent manual station 1-13 HTRI-M intelligent interface module 1-13 HTRI-S/-R/-D intelligent interface modules 1-13 HZM remote conventional zone module 1-13 Intelligent environmental compensation. See IEC Index - 2 | INDEX L lamp test 4-21 LCM-8 LED control module 1-7 LEDs 1-4, 3-1, 4-4 LPB local page board 1-10, 4-1 LVM live voice module 1-11, 4-1, 4-4 M maintenance Appendix-11 manual station. See intelligent analog devices Map 3-4 menu 3-2 minimum configuration 1-2 More Info (+ / -) 3-2, 3-3 More Info button 1-1 N navigation buttons 1-4 NFPA 72 Central Station Appendix-9 NFPA 72 Remote Station Appendix-9 NIC-C network interface card 1-1, 1-7, 2-4 Normal mode 3-2 O OCM-16 output control 1-8 optional modules 1-6 to 1-7 P Page. See emergency page preview 4-17 Page to Alert 4-7 Page to Background Music 4-8 Page to Evacuation 4-6 PAL-1 printer Appendix-7 PFT Series Firefighter's Telephones 1-11 phone group 4-21 phone page 4-22 PMI person machine interface 1-1, 1-3 to 1-4, 2-1, 31, Appendix-13 PMI-REM remote PMI 1-8 PSC-12 power supply 1-1, 1-3, 1-4, 1-8, 2-2, Appendix-9 PTB power termination board 1-1, 1-3, 1-5, 2-2 INDEX | FIREFINDER-XLS INSTALLATION, OPERATION AND MAINTENANCE MANUAL R REMBOX 2/4 remote enclosures 1-8 Reporting detector sensitivities 3-6 Reports Configuration 3-7 History 3-7 Queue 3-7 Reset system 3-3, 3-6 RNI remote network interface 1-8 RPM remote printer module 1-3, 1-6, 2-4 S SCM-8 switch control 1-9, 4-1, 4-4 Scroll UP / Scroll DOWN 3-2 Security 3-5 security point Appendix-7 Select Alert 4-10 Select Background Music 4-12 Select Convenience Page 4-11 Select Evacuation 4-9 Select Page 4-5 sensitivity report 3-7 silence individual 4-14 cancel 4-14 Silent Knight Model 5129 Appendix-9 SIM-16 supervised input 1-9 soft keys 1-4, 3-1 acknowledge 3-3 acknowledge supervisory 3-5 acknowledge trouble 3-6 map 3-4 reset system 3-3 status 3-7 soft reset 3-6 speaker groups 4-13 to 4-20 audible silence / unsilence 4-13 audio to local speaker 4-17 display 4-14 alert 4-15 auto 4-14 background music 4-16 convenience page 4-16 evacuation 4-15 silenced 4-15 non-silence 4-14 preview alert 4-17 background music 4-18 convenience page 4-18 evacuation 4-17 page 4-17 select audio preview 4-16 SSD system status display 1-9, 2-4 Status report 3-7 Sensitivity 3-7 Supervisory 3-5 system priorities 4-3 T testing Appendix-11 Touch screen 3-2 Trouble 3-5 trouble messages Appendix-13 TZC-8B 1-11, 4-1 V VGA display 1-1, 1-4, 3-1 Voice System Modules 1-9 to 1-12 AIC audio input card 1-9 DAC-NET 1-10 FMT fireman's master telephone 1-10 FTS Series Firefighter's Telephone Stations 1-10 LPB local page board 1-10 LVM live voice module 1-11 PFT Series Firefighter's Telephones 1-11 TXC-8B telephone zone card 1-11 Voice System Operation 4-2 audible silence 4-13 audible unsilence 4-13 audio volume control 4-18 automatic 4-2 Alert signal 4-3 evacuation signal 4-3 cancel silence individual 4-14 lamp test 4-21 manual 4-3 Alert signal 4-3, 4-10 background music 4-3, 4-12 to 4-13 clear 4-21 convenience page 4-3, 4-10 to 4-12 emergency page 4-3, 4-4 to 4-9 evacuation signal (EVAC) 4-3, 4-9 to 4-10 priorities 4-3 silence individual 4-14 speaker groups 4-13 to 4-20 volume control. See audio volume control W Warden's page 4-22 Z ZAC-40 zone amplified card 1-11, 4-1 ZAM-180 zone amplifier 1-12 Zeus programming tool 1-2, 2-4, 3-2, 3-3, 34, Appendix-3 ZIC-4A zone indicating card 1-1, 1-3, 1-5, 2-4, 4-1 Index - 3 FIREFINDER-XLS INSTALLATION, OPERATION AND MAINTENANCE MANUAL Index - 4 | INDEX Siemens Building Technologies, Inc. 8 Fernwood Road Florham Park, New Jersey 07932 Siemens Building Technologies Fire Safety Siemens Building Technologies, Ltd. 2 Kenview Boulevard Brampton, Ontario L6T 5E4 CN P/N 315-033744-3