1
General workflow
2.
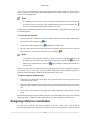
In the Add Photos dialog box browse to the folder containing the images and select files to be
processed. Then click Open button.
3.
Selected photos will appear on the Workspace pane.
Note
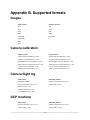
• PhotoScan accepts the following image formats: JPEG, TIFF, PNG, BMP, PPM, OpenEXR
and JPEG Multi-Picture Format (MPO). Photos in any other format will not be shown in the
Add Photos dialog box. To work with such photos you will need to convert them in one of the
supported formats.
If you have loaded some unwanted photos, you can easily remove them at any moment.
To remove unwanted photos
1.
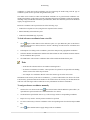
On the Workspace pane select the photos to be removed.
2.
Right-click on the selected photos and choose Remove Items command from the opened context
menu, or click
Remove Items toolbar button on the Workspace pane. The selected photos will
be removed from the working set.
Camera groups
If all the photos or a subset of photos were captured from one camera position - camera station, for
PhotoScan to process them correctly it is obligatory to move those photos to a camera group and mark
the group as Camera Station. It is important that for all the photos in a Camera Station group distances
between camera centers were negligibly small compared to the camera-object minimal distance. 3D model
reconstruction will require at least two camera stations with overlapping photos to be present in a chunk.
However, it is possible to export panoramic picture for the data captured from only one camera station.
Refer to Exporting results section for guidance on panorama export.
Alternatively, camera group structure can be used to manipulate the image data in a chunk easily, e.g. to
apply Disable/Enable functions to all the cameras in a group at once.
To move photos to a camera group
1.
On the Workspace pane (or Photos pane) select the photos to be moved.
2.
Right-click on the selected photos and choose Move Cameras - New Camera Group command from
the opened context menu.
3.
A new group will be added to the active chunk structure and selected photos will be moved to that
group.
4.
Alternatively selected photos can be moved to a camera group created earlier using Move Cameras
- Camera Group - Group_name command from the context menu.
To mark group as camera station, right click on the camera group name and select Set Group Type
command from the context menu.
Inspecting loaded photos
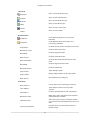
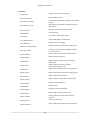
Loaded photos are displayed on the Workspace pane along with flags reflecting their status.
9