1
OPERATING AND
MAINTENANCE INSTRUCTIONS
Double column
PAINTING EQUIPMENT
ENGLISH
RAM
English
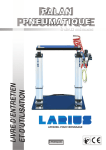
DOUBLE COLUMN PNEUMATIC RAM
F
G
H
I
L
M
WORKING PRINCIPLE ......................................p.1
WARNINGS ........................................................p.2
A
B
C
D
E
WORKING PRINCIPLE ......................................p.3
TECHNICAL DATA..............................................p.3
DESCRIPTION OF THE EQUIPMENT...............p.4
SAFETY RULES .................................................p.6
WORKING ..........................................................p.7
REPLACEMENT OF THE DRUM .......................p.10
ROUTIN MAINTENANCE ...................................p.11
PROBLEMS AND SOLUTION ............................p.11
SPARE PARTS ...................................................p.12
VERSIONS .........................................................p.13
SETTING-UP ......................................................p.6
WE ADVISE THE USE OF THIS EQUIPMENT ONLY BY PROFESSIONAL OPERATORS.
ONLY USE THIS MACHINE FOR USAGE SPECIFICALLY MENTIONED IN THIS MANUAL.
Thank you for choosing a LARIUS s.r.l.
As well as the product purchased,
you will receive a range of support services
enabling you to achieve the results desired,
quickly and professionally.
1
RAM
English
WARNINGS
The table below provides the meaning of the symbols used in this manual in relation to using, earthing,
operating, maintaining, and repairing of this equipment.
Read this operator’s manual carefully before using the equipment.
An improper use of this machine can cause injuries to people or things.
Do not use this machine when under the influence of drugs or alcohol.
Do not modify the equipment under any circumstances.
Use products and solvents that are compatible with the various parts of the equipment, and read the manufacturer’s warnings carefully.
See the Technical Details for the equipment given in the Manual.
Check the equipment for worn parts once a day. If any worn parts are found, replace them using ONLY original spare parts.
Keep children and animals away from work area.
Comply with all safety standards.
It indicates an accident risk or serious damage to equipment if this warning is not followed.
It indicates a fire or explosion risk if this warning is not followed.
Eliminate all ignition sources such as pilot lights, cigarettes, portable electric lamps and plastic drop cloths.
Keep work area free of debris.
ONLY use this equipment in a well ventilated area.
EARTH ALL THE EQUIPMENT LOCATED IN THE WORK AREA.
Do not form connections or switch light switches on or off if the air contains inflammable fumes.
If electrical shocks or discharges are encountered the operation being carried out using the equipment must be stopped immediately.
Keep a fire extinguisher at hand in the immediate vicinity of the work area.
It indicates wound and finger squashing risk due to movable parts in the equipment.
Tenersi lontano dalle parti in movimento.
Do not use the equipment without the proper protection.
Before any inspection or maintenance of the equipment, carry out the decompression procedure explained in this manual, and prevent
any risk of the equipment starting unexpectedly.
It indicates the danger of carriage unexpected movement on slanting surfaces
It indicates important recommendations about disposal and recycling process of products in accordance with the environmental
regulations.
Report any danger of electric shock if the warning and presence of live electrical parts has not been indicated.
Store in a dry place and do not expose to the rain.
Check that the cables are in good condition.
Switch off the equipment and discharge any electricity before cleaning or maintaining the equipment.
Mark any clamps attached to earth cables.
Use ONLY 3-wire extension cords and grounded electrical outlets.
Before starting work make sure that the electrical system is earthed and that it complies with safety standards.
It is obligatory to wear suitable clothing as gloves, goggles and face shield.
Wear clothing that complies with the safety standards in force in the country in which the equipment is used.
Do not wear bracelets, earrings, rings, chains, or anything else that may hinder the operator’s work.
Do not wear clothing with wide sleeves, scarves, ties, or any other piece of clothing that could get tangled up in moving parts of the
equipment during the work, inspection, or maintenance cycles.
2
RAM
A WORKING PRINCIPLE
B TECHNICAL DATA
PNEUMATIC RAM
FEED AIR PRESSURE (MAX)
7 bar
FEED AIR INLET
Bayonet
WEIGHT
40 Kg
OVERALL DIMENSION
600X800X900
3
English
drying process caused by the touch with air. The ram can automatically compensate the shovel plate descent during the use of
the product. This system allows a quick replacement of the drum
when the product is finished.
This type of pneumatic lifting ram allows to lift tranfer and extrusion
pumps of LARIUS GHIBLI and VEGA series. The use of the ram
enables to drive the sucking unit of the pump during the product
intake phase directly into the 25 litres drums (or similar drums).
At the base of the pump sucking unit a shovel plate is mounted to
compress the material assuring a constant flow during use. The
shovel plate is supplied with a series os gaskets able to protect
the product contained in the drum from powder, moisture and
RAM
English
C DESCRIPTION OF THE EQUIPMENT
2
4
1
1
5
3
6
7
POS.
POS.
Description
Description
1
Lifting cylinders
5
Pump air valve
2
Pump face
6
Shovel plate pressure gauge
3
Face for drum product
7
Shovel plate valve
4
Control lever (up/down)
4
RAM
12
14
13
English
8
10
11
9
POS.
POS.
Description
Description
8
Drum-block
12
Up/down pressure gauge control
9
Drum product
13
Pump pressure gauge
10
Bleeder valve
14
Main air feeder
11
Shovel plate
5
RAM
English
D SAFETY RULES
IF THE PRODUCT TO BE USED IS TOXIC, AVOID
INHALATION AND CONTACT BY USING
PROTECTION GLOVES, GOGGLES AND PROPER
FACE SHIELDS.
These instructions refer to the correct use of the
pneumatic ram. In addition, read caerfully the
Instructione contained in the manuals relevant to
the different components (pneumatic pump,
delivery gun, etc.) which can be used with the
ram.
E SETTING-UP
The operator will have to arrange an environment suitable to the
plant before installing it as indicated here below:
•
ALWAYS KEEP CLEAN AND TIDY THE WORK AREA.
•
KEEP THOSE WHO ARE NOT RESPONSABLE FOR THE
EQUIPMENT OUT OF THE WORK AREA.
•
An area wide enough to allow the drum loading and unloading
and routine maintenance operations.
•
BEFORE USING THE EQUIPMENT, THE OPERATOR
MUST BE TRAINED AND INFORMED ABOUT THE
POSITION AND WORKING OF ALL THE CONTROLS OF
THE EQUIPMENT.
•
Ensure there is a sufficient space in height to enable the ram
lifting and easy access to the air regulation groups.
•
For the pneumatic ram feeding, use a tube with an internal
diameter no lower than 10 mm.
•
•
•
NEVER EXCEED THE MAXIMUM WORKING PRESSURE
INDICATED.
Install a condensate filter and a shut-off valve type
ON-OFF on the air supply line to the ram.
RELEASE THE PRESSURE IN THE CIRCUIT BEFORE
PERFORMING ANY CHECK OR PART REPLACEMENT
OF THE EQUIPMENT.
NEVER MODIFY PARTS IN THE EQUIPMENT. CHECK
REGULARLY THE COMPONENTS OF THE SYSTEM.
REPLACE THE PARTS DAMAGED OR WORN.
•
TIGHTEN AND CHECK ALL THE FITTINGS FOR
CONNECTION BETWEEN PUMP, FLEXIBLE HOSE AND
SPRAY GUN BEFORE USING THE EQUIMPENT.
•
DO NOT APPROACH TOO MUCH TO THE RAM DURING
ITS ASCENT AND DESCENT OPERATIONS.
•
BEFORE ANY MAINTENANCE OPERATIONS DISCONNECT THE ELECTRIC VOLTAGE.
•
Make sure the air governors to the pump and ram are closed.
(turn counterclockwise the control knob to close them).
•
Make sure the air delivery valve to the shovel plate is
closed.
•
Make sure the air delivery pipe to the pneumatic pump is
connected to the ram and to the pump.
•
Make sure the air delivery pipe to the shovel plate is connected
to the ram and to the shovel plate.
Never spray over flammable products or solvents in
closed places never use the tooling in presence of
potentially explosive gas always check the product
is compatible with the materials composing the
equipment (pump, spray gun, flexible hose and
accessories) with which it can come into contact.
When the unit is in operation do not get to close to
the mobile parts, in order to avoid possible injuries
at the hands or fingers.
It indicates the danger of carriage unexpected movement
on slanting surfaces
6
RAM
Ram air governor
F WORKING
F2
English
Check all the fittings for the connection of the different components (pump, flexible hose, gun, etc.)
before using the equipment avoid approaching too
much to the ram during the ascent and
descent functions.
•
Open the air supply to the ram.
•
Turn the lifting control lever (F1) upwards.
F3
F4
F1
Check if there are any dents on the drum (F4):
they could clock the shovel plate (F5) of the ram
inside the drum.
Upwards
F1
•
Acting on the air (F2) governor to the ram, gradually increase
the feeding pressure to the pneumatic cylinder (F3) till the
ram starts lifting. Let the ram reaches its maximum height.
•
Remove the cover from the drum (F4) to be used.
F5
7
RAM
Place the drum (F4) on the ram’s plate (F6) and tighten
the drum-block.
English
•
Stop
F4
F5
F4
Center the drum
Drum-block
•
F6
Turn the control lever (F1) downwards till the shovel plate
(F5) lower near the upper edge of the drum (F4).
•
Tighten the drum-block (F6).
•
Open the bleeder valve placed (F7) on the shovel plate (F5).
F7
F1
Downwards
•
•
Stop the descent of the ram by turning the control lever (F1)
to the intermediate position.
Center the drum (F4) correctly so as it ia in axis with the
shovel plate (F5).
Open the bleeder valve
8
RAM
Turn the control lever (F1) downwards let the shovel plate
(F5) enter into the drum (F4).
•
Close the bleeder valve (F7) of the shovel plate (F5).
•
Open the air (F8) passage valve on the pneumatic pump (F9).
•
Allow thw compressed air flow into the pump (F9) acting on the
air governor placed on the ram. It is advised to adjust the air
pressure to the minimum value necessary to a continuous
working.
F8
F1
Downwards
Pump air valve
F9
F7
F5
Close the bleeder valve
Air pump regulator
•
To make the bleed of the pumping, read the pump manual.
•
The pump will start working and then will stop when all the
chamber of the product is full. The pump will start working
any time the trigger of the gun is pushed or the delivery valve
is open.
•
In case of difficult suction of the pump, slowly open the bleeder
valve placed (F7) on the shovel plate (F6) and close it when
some product comes out from the bleeder fitting.
F4
Never let the pump idle for a long period: it could
damage the pneumtic motor and ruin the
seals.
9
English
•
RAM
English
G REPLACEMENT OF THE
DRUM
•
Close the air supply to the pump (G1).
•
Turn the lifting control lever upwards.
•
Gradually open the air delivery valve (G2) to the shovel plate
in order to facilitate the extraction of the shovel plate (G3)
from the drum (G4).
•
Let the ram reach its maximum height.
•
Remove the empty drum and replace it with a full one.
G1
G3
G2
Shovel plate air valve
10
G4
RAM
H ROUTINE MAINTENANCE
•
•
Periodically check if the gasket of the shovel plate are
worn.
•
Follow the instructions on the maintenance of the pneumatic
pump contained in the user’s manual.
Periodically check on the air supply to the ram. Make sure
thet air is always clean and lubricated.
I PROBLEMS AND SOLUTION
Problem
•
•
The ram does not lift
Leakage of material from the
edges of the drum
Solution
Problem possible cause
•
The feed air pressure is too low;
•
Increase air pressure;
•
The control lever is not in the
high position;
•
Turn the lifting control lever
upwards;
•
The shovel plate is blocked on the
drum;
•
Gradually open the bleeder delivery
valve to the shovel plate so as to
facilitate coming out of the drum;
•
Chovel plate gasket worn;
•
Replace the gasket;
•
The feed air pressure of the pneumatic
cylinder is too hogh.
•
Reduce air pressure.
Always close the compressed air supply and release the pressure in the plant before performing any check or
replacement of parts of the pump
11
English
Always close the air compressed supply and release
pressure in the circuit before perforfming
any check or maintenance operation of the pump.
RAM
L SPARE PARTS
English
WARNING: Always indicate code and quantity for each part required.
10
7
5
1
8
4
12
3
6
8
9
11
1
2
7
11
13
8
Pos.
Code
1
10103
2
Description
Q.ty
Pos.
Code
Bayonet connection
2
8
11797
Revolving elbow
4
96259
Manometer
1
9
510438
Lever-operated valve
1
3
91107
Governor filter
1
10
510423
Silencer
1
4
91020
Reduction
1
11
8167
Manometer
1
5
91102
Elbow M-F 1/4
1
12
3348
Cross joint
1
6
3560
Nipples M-M 1/4
2
13
3347
Metering valve
1
7
3344
Governor
1
12
Description
Q.ty
M VERSIONS
Code
Description
510412
Pneumatic cylinder
510431
Gasket kit pneumatic cylinder
Due to a constant product improvement programme, the factory reserves the right to modify
technical details mentioned in this manual without prior notice.
MANUFACTURER:
23801 CALOLZIOCORTE - LECCO - ITALY - Via Stoppani, 21
Tel. (39) 0341/62.11.52 - Fax (39) 0341/62.12.43
E-mail: [email protected] - Internet http://www.larius.com
DIRECT LINE
CUSTOMERS TECHNICAL SERVICE
Tel. (39) 0341/621256
Fax (39) 0341/621234