Transcript
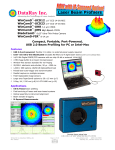
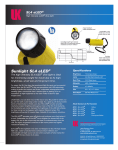
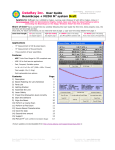
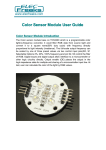
 DataRay Inc. User Guide WinCamD + BSF series UV Converter Advancing the Technology of Laser Beam Analysis
Very Important: Per the User Manual instructions, with full Administrator Rights, Install, Open and Close the latest Software before connecting the Camera. You should have received: a) A WinCamD series camera with or without a screw‐
on ND4.0 filter covered by a screw‐on target cap. b) A separately packaged UV converter with an attached spacer, prefocused for screwing on to the camera. c) User Manual with software CD inside the front cover, 3 m USB 2.0 cable, Camera and or UV converter Calibration Certificate. First: d) Install the software, open and close it, and then install the hardware. Follow the instructions in the User Manual. e) Read the manual and learn to use the camera before you attach the UV converter. This is particularly true if you are working with a pulsed laser, as is often the case for the UV. To use the UV converter: f) Inspect the UV converter. It has an aperture ring which allows you to vary the irradiance on the camera by a factor of 100:1 by varying the aperture from (typically) f/1.6 to f/16. g) Unscrew the ND4.0 filter and screw‐on the UV converter. Remove the front cover cap. h) Start the software. Read the PMF = section on the label on the UV converter. In the Setup pull‐down menu, choose Capture Setup Dialog. In the USB Capture Setup menu enter the PMF value on the label. (Don’t know how to do this? You skipped e) above.) i) Measure the power in your beam/energy in order to ensure that it does not approach the 500 mJ/cm2 damage threshold. j) With the UV converter aperture set to f/4, ‘walk’ the beam onto the converter from one side. If the camera saturates, and increasing the aperture f/# does not help, then you need to add additional attenuation/sampling before the converter. (A 5% right angle prism sampler is an available accessory. An RA for BSF10, or RA‐20 for BSF20.) Refocusing & PMF adjustment. Lay grid on crystal. Fine focus: Loosen 1.5 mm set screw & rotate the body. Coarse focus & PMF adjustment: Loosen the three labeled 0.89 mm set screws using the key provided. Additional focus grids & spacer rings are available. [Legacy BSF10C13N has fine adjustment only] Problems? Reread this User Guide. Still no luck? Save a *.wcf file (per the instructions in the User Manual) and email it with a description of your problem to [email protected]. UV_Converter_User_Guide.docx
Rev. 1009a
Page 1 of 1
For contacts visit: www.dataray.com
DataRay Inc., Boulder Creek, CA, USA