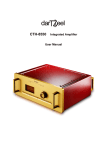
Download CTH-8550 Integrated amplifier User Manual
Transcript
CTH-8550 Integrated amplifier User Manual Table of contents 1. Preliminary note ________________________________________________________ 5 2. Introduction ___________________________________________________________ 5 3. Brief description ________________________________________________________ 5 4. Warranty ______________________________________________________________ 6 5. Installation ____________________________________________________________ 6 5.1. 5.2. 5.3. 6. Unpacking _______________________________________________________________________ 6 Location ________________________________________________________________________ 6 Connections______________________________________________________________________ 6 The CTH-8550 in details _________________________________________________ 7 6.1. Front panel ______________________________________________________________________ 7 6.2. Rear panel _______________________________________________________________________ 8 6.2.1 Fuse and voltage settings__________________________________________________________ 8 6.3. Remote control ___________________________________________________________________ 8 7. 8. Activation key procedure _________________________________________________ 9 User parameters ________________________________________________________ 9 8.1. 9. How to set everything ____________________________________________________ 9 9.1. 10. 11. Main features_____________________________________________________________________ 9 Power on sequence _______________________________________________________________ 10 Full configuration and settings ___________________________________________ 10 Some advice and tips ___________________________________________________ 14 11.1. 11.2. Cleaning and upkeep ____________________________________________________________ 14 What not to do_________________________________________________________________ 14 12. Assistance ____________________________________________________________ 14 11. Technical data ________________________________________________________ 15 darTZeel CTH-8550 User Manual, version 0.92 Page 3 of 15 darTZeel CTH-8550 integrated amplifier User Manual 1. Preliminary note 3. Brief description Your CTH-8550 comes with an USB key. This key will be necessary for giving all needed information to the internal CPU. When you will receive your CTH-8550, you will have to register before being able to use your integrated amplifier. Until registration will be completed, the CTH-8550 will only operate for 15 minutes from each powering ON. As soon as you will have registered, your official dealer will send you by e-mail the appropriate files. Go to chapter 7 “Activation key procedure”, page 9, knowing how to proceed for receiving your activation key file. Please read this user manual in its entirety. We did our best not to make you fall asleep. We hope it will work… The CTH-8550 will require about 170 hours of playing time before it will deliver what you bought for. 2. Introduction We would like to congratulate you for purchasing a darTZeel CTH-8550. The darTZeel CTH-8550 is the most advanced analogue integrated amplifier designed so far. Your CTH-8550 represents the cumulative research and development we brought in the audio industry these past decades. Passion and love for music reproduction are easily palpable in the CTH-8550. Our challenging goal was designing and realizing a “no compromise, all-in-one music machine”. The result is what you will experience very soon, when you will listen to your favourite records. With no less than nine inputs – including optional phono inputs – and two preamp outputs, the darTZeel CTH-8550 is the ideal modern audio integrated amplifier to fit in any high-end audio system. Thanks to its newly developed output power stages, driving any speaker load will be a real game for the CTH-8550. With more than 200 watts into 8 ohms, and close to 350 watts into 4 ohms, even low sensitive speakers will put out plenty of SPL during your most demanding, dynamically speaking, sessions. The new power circuits only use three junctions in the signal path, offering a truly musically, fast and transparent reproduction. Furthermore, in those “green” days, we are proud to say the CTH-8550 runs very cool, saving your electrical bill, thus only giving power to the speakers instead of wasting it unnecessarily. This new musical component directly benefits from our past experience in audio, yet with plenty of innovative features you will discover in reading this – hopefully joyful – user manual. This integrated amplifier actually marks a new corner in the darTZeel history, by bringing features you will not find elsewhere. Especially designed for its friendly user operation, the CTH-8550 will provide you many years of total pleasure listening to your favourite music. On the technical point of view, there is no doubt that the CTH-8550 is a very special machine. The new fluorescent display, with its comprehensive menus, will greatly simplify all possible provided settings. As for the most important thing you will ask for, and we obviously do mean the music, you will simply find it… enthralling. Hey, this is a darTZeel machine, isn’t it? The rather intuitive menus much helped in keeping this user manual quite compact. Sometimes, it is possible to bring high technology while preserving some trees... darTZeel CTH-8550 User Manual, version 0.92 Page 5 of 15 5.2. 4. Warranty Your CTH-8550 is guaranteed for one full year, parts and labour, against any breakdowns or component failure, as is the tradition in Switzerland for such equipment. As we see it, any warranty longer than 1 year is the obvious sign of inferior quality and design, indicating that a failure could arise anytime. Any component either will fail within days or will last "forever". This is the reason why all our machines are thoroughly broken in before being lovingly packed and sent to you. We are still fully aware that no component is always flawless, and that a problem could arise anytime after the warranty period. In such a case, we will carefully examine every situation, with the aim of reducing the likely repair costs to minimum levels. You can always trust us for customer care, as you already trusted us when purchasing your CTH-8550. The warranty is valid in the original country of purchase only. Warranty is transferable to a single second hand user within the first year, provided the country will remain the same. Unpacking Please remember how your CTH-8550 was packed. It will be very useful in case of move. Your CTH-8550 has been carefully inspected and packed prior shipping. Be sure you will receive your carton box in mint condition, without any signs of external damage. If you would notice any packaging problem, please immediately report to your official dealer! Any future shipping must be done in the original carton box. Any warranty rights will be void if the CTH-8550 is not shipped/returned in its original package. Your carton box must contain: The CTH-8550 The IRC-885 infrared remote control The darTZeel USB key The AC power cable related to your country This present user manual darTZeel CTH-8550 Before making the first connection, you should think carefully about the location where you are going to put your gear. If you planned to fit your darTZeel CTH-8550 into furniture, please bear in mind that you must allow at least one inch of free space all around the unit, for proper cooling. As said in the “Brief description” chapter, the CTH-8550 runs quite in a cool way. However, as long as one dissipates an even low thermal power, not allowing proper ventilation will quickly rise the internal temperature. If you do not respect this, the CTH-8550 may stop playing if it becomes too hot. The heat sinks shutdown point is at around 70°C, and the power supply starts up again when the temperature has dropped to 60 °C. Please also note that permanent excessive temperature will reduce the life span of your machine Anyway, if possible, always leave enough space around your darTZeel CTH-8550, allowing you to gain easy access to it when making connections. 5.3. Connections As you will see in next chapter, connecting the CTH-8550 is quite easy, thanks to its clearly labelled rear panel. The only thing you will have to check is proper voltage settings. You will find above the IEC connector a small window showing the voltage selection. Please read chapter 6.2.1 about this topic. 5. Installation 5.1. Location Speaker binding posts can accept most types of connection. In case you will use speaker cables terminated by spades lugs, be sure not over tighten speaker posts. Over tighten will create some play and could lead to loosen speaker posts. If you have the choice, prefer spring loaded banana plugs. Our experience showed that they bring very reliable contacts over the long haul, without needing to be periodically re tighten. As soon as the CTH-8550 will be plugged into the AC wall outlet, the operation status LED will go red. There is no general hardware on/off switch. We do hope you will nevertheless still sleep well, knowing that the CTH-8550 consumption is less than 3 watts when powered off. User Manual, version 0.92 Page 6 of 15 6. The CTH-8550 in details 6.1. Front panel 1. 2. 3. 4. 5. 6. 7. 8. 9. A. B. C. D. RCA Input 1 RCA Input 2 RCA Input 3 RCA Input 4 Phono MM (optional) Phono MC (optional) Zeel Input 1 Zeel Input 2 XLR Balanced input → → → → Enter in configuration settings Display/Hide time and date Enable/Disable display Auto-Off Display serial number and owner’s name Press once for 5 seconds of display. Press twice to hold the owner’s name permanently. Press a third time to resume into standard display mode. Has same function as “Owner” key on the remote. E. Mute → Reduce/Cut/Resume output volume level When set to -20dB or -40dB, Mute will resume to previous level either by pressing again Mute or by altering volume level with the Pleasure Control or the Remote. S. Display screen P. Pleasure Control Knob Used – of course – for adjusting output volume level. Also used for Balance adjustment. In ALL menus, + and – keys functions can be replaced by rotating Pleasure Control. Very Useful! L. Operation Led Status Shows various operation states: → CTH-8550 is off (stand-by mode). Red Orange → CTH-8550 is on (even is the screen has been dimmed out). Green → CTH-8550 is on, acknowledging a remote control sending order. darTZeel CTH-8550 Menu Time Light Name F. Mono → Switch from Stereo to Mono G. Balance → Adjust L/R channel balance Press Balance then adjust with the Pleasure Control knob within 3 seconds. Remote control: use L and R keys. Pressing both L and R keys at same time resume balance in central position. R. Infrared Receiver The orders sent by the remote control are received at this point. Never cover it, or the remote control will no more work properly. Never, ever push, scratch, or attempt to move the infrared receiver! Remote control access will no more work in case of damaging the receiver. User Manual, version 0.92 Page 7 of 15 6.2. Rear panel We do think that the rear panel labelling talks for itself. Nevertheless we will keep you awake in providing you some general explanation… You will note that we installed two USB ports on the lower left corner. The standard rectangular port is the one in which you will insert your USB key when you will have to register, or when a firmware update will be needed. When you will register your CTH-8550, you will need to insert your USB key in the rear panel rectangular USB port. Please carefully read the chapter 7, “Activation key procedure”, next page. !!! YOUR MACHINE WILL ONLY WORK FOR 15 MINUTES IF NOT PROPERLY ACTIVED !!! 6.2.1 Fuse and voltage settings The little window located above the AC connector indicates the factory voltage settings. In case of moving to another country, you could have to change the voltage setting. Please contact your dealer for more information in how to proceed. In such an event, a new activation code will be required. !!! Warning !!! Improper fuse setting and/or voltage selection will definitely damage your CTH-8550. For 100-120 volts AC, proper rating is 8 amperes. For 200-240 volts AC, proper rating is 4 amperes. Fuses must be of T (temporized) type. Do NOT use fuses with wounded coil filament. In case of doubt, always prefer Fast blow type. 6.3. Remote control The remote control is quite easy to use indeed. The nine lower keys numbered from 1 to 9 are for selecting the source, as described in chapter 6.1 “FRONT PANEL”. + and – keys are for adjusting the output volume level. L and R keys are used for direct balance adjustment. It is easier to adjust balance from here than from the front panel since it allows for direct access. Resetting balance to central position is simply obtained by pressing both L and R keys simultaneously. Lite key just behaves the same as “Light” key on the front panel. Owner key behaves the same as “Name” key on the front panel. Others keys talk for themselves. darTZeel CTH-8550 User Manual, version 0.92 Page 8 of 15 7. Activation key procedure Please remember that your darTZeel CTH-8550 will only work for 15 minutes from each powering on, until it will be officially registered. Registration procedure: Your CTH-8550 is provided with a programming USB key. This key is blank when receiving your machine. Ask your official dealer for an activation key. You will receive it by email in the form of a zipped folder containing a file with a “dtz” name extension. How to proceed: 1. Unzip the key activation software from the zip folder, and directly copy the “dtz” file on the USB key using your home computer. DO NOT ALTER THE FILE NAME! 2. Insert the USB key in the rectangular USB port located in the rear panel of your CTH-8550. 3. From the front panel, press the following: Menu ► Parameters ► Diag ► DTZ. 4. The file will be uploaded. 5. Remove the USB key. At registration enquiry time, please note that your owner name can not exceed 14 characters maximum in length. So please try to choose “J.D. Smith” rather than “Jonathan Donald Smith”… 8. User parameters The section actually starting at chapter 10 is the biggest part of this user manual. With more than fifty different possible display screens, you will see that we put quite a lot of features in the CTH-8550. Thanks to the intuitive menus, you will be able to directly access to all parameters directly from the front panel. 8.1. The power amplifier section can be switched off, in case you would use the CTH-8550 as a stand alone preamplifier. Doing so, the big power transformer will be shut down, even further reducing the power comsumption and improving the signal-to-noise ratio. Last but not least, a real time clock, primarily implemented for memorizing internal CPU events, will also permits to automatically power on and/or off your CTH-8550. Quite a luxury alarm clock, but who can do the most… Sincerely hoping that those little useful things will please you, let us go to the next chapter… 9. How to set everything Everything? Almost… The following four full pages show how to fully set your CTH-8550, by mean of graphical charts. We actually took the actual screens and explained how to proceed, exactly if you would be on front of your machine, setting it up. As there are actually more than 50 different screens, we tried to concentrate a little bit, yet without sacrifice any important part of the numerous options. We are sure you will be able to find out the few percents of remaining “hidden” settings, once you will get familiar browsing into the menus. Important note While already written elsewhere, it is worth mentioning that the Pleasure Control wheel can be used in the menus, instead of + and – keys. So you will be able to set your machine using both hands, improving your speed when you will try to crack your score when setting any new parameter. Now, as they say, a nice drawing is often much more useful than a longer than wanted explanation… Main features For each input, you can adjust the followings: Name of the source Input level Balance Mono/Stereo Bypass mode The CTH-8550 offers a nice, smooth mute operation, softly shutting off/resuming on the music played. You can choose between a standard full mute, or only have a -20dB or -40dB in level reduction. darTZeel CTH-8550 User Manual, version 0.92 Page 9 of 15 9.1. Power on sequence Hereunder is what you will see on the display when powering the darTZeel CTH-8550 on: 10. Full configuration and settings Press the Menu key “A”, (chapter 6.1, page 7) on the front panel, and then play with the charts… You can choose the source which will be routed at RCA REC outputs. Pressing + or – will change the illumination screen in 4-step increments: “Listening” means that you will record what you are listening to. Press OK when set. The standard screen will display the selected listening source with its corresponding input label reversed colour: REC = Source Press + or – in order to set the source which will be recorded, regardless of the source you are listening to. 25% → 50% → 75% → 100%. Press RST to resume at 100%. Press ◄ or ► to go to “Auto-off time” shown hereunder. This section offers an awful lot of settings possibilities, allowing for personalizing your CTH-8550. You will be able to set virtually any parameter for each input, as well as performing software updates, when and if available in the future. PARAMETERS SEE NEXT PAGE The above screen is an example of a chosen source for recording: Whatever you will listen to a line source or phono source, the REC outputs will always reproduce the signal from source ZEEL 1. Accordingly, the standard screen will display “ZEEL 1” label in reversed colour, whatever the source chosen, indicating “ZEEL 1” is now the default record output source: REC = frozen on chosen source. darTZeel CTH-8550 Pressing either the “Light” key from the front panel or the ”Lite” key on the remote control will toggle the display between “Display auto-off” ON or OFF. When this function is ON, the display will dim after the above defined time. Press + or - to choose from 2 to 15 seconds. Press OK when set. Press RST to resume to factory mode. Press ◄ or ► to return to illumination level settings. User Manual, version 0.92 Page 10 of 15 Go to Page 13 When pressing “Rename” from the above PARAMETERS menu, the default input source displayed is the one you selected for listening. When pressing “Settings” from the above PARAMETERS menu, the default input source displayed is the one you selected for listening. Press ▲ or ▼ in order to change the source to be renamed. Press ▲ or ▼ to select another source. Press + or – in order to adjust the input level. Press ◄ or ► to select the character (alphanumeric key) to be changed. Press + or – in order to browse from A-Z and 0-9. Space (blank) is just before “A”. Press OK for validating the new name. Press RST and OK in order to resume to default factory name. Range is from -10dB to +10dB. Press OK to memorize the level. Press RST to resume to 0dB. Press ► to set Input balance, hereunder. Altering default balance for a source can be helpful when a specific source exhibits some channel unbalance, like a phono cartridge. Press + or – in order to adjust the input balance. Range is from 9.5dB Left to 9.5dB Right. Press OK to memorize the balance setting. Press ▲ or ▼ to select another source. Press RST to resume to 0dB. Press ► to set Input mode, hereunder. darTZeel CTH-8550 Go to next page The “USER INFORMATION” screen indicates the serial number of your CTH-8550, as well as your registered name. Please be sure the registered name corresponds to yours. If the registered name is not correct, immediately contact your dealer. Any wrong registered name will void access to warranty rights. Altering input mode for a source can be helpful for a monophonic source, like an old AM tuner or a mono 78 rpm phono cartridge. Used for Home Theatre systems. The gain of the bypassed source is 0dB. Press + or – in order to switch between Stereo or Mono. Press OK to memorize the input mode. Press ▲ or ▼ to select another source. Press RST to resume to Stereo. Press ► to set Input bypass, right after. Press + or – in order to switch between bypass On or Off. Press OK to memorize. Press ▲ or ▼ to select another source. Press RST to resume bypass to Off. User Manual, version 0.92 WARNING !!! Pleasure control will be defeated !!! Page 11 of 15 Previous page Go to previous page Clock & Diag SEE NEXT PAGE This is the maximum level at which your CTH-8550 will power on. In the above example, if - and only - you listened at more than -26dB, the output level will resume to this value at next start. Press + or – to set the desired level. Press OK to store this value. Press RST to restore to factory default. Press ► to set the source. The CTH-8550 will always start with a preferred source, whatever the source was selected during last powering off. “No change” means the CTH-8550 will start with same selected source as played during previous music session. Press + or – to choose a source to be played at power on. Press OK to save this setting. Press RST to restore to default factory. Press ► to set the internal power amp. When using the CTH-8550 as a stand alone preamplifier, the power amplifier section will be shut off, improving both electrical consumption and signal-to-noise ratio. Press + or – to enable or disable the internal power amplifier. Press OK to validate. The CTH-8550 will shut down and restart. darTZeel CTH-8550 Allows for 3 different types of attenuation. This can be useful when you just want to decrease the level instead of cutting it off completely. Press + or – to set the Mute level: ∞ → -20dB → -40dB Press OK to memorize this setting. Press ► to set the Volume limit. Enables/disables a maximum output level. Very practical for not overloading low power rated speakers, or simply allowing your kids to play with your system without shaking neighbours’ walls! When left to Off, pressing ◄ or ► will go back to above “Mute level” screen. Press + or – to set to On. Press ► to set the new value in the next, hereunder screen. In the sample above screen, the maximum output level has been set to -2.5dB. Press + or – to set the desired value. Press OK to store it. Press RST to resume to +12dB default. When max volume has been set, there is no need to reset the value when you do not want using a limit, just enable or disable it. User Manual, version 0.92 Page 12 of 15 Go to Page 11 See Start time If you have to both set time and date, it will be more convenient to first set the date, then the time. When “Auto start” is set to On, your CTH-8550 will power on itself at the time programmed on the next hereunder screen. This screen provides you the software version and the registration status. Press + or - to set the correct hour. Press ► to jump to minutes figures. Press + or – to set the correct minutes. Press OK to save. When “Auto start” is left to Off, your CTH8550 will not start automatically. DTZ: When your machine is new, you will need to register it. Insert your USB key on the rear panel port, and press DTZ. BKP: This feature allows copying internal CTH-8550 parameters into the USB key, for factory diagnosis. Insert your USB key on the rear panel port, and press BKP. UPD: Used for updating the internal CTH-8550 firmware. Insert your USB key on the rear panel port, and press UPD. The time clock will synchronize at the moment you will press OK. Until you will press OK, the internal time clock will not be changed. Press + or – to set “Auto start” to On or Off. Press ▲ or ▼ to go to the next menu and set the start time. Press ▲ or ▼ in order to display the next screen for date setting. Your USB key must contain the appropriate files in order to properly operate. Further details about key activation procedure are described in chapter 7. The date format is DD.MM.YYYY. This format cannot be changed. Sorry for those used to other formats, but this is the most universal one. Press + or - to set the correct hour. Press ► to jump to minutes figures. Press + or – to set the correct minutes. Press OK to save. Press + or - to set the correct day. Press ► to jump to month figures. Press + or – to set the correct month. Press ► to jump to year figures. Press + or – to set the correct year. The STOP TIME procedure is exactly the same as the START TIME one. Press “Stop time” from the main CLOCK menu in order to proceed. If time has not been set yet: Press ▲ or ▼ to return to “Set time”, and adjust the time. Date settings will be kept correct, saving you entering twice in the “Set Clock” menu. Press OK to save. darTZeel CTH-8550 User Manual, version 0.92 Page 13 of 15 11. Some advice and tips 11.1. Cleaning and upkeep The darTZeel CTH-8550 has not only been designed for providing you intense moments of musical pleasure; it is also designed to withstand the rigors of time, especially if you take proper care. These few but important warnings are the following: Never, ever attempt to short circuit the Speaker Terminals. Repetitive shorts could lead to permanent damage to the corresponding output stage. When bi or tri cabling, be especially careful when connecting the cables. If you inadvertently cross the polarity of one run regarding the other(s), you will make a perfect short circuit. This can easily destroy the corresponding output stage! The whole Swedish steel case performs heat exchange, while the two internal lateral heat sinks regulate and maintain the correct temperature. Vent slots are provided for heat sink dissipation, but they do not communicate with the inside of the machine. So the reason the CTH-8550 is virtually dust-proof. The warranty will be partially or totally void in the event of non-compliance with the above! It is not recommended to clean internal parts. Actually, we do not recommend even to remove the top cover! As for the external parts of your equipment, a soft cloth or even a dust brush will be completely adequate. In case of fingerprints, a gentle rub with a cloth soaked in isopropyl alcohol will be more appropriate. 12. Assistance Just bear in mind, however, that the simplest things are, more often than not, the most efficient. We personally found that a spot of soap on a wet soft cloth is the best method most of the time. Try for yourself! Never forget to power your darTZeel CTH-8550 off before connecting or disconnecting any source or loudspeakers. If you need any commercial or technical information about the darTZeel CTH-8550, or if you have any difficulties or enquiries, please feel completely free to contact us by email at [email protected] You can of course write us at the following address: As you have certainly guessed, we confirm that it is strongly recommended to never use acid to clean your gear. Acid is very corrosive and could react with the front plate anodized coating. Furthermore, acid is very corrosive for the skin, too… darTZeel Audio SA 2, chemin Louis-Hubert CH-1213 Petit-Lancy Geneva/Switzerland If you follow these few elementary rules, you will be assured of having a very nice looking machine for years to come. We also invite you to visit our website at 11.2. What not to do Our advice and recommendations have been voluntary placed close to the end of this owner's manual. This does not mean that they are of only minor importance - quite the contrary. We just thought that the following points are not directly involved in the everyday use of your amplifier. However, the darTZeel CTH-8550 calls for certain precautions. www.darTZeel.com We wish you countless hours of musical delight with your CTH-8550 and do hope that you will have no further need to read this manual except for the pleasure… Your darTZeel team darTZeel CTH-8550 User Manual, version 0.92 Page 14 of 15 11. Technical data darTZeel CTH-8550 Nominal output power : 200 watts RMS (230 watts peak) @ 8 ohms. 330 watts RMS (360 watts peak) @ 4 ohms. 330 watts RMS (400 watts peak) @ 2 ohms (software limited). Line Gain Power Stage Gain : : 12 dB nominal, up to 22dB. 26 dB @ 8 ohms. Input impedances : Phono MM* = Phono MC* = RCA: Zeel BNC: XLR: > > > 47 kohms. Neumann RIAA 4th pole included. 1 Kohms. Neumann RIAA 4th pole included. 30 kohms. 50 1 ohm. 15 kohms between Pin 1 and 2. 15 kohms between Pin 1 and 3. Line output impedances Speaker output impedance : : < RCA = 75 ohms, darT BNC = 50 ohms 0.33 ohms, from 20 Hz to 20 kHz (measured under 8 ohms). Frequency response : 3 Hz to 300 kHz, 20 Hz to 20 kHz, 20 Hz to 50 kHz, Rise time : < 0.8 s. Slew rate : > 88 V/s, peak-peak. DC output voltage : < ±15 mV max. Total Harmonic Distortion (THD) : < 1 % from 7 Hz to 77 kHz Temporal Distortion : None, at any level and load, as specified above. Crosstalk : < -90 dB from 20Hz to 20kHz. Signal to noise ratio : > 115 dB (A) @ nominal power. Consumption : 3 watts StdBy, 40 watts @ idle, 1000 watts @ maximum output power. Size in mm : 440 x 335 x 170 (WxDxH). Total deep with handles: 415 mm. Net weight : 28 kg. * +0, -6 +0, -0.5 ±0.5 dB. dB. dB. Phono inputs are optional and are not installed in standard delivery. darTZeel amplifiers are made to last forever by darTZeel Audio SA in Geneva, Switzerland. darTZeel Audio SA www.dartzeel.com 2, chemin Louis-Hubert CH-1213 Petit-Lancy / Genève [email protected] Suisse darTZeel CTH-8550 User Manual, version 0.92 Page 15 of 15


