1
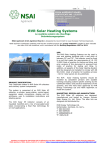
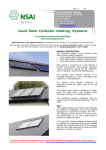
SK201 SOLAR WATER HEATER
Vacuum Tube Series
User’s Manual
Please read carefully the manual before use
Thank you for having Sunrain vision SK201 solar water heater. You have now a solar heater with the
world’s top-level technology, superb performance and safe and reliable solar energy water heater. To bring
its effectiveness to the full, please carefully read the User’s Manual before installing and using your heater
and proceed with your installation and use according to the manual.
Please keep your User’s Manual for later reference.
Content: 1.Features
2.Names of parts and components
3.Installation
4.Points for attention
5.Eliminate Malfunction
1. Features
1). Effective and applicable:
It adopts the efficient AL-N/AL heat absorption-coating vacuum tube. It has high absorption efficiency, low
emission rate. The full stainless steel mirror reflector has higher reflective efficiency. It effectively enhances the
thermal efficiency of the solar water heater.
2). Low heat loss:
With imported polyurethane foam, which is of high density and strength, the heater has excellent heat
insulation.
3). Superior material:
The outer casing of the water tank adopts the excellent quality stainless steel with strong corrosion-resistance.
The inner of the water tank is made of imported SUS304 food grade stainless steel welding for shaping. It has
features such as strong erosion-proof, long life, non-pollution to the water, clean and hygiene!
4). Energy-saving and environment protection:
Non-pollution, effectively protect the environment, energy saving, extremely low cost at ordinary times. Once
invested, you will benefit from it forever. You may withdraw the cost within 2 or 3 years. The product working
life is as long as above 15 years.
5). Large applicable scope:
It can fully satisfy the living hot water purpose for various use such as shower; cleaning; clothes, bowls and
vegetables washing etc. When the multiple solar water heater are linked one with another, they are suitable for the
collective central heat-water projects such as residence buildings, schools, hospitals, office buildings and so on.
6). All-weather hot water supply:
It may install the auxiliary heating element according to users’ requirements. It ensures the customers to get
the satisfactory hot water under the circumstances such as cloudy, rainy days, or days with insufficient sunshine
and so on.
Tel: +86-573-86288600
http://www.suunny.com
1
2.Names of parts and components
1). Vacuum tube solar water heater (see Fig 1)
Fig 1
2). Water tank of solar water heater (see Fig 2)
Fig 2
Tel: +86-573-86288600
http://www.suunny.com
2
3). Vacuum tube (see Fig 3)
Fig 3
3. Installation
Fig 4
Points for attention when installing the heater
Attention! ● Installation of the heater must be done by qualified professionals.
● Location of installation must be flat, with no object blocking in the front to reduce heat
gathering efficiency
● Installation foundation of the solar heater shall bear twice the weight of water container
holding capacity
●Installation must be secure and stable to prevent damage and accident
● It is recommended to provide the hot/cold water pipelines with adequate insulation in order
to prevent freezing in winter times, which will affect the normal use of the heater
● Before installation be sure to check the water tank of the heater for alien matter and flush
it clean with water
Tel: +86-573-86288600
http://www.suunny.com
3
Solar water heaters consist of vacuum tubes, water tank, frame and reflector. They are packed into four cartons.
1) One step ---- unpack the carton of frame
The frame and all fastenings are contained in a long thin carton. Please unpack this carton with cares and lay
out the parts. Please collect all the nuts, in fear losing one or some. Lay all the U section stainless steel arms on
the floor in order of size
2) Two step ---- assemble reflector
Please unpack the slim square carton. The two or four panels are the reflectors, which bolt to the two or three
long U section legs. Bolt the reflector panels are evenly in line across the structure.
Fit the three swivel feet to the lower end of the three legs.
Attach the three cradle frames to the top of the three legs. Note there is a left and right side fit.
Select the three rear legs and fit the swivel feet to each.
The three rear legs can now be attached to the cradles and the transverse braces fitted using the triangular and
tee bracing plates.
The diagonal bracing arms can now be fitted.
Below the reflector panels on the front of the front legs fit the tube carriage and insert the plastic caps in the
holes provided.
Ensure all bolts are tight and the frame is rigid.
3) Three step ---- assemble water tank
You are now ready to secure the frame in position, if attaching directly to the ground now lowers the hot water
tank on to the cradle at the top of the frame, ensure the bolts from the tank are through the slots on the cradle and
fit the nuts finger tight. Using a string or straight edge check the alignment of the tube carriage guides and tube
locating holes in the tanks. Gently turn the tank to achieve alignment if the holes are not aligned the unit may leak
or tubes may break when being fitted. Once the tank is aligned tighten the bolts to lock it in place and recheck
alignment.
Using a clean rag and a small amount of silicone grease clean and lubricate each of the white silicone seal
inside the 30 tube location holes on the tank.
Note: before assembly, please check the water tank whether there are other things inside or not inside it. If
yes, please take them out and clean the tank with water.
4) Four step ----- assemble vacuum tubes
Carefully unpack the vacuum tube; remember this is glass, unlike the rest of assembly this will be broken
unless handled carefully. Fit a rubber dust seal to the tubes from the open end with the rounded side facing down.
Slide this 200mm down the tube.
Apply a smear of grease to the top 100mm of the open end of the first vacuum glass tube. Using a gentle
pressure and twisting motion insert the greased tube into the locating hole until it is well inside the water tank and
the bottom end of the tube is at least 25mm clear of the tube brackets. Now using a gentle downward pressure and
twisting motion lower the tube until it fits snugly into the tube bracket.
Slide the rubber dust seal up the tube until its outside edge fits flush with the water tank.
Repeat for the rest of the tubes.
Please find the installation pictures (see Fig 5, Fig 6):
Installation
When considering where to locate your new solar water heater you should try to find the best location for
your particular house. The points to consider include distance to largest use (typically this is the bathroom),
available sunlight, orientation, level, angle and load bearing capacity. Weight of the solar water heater complete
and filled with water is about 330kg (30 pipe). The load is spread to 6 adjustable feet with the stand bracket you
Tel: +86-573-86288600
http://www.suunny.com
4
may need to check with a qualified builder to make sure that you for can support this weight properly. The
brackets may have to be modified for your particular installation and must be done in a proper engineering manner
with in the standard building codes.
Fig 5
Fig 6
Tel: +86-573-86288600
http://www.suunny.com
5
Always try to locate your unit as close as possible to your largest water use to avoid wastage. Solar water
heaters work best where they have the best sunlight. Avoid areas with partial shade or overhanging branches. The
unit requires a sound base capable of carrying the weight of the unit and where it can be securely fastened. The
cylinder needs to be laying true level with the horizon, check with a level and adjust with packers under the feet if
necessary.
Please pay attention to the following when doing the installation:
¤ Keep the air in/out at the overflow is smooth;
¤If the electric element is used, please be sure to have a power leakage protection when installing the electric
element and also be sure to have the live line, neutral line and earth line properly connected to the leakage
protection and make it error-free, at the same time the power source socket must be properly connected to earth;
¤ Lightening arrester of the building shall be higher than the main part of the solar heater and refrain from using
your heater in a thunder storm;
¤At the completion of installation the supporting frame of the solar heater shall have wind protection where the
frame is in contact of the ground so that strong wind cannot topple the heater and damage it
¤Arrangement of pipelines shall be as per relevant norm of plumbing. Plumbing outdoors shall have support
and it is not allowed to have the piping directly hanging from the water tank. Plumbing shall start higher up and
going downward, free of horizontal sector and reverse bends in order to prevent water accumulating in the
pipeline when draining
¤If pipeline has to run through the roof, be sure to use sleeves and have proper water proof measures; in a
storied building plumbing may run inside the ventilation ducts
¤All pipelines need insulation; for areas with freezing temperature in winter pipeline outdoors shall have
insulation layer not less than 50 mm in thickness; insulation can be of asbestos sleeve or other insulation material;
water-tight insulation is also a must
¤If your solar heater is installed at a level higher than the buildings, around the user will have to have lightening
arrester, which shall be higher than the solar heater for min 50 cm; in case the lightening arrester has the heater for
supporting it shall be separated from the heater with insulator and the clearance between the two shall not be less
than 30 mm
4. Points of attention
▲Be sure to try the hot water temperature before using hot water in order to be safe from scorching
▲Be sure to unplug the electric element before using hot water if you use it.
▲Where atmospheric contamination is serious, it is necessary to clean up the vacuum tubes and reflector with
accumulated dust for better receiving sunlight radiation
▲For solar heater with electric element, the right practice is to feed in water before turning the power on,
thereby preventing heating without water in the water tank
▲Where temperature drops below zero in winter, be sure to remove the accumulated snow or other matter
covering the vacuum tubes, which will affect heat gathering or causing unnecessary damage.
▲Where water supply is only at regular hours or water pressure is inadequate, user may prepare a standby
water tank for an auxiliary water supply source
▲Before winter comes, be sure to check on the insulation of the pipeline; where insulation is absent, it is
necessary to properly insulate the pipeline
5. Eliminate Malfunction
1) The water in the solar water heater is not heating.
The surface of the vacuum tube is covered with dust or there are something shelter from it. The weather is cloudy,
Tel: +86-573-86288600
http://www.suunny.com
6
so the radiant emittance is relatively lower .You have to use out all the water in the tank.
The valve for feeding water is damaged or not shut down well, which make the tank be in the state of slowly
feeding or drawing off water for a long time, result in the overflowing or leaking of the heating water.
The water stains in the vacuum tube is too much and influence the heat transfer. Handling: you can debus the
tube and clean it out with the acid liquor made up with vinegar.
2) The heater leaks water
The silica gel band is not sealed up well with the bladder-like inner container. Diagnostic: having foreign
body. Disposition: remove the foreign body.
The silica gel band is aging and ruptures. Handling: replacing the silica gel band.
The top of the vacuum tube has slip from the silica gel band. Handling: adjusting the tailstock and the heating
water tank.
The silica gel band has turned over or come off. Handling: adjusting the silica gel band.
The conjunction between the tank and the bladder-like inner container has become flexible. Handling: fixing
it again.
3) The pipeline is frozen up and not able to feed water. Handling: you can pour some hot water into the pipe
from the spout of the tank to defrost it.
Generally, the expanding rate of the heater is very low. You can solve the problems above through adjusting
it yourself or consultation.
4) One of the tubes is broken
The vacuum tubes can be replaced very easily. They are also fairly inexpensive. Your local distributor will
stock spare tubes. The system can operate with several broken tubes, but the efficiency will be reduced, so it is
recommended that broken tubes be replaced immediately.
Tel: +86-573-86288600
http://www.suunny.com
7