1
NASA/TM-2002-211641
Videogrammetric Model Deformation
Measurement System User Manual
Harriett R. Dismond
Langley Research Center, Hampton, Virginia
April 2002
The NASA STI Program Office . . . in Profile
Since its founding, NASA has been dedicated to the
advancement of aeronautics and space science. The
NASA Scientific and Technical Information (STI)
Program Office plays a key part in helping NASA
maintain this important role.
• CONFERENCE PUBLICATION.
Collected papers from scientific and
technical conferences, symposia,
seminars, or other meetings sponsored or
co-sponsored by NASA.
The NASA STI Program Office is operated by
Langley Research Center, the lead center for NASA’s
scientific and technical information. The NASA STI
Program Office provides access to the NASA STI
Database, the largest collection of aeronautical and
space science STI in the world. The Program Office
is also NASA’s institutional mechanism for
disseminating the results of its research and
development activities. These results are
published by NASA in the NASA STI Report
Series, which includes the following report
types:
• SPECIAL PUBLICATION. Scientific,
technical, or historical information from
NASA programs, projects, and missions,
often concerned with subjects having
substantial public interest.
• TECHNICAL PUBLICATION. Reports of
completed research or a major significant
phase of research that present the results
of NASA programs and include extensive
data or theoretical analysis. Includes compilations
of significant scientific and technical data and
information deemed to be of continuing reference
value. NASA counterpart of peer-reviewed formal
professional papers, but having less stringent
limitations on manuscript length and extent of
graphic presentations.
• TECHNICAL MEMORANDUM.
Scientific and technical findings that are
preliminary or of specialized interest,
e.g., quick release reports, working
papers, and bibliographies that contain
minimal annotation. Does not contain
extensive analysis.
• CONTRACTOR REPORT. Scientific and
technical findings by NASA-sponsored
contractors and grantees.
TECHNICAL TRANSLATION. Englishlanguage translations of foreign scientific
and technical material pertinent to
NASA’s mission.
Specialized services that complement the
STI Program Office’s diverse offerings include
creating custom thesauri, building customized
databases, organizing and publishing
research results . . . even providing videos.
For more information about the NASA STI
Program Office, see the following:
• Access the NASA STI Program Home
Page at http://www.sti.nasa.gov
• Email your question via the Internet to
[email protected]
• Fax your question to the NASA STI
Help Desk at (301) 621-0134
• Telephone the NASA STI Help Desk at
(301) 621-0390
• Write to:
NASA STI Help Desk
NASA Center for AeroSpace Information
7121 Standard Drive
Hanover, MD 21076-1320
NASA/TM-2002-211641
Videogrammetric Model Deformation
Measurement System User Manual
Harriett R. Dismond
Langley Research Center, Hampton, Virginia
National Aeronautics and
Space Administration
Langley Research Center
Hampton, Virginia 23681-2199
April 2002
The use of trademarks or names of manufacturers in this report is for accurate reporting and does not constitute an
official endorsement, either expressed or implied, of such products or manufacturers by the National Aeronautics and
Space Administration.
Available from:
NASA Center for AeroSpace Information (CASI)
7121 Standard Drive
Hanover, MD 21076-1320
(301) 621-0390
National Technical Information Service (NTIS)
5285 Port Royal Road
Springfield, VA 22161-2171
(703) 605-6000
Contents
Overview....................................................................................................................................1
Hardware ..................................................................................................................................1
Experimental Setup...................................................................................................................2
Camera...........................................................................................................................2
Connections ...................................................................................................................2
Trigger Connections......................................................................................................3
Software Setup ..........................................................................................................................4
Software Environment ..................................................................................................4
System Initialization......................................................................................................4
Data Directory Structure..........................................................................................................4
Operational Procedure: National Transonic Facility ..............................................................6
Camera Setup ................................................................................................................6
Lighting..........................................................................................................................6
Using the Computer for Lighting .................................................................................7
Using 4MIP................................................................................................................................7
Reducing Glints on the Wing....................................................................................................8
Area of Interest Boxes ...................................................................................................8
Black Wall .....................................................................................................................9
Painted Black Stripes ....................................................................................................9
MDef.exe....................................................................................................................................9
MDef Operation........................................................................................................... 10
Work Directory ....................................................................................................................... 10
Data Sub-directories.................................................................................................... 10
Data Acquisition Files ................................................................................................. 11
Image Adjustment................................................................................................................... 11
Targeting ................................................................................................................................. 12
Retro-reflective Targets .............................................................................................. 12
Painted Targets............................................................................................................ 12
Appendix A: Parameter Data File Sample............................................................................. 13
Appendix B: Target Painting Techniques.............................................................................. 16
References ............................................................................................................................... 19
Figures ..................................................................................................................................... 20
iii
The purpose of this guide is to provide the user of the NASA VMD system,
running the MDef software Version 1.10, all information required to operate the
system.
Overview
The NASA Videogrammetric Model Deformation (VMD) system consists of an
automated videogrammetric technique used to measure the change in wing twist
and bending under aerodynamic load in a wind tunnel. The basic instrumentation
consists of a single CCD video camera and a frame grabber interfaced to a
computer. The technique is based upon a single view photogrammetric
determination of two-dimensional coordinates of wing targets with fixed (and
known) third dimensional coordinate, namely the span-wise location. The
measurement technique has been used successfully at the National Transonic
Facility, the Transonic Dynamics Tunnel, the Unitary Plan Wind Tunnel, and the
16-FT Transonic Tunnel at NASA Langley Research Center and the 12-Ft
Subsonic Tunnel at NASA Ames Research Center. A major consideration in the
development of the measurement system was that productivity must not be
appreciably reduced. ( Reference 1.)
Hardware List:
•
•
•
•
•
•
Minimum: Pentium-based personal computer; 64 MB RAM; 500 MHz
processor; 30 GB hard disk; LS-120 disk drive or 100 MB zip drive; 40x CDROM; and a mouse.
Motherboard with two, adjacent, full-length card slots with no obstructions.
17-inch monitor.
EPIX Model 12 frame grabber board.
EPIX external cable bundle, model 1DB25.
4MIP Software, Ver. 3.0; 4MEG VIDEO – Image Acquisition, Display,
Processing, Analysis.
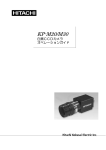
Note: For examples in this report a Hitachi CCD Camera, model KP-M1U with
pixel clock output for optimum performance was used (see fig. 001 Hitachi
CCD Camera-Side View). However, a video camera can be used without
pixel clock output at reduced performance.
•
•
•
•
•
•
Hitachi CCD Camera, model KP-M1U, with pixel clock output option.
Camera Junction Box with clock out (if using pixel clock lock option).
Hitachi mounting plate, model TA-M1(or equivalent).
Hitachi AC adapter, model AP-130U (or equivalent).
Hitachi camera cable, model C-501KS (or equivalent).
Fostec fiber optic light bundle, Part # A08051.40 (when using retro-reflective
targets only, when using polished paint targets [NTF] use existing test
section lighting).
1
•
•
•
•
Various lens sizes: 16mm, 25mm 35mm, 50mm and 75mm, 10-100 mm
zoom (fixed focal lengths are preferred for optimum performance if possible).
Two video monitors, (1) live-view direct from camera with loop through to
Epix frame grabber, and (2) output from Epix frame grabber.
4 BNC RG-59, 75 ohms cables.
1 BNC RG-59 cable connected to a contact closure.
Note: Other parts may be needed depending on the manner in which wind-tunnel
data is being sent to the VMD system (See “Trigger Connections”).
Experimental Setup:
Camera
The camera is mounted at an angle to the model and at a distance to adequately
frame the portion of interest of the model (usually 1 of the wings) to be
measured. The camera should also be positioned at an angle to the model
(typically around 30 degrees to the horizontal for horizontally mounted models) in
order to view all targets on the wing. The camera’s shutter should be ON with the
shutter speed set to the shortest exposure (usually 1/250 sec or shorter if the
lighting is adequate) that can be used at a moderate f-number. (Reference 2.)
For some dynamic applications with sufficient return from the targets, 1/10,000
sec exposure may be used to lessen image smear. The camera should be in
FIELD mode. Lens choice is determined by the proximity of the camera to the
model and the need to see all the targets on the model.
Connections
•
•
•
•
•
•
•
With the computer turned off, mount the EPIX Model-12 frame grabber
board into an ISA slot with enough room to accommodate the 2 board widths.
The EPIX external cable bundle is connected to the rear of the EPIX Model12 frame grabber board. (See fig. 002, EPIX bundle cable.)
Connect one end of the camera cable, (HR10A-10P-12S [01] for Hitachi KPM1U), to the camera output, DC IN/SYNC and the other end to the junction
box.
A BNC cable is connected to VIDEO OUT on the junction box and the other
end is connected to VIDEO IN on one of the video monitors; this is LIVE
video. (See fig. 003, Cable Junction Box-Hitachi Camera.)
Connect a BNC cable from VIDEO OUT of the live monitor to the EPIX
external cable bundle connection labeled VIDEO_IN.
Check that the connection to the monitors are properly terminated if not
automatically terminated. 75 ohms should be used for the last termination
and High Input impedance termination used if feed through loop is used.
Connect a BNC cable from the green-labeled EPIX connection from the
external cable bundle to the input of the second monitor sometimes labeled
“EPIX”.
2
•
•
•
•
•
•
From the junction box, connect one end of a BNC cable to CLOCK and the
other end to CLOCK_IN on the EPIX external cable bundle. (Skip this step if
using a video camera without pixel clock output.)
Connect the contact closure cable to EXT_IN on the EPIX external cable
bundle.
Connect the AC adapter’s DC cable to DC IN on the junction box. (See fig.
004, AC Converter-Hitachi Camera.)
Power-up (117V) the computer, monitors and the camera.
Select a lens focal length that will allow the targets on the model to fill the
camera view, allowing enough image space for movement of the model –
due to changes in angle of attack and wing bending - under test conditions,
while keeping the all targets within about 80% of the field of view.
Re-position the camera as necessary for optimum viewing with
consideration for the angle of attack range and anticipated sting and wing
bending.
Trigger Connection
The EPIX card has a trigger input connection labeled (EXT_IN) on the cable
bundle that can be used to trigger data taking. The trigger is a TTL level high to
low transition. The EXT_IN floats high (~5V) and a simple short to ground (0Vcontact closure) is needed to trigger the signal.
An alternative method of triggering the system is via a network connection to the
Data Acquisition System (DAS) in the facility where the test is conducted. A
network connection requires the computer to have an Ethernet card installed,
network address to be assigned, and the network port that is to be monitored.
When MDef is started with the proper command-line options, it will establish a
network connection with the DAS; MDef will then pole the DAS several times a
second to determine when to take data. (Reference 3.)
3
Software Setup:
Software Environment
Windows 98/2000 is the primary operating system of the computer.
The primary software application used to acquire model deformation
measurements is MDef Ver. 1.10. The secondary software applications used are
EPIX 4MIP Ver. 3.0 and MatLab Ver. 5.3 (or later). It is also suggested that a text
editor, such as TEXTPAD be installed.
System Initialization
Windows 98/2000 provides a login requirement to operate the computer. The
user should login as “mdef”.
Windows Icons: Essential test software programs and test files can be accessed
with short-cut icons on the desktop. They are:
•
•
•
•
•
•
MDef: The Model Deformation program.
4MIP: The Image Acquisition, Display, Processing and Analysis program.
MATLAB 5.3 (or higher).
Param.dat: The configuration file for MDef.
Tunnel.log: Tunnel data acquired through DAS for each point taken.
Test Directory Folder: Windows file structure of test sub-directories and
files.
Icons are created by right-clicking on an application or file. Select Send To
then select Desktop (Create Shortcut). Right click on the icon and select
Properties Shortcut (if not the default). For files such as param.dat and
tunnel.log, verify in the Target field that the Notepad application is indicated
as the source to open the file. For example, the Target field should be set as:
Notepad\C:\Facility\NTF\T119.777. The paths for the icons Target field
should match the current test’s work directory. For software applications,
the Target field should indicate the current test directory.
Data Directory Structure:
All directory data setup files and acquisition files are located in the FACILITY
directory. Directories are named after the facility where the test is being
conducted. Test (or work) directories are created in the appropriate facility
directory. (Reference 3.)
For example, for a 777 model tested at the National Transonic Facility, the test
number was 119, therefore, the work directory would be:
C:\FACILITY\NTF\T119.777
4
At the beginning of a test, the user must set the path directory for all associated
files. This is done in the Windows directory.
• Open Windows Explorer.
• On the c:\ drive, go to the Windows directory.
• Scroll down to file “mdef_dir.bat”. Double click on the file.
• Edit the two lines in the file to reflect the test name of the current test. For
example, the test name lines would be:
ECHO. C:\Facility\NTF\T119.777 and
CD C:\Facility\NTF\T119.777.
•
Go to File, select Save, then Exit file.
The necessary files are:
•
•
•
•
•
MDef.exe
The main VMD program
Param.dat
The test configuration file
FlapAngl.ini
Flap and wing angle configuration file
Polydat.ini
Target locations, eta, are entered here; user created file
Loadsensitivity.ini Load values of each target row station; user created file.
Values are customer generated.
The user created files can be copied from the previous test and edited for the
current test.
The miscellaneous files are:
• GetFile.bat The file used to obtain the wind tunnel data when a socket
connection is not used
• For-A.exe Reads a stream of RS-232 data and uses it to create a copy of
Video.dat
• For-A.ini Configuration file used by For-A.exe
• MDef.send A sample script file used by the DAS to format and send data to
MDef via a socket connection
• ReRun.exe Re-processes the target data using a modified copy of
Param.dat
• ReDoFlap.exe Re-processes the Flap-Angle data (FlapAngl.txt) using a
modified copy of FlapAngl.ini
The subdirectories associated with the test directory are:
CENTROID\
Centroid data files are saved here in the format, Centxxxx or
Cerrxxxx, where the Cerr files are files with an insufficient
number of targets to allow automatic sorting
5
IMAGES\
RAW and TIFF image files are saved here
XYZ\
XYZ data files are saved here in the format, XYZxxxx
ZSLP\
Z-intercept/Slope files are saved here in the format, ZSLPxxxx
The above are output files used only when the proper number of targets are
found and data is written.
Other subdirectories associated are:
BACKUP\
After a series of test runs are completed, data is saved here
CALIBRAT\
Camera calibration and configuration is determined in this
subdirectory
DISTORT\
Camera distortion values are determined in this subdirectory
Operational Procedure: National Transonic Facility (NTF)
Camera Set-up
In the NTF, the camera is used with a 10 - 100mm Rainbow zoom lens, (see fig.
005, Rainbow Zoom Lens, 10 – 10mm with Control Box). If the area of interest to
be measured is on the far-side (right) wing, camera port 55 is generally used. If
the area of interest is on the near-side (left) wing, camera port 17 is generally
used. (See fig. 006, Test Section Video Configuration drawing). Adjust the
camera position and the zoom lens for optimum viewing of the wing to be
measured so that all the targets remain in the field-of-view of the camera during a
pitch sweep over the maximum excursion expected. The camera is positioned
manually (in its housing) and the zoom is adjusted from the control room. During
setup at room temperature, allow for model displacement in the flow direction of
up to 1 inch due to contraction at very low temperatures.
Lighting
Open the camera iris just enough to see the targets.
To set lighting in the NTF, first turn off all of the lights from the light control panel.
The panel must be in “local” mode. Then, beginning with light number 3, increase
the pot setting for each light, one-at-a-time, to determine which lights (and at
what pot settings) best illuminate the targets for maximum contrast while at the
same time minimizing extraneous glints. (In past tests, lights 3 and 11 have been
the primary lights.) The lights can be adjusted until optimum lighting is achieved
in an iterative manner, (see fig. 007, targets as they appear during testing). This
can be a very tedious and time-consuming effort, often requiring a few hours or
so. When the light settings have been established, request a wind-off pitch
sweep to check for glints that may interfere with accurate data acquisition at
certain angles. Adjust the lighting as needed to minimize the glints that may
occur at some angles. Note: In the NTF, glints on the wing surface are difficult to
completely eliminate. Therefore, other methods have been developed (e.g., area
of interest boxes) to help obtain robust data acquisition.
6
Using the Computer for Lighting
• The lights can also be set using the computer.
• Set the light control panel to computer mode.
• Select server 10 on the server router.
• On the computer, Video Set-up Deck, select Lighting.
• From the File menu, select Open Log File, then, select Lighting.
• From the pull-down menu, select mdef. The light control window will be
displayed.
• For first time lighting set-ups, the user should select All On from the bottom
left-hand corner of the screen.
• Begin adjusting the light settings, as stated above in local mode, by moving the
slider bars associated with each light.
• When complete, from File menu, select Save log file, then select Lighting.
• Enter a filename and then click OK.
• Use the slider bar to adjust the lighting as needed once initial set-up is
complete.
If the user finds that slightly different light settings are needed for different tunnel
testing conditions (i.e., cryogenic vs. heat), filenames can be given to each
condition and recalled as appropriate.
Using 4MIP:
4MIP is an EPIX software program that performs image acquisition, display,
processing and analysis. In 4MIP the user can determine target size and
threshold. Once these values are found, they then can be entered in the
parameter data file (param.dat).
To validate the light settings, run the software program 4MIP (4MIP Locked if
using the pixel clock locked at ~14.318 MHz) from the Windows Desktop. The
4MIP software can aid in determining contrast between the targets and
background.
• On the main menu page, open the EXAMINE menu, click PIXEL PEEK, POKE
& PLOT.
• Click PIXEL PEEK, X – Y.
• Press SHIFT + F1 to obtain a live image of the model.
• Right-click and hold mouse button to place the cursor on the center of a target
(or blob). Targets are indicated by high pixel values. (See fig. 008,
4mip_ppp.bmp).
7
• Count the pixel width, in x-direction, and pixel height, in y-direction to estimate
the target/blob size. For example, in fig. 008 , the pixel width, x, of the blob would
be about 11 pixels and the pixel height, y, of the blob would be about 9 pixels.
• Exit (press the Delete key) PIXEL PEEK, X – Y.
• Click on PIXEL PLOT LINE, X.
• Position the cursor (right-click on the mouse) so that the x-axis line is over a
row of targets. (See fig. 009, 4mip_plotlinex.bmp) The objective here is to
determine a threshold value of about 50 percent between the maximum average
pixel value of all of the targets in that row and the background. Subtract the
background pixel value from the targets’ maximum average pixel value, divide
the result by two, and add the result to the background level to establish a
starting threshold. It should be noted here that if a target in a particular row has a
pixel value much lower than the other targets, a separate threshold can be set for
that target. Creating an “area of interest box” (discussed below) around the target
allows for this.
• Exit the EXAMINE menu (press Delete key twice).
• On the main menu page, open the MEASURE menu, click on BLOB
ANALYSIS.
• Set the Threshold Level to 100 (or starting threshold level found above).
• Set the Max Width, X to 15 (four pixels greater than size found in PIXEL
PEEK, X – Y).
• Set the Max Height, Y to 13 (four pixels greater than size found in PIXEL
PEEK, X – Y). Min Width, X and Min Height, Y are set at the default 3 which is
adequate for this example, but may be increased to about 4 pixels less than the
target X and Y size if small glints are present in the regions of interest.
• Move cursor to highlight Blob Search as per Constraints, Light Blobs and
<Enter>.
• Check the RESULTS of the analysis by observing Number of Blobs and
Number of Bad Blobs. The number of blobs found in Number of Blobs should
equal the number of targets and be located at each target. If the results indicate
there are any Bad Blobs, adjustments can be made to Threshold Level, Max
Width, X and/or Max Height, Y. Before re-executing Blob Search as per
Constraints, Light Blobs, press SHIFT + F1 to get a Live image.
• If no bad blobs are found, the Threshold Level and Search values for X and Y
can be entered into the Param.dat file. (Reference 3.)
Reducing glints on the wing:
Area of interest boxes
When glints on the wing cannot be completely eliminated by adjusting the lights,
MDef will allow areas of interest to be defined around the targets. (See fig. 010
Targets with area of interest boxes).
In the parameter data file (param.dat) are entries for northwest-x, northwest-y
(nw.x, nw.y) and southeast-x, southeast-y (se.x, se.y) coordinates. (See
8
Appendix A parameter data file). These coordinates are determined by using the
752 by 240 viewing area, where (0,0) is the upper-left corner of the viewing area
and (752,240) is the lower-right corner of the viewing area.
From fig. 010, targets with area of interest boxes, the user can see that the
model has five areas of interest regions. Each region is numbered in the upper
left corner of the box. The size of each box is determined by the movement the
targets on the model make through the angle-of-attack range.
Using area of interest box 1 as an example, the nw.x, nw.y coordinate is (27,8)
and the se.x, se.y coordinate is (228, 119). When these boundaries are entered
and saved, a white box is then drawn around the targets. Also, a threshold value
can be entered at the beginning of this row in param.dat for this particular
region.
If the user finds that one target within a row of targets requires a much lower
threshold, that target can be given its own area of interest region and threshold
value as is the case with targets 11 and 12 in area of interest regions 4 and 5,
respectively.
Black wall
Another method to reduce glints on the wing is to paint both tunnel walls flat
black. The NTF normally tests highly polished steel models. When painted flat
black, the tunnel walls reflect black from the polished steel. This creates a higher
contrast between the model and the white targets. (See fig. 011,
T111_cal07.jpg).
Painted black stripes
Painted black stripes may also be incorporated in the painted-target method to
help reduce glinting near the targets, especially for semi-span models. The black
stripes are painted in the flow direction of the wing.
This procedure should be discussed with the lead aerodynamicist prior to testing.
The resulting black stripes surface roughness should not exceed 10 microinches, as measured with a surface profilometer. The thickness of the paint
should not exceed 0.0005 inch (0.5 mil) as measured with a paint thickness
gauge. See Appendix B, Target Painting Procedure Using Black
Stripes.
MDef.exe:
The primary means of image capture and target measurement is the software
package MDef.exe or MDef, written as an MS-DOS application for use with the
EPIX Model-12 video capture card. MDef.exe can capture images in the EPIX
9
card’s memory, locate light or dark targets (a.k.a. blobs) within the images, and
compute the XZ coordinates for each target. When enabled, MDef can also
compute the amount of twist along specified rows of targets. (Reference 3.)
MDef Operation
Fig. 012 shows the MDef program window in the Flap-Angle display. The Flapangle mode runs when the first line in Param.dat is negative.
Fig. 013 shows the MDef program window in the Zintslpe display. There is no
negative sign at the first line in Param.dat.
The MDef program can be executed from the Windows Desktop icon.
Prior to data acquisition, the MDef operator should request a wind-off polar
sweep of the model from the tunnel operators, to ensure that the external trigger
or DAS trigger is operational and that all targets are found and successfully
numbered over the angle of attack range of the model.
Press “B” (Box test) to sample and process an image without writing to any of
the appended files. Boxes will be drawn around regions of interest and targets
and the regions will be numbered.
Press “T” to manually Trigger data acquisition. The image will be processed and
data will be written to the appended files. The appended files are:
•Tunnel.log
•Log.dat
•ZintSlpe
•XYZmean.dat
Separate files written for each point (xxxx) are:
•
•
•
Centxxxx or Cerrxxxx
XYZxxxx
ZSLPxxxx
Work Directory:
The work (or test) directory is where all test data is acquired and processed.
Data Sub-Directories
When the VMD code is executed, sub-directories save and append the output
files, but only when data is to be written. The directories that MDef uses are:
10
•
•
•
•
Centroid\
XYZ\
ZSLP\
Images\
Data Acquisition Files
When the VMD system is triggered, MDef creates several output files.
•
•
Tunnel.log
Blobs.dat.
Within the Centroid sub-directory are two file types:
•
Cent
valid rows of targets containing proper number of targets (ex.
Cent0015).
• Cerr
invalid rows of targets that do not contain proper number of targets
(ex.Cerr0015).
Computations are made using valid centroid locations to determine the X
and Z locations of the targets in 2-dimensional space at each semispan location
where a row of targets resides. The results are then written to a XYZ-type file in
the XYZ sub-directory. The averaged X, Y and Z values for all fields are written to
the xyzmean.dat file in the work directory. The slope (angle-of-attack) of each
row is calculated, along with the Z-axis displacement and the standard deviation
values, and written to the zintslpe file.
Image Adjustment:
If some or any of the targets are not found, adjustments can be made by quitting
(Q) MDef and opening the param.dat file icon. Adjustments can be made to:
•
•
•
Target threshold: Gray-scale level for detecting targets.
Target size, min- and max-x and y: The maximum and minimum sizes for
the targets within each search region. If the entire image is used as a single
region, the first set of these values is used as the default.
Region threshold: The threshold value for a search region (region of
interest) within an image. A positive value here overrides the default
threshold. A negative value marks the end of the search region information
within this table. The number of consecutive positive threshold values
determine the number of regions.
Appendix A is an example of param.dat file.
Save and exit param.dat and return to MDef.exe. Do a ‘B’ test for validation.
11
Threshold adjustments can also be done within the MDef environment. The
function key F1 can be used to pull up a scrollable help screen. ALT-L will allow
the operator to change the LUX (threshold) setting for any region.
Note: If the camera is moved anytime after calibration, another calibration
must be done if the camera cannot be reset to near its original setting so
that the current image overlays an old image at the same angle of attack
with wind off.
Targeting:
Circular retro-reflective or white polish-painted targets are used to measure
deformation. The target size is dependant on the area to be measured and fieldof-view.
Targets must be placed on the wing at the semi-span locations where change in
wing twist and bending are required. The Y-coordinates of the targets in the
span-wise direction are determined from pressure tap and other reference
locations on the wing to be used in the computation of X in the stream-wise and
Z in the vertical direction. High contrast targets are required on the wing in order
for the image processing routines to automatically locate the targets reliably,
without ambiguity and with no user interaction.
Retro-reflective Targets
Retro-reflective tape targets are ideal for achieving a high contrast image. They
are best suited for facilities where aerodynamic considerations will tolerate their
thickness (0.004 inch). This is achieved by closing the aperture of the camera
lens until the background with tunnel lighting is minimized and then increasing
the variable light source placed near the camera until the desired threshold is
achieved.
Retro-reflective targets are made using 3M brand retro-reflective tape, series
7610. The targets are produced using a punch set with sizes from one-eight inch
to three-quarter inch punches. The tape targets are then placed on the model in
the pre-determined span-wise locations.
Painted Targets
Polished painted targets are used when the tunnel environment will not allow the
use of retro-reflective tape targets (i.e., locating a light source sufficiently close to
the camera is not possible or application of the 4 mil thick targets may
undesirably affect the aerodynamics).
Polished painted targets require more time and preparation than retro-reflective
tape targets (up to 1 shift). Target templates are punched in strips of foil tape and
12
another tape medium (such as mailing labels) to create a slightly raised target.
The paint (actually a mixture of primer and paint activator) is applied with a paint
sprayer, which requires the use of proper ventilation. A minimum of two hours is
needed to allow the paint to completely dry and then to wet sand the targets. (For
complete details, see “Target Painting Procedure” in Appendix B. The finished
surface roughness of painted targets, measured with a surface profilometer,
should not exceed 10 micro-inches. The thickness of the targets should not
exceed 0.0005 inch (0.5 mil) as measured with a paint thickness gauge.
Appendix A
Parameter Data (Param.dat) File
1
2
3
4
5
6
7
8
9
10
11
12
13
14
15
16
17
18
19
20
21
22
23
24
25
26
27
28
29
30
31
32
33
34
35
36
37
38
39
40
41
42
43
44
-7595
Tab Point
|NTF Test 119 777 Full-Span
752
Horizontal pixels ( Must be divisible by four, Max=752 )
0
Horizontal offset ( -1 to center )
240
Vertical pixels
( Max = 240, 480 if interlace On )
0
Vertical offset
( -1 to center )
0.02600000
Vertical
pixel spacing of camera in mm
0.01098698
Horizontal pixel spacing of camera in mm
354.83
Pixel x principal point ( To be measured during cal )
107.39 Pixel y principal point
"
"
354.83 Pixel x symmetry point ( Measured by zoom symmetry on image )
107.39 Pixel y symmetry point
"
"
5.962e-004
k1 3rd order radial distortion mm^-2
( Put K2,K3,P1 & P2 after this
line if needed )
4.168e-005
k2 5th order radial distortion mm^-4
0.000e+000
k3 7th order radial distortion mm^-6
-3.724e-004
p1 1st de-centering term mm^-1
4.984e-004
p2 2nd de-centering term mm^-1
1.0000000
Unitless sh_ratio locked/unlocked
0.00
Pixel x shift unlocked to locked
0.00
Pixel y shift unlocked to locked
0
Delta_x ( how much to increase the box over min of 4 )
1
Delta_y ( how much to increase the box over min of 2 )
26.3269
Camera constant c in mm
61.57981992730000
Deg omega
-2.79960458070000
Deg phi
-90.77486139849999
Deg kappa
-8.43687491760000
Inch Xc
-55.19514700000000
Inch Yc
34.47654654810000
Inch Zc
1
White-on-black
( 0 = Dark targets, else Light )
12
Minimum_blob_mass
-4
Fields delay ( if <= 0 get tunnel data AFTER scanning for blobs )
109
Target threshold
( difference for White-on-black )
60
Maximum buffers to process ( 0 to let it compute number )
7
Skip buffer offset
( 0 to process every buffer )
0
Row orientation ( <0 = No sort, 0 = vertical, else horizontal )
6
Number of rows of targets ( See: f12atv.cal in plates directory )
ROW 1 INFORMATION
2
Number of targets on Row 1
0.9910 Y/b/2
(Row 1)
0.0000 Z ref offset (Row 1) z_int = (intercept - zref) * zref_slope
0.0000 AOA ref offset
(Row 1) angle = (aoa - aoaref) * aoaref_slope
1.0000 Z ref slope
(Row 1)
1.0000 AOA ref slope (Row 1)
1.0000 Ref Point
(Row 1) (x.y -> .y after point x)
ROW 2 INFORMATION
2
Number of targets on Row 2
0.8780 Y/b/2
(Row 2)
0.0000 Z ref offset
(Row 2)
0.0000
AOA ref offset
(Row 2)
1.0000
Z ref slope
(Row 2)
13
45
46
1.0000
AOA ref slope (Row 2)
1.0000
Ref Point
(Row 2) (x.y
ROW 3 INFORMATION
2
Number of targets on Row 3
0.7690 Y/b/2
(Row 3)
0.0000 Z ref offset (Row 3)
0.0000 AOA ref offset
(Row 3)
1.0000 Z ref slope
(Row 3)
1.0000
AOA ref slope (Row 3)
1.0000 Ref Point
(Row 3) (x.y
ROW 4 INFORMATION
2
Number of targets on Row 4
0.6190 Y/b/2
(Row 4)
0.0000 Z ref offset (Row 4)
0.0000 AOA ref offset
(Row 4)
1.0000 Z ref slope
(Row 4)
1.0000 AOA ref slope (Row 4)
1.0000 Ref Point
(Row 4) (x.y
ROW 5 INFORMATION
2
Number of targets on Row 5
0.3500 Y/b/2
(Row 5)
0.0000 Z ref offset (Row 5)
0.0000 AOA ref offset
(Row 5)
1.0000 Z ref slope
(Row 5)
1.0000 AOA ref slope (Row 5)
1.0000 Ref Point
(Row 5) (x.y
ROW 6 INFORMATION
2
Number of targets on Row 6
-0.0470 Y/b/2
(Row 6)
0.0000 Z ref offset (Row 6)
0.0000 AOA ref offset
(Row 6)
1.0000 Z ref slope
(Row 6)
1.0000 AOA ref slope (Row 6)
1.0000 Ref Point
(Row 6) (x.y
Thres nw.x nw.y minx miny maxx maxy
90
27
8
3
2
12
10
Z
Mtar se.x se.y
0.00000
6
228 119
-> .y after point x)
-> .y after point x)
-> .y after point x)
-> .y after point x)
-> .y after point x)
yref[]
Light bac_sub add_sub
31.65600
0
1
1
X
0.00000
Description of Parameter Data File
Line 1
Tab point: Used as a starting value for the point numbers when either Video.dat
or a socket connection is not available. A negative point number indicates that
flap-angle computations are to be solved, otherwise, MDef defaults to a Zintslpe
display.
Line 2
Horizontal pixels: The image dimensions used by the Epix card, normally 752 X
240 for non-interlaced images. If a full image is not desired, the horizontal
and vertical offsets, in pixels, of the portion of the image to capture is given
on lines 3 and 5, respectively.
Line 3
Horizontal offset: Normally 0; use –1 to center the captured region on the
screen.
Line 4
Vertical pixels: Maximum pixels is 240 in non-interlace; if interlace ON, then
480 is maximum pixels.
Line 5
Vertical offset: Normally 0; use –1 to center the captured region on the screen.
Line 6
Vertical pixel spacing: The spacing of the camera’s pixel, in millimeters. For
the Hitachi KP-M1U CCD camera, the vertical spacing is approximately 0.026 mm.
Line 7
Horizontal pixel spacing: For the Hitachi KP M1U
spacing is approximately 0.011 mm.
Line 8
Pixel x principal point: Measured during distortion process.
Line 9
Pixel y principal point: Measured during distortion process.
Line 10
Pixel x symmetry point: Measured by zoom symmetry on image.
CCD camera, the horizontal
14
Line 11
Pixel y symmetry point: Measured by zoom symmetry on image.
Line 12
k1 3rd order radial distortion, mm^-2: Measured during the distortion process.
Line 13
k2 5th order radial distortion, mm^-4: Measured during the distortion process.
Line 14
k3 7th order radial distortion, mm^-6: Measured during the distortion process.
Line 15
p1 1st de-centering term, mm^-1: Measured during the distortion process.
Line 16
p2 2nd de-centering term, mm^-1: Measured during the distortion process.
Line 17
Unitless sh_ratio: Measured during the distortion process.
Line 18
Pixel x shift: Determined in the distortion process.
Line 19
Pixel y shift: Determined in the distortion process.
Line 20
Delta_x: How much to increase the target bounding box over the default minimum
4.
Line 21
Delta_y: How much to increase the target bounding box over the default minimum
2.
Line 22
Camera constant: Measured in the calibration process, measured in mm.
Line 23
Deg omega: The camera’s rotation (orientation) about the x-axis within the wind
tunnel.
Line 24
Deg phi: The camera’s rotation about the y-axis within the wind tunnel.
Line 25
Deg kappa: The camera’s rotation about the z-axis within the wind tunnel.
Line 26
Inch Xc: The camera’s position in relation to the model, in inches, along the
air flow axis.
Line 27
Inch Yc: The camera’s horizontal position in relation to the model, in inches.
Line 28
Inch Zc: The camera’s height in relation to the model, in inches.
Line 29
White-on-black: 0 = Dart targets on light background, else, light targets on
dark background.
Line 30
Minimum_blob_mass: The minimum number of pixels in a valid target.
Line 31
Fields delay: If <= 0 tunnel data is acquired AFTER scanning for blobs.
Line 32
Target threshold: Gray-scale level for detecting targets.
Line 33
Maximum buffers to process: If set to 0, then MDef computes this value based on
the image size and the size of the Epix card’s memory.
Line 34
Skip buffer offset: When set to 0, MDef processes every buffer; a value of 5,
for example, processes the fields in the sequence: 1, 7, 13, etc.
Line 35
Row orientation: If <0, MDef sorts the targets as horizontal rows; If set to 0,
MDef sorts the targets as vertical rows.
Line 36
Number of rows of targets: The targets are aligned as rows parallel to the
model’s center of axis. This is the number of rows for sorting, etc.
Line 37
Row 1: Start of the information describing the target row.
Line 38
Number of targets on Row 1: Actual number of targets for this row.
Line 39
Y/b/2: The normalized semi span offset.
Line 40
z ref offset:
Line 41
AOA ref offset:
15
Line 42
Z ref slope:
Line 43
AOA ref slope:
Line 44
Ref point: Point within a row to use to determine z_int; can be a fraction to
specify a position between two targets.
Line 45
Header line specifying information when search region(s) are used. If the first
threshold value below is set to a negative value, then the threshold value on
line 32 will be used. Columns 4, 5, 6, 7, and 8 on the first line of
information, are always used to describe target size and location.
Column 1
Thres: The threshold value for a search region or “region of
interest” within an image. A positive threshold value would utilize
the threshold value on line 32.
Column 2, 3
nw.x, nw.y: The area of interest boundaries, in pixels, for a
search region within an image. Nw.x and nw.y designate the upperleft boundary.
Column 4,5,6,7
minx, miny, maxx, maxy: The maximum and minimum sizes for the
targets within each search region. If the entire image is used as a
single region, the first line values are used as the default.
Column 8
y-ref: Y-reference value. This value is the distance of each target
from the centerline of the model, in inches. Each target’s y-ref is
indicated.
Column 9
compl: This value determines if the pixels within the rectangle
bounding a target are to be complemented.
Column 10
bac_sub: This value indicates if the background is to be subtracted
from every pixel in the target rectangle.
Column 11
add_sub: An additional value to subtract from the pixels in the
target rectangle.
Column 12
X: The target’s x-reference value, in inches.
Column 13
Z: The target’s z-reference value, in inches.
Column 14
Mtar: The maximum number of targets to be found in a particular
search region. When this number is reached, MDef begins searching
for targets in the next region.
Column 15,16
right boundary.
se.x, se.y: The location, in pixels, for a search region within an image. Se.x, se.y designate the lower-
Appendix B
Target Painting Techniques
White Targets:
1.
2.
3.
4.
5.
6.
Shake primer for about 10 minutes in paint shaker.
Fill 4oz. mixing jar about half-full with black primer.
Fill remainder of mixing jar with activator.
Shake mixture well. (Note: Primer settles quickly, shake mixture often.)
Strain paint mixture into sprayer, filling half full.
Attach sprayer to air hose.
16
7.
8.
9.
10.
11.
12.
13.
14.
15.
Turn on air
Adjust pressure on sprayer to 20 – 25 psi. Air pressure on hose should be
set at 40 – 45 psi.
Adjust spray stream on sprayer to medium-wide dispersion.
Spray paint over template(s) using sweeping motion.
Allow paint to dry about 10 minutes. Remove masking.
Dry paint with heat lamps for 1 hour.
Allow model to cool to room temperature.
Wet-sand targets using 1000 – 2000 grit sand paper.
Targets should be sanded down to within 0.5 – 1.0 mil in height.
Clean-Up
Use paint thinner to clean sprayer jar. Spray thinner through sprayer to clean
nozzle.
Lay-out Procedure
Note: Templates will be made based on target-lay information from
researcher.
1. Punch holes in sheeting or 2-in. copper foil tape at least 1/8-in. larger than
actual size of targets. Punch actual target-sized holes in another medium,
i.e., labels (do not remove backing).
2. Lay copper template on model on pre-designated target locations. Tape
down.
3. Lay label cut-outs over copper cut-outs. Tape down.
4. Mask off rest of model.
5. Spray on targets.
6. Allow to air dry about 10 minutes before removing masking.
7. Dry under heat lamps for 1 hour.
8. Allow model to cool to room temperature.
9. Wet-sand targets to within 0.5 – 1.0 mil in height.
Materials
1.
2.
3.
4.
5.
6.
7.
8.
9.
10.
3M 1000, 1500, 2000 grit sand paper.
Thin copper sheeting or 2-in. copper metallic tape.
Hole punch set.
1-in. masking tape.
1-inch feathering tape.
DuPont Prime n Seal, #2610S-white; Prime n Seal, #2690S-black; Prime-nseal, #2675-activator and; Acrylic Lacquer Thinner, #3602S.
Tack cloth.
Paper towels.
Nitrile synthetic co-polymer gloves or equivalent.
Masking paper.
17
Black Stripes with White Targets:
1.
2.
3.
4.
5.
6.
7.
8.
9.
10.
11.
12.
13.
14
15.
Shake primer for about 10 minutes in paint shaker.
Fill 4oz. mixing jar about half-full with black primer.
Fill remainder of mixing jar with activator.
Shake mixture well. (Note: Primer settles quickly, shake mixture often.)
Strain paint mixture into sprayer, filling half full.
Attach sprayer to air hose.
Turn on air
Adjust pressure on sprayer to 20 – 25 psi. Air pressure on hose should be
set at 40 – 45 psi.
Adjust spray stream on sprayer to medium-wide dispersion.
Spray paint over template(s) using sweeping motion.
Allow paint to dry about 10 minutes. Remove masking.
Dry paint with heat lamps for 1 hour.
Allow model to cool to room temperature.
Wet-sand targets using 1000 – 2000 grit sand paper.
Targets should be sanded down to within 0.5 – 1.0 mil in height.
Clean-Up
Use paint thinner to clean sprayer jar. Spray thinner through sprayer to clean
nozzle.
Lay-out Procedure
Note: Templates will be made based on target lay-out information from
researcher.
1. Using 1-in. feathering masking tape, lay-out areas to be painted black.
2. Mask-off rest of model.
3. Using thin copper sheeting, cut-out templates the length and width of black
stripes.
4. Punch holes in sheeting at least 1/8-in. larger than actual size of targets.
Punch actual target-sized holes in another medium, i.e., labels (do not
remove backing).
5. Spray paint black stripes. Allow to air dry 10 minutes; remove masking.
6. Dry under heat lamps for 1 hour.
7. Allow model to cool to room temperature.
8. Ready sprayer for white paint using above mixing procedure.
9. Lay copper sheeting template over black stripes. Tape down.
10. Lay target sized templates over holes in copper sheeting. Tape down. Mask
off rest of model.
11. Spray on white targets.
12. Allow to air dry about 10 minutes before removing masking.
13. Dry under heat lamps for 1 hour.
18
14. Allow model to cool to room temperature.
15. Wet-sand targets to within 0.5 – 1.0 mil in height.
Materials
1.
2.
3.
4.
5.
6.
7.
8.
9.
10.
3M 1000, 1500, 2000 grit sand paper.
Thin copper sheeting or 2-in. copper metallic tape.
Hole punch set.
1-in. masking tape.
1-inch feathering tape.
DuPont Prime n Seal, #2610S-white; Prime n Seal, #2690S-black; Prime n
Seal, #2675-activator and; Acrylic Lacquer Thinner, #3602S.
Tack cloth.
Paper towels.
Nitrile synthetic co-polymer gloves or equivalent.
Masking paper.
References:
Reference 1.
Journal of Aircraft, vol. 38, No. 4, July – August 2001, pp. 745-754.
Reference 2.
Hitachi Denshi, Ltd., Operation Manual Hitachi KP-M1U Black & White CCD
Camera, “How To Use Electronic Shutter”, p. 11.
Reference 3.
Cate, Kenneth H.: Videogrammetric Model Deformation Measurement Software
Package, Reference Manual for MDef.exe. NASA TM-2001-210554, 2001.
19
Figure 1. Hitachi CCD Camera-Side View.
Figure 2. Epix Bundle Cable.
Figure 3. Cable Junction Box for Hitachi Camera.
20
Figure 4. AC Converter for Hitachi Camera.
Figure 5. Rainbow Zoom Lens, 10 – 100mm with
Control Box.
21
Figure 6. NTF Test Section Video
Configuration.
Figure 7. Targets as they appear during test.
22
Figure 8. 4MIP, Pixel Peek, X –Y.
Figure 9. 4MIP, Pixel Plot Line, X.
Figure 10. Targets with area of interest boxes.
23
Figure 11. Tunnel wall painted flat black for contrast.
Figure 12. Mdef in Flap-Angle display mode.
24
Figure 13. Mdef in Zintslpe display mode.
25
Form Approved
OMB No. 0704-0188
REPORT DOCUMENTATION PAGE
Public reporting burden for this collection of information is estimated to average 1 hour per response, including the time for reviewing instructions, searching existing data sources,
gathering and maintaining the data needed, and completing and reviewing the collection of information. Send comments regarding this burden estimate or any other aspect of this
collection of information, including suggestions for reducing this burden, to Washington Headquarters Services, Directorate for Information Operations and Reports, 1215 Jefferson
Davis Highway, Suite 1204, Arlington, VA 22202-4302, and to the Office of Management and Budget, Paperwork Reduction Project (0704-0188), Washington, DC 20503.
1. AGENCY USE ONLY (Leave blank) 2. REPORT DATE
April 2002
3. REPORT TYPE AND DATES COVERED
Technical Memorandum
4. TITLE AND SUBTITLE
5. FUNDING NUMBERS
Videogrammetric Model Deformation Measurement System User's Manual
706-31-31-80
6. AUTHOR(S)
Harriett R. Dismond
7. PERFORMING ORGANIZATION NAME(S) AND ADDRESS(ES)
8. PERFORMING ORGANIZATION
REPORT NUMBER
NASA Langley Research Center
Hampton, VA 23681-2199
L-18170
9. SPONSORING/MONITORING AGENCY NAME(S) AND ADDRESS(ES)
10. SPONSORING/MONITORING
AGENCY REPORT NUMBER
National Aeronautics and Space Administration
Washington, DC 20546-0001
NASA/TM-2002-211641
11. SUPPLEMENTARY NOTES
12a. DISTRIBUTION/AVAILABILITY STATEMENT
12b. DISTRIBUTION CODE
Unclassified–Unlimited
Subject Category 09
Distribution: Nonstandard
Availability: NASA CASI (301) 621-0390
13. ABSTRACT (Maximum 200 words)
The purpose of this manual is to provide the user of the NASA VMD system, running the MDef software, Version
1.10, all information required to operate the system. The NASA Videogrammetric Model Deformation system consists of an automated videogrammetric technique used to measure the change in wing twist and bending under
aerodynamic load in a wind tunnel. The basic instrumentation consists of a single CCD video camera and a frame
grabber interfaced to a computer. The technique is based upon a single view photogrammetric determination of
two-dimensional coordinates of wing targets with fixed (and known) third dimensional coordinate, namely the
span-wise location. The major consideration in the development of the measurement system was that productivity
must not be appreciably reduced.
14. SUBJECT TERMS
15. NUMBER OF PAGES
Model deformation; wing twist; flap angle; z-interslope
31
16. PRICE CODE
17. SECURITY CLASSIFICATION
OF REPORT
Unclassified
NSN 7540-01-280-5500
18. SECURITY CLASSIFICATION
OF THIS PAGE
Unclassified
19. SECURITY CLASSIFICATION
OF ABSTRACT
Unclassified
20. LIMITATION
OF ABSTRACT
UL
Standard Form 298 (Rev. 2-89)
Prescribed by ANSI Std. Z39-18
298-102