1
Nexacro Platform 14 / Getting Started
Tutorial
14.0.0.700
14.0.0.700
Nexacro Platform 14 / Getting Started
Tutorial
TOBESOFT
TOBESOFT strives to maintain the accuracy of information provided in this document and will
consistently modify and supplement it. However, we cannot guarantee accuracy of information in this
document. TOBESOFT assumes no responsibility for errors and omissions. No liability is assumed
for damages resulting from the use of information contained herein.
Users of this document implicitly agree that they understand the contents of this disclaimer.
Each trademark herein, including the product name of each company, is a solely registered
trademark of each company who developed it, and is protected by patent laws and the copyright
laws, and should be used for the purpose of reference only.
TOBESOFT Co.,Ltd.
2-5F INTOPS Building, 617 Bongeunsa-Ro, Gangnam-Gu,
Seoul 06083, Korea
www.tobesoft.com
Table of Contents
.................................................
iv
....................................................................
v
............................................................................
ix
.....................................................
1
........................................................
1
.............................................................
2
......................................................................
3
............................................................................
3
.......................................................
5
...................................................................
5
................................................................
6
............................................................
7
...........................................................................
9
Copyright and Disclaimer (TOBESOFT)
Table of Contents
Preface
1.
Nexacro Platform Introduction
1.1 The Evolution of UI/UX for Business
BUX: Business User eXperience
1.2 Nexacro Platform
Key Features
2. Overview of Nexacro Studio
2.1 System Requirements
2.2 Installing Nexacro Studio
Additional Installation Information
Version Check
. . . . . . . . . . . . . . . . . . . . . . . . . . . . . . . . . . . . . . . . . . . . . . . . . . . . . . . . . . . . . . . . . . . . . 10
Licence Authentication
2.3 Uninstalling Nexacro Studio
2.4 Using Help
. . . . . . . . . . . . . . . . . . . . . . . . . . . . . . . . . . . . . . . . . . . . . . . . . . . . . . . . . . . . . . . . . . . . . . . . . . . 12
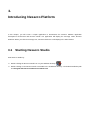
3. Introducing Nexacro Platform
3.1 Starting Nexacro Studio
3.3 Creating an Application
Write Letters
. . . . . . . . . . . . . . . . . . . . . . . . . . . . . . . . . . . . . . . . . . . . . . . . . . . . . . . . . . . . . . . . . . 17
. . . . . . . . . . . . . . . . . . . . . . . . . . . . . . . . . . . . . . . . . . . . . . . . . . . . . . . . . . . . . . . . . . . . . . . 17
. . . . . . . . . . . . . . . . . . . . . . . . . . . . . . . . . . . . . . . . . . . . . . . . . . . . . . . . . . . . . . . . . . . . . . . . . 17
Component Assignment
Screen Layout
. . . . . . . . . . . . . . . . . . . . . . . . . . . . . . . . . . . . . . . . . . . . . . . . . . . . . . . . . . . . . . . . . 13
. . . . . . . . . . . . . . . . . . . . . . . . . . . . . . . . . . . . . . . . . . . . . . . . . . . . . . . . . . . . . . . . . . . . . . . . . . 17
Form Dimensions
Run the Wizard
. . . . . . . . . . . . . . . . . . . . . . . . . . . . . . . . . . . . . . . . . . . . . . . . . . . . . . 13
. . . . . . . . . . . . . . . . . . . . . . . . . . . . . . . . . . . . . . . . . . . . . . . . . . . . . . . . . . . . . . . . . . . . . . 15
3.2 Creating a Project
Creating a Form
. . . . . . . . . . . . . . . . . . . . . . . . . . . . . . . . . . . . . . . . . . . . . . . . . . . . . . . . . . . . . . 11
. . . . . . . . . . . . . . . . . . . . . . . . . . . . . . . . . . . . . . . . . . . . . . . . . . . . . . . . . . . . . . . . . . . . 18
. . . . . . . . . . . . . . . . . . . . . . . . . . . . . . . . . . . . . . . . . . . . . . . . . . . . . . . . . . . . . . . . . . . . . . . . . 18
. . . . . . . . . . . . . . . . . . . . . . . . . . . . . . . . . . . . . . . . . . . . . . . . . . . . . . . . . . . . . . . . . . . . . . . . . . . 20
Assign a Component in a Different Size
Revise Static Component Text
. . . . . . . . . . . . . . . . . . . . . . . . . . . . . . . . . . . . . . . . . . . . . . . . . . . . . . 20
. . . . . . . . . . . . . . . . . . . . . . . . . . . . . . . . . . . . . . . . . . . . . . . . . . . . . . . . . . . . . 21
v
vi | Nexacro Platform 14 / Getting Started Tutorial
. . . . . . . . . . . . . . . . . . . . . . . . . . . . . . . . . . . . . . . . . . . . . . . . . . . . . . . . . . . . . . . . . . . . . . . . . . . 21
Generate Path
. . . . . . . . . . . . . . . . . . . . . . . . . . . . . . . . . . . . . . . . . . . . . . . . . . . 21
Using QuickView to Specify Generate Path
Using Options Menu to Generate Path
Generating the JavaScript Code
. . . . . . . . . . . . . . . . . . . . . . . . . . . . . . . . . . . . . . . . . . . . . . . . . . . . . . 22
. . . . . . . . . . . . . . . . . . . . . . . . . . . . . . . . . . . . . . . . . . . . . . . . . . . . . . . . . . . 23
. . . . . . . . . . . . . . . . . . . . . . . . . . . . . . . . . . . . . . . . . . . . . . . . . . . . . . . . . . . . . . . . . . . . . . . . . . . 25
Adding Events
4. Test Server Environment Setup
. . . . . . . . . . . . . . . . . . . . . . . . . . . . . . . . . . . . . . . . . . . . . . . . . . . . . 27
. . . . . . . . . . . . . . . . . . . . . . . . . . . . . . . . . . . . . . . . . . . . . . . . . . . . . . . . . . . . . . . . . . . . . . . 28
4.1 Using Mongoose
Download Web Server Software
. . . . . . . . . . . . . . . . . . . . . . . . . . . . . . . . . . . . . . . . . . . . . . . . . . . . . . . . . . . . . 28
Run the Web Server
. . . . . . . . . . . . . . . . . . . . . . . . . . . . . . . . . . . . . . . . . . . . . . . . . . . . . . . . . . . . . . . . . . . . . . 29
Test the Application
. . . . . . . . . . . . . . . . . . . . . . . . . . . . . . . . . . . . . . . . . . . . . . . . . . . . . . . . . . . . . . . . . . . . . . . 29
4.2 Running Apache to Test Data Transactions
. . . . . . . . . . . . . . . . . . . . . . . . . . . . . . . . . . . . . . . . . . . . . . . . . . 29
Installing the JDK(Java SE Development Kit)
. . . . . . . . . . . . . . . . . . . . . . . . . . . . . . . . . . . . . . . . . . . . . . . . . . . 30
Installing Apache Tomcat
. . . . . . . . . . . . . . . . . . . . . . . . . . . . . . . . . . . . . . . . . . . . . . . . . . . . . . . . . . . . . . . . . . . 32
Testing your Tomcat Installation
. . . . . . . . . . . . . . . . . . . . . . . . . . . . . . . . . . . . . . . . . . . . . . . . . . . . . . . . . . . . . 32
. . . . . . . . . . . . . . . . . . . . . . . . . . . . . . . . . . . . . . . . . . . . . . . . . . . . . . . . . . . . . . . . . . . . . . . . . . 32
Adding Context
Webapps Set-up
. . . . . . . . . . . . . . . . . . . . . . . . . . . . . . . . . . . . . . . . . . . . . . . . . . . . . . . . . . . . . . . . . . . . . . . . 32
Adding External Context
. . . . . . . . . . . . . . . . . . . . . . . . . . . . . . . . . . . . . . . . . . . . . . . . . . . . . . . . . . . . . . . . . . 34
. . . . . . . . . . . . . . . . . . . . . . . . . . . . . . . . . . . . . . . . . . . . . . . . . . . . . 35
Testing Your Nexacro Platform Application
5. Creating a Customer List Inquiry Screen
5.1 Dataset Component
. . . . . . . . . . . . . . . . . . . . . . . . . . . . . . . . . . . . . . . . . . . . . 36
. . . . . . . . . . . . . . . . . . . . . . . . . . . . . . . . . . . . . . . . . . . . . . . . . . . . . . . . . . . . . . . . . . . . 36
Dataset Contents Editor
. . . . . . . . . . . . . . . . . . . . . . . . . . . . . . . . . . . . . . . . . . . . . . . . . . . . . . . . . . . . . . . . . . . . 38
Component Assignment
. . . . . . . . . . . . . . . . . . . . . . . . . . . . . . . . . . . . . . . . . . . . . . . . . . . . . . . . . . . . . . . . . . . . 40
5.2 Linking the Grid to the Data
. . . . . . . . . . . . . . . . . . . . . . . . . . . . . . . . . . . . . . . . . . . . . . . . . . . . . . . . . . . . . . 42
. . . . . . . . . . . . . . . . . . . . . . . . . . . . . . . . . . . . . . . . . . . . . . . . . . . . . . . . . . . . . . . . . . . . . . . . . 42
Binding the Data
Formatting the Data in the Grid
. . . . . . . . . . . . . . . . . . . . . . . . . . . . . . . . . . . . . . . . . . . . . . . . . . . . . . . . . . . . . . 42
. . . . . . . . . . . . . . . . . . . . . . . . . . . . . . . . . . . . . . . . . . . . . . . . . . . . . . . . . . . . . . . . . . . . . . . . . . . . 49
5.3 Data Test
Button Click Event
. . . . . . . . . . . . . . . . . . . . . . . . . . . . . . . . . . . . . . . . . . . . . . . . . . . . . . . . . . . . . . . . . . . . . . . . 49
Generate the Javascript
. . . . . . . . . . . . . . . . . . . . . . . . . . . . . . . . . . . . . . . . . . . . . . . . . . . . . . . . . . . . . . . . . . . . 50
Move the Library Folder to the Project Folder
Quick View
. . . . . . . . . . . . . . . . . . . . . . . . . . . . . . . . . . . . . . . . . . . . . . . . . . . . . . . . . . . . . . . . . . . . . . . . . . . . . . 51
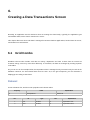
6. Creating a Data Transactions Screen
6.1 Grid Combo
. . . . . . . . . . . . . . . . . . . . . . . . . . . . . . . . . . . . . . . . . . . . . . . . 52
. . . . . . . . . . . . . . . . . . . . . . . . . . . . . . . . . . . . . . . . . . . . . . . . . . . . . . . . . . . . . . . . . . . . . . . . . . . 52
. . . . . . . . . . . . . . . . . . . . . . . . . . . . . . . . . . . . . . . . . . . . . . . . . . . . . . . . . . . . . . . . . . . . . . . . . . . . . . . . . 52
Dataset
Grid
. . . . . . . . . . . . . . . . . . . . . . . . . . . . . . . . . . . . . . . . . . . . . . . . . . . 50
. . . . . . . . . . . . . . . . . . . . . . . . . . . . . . . . . . . . . . . . . . . . . . . . . . . . . . . . . . . . . . . . . . . . . . . . . . . . . . . . . . . 53
. . . . . . . . . . . . . . . . . . . . . . . . . . . . . . . . . . . . . . . . . . . . . . . . . . . . . . . . . . . . . . . . . . . . . . . . . . . . . . . 54
Generate
6.2 Transaction
sample.xml
. . . . . . . . . . . . . . . . . . . . . . . . . . . . . . . . . . . . . . . . . . . . . . . . . . . . . . . . . . . . . . . . . . . . . . . . . . . 55
. . . . . . . . . . . . . . . . . . . . . . . . . . . . . . . . . . . . . . . . . . . . . . . . . . . . . . . . . . . . . . . . . . . . . . . . . . . . . . 55
Button click event
. . . . . . . . . . . . . . . . . . . . . . . . . . . . . . . . . . . . . . . . . . . . . . . . . . . . . . . . . . . . . . . . . . . . . . . . . 57
Callback Function
. . . . . . . . . . . . . . . . . . . . . . . . . . . . . . . . . . . . . . . . . . . . . . . . . . . . . . . . . . . . . . . . . . . . . . . . 58
6.3 Log
. . . . . . . . . . . . . . . . . . . . . . . . . . . . . . . . . . . . . . . . . . . . . . . . . . . . . . . . . . . . . . . . . . . . . . . . . . . . . . . . . 59
Table of Contents | vii
. . . . . . . . . . . . . . . . . . . . . . . . . . . . . . . . . . . . . . . . . . . . . . . . . . . . . . . . . . . . . . . . . . . . . . . . . . 60
Google Chrome
Firefox
. . . . . . . . . . . . . . . . . . . . . . . . . . . . . . . . . . . . . . . . . . . . . . . . . . . . . . . . . . . . . . . . . . . . . . . . . . . . . . . . . 60
. . . . . . . . . . . . . . . . . . . . . . . . . . . . . . . . . . . . . . . . . . . . . . . . . . . . . . . . . . . . . . . . . . . . . . . . . 62
Internet Explorer
7.
Creating Data Transaction Service using X-API
. . . . . . . . . . . . . . . . . . . . . . . . . . . . . . . . . . . . . . . . . . . . . . . . . . . . . . . . . . . . . . . . . . . . . . . . . . . . . . 63
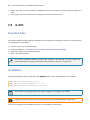
7.1 Service
. . . . . . . . . . . . . . . . . . . . . . . . . . . . . . . . . . . . . . . . . . . . . . . . . . . . . . . . . . . . . . . . . . . . . . . . . . . . . . . . 64
7.2 X-API
Provided Files
Installation
Objects
. . . . . . . . . . . . . . . . . . . . . . . . . . . . . . . . . . . . . . . 63
. . . . . . . . . . . . . . . . . . . . . . . . . . . . . . . . . . . . . . . . . . . . . . . . . . . . . . . . . . . . . . . . . . . . . . . . . . . 64
. . . . . . . . . . . . . . . . . . . . . . . . . . . . . . . . . . . . . . . . . . . . . . . . . . . . . . . . . . . . . . . . . . . . . . . . . . . . . . 64
. . . . . . . . . . . . . . . . . . . . . . . . . . . . . . . . . . . . . . . . . . . . . . . . . . . . . . . . . . . . . . . . . . . . . . . . . . . . . . . . . 66
7.3 initdata.jsp
. . . . . . . . . . . . . . . . . . . . . . . . . . . . . . . . . . . . . . . . . . . . . . . . . . . . . . . . . . . . . . . . . . . . . . . . . . . . 66
pseudo code
. . . . . . . . . . . . . . . . . . . . . . . . . . . . . . . . . . . . . . . . . . . . . . . . . . . . . . . . . . . . . . . . . . . . . . . . . . . . 66
Coding
. . . . . . . . . . . . . . . . . . . . . . . . . . . . . . . . . . . . . . . . . . . . . . . . . . . . . . . . . . . . . . . . . . . . . . . . . . . . . . . . . 67
Designating a Java library
Defining a MIME type
. . . . . . . . . . . . . . . . . . . . . . . . . . . . . . . . . . . . . . . . . . . . . . . . . . . . . . . . . . . . . . . . 67
. . . . . . . . . . . . . . . . . . . . . . . . . . . . . . . . . . . . . . . . . . . . . . . . . . . . . . . . . . . . . . . . . . . . 67
Creating a basic object of Nexacro Platform (PlatformData)
. . . . . . . . . . . . . . . . . . . . . . . . . . . . . . . . . . . . . . 67
Processing data: saving data as a file
. . . . . . . . . . . . . . . . . . . . . . . . . . . . . . . . . . . . . . . . . . . . . . . . . . . . . . . 68
Processing ErrorCode and ErrorMsg
. . . . . . . . . . . . . . . . . . . . . . . . . . . . . . . . . . . . . . . . . . . . . . . . . . . . . . . . 69
Sending result data to the client
Overall Code
. . . . . . . . . . . . . . . . . . . . . . . . . . . . . . . . . . . . . . . . . . . . . . . . . . . . . . . . . . . . 69
. . . . . . . . . . . . . . . . . . . . . . . . . . . . . . . . . . . . . . . . . . . . . . . . . . . . . . . . . . . . . . . . . . . . . . . . . . . . 70
Data Initialization Event
. . . . . . . . . . . . . . . . . . . . . . . . . . . . . . . . . . . . . . . . . . . . . . . . . . . . . . . . . . . . . . . . . . . . 72
7.4 search.jsp
. . . . . . . . . . . . . . . . . . . . . . . . . . . . . . . . . . . . . . . . . . . . . . . . . . . . . . . . . . . . . . . . . . . . . . . . . . . . 74
pseudo code
. . . . . . . . . . . . . . . . . . . . . . . . . . . . . . . . . . . . . . . . . . . . . . . . . . . . . . . . . . . . . . . . . . . . . . . . . . . . 74
Coding
. . . . . . . . . . . . . . . . . . . . . . . . . . . . . . . . . . . . . . . . . . . . . . . . . . . . . . . . . . . . . . . . . . . . . . . . . . . . . . . . . 74
Designating a Java library
Defining a MIME type
. . . . . . . . . . . . . . . . . . . . . . . . . . . . . . . . . . . . . . . . . . . . . . . . . . . . . . . . . . . . . . . . 74
. . . . . . . . . . . . . . . . . . . . . . . . . . . . . . . . . . . . . . . . . . . . . . . . . . . . . . . . . . . . . . . . . . . . 74
Creating a basic object of Nexacro Platform (PlatformData)
Processing data: Loading data from the file
Processing ErrorCode and ErrorMsg
Sending result data to the client
Overall Code
Coding
. . . . . . . . . . . . . . . . . . . . . . . . . . . . . . . . . . . . . . . . . . . . . . . . . . . . . . . . 75
. . . . . . . . . . . . . . . . . . . . . . . . . . . . . . . . . . . . . . . . . . . . . . . . . . . . . . . . . . . . 76
. . . . . . . . . . . . . . . . . . . . . . . . . . . . . . . . . . . . . . . . . . . . . . . . . . . . . . . . . . . . . . . . . . . . . . . . 79
. . . . . . . . . . . . . . . . . . . . . . . . . . . . . . . . . . . . . . . . . . . . . . . . . . . . . . . . . . . . . . . . . . 79
Connecting to a Database
pseudo code
. . . . . . . . . . . . . . . . . . . . . . . . . . . . . . . . . . . . . . . . . . . . . . . . . . . 75
. . . . . . . . . . . . . . . . . . . . . . . . . . . . . . . . . . . . . . . . . . . . . . . . . . . . . . . . . . . . . . . . . . . . . . . . . . . . 77
Data Search Event
7.5 save_list.jsp
. . . . . . . . . . . . . . . . . . . . . . . . . . . . . . . . . . . . . . 75
. . . . . . . . . . . . . . . . . . . . . . . . . . . . . . . . . . . . . . . . . . . . . . . . . . . . . . . . . . . . . . . . . . . . . . . . . . 82
. . . . . . . . . . . . . . . . . . . . . . . . . . . . . . . . . . . . . . . . . . . . . . . . . . . . . . . . . . . . . . . . . . . . . . . . . . . . 82
. . . . . . . . . . . . . . . . . . . . . . . . . . . . . . . . . . . . . . . . . . . . . . . . . . . . . . . . . . . . . . . . . . . . . . . . . . . . . . . . . 82
Designating a Java library
Defining a MIME type
. . . . . . . . . . . . . . . . . . . . . . . . . . . . . . . . . . . . . . . . . . . . . . . . . . . . . . . . . . . . . . . . 82
. . . . . . . . . . . . . . . . . . . . . . . . . . . . . . . . . . . . . . . . . . . . . . . . . . . . . . . . . . . . . . . . . . . . 82
Creating a basic object of Nexacro Platform (PlatformData)
Receiving a request from the client
. . . . . . . . . . . . . . . . . . . . . . . . . . . . . . . . . . . . . . 83
. . . . . . . . . . . . . . . . . . . . . . . . . . . . . . . . . . . . . . . . . . . . . . . . . . . . . . . . . 83
Extracting and saving the data sent by the client
. . . . . . . . . . . . . . . . . . . . . . . . . . . . . . . . . . . . . . . . . . . . . . . 83
viii | Nexacro Platform 14 / Getting Started Tutorial
Processing ErrorCode and ErrorMsg
Sending result data to the client
Overall Code
. . . . . . . . . . . . . . . . . . . . . . . . . . . . . . . . . . . . . . . . . . . . . . . . . . . . . . . . 84
. . . . . . . . . . . . . . . . . . . . . . . . . . . . . . . . . . . . . . . . . . . . . . . . . . . . . . . . . . . . 84
. . . . . . . . . . . . . . . . . . . . . . . . . . . . . . . . . . . . . . . . . . . . . . . . . . . . . . . . . . . . . . . . . . . . . . . . . . . . 85
Data Saving Event
. . . . . . . . . . . . . . . . . . . . . . . . . . . . . . . . . . . . . . . . . . . . . . . . . . . . . . . . . . . . . . . . . . . . . . . . 86
Preface
Useful Information
Target audience
Planners, developers,and designers who are unfamiliar with nexacro platform
nexacro studio
For details on nexacro studio installation, composition, and options, refer to the Studio Guide.
nexacro platform programming
For details about nexacro platform application development, refer to the Developer Guide.
nexacro platform distribution
For details on nexacro platform application distribution or execution stages, refer to the Administrator
Guide.
Other Development Tools
Web server and other development tools not provided by TOBESOFT will be mentioned here only
briefly. For further information, refer to manuals provided by the respective manufacturers.
What You Will Learn
Introduction to nexacro platform
Provides an overview of nexacro platform.
ix
x | Nexacro Platform 14 / Getting Started Tutorial
Overview of nexacro studio
Describes the studio development environment and installation.
Hello nexacro platform
Presents the first step in creating a nexacro platform application using nexacro studio.
Test Server Environment Setup
Describes how to set up environment in which nexacro platform applications (not the Runtime version)
can be tested. You can skip this if you have an environment already set up.
Creating a Customer List Inquiry Screen
Discusses how to create a screen that manipulates dataset data on a grid.
Creating a Transaction Screen
Covers how to display on the screen after fetching data from the server. It also explains the use of logs
on the web browser.
Common Notation
To increase readers' understanding, this user manual contains separate notations for words or sentences with
special meanings. The following is an explanation of the notations.
Notes, tips, and cautions are given as follows:
Notes are used to provide brief explanations, references, or comments.
Tips are provided to give helpful advice.
Cautions provide information that demands special attention from readers or users.
1.
Nexacro Platform Introduction
An application with a high quality user interface and user experience (UI/UX) results in more rapid adoption
and more productive users, leading to lower support costs, a reduced Total Cost of Ownership (TCO) and
increased Return on Investment (ROI). The Nexacro Platform is a solution custom-tailored for business users,
with all the features, functionality, and design elements required to support business requirements. The
Nexacro Platform will empower you to create a high quality UI/UX, so that you can improve productivity and
reduce repetitive data entry tasks in your business.
1.1 The Evolution of UI/UX for Business
The continued evolution of internet technology is now enabling connectivity for almost any physical object
through the “Internet of Things.” As the scope of internet usage increases, web applications have also evolved
to provide richer user experiences for corporate and individual users.
Prior technology generations included client-server (C/S) environments which provided acceptable
performance, but included significant challenges associated with installation, distribution, and maintenance.
Eventually, the World Wide Web fixed many of these issues, but slow data transfer speeds and limited UI
functionality troubled users and developers. Several companies developed platforms to support the
development of “Rich Internet Applications” to address these concerns while the HTML standard grew to
enable more user interface technology over time.
Over time, the importance of usability has led application developers to focus not only on the user interface of
an application but also on the full user experience with it. Those applications that deliver the best experiences
to their users enjoy more rapid adoption and, since a good experience is an easy-to-use experience, these
application lead to fewer support calls.
Recently enterprises have shown increasing interest in the "business view" where UI/UX is optimized for the
business environment. Against this backdrop, we seek to improve the “Business User Experience,” including
helping users make quick decisions and promoting productivity through an intuitive work environment, thereby
creating business value.
2 | Nexacro Platform 14 / Getting Started Tutorial
BUX: Business User eXperience
Nexacro enables a great business-user experience by integrating three critical elements.
●
A unified platform – One set of source code easily supporting different screen sizes, creating optimized
results, across a wide variety of operating systems, browsers and devices, including tablets, phones and
desktops.
●
A unified development process - Nexacro Studio improves productivity by integrating all processes from
development to testing and distribution while enabling simpler in-house development as well as advanced
UI construction
●
A data-centric unified data framework - capable of supporting structured and unstructured data as well as
data from online transaction processing, online analysis processing, and big-data visualization
applications.
Nexacro Platform Introduction | 3
1.2 Nexacro Platform
Nexacro Platform uses a JavaScript-based framework to accommodate enterprise demands. Applications
developed using Nexacro Platform, with its write-once-deploy-many capability, support functionality on many
different operating systems, browsers, and devices without requiring additional development.
Nexacro Studio, bundled with Nexacro Platform, is the WYSIWYG development environment that enables
creation of mobile and web applications. Nexacro Studio offers developers a variety of technical capabilities
including drag-and-drop editing of user interface components, an easy-to-use data binding capability,
“Adaptive Visual Editor” - a feature that greatly simplifies support of varying device screen sizes and
orientations, as well as a collection of interesting design effects, all of which collectively maximize
development productivity.
The platform supports HTML5 and hybrid architectures using the same development process and setup files.
HTML5 applications can be freely deployed without any special installation. Applications deployed with the in
the hybrid architectures attain higher performance and reliability by leveraging an installed virtual engine
optimized for each supported operating system.
Key Features
Table 1-1
Key Features
Feature
Description
Powerful IDE
Similar to existing development tools, Nexacro Studio,
Nexacro Platform’s development environment, provides a
variety of convenient development features. With its
intelligent editor and WYSIWYG screen design, Nexacro
Studio
supports
numerous
convenient
features
for
developers.
Support for standards
The Nexacro Platform uses widely adopted standards such
as
JavaScript,
technologies,
CSS,
and
developers
XML.
don't
By
need
using
to
familiar
learn
new
languages and can become productive in the new
development environment quickly.
Integrated device event processing
By standardizing mouse,
touch and other event processing, the same, single set of
code can handle
4 | Nexacro Platform 14 / Getting Started Tutorial
Feature
Description
events on a variety of devices, reducing the cost of
supporting multiple devices running multiple operating
systems.
Quick data processing
Nexacro Platform
enables responsive applications using optimized data
communications and
supporting asynchronous communications, which allows
an optimal environment for
each task.
Rich Component Library
Nexacro provides a variety of components for enterprise
applications, reducing application development time. In
particular, Grid, the most frequently used tool, provides
strong support for externally-supplied data.
With Nexacro Studio, you can create new events through
drag-and-drop while a few simple clicks enable data
binding for each component.
Hybrid Architecture
Although the performance of web applications is gradually
improving, they still cannot always meet the performance
requirements of the most intensive applications. Runtime
provides a superior alternative.
Visual Effects
Its many styles and themes make it easy to create a
variety of visual effects with Nexacro Studio.
2.
Overview of Nexacro Studio
Nexacro Studio is an application development tool included with the Nexacro Platform. It supports both
HTML5 and Runtime versions by providing interfaces and features similar to 4GL development tools (for
example, Visual Basic, Delphi, PowerBuilder). Nexacro Studio supports WYSIWYG (What You See Is What
You Get) screen/form design, data visualization, and logic composition with scripts.
Instead of developing separate applications optimized for different kinds of devices, Nexacro Studio's
Multi-Layout Manager (MLM) enables high performance from one source, which can be applied to various
devices including PCs, smartphones, and tablets.
2.1 System Requirements
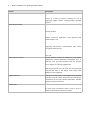
The following table lists the system requirements for Nexacro Studio.
Table 2-1
Specifications
Item
CPU
Minimum Requirements
Intel® Pentium III, 1GHz or Higher
Recommended Requirements
1GHz or Higher 32 bit(x86)
Or 64 bit (x64) Processor
Display
-
Graphic Device over and
above 512MB with Accelerator
Memory
512M
1GB(32bit) or 2GB(64bit)
HDD
100M
16GB(32bit) or 20GB(64bit)
Platform
Windows2000 SP4
Windows 7 Home Premium
6 | Nexacro Platform 14 / Getting Started Tutorial
2.2 Installing Nexacro Studio
Nexacro Studio is included in the Nexacro Platform install package. Run the Setup file to start the installation
process. When prompted, click Next.
If the Security Warning Window is displayed (Window Vista and above), click Yes.
To create a shortcut icon on the background, select the checkbox.
Overview of Nexacro Studio | 7
Once Setup has been completed, click the Finish button to complete program installation.
Additional Installation Information
The installation package includes the following shortcut tool icons, which are accessible from the path Start >
Program > nexacro > 14].
Icon
Menu
Description
Help
Nexacro Platform Help Icon
Uninstall
Uninstall Shortcut Icon
nexacrostudio14
Nexacro Studio Shortcut Icon
The list of installed files may vary depending upon product version.
8 | Nexacro Platform 14 / Getting Started Tutorial
Overview of Nexacro Studio | 9
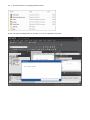
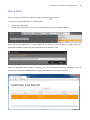
Version Check
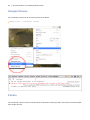
To check the version of Nexacro Studio, click Help About – Nexacro Studio from the menu.
10 | Nexacro Platform 14 / Getting Started Tutorial
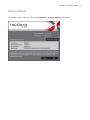
Licence Authentication
When Nexacro Studio is first installed, the development tool is set as a trial version that will be expired after
60 days. If you purchase the software through an official route, you can enter the given product key to
authenticate your Nexacro Studio.
Access Help > About Nexacro Studio and click Enter New License on the version check window. When a
pop-up appears, you are required to enter Application/Service Name and Developer License Key.
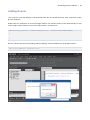
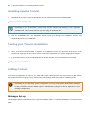
If a correct key is entered, you can see the below message and authentication is done.
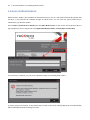
If you put your key incorrectly, or the product key is found to have been already approved, the authentication
will be failed with the below message on show.
Overview of Nexacro Studio | 11
2.3 Uninstalling Nexacro Studio
To uninstall the Nexacro Platform Package and Nexacro Studio, access Start > Program > nexacro > 14,
and run UnInstall. At the confirmation prompt, click Yes to complete the uninstall process.
12 | Nexacro Platform 14 / Getting Started Tutorial
2.4 Using Help
To access the online help, press F1 or select the menu option Help – Help.
The following table lists sample help categories.
Table 2-2
Contents of Help
Description
Item
Application Objects Reference
Help related to the Application
Frame Objects Reference
Help related to the Frame Object
Script Reference
Help related to scripts
Objects Reference
Help related to objects
Components Reference
Help related to Component
Plugins Reference
Help related to PlugIns
Appendix
Additional Help content
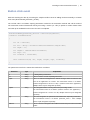
The following figure illustrates sample Help content.
3.
Introducing Nexacro Platform
In this chapter, you will create a simple application to demonstrate the Nexacro Platform application
development environment and Nexacro Studio. The application will display the message "Hello, Nexacro
Platform!" When you click the message text, "Nexacro Platform 14" will display in the Alert window.
3.1 Starting Nexacro Studio
Start Nexacro Studio by:
●
Double-clicking the Nexacro Studio icon on your Windows desktop.
or
●
Double-clicking on the Nexacro Studio executable in the installation directory. The default installation path
is C:\Program Files\nexacro\14\nexacrostudio14.exe
14 | Nexacro Platform 14 / Getting Started Tutorial
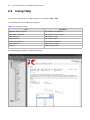
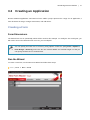
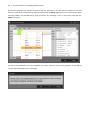
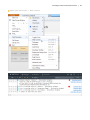
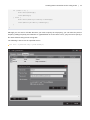
Immediately after installation, the Nexacro Studio UI displays the following screen without an open project.
Callout
Component
Description
1
Project Explorer
List of components for the open project.
2
Form Design
Place for designing an application screen and editing a script.
3
Properties
Properties of the form, component, and dataset component. You can edit them
in this sector.
4
Output
List of output messages (such as error messages), generated messages, and
messages set up with trace() method.
Introducing Nexacro Platform | 15
3.2 Creating a Project
Before creating a Nexacro Platform application, you must create a project. The project defines how the
application will appear and run on the user’s screen. You can create a new project or reuse an existing
template project. In this chapter, you will learn how to create a project.
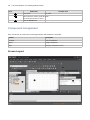
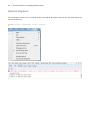
Select the New Project Wizard from the menu:
[Menu] File > New > Project
1 Type the project's name in the "Name" field. 2 Set the location where the file will be saved in the
"Location" field.
16 | Nexacro Platform 14 / Getting Started Tutorial
In this example, the settings will be as follows.
Field
Description
Predetermined value
1
Project name
Hello
2
Project file savinglocation
D:\XP\PJ\Hello
3
Select project format
Create a new Project
4
Click Finish to save the project
As the project is created, the project component will be displayed in the project explorer window.
The paths explained in this chapter are based on the Windows 7 operating system. The paths
may differ depending on the operating system.
The file will be saved automatically to this location if you don't specify an alternative:
C:\Users\[User]\Documents\nexacro\
If you want to add ADL (Assertion Definition Language) while the project is still open, select Add
to Current Project instead of 3 Create a New Project.
Introducing Nexacro Platform | 17
3.3 Creating an Application
Nexacro Platform applications run based on forms. While a project presents the "stage" for an application, a
form decorates the stage, arranges movements, and add effects.
Creating a Form
Form Dimensions
The default form size is (1024x768), which will be used for this example. To modify the size and layout, you
will need to access the Dimension tab. For now, you can skip this.
You can specify the basic size of a form by using Options. Follow the path [Tools > Options >
Form Design > General], and revise the item "Default Width" and "Default Height" so that you
can specify the basic size of created forms.
Run the Wizard
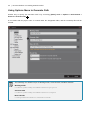
To create a new form, run the New Form Wizard and follow these steps.
[Menu] File > New > Form
18 | Nexacro Platform 14 / Getting Started Tutorial
Field
Explanation
Example Value
1
Form name
frm_hello
2
Place where the service group will Base
be saved (default value is "Base")
3
Click the Finish button.
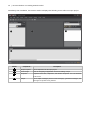
Component Assignment
Once a new form is created, the form design window and toolbars are activated.
Toolbar
Description
TextStyle
Sets text properties
Object
Assigns component
Align
Arranges component’s screen
Screen Layout
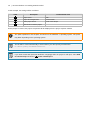
Introducing Nexacro Platform | 19
Form Area
Description
1 Project Explorer
List of project objects
2 Design/Source/Script tabs
Panel for editing design, source code, and scripts for form
3 Properties/Style Property Editor tabs
Panel for modifying the form properties and styles
4 Ribbon
Common commands
20 | Nexacro Platform 14 / Getting Started Tutorial
Write Letters
You can use Static components to write text in Nexacro Platform applications. Click the Static component
on the "Objects" toolbar, and then click where you want it placed in the Form Design window. The Static
component is displayed in the default size.
Assign a Component in a Different Size
You can assign a component to the Form Design window in a different size than the default. Select the
component, and instead of clicking the place where you want it in the design window, press and drag the left
mouse button to the size you want.
Introducing Nexacro Platform | 21
Revise Static Component Text
To revise a static component’s text, select the component in the Form Design window, click its text area to
switch to edit mode, and make your changes.
To modify a component's properties, select it in the Form Design window, then edit the properties in the
Properties window.
Generate Path
Nexacro Platform applications don't execute the code created on Nexacro Studio directly. The JavaScript
code needs to be generated, which can be used in any environment based on the integrated framework. You
need to specify the Generate Path to designate the folder where the generated JavaScript files are written.
You can do this using QuickView or the Options menu as described in this section.
Using QuickView to Specify Generate Path
Access QuickView:
[Menu] Build > Quick View > Quick View
22 | Nexacro Platform 14 / Getting Started Tutorial
Using Options Menu to Generate Path
Another way to specify the Generate Path is by accessing: [Menu] Tools > Options > Environment >
General > Generate Path. 1 .
A new folder with the project name is created under the designated folder, and the JavaScript files will be
created.
The followings are default set-ups of Working Folder, Generate Path, and Base Lib Path.
Working Folder
C:\Users\[user name]\Documents\nexacro\projects
Generate Path
C:\Users\[user name]\Documents\nexacro\outputs
Base Lib Path
C:\Program Files\nexacro\14\nexacro14lib
Introducing Nexacro Platform | 23
Generating the JavaScript Code
Nexacro Studio creates the JavaScript files and stores them at the Generate Path location.
24 | Nexacro Platform 14 / Getting Started Tutorial
As the converted JavaScript files are created, you can see QuickView executed.
Introducing Nexacro Platform | 25
Adding Events
Let's create an event that displays an Alert window when the user double-clicks the Static component, "Hello,
Nexacro Platform."
Double-click the component on the Form Design window. The function will be created automatically as soon
as the design window switches to the Form Script window, as shown here:
this.Static00_onclick = function(obj:Static,
e:nexacro.ClickEventInfo)
{
}
Declare a task in this function by adding code that displays "Nexacro Platform 14" in the Alert window.
this.alert("Nexacro Platform 14");
26 | Nexacro Platform 14 / Getting Started Tutorial
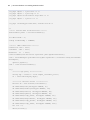
The corresponding code for the form we have created here (frm_hello.xfdl) is listed below:
<?xml version="1.0" encoding="utf-8"?>
<FDL version="1.5">
<TypeDefinition url="..\default_typedef.xml"/>
<Form id="frm_hello" classname="frm_hello" left="0" top="0" width="1024"
height="768" titletext="New Form">
<Layouts>
<Layout>
<Static id="Static00" text="Hello, Nexacro Platform!" left="50"
top="50" width="160" height="70" onclick="Static00_onclick"/>
</Layout>
</Layouts>
<Script type="xscript5.0"><![CDATA[
this.Static00_onclick = function(obj:Static,
{
this.alert("Nexacro Platform 14");
}
]]></Script>
</Form>
</FDL>
e:nexacro.ClickEventInfo)
4.
Test Server Environment Setup
Before you can execute a Nexacro Platform application directly on a web browser, you need to create and test
an operating environment for each browser you want to support. This can be done with the Windows Runtime
architecture or on Nexacro Studio.
To run Nexacro Platform applications, you only need a web server. Choose a web server based
on your particular needs. The following table compares two popular web servers, Mongoose and
Apache Tomcat.
If you want to test data transactions, you should also install a web application server (WAS).
Refer to 4.2 Running Apache to Test Data Transactions.
Feature
Mongoose
Installation file
Apache Tomcat
None
Installation file provided
The executable is unpacked and ready to run.
You must install the web server before you
can use it.
JDK Installation
Not required
Separate JDK installation required
Contexts
None
Create contexts using the Apache interface or
The folder where the executable is located is by deploying a war file.
the web server root.
X-API support
Not available
Available through separate installation
XPLATFORM 9.2
Not available
Available
Version 9.2 requires JSP
For more information about various web servers, refer to the vendor's documentation.
28 | Nexacro Platform 14 / Getting Started Tutorial
4.1 Using Mongoose
Use Mongoose, a lightweight web server, to test the Nexacro Platform application without testing data
transactions.
Mongoose does not require installation. Simply copy the executable file to your computer and run it.
Download Web Server Software
Download the Mongoose executable for your environment from Google: https://code.google.com/p/mongoose/
Copy the downloaded file to the Generate Path that you specified in Nexacro Studio (Options > Generate
path). Nexacro Studio creates the application JavaScript code in the designated folder.
Test Server Environment Setup | 29
Run the Web Server
1.
Double-click the Mongoose executable file to run Mongoose.
2.
Right-click the Mongoose icon in the system tray to interact with the web server. (Refer to the Mongoose
documentation at http://cesanta.com/docs.shtml for more information.)
3.
Selecting Start browser opens the web browser. (The Mongoose executable file appears as the web
server's root.)
The directory list varies depending on the Mongoose version that you are using.
Test the Application
You can test Nexacro Platform by clicking the newly created project directory (Hello).
To test Nexacro Platform applications in a web browser, copy any related library files to the web
server. For more information, refer to Generate.
To execute an application through a web browser directly in Nexacro Studio, select the web browser on the
build toolbar and enter the following URL:
http://127.0.0.1:8080/Hello/index.html
To shut down the web server, right click on the Mongoose icon and select Exit.
4.2 Running Apache to Test Data Transactions
To test applications as well as test data transactions, you will need to install a web application server (WAS).
You can use a free application, such as Tomcat, Jetty, or Winstone, or a commercial application. This section
illustrates how to install Apache Tomcat and the required Java SE Development Kit (JDK).
30 | Nexacro Platform 14 / Getting Started Tutorial
Installing the JDK(Java SE Development Kit)
Tomcat is a Java-based program and requires the Java SE Development Kit (JDK) to run. The JDK is
distributed by Oracle Software.
1.
Download the JDK for your environment from Oracle via this URL:
http://www.oracle.com/technetwork/java/javase/downloads/index.html
If you are running Windows,download the 32- or 64-bit JDK that matches your operating system.
Test Server Environment Setup | 31
2.
Run the downloaded installation file to automatically install and configure the JDK.
3.
You can use the command line interface to confirm that Java has installed successfully with the following
command:
java -version
When installing JDK version 1.5 and later, you can access the system path by copying execution
files without setting up the environment variables (Java_Home) needed for execution.
32 | Nexacro Platform 14 / Getting Started Tutorial
Installing Apache Tomcat
1.
Download the version of Tomcat appropriate for your environment from the following URL:
http://tomcat.apache.org
Depending on the environment, Tomcat may execute a binary file directly or use a separate
installation file. This section assumes you are using an installation file.
2.
Run the downloaded file, the installation wizard leads you through the installation process and
automatically locates your JRE path.
Testing your Tomcat Installation
1.
Once Tomcat has been installed, it registers as a Windows service and starts the web server. In the
System tray, right click on the Tomcat icon to view status information or to make configuration changes.
2.
In your web browser, enter the following URL to confirm that the server has installed successfully.
http://127.0.0.1:8080
Adding Context
To execute an application on Tomcat, you must add context. Although there are several ways to add context,
this chapter discusses ways to set up context under the webapps folder and under a temporary folder.
Depending on your operating system configuration, you may need system administrator privileges
to add or edit files. Nexacro Studio requires administrator privileges to add an application to your
webapps configuration.
Webapps Set-up
The webapps folder is subordinate to the Tomcat installation folder. In a default installation, it is located in this
path:
Test Server Environment Setup | 33
C:\Program Files\Apache Software Foundation\Tomcat 7.0\webapps\
1.
In Windows Explorer, add a new folder under the webapps folder. And then, add another folder named
"WEB-INF".
2.
Using a text editor, create a file in the WEB-INF folder named web.xml. Paste the following content in
web.xml:
<?xml version="1.0" encoding="UTF-8"?>
<web-app xmlns="http://java.sun.com/xml/ns/javaee"
xmlns:xsi="http://www.w3.org/2001/XMLSchema-instance"
xsi:schemaLocation="http://java.sun.com/xml/ns/javaee
http://java.sun.com/xml/ns/javaee/web-app_3_0.xsd"
version="3.0"
metadata-complete="true">
</web-app>
Once you set the Options > Generate path, Nexacro Studio creates application JavaScript code in the
specified folder.
34 | Nexacro Platform 14 / Getting Started Tutorial
Adding External Context
Apache webapps setup is limited to a predetermined path. To use a different folder (for example, on a
Windows D: drive), you must use an external context. To do this, add an application context file (created in the
form of a XML file) to a designated folder under the path where Tomcat is installed.
C:\Program Files\Apache Software Foundation\Tomcat 7.0\conf\Catalina\localhost
Create an XML file with a name of your choice and add the following content.
<Context path="/Hello" docBase="D:\03_TEST\XP\BUILD\Hello"
debug="0" prvileged="true" reloadable="true">
<Logger className="org.apache.catalina.logger.FileLogger"
directory="logs" prefix="localhost_log." suffix=".txt"
timestame="true"/>
</Context>
Test Server Environment Setup | 35
Testing Your Nexacro Platform Application
Test your Nexacro Platform application by:
1.
Entering that application's path in your web browser, or
2.
Directly from the web browser in Nexacro Studio by clicking Web Browser on the build toolbar, and enter
the following URL:
http://localhost:8080/Hello/index.html
To shut down the web server, right-click on the Tomcat icon and select Exit.
5.
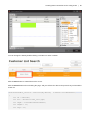
Creating a Customer List Inquiry Screen
The most basic item used in tasks when creating an application is the inquiry screen. This chapter discusses
using the Grid and Dataset components on a form to create a simple customer list inquiry screen .
This section assumes that you have already created the project and form, and have the form
open.
5.1 Dataset Component
The Dataset component provides data management support for a Nexacro Platform application. It stores data
fetched from the server and manages the data change status (add/revise/delete).
This component manages the data in a two-dimensional table format and manipulates the data in a column or
row record format. A form can have several datasets and multiple forms can utilize multiple datasets by using
Global Variables.
You can add a dataset to a form by selecting the Dataset
icon on the Nexacro Studio toolbar and clicking
anywhere on the form. Because a dataset is an invisible component used for data management inside
applications, it is shown in the UI as an Invisible Objects item.
You can change the following Dataset properties from the Form Properties panel. For further dataset
properties, use the Dataset Contents Editor.
Creating a Customer List Inquiry Screen | 37
Property
id
Value
dsCustomers
Explanation
Dataset id
38 | Nexacro Platform 14 / Getting Started Tutorial
Dataset Contents Editor
For general form components, the associated properties can be changed in the properties window. However,
to manage dataset properties, you need to use the Dataset Contents Editor. Using the Editor, you can also
design columns and add data directly to a two-dimensional table form.
Double-click the dataset to display the Dataset Content Editor.
To add columns to the dataset, click the
icon in the Columns section.
Creating a Customer List Inquiry Screen | 39
This example uses the following columns.
No.
id
type
size
Explanation
1
id
STRING
4
Series No.
2
name
STRING
16
Name
3
email
STRING
32
Email
4
phone
STRING
16
Phone No.
5
comp_name
STRING
32
Company
6
department
STRING
32
Department
7
comp_phone
STRING
16
Company Phone No.
8
comp_addr
STRING
256
Company Address
In the Rows section, you can add data in the same way you add columns.
Review the items that have been added. They are displayed as source code in the editor. If you make any
change directly to the source code, it is immediately reflected in the dataset columns.
40 | Nexacro Platform 14 / Getting Started Tutorial
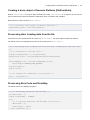
Component Assignment
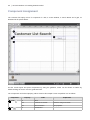
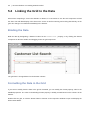
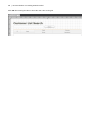
The customer list inquiry screen is composed of a title, a search window, a search button and a grid, as
illustrated in the picture below.
Set the overall layout and place components by using the guideline, which can be shown or hidden by
double-clicking the screen over the graduated ruler.
The components and revised property values used for this sample screen composition are as follows:
Component
1 Static
2 Div
Property
Value
Explanation
id
sttList
text
Customer List Search
Character string to be shown
font
bold 20 Verdana
Font properties
id
divCommand
Creating a Customer List Inquiry Screen | 41
Component
Property
Value
3 Edit
id
edtSearch
4 Button
id
btnSearch
text
Search
id
grdCustomers
5 Grid
Explanation
Character string to be shown on button
The Div component plays the role of wrapping several components. Assign the Div component
first, and then other components to be wrapped inside it such as the Edit and Button components.
42 | Nexacro Platform 14 / Getting Started Tutorial
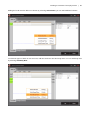
5.2 Linking the Grid to the Data
Often when composing a screen that includes a dataset, it is convenient to use the Grid component to bind
the data. This will allow display of the data on the screen as well as entering and revising data directly on the
grid. The changes are reflected immediately in the dataset.
Binding the Data
Bind the data by designating a dataset id value for the binddataset property, or by clicking the dataset
component on Nexacro Studio and dragging it onto the grid component.
The grid form is changed based on the dataset columns.
Formatting the Data in the Grid
If you want to modify how the data in the grid is formatted, you can modify the format property value in the
databind properties. The value in the Binding formats property is initially created based on the columns in the
dataset.
Double-click the grid, or click the button linked to formats on the Properties window to open and display the
Grid Content Editor.
Creating a Customer List Inquiry Screen | 43
The Grid Content Editor modifies the data formats shown on a grid but does not affect the dataset
itself.
Existing formats can be deleted to edit in a new format. Select the head and body on the grid content editor
and deletes designated formats by selecting the delete item on the context menu.
44 | Nexacro Platform 14 / Getting Started Tutorial
The newly edited columns are composed of four columns with two head rows and two body rows.
Add head rows by clicking the right mouse button on the Grid Content Editor and choosing Add Head Row .
Creating a Customer List Inquiry Screen | 45
Adding the head row also adds one column. By selecting Add Column, you can add additional columns.
To show two types of data on col2 and col3, add two head rows and two body rows. You can add body rows
by selecting Add Body Row.
46 | Nexacro Platform 14 / Getting Started Tutorial
Because the col0 and col1 columns connect to only one data source, the cells must be combined. You must
select the cells on the col0 head rows, followed by selecting the Merge Cells item on the context menu. When
selecting multiple cells simultaneously, drag the mouse after selecting a cell, or select other cells with the
Shift key pressed.
If you try a cell combination, you are prompted if you want to retain the current cells' properties. As you will not
use the sub-cell properties here, select No.
Creating a Customer List Inquiry Screen | 47
Combine cells in the body rows in col0 and col1.
If you select several cells with the Ctrl key pressed, the Merge Cells item on the context menu will
not be activated.
The following table lists the cell values illustrated in this example.
Head Cell: text
Column
Body Cell: text
Column: size
col0
ID
bind:id
80
col1
Name
bind:name
150
col2
Email
bind:email
200
Phone
bind:phone
Company
bind:comp_name
Department
bind:department
col3
320
Specify cell values by selecting the cell and entering the value in the properties window on the right side.
48 | Nexacro Platform 14 / Getting Started Tutorial
Click OK after entering the value to show the new value on the grid.
Creating a Customer List Inquiry Screen | 49
5.3 Data Test
To test the functionality of the grid, we will add data using a simple script.
Button Click Event
To process data, add a click event to the btnSearch button:
1.
Select btnSearch button.
2.
Right-click properties.
3.
When prompted, add an onclick event with the value divCommand_btnSearch_onclick.
The event script is as follows. It adds a data row to the dataset and designates a value.
this.divCommand_btnSearch_onclick = function(obj:Button,
e:nexacro.ClickEventInfo)
{
var row = this.dsCustomers.addRow();
this.dsCustomers.setColumn(row, "id", "TC-001");
this.dsCustomers.setColumn(row, "name", "Dustin Kim");
this.dsCustomers.setColumn(row, "email", "[email protected]");
this.dsCustomers.setColumn(row, "phone", "6987-6543");
this.dsCustomers.setColumn(row, "comp_name", "TOBESOFT");
this.dsCustomers.setColumn(row, "department", "0");
this.dsCustomers.setColumn(row, "comp_phone", "6506-7000");
this.dsCustomers.setColumn(row, "comp_addr", "Seoul");
}
50 | Nexacro Platform 14 / Getting Started Tutorial
Generate the Javascript
To implement your new application on a web browser, convert the current code into a JavaScript file by
selecting:
[Menu] Build > Generate Application
The Output window should show the JavaScript being created.
Move the Library Folder to the Project Folder
Once the JavaScript file has been created, you have to put the library folder into the project folder. Do this by
adding a copy of the nexacro14lib to a path in which Nexacro Studio is installed.
Creating a Customer List Inquiry Screen | 51
Quick View
After executing the web server on Nexacro Studio, QuickView
is executed.
If you want to execute QuickView on a web browser:
1.
Activate the build toolbar.
2.
Change the browser option. (You can use the web browser on your desktop computer.)
When you execute QuickView on a web browser for the first time, you must type in a path in which the
QuickView.html file is located. This path may differ from the Generate path.
While the designated web browser is running, you can check Nexacro Platform applications that are
processing by clicking the Search button to display data added from the script to the Grid.
6.
Creating a Data Transactions Screen
Normally, an application used for business does not manage the data locally. Typically, the application gets
and modifies data, but the data is stored on the server.
This chapter discusses how code data is managed in Nexacro Platform applications, fetched from the server,
and viewed on a web browser.
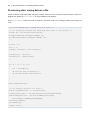
6.1 Grid Combo
Database schema often include such data as country, department and rank. If these data are entered as
character strings, users may enter them differently. To avoid this, the data are managed by creating separate
code tables.
As you can see in the example below, the Department item is managed not by its name but by its code in the
database. However, the item should show users its name. So, in the grid component, you can determine a
displaytype according to data forms.
Dataset
Create a dataset first, and then enter properties and column values.
Property
Value
id
Explanation
dsDepartment
No.
id
Dataset id
type
size
Explanation
1
code
STRING
32
Department code
2
value
STRING
32
Department name
Creating a Data Transactions Screen | 53
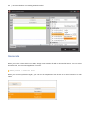
Grid
Execute the Grid content editor by double-clicking the Grid. Select the data cell of Department and revise the
following items in the properties window. The combodataset item can be entered manually or selected from
the list. Once the combodataset item is entered, you can manually enter items on combocodecol and
colbodatacol or select from the list.
Property
Value
Explanation
displaytype
combo
Data indication format for the cell
combodataset
dsDepartment
Dataset to be linked with a combo
component
when
edittype is combo
combocodecol
code
Code column
combodatacol
value
Data column
displaytype
or
54 | Nexacro Platform 14 / Getting Started Tutorial
Generate
When you revise a form which is not ADL, simply create another file with a relevant file format. You can select
Generate File, not Generate Application on menu.
[Menu] Build > Generate File
When you execute QuickView again, you can see the Department item shown as a name instead of a code
name.
Creating a Data Transactions Screen | 55
6.2 Transaction
Now, let's fetch data from a server using the transaction method. The test will fetch the XML file created with a
data format used in Nexacro Platform applications.
Test data is used in this example to retrieve the data. For that reason, in an application operating
environment, you have to import the data stored in a specific place for data storing.
sample.xml
The XML file to be used in the example is as follows. It is assumed that there are four records and that
retrieval has been successful.
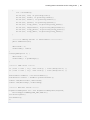
<?xml version="1.0" encoding="utf-8"?>
<Root xmlns="http://www.nexacroplatform.com/platform/dataset" ver="5000" >
<Parameters>
<Parameter id="ErrorCode" type="int">0</Parameter>
<Parameter id="ErrorMsg" type="string">SUCC</Parameter>
</Parameters>
<Dataset id="customers">
<ColumnInfo>
<Column id="id" type="STRING" size="4"/>
<Column id="name" type="STRING" size="16"/>
<Column id="email" type="STRING" size="32"/>
<Column id="phone" type="STRING" size="16"/>
<Column id="comp_name" type="STRING" size="32"/>
<Column id="department" type="STRING" size="32"/>
<Column id="comp_phone" type="STRING" size="16"/>
<Column id="comp_addr" type="STRING" size="256"/>
</ColumnInfo>
<Rows>
<Row>
<Col id="id">TC-001</Col>
<Col id="name">Dustin Kim</Col>
<Col id="email">[email protected]</Col>
<Col id="phone">6987-6543</Col>
<Col id="comp_name">TOBESOFT</Col>
<Col id="department">0</Col>
<Col id="comp_phone">6506-7000</Col>
56 | Nexacro Platform 14 / Getting Started Tutorial
<Col id="comp_addr">Seoul</Col>
</Row>
<Row>
<Col id="id">TC-002</Col>
<Col id="name">Sean Oneal</Col>
<Col id="email">[email protected]</Col>
<Col id="phone">7357-3715</Col>
<Col id="comp_name">AC</Col>
<Col id="department">0</Col>
<Col id="comp_phone">7357-7000</Col>
<Col id="comp_addr">Lansing</Col>
</Row>
<Row>
<Col id="id">TC-003</Col>
<Col id="name">ieter Valenzuela</Col>
<Col id="email">[email protected]</Col>
<Col id="phone">9025-0645</Col>
<Col id="comp_name">Maecenasmifelis</Col>
<Col id="department">0</Col>
<Col id="comp_phone">9025-7000</Col>
<Col id="comp_addr">Coral Springs</Col>
</Row>
<Row>
<Col id="id">TC-004</Col>
<Col id="name">Mark Contreras</Col>
<Col
id="email">[email protected]</Col>
<Col id="phone">7026-3815</Col>
<Col id="comp_name">consectetueripsumnunc</Col>
<Col id="department">0</Col>
<Col id="comp_phone">7026-7000</Col>
<Col id="comp_addr">Elmira</Col>
</Row>
</Rows>
</Dataset>
</Root>
Creating a Data Transactions Screen | 57
Button click event
Add code fetching the data by accessing the sample.xml file instead of adding the data manually to a button
click event (divCommand_btnSearch_onclick).
The revised code is as follows. Specify parameters needed for the transaction method and call the method.
The transaction method downloads data by accessing a service (or a file) to update a certain dataset value
and calls up the CallBack function once the task is completed.
this.divCommand_btnSearch_onclick = function(obj:Button,
e:nexacro.ClickEventInfo)
{
var id = "search";
var url = "http://localhost:8080/CustomerList/sample.xml";
var reqDs = "";
var respDs = "dsCustomers=customers";
var args = "";
var callback = "received";
this.transaction(id, url, reqDs, respDs, args, callback);
}
The parameters used in the transaction method are as follows:
Parameter
Type
Explanation
id
String
ID distinguishing transactions
url
String
URL of a service or a file requesting transaction
reqDs
String
This is a value that designates the dataset changed when the dataset data
used in the application are revised. The transmission format is as follows:
(Dataset designated in a service or a file) = (Dataset revised in the application).
Multiple values may be designated separately.
respDs
String
Value designated when receiving transaction processing results.
The transmission format is as follows: (Dataset revised in the application) =
(Dataset designated in a service or a file). Multiple values may be designated
separately.
args
String
Value that designates the parameters transmitted when requesting transaction.
The transmission format is as follows: parameter_name = value. Multiple
values maybe designated separately.
callback
String
This is a value that designates the CallBack function that processes transaction
results.
58 | Nexacro Platform 14 / Getting Started Tutorial
The transaction method has three more parameters including asynchronous, binary and
compressed communication. If you omit the parameter, the default value will be applied.
Callback Function
Access a service or a file by transaction method, and then execute the designated CallBack function. The
CallBack function is created as follows:
this.received = function(id, code, message)
{
if (code == 0) {
this.alert(this.dsCustomers.rowcount + " numbers of data have been
found.");
trace(this.dsCustomers.rowcount + " numbers of data have been
found.");
} else {
this.alert("Error["+code+"]:"+message);
trace("Error["+code+"]:"+message);
}
}
As the XML file used in the example always sends a successful message, the result is as below. It shows data
on the Grid.
If a transaction URL is not on the same server as Nexacro Platform applications, you may
experience an Access-Control-Allow-Origin error.
Creating a Data Transactions Screen | 59
6.3 Log
The error messages occurring in Nexacro Platform applications and those messages processed in the trace
method differ slightly depending on the Runtime or web browser. You can check the error messages occurring
in Form Design and Generate in the Nexacro Studio Output window.
However, in the Runtime version, you can check errors or messages that occur while running applications in
the Nexacro Studio Output window. In the HTML5 version, visibility of errors in the log depends on the
configuration of the web browser.
The following section is based on web browser versions listed below. It is subject to change
depending on the version in use.
- Google Chrome 34.x
- Firefox 20.x
- Internet Explorer 10.x
60 | Nexacro Platform 14 / Getting Started Tutorial
Google Chrome
The JavaScript console can be accessed via the menu below.
[Menu] Tools > JavaScript Console
Firefox
The JavaScript console can be accessed via the menu below. Firefox provides more features and information
than Google Chrome.
Creating a Data Transactions Screen | 61
[Menu] Web Developer > Web Console
62 | Nexacro Platform 14 / Getting Started Tutorial
Internet Explorer
The JavaScript console can be accessed via the menu below. Developer tools can be accessed directly via
the F12 function key.
[Menu] Tools > developer tools > Console
7.
Creating Data Transaction Service using
X-API
6. Creating a Data Transactions Screen handled XML file data that is already written and stored. In actual
business environments, however, data transaction usually involves more complicated tasks such as querying
multiple databases and saving input data into databases.
Nexacro Platform applications employ the transaction() method to transmit inputs from a form to a server
and to receive data from a server. The method transforms input variables and datasets into an XML format to
transmit them to a server. The method uses a callback to process data from a server.
The foregoing course of operation requires services on the server side to handle variables and datasets sent
from clients and manipulate data in databases. The services on the server side fetch data at the request of
clients and send the data to them after processing it appropriately. If there are problems for client requests,
the services will return error codes and messages, which will help clients figure out the natures of the
problems.
Those services can be written with various programming languages such as JSP, Servlet, ASP, and PHP
according to server environments. This chapter will demonstrate how to make simple services with JSP and
how they work.
7.1 Service
You will be taught how to develop a group of services for using the transaction() method to deliver input
data from a form to a server and to retrieve data stored in the server.
You will try to retrieve the data stored in the server instead of accessing to a database for the
sake of simplicity.
The following three services will be explained.
●
initdata.jsp: used to create data and save it in the form a file
64 | Nexacro Platform 14 / Getting Started Tutorial
●
search.jsp: used to create a dataset by reading data from the saved file and then sends the dataset to a
client
●
save_list.jsp: used to modify the file according to the data sent from the client
7.2 X-API
Provided Files
The Nexacro Platform X-API library provides functions necessary for developing services for data processing.
The provided files are as below.
●
nexacro-xapi-1.0.jar (X-API library file)
●
commons-logging-1.1.1.jar (http://commons.apache.org/proper/commons-logging/)
●
nexacro14_server_license.xml (license file)
●
docs > api (X-API manual)
The X-APIs of Nexacro Platform, used for the example in this manual, are just a library that
contains functions necessary for data processing. Therefore, they are not a must-use.
Installation
Copy the two JAR files and a license file to the WEB-INF folder of your web application server (WAS).
/WEB-INF/lib/nexacro-xapi-1.0.jar
/WEB-INF/lib/commons-logging-1.1.1.jar
/WEB-INF/lib/nexacro14_server_license.xml
The location for copying the library can vary according to the settings of your WAS.
Library files and license file must be in the same location for the identification of those files.
You can verify whether the installation has been successful with the below code.
Creating Data Transaction Service using X-API | 65
<%@ page contentType="text/html; charset=UTF-8" %>
<html>
<head>
<title>JarInfo</title>
<style>
* { font-family: Verdana }
</style>
</head>
<body>
<pre>
<%
new com.nexacro.xapi.util.JarInfo().info(out);
%>
</pre>
</body>
</html>
66 | Nexacro Platform 14 / Getting Started Tutorial
Objects
The followings are objects included in the X-API library.
●
PlatformData : a basic object that stores data
●
PlatformRequest : an input object that reads XML data and objectifies it upon the request from JSP
●
PlatformResponse : an output object that put out XML data upon the request from JSP
●
DatasetList & Dataset : objects that store data in the form of a two-dimensional table or table array.
●
VariableList & Variable : objects that store a set of input/output arguments
See the X-API manual included in the library for further explanations
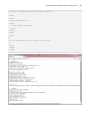
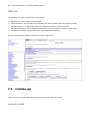
7.3 initdata.jsp
This is a service to create basic data and save it to the server in the form of a file.
pseudo code
Creating Data Transaction Service using X-API | 67
// 1. Designating a Java library (including nexacro platform X-API)
// 2. Defining a MIME type
// 3. Creating a basic object of Nexacro Platform (PlatformData)
try {
// 4. Processing data
// 5. Processing ErrorCode and ErrorMsg (success message)
} catch (Error) {
// 5. Processing ErrorCode and ErrorMsg (failure message)
}
// 6. Sending result data to the client
Coding
Designating a Java library
Designate a basic Java library to write a JSP service. The necessary code is as below.
<!-- 1. Designating a Java library -->
<%@ page import="java.io.*" %>
<%@ page import="com.nexacro.xapi.data.*" %>
<%@ page import="com.nexacro.xapi.tx.*" %>
Defining a MIME type
Define a MIME (Multipurpose Internet Mail Extensions) type for creating a XML file.
<!-- 2. Defining a MIME type -->
<%@ page contentType="text/xml; charset=UTF-8" %>
Creating a basic object of Nexacro Platform (PlatformData)
Declare PlatformData as a basic object for data processing. PlatformData is an object that can store all
types of data used in Nexacro Platform's applications such as datasets and variables.
Write the below code to declare PlatformData.
/** 3. Creating a basic object of Nexacro Platform **/
PlatformData pdata = new PlatformData();
68 | Nexacro Platform 14 / Getting Started Tutorial
Processing data: saving data as a file
Create a dataset, enter information about the column, create two rows, and input column values to each row.
Register the dataset in PlatformData for easy handling of the dataset.
Save PlatformData under the name saveFile.bin. The below code is for creating a dataset and saving it as
a file.
/** 4. Processing data: saving data as a file **/
/** 4.1 Creating a dataset and inputting basic data to the dataset **/
DataSet ds = new DataSet("customers");
ds.addColumn("id",DataTypes.STRING, 4);
ds.addColumn("name",DataTypes.STRING, 16);
...
int row = 0;
int i = 0;
String[] customers = new String[8];
customers[0] = "TC-001";
customers[1] = "Dustin Kim";
...
for (i = 0; i < 2; i++)
{
row = ds.newRow();
ds.set(row,"id",customers[0]);
ds.set(row,"name",customers[1]);
...
}
pdata.addDataSet(ds);
/** 4.2 Saving a dataset as a file **/
String targetFilename = "./saveFile.bin";
OutputStream target = new FileOutputStream(targetFilename);
PlatformResponse res = new PlatformResponse(target,
PlatformType.CONTENT_TYPE_BINARY);
res.setData(pdata);
res.sendData();
target.close();
Creating Data Transaction Service using X-API | 69
Processing ErrorCode and ErrorMsg
The below code is for handling exceptions.
/** 5.1 Processing ErrorCode and ErrorMsg **/
int nErrorCode = 0;
String strErrorMsg = "START";
try {
/** 5.2 Setting ErrorCode and ErrorMsg for success **/
nErrorCode = 0;
strErrorMsg = "SUCC";
} catch (Throwable th) {
/** 5.3 Setting ErrorCode and ErrorMsg for failure **/
nErrorCode = -1;
strErrorMsg = th.getMessage();
}
/** 5.4 Saving ErrorCode and ErrorMsg to send them to the client **/
PlatformData senddata = new PlatformData();
VariableList varList = senddata.getVariableList();
varList.add("ErrorCode", nErrorCode);
varList.add("ErrorMsg", strErrorMsg);
Sending result data to the client
Use PlatformData to let the client know whether the initial data has been successfully saved. For here, the
previously-saved ErrorCode and ErrorMsg will be delivered.
Since VariableList is a member of PlatformData, the result of processing ErrorCode is included in
PlatformData. Now, you will learn how to extract XML data from PlatformData and send it to the client
as Nexacro Platform can handle XML format. First, create the object PlatformResponse to facilitate data
transfer. Then, write the below code to extract data from PlatformData.
/** 6. Sending result data to the client **/
HttpPlatformResponse res = new HttpPlatformResponse(response,
PlatformType.CONTENT_TYPE_XML,"UTF-8");
res.setData(senddata);
res.sendData();
If the data is successfully processed, the client will receive the below XML data.
70 | Nexacro Platform 14 / Getting Started Tutorial
<Root xmlns="http://www.nexacro.com/platform/dataset" ver="5000">
<Parameters>
<Parameter id="ErrorCode" type="int">0</Parameter>
<Parameter id="ErrorMsg" type="string">SUCC</Parameter>
</Parameters>
</Root>
Overall Code
<!-- 1.Designating a Java library -->
<%@ page import="java.io.*" %>
<%@ page import="com.nexacro.xapi.data.*" %>
<%@ page import="com.nexacro.xapi.tx.*" %>
<!-- 2. Defining a MIME type -->
<%@ page contentType="text/xml; charset=UTF-8" %>
<%
/** 3. Creating a basic object of Nexacro Platform **/
PlatformData pdata = new PlatformData();
/** 5-1. Processing ErrorCode and ErrorMsg **/
int nErrorCode = 0;
String strErrorMsg = "START";
try {
/** 4. Processing data: saving data as a file **/
/** 4.1 Creating a dataset and inputting basic data to the dataset **/
DataSet ds = new DataSet("customers");
ds.addColumn("id",DataTypes.STRING, 4);
ds.addColumn("name",DataTypes.STRING, 16);
ds.addColumn("email", DataTypes.STRING, 32);
ds.addColumn("phone", DataTypes.STRING, 16);
ds.addColumn("comp_name", DataTypes.STRING, 32);
ds.addColumn("department", DataTypes.STRING, 32);
ds.addColumn("comp_phone", DataTypes.STRING, 16);
ds.addColumn("comp_addr", DataTypes.STRING, 256);
int row = 0;
Creating Data Transaction Service using X-API | 71
int i = 0;
String[] customers = new String[8];
customers[0] = "TC-001";
customers[1] = "Dustin Kim";
customers[2] = "[email protected]";
customers[3] = "6987-6543";
customers[4] = "TOBESOFT";
customers[5] = "0";
customers[6] = "6506-7000";
customers[7] = "Seoul";
for (i = 0; i < 1; i++)
{
row = ds.newRow();
ds.set(row,"id",customers[0]);
ds.set(row,"name",customers[1]);
ds.set(row,"email",customers[2]);
ds.set(row,"phone",customers[3]);
ds.set(row,"comp_name",customers[4]);
ds.set(row,"department",customers[5]);
ds.set(row,"comp_phone",customers[6]);
ds.set(row,"comp_addr",customers[7]);
}
pdata.addDataSet(ds);
/** 4.2 Saving a dataset to a file **/
String targetFilename = "./saveFile.bin";
OutputStream target = new FileOutputStream(targetFilename);
PlatformResponse res = new PlatformResponse(target,
PlatformType.CONTENT_TYPE_BINARY);
res.setData(pdata);
res.sendData();
target.close();
System.out.println("after file write..");
/** 5.2 Setting ErrorCode and ErrorMsg for success**/
nErrorCode = 0;
strErrorMsg = "SUCC";
72 | Nexacro Platform 14 / Getting Started Tutorial
} catch (Throwable th) {
/** 5.3 Setting ErrorCode and ErrorMsg for failure **/
nErrorCode = -1;
strErrorMsg = th.getMessage();
}
/** 5.4 Saving the ErrorCode and ErrorMsg to send them to the client **/
PlatformData senddata = new PlatformData();
VariableList varList = senddata.getVariableList();
varList.add("ErrorCode", nErrorCode);
varList.add("ErrorMsg", strErrorMsg);
/** 6. Sending result data to the client **/
HttpPlatformResponse res = new HttpPlatformResponse(response,
PlatformType.CONTENT_TYPE_XML,"UTF-8");
res.setData(senddata);
res.sendData();
%>
Data Initialization Event
Add a button component to the screen developed in the Chapter 6. 6. Creating a Data Transactions Screen
and then add the onclick event as seen in the below code. Clicking the button will call up the initdata.jsp
service, creating a file that contains a dataset in the server.
this.btnInitdata_onclick = function(obj:Button,
e:nexacro.ClickEventInfo)
{
var id = "initdata";
var url = "SvcList::initdata.jsp";
var reqDs = "";
var respDs = "";
var args = "";
var callback = "received";
this.transaction(id, url, reqDs, respDs, args, callback);
}
this.received = function(id, code, message)
{
Creating Data Transaction Service using X-API | 73
if (code == 0) {
this.alert(message);
trace(message);
} else {
this.alert("Error["+code+"]:"+message);
trace("Error["+code+"]:"+message);
}
}
Although you can enter a full URL whenever you need to specify the url property, you can make the process
simple by adding frequently-used domains to TypeDefinition as service URLs. Then, you just need to specify a
file name without having to write a long URL.
The following is how to use the specified service.
var url = "[Service ID]::[file name]";
74 | Nexacro Platform 14 / Getting Started Tutorial
7.4 search.jsp
This is a service to create a dataset by reading data from the saved file and then sends the dataset to a client.
pseudo code
// 1. Designating a Java library (including nexacro platform X-API)
// 2. Defining a MIME type
// 3. Creating a basic object of Nexacro Platform (PlatformData)
try {
// 4. Processing data
// 5. Processing ErrorCode and ErrorMsg (success message)
} catch (Error) {
// 5. Processing ErrorCode and ErrorMsg (failure message)
}
// 6. Sending result data to the client
Coding
Designating a Java library
Designate a basic Java library to write a JSP service. The necessary code is as below.
<!-- 1. Designating a Java library -->
<%@ page import="java.io.*" %>
<%@ page import="com.nexacro.xapi.data.*" %>
<%@ page import="com.nexacro.xapi.tx.*" %>
Defining a MIME type
Define a MIME (Multipurpose Internet Mail Extensions) type for creating a XML file.
<!-- 2. Defining a MIME type -->
<%@ page contentType="text/xml; charset=UTF-8" %>
Creating Data Transaction Service using X-API | 75
Creating a basic object of Nexacro Platform (PlatformData)
Declare PlatformData as a basic object for data processing. PlatformData is an object that can store all
types of data used in Nexacro Platform's applications such as datasets and variables.
Write the below code to declare PlatformData.
/** 3. Creating a basic object of Nexacro Platform **/
PlatformData pdata = new PlatformData();
Processing data: Loading data from the file
Load data from the saveFile.bin file and save it to PlatformData. The basic object contains the dataset.
The below code is for reading data from the file and saving it into PlatformData.
/** 4. Processing data: Loading data from the file: loading data from the file
**/
/** 4.1 Loading data from the file **/
String sourceFilename = "./saveFile.bin";
InputStream source = new FileInputStream(sourceFilename);
PlatformRequest req = new PlatformRequest(source,
PlatformType.CONTENT_TYPE_BINARY);
req.receiveData();
source.close();
/** 4.2 Copying the loaded data to the dataset **/
pdata = req.getData();
Processing ErrorCode and ErrorMsg
The below code is for handling exceptions.
/** 5.1 Processing ErrorCode and ErrorMsg **/
int nErrorCode = 0;
String strErrorMsg = "START";
try {
/** 5.2 Setting ErrorCode and ErrorMsg for success**/
nErrorCode = 0;
strErrorMsg = "SUCC";
} catch (Throwable th) {
76 | Nexacro Platform 14 / Getting Started Tutorial
/** 5.3 Setting ErrorCode and ErrorMsg for failure **/
nErrorCode = -1;
strErrorMsg = th.getMessage();
}
/** 5.4 Saving ErrorCode and ErrorMsg to send them to the client **/
PlatformData pdata = new PlatformData();
VariableList varList = pdata.getVariableList();
varList.add("ErrorCode", nErrorCode);
varList.add("ErrorMsg", strErrorMsg);
Sending result data to the client
Use PlatformData to let the client know whether the initial data has been successfully saved. For here, the
previously-saved ErrorCode and ErrorMsg will be delivered.
While the PlatformData object in initdata.jsp only contains ErrorCode and ErrorMsg, the
PlatformData in search.jsp also includes a dataset containing the name list that the client uses.
Since VariableList is a member of PlatformData, the result of processing ErrorCode is included in
PlatformData. Now, you will learn how to extract XML data from PlatformData and send it to the client
as Nexacro Platform can handle XML format. First, create the object PlatformResponse to facilitate data
transfer. Then, write the below code to extract data from PlatformData.
/** 6. Sending result data to the client **/
HttpPlatformResponse res = new HttpPlatformResponse(response,
PlatformType.CONTENT_TYPE_XML,"UTF-8");
res.setData(pdata);
res.sendData();
If the data is successfully processed, the client will receive the below XML data.
<Root xmlns="http://www.nexacro.com/platform/dataset" ver="5000">
<Parameters>
<Parameter id="ErrorCode" type="int">0</Parameter>
<Parameter id="ErrorMsg" type="string">SUCC</Parameter>
</Parameters>
<Dataset id="customers">
<ColumnInfo>
<Column id="id" type="string" size="4"/>
<Column id="name" type="string" size="16"/>
<Column id="email" type="string" size="32"/>
Creating Data Transaction Service using X-API | 77
<Column id="phone" type="string" size="16"/>
<Column id="comp_name" type="string" size="32"/>
<Column id="department" type="string" size="32"/>
<Column id="comp_phone" type="string" size="16"/>
<Column id="comp_addr" type="string" size="256"/>
</ColumnInfo>
<Rows>
<Row>
<Col id="id">TC-001</Col>
<Col id="name">Dustin Kim</Col>
<Col id="email">[email protected]</Col>
<Col id="phone">6987-6543</Col>
<Col id="comp_name">TOBESOFT</Col>
<Col id="department">0</Col>
<Col id="comp_phone">6506-7000</Col>
<Col id="comp_addr">Seoul</Col>
</Row>
</Rows>
</Dataset>
</Root>
Overall Code
<!-- 1.Designating a Java library -->
<%@ page import="java.io.*" %>
<%@ page import="com.nexacro.xapi.data.*" %>
<%@ page import="com.nexacro.xapi.tx.*" %>
<!-- 2. Defining a MIME type -->
<%@ page contentType="text/xml; charset=UTF-8" %>
<%
/** 3. Creating a basic object of Nexacro Platform **/
PlatformData pdata = new PlatformData();
/** 5.1 Processing ErrorCode and ErrorMsg **/
int nErrorCode = 0;
String strErrorMsg = "START";
try {
78 | Nexacro Platform 14 / Getting Started Tutorial
/** 4. Processing data : Loading data from the file: loading data from the
file **/
/** 4.1 Loading data from the file **/
String sourceFilename = "./saveFile.bin";;
InputStream source = new FileInputStream(sourceFilename);
PlatformRequest req = new PlatformRequest(source,
PlatformType.CONTENT_TYPE_BINARY);
req.receiveData();
source.close();
/** 4.2 Copying the loaded data to the dataset **/
pdata = req.getData();
/** 5.2 Setting ErrorCode and ErrorMsg for success **/
nErrorCode = 0;
strErrorMsg = "SUCC";
} catch (Throwable th) {
/** 5.3 Setting ErrorCode and ErrorMsg for failure **/
nErrorCode = -1;
strErrorMsg = th.getMessage();
}
/** 5.4 Saving ErrorCode and ErrorMsg to send them to the client **/
VariableList varList = pdata.getVariableList();
varList.add("ErrorCode", nErrorCode);
varList.add("ErrorMsg", strErrorMsg);
/** 6. Sending result data to the client **/
HttpPlatformResponse res = new HttpPlatformResponse(response,
PlatformType.CONTENT_TYPE_XML,"UTF-8");
res.setData(pdata);
res.sendData();
%>
Creating Data Transaction Service using X-API | 79
Data Search Event
Modify the onclick event applied to the Search button in the screen developed in the Chapter 6. Creating a
Data Transactions Screen. Clicking the button will call up the search.jsp service, reading the file saved in the
server and returning a dataset.
The information on the dataset sent from the server will be contained by the dsCustomers dataset written
within the developed screen before being output through the relevant grid.
this.divCommand_btnSearch_onclick = function(obj:Button,
e:nexacro.ClickEventInfo)
{
var id = "search";
var url = "SvcList::search.jsp";
var reqDs = "";
var respDs = "dsCustomers=customers";
var args = "";
var callback = "received";
this.transaction(id, url, reqDs, respDs, args, callback);
}
this.received = function(id, code, message)
{
if (code == 0) {
var rowcount = this.dsCustomers.rowcount;
this.alert(rowcount + " numbers of data have been found.");
trace(rowcount + " numbers of data have been found.");
} else {
this.alert("Error["+code+"]:"+message);
trace("Error["+code+"]:"+message);
}
}
Connecting to a Database
In the example presented in this manual, you just brought a dataset file already saved in the server and sent it
to a client. In contrast, the below code shows how to connect to a database instead of just accessing a file.
80 | Nexacro Platform 14 / Getting Started Tutorial
<%@ page import = "java.util.*" %>
<%@ page import = "java.sql.*" %>
<%@ page import="com.nexacro.xapi.data.*" %>
<%@ page import = "java.io.*" %>
<%@ page contentType="text/xml; charset=utf-8" %>
<%
/****** Service API initialization ******/
PlatformData pdata = new PlatformData();
int nErrorCode = 0;
String strErrorMsg = "START";
/******* JDBC Connection *******/
Connection conn = null;
Statement
stmt = null;
ResultSet
rs
= null;
Class.forName("com.microsoft.sqlserver.jdbc.SQLServerDriver");
conn = DriverManager.getConnection("jdbc:sqlserver://localhost:1433;;DatabaseNa
me=Sample",
"guest","guest");
stmt = conn.createStatement();
try {
/******* SQL query *************/
String SQL = "select * from sample_customers_list";
rs = stmt.executeQuery(SQL);
/********* Dataset Create ************/
DataSet ds = new DataSet("customers");
ds.addColumn("id",DataTypes.STRING, 4);
ds.addColumn("name",DataTypes.STRING, 16);
ds.addColumn("email", DataTypes.STRING, 32);
ds.addColumn("phone", DataTypes.STRING, 16);
ds.addColumn("comp_name", DataTypes.STRING, 32);
ds.addColumn("department", DataTypes.STRING, 32);
ds.addColumn("comp_phone", DataTypes.STRING, 16);
ds.addColumn("comp_addr", DataTypes.STRING, 256);
int row = 0;
while(rs.next())
Creating Data Transaction Service using X-API | 81
{
row = ds.newRow();
ds.set(row, "id", rs.getString("id"));
ds.set(row, "name", rs.getString("name"));
ds.set(row, "email", rs.getString("email"));
ds.set(row, "phone", rs.getString("phone"));
ds.set(row, "comp_name", rs.getString("comp_name"));
ds.set(row, "department", rs.getString("department"));
ds.set(row, "comp_phone", rs.getString("comp_phone"));
ds.set(row, "comp_addr", rs.getString("comp_addr"));
}
/********* Adding Dataset to PlatformData ************/
pdata.addDataSet(ds);
nErrorCode = 0;
strErrorMsg = "SUCC";
}
catch(SQLException e) {
nErrorCode = -1;
strErrorMsg = e.getMessage();
}
/******** JDBC Close *******/
if ( stmt != null ) try { stmt.close(); } catch (Exception e) {}
if ( conn != null ) try { conn.close(); } catch (Exception e) {}
PlatformData senddata = new PlatformData();
VariableList varList = senddata.getVariableList();
varList.add("ErrorCode", nErrorCode);
varList.add("ErrorMsg", strErrorMsg);
/******** XML data Create ******/
HttpPlatformResponse res = new HttpPlatformResponse(response,
PlatformType.CONTENT_TYPE_XML,"UTF-8");
res.setData(pdata);
res.sendData();
%>
82 | Nexacro Platform 14 / Getting Started Tutorial
7.5 save_list.jsp
This is a service to modify the file according to the data sent from a client.
pseudo code
Unlike 7.3 initdata.jsp and 7.4 search.jsp, there is a step called "Receiving a request from the client."
// 1. Designating a Java library (including nexacro platform X-API)
// 2. Defining a MIME type
// 3. Creating a basic object of Nexacro Platform (PlatformData)
try {
// 4. Receiving a request from the client
// 5. Processing data
// 6. Processing ErrorCode and ErrorMsg (success message)
} catch (Error) {
// 6. Processing ErrorCode and ErrorMsg (failure message)
}
// 7. Sending result data to the client
Coding
Designating a Java library
Designate a basic Java library to write a JSP service. The necessary code is as below.
<!-- 1. Designating a Java library -->
<%@ page import="java.io.*" %>
<%@ page import="com.nexacro.xapi.data.*" %>
<%@ page import="com.nexacro.xapi.tx.*" %>
Defining a MIME type
Define a MIME (Multipurpose Internet Mail Extensions) type for creating a XML file.
Creating Data Transaction Service using X-API | 83
<!-- 2. Defining a MIME type -->
<%@ page contentType="text/xml; charset=UTF-8" %>
Creating a basic object of Nexacro Platform (PlatformData)
Declare PlatformData as a basic object for data processing. PlatformData is an object that can store all
types of data used in Nexacro Platform's applications such as datasets and variables.
Write the below code to declare PlatformData.
/** 3. Creating a basic object of Nexacro Platform **/
PlatformData pdata = new PlatformData();
Receiving a request from the client
The server handles the dataset sent from the client as a parameter.
/** 4. Receiving a request from the client **/
// create HttpPlatformRequest for receive data from client
HttpPlatformRequest req = new HttpPlatformRequest(request);
req.receiveData();
Extracting and saving the data sent by the client
Transform the data sent by the client into PlatformData and extract the dataset from the basic object to
allow the server to handle the data. Save the created PlatformData as a file under the name saveFile.bin.
/** 5. Processing data: Loading data from the file **/
/** 5.1 Loading data from the http object **/
pdata = req.getData();
/** Obtaining a dataset from the received data **/
DataSet ds = pdata.getDataSet("dsPerson");
/** Saving data as a file with init data **/
String targetFilename = "./saveFile.bin";
OutputStream target = new FileOutputStream(targetFilename);
PlatformResponse res = new PlatformResponse(target,
PlatformType.CONTENT_TYPE_BINARY);
res.setData(pdata);
84 | Nexacro Platform 14 / Getting Started Tutorial
res.sendData();
target.close();
Processing ErrorCode and ErrorMsg
The below code is for handling exceptions. If the data processing is successful, the server will return a
message that data has been successfully saved.
/** 6.1 Processing ErrorCode and ErrorMsg **/
int nErrorCode = 0;
String strErrorMsg = "START";
try {
/** 6.2 Setting ErrorCode and ErrorMsg for success **/
nErrorCode = 0;
strErrorMsg = "person list saved complete : row
count("+ds.getRowCount()+")";
} catch (Throwable th) {
/** 6.3 Setting ErrorCode and ErrorMsg for failure **/
nErrorCode = -1;
strErrorMsg = th.getMessage();
}
/** 6.4 Saving ErrorCode and ErrorMsg to send them to the client **/
PlatformData senddata = new PlatformData();
VariableList varList = senddata.getVariableList();
varList.add("ErrorCode", nErrorCode);
varList.add("ErrorMsg", strErrorMsg);
Sending result data to the client
Use PlatformData to let the client know whether the initial data has been successfully saved. For here, the
previously-saved ErrorCode and ErrorMsg will be delivered.
Since VariableList is a member of PlatformData, the result of processing ErrorCode is included in
PlatformData. Now, you will learn how to extract XML data from PlatformData and send it to the client
as Nexacro Platform can handle XML format. First, create the object PlatformResponse to facilitate data
transfer. Then, write the below code to extract data from PlatformData.
/** 7. Sending result data to the client **/
HttpPlatformResponse res = new HttpPlatformResponse(response,
PlatformType.CONTENT_TYPE_XML,"UTF-8");
Creating Data Transaction Service using X-API | 85
res.setData(senddata);
res.sendData();
Overall Code
<!-- 1. Designating a Java library -->
<%@ page import="java.io.*" %>
<%@ page import="com.nexacro.xapi.data.*" %>
<%@ page import="com.nexacro.xapi.tx.*" %>
<!-- 2. Defining a MIME type -->
<%@ page contentType="text/xml; charset=UTF-8" %>
<%
/** 3. Creating a basic object of Nexacro Platform **/
PlatformData pdata = new PlatformData();
/** 6.1 Processing ErrorCode and ErrorMsg **/
int nErrorCode = 0;
String strErrorMsg = "START";
try {
/** 4. Receiving a request from the client **/
// create HttpPlatformRequest for receive data from client
HttpPlatformRequest req = new HttpPlatformRequest(request);
req.receiveData();
/** 5. Processing data: Loading data from the file **/
/** 5.1 Loading data from the http object **/
pdata = req.getData();
/** Obtaining a dataset from the received data **/
DataSet ds = pdata.getDataSet("dsPerson");
/** Saving data as a file with init data **/
String targetFilename = "./saveFile.bin";
OutputStream target = new FileOutputStream(targetFilename);
PlatformResponse res = new PlatformResponse(target,
PlatformType.CONTENT_TYPE_BINARY);
res.setData(pdata);
86 | Nexacro Platform 14 / Getting Started Tutorial
res.sendData();
target.close();
/** 6.2 Setting ErrorCode and ErrorMsg for success **/
nErrorCode = 0;
strErrorMsg = "person list saved complete : row
count("+ds.getRowCount()+")";
} catch (Throwable th) {
/** 6.3 Setting ErrorCode and ErrorMsg for failure **/
nErrorCode = -1;
strErrorMsg = th.getMessage();
System.out.println("ERROR:"+strErrorMsg);
}
/** 6.4 Saving ErrorCode and ErrorMsg to send them to the client **/
PlatformData senddata = new PlatformData();
VariableList varList = senddata.getVariableList();
varList.add("ErrorCode", nErrorCode);
varList.add("ErrorMsg", strErrorMsg);
/** 7. Sending result data to the client **/
HttpPlatformResponse res = new HttpPlatformResponse(response,
PlatformType.CONTENT_TYPE_XML,"UTF-8");
res.setData(senddata);
res.sendData();
%>
Data Saving Event
Add a button component to the screen developed in the Chapter 6. 6. Creating a Data Transactions Screen
and then add the onclick event as seen in the below code. Clicking the button will call up the save_list.jsp
service, sending the dataset modified in the screen to the server and saving it in the server as a file.
You can add a simple function that can modify data. Double-click the grid in the screen to open the Grid
Contents Editor. Select the Name cell and change the edittype property to text.
Creating Data Transaction Service using X-API | 87
You can change the data by double-clicking a cell where a name is written.
Click the Save button to transmit data to the server.
Click the Search button after refreshing the page, and you will see the data on the person that you intended to
search for.
this.btnSaveList_onclick = function(obj:Button,
{
var id = "search";
var url = "SvcList::save_list.jsp";
var reqDs = "customers=dsCustomers";
var respDs = "";
var args = "";
e:nexacro.ClickEventInfo)
88 | Nexacro Platform 14 / Getting Started Tutorial
var callback = "received";
this.transaction(id, url, reqDs, respDs, args, callback);
}
this.received = function(id, code, message)
{
if (code == 0) {
this.alert(message);
trace(message);
} else {
this.alert("Error["+code+"]:"+message);
trace("Error["+code+"]:"+message);
}
}