1
How to Make a Bag from a FoodSaver Vacuum Sealing Roll
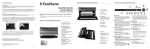
Lift Roll Cutter
1. Open appliance door and place roll into Roll Storage
Compartment (H). For Best results, insert roll with
material flap down. Note: Bags can be sealed with
appliance door either open or closed.
2. Lift up Bag Cutter Bar (i) and place bag material
beneath the cutter bar (See Fig.1).
3. Pull out enough bag material to hold item being
vacuum packed, plus 4 inches (10.16 centimeters).
Lower the Cutter Bar and slide Bag Cutter (i) across
the Cutter Bar (See Fig.2).
®
Slide Cutter
Fig. 1
Fig. 2
4. Press Seal Button (C). Red seal light will illuminate.
5. Using two hands, insert open end of bag into
Vacuum Channel (E) until clamp motor starts. Bag
must be centered between arrows.
6. When red seal light 11 turns off, sealing is
complete. You may remove bag from the
Vacuum Channel (E).
7. You now have one sealed end.
8. Now you are ready to vacuum seal with your new bag
(See below).
Your FoodSaver® Vacuum Sealing System has a special
Quick Marinate Cycle which will last about ten minutes.
The vacuum motor will “hold” the vacuum for several
minutes then release the vacuum allowing the food to
“rest” for 30 seconds. This process will then repeat
two more times. This “Pulsing” action of “vacuuming
and resting” will allow for quicker marinating. When the
Quick Marinate Cycle is completed the appliance will
beep to signal marinating is complete.
The FoodSaver® Quick Marinator Canister is the perfect
FoodSaver® Accessory for marinating foods. Foods will
marinate in minutes when vacuum sealed because
the vacuum process opens the pores of the food and
absorbs the marinade more quickly.
Important Note: Use the FoodSaver® Quick Marinating
Canister with clear lid and large white knob. During the
Quick Marinate Cycle, make sure knob on accessory lid
is set to OPEN. Do not set knob to Vacuum. The
Vacuum position on the knob will allow the Quick
Marinating Canister to be used for extending
vacuum storage.
1. Prepare enough of your favorite marinade to fully
cover food inside a marinating canister.
How to Vacuum Seal with FoodSaver Vacuum Sealing Bags
®
Insert Bag
Tips for Successful Vacuum Sealing (continued)
Marinating with your FoodSaver Appliance
®
Optional Bag Storage
Always leave at least one inch (2.54 centimeters) of
space between contents and top of rim.
11. If appliance does not function, or Seal button (C) flashes to
2. Make sure rubber gasket underneath lids as well as
rim of marinating canister is free from food materials.
3. Make sure Accessory Hose is securely inserted into
port on the FoodSaver® Quick Marinator lid.
4. Make sure knob on accessory lid is set to OPEN.
5. Make sure lid is firmly attached to marinator base.
6. Press Marinate button 3 on the control panel.
7. Your FoodSaver® Vacuum Sealing System will now
begin the Quick Marinate Cycle. The Marinate
Indicator Light will flash to indicate the marinating
process has begun.
Tips on Using PulseVac™ Control Feature
(This special feature is not available on all V3800 models)
Use the PulseVac™ Control feature to manually control the
vacuum process and avoid crushing delicate items.
8. During the initial vacuum cycle the Marinate Mode
Indicator will illuminate. While Marinating, the
Vacuum Progress Display will blink during the
Vacuum Hold or Rest Cycle.
1. Place item(s) in bag, allowing at least 3 inches
(7.62 centimeters) of space between bag contents and
top of bag.
9. To preserve food safely, after completing the
marinating cycle, the appliance will signal with
short beeps to indicate your Quick Marinate Cycle is
completed. Press any button to silence the signal.
You may now cook or refrigerate your marinated food.
2. Press the PulseVac™ button 8 . PulseVac™ LED will
flash to indicate PulseVac™ mode.
3. Press appropriate Speed Setting Button 5 – Normal
or Gentle.
4. Insert open end of bag into Vacuum Channel (J).
The clamp will close to secure the bag.
Tips for Successful Vacuum Sealing
General Tips
Tips for Successful Vacuum Sealing
1. Vacuum sealing is NOT a substitute for the heat process of
canning. Perishables still need to be refrigerated or frozen.
Fig. 3
1. Begin with a FoodSaver® Vacuum Sealing System Bag
(or create a bag as described in the “How to Make a
Bag from a Roll” section above).
2. Place item(s) in bag, allowing at least 3 inches of
space between bag contents and top of bag.
3. Using two hands, insert open end of bag into Vacuum
Channel (E) until clamp motor starts (See Fig.3). The
vacuum progress lights will illuminate.
4. Continue to hold bag until vacuum pump starts. You
may now release bag. Note: To prevent crushing
delicate items, you may press Seal Button (C) at any
time to begin automatic sealing process.
2. For best results, use FoodSaver® brand Bags, Canisters
and Accessories.
Fig. 4
3. During the vacuum sealing process, small amounts of
liquids, crumbs or food particles can be inadvertently
pulled into Drip Tray (O), clogging the pump and
damaging your appliance.
5. When red Seal Light 11 turns off, remove bag.
Refrigerate or freeze if needed. (See FoodSaver®
Reference Guide for food safety tips.) Note: Wait at
least 20 seconds between seals to allow appliance
to properly cool.
6. See page 7 for information on the Pre-cut Bag Storage
(Shown in Fig. 4). This accessory is not included with
all units.
To prevent this, follow these tips:
a. For moist and juicy foods: Freeze first and avoid
overfilling bags. You can also place a folded paper
towel inside top of bag, and below seal area, before
vacuum sealing.
b. For soups, sauces and liquids: Freeze first and avoid
overfilling bags. Or, use a canister in refrigerator.
c. For powdery or fine-grained foods: Avoid overfilling bags
or use a canister. You can also place a coffee filter or
paper towel inside before vacuum packaging.
d. Empty drip tray (O) after each use.
4
signal ERROR:
a. Check power cord to see if it is firmly plugged into an
electrical outlet.
b. Examine power cord for any damages.
c. See if electrical outlet is working by plugging in
another appliance.
d. Check to be certain the Upper Bag Detection Tray (P)
is properly inserted.
e. Make sure bag is placed correctly inside Vacuum
Channel (E). (See How to Vacuum Seal with FoodSaver®
Vacuum Sealing Bags)
Tips on Sealing a Bag
When making a bag from a roll:
Press the Seal Button (C) before placing bag material into
the Vacuum Channel (E). Once bag in inserted the Seal
process will begin immediately.
Note: If you forget to press the Seal Button (C) before
inserting the bag into the Vacuum Channel (E), the vacuum
pump will turn on, this is not a problem, simply press the
Seal Button to prevent the pump from running continuously,
and the sealing process will begin.
4. To avoid overfilling, always leave at least 3 inches
(7.62 centimeters) of bag material between bag contents
and top of bag. Then leave at least one additional inch
(2.54 centimeters) of bag material for each time you plan
to reuse bag.
5. Do not create your own side seams for a FoodSaver® brand
Bag. Our bags are manufactured with a special side seam,
which is sealed all the way to the outer edge.
6. To prevent wrinkles in a seal when vacuum sealing bulky
items, gently stretch bag flat while inserting into the
vacuum channel and hold until pump begins.
7. If you are unsure your bag was sealed properly, simply
reseal bag.
Tips on Using the Intergrated Bag Opener
The Bag Opener is a handy and convenient way to open
sealed bags.
8. When you are vacuum sealing items with sharp edges
(dry spaghetti, silverware, etc.), protect bag from punctures
by wrapping item in soft cushioning material, such as a
paper towel. You may want to use a canister or Mason jar
instead of a bag.
To Use:
1. Press Bag Opener to extend (press again to retract Bag
Opener for storage).
Tips on Removing Air from a Bag
f. Check to ensure Release Buttons (K) are
properly latched.
g. Check Foam Gasket (M) around Drip Tray to make sure
it is free from food material and is properly inserted
into gasket channel.
h. Check Upper Gasket (Q) around Upper Bag Detection
Tray (P) to be sure it is free from food material.
i. If overheated, allow appliance to cool for 20 minutes.
j. For more usage tips and safety information, please
refer to the FoodSaver® Reference Guide or visit our
website at www.foodsaver.com.
Avoid wrinkles when inserting the bag into the
Vacuum Channel (E).
Wrinkles in seal may cause leakage and allow air to
return into bag. To eliminate any wrinkles while
inserting bag into the vacuum channel (E), hold bag with
two hands gently stretching bag flat until vacuum pump
begins. If you find wrinkles after sealing bag, simply cut
bag open and vacuum seal again.
®
Accessory Hose Reel
1. Prepare container according to FoodSaver®
Accessory Guidelines.
2. Pull Accessory Hose (F) from appliance and Insert the
end into the port on accessory. Twist tab while inserting
to ensure a tight fit.
3. Push Canister Vacuum Button 4 to begin vacuum
process. Motor will run until vacuum process is complete.
(To Marinate, follow instructions found in Marinate Button
section of this Quick Start Guide).
6. Press Seal Button 9 to seal the bag and end the
PulseVac™ mode.
7. When the red Seal Indicator Light 11 turns off, remove
bag. Refrigerate or freeze if needed.
4. When motor turns off, gently twist and remove Accessory
Hose from accessory.
How to Prevent moisture or liquid from being pulled into the
Drip Tray (O) or getting trapped in the seal:
Either pre-freeze moist food such as raw meat for 1-2 hours
before vacuum sealing, or place a folded paper towel between
food and end of bag to absorb excess liquids. Be sure to leave
at least 3 inches (7.62 centimeters) between paper towel and
end of bag so that bag seals properly with paper towel inside
and is not positioned in between the seal area.
Note: if you are using a canister with large white knob,
rotate knob clockwise to the “Closed” position, then gently
twist and remove Accessory Hose from accessory.
5. To test vacuum, simply tug on accessory lid. It should
not move.
6. To retract accessory hose, while holding unit, gently pull
on hose end to allow hose to retract into appliance
housing. Do not release freely as it may damage the
hose tip.
Make sure appliance has time to cool down.
Wait at least 20 seconds between seals. Under very heavy
usage, appliance will stop operating to prevent overheating.
If it does, wait 20 minutes to allow appliance to cool off.
Pull Through Cutter
10. Pre-freeze fruits and blanch vegetables before vacuum
sealing for best results. See FoodSaver® Reference Guide
included with your appliance for more information.
3. Hold bag taught with two hands and pull bag through the
cutter (See Fig. 6).
5
How to Open FoodSaver® Vacuum Sealing
Accessories after Vacuum Sealing
FoodSaver® Vacuum Sealing Canisters
(without large knob on lid)
To release vacuum and open, push gray rubber button on lid.
Quick Marinators (with large knob on lid) and Universal Lids
To release vacuum and open, turn knob counterclockwise on
lid to open.
FoodSaver® Jar Sealer with Mason Jars
For use with Ball® and Kerr® brand Mason jars.
To release vacuum and open, wedge spoon between Mason
jar lid and highest part of threaded rim. Twist spoon gently
to release vacuum.
IMPORTANT: Do NOT use screw bands when vacuum sealing jars.
FoodSaver® Lunch and Leftover and Sandwich and
Snack Containers
Note: For important tips on using accessories with different
foods, please refer to the FoodSaver® Reference Guide.
Attach the supplied adapter to the accessory hose and place
the adapter over the vacuum valve of the Container lid. While
applying downward pressure to the adaptor, press the Canister
Button. Once the air has been removed from the Container, the
Sealer will automatically turn off.
Pre-cut bag storage (as shown in Fig. 4, pg.4)
FoodSaver® Bottle Stoppers
Some models include a storage tray for precut bags.
Attach the precut storage tray to the back of the housing
by aligning the four tabs into the corresponding slots of
the back of the appliance housing. Once aligned, gently
press storage tray downward until the storage tray clicks
into place.
To release vacuum and open, simply pull up on Bottle Stopper.
Important: When pulling hose Do Not extend beyond green
circle marked on hose.
Note: Bags that previously contained fruits, vegetable and
dry goods can be resealed. Bags that contained raw meats,
fish eggs or unpasteurized cheese should be discarded
after use becase they may contain invisible bacteria that
will remain after washing.
Fold Bag
If motor runs for more than 30 seconds without
stopping, consider the following:
If you are vacuum sealing with a bag, make sure the
bag is properly sealed (See “How to Make a Bag From a
Roll”). Check foam gasket around Drip Tray to make sure
it is free from food material and is properly inserted into
gasket channel.
If vacuum sealing with an accessory, check Accessory
Hose connections to ensure a tight fit.
FoodSaver Vacuum Sealing Accessories
5. Push and hold the PulseVac™ Button 8 . The vacuum
pump will run when the PulseVac Button is held down.
Release the PulseVac™ Button to stop the vacuum
process. This will allow you to adjust the contents of the
bag for better control of the vacuum sealing process.
Repeat pushing the PulseVac™ Button until desired
amount of air has been removed.
NOTE: If the vacuum pump stops engaging after several
pushes of the PulseVac™ Button, it means the maximum
vacuum has been reached. Do not continue to push the
PulseVac™ Button.
2. Fold end of bag to create a loop (as shown in Fig.5)
with the sealed bag so the Heat Sealed area is above
the cutter.
9. When using accessories, remember to leave one inch
(2.54 centimeters) of space at top of canister or container.
(continued on next page)
Tips for Successful Vacuum Sealing
Always unplug appliance before cleaning.
For information on how to purchase the pre-cut bag storage,
please visit our website at www.foodsaver.com.
Fig. 5
Fig. 6
6
7