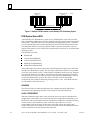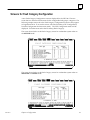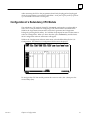
1
GE
Intelligent Platforms
ÎÎ
Programmable Control Products
Series 90* - 70
Hot Standby CPU Redundancy
User’s Guide
GFK-0827
March 2010
GFL-002
Warnings, Cautions, and Notes
as Used in this Publication
Warning
Warning notices are used in this publication to emphasize that hazardous voltages,
currents, temperatures, or other conditions that could cause personal injury exist in this
equipment or may be associated with its use.
In situations where inattention could cause either personal injury or damage to equipment,
a Warning notice is used.
Caution
Caution notices are used where equipment might be damaged if care is not taken.
Note:
Notes merely call attention to information that is especially significant to
understanding and operating the equipment.
This document is based on information available at the time of its publication. While efforts
have been made to be accurate, the information contained herein does not purport to cover all
details or variations in hardware or software, nor to provide for every possible contingency in
connection with installation, operation, or maintenance. Features may be described herein
which are not present in all hardware and software systems. GE Intelligent Platforms assumes
no obligation of notice to holders of this document with respect to changes subsequently made.
GE Intelligent Platforms makes no representation or warranty, expressed, implied, or statutory
with respect to, and assumes no responsibility for the accuracy, completeness, sufficiency, or
usefulness of the information contained herein. No warranties of merchantability or fitness for
purpose shall apply.
* indicates a trademark of GE Intelligent Platforms, Inc. and/or its affiliates. All other
trademarks are the property of their respective owners.
©Copyright 2010 GE Intelligent Platforms, Inc.
All Rights Reserved
Contact Information
If you purchased this product through an Authorized Channel Partner, please contact the seller
directly.
General Contact Information
Online technical support and
GlobalCare
http://www.ge-ip.com/support
1H2
Additional information
http://www.ge-ip.com/
3H
Solution Provider
[email protected]
4H
Technical Support
If you have technical problems that cannot be resolved with the information in this guide, please
contact us by telephone or email, or on the web at www.ge-ip.com/support
5H
Americas
Online Technical Support
www.ge-ip.com/support
6H7
Phone
1-800-433-2682
International Americas Direct Dial
1-780-420-2010 (if toll free 800 option is unavailable)
Technical Support Email
[email protected]
8H9
Customer Care Email
Primary language of support
[email protected]
10H
English
Europe, the Middle East, and Africa
Online Technical Support
www.ge-ip.com/support
12H3
Phone
+800-1-433-2682
EMEA Direct Dial
+352-26-722-780 (if toll free 800 option is unavailable or if
dialing from a mobile telephone)
Technical Support Email
[email protected]
14H5
Customer Care Email
Primary languages of support
[email protected]
16H7
English, French, German, Italian, Czech, Spanish
Asia Pacific
Online Technical Support
www.ge-ip.com/support
Phone
18H9
+86-400-820-8208
+86-21-3217-4826 (India, Indonesia, and Pakistan)
Technical Support Email
[email protected] (China)
20H1
[email protected] (Japan)
2H3
[email protected] (remaining Asia customers)
24H5
Customer Care Email
[email protected]
26H7
[email protected] (China)
28H
Preface
This manual is a reference to the hardware components, configuration and operation of
the Hot Standby CPU Redundancy system for the Series 90 -70 Programmable Logic
Controller. This redundancy system is one of several redundancy alternatives that may
be incorporated into a Series 90-70 Programmable Logic Controller system (see
Appendix A).
t
The information in this manual is intended to supplement the information contained in
the system installation, programming, and configuration information found in the
manuals listed below under ”Related Publications”.
Content of this Manual
Chapter 1. Introduction: describes the basic system features of the Hot Standby CPU
Redundancy system Control Strategy, and provides an overview of system components,
configuration, and operation.
Chapter 2. Components: describes the hardware components for the Hot Standby CPU
Redundancy system.
Chapter 3. Configuration: describes the special configuration requirements of a Hot
Standby CPU Redundancy system and provides an example of system configuration.
Chapter 4. Operation: describes the operation of a Hot Standby CPU Redundancy
system, fault detection and actions taken, and the on-line repair of a failed component.
Appendix A. Redundancy Alternatives: describes the redundancy alternatives for the
Series 90-70 Programmable Logic Controller for those readers not familiar with those
alternatives.
Related Publications
For more information, refer to these publications:
Genius I/O System User’s Manual (GEK-90486-1). Reference manual for system
designers, programmers, and others involved in integrating Genius I/O products in a
PLC or host computer environment. This book provides a system overview, and
describes the types of systems that can be created using Genius products. Datagrams,
Global Data, and data formats are defined.
Genius Discrete and Analog Blocks User’s Manual (GEK-90486-2). Reference manual for
system designers, operators, maintenance personnel, and others using Genius discrete
and analog I/O blocks. This book contains a detailed description, specifications,
installation instructions, and configuration instructions for discrete and analog blocks.
Series 90-70 PLC Installation Manual (GFK-0262). This book describes the hardware
components in a Series 90-70 PLC system, and provides the details of system installation.
Logicmaster 90-70 Programming Software User’s Manual (GFK-0263). A programming
software user’s manual for system operators and others using the Logicmaster 90-70
software to program, configure, monitor, or control a Series 90-70 PLC system.
GFK-0827
v
Preface
Series 90-70 PLC Reference Manual (GFK-0265). Reference manual which describes
operation, fault handling, and Logicmaster 90-70 programming instructions for the
Series 90-70 PLC.
Series 90-70 Remote I/O Scanner User’s Manual (GFK-0579). Reference manual for the
Remote I/O Scanner, which interfaces a drop containing Series 90-70 modules to a
Genius bus. Any CPU capable of controlling the bus can be used as the host. This book
describes the Remote I/O Scanner features, configuration, and operation.
Series 90-70 Bus ControllerUser’s Manual (GFK-0398). Reference manual for the bus
controller, which interfaces a Genius bus to a Series 90-70 PLC. This manual describes
the installation and operation of the Bus Controller. It also contains the programming
information needed to interface Genius I/O devices to a Series 90-70 PLC.
We Welcome Your Comments and Suggestions
At GE Intelligent Platforms , we strive to produce quality technical documentation. After
you have used this manual, please take a few moments to complete and return the
Reader ’s Comment Card located on the next page.
Henry A. Konat
Senior Technical Writer
vi
Hot Standby CPU Redundancy User’s Manual - December 1993
GFK-0827
Contents
Chapter 1
Introduction . . . . . . . . . . . . . . . . . . . . . . . . . . . . . . . . . . . . . . . . . . . . . . .
1
Hot Standby CPU Redundancy Product . . . . . . . . . . . . . . . . . . . . . . . . . . . . .
1
Features of the Hot Standby CPU Redundancy Product . . . . . . . . . . . . .
3
Benefits of the Hot Standby CPU Redundancy Product . . . . . . . . . . . . .
3
I/O Systems for Hot Standby CPU Redundancy Systems . . . . . . . . . . . .
4
GFK–0827
Genius I/O System . . . . . . . . . . . . . . . . . . . . . . . . . . . . . . . . . . . . . . . . . . . . .
4
Local I/O System . . . . . . . . . . . . . . . . . . . . . . . . . . . . . . . . . . . . . . . . . . . . . . .
4
Cable Connections . . . . . . . . . . . . . . . . . . . . . . . . . . . . . . . . . . . . . . . . . . . . .
4
Control Strategy . . . . . . . . . . . . . . . . . . . . . . . . . . . . . . . . . . . . . . . . . . . . . . .
5
Basic Hot Standby Operation . . . . . . . . . . . . . . . . . . . . . . . . . . . . . . . . . . . . . . .
5
Redundancy CPU Module . . . . . . . . . . . . . . . . . . . . . . . . . . . . . . . . . . . . . .
7
Redundancy Communications Module . . . . . . . . . . . . . . . . . . . . . . . . . . .
7
Bumpless Switching . . . . . . . . . . . . . . . . . . . . . . . . . . . . . . . . . . . . . . . . . . . .
8
Synchronized CPUs . . . . . . . . . . . . . . . . . . . . . . . . . . . . . . . . . . . . . . . . . . . .
8
Effect on Scan Time . . . . . . . . . . . . . . . . . . . . . . . . . . . . . . . . . . . . . . . . . . . . .
8
Fail Wait Time . . . . . . . . . . . . . . . . . . . . . . . . . . . . . . . . . . . . . . . . . . . . . . . . .
8
Switch to Backup Unit Time . . . . . . . . . . . . . . . . . . . . . . . . . . . . . . . . . . . . .
8
Configurable Backup Data Size . . . . . . . . . . . . . . . . . . . . . . . . . . . . . . . . . . .
9
On-Line Programming . . . . . . . . . . . . . . . . . . . . . . . . . . . . . . . . . . . . . . . . .
9
On-Line Repair . . . . . . . . . . . . . . . . . . . . . . . . . . . . . . . . . . . . . . . . . . . . . . . .
9
Programming Considerations . . . . . . . . . . . . . . . . . . . . . . . . . . . . . . . . . . . .
10
Configuration Requirements . . . . . . . . . . . . . . . . . . . . . . . . . . . . . . . . . . . .
10
Definition of Terms . . . . . . . . . . . . . . . . . . . . . . . . . . . . . . . . . . . . . . . . . . . . . . .
11
Commonly Used Acronyms . . . . . . . . . . . . . . . . . . . . . . . . . . . . . . . . . . . . . . . .
12
Series 90–70 Hot Standby CPU Redundancy User’s Guide – December 1993
vii
Contents
Chapter 2
System Components . . . . . . . . . . . . . . . . . . . . . . . . . . . . . . . . . . . . . . .
13
Redundancy CPU . . . . . . . . . . . . . . . . . . . . . . . . . . . . . . . . . . . . . . . . . . . . . . . .
13
CPU Architecture . . . . . . . . . . . . . . . . . . . . . . . . . . . . . . . . . . . . . . . . . . . . . .
14
CPU Features . . . . . . . . . . . . . . . . . . . . . . . . . . . . . . . . . . . . . . . . . . . . . . . . .
15
CPU Mode Switch . . . . . . . . . . . . . . . . . . . . . . . . . . . . . . . . . . . . . . . . . . . . . .
16
Memory Protect Keyswitch . . . . . . . . . . . . . . . . . . . . . . . . . . . . . . . . . . . . . .
17
CPU Status LEDs . . . . . . . . . . . . . . . . . . . . . . . . . . . . . . . . . . . . . . . . . . . . . . .
17
Battery Connectors . . . . . . . . . . . . . . . . . . . . . . . . . . . . . . . . . . . . . . . . . . . . .
17
Serial Port Connector . . . . . . . . . . . . . . . . . . . . . . . . . . . . . . . . . . . . . . . . . . .
18
Expansion Memory Board . . . . . . . . . . . . . . . . . . . . . . . . . . . . . . . . . . . . . . .
18
Redundancy Communications Module . . . . . . . . . . . . . . . . . . . . . . . . . . . . . .
19
RCM Features . . . . . . . . . . . . . . . . . . . . . . . . . . . . . . . . . . . . . . . . . . . . . . . . .
19
RCM System Status LEDS . . . . . . . . . . . . . . . . . . . . . . . . . . . . . . . . . . . . . . .
20
Unit Selection Pushbutton . . . . . . . . . . . . . . . . . . . . . . . . . . . . . . . . . . . . . . .
21
RCM Connectors . . . . . . . . . . . . . . . . . . . . . . . . . . . . . . . . . . . . . . . . . . . . . . .
21
Bus Transmitter Module . . . . . . . . . . . . . . . . . . . . . . . . . . . . . . . . . . . . . . . . . . .
LED Status Indicators . . . . . . . . . . . . . . . . . . . . . . . . . . . . . . . . . . . . . . . . . . .
22
BTM Connectors . . . . . . . . . . . . . . . . . . . . . . . . . . . . . . . . . . . . . . . . . . . . . . .
23
Bus Receiver Module . . . . . . . . . . . . . . . . . . . . . . . . . . . . . . . . . . . . . . . . . . . . . .
23
I/O Bus Signal Termination . . . . . . . . . . . . . . . . . . . . . . . . . . . . . . . . . . . . . .
24
LED Status Indicators . . . . . . . . . . . . . . . . . . . . . . . . . . . . . . . . . . . . . . . . . . .
24
BRM Connectors . . . . . . . . . . . . . . . . . . . . . . . . . . . . . . . . . . . . . . . . . . . . . . .
24
Genius Bus Controller . . . . . . . . . . . . . . . . . . . . . . . . . . . . . . . . . . . . . . . . . . . . .
24
Genius Bus Controller User Features . . . . . . . . . . . . . . . . . . . . . . . . . . . . . .
25
LED Status Indicators . . . . . . . . . . . . . . . . . . . . . . . . . . . . . . . . . . . . . . . . . . .
25
GBC Connectors . . . . . . . . . . . . . . . . . . . . . . . . . . . . . . . . . . . . . . . . . . . . . . .
26
Racks . . . . . . . . . . . . . . . . . . . . . . . . . . . . . . . . . . . . . . . . . . . . . . . . . . . . . . . . . . .
GFK–0827
22
Series 90–70 Hot Standby CPU Redundancy User’s Guide – December 1993
viii
26
Contents
Chapter 3
Configuration . . . . . . . . . . . . . . . . . . . . . . . . . . . . . . . . . . . . . . . . . . . . .
27
Configuring a Hot Standby CPU Redundancy System . . . . . . . . . . . . . . . . .
27
Redundancy System Requirements . . . . . . . . . . . . . . . . . . . . . . . . . . . . . . . . .
28
Basic Redundancy System Setup . . . . . . . . . . . . . . . . . . . . . . . . . . . . . . . . .
28
Logicmaster 90 Configuration . . . . . . . . . . . . . . . . . . . . . . . . . . . . . . . . . . .
28
I/O System Configuration . . . . . . . . . . . . . . . . . . . . . . . . . . . . . . . . . . . . . . .
28
Screens for Fault Category Configuration . . . . . . . . . . . . . . . . . . . . . . . . . . . .
29
Handling Folders . . . . . . . . . . . . . . . . . . . . . . . . . . . . . . . . . . . . . . . . . . . . . . . . .
30
Configuration with Logicmaster 90-70 . . . . . . . . . . . . . . . . . . . . . . . . . . . . . . .
30
Configuration of a Redundancy CPU Module . . . . . . . . . . . . . . . . . . . . . . . . .
31
Redundant CPU Requirements . . . . . . . . . . . . . . . . . . . . . . . . . . . . . . . . . .
33
GFK–0827
Redund Type . . . . . . . . . . . . . . . . . . . . . . . . . . . . . . . . . . . . . . . . . . . . . . . . . .
34
Background Window . . . . . . . . . . . . . . . . . . . . . . . . . . . . . . . . . . . . . . . . . . .
34
Normal Sweep Mode . . . . . . . . . . . . . . . . . . . . . . . . . . . . . . . . . . . . . . . . . . .
34
Constant Window Sweep Mode . . . . . . . . . . . . . . . . . . . . . . . . . . . . . . . . . .
35
Constant Sweep Mode . . . . . . . . . . . . . . . . . . . . . . . . . . . . . . . . . . . . . . . . . .
35
Ctrl Strgy . . . . . . . . . . . . . . . . . . . . . . . . . . . . . . . . . . . . . . . . . . . . . . . . . . . . .
36
Fail Wait . . . . . . . . . . . . . . . . . . . . . . . . . . . . . . . . . . . . . . . . . . . . . . . . . . . . . .
36
SharedI/O . . . . . . . . . . . . . . . . . . . . . . . . . . . . . . . . . . . . . . . . . . . . . . . . . . . .
36
Configuring a CPU Expansion Memory Board . . . . . . . . . . . . . . . . . . . . .
39
Configuration of a Redundancy Communications Module . . . . . . . . . . . . . .
40
Configuration of a Genius Bus Controller . . . . . . . . . . . . . . . . . . . . . . . . . . . .
42
Paired GBC Parameter . . . . . . . . . . . . . . . . . . . . . . . . . . . . . . . . . . . . . . . . . .
42
Configuring a Primary Redundant PLC . . . . . . . . . . . . . . . . . . . . . . . . . . . . . .
44
Select the Redundancy CPU Module . . . . . . . . . . . . . . . . . . . . . . . . . . . . .
45
Select an Expansion Memory Board . . . . . . . . . . . . . . . . . . . . . . . . . . . . . .
46
Configure the Redundant Communications Module . . . . . . . . . . . . . . . .
47
Configure a Genius Bus Controller . . . . . . . . . . . . . . . . . . . . . . . . . . . . . . .
48
Configure Genius I/O Blocks . . . . . . . . . . . . . . . . . . . . . . . . . . . . . . . . . . . .
50
Configure the Bus Transmitter Module . . . . . . . . . . . . . . . . . . . . . . . . . . . .
51
Configuring a Secondary Redundant PLC . . . . . . . . . . . . . . . . . . . . . . . . . . . .
52
Change Redund Type . . . . . . . . . . . . . . . . . . . . . . . . . . . . . . . . . . . . . . . . . .
53
Series 90–70 Hot Standby CPU Redundancy User’s Guide – December 1993
ix
Contents
Chapter 4
Operation . . . . . . . . . . . . . . . . . . . . . . . . . . . . . . . . . . . . . . . . . . . . . . . . .
55
Section 1: System Operation . . . . . . . . . . . . . . . . . . . . . . . . . . . . . . . .
55
Power-Up Sequence of a Redundant CPU . . . . . . . . . . . . . . . . . . . . . . . . . . . .
55
Incompatible Configurations . . . . . . . . . . . . . . . . . . . . . . . . . . . . . . . . . . . .
56
Resynchronization of the Redundant CPU . . . . . . . . . . . . . . . . . . . . . . . . . . .
57
Hot-Standby Redundancy Control Strategy . . . . . . . . . . . . . . . . . . . . . . . . . .
58
Synchronous Scan . . . . . . . . . . . . . . . . . . . . . . . . . . . . . . . . . . . . . . . . . . . . . . . .
59
First Data Transfer %I, %AI and Synchronization . . . . . . . . . . . . . . . . . . .
59
Data Transfer from Backup Unit to Active Unit . . . . . . . . . . . . . . . . . . . . .
Second Data Transfer %Q, %AQ, %R, and %M . . . . . . . . . . . . . . . . . . . . .
61
Switching Control to Backup Unit . . . . . . . . . . . . . . . . . . . . . . . . . . . . . . . .
61
Role Switch SVCREQ . . . . . . . . . . . . . . . . . . . . . . . . . . . . . . . . . . . . . . . . . . .
62
%S References for CPU Redundancy . . . . . . . . . . . . . . . . . . . . . . . . . . . . . . . .
63
Redundancy CPU Considerations . . . . . . . . . . . . . . . . . . . . . . . . . . . . . . . . . . .
64
Features not Available with CPU 780 . . . . . . . . . . . . . . . . . . . . . . . . . . . . . .
64
I/OInterrupts . . . . . . . . . . . . . . . . . . . . . . . . . . . . . . . . . . . . . . . . . . . . . . . . .
64
Timed Interrupts . . . . . . . . . . . . . . . . . . . . . . . . . . . . . . . . . . . . . . . . . . . . . . .
64
VME Integrator Racks . . . . . . . . . . . . . . . . . . . . . . . . . . . . . . . . . . . . . . . . . .
64
STOP/IOSCAN Mode . . . . . . . . . . . . . . . . . . . . . . . . . . . . . . . . . . . . . . . . . . .
64
Flash Operation . . . . . . . . . . . . . . . . . . . . . . . . . . . . . . . . . . . . . . . . . . . . . . . .
64
Differences in Operation for CPU 780 . . . . . . . . . . . . . . . . . . . . . . . . . . . . .
65
RUN Disabled Mode . . . . . . . . . . . . . . . . . . . . . . . . . . . . . . . . . . . . . . . . . . . .
65
Configuration of Fault Actions . . . . . . . . . . . . . . . . . . . . . . . . . . . . . . . . . . .
67
STOP to RUN Mode Transition . . . . . . . . . . . . . . . . . . . . . . . . . . . . . . . . . . .
68
Background Window Time . . . . . . . . . . . . . . . . . . . . . . . . . . . . . . . . . . . . . .
68
Background User Checksum and Background Window
Timing Instructions . . . . . . . . . . . . . . . . . . . . . . . . . . . . . . . . . . . . . . . . . . . . .
69
Miscellaneous Operation Information . . . . . . . . . . . . . . . . . . . . . . . . . . . .
GFK–0827
60
70
Timer and PID Function Blocks . . . . . . . . . . . . . . . . . . . . . . . . . . . . . . . . . . .
70
Timed Contacts . . . . . . . . . . . . . . . . . . . . . . . . . . . . . . . . . . . . . . . . . . . . . . . .
70
OVR_PRE %S Reference . . . . . . . . . . . . . . . . . . . . . . . . . . . . . . . . . . . . . . . .
70
Genius Bus Controller Switching . . . . . . . . . . . . . . . . . . . . . . . . . . . . . . . . .
71
Series 90–70 Hot Standby CPU Redundancy User’s Guide – December 1993
x
Contents
Section 2: Fault Detection and Control Actions . . . . . . . . . . . . . . .
Appendix A
72
Fault Detection . . . . . . . . . . . . . . . . . . . . . . . . . . . . . . . . . . . . . . . . . . . . . . . . . . .
72
Fault Categories . . . . . . . . . . . . . . . . . . . . . . . . . . . . . . . . . . . . . . . . . . . . . . . . . .
72
Changing Fault Category Actions . . . . . . . . . . . . . . . . . . . . . . . . . . . . . . . .
73
PLC Fault Table . . . . . . . . . . . . . . . . . . . . . . . . . . . . . . . . . . . . . . . . . . . . . . . .
74
Faulting RCMs, Losing Links, and Terminating Communications . . . . .
75
Fault Actions in a CPU Redundancy System . . . . . . . . . . . . . . . . . . . . . . .
77
On-Line Repair . . . . . . . . . . . . . . . . . . . . . . . . . . . . . . . . . . . . . . . . . . . . . . . . . . .
80
Maintaining Parallel Bus Termination . . . . . . . . . . . . . . . . . . . . . . . . . . . . .
80
On-Line Repair Recommendations . . . . . . . . . . . . . . . . . . . . . . . . . . . . . . .
80
Power Supply . . . . . . . . . . . . . . . . . . . . . . . . . . . . . . . . . . . . . . . . . . . . . . . . .
81
Racks . . . . . . . . . . . . . . . . . . . . . . . . . . . . . . . . . . . . . . . . . . . . . . . . . . . . . . . .
81
Central Processor Unit . . . . . . . . . . . . . . . . . . . . . . . . . . . . . . . . . . . . . . . . . .
81
Redundancy Communications Module and Cables . . . . . . . . . . . . . . . . .
81
Redundancy Communications Link Failures . . . . . . . . . . . . . . . . . . . . . . .
82
Bus Transmitter Module . . . . . . . . . . . . . . . . . . . . . . . . . . . . . . . . . . . . . . . .
82
Genius Bus Controller . . . . . . . . . . . . . . . . . . . . . . . . . . . . . . . . . . . . . . . . . .
82
Genius Bus . . . . . . . . . . . . . . . . . . . . . . . . . . . . . . . . . . . . . . . . . . . . . . . . . . .
83
Genius Blocks . . . . . . . . . . . . . . . . . . . . . . . . . . . . . . . . . . . . . . . . . . . . . . . . .
83
Redundancy Alternatives . . . . . . . . . . . . . . . . . . . . . . . . . . . . . . . . . . .
85
Redundancy Alternatives . . . . . . . . . . . . . . . . . . . . . . . . . . . . . . . . . . . . . . . . . .
85
Series 90-70 Redundancy Through Application Logic . . . . . . . . . . . . . . . . . .
88
GFK–0827
Series 90–70 Hot Standby CPU Redundancy User’s Guide – December 1993
xi
Contents
Figure 1. Example of a Local I/O Configuration with Expansion Racks in a
Hot Standby CPU Redundancy System . . . . . . . . . . . . . . . . . . . . . . . . . . . . . . . . . . .
5
Figure 2. Synchronized Hot Standby CPU Redundancy System Configuration . . . . . . . . . . . . .
6
Figure 3. CPU 780 Locations in a Hot Standby CPU Redundancy System . . . . . . . . . . . . . . . . . .
14
Figure 4. Redundancy CPU - IC697CPU 780 . . . . . . . . . . . . . . . . . . . . . . . . . . . . . . . . . . . . . . . . . .
15
Figure 5. Redundancy Communications Module - IC697RCM711 . . . . . . . . . . . . . . . . . . . . . . . .
19
Figure 6. Example of RCM Location in a Hot Standby CPU Redundancy System . . . . . . . . . . .
20
Figure 7. Example of Multiple Genius Busses in a Hot Standby CPU Redundancy System . . .
26
Figure 8. Active and Backup Sweeps . . . . . . . . . . . . . . . . . . . . . . . . . . . . . . . . . . . . . . . . . . . . . . . . .
59
Figure 9. Guide to Selection of Redundancy Option Key for Table 1 (Redundancy Options) . .
86
GFK–0827
Series 90–70 Hot Standby CPU Redundancy User’s Guide – December 1993
xii
Contents
Table 1. Capacities for Redundancy CPU, IC697CPU780 . . . . . . . . . . . . . . . . . . . . . . . . . . . . . . . . . . . . .
14
Table 2. Valid Operating Mode Selection . . . . . . . . . . . . . . . . . . . . . . . . . . . . . . . . . . . . . . . . . . . . . . . . . . .
16
Table 3. Expansion Memory Boards for CPU 780 . . . . . . . . . . . . . . . . . . . . . . . . . . . . . . . . . . . . . . . . . . . .
18
Table 4. Shared I/O Data Parameters . . . . . . . . . . . . . . . . . . . . . . . . . . . . . . . . . . . . . . . . . . . . . . . . . . . . . .
37
Table 5. Shared I/O Reference Values . . . . . . . . . . . . . . . . . . . . . . . . . . . . . . . . . . . . . . . . . . . . . . . . . . . . . .
37
Table 6. Transfer Data Size . . . . . . . . . . . . . . . . . . . . . . . . . . . . . . . . . . . . . . . . . . . . . . . . . . . . . . . . . . . . . . .
38
Table 7. Definition for% S Reference for Redundancy Status . . . . . . . . . . . . . . . . . . . . . . . . . . . . . . . . . .
63
Table 8. Fault Zoom Help Text for Redundancy Error Codes . . . . . . . . . . . . . . . . . . . . . . . . . . . . . . . . . .
74
Table 9. Maskable Fault Group Descriptions . . . . . . . . . . . . . . . . . . . . . . . . . . . . . . . . . . . . . . . . . . . . . . . .
77
Table 10. Maskable Fault Group Actions . . . . . . . . . . . . . . . . . . . . . . . . . . . . . . . . . . . . . . . . . . . . . . . . . . .
78
Table 11. Non-Maskable Fault Group Descriptions . . . . . . . . . . . . . . . . . . . . . . . . . . . . . . . . . . . . . . . . . .
79
Table 12. Non-Maskable Fault Action Descriptions . . . . . . . . . . . . . . . . . . . . . . . . . . . . . . . . . . . . . . . . . .
79
Table 13. Redundancy Options . . . . . . . . . . . . . . . . . . . . . . . . . . . . . . . . . . . . . . . . . . . . . . . . . . . . . . . . . . .
87
GFK–0827
Series 90–70 Hot Standby CPU Redundancy User’s Guide – December 1993
xiii
restart lowapp ARestart oddapp: ARestarts for autonumbers that do not restart in
each chapter. figure bi level 1, reset table_big level 1, reset chap_big level 1, reset1
Lowapp Alwbox restart evenap:A1app_big level 1, resetA figure_ap level 1, reset
table_ap level 1, reset figure level 1, reset Figure 1. table level 1, reset Table 1.
these restarts oddbox reset: 1evenbox reset: 1must be in the header frame of
chapter 1. a:ebx, l 1 resetA a:obx:l 1, resetA a:bigbx level 1 resetA a:ftr level 1 resetA
c:ebx, l 1 reset1 c:obx:l 1, reset1 c:bigbx level 1 reset1 c:ftr level 1 reset1
Reminders for autonumbers that need to be restarted manually (first instance will
always be 4) let_in level 1: A. B. C. letter level 1:A.B.C. num level 1: 1. 2. 3.
num_in level 1: 1. 2. 3. rom_in level 1: I. II. III. roman level 1: I. II. III. steps level 1:
1. 2. 3.
Chapter
1 Introduction
1
section level 1 1
figure bi level 1
table_big level 1
This chapter is an introduction to a method of CPU Redundancy for the Series 90-70
Programmable Logic Controller which is referred to as the Hot Standby CPU
Redundancy product.
The contents of this chapter provide:
h
h
h
a basic description of what Hot Standby CPU Redundancy is;
h
provides a basic description of how a system is configured using the Logicmaster
90-70 programming software configurator function;
h
h
lists certain restrictions that you must be aware of;
tells what it does for you - the user;
provides a basic description of the components of the Hot Standby CPU
Redundancy system;
and defines terminology unique to this product.
Note
For those who are not familiar with the various redundancy alternatives
which may be applied to a Series 90-70 PLC system, please refer to
Appendix A before proceeding with this chapter. For those who are familiar
with those redundancy alternatives please proceed with the dicussion of the ’Hot
Standby CPU Redundancy Product” below.
Hot Standby CPU Redundancy Product
CPU Redundancy for the Series 90-70 Programmable Logic Controller provides a
method of allowing a critical application or process to continue operating if a failure
occurs in any single component. The CPU Redundancy system described in this guide
is the Hot Standby CPU Redundancy product. A Hot Standby CPU Redundancy system
consists of two CPUs connected to one or more Genius I/O buses. Each PLC is
configured as either Primary or Secondary. The Primary PLC is the preferred PLC and
GFK-0827
1
1
contains all redundant Genius Bus Controllers at Serial Bus Address 31; the Secondary
PLC contains all redundant Genius Bus Controllers at Serial Bus Address 30. The CPU
that currently controls the system is called the active unit, the other CPU is the standby
unit.
If certain system failures are detected in the active unit, control is switched to the
standby unit. Control can also be switched by depressing a pushbutton on the
Redundancy Communications Module, or through the user’s logic program. When a
switch of control occurs, the units switch roles; the active unit becomes the standby unit
and the standby unit becomes the active unit.
Each PLC must have a Redundancy CPU module (catalog number IC697CPU780) and a
Redundancy Communications module (IC697RCM711) which provides the synchronization
link between the two units, (and a Bus Transmitter Module (IC697BEM713)). The
scanning process of both CPUs is synchronized to keep active and standby units in
lockstep to minimize ”bumps” or upsets to the process when switching from the active
to the standby unit. The effect of this action is a bumpless switch.
The Series 90-70 CPU Redundancy system runs synchronously with a transfer of all
control data that defines machine status and any internal data needed to keep the two
CPUs operating in sync, and is capable of executing the same program and obtaining the
same results. The transfer of data from the active unit to the standby unit occurs once
per sweep. These CPU to CPU transfers are checked for data integrity.
2
Series 90-70 Hot Standby CPU Redundancy User’s Guide – December 1993
GFK-0827
1
Features of the Hot Standby CPU Redundancy Product
H
Bumpless switching
h
h
Synchronized CPUs
h
h
One scan switching (in most cases)
20 millisecond scan extension (nominal). This figure is variable, depending on
amount of data transferred.
Configurable backup data size
H
H
H
H
H
H
No single point of failure (excluding Genius I/O)
H
Redundancy Communications Module
Redundant backup communications
On–line repair of failed component
On–line programming
Same or different programs in Primary and Secondary units
Redundancy CPU has a 16 MHz microprocessor, configurable memory and
configurable addressing capacity
h
Manual pushbutton switch for switching control between active and backup
CPUs
h
Five Status LEDs
– Board OK
– Local System Ready
– Local System Active
– Remote System Ready
– Remote System Active
H
H
H
H
H
Status Bits (%S) reflect redundancy status of Primary/Secondary units
Program control switching
Memory parity and checksums
Common I/O on Genius bus
Background Diagnostics
– Processor test
– PLC CPU EPROM CRC Validation
– User program checksumming
– Time-of-Day/ElapsedTime Clock test
H
Memory Protect Keyswitch
Benefits of the Hot Standby CPU Redundancy Product
Implementation of the Hot Standby CPU Redundancy product provides you with a
method of ensuring that a critical control system or process is uninterrupted in the event
of a failure of any single component (excluding I/O) of the PLC system.
GFK-0827
Chapter 1 Introduction
3
1
I/O Systems for Hot Standby CPU Redundancy Systems
Both Series 90-70 Local I/O and Genius I/O systems can be present in a Hot Standby
CPU Redundancy control system. The two units are not required to have matching I/O
systems. They may have different numbers of I/O racks, and different local I/O or
option modules.
Genius I/O System
A Genius I/O system is the I/O system that is included in the redundancy system as
shown below. The system can have multiple Genius I/O buses. Any Genius device can
be placed on the bus (Genius blocks, Remote I/O Scanner, etc.). The Genius devices are
under control of the active unit in the Redundancy system. The Genius Bus Controller
in the Primary Unit has a Serial bus Address of 31; the Genius Bus Controller in the
Secondary Unit has a Serial Bus Address of 30. Data from Serial Bus Address 31 is the
preferred data when data is being sent from both units to devices on the Genius bus.
Local I/O System
Local I/O can be configured in the overall PLC system; however, it is not part of the Hot
Standby CPU Redundancy system. Control of Local I/O is done normally through the
user’s logic program. The user may choose to transfer or not transfer this data. A failure
in the Local I/O system will affect the system as described in GFK-0265, the Series 90-70
Programmable Controller Reference Manual.
Cable Connections
The I/O system is configured ”normally” except as described below (see the following
figure). That is, a Bus Transmitter Module configured in rack 0 is connected through a
parallel I/O cable to a Bus Receiver Module in the next rack. The link is continued from
this Bus Receiver Module to the Bus Receiver Module in the next rack. This link is
continued with a maximum of six expansion racks. Then, the last Bus Receiver is
connected via an I/O cable with built-in termination (catalog IC697CBL811 (10 feet (3m))
or IC697CBL826 (25 feet (7.5m)). The last module in the parallel I/O bus link must be a
Redundancy Communications Module (RCM). This terminated I/O cable allows
replacement of the RCM without interrupting the running system. If no expansion
racks are used, the terminated I/O cable is connected directly from the Bus Transmitter
Module to the Redundancy Communications Module.
Note
The exception to a normally configured system is that Rack 7, which
normally can contain I/O modules is not available for physical I/O
modules in a Hot Standby CPU Redundancy system.
4
Series 90-70 Hot Standby CPU Redundancy User’s Guide – December 1993
GFK-0827
1
a47000
PRIMARY UNIT
SECONDARY UNIT
RACK 0
RACK 0
P C B R G I I I I I
S P T C B O O O O O
U M M C
C B R G I I I I I
P T C B O O O O O
UM M C
P
S
30
31
* TERMINATED I/O CABLE
REMOTE DROP
B
L
O
C
K
LOCAL I/0
CAN BE IN
RACKS
0-6
B
L
O
C
K
B
L
O
C
K
P S I I I I I I I I
S C O O O O O O O O
A
N
N
E
R
RACK 1
P B I I I I I I I I
S R O O O O O O O O
M
Y
RACK 6
P B I I I I I I I I
S R O O O O O O O O
M
* I/O CABLE WITH BUILT-IN TERMINATION
IC697CBL811 (10 FEET (3m))
IC697CBL826 (25 FEET (7.5m)
*
TERMINATED I/O CABLE
Figure 1. Example of a Local I/O Configuration with Expansion Racks in a
Hot Standby CPU Redundancy System
Control Strategy
Control strategy refers to the type of redundancy alternative that may be used. For the
Hot Standby CPU Redundancy product, the control strategy is referred to as Genius Hot
Standby (GHS). The control strategy must be selected when configuring the system with
the Logicmaster 90-70 programming Software Configurator function.
Basic Hot Standby Operation
In a basic Genius Hot Standby CPU Redundancy system, Genius blocks receive outputs
from two PLCs (Primary PLC and Secondary PLC), but they are normally controlled
directly by the Genius Bus Controller at serial bus address 31 (Genius Bus Controller in
the Primary PLC). If no output data is available from bus address 31 (the preferred data)
GFK-0827
Chapter 1 Introduction
5
1
for three consecutive Genius I/O bus scans, the outputs are then controlled by the
Genius Bus Controller at serial bus address 30 (Genius Bus Controller in the Secondary
PLC).
If output data is not available from either bus address 31 or 30, the outputs go to their
configured default (OFF or hold last state). The PLC at serial bus address 31 always has
priority, therefore when the PLC with serial bus address 31 is On-line, it always has
control of the outputs.
The redundancy system configuration is shown in the following figure. This example
configuration shows only the redundancy system components. As described previously,
a system can also contain Local I/O which is not a part of the redundancy scheme.
PRIMARY UNIT
SECONDARY UNIT
P C B R G
S P T C B
U M M C
P C B R G
S P T C B
U M M C
31
30
a47001
* TERMINATED I/O CABLE
* TERMINATED I/O CABLE
other Genius devices
REMOTE DROP
B
L
O
C
K
B
L
O
C
K
B
L
O
C
K
P S I I I I I I I I
S C O O O O O O O O
A
N
N
E
R
Legend
PS....................
CPU.................
BTM.................
RCM................
GBC................
BLOCK...........
SCANNER.......
*......................
Power Supply..............................................
Central ProcessorUnit..............................
Bus TransmitterModule.............................
Redundancy Communications Module.....
Genius Bus Controller................................
Genius I/O Block........................................
Remote I/O Scanner....................................
Terminated I/O Cable.................................
IC697PWRXXX
IC697CPU780
IC697BEM713
IC697RCM711
IC697BEM731
IC660XXXYYY
IC697BEM733
IC697CBL811/826
Figure 2. Synchronized Hot Standby CPU Redundancy System Configuration
6
Series 90-70 Hot Standby CPU Redundancy User’s Guide – December 1993
GFK-0827
1
Redundancy CPU Module
The same model of CPU must be installed in both the Primary and Secondary PLCs.
This CPU, which is the only CPU that currently supports synchronized Hot Standby
CPU redundancy, is the CPU 780 (catalog number IC697CPU780). This CPU is similar to
the existing IC697CPU782 CPU in that it has an 80386DX microprocessor which operates
at a speed of 16 MHz, supports floating point calculations, and requires an expansion
memory board which can be 128 KBytes, 256 Kbytes with 256 KBytes of non-volatile
flash memory, 256 KBytes or 512 KBytes.
NOTE
It is important to note that the following features available with other
Series 90-70 CPUs are not supported by the CPU 780: I/O interrupts,
timed interrupts, the VME Integrator Racks (IC697CHS782 and
IC697CHS783), Flash memory operation, and STOP/IOSCAN mode. In
addition, the operation of several other features is changed. For more
detailed information on these features, please see Chapter 4.
As with the other Series 90-70 CPUs, the CPU 780 must be installed in slot 1 of rack 0
(CPU rack). The Primary unit and the Secondary unit must each have a Redundancy
CPU installed in slot 1 of rack 0 with one CPU configured as the Primary CPU and the
other CPU configured as the Secondary CPU. Configuration of the CPU 780 in the
Primary unit and the CPU 780 in the Secondary unit must be done separately (see
Chapter 3 for details of configuration with the Logicmaster 90-70 configurator function).
Redundancy Communications Module
The Redundancy Communications Module (RCM), catalog number IC697RCM711,
provides a path (see Figure 1) for sharing data between the two CPUs in the redundant
system. The RCM has five LEDS:
H
H
H
H
H
BOARD OK
LOCAL SYSTEM READY
LOCAL SYSTEM ACTIVE
REMOTE SYSTEM READY
REMOTE SYSTEM ACTIVE.
These LEDs report the status of the health of the RCM and the control status of the Hot
Standby CPU Redundancy system. The status provided by these LEDs is also provided
in an area of %S memory (%S33 through %S39) which is accessible from the user logic
program but cannot be altered or overridden.
The module has a momentary pushbutton switch which when depressed for 1 second
and released allows you to manually switch control from the active unit to the standby
unit. The switch between units can also be controlled through user logic
implementation of a SVC_REQ function that is activated by a discrete input point. Both
of these switch requests may only be made every 10 seconds.
In a synchronized system, I/O data is controlled by only one unit (the active unit) but is
shared between both units (active and backup units). The RCM provides the path for a
synchronizing message from the active to the backup unit which is used to synchronize
GFK-0827
Chapter 1 Introduction
7
1
the two CPUs and provides the communications path for the transfer of I/O data
between the two units. An RCM must be configured in both the Primary PLC and the
Secondary PLC. The RCM must reside in the CPU rack (rack 0) in a system and there
can be no empty slot between the RCM and the CPU (there can be other modules).
Bumpless Switching
Bumpless switching occurs when the active unit fails and system control is transferred to
the backup unit without affecting the operation of the process under control.
Synchronized CPUs
For bumpless switching to occur, the CPU in the active and backup units must operate in a
synchronous fashion, that is, the operation of both units must occur at the same time (or as
close to the same time as possible). There are two synchronization points in the sweep: one
immediately after the input scan and the other immediately before the output scan.
Synchronization data is passed from the active to the backup unit at the first
synchronization point, which occurs after the input scan. Specifically, after the inputs are
scanned, the inputs that were just read (%I and %AI) are sent from the active to the backup
unit and the synchronization message is passed after the input data.
The second synchronization point occurs immediately after the end of the logic solution
before the output scan begins. During this time, all remaining control data, including the
%Q, %AQ, %M and %R memories is transferred from the active unit to the backup unit.
Effect on Scan Time
When a system is operating normally (no faults exist in the system) redundancy adds about
21 ms (includes 5 ms default background window setting) per PLC scan. The effect on scan
time depends on the system configuration. The following number of data points and
registers is considered the base configuration on which the 21 ms was calculated.
512
%I, 512 %Q, 512 %M
256
%AI, 256 %AQ
2048
%R
Each additional 1K %I, %Q, or %M data points adds about 1.8 ms to the scan impact
(add 25% for each %I or %Q reference if point faults enabled) and each additional 1K of
%R, %AI, or %AQ registers adds about 5 ms to the scan impact (add 50% for each %AI
or %AQ reference if point faults enabled).
Fail Wait Time
When the active CPU has a failure, the backup CPU will wait for a specified time (in
milliseconds) before assuming that the link has failed. This time is referred to as the Fail
Wait time. The duration of this time must be specified during configuration of both the
Primary and Secondary units and can range from 60 ms to 400 ms (in increments of 10
ms), with the default value being 60 ms.
Switch to Backup Unit Time
The amount of time it takes to switch control from the active unit to the backup unit
depends on what caused the switch to take place.
8
Series 90-70 Hot Standby CPU Redundancy User’s Guide – December 1993
GFK-0827
1
If the switch occurs due to a controlled condition such as toggling the unit selection
switch on the Redundancy Communications Module or forcing a switch in the user logic
program with a SVC_REQ, or because of a fault detected by the PLC CPU, then the
switch-over will occur at the beginning of the next sweep. The delay will be up to 1
sweep with the possibility of an input and an output scan after failure detection.
If the switch occurs due to a failure of the PLC CPU (including loss of power), then the
switch will occur after the backup unit determines that the active unit has failed to
rendezvous at the synchronization point. Failure to rendezvous may take up to 2 failwait
timeouts (1 for each link) to determine that a failure has occurred. Control will not
transfer, in this case, until both links have been tried unsuccessfully.
Configurable Backup Data Size
The maximum size of the backup data (Shared I/O) is 20 KBytes of Input data and 28
KBytes of Output data. The shared I/O data configuration must be the same in both the
Primary and Secondary units. This shared I/O data is transferred from the active CPU to
the backup CPU during the CPU sweep process. A total of up to 56 KBytes of user
memory is consumed by this data transfer. A maximum of 48 KBytes of the 56 KBytes is
the total Shared I/O (20 KBytes %I, %AI; 28 KBytes %Q, %M, %AQ, and %R), while the
remainder (8 KBytes) is used by the system for internal data transfers, including
synchronizing data.
On-Line Programming
On-line changes to the user logic program are permitted in both the active unit and the
backup unit. The programming device must be connected to the system in which
changes are to be made in order to make any on-line changes. Note that all precautions
regarding power source and grounding for connecting the programming device must be
followed in accordance with instructions in the Series 90-70 Programmable Controller
Installation Manual, GFK-0262.
A connection and disconnection of the parallel programmer cable should only be made
with the programmer properly grounded, and Logicmaster 90 software properly booted
up and in OFF-LINE mode. For more information, refer to the Series 90-70 Installation
manual, GFK–0262.
On-Line Repair
A Hot Standby CPU Redundancy system allows you to do on-line repair of failed
components without disrupting the process under control. Control status of both the
Primary and the Secondary units can be monitored by the LEDS on the Redundancy
Communications Modules in each system. When a component of the active unit fails,
control is switched to the backup unit. The failed component can then be replaced by
removing power from the rack in which it is installed.
After replacing the failed component and returning power to the rack, the backup unit
will resynchronize with the currently active unit. The unit which had failed and was
previously the active unit will determine its role in the system as part of the
resynchronization process. If it is the Primary unit (with Serial Bus Address 31) it will
once again become the active unit, the unit with Serial Bus Address 30 (Secondary unit)
will again become the backup unit. For more detailed information on replacing failed
components and resynchronization, see Chapter 4, ”System Operation”.
GFK-0827
Chapter 1 Introduction
9
1
Programming Considerations
There are several features in the operation of the Redundancy CPU which are not
supported or are different then operation of other CPUs. These features are listed below
and are described in detail in Chapter 4, ”System Operation”.
The following features are not available with the Redundancy CPU (CPU 780):
H
H
H
H
H
I/OInterrupts
Timed Interrupts
VME Integrator Rack
STOP/IOSCAN mode
Flash memory operation
The operation of the following features is different with the CPU 780 than with other
Series 90-70 CPUs:
H
H
H
H
RUN/DISABLEDmode
Configuration of fault actions
STOP to RUN mode
Default Background Window Time
Configuration Requirements
The Redundancy CPU and the Redundancy Communications Module must be
configured into the redundancy system. There are several additional parameters (other
than the normal CPU parameters) that must be configured with the Logicmaster 90-70
Configurator function which are unique to the Hot Standby CPU Redundancy system.
The following items require configuration when specifying the CPU 780 (the
Redundancy CPU) as the CPU for configuration:
Configuration
Parameter
10
Description
Fail-wait (60 ms to 400 ms)
The time to wait on a failed active PLC before switching to
the backup CPU. The default value is 60 ms.
Control Strategy
The control strategy for the current configuration. Configured as a three-character identifier (GHS for Hot Standby
CPU Redundancy). The default value is GHS (currently
the only value that is valid).
Shared I/O References
The references within the control of the Redundancy system; up to 20 KBytes of Input data and 28 KBytes of Output data is transferred. The references which may be used
as shared I/O are %I, %Q, %AI, %AQ, %R, and %M.
Redund Type
Whether the CPU being configured is the Primary or Secondary CPU in the Redundancy system. Redund Type
has three possible values: PRIMARY, SECONDARY, or
SIMPLEX. SIMPLEX (not supported in this release of the
product) indicates a non–redundant system. The default
value is PRIMARY.
Series 90-70 Hot Standby CPU Redundancy User’s Guide – December 1993
GFK-0827
1
The Primary Unit and the Secondary Unit must be configured separately. That is, the
programming device should be connected directly to either the Primary or the
Secondary Unit to configure that unit. When you have completed configuring that unit,
disconnect the programmer from the configured unit and move it to the other unit and
proceed with configuration of the second unit. Refer to Chapter 3, ”System
Configuration” for details of configuring a Redundancy system
Definition of Terms
Several new or unfamiliar terms are used throughout this manual which are relevant to
the discussions of CPU Redundancy. These terms are defined in the following table.
Term
GFK-0827
Definition
Active Unit
The unit that is actively controlling the process.
Backup Unit
That unit that is synchronized with the active unit and able to take over the process.
CPU Redundancy
A system with two PLC CPU units cooperating to control the same process.
CriticalComponent
A component whose failure causes the PLC (either active or backup) in which it resides to
stop.
Hot Standby
A feature of Genius blocks whereby the block prefers output data from the
Bus Controller at Serial Bus Address 31. When inputs from that Bus Controller are not
available, the block takes output data from the Bus Controller at Serial Bus Address 30.
If inputs from neither Controller are available, the block places its outputs in the
designated default state.
Local Unit
The RCM LEDs and %S status bits refer to the PLC in which they reside as
the ”Local Unit”.
Primary Unit
The unit in which the Genius Bus Controller ’s Serial Bus Address is 31.
Redundancy
A system feature that has multiple elements controlling the same process to provide alternate functional channels in case of failure.
Remote Unit
The RCM LEDs and status bits refer to the other PLC as the ”Remote Unit”.
For example, the Primary Unit is the Remote Unit to the Secondary Unit and likewise
the Secondary Unit is the Remote Unit to the Primary Unit.
Secondary Unit
The unit in which the Genius Bus Controller ’s Serial Bus Address is 30.
Synchronized
A unit is considered to be synchronized when it has received the latest status information
from the Active unit and is running the PLC program in parallel.
Chapter 1 Introduction
11
1
Commonly Used Acronyms
A list of acronyms used in this manual are defined for your convenience in the following
table.
Acronym
12
Definition
BRM
Bus Receiver Module
BSM
Bus Switching Module
BTM
Bus TransmitterModule
CPU
Central Processor Unit
EPROM
Erasable Programmable Read Only Memory
GBC
Genius Bus Controller
GHS
Genius Hot Standby Redundancy
GMR
Genius Modular Redundancy
HHM
Hand Held Monitor
LED
Light Emitting Diode
OI
Operator Interface
PLC
ProgrammableLogicController
PROM
Programmable Read–Only Memory
RAM
Random Access Memory
RCM
RedundancyCommunicationsModule
PLD
Relay Ladder Diagram
SBA
Serial Bus Address
SNP
Series 90 Protocol
VME
VersaModule Europe: the backplane standard
used by the Series 90-70 PLC system
Series 90-70 Hot Standby CPU Redundancy User’s Guide – December 1993
GFK-0827
Chapter
2
2 System Components
section level 1 1
figure bi level 1
table_big level 1
This chapter describes the hardware components for a Hot Standby CPU Redundancy
system. It describes the modules required for the system and provides catalog numbers
of the components. For detailed installation instructions for the Series 90-70 PLC, refer
to GFK-0262, the Series 90-70 Programmable Controller Installation Manual.
Redundancy CPU
The IC697CPU780 Central Processing Unit (CPU) has been designed specifically for
Series 90-70 Hot Standby CPU Redundancy applications. This is the only Series 90-70 CPU
that currently supports CPU redundancy .
Note
It is important to note that the following features available with other
Series 90-70 CPUs are not supported by the CPU 780: I/O interrupts,
timed interrupts, the VME Integrator Racks (IC697CHS782 and
IC697CHS783), Flash Memory operation, and STOP/IOSCAN mode. In
addition, the operation of several other features is changed. For more
detailed information on these features, please see Chapter 4.
The CPU 780 supports floating point calculations, offers remote programmer keyswitch
memory protection, and has four status LEDs. Operation of this module may be
controlled by the three-position RUN/STOP switch on the module, or remotely by an
attached programmer and Logicmaster 90-70 Programming Software. Program and
configuration data can be locked through software passwords or manually by the
memory protect keyswitch. When the key is in the ”protected” position, program and
configuration data can only be changed by a programmer connected for parallel
communications (that is, to the Bus Transmitter Module).
As with the other Series 90-70 CPUs, the CPU 780 must be installed in slot 1 of rack 0
(CPU rack). In a Hot Standby CPU Redundancy system, the Primary unit and the
Secondary unit must each have a Redundancy CPU installed in slot 1 of rack 0. One
CPU is configured as the Primary CPU and the other CPU is configured as the
Secondary CPU. Configuration of the CPU 780 in the Primary unit and the CPU 780 in
the Secondary unit must be done separately (see Chapter 3 for details of configuration
with the Logicmaster 90-70 configurator function). The following figure shows the CPU
location in a Hot Standby CPU Redundancy system.
GFK-0827
13
2
PRIMARY UNIT
SECONDARY UNIT
P C B R G
S P T C B
U M M C
P C B R G
S P T C B
U M M C
31
30
a47002
Redundancy Communications Link
Redundancy Communications Link
CPU 780
Genius Bus
Figure 3. CPU 780 Locations in a Hot Standby CPU Redundancy System
The capacities for the CPU 780 are as listed in the following table.
Table 1. Capacities for Redundancy CPU, IC697CPU780
Speed
(MHz)
Processor
Input
Points
Output
Points
On-Board
UserMemory
16
80386DX
12288 [
12288 [
not available
Expansion Memory
(KBytes)
128/256/512
Floating Point
Math
Yes
[ The total number of Input points and Output points on the model 780 CPU cannot exceed 12288.
CPU Architecture
The CPU 780 has an 80386DX microprocessor as the main processing element, on-board
memory, a dedicated VLSI processor for performing boolean operations and interfaces
to a serial port and the system bus. The microprocessor provides all fundamental sweep
and operation control, plus execution of non-boolean functions. Boolean functions are
handled by a dedicated, VLSI, Boolean Coprocessor (BCP) designed by GE Intelligent Platforms.
Program and data memory on the CPU 780 is available by the attachment of an
expansion memory board with either 128 Kbytes, 256 Kbytes or 512 Kbytes of
battery-backed CMOS RAM, or 256 Kbytes with 256 Kbytes of non-volatile flash
memory.
When the CPU board is in storage, disconnect the lithium battery if there is no
application program stored in memory. If a program is stored in memory, do not
disconnect the battery; otherwise the data will be lost.
Caution
If a Low Battery Warning occurs, replace the battery before removing
power from the rack. Otherwise there is the possibility that data will
be corrupted or the program will be cleared from memory.
Watchdog Timer
The CPU provides a watchdog timer to catch certain failure conditions. The value of this
timer is controlled by the user from the programmer. The valid range of the watchdog
14
Series 90-70 Hot Standby CPU Redundancy User’s Guide – December 1993
GFK-0827
2
timer is 10 milliseconds to 1000 milliseconds. The default value for the watchdog timer is
200 milliseconds. The watchdog timer resets at the beginning of each sweep. The fail
wait time is included in the watchdog check. The watchdog timer should be set to allow
for the expected scan plus two fail wait times.
CPU Features
The CPU must reside in Slot 1 in rack 0, the main (CPU) rack. An illustration of the CPU
780 is shown in the following figure, followed by a description of the CPU features.
a47003
ÎÎÎÎÎ
ÎÎ
ÎÎÎÎÎ
ÎÎ
ÎÎÎÎÎ
ÎÎ
ÎÎÎÎÎ
ÎÎ
ÎÎÎÎÎ
ÎÎ
ÎÎÎÎÎ
ÎÎ
ÎÎÎÎÎ
ÎÎ
ÎÎ
ÎÎÎÎÎ
ÎÎÎÎÎ
ÎÎ
ÎÎÎÎÎ
ÎÎ
ÎÎÎÎÎ
ÎÎ
ÎÎÎÎÎ
ÎÎ
ÎÎÎÎÎ
ÎÎ
ÎÎÎÎÎ
ÎÎ
ÎÎÎÎÎ
ÎÎ
ÎÎÎÎÎ
ÎÎ
ÎÎ
ÎÎÎÎÎ
ÎÎÎÎÎ
ÎÎ
ÎÎÎÎÎ
ÎÎ
ÎÎÎÎÎ
ÎÎ
ÎÎÎÎÎ
ÎÎ
ÎÎÎÎÎ
ÎÎ
ÎÎÎÎÎ
ÎÎ
ÎÎÎÎÎ
ÎÎ
ÎÎÎÎÎ
ÎÎ
ÎÎÎÎÎ
ÎÎ
ÎÎÎÎÎ
ÎÎ
ÎÎÎÎÎ
OK
RUN
ENABLED
MEM PROTECT
CENTRAL
PROCESSOR
UNIT
MEMORY
PROTECT
KEY
SWITCH
CPU
STATUS
LEDS
CPU MODE
SWITCH
OPEN
REPLACEMENT
BATTERY
CONNECTOR
CURRENTLY
INSTALLED
BATTERY
CONNECTOR
ÎÎ
ÎÎ
ÎÎ
Î
ÎÎ
Î
ÎÎ
ÎÎ
Î
ÎÎÎÎ
Î
ÎÎ
ÎÎ
Î
ÎÎ
ÎÎ
Î
Î
ÎÎ
Î
ÎÎ
ÎÎ
Î
ÎÎ
Î
ÎÎ
ÎÎ
Î
Î
ÎÎ
ÎÎ
Î
ÎÎ
ÎÎ
Î
Î
ÎÎ
Î
Î
Î
ÎÎ
Î
Î
Î
Î
ÎÎ
Î
Î
ÎÎ
Î
Î
Î
ÎÎ
Î
Î
ÎÎ
Î
ÎÎ
Î
Î
Î
Î
ÎÎ
Î
ÎÎ
Î
Î
Î
ÎÎ
Î
Î
ÎÎ
Î
Î
ÎÎ
Î
Î
ÎÎ
Î
Î
ÎÎ
Î
Î
ÎÎ
Î
ÎÎ
ÎÎ
Î
ÎÎ
Î
Î
ÎÎ
Î
Î
Î
ÎÎ
Î
Î ÎÎ
ÎÎ
B
A
T
T
E
R
Y
CPU 780
TOP
OFF
ON
REMOTE PROGRAMMER
MEMORY PROTECT
KEY POSITION
FRONT
MODULE OK
RUN
OUTPUTS
ENABLED
MEMORY PROTECT
REMOTE
PROGRAMMER
ONLY
ON = OK, ENABLED
PROTECTED
RUN WITH
OUTPUTS
ENABLED
RUN WITH
OUTPUTS
DISABLED
EXPANSION
MEMORY
BOARD
IC697MEM731
IC697MEM732
IC697MEM733
IC697MEM735
STOP
BATTERY
CONNECTORS
INSTALL NEW
BATTERY BEFORE
UNPLUGGING OLD
BATTERY. USE
IC697ACC701
MODULE FUNCTION
16MHz 32 BIT CENTRAL
PROCESSING UNIT
WITH FLOATING POINT
MATH COPROCESSOR
FOR HOT STANDBY
CPU APPLICATIONS
RS-485
COMPATIBLE
SERIAL PORT
SERIAL PORT
RS-485
COMPATIBLE
USE THIS MODULE
IN SLOT 1 ONLY
MODULE
IC697CPU 780
LABEL
44A726758-130R03
Figure 4. Redundancy CPU - IC697CPU 780
GFK-0827
Chapter 2 System Components
15
2
CPU Mode Switch
A three-position toggle switch is mounted near the top of the CPU board. This switch
selects one of three operating modes for the CPU: RUN/ENABLED, RUN/DISABLED, or
STOP. Although the mode of operation for the CPU can be controlled from both the
switch and the programmer, the switch position restricts the ability of the programmer
to put the CPU into certain modes.
The following table shows the modes that can be selected by the programmer based
upon the position of the CPU mode switch.
Table 2. Valid Operating Mode Selection
CPU Mode Switch
Position
Allowable Programmer
Mode Command
RUN/OUTPUTSENABLED
STOP
RUN/DISABLED
RUN/ENABLED
RUN/OUTPUTSDISABLED
STOP
RUN/DISABLED
STOP
STOP
Run/Outputs Enabled
The top position of the switch is Run with Outputs Enabled. With the switch in this
position, the CPU executes all portions of the sweep normally.
Run/Outputs Disabled
The middle position of the switch is Run with Outputs Disabled. When the switch is in
this position, the CPU executes all portions of the sweep normally, but physical outputs
are held in their default state, and therefore remain unchanged. Refer to Chapter 4,
page 65 for important information on the Run/Disabled mode in a Hot Standby CPU
Redundancy system.
STOP
NOTE
The STOP/IOSCAN mode is not a valid mode in a redundancy system.
Refer to Chapter 4 for detailed information.
The bottom position of the switch is labeled STOP. With the switch in this position, the
CPU communicates only with the programmer and devices connected to the serial port,
and recovers faulted modules. Any of the values in the I/O tables can be changed using
the programming computer.
16
Series 90-70 Hot Standby CPU Redundancy User’s Guide – December 1993
GFK-0827
2
Memor y Protect Keyswitch
The Memory Protect keyswitch is located at the top of the module and has two
positions: ON and OFF. This keyswitch is used to manually lock program and
configuration data. When the key is in the ”protected” (ON) position, program and
configuration data can only be changed by a programmer connected for parallel
communications with the CPU 780 (that is, to the Bus Transmitter Module).
CPU Status LEDs
There are four LEDs mounted at the top of the CPU board which indicate the current
state of the CPU. The normal state of these LEDs when the CPU is running is ON. They
are OFF or flashing to indicate special or failure conditions.
OK
The top LED, labeled OK is an indicator of the health of the CPU. It is ON when the CPU
is functioning properly. The LED blinks when the CPU executes the power-up
diagnostics, when the system has failed, and when the remote unit is powered-up.
However, when in this state, the CPU can still communicate with the programmer (the
CPU cannot communicate with the programmer during power-up diagnostics) . The
LED is OFF when the system has failed and the CPU cannot communicate with the
programmer.
RUN
The middle LED, labeled RUN is an indicator of the RUN/STOP status of the CPU. It is
ON when the CPU is in the RUN/ENABLE or RUN/DISABLE mode. When the CPU is in
the STOP mode, the LED is OFF.
ENABLED
The bottom LED, labeled ENABLED indicates the state of the outputs. This LED is ON
when the outputs are enabled, and OFF when the outputs are disabled.
MEM PROTECT
This LED indicates the status of the memory protect keyswitch. When the keyswitch is
in the OFF position the LED is OFF, and the CPU can be programmed (if connected for
parallel communications, the CPU can be programmed regardless of the keyswitch
position). After the program has been verified, the toggle switch for mode selection can
be moved to the appropriate mode position. When the memory protect keyswitch is in
the ON position, the LED will be ON.
Battery Connectors
Directly below the mode switch are two identical battery connectors. The connector
wired to the lithium backup battery cable plugs into one of these connectors to connect
the battery to the CMOS memory devices. Two connectors are provided for use when
the battery requires replacement. The battery currently installed can remain connected
until the new battery is connected, thus minimizing the possibility of losing data.
GFK-0827
Chapter 2 System Components
17
2
Serial Port Connector
The 15-pin D-connector at the bottom of the module provides the connection to an
RS-422/RS-485 serial port. Its port provides a serial connection to the Work Station
Interface (WSI) board installed in the programming computer. For applications
requiring RS-232 communications, an RS-232 to RS-422 converter (IC690ACC900) or
RS-232 to RS422 miniconverter (IC690ACC901) is available.
Note
An RS-422 Isolated Repeater/RS-232 Converter (IC655CCM590) is
available for applications requiring ground isolation where a common
ground cannot be established between components.
A standard serial COM port version of Logicmaster 90-70 programming software
provides logic programming and configuration for the Series 90-70 PLC using the COM1
or COM2 serial port of the programming device (a Work Station Interface board is not
needed). Connections for this configuration are made from the programmer’s COM1 or
COM2 serial port to the converter to the serial port on the Series 90-70 CPU.
Expansion Memory Board
The CPU 780 requires an expansion memory board (see GFK-0837 and GFK-0531C, or
later versions), for more information. The expansion memory board uses battery-backed
CMOS RAM memory devices for program and data storage. These expansion memory
boards are arranged in a 32-bit memory configuration and can only be used on the
models 780, 781 and 782 CPUs. Error checking is provided by a CPU checksum routine.
Logic program memory is continually error-checked by the CPU as a background task.
Memory parity errors are reported to the CPU when they occur.
These expansion memory boards are not compatible with the expansion memory boards
used with the models 771 and 772 CPUs or the Programmable Coprocessor Module.
Four versions of the 32-bit memory expansion board are available as listed in the table
below. These expansion memory boards are installed on the CPU 780 module by
mounting them on a connector provided for that purpose. The CMOS RAM memory on
the expansion memory boards is backed-up by the Lithium battery mounted on the CPU
module on which the boards are installed.
Table 3. Expansion Memory Boards for CPU 780
Catalog Number
IC697MEM731
IC697MEM732
IC697MEM733
IC697MEM735
Memory Size
128K Bytes
256K Bytes w/256 K Bytes Non-Volatile Flash Memory
256K Bytes
512K Bytes
Note that the current version of the expansion memory boards must be used with the
CPU 780. consult your local PLC Distributor or PLC sales office for more
information.
18
Series 90-70 Hot Standby CPU Redundancy User’s Guide – December 1993
GFK-0827
2
Redundancy Communications Module
The Redundancy Communications Module (RCM), catalog number IC697RCM711, provides
a communications path for sharing data between the two CPUs in the redundant system.
In a synchronized system, I/O data is controlled by one unit (the active unit) but is shared
between both units (active and backup units). The RCM provides the communications path
between the two units. An RCM must be configured in both the Primary PLC and the
Secondary PLC. The RCM must reside in rack 0 and there can be no empty slot between
the RCM and the CPU (there can be other modules).
RCM Features
The following figure shows the features of the RCM module.
a47004
ÎÎÎÎÎ
ÎÎ
ÎÎ
ÎÎÎÎÎ
ÎÎÎÎÎ
ÎÎ
ÎÎ
ÎÎÎÎÎ
ÎÎ
ÎÎ
ÎÎÎÎÎ
ÎÎ
ÎÎÎÎÎ
ÎÎ
ÎÎÎÎÎ
ÎÎÎÎÎ
ÎÎ
ÎÎÎÎÎ
ÎÎ
ÎÎÎÎÎ
ÎÎ
ÎÎ
ÎÎÎÎÎ
ÎÎ
ÎÎÎÎÎ
ÎÎ
ÎÎÎÎÎ
ÎÎ
ÎÎÎÎÎ
ÎÎÎÎÎ
ÎÎ
ÎÎ
ÎÎÎÎÎ
ÎÎÎÎÎ
ÎÎ
ÎÎÎÎÎ
ÎÎ
ÎÎÎÎÎ
ÎÎ
ÎÎ
ÎÎÎÎÎ
ÎÎÎÎÎ
ÎÎ
ÎÎÎÎÎ
ÎÎ
ÎÎÎÎÎ
ÎÎ
ÎÎÎÎÎ
ÎÎ
ÎÎÎÎÎ
ÎÎ
Î
ÎÎÎÎÎ
ÎÎÎ
ÎÎÎÎÎ
OK
LOCAL READY
LOCAL ACTIVE
REMOTE READY
REMOTE ACTIVE
REDUNDANCY
COMMUNICATIONS
MODULE
Î
ÎÎ
Î
ÎÎ
Î
ÎÎ
ÎÎ
ÎÎ
Î
ÎÎ
Î
Î
Î
ÎÎ
Î
ÎÎ
ÎÎ
Î
Î
Î
ÎÎ
Î
ÎÎ
Î
ÎÎ
Î
ÎÎ
Î
ÎÎ
Î
ÎÎ
Î
ÎÎ
Î
ÎÎ
Î
ÎÎ
Î
ÎÎ
Î
ÎÎ
Î
ÎÎ
Î
ÎÎ
Î
ÎÎ
Î
ÎÎ
Î
ÎÎ
Î
ÎÎ
Î
ÎÎ
Î
RCM 711
BOARD OK
LOCAL SYSTEM
READY
LOCAL SYSTEM
ACTIVE
REMOTE SYSTEM
READY
REMOTE SYSTEM
ACTIVE
ON = TRUE
DEPRESS 1 SEC.
TO SWITCH ACTIVE
CPU (MIN 10 SECS
BETWEEN SWITCHES)
MODULE FUNCTION
REDUNDANCY
COMMUNICA TIONS
MODULE.
HIGH SPEED INTERFACE
BETWEEN HOT.
STANDBY REDUNDANCY
SUPPORTED CPUs.
CONNECT TO END
OF EXPANSION BUS
EXPANSION
PORT IN
(TOWARDS CPU)
TO BEM711
OR BEM713
(USE TERMINATED
CABLE CBL811
OR CBL826)
50 FT. MAXIMUM
CABLE LENGTH FROM
BEM 713 TO TO RCM711
UNUSED PORT
DO NOT INSTALL
CABLE OR
TERMINATOR
MODULE
IC697RCM711
LABEL:
44A726758–136R02
Figure 5. Redundancy Communications Module - IC697RCM711
GFK-0827
Chapter 2 System Components
19
2
PRIMARY UNIT
( RACK 0 )
P
S
SECONDARY UNIT
( RACK 0 )
C B R G
P T C B
U M M C
P C B R G
S P T C B
U M M C
31
30
a47005
Redundancy Communications Link
Redundancy Communications Link
Figure 6. Example of RCM Location in a Hot Standby CPU Redundancy System
RCM System Status LEDS
A Hot Standby CPU Redundancy system has two RCM modules, each with five LEDs
and a momentary pushbutton switch for manually switching between the active and the
backup units. The LEDs will always be updated by the appropriate system. The RCM
has two internal timers that will automatically turn off four of the LEDs (not the board
OK LED) if the LEDs have not been updated within a specified time period. The two
remote LEDs and the two local LEDs have separate timers since they are controlled from
different systems.
The RCM has five LEDS:
H
H
H
H
H
BOARD OK
LOCAL SYSTEM READY
LOCAL SYSTEM ACTIVE
REMOTE SYSTEM READY
REMOTE SYSTEM ACTIVE.
These LEDs report the status of the health of the RCM and the control status of the Hot
Standby CPU Redundancy system. The status provided by these LEDs is also provided
in an area of %S memory (%S33 - %S39) which is accessible from the user logic program
but cannot be altered or overridden. The LEDs have the following meanings and uses.
Note that the term Local Unit when associated with a particular RCM refers to that unit
in which the RCM resides. Remote Unit refers to that unit in which the RCM is
configured by the system for addressing as being in rack 7, slot 1. Each RCM will have
an associated local and remote unit.
BOARDOK
This LED will come on when the diagnostics are complete and the RCM has been
determined to be operating normally. It will remain on unless the RCM fails.
LOCAL SYSTEM READY
Indicates whether the local unit is ready to become the active unit in a redundant PLC
configuration. If the LED is on, the local unit has been configured for redundancy, is in
RUN mode, and has performed sufficient initialization, diagnostics, and hand–shaking
to take control of the redundant system if selected as the active unit. It is the
responsibility of the local unit to set the state of this LED at least once during each
sweep; if the local unit is unable to set (or fails to set) the state of the LED, the hardware
will force the LED to off after the timer has timed out.
20
Series 90-70 Hot Standby CPU Redundancy User’s Guide – December 1993
GFK-0827
2
LOCAL SYSTEM ACTIVE
Indicates whether the local unit is the controlling (or active) unit in a redundancy
system. It is the responsibility of the local unit to set the state of this LED at least once
during each sweep; if the local unit is unable to set (or fails to set) the state of the LED,
the hardware will force the LED to off after the timer has timed out.
REMOTE SYSTEM READY
Indicates whether the remote unit is ready to become the active unit in a redundant PLC
configuration. If the LED is on, the remote unit has been configured for redundancy, is
in RUN mode, and has performed sufficient initialization, diagnostics, and
hand–shaking to take control of the redundant system if selected as the active unit. It is
the responsibility of the remote unit to set the state of this LED at least once during each
sweep; if the remote unit is unable to set (or fails to set) the state of the LED, the
hardware will force the LED to off after the timer has timed out.
REMOTE SYSTEM ACTIVE
Indicates whether the remote unit is the controlling (or active) unit in a redundancy
scheme. It is the responsibility of the remote unit to set the state of this LED at least once
during each sweep; if the remote unit is unable to set (or fails to set) the state of the LED,
the hardware will force the LED to off after the timer has timed out.
Unit Selection Pushbutton
The module has a momentary pushbutton switch which when depressed for 1 second
and released allows you to manually switch control from the active unit to the backup unit
if the backup unit is READY. The status of each pushbutton is checked by the PLC CPU
software. The switch between units can also be controlled through user logic
implementation of a SVC_REQ function that is activated by user logic. After a switch
has been requested, you must wait 10 seconds before requesting another switch.
RCM Connectors
The RCM has two connectors mounted on the front of the board. The top connector is the
only one used. It is connected via an I/O cable with built-in termination to the last rack of
the other PLC system. If no expansion rack is used, it is connected to the lower connector
on the Bus Transmitter Module of the other system. The I/O cable with built-in
termination is available in two lengths:
H
H
GFK-0827
IC697CBL811, 10 feet (3 meters)
IC697CBL826, 25 feet (7.5 meters)
Chapter 2 System Components
21
2
Bus Transmitter Module
A Bus Transmitter Module (BTM), catalog number IC697BEM713, is required in both the
Primary PLC CPU rack (rack 0) and the Secondary PLC CPU rack (rack 0) in a Hot
Standby CPU Redundancy system. The BTM provides a path for Redundancy
communications when connected to the Redundancy Communications Module (RCM).
Each PLC system (Primary and Secondary) has a BTM and an RCM in rack 0. The BTM
in one unit connects to the RCM in the other unit (or through a series or BRMs if
expansion racks are in a system).
PRIMARY UNIT
( RACK 0 )
P
S
SECONDARY UNIT
( RACK 0 )
C B R G
P T C B
U M M C
P C B R G
S P T C B
U M M C
31
30
a47006
Redundancy Communications Link
Redundancy Communications Link
When included as a bus communications module in an I/O
expansion system, the BTM is a high speed parallel interface which
propagates the I/O bus signals through a cable to a Bus Receiver
Module located in the first I/O expansion rack. The BTM also
provides a high speed parallel connection to the programmer
through the Work Station Interface board installed in the
programmer.
a42986
ÎÎ
ÎÎ
Î
ÎÎÎ
ÎÎ
ÎÎ
ÎÎ
Î
ÎÎ
Î
ÎÎ
ÎÎ
Î
ÎÎ
Î
Î
ÎÎ
Î
ÎÎ
Î
ÎÎ
Î
ÎÎ
Î
ÎÎ
Î
ÎÎ
Î
ÎÎ
Î
ÎÎ
Î
ÎÎ
Î
ÎÎ
Î
ÎÎ
Î
ÎÎ
Î
ÎÎ
Î
Î
ÎÎ
Î Î
ÎÎ
Î
MODEL 70
BEM 713
LED Status Indicators
MODULE OK
PROGRAMMER
PORT ENABLED
EXPANSION
PORT ENABLED
ON = OK, ENABLED
There are three LEDs located at the top of the BTM. The LEDs are
labeled: OK, PGMR ACTIVE and BUS ACTIVE. As with all other
Series 90-70 PLC LEDs, they are visible through the clear plastic lens
at the top of the module’s cover. The function of each LED is
described below.
Module OK
MODULE FUNCTION
SERIES 90–70
BUS TRANSMITTER
HIGH SPEED
PARALLEL
INTERFACE TO
PROGRAMMER AND
90–70 EXPANSION
RACKS.
PARALLEL
PORT
PROGRAMMER
ONLY
The top LED is the MODULE OK LED and is ON when the CPU
software completes its power-up configuration of the BTM, and has
polled (or attempted to poll) each expansion rack in the system. It is
OFF when any of these conditions are not met.
50 FT. MAXIMUM
CABLE LENGTH
EXPANSION
PORT
Programmer Port Enabled
The middle LED is the Programming Port Active LED. This LED is
either blinking or ON when the programmer and the PLC are
communicating. It is OFF when they are not communicating.
Expansion Port Enabled
The bottom LED provides the status of the expansion bus.
This LED is either blinking or ON when the BTM is communicating
with the Bus Receiver Modules connected to it through the parallel
I/O bus link. It is OFF when they are not communicating.
22
TO BEM 711
(7 DROPS
MAXIMUM)
50 FT. MAXIMUM TOTAL
CABLE LENGTH TO
LAST BEM 711
MODULE
IC697BEM713
LABEL
44A726758–103
BUS TRANSMITTER MODULE
Series 90-70 Hot Standby CPU Redundancy User’s Guide – December 1993
GFK-0827
2
BTM Connectors
There are two connectors on the front of the BTM board. The top one provides a parallel
connection to a Work Station Interface (WSI) board installed in the programmer for the
Series 90-70 PLC. Serial connection to Workmaster II is through a programmer cable
(IC647CBL703) 10 feet (3 meters) in length (parallel connection to Workmaster is through a
parallel I/O cable, IC600WD005A). Standard parallel I/O cables are used to connect the
BTM’s lower connector to a Redundancy Communications Module in the other
Redundancy unit, or to a Bus Receiver Module in the first expansion rack. These connectors
are 37-pin connectors. The top one is a male connector, while the lower one is female.
Note
The programmer running Logicmaster 90 Software must be connected to the
same power ground as the PLC, unless special isolated drivers are used. The
parallel programmer cable should only be connected/disconnected when the
programmer is powered-up and offline. Do not power the parallel programmer
up or down while connected to a PLC that is running.
a42987
Bus Receiver Module
The Bus Receiver Module is required if expansion racks are used in
the overall redundancy system.
ÎÎ
ÎÎ
Î
ÎÎÎÎ
ÎÎ
Î
ÎÎ
ÎÎ
Î
ÎÎ
ÎÎ
Î
Î
ÎÎ
ÎÎ
Î
ÎÎ
Î
Î
ÎÎ
Î
ÎÎ
Î
ÎÎ
Î
ÎÎ
Î
ÎÎ
Î
ÎÎ
Î
ÎÎ
Î
ÎÎ
Î
ÎÎ
Î
ÎÎ
Î
ÎÎ
Î
ÎÎ
Î
ÎÎ
Î
ÎÎ
Î
Î Î
ÎÎ
The Bus Receiver Module (BRM), catalog number IC697BEM711,
which must be installed in slot 1 of each expansion rack in a system,
is the expansion rack interface to the I/O bus. It provides the link to
the I/O bus for I/O modules installed in its rack. The BRM in the first
expansion rack connects to the BTM in the CPU rack through a
parallel I/O bus cable.
This cable is connected to the bottom connector on the BTM, and to
the top connector on the BRM. The next rack to be included in the
I/O bus is connected to the lower connector on the BRM in the first
expansion rack and the top connector of the BRM in the next rack.
Connection of expansion racks on the I/O bus is continued in this
manner until the maximum of 6 expansion racks is connected. The
bottom connector in the last expansion rack is connected to the top
connector of the RCM in the remote unit. Note that the last bus
connection is to an RCM module (instead of a BRM).
Note
The total cable length of all connecting cables between racks
on the I/O bus cannot exceed 50 feet (15 meters).
MODEL 70
BEM 711
RACK
CONFIGURED
TERMINATION
INSTALLED
EXPANSION
PORT ENABLED
ON = OK, ENABLED
MODULE FUNCTION
SERIES 90–70
BUS RECEIVER
HIGH SPEED
INTERFACE FROM
90–70 EXPANSION
RACKS TO 90–70
MAIN RACK
EXPANSION
PORT IN
(TOWARDS CPU)
TO BEM 711
OR BEM 713
50 FT. MAX.TOTAL
CABLE LENGTH
FROM BEM 713 TO
LAST BEM 711
EXPANSION
PORT OUT
(AWAY FROM CPU)
TO BEM 711
INSTALL
TERMINATOR
PLUG IN LAST
RACK IN CHAIN
USE IC697ACC702
USE THIS MODULE
IN FIRST SLOT ONLY
MODULE
IC697BEM711
LABEL
44A726758–201
BUS RECEIVER MODULE
GFK-0827
Chapter 2 System Components
23
2
I/O Bus Signal Termination
The I/O bus signals must be terminated at the end of the bus. In a standard PLC system
this is done by installing a resistor pack, located inside of a terminator plug (catalog
number IC697ACC702) on the bottom connector of the BRM module that is installed in
the last I/O expansion rack in the system. In a Hot Standby CPU Redundancy system a
special I/O cable with built-in termination is used. Do not use the resistor plug with the
terminated cable.
LED Status Indicators
There are three LEDs located at the top of the BRM. The LEDs are labeled: OK, LAST
RACK, and BUS ACTIVE. The LEDs are visible through the clear plastic lens at the top
of the module’s cover. The function of each LED is described below.
Board OK
The top LED, the Board OK LED, is ON when the CPU software completes its power-up
configuration of the expansion rack and at least one module in that rack responds to the
CPU requests for information. It is OFF when any of these conditions are not met.
Last Rack
The middle LED is the Last Rack LED. This LED is ON when the I/O bus terminator
plug is installed in the bottom connector of this BRM, and is Off when it is not installed.
The terminator plug is to be installed only on the BRM that is at the end of the expansion
rack I/O bus. All BRMs are shipped from the factory with a terminator plug installed.
These terminator plugs must be removed from any expansion rack located between the
CPU rack and the last expansion rack.
Expansion Bus Active
The bottom LED provides the status of the expansion bus. This LED is ON when the
BRM has detected that there has been activity on the expansion bus in the last 500 ms,
otherwise it is off. When this LED is OFF, the BRM is holding the Series 90-70 I/O
modules in its rack in their default state.
BRM Connectors
The BRM has two connectors mounted on the front of the board. The top connector is
for the I/O cable connection to either the lower connector on a BTM in the CPU rack, or
to the lower connector on another BRM. The lower connector is for an I/O cable
connection to the upper connector of a BRM in the next expansion rack on the I/O bus or
to the top connector on an RCM. The I/O cable is an 18 twisted-pair cable with a ground
shield. The total maximum cable length from the CPU rack to the most distant
expansion rack (at the same ground potential) is 50 feet. Standard parallel I/O bus cables
that meet this specification are available in lengths of 5, 10, 25, and 50 feet.
Genius Bus Controller
The Genius Bus Controller (GBC), catalog number IC697BEM731, for the Series 90-70
PLC is the interface for the Series 90-70 PLC to a Genius I/O communications system.
Configuration of the GBC is simple through use of Logicmaster 90 Configurator
software. Genius I/O blocks are scanned asynchronously by the GBC and I/O data is
transferred to the CPU once per scan over the backplane of the Series 90-70 PLC rack.
24
Series 90-70 Hot Standby CPU Redundancy User’s Guide – December 1993
GFK-0827
2
The Hot Standby CPU Redundancy system uses a single Genius bus and requires one GBC
module in the Primary PLC and one in the Secondary PLC; however there can be multiple
Genius busses configured in this manner in a system. The GBCs in the Primary PLC are
assigned SBA 31, and the GBCs in the Secondary PLC are assigned SBA 30. Data from SBA
31 in the Primary PLC is the ”preferred” data. The Primary PLC is normally the active unit
in the redundancy system.
In a redundancy system the GBCs must be configured for ”RED CTRL” redundancy. All of
the Genius devices on the Genius bus must also be configured for ”Redundancy”
The bus can have up to 30 Genius devices connected to it, with one of the SBAs reserved for
the Hand-Held Monitor. Any type of Genius I/O block may be connected to this bus. A
Genius I/O device will use the output data received from SBA 31 in preference to data from
SBA 30. If the active and backup units switch roles, the GBC will then use the output data
from SBA 30.
As a safety feature, a watchdog timer protects each Genius I/O link. This timer is
periodically reset by the GBC software, Should it ever expire, the microcontroller on the
board ceases functioning and the Channel OK LED turns off. If this happens in a CPU
Redundancy system, the other GBC will then drive the Genius I/O blocks The cause of
the link failure must be determined to re-establish communications.
Genius Bus Controller User Features
a42985
ÎÎ
ÎÎ
Î
ÎÎ
ÎÎ
Î
ÎÎÎÎ
ÎÎ
ÎÎ
ÎÎ
Î
Î
ÎÎ
ÎÎ
Î
ÎÎ
ÎÎ
Î
Î
Î
ÎÎ
Î
ÎÎ
Î
ÎÎ
Î
ÎÎ
Î
ÎÎ
ÎÎ
Î
ÎÎ
Î
ÎÎ
Î
Î
ÎÎ
ÎÎ
Î
Î
ÎÎ
Î
ÏÏÏÏ
ÎÎ
ÎÎ
Î
Î
ÎÎ
ÎÎ
Î Î
ÎÎ
Î
A Genius Bus Controller can be installed in any slot in rack 0, except
for slot 1 which is reserved for the CPU module. It can be installed
in any slot in an expansion rack, except slot 1 which must contain a
Bus Receiver Module.
MODEL 70
BEM 731
MODULE OK
CHANNEL 1 OK
NOT USED
ON = OK
HAND HELD
MONITOR
CHANNEL 1
LED Status Indicators
MODULE FUNCTION
The GBC has three LEDs located at the top of the board: one as an
indicator of the state of the board, and one to indicate the state of
the Genius I/O link. When the board is functionally properly, the
top two LEDs are ON (third LED currently not used). They are
either blinking or OFF to indicate special or failure conditions. If,
after the power-up diagnostics routine has been completed, all LEDs
are OFF, this is an indication that a board failure has been detected
and the board must be replaced.
Module OK
The top LED, labeled OK, indicates the health of the GBC. It is ON
when the board has successfully completed the power-up
diagnostics. If the power-up diagnostics detects a failure or if the
board fails during operation, the LED will be OFF. The LED blinks
during the power-up diagnostics and when the GBC is installed in
a slot different from the slot specified by the configuration
information downloaded from the programmer.
GFK-0827
Chapter 2 System Components
SERIES 90–70
GENIUS BUS
CONTROLLER
( 1 CHANNEL )
Removal of terminal
block breaks bus if
external jumpers are
not applied as shown
CHANNEL 1
SER 1
SER 1
SER 2
SER 2
SHIELD
OUT
SHIELD
IN
N
C
N
C
N
C
N
C
N
C
N
C
MODULE
IC697BEM731C
LABEL
44A726758–11
GENIUS BUS CONTROLLER
25
2
CH 1 OK
The CH 1 OK LED is the middle LED. It operates identical to the Module OK LED in that it
is ON after the board has successfully completed the power-up diagnostics and OFF if a
failure has been detected during the power-up diagnostics, or if its bus or bus controller fails
while the CPU is running (even in the STOP mode). If the failure is a bus controller failure,
the LED will remain permanently off. If it is a bus failure, such as a broken wire or excessive
bus errors, the LED remains off until the failure condition is corrected.
GBCConnectors
A GBC has two connectors. Directly below the LED is a dedicated nine-pin connector for
connection to the Hand-Held Monitor. The actual bus connections are made through a 12
point removable terminal board. Six of these terminals are used for connection to the
Genius I/O channel. The GBC may be located on either end or in the middle of the bus.
PRIMARY UNIT
a47007
SECONDARY UNIT
P C B R G G G
S P T C B B B
U M M C C C
P C B R G G G
S P T C B B B
U M M C C C
31 31 31
30 30 30
Genius Bus
Genius Bus
Genius Bus
Genius Devices
Genius Devices
Genius Devices
Figure 7. Example of Multiple Genius Busses in a Hot Standby CPU Redundancy System
Racks
The standard series 90-70 I/O racks may be used to contain the modules in a Hot
Standby CPU Redundancy System.. These racks include the following:
H
H
H
IC697CHS750, 5-slot rear mount;
IC697CHS790, 9-slot rear mount;
IC697CHS791, 9-slot front mount.
Note
Please note that he Series 90-70 VME Integrator racks (IC697CHS782
and IC697CHS783) are not supported by this release of the Hot Standby
CPU Redundancy product.
For detailed information on the Series 90-70 I/O racks, refer to GFK–0262, the Series
90-70 Programmable Controller Installation Manual.
26
Series 90-70 Hot Standby CPU Redundancy User’s Guide – December 1993
GFK-0827
Chapter
3 Configuration
3
section level 1 1
figure bi level 1
table_big level 1
This chapter describes how to configure a Series 90-70 PLC system for Hot Standby CPU
Redundancy. Several parameters in addition to the normally configured CPU
parameters must be configured for the Redundancy CPU 780. A description of all of the
parameters for a redundancy system is provided first, followed by an example of a
Primary system configuration and a Secondary system configuration.
Configuring a Hot Standby CPU Redundancy System
As discussed previously, when configuring a system for Hot Standby CPU Redundancy,
the following parameters require configuration in addition to the CPU configuration
parameters that are done for any other CPU78X CPU.
Configuration
Parameter
GFK-0827
Description
Fail-wait
The time one PLC will wait on one RCM link for the other
PLC to respond before faulting that link. The CPU will try
both links before continuing its scan. Once the RCM links are
marked as failed, one unit or the other must be power cycled
to recover them. Range is 60 ms to 400 ms, with the default
value being 60 ms.
Control Strategy
The control strategy for the current configuration. Configured as a three-character identifier (GHS for Hot Standby
CPU Redundancy). The default value is GHS (currently the
only value that is valid).
Shared I/O References
The references within the control of the Redundancy system;
limited to total of 20 KBytes for Inputs and 28 Kbytes for Outputs. The references which may be used as shared I/O are
%I, %Q, %AI, %AQ, %R, and %M. .
Redund Type
Whether the CPU being configured is the Primary or Secondary CPU in the Redundancy system. Redund Type has three
possible values: PRIMARY, SECONDARY, or SIMPLEX. SIMPLEX indicates a non-redundant system. The default value is
PRIMARY. SIMPLEX is not a currently supported Redund Type
for the CPU 780.
27
3
Redundancy System Requirements
For a redundant CPU configuration using the Hot-Standby Redundancy scheme to be
valid, the following requirements must be true in both the Primary Unit and the
Secondary Unit in the redundancy system.
H One configuration must be set to Primary; the other to Secondary.
H The control strategy configurable parameter must be set to ”GHS”.
H An RCM must be configured in rack 0 of each system. There can be no empty slots
between the RCM and the CPU. For a given unit, the Local RCM is the one
configured in that unit; the Remote RCM is not configured by the user, but is
automatically configured by the system to be in slot 1 of rack 7.
H All Genius Bus Controllers in the system must be configured for RED CTRL
Redundancy with the redundant pair set for EXTERNAL, or they must be
configured for no redundancy.
H If a Genius Bus Controller is set to redundant in a redundant CPU configuration, all of
its bus blocks must also be set redundant; if a Genius Bus Controller is set
non-redundant in a redundant CPU configuration, all of its bus blocks must also be set
non-redundant.
H If the primary/secondary configurable item is set to PRIMARY, all Genius Bus
Controllers configured for RED CTRL redundancy must have Serial Bus Address 31.
If the primary/secondary configurable item is set to SECONDARY, all Genius Bus
Controllers configured for RED CTRL redundancy must have Serial Bus Address 30.
H The Shared I/O selections must match exactly between Primary and Secondary PLCs.
Basic Redundancy System Setup
H
Assemble each PLC system and cable the last rack of each system to the RCM of the
other PLC using the terminated I/O cable. If there are no expansion racks in the
system, cable each BTM to the RCM in the other PLC.
Logicmaster 90 Configuration
H
H
Set the primary CPU to PRIMARY.
Set the secondary CPU to SECNDARY.
For both Primary and Secondary CPUs, do the Following:
H
Select Data Transfer (SHARED I/O) parameters (up to 20 Kbytes Input data, up to 28
Kbytes Output data).
H
Configure the SBA for all Redundancy Genius Bus Controllers (SBA 31 for the
Primary; SBA 30 for the Secondary), and Redund Mode to ”RED CTRL”.
H
H
Select fail-wait time. The default value of 60 ms should suffice for most applications.
H
Select the programmer window. Set to about 10% of the normal scan time (if scan
time is unknown, use default time (do not exceed the fail wait time).
H
Select Fault Actions.
Select watchdog timer. Allow for worst case scan time plus data transfer time plus
two fail-wait times (plus a generous margin). Setting this value too small could
cause the standby unit to time out during a failure of the active unit.
I/O System Configuration
H
28
Configure your I/O system as required for your application.
Series 90-70 Hot Standby CPU Redundancy User’s Guide – December 1993
GFK-0827
3
Screens for Fault Category Configuration
A new Fault Category Configuration screen is displayed for the CPU 780. This new
screen has two columns of fault actions for the configurable fault groups/categories. The
following sample screens show the Fault Category Configuration screens as they appear
in Logicmaster 90-70. To access this screen, select the F2 softkey (CPU Configuration)
from the Configuration Software main menu. The CPU Configuration menu will be
displayed. From this menu select the F5 softkey (Fault Category).
The screen shown below is the Fault Category screen for a redundant system when in
the OFFLINE mode
The screen shown below is the Fault Category screen for a redundant system when in
MONITOR or ONLINE mode
GFK-0827
Chapter 3 Configuration
29
3
The Fault Type is shown at the left. The first column under Fault Category (CFG) shows
which faults are FATAL and which faults are DIAGNOSTIC for this CPU, when it is the
only running CPU (i.e., stand-alone with no backup available). This column can be
edited for each fault group/category to select FATAL or DIAGNOSTIC so that a safe
shutdown or fault tolerant operation can be selected for when a failure occurs with no
backup ready. The column next to it (PLC) shows the value (F or D) currently stored to
the PLC or the defaults if it is not stored.
The next column shows the Synchronized PLC values. These values are either F (FATAL
- which causes a transition to STOP mode), or D (DIAGNOSTIC - which maintains the
current state of the PLC) for this CPU, when it is synchronized. This column cannot be
edited.
Handling Folders
It is very desirable from a maintenance standpoint to keep the applications programs
identical between PLCs. The best way to handle this is to maintain different folders for
each configuration and use the same logic folder for both PLCs. By using this scheme,
you would have three folders for the redundant system.
1.
Folder ”A” - configuration for the Primary unit.
2.
Folder ”B” - configuration for the Secondary unit.
3.
Folder ”C” - logic and reference tables for both systems.
It is recommended that for a new system, you should STORE the configuration first,
then the logic.
Functionally, it is not necessary to keep the same ladder in both PLCs but it is difficult to
maintain such a system. Any ladder changes made in one system would have to be
evaluated and hand-keyed in to the other folder. Other than visual inspection, there would
be no way to tell if changes made in one system were appropriately made in the other.
Note
When entering either the Programmer Package or the Configuration
Package while ONLINE and EQUAL, the folder containing the logic
program will be automatically selected.
Configuration with Logicmaster 90-70
To configure the Hot Standby CPU Redundancy system, connect the programmer to
either the Bus Transmitter Module for parallel communications or to the RS-485 serial
port on the CPU 780 module for serial communications. For detailed information on
installation procedures refer to GFK-0262, the Series 90-70 Programmable Controller
Installation Manual. For detailed information on running Logicmaster 90-70
Programming Software, refer to GFK-0263, the Logicmaster 90-70 Programming Software
User’s Manual.
Any computer running Logicmaster 90 interfacing with the PLC must be connected to
the same power ground as the PLC unless special isolated drivers are used. The parallel
30
Series 90-70 Hot Standby CPU Redundancy User’s Guide – December 1993
GFK-0827
3
cable connecting the PLC to the programmer should only be plugged and unplugged
when the programmer is powered up and offline. Avoid powering the parallel programmer
up or down while connected to a running PLC.
Configuration of a Redundancy CPU Module
The redundancy CPU module, IC697CPU 780 must be configured as a rack module in
rack 0, slot 1. The procedure for configuring a CPU 780 in a rack is described below.
While in the Logicmaster 90 main menu, select the Logicmaster 90 Configuration
Package by pressing the F2 softkey. You will then be prompted to enter a folder name or
select an existing folder. When you have done this, press the Enter key and the Series
90-70 Configuration software main menu will appear.
While in the Configuration Software main menu, select the I/O softkey (F1) for I/O
Configuration. The default I/O Configuration Rack screen is displayed.
To configure the CPU 780 module position the cursor on rack 0, slot 1, then press the
zoom softkey (F10).
GFK-0827
Chapter 3 Configuration
31
3
The detail screen of the currently configured CPU module is displayed. The following
screen shows the CPU module detail screen for the currently displayed module.
To select the CPU 780 Redundancy CPU module, press the cpu softkey (F1). A list of the
available CPU modules is displayed with the currently selected CPU module highlighted
in reverse video. Move the cursor to the line for the Redundant CPU (catalog number
IC697CPU 780), as shown below, and press Enter.
If the existing CPU configuration requires any modification for the redundant CPU
configuration, an informative message will be displayed.
Note
The message area can show messages for all possible types of
configuration modifications; any number of these messages could be
displayed at any one time.
32
Series 90-70 Hot Standby CPU Redundancy User’s Guide – December 1993
GFK-0827
3
If the existing configuration does not require any modification to suit the redundant
CPU configuration, the prompt ”REPLACE displayed module ? (Y/N)” will be displayed
beneath the softkey strip instead of the message box.
If you answer ”Y”, page 1 of the detail screen for the redundant CPU (IC697CPU 780) is
displayed, If you were to answer ”N”, the previous CPU is displayed. For the
redundant CPU configuration example, the answer is ”Y”.
The differences between screen page 1 of the redundant CPU and non-redundant CPU
are described below.
Redundant CPU Requirements
The I/O configuration of a redundant CPU has the following restrictions, which are:
GFK-0827
1.
In a redundant CPU system, rack I/O module interrupts MUST be disabled.
2.
The SBAs of redundant GBCs in a Primary redundant CPU system must be 31; the
SBAs of redundant GBCs in a Secondary redundant CPU system must be 30.
Chapter 3 Configuration
33
3
3.
In a redundant CPU system, RCMs cannot be configured in expansion racks.
4.
Rack 7 cannot be seen nor edited.
Redund Type
This parameter specifies whether the CPU is configured as the primary controller or the
secondary controller. The Redund Type has three possible choices: PRIMARY,
SECNDARY, or SIMPLEX. The default value is PRIMARY.
When this configuration item is set PRIMARY, all configured redundant Genius Bus
Controller(GBC) Serial Bus Addresses (SBA) must be 31. If any one of the SBAs is not 31,
the message ”SBAs of all redundant GBCs in a primary system must be 31: modify (Y/N) ?.
Answering ”Y” automatically changes all SBAs to 31. Answering ”N” leaves this field
unchanged.
When this configuration item is set to SECNDARY, all configured redundant Genius Bus
Controller(GBC) Serial Bus Addresses (SBA) must be 30. If any one of the SBAs is not 30,
the message ”SBAs of all redundant GBCs in a secondary system must be 30: modify
(Y/N) ?.” Answering ”Y” automatically changes all SBAs to 30. Answering ”N” leaves
this field unchanged.
The third choice is SIMPLEX, which is currently not a valid mode for the CPU 780. You
can configure the Redund Type for SIMPLEX, but the choice will be rejected when you
attempt to STORE the configuration.
Background Window
The default for this parameter for CPU redundancy systems is 5 ms (limited Window
mode). The background window runs several diagnostic tests which can be disabled by
setting the the background window time to 0. These tests are run in Constant Window
and Constant Sweep mode only if the window/sweep time is large enough.
Normal Sweep Mode
The Sweep Mode for the redundant CPU has to be selected. Below is the detail screen
(page 2) of a redundant CPU configured for NORMAL sweep mode.
34
Series 90-70 Hot Standby CPU Redundancy User’s Guide – December 1993
GFK-0827
3
Constant Window Sweep Mode
To change the Sweep Mode, move the cursor to the Sweep Mode field and press the Tab
key until the desired mode is displayed. Below is the detail screen (page 2) of a
redundant CPU configured for CNST WND (constant window) sweep mode.
When a Series 90-70 redundant CPU is configured for CNST WND (constant window)
mode, the window value will automatically be set to 10 msec.
Constant Sweep Mode
Below is the detail screen (page 2) of a redundant CPU configured for CNST SWP
(constant sweep) mode.
When a Series 90-70 redundant CPU is configured for CNST SWP (constant sweep)
mode, its Sweep Timer value will automatically be set to 100 msec.
The screen shown below is the detail screen (page 3) of a redundant CPU module. This
screen will not appear for non-redundant CPU modules, or when the redundant CPU is
GFK-0827
Chapter 3 Configuration
35
3
set for SIMPLEX mode. The parameters on this screen are Ctrl Strgy (Control Strategy),
Fail Wait and SHARED I/O.
Ctrl Strgy
This parameter specifies which type of control strategy is selected for a redundancy
system. The valid entry is three ASCII characters (A...Z). The only value that is
supported at this time is Genius Hot Standby (GHS). If this parameter is set to any other
value, the configuration will be considered valid, but any attempt to STORE the
configuration will be rejected by the PLC. The default value is GHS.
Fail Wait
This parameter specifies the time one PLC will wait on one RCM link for the other PLC
to respond before faulting that link. The Fail Wait range is 60 msec to 400 msec
(measured in multiples of 10 msec) with the default value being 60 msec. The following
table lists the two parameters described above.
Parameter
Description
Valid Values
Default Value
60
Fail Wait
Wait time
60 to 400 milliseconds in
10 millisecond increments
Control Strategy
Three character control
strategyidentifier
A......Z
GHS
Shared I/O
The Shared I/O values are the reference addresses and ranges for the I/O references
included in the 20 KBytes of Input data (%I, %AI) and 28 KBytes of Output data (%Q,
%AQ, %M, %R) which is shared between the Primary and the Secondary units in the
Hot Standby CPU Redundancy control system. The Shared I/O data is transferred from
the active CPU to the backup CPU each sweep (refer to Chapter 4, ”Synchronous Scan”,
for details). The valid entries for these parameters are described in the following tables.
36
Series 90-70 Hot Standby CPU Redundancy User’s Guide – December 1993
GFK-0827
3
Table 4. Shared I/O Data Parameters
I/O Parameter
Description and Valid Entries
%I Ref Adr
Starting address for redundant %I data region. Range is %I00001...%I12288. The starting
address is bit aligned. Default value is %I00001.
%I LENGTH
The bit length of the redundant %I data region. Range is 0...12288. Default value is 0.
%Q Ref Adr
Starting address for redundant %Q data region. Range is %Q00001...%Q12288. The
starting address is byte aligned. Default value is %Q00001.
%Q LENGTH
The bit length of the redundant %Q data region. Range is 0...12288. Default value is 0.
%M Ref Adr
Starting address for redundant %M data region. Range is %M00001...%M12288. The
starting address is byte aligned. Default value is %M00001.
%M LENGTH
The bit length of the redundant %M data region. Range is 0...12288. Default value is 0.
%R Ref Adr
Starting address for redundant %R data region. Range is %R00001...%R configured limit or
8K, whichever is smaller (since only 28 Kbytes can be transferred). The %R memory limit
for the CPU 780 is configurable in the PLC memory configuration screen. The maximum
limit depends on the available CPU memory. See ”Memory Configuration” later in this
chapter. The default value is %R00001.
%R LENGTH
The word length of the redundant %R data region. Range is 0...%R configured limit. The
default value is 0.
%AI Ref Adr
Starting address for redundant %AI data region. Range is %AI00000...%AI configured
limit. The %AI memory limit for the is configurable in the PLC memory configuration screen.
The maximum limit depends on the available CPU memory. The default value is %AI00001.
%AI LENGTH
The word length of the redundant %AI data region. Range is 0...%AI configured limit.
The default value is 0.
%AQ Ref Adr
Starting address for redundant %AQ data region. Range is %AQ00000...%AQ configured limit.
The %AQ memory limit for the is configurable in the PLC memory configuration screen. The
maximum limit depends on the available CPU memory. The default value is %AQ00001.
%AQ
LENGTH
The word length of the redundant %AQ data region. Range is 0...%AQ configured limit.
Default value is 0.
Table 5. Shared I/O Reference Values
Parameter
Valid Values
Default Values
%I Ref Adr
%I00001...%I12288
%I00001
%I Length
0...12288
0
%Q Ref Adr
%Q00001...%Q12288
%Q00001
%Q Length
0...12288
0
%M Ref Adr
%M00001...%M12288
%M00001
%M Length
0...12288
0
%R Ref Adr
%R0001..configuredlimits
%R00001
%R Length
0...PLC memory limits
0
%AI Ref Adr
%AI0001..configuredlimits
%AI00001
%AI Length
0...configuredlimits
0
%AQ Ref Adr
%AQ0001..configuredlimits
%AQ00001
%AQ Length
0...configuredlimits
0
Transfer Data Size
The following table shows the amount of Shared I/O data transferred for each reference
type. No more than 20 Kbytes of Input data and 28 Kbytes of Output data can be
transferred (an additional 8 Kbytes is reserved for resynchronization transfers).
GFK-0827
Chapter 3 Configuration
37
3
Note that the memory for the Shared I/O data that is stored at configuration must be
subtracted from the amount of memory on the configured expansion memory module.
The calculation for the size of the memory for Shared I/O data is (bytes of Input data
transfer plus bytes of Output data transfer plus 8 Kbytes for synchronization
information).
For example if the selected expansion memory is 512 Kbytes, and the Shared I/O data is
10 Kbytes of Input data transfer and 20 Kbytes of Output data transfer, then 10K + 20K
+ 8K Bytes = 38 KBytes is reserved for data transfers. This is subtracted from the 512
KBytes of available user memory (512K – 38K = 474K Bytes, which means that 474
KBytes is available for the user’s control program.
Table 6. Transfer Data Size
Reference Type
Reference Size
Calculation for Number of Bytes
If point faults are DISABLED use the following calculations.
%I
Bit
(%I references x 4 bits/reference) ÷ 8bits/byte
%AI
Word
(%AI references x 2 bytes/reference)
%Q
Bit
(%Q references x 4 bits/reference) ÷ 8bits/byte
%M
Bit
(%M references x 4 bits/reference) ÷ 8bits/byte
%AQ
Word
(%AQ references x 2 bytes/reference)
%R
Word
(%R references x 2 bytes/reference)
If point faults are ENABLED use the following calculations.
%I
Bit
(%I references x 5 bits/reference) ÷ 8bits/byte
%AI
Word
(%AI references x 3 bytes/reference)
%Q
Bit
(%Q references x 5 bits/reference) ÷ 8bits/byte
%M
Bit
(%M references x 4 bits/reference) ÷ 8bits/byte
%AQ
Word
(%AQ references x 3 bytes/reference)
%R
Word
(%R references x 2 bytes/reference)
Interrupts
Interrupts cannot be ENABLED for Input Modules or VME modules when the
configured CPU is a CPU 780. The current configuration will be checked to ensure that
there are no modules that have interrupts ENABLED. If modules do exist in the current
configuration that have interrupts ENABLED and you configure a CPU 780, a prompt
will appear asking whether or not all module interrupts should be DISABLED
automatically. You cannot configure a Redundant CPU (CPU 780) until all module
interrupts are DISABLED.
38
Series 90-70 Hot Standby CPU Redundancy User’s Guide – December 1993
GFK-0827
3
Configuring a CPU Expansion Memory Board
To configure a CPU expansion memory board for the CPU 780, press the expbd softkey
(F9) and then the memory softkey (F1). Position the cursor on the desired expansion
memory board and press Enter to select that board. The detail screen for the expansion
memory board and the displayed catalog list for the available CPU expansion memory
boards is shown below.
Press the Esc key twice to return to the Rack level display. The selected memory size is
shown below the CPU model (CPU 780).
GFK-0827
Chapter 3 Configuration
39
3
Configuration of a Redundancy Communications Module
As described previously, one Redundancy Communications Module (the Local unit)
must be configured in rack 0 (can be in slots 2 to 9). There must not be an empty slot
between the CPU 780 module and the RCM module. If there is an empty slot, the
configuration will be invalid. The following example screens show an RCM configured
in slot 2 in rack 0. While in the I/O Configuration rack screen, cursor to slot 2 (currently
empty) as shown below.
Select the bem softkey (f3) from the I/O Configuration rack screen, the following screen
will be displayed:
40
Series 90-70 Hot Standby CPU Redundancy User’s Guide – December 1993
GFK-0827
3
To display the RCM catalog list, press the rcm softkey (F3). The RCM catalog list is then
displayed as shown below.
Next, press the Enter key, the following screen is displayed to confirm that you have
selected the RCM catalog entry.
You have just configured the Local RCM in rack 0. The system automatically configures
the RCM in the Secondary unit as being in slot 1 of rack 7 (in relation to the RCM you
have just configured in the Primary unit).
GFK-0827
Chapter 3 Configuration
41
3
Configuration of a Genius Bus Controller
For this example, assume that a Genius Bus Controller has been configured in slot 3 of
rack 0. In a Hot Standby CPU Redundancy system, the Redundancy parameter
(Redund Mode) of a Genius Bus Controller can only be NONE or RED CTRL; any other
value is not valid. The following screen is the GBC screen when the Redund Mode
parameter is set to NONE.
To change the Redund Mode, move the cursor to the Redund Mode field and press the
Tab key until the desired mode is selected. When the Redund Mode parameter for the
GBC is set to RED CTRL, the following screen is displayed:
Paired GBC Parameter
When the GBC redundancy mode, Redund Mode is set to RED CTRL, the Paired GBC
configuration parameter MUST be set to EXTERNAL. This is automatically done by the
system.
42
Series 90-70 Hot Standby CPU Redundancy User’s Guide – December 1993
GFK-0827
3
Serial Bus Address
All redundant GBCs in the Primary CPU redundant system MUST be configured at SBA
31. In the sample screen on the previous page, the rack level GBC is configured at SBA
31. The Bus level GBC is automatically configured at SBA 30.
All redundant GBCs in the Secondary CPU redundant system MUST be configured at
SBA 30. In our example, the rack level GBC is configured at SBA 30. The Bus level GBC
is automatically configured at SBA 31
All of the Genius I/O blocks on the bus of a redundant GBC in a Hot Standby CPU
Redundancy system MUST be set Redundant.
Note
For fastest switching, all Genius Bus Controllers in the Hot Standby CPU
Redundancy system should be in the main rack, or in a rack driven by
the main rack’s power supply. This will cause the Genius Bus Controller
to lose power at the same time that the CPU loses power and allow the
backup unit to gain full control of the I/O as soon as possible.
GFK-0827
Chapter 3 Configuration
43
3
Configuring a Primary Redundant PLC
The steps required for configuring a Primary Redundant PLC are described below. The
Primary PLC and the Secondary PLC must be configured separately. An example of the
configuration screens for each system is provided on the following pages. The
programmer must be connected to the CPU in the Primary PLC to configure the Primary PLC and
then moved to the CPU in the Secondary PLC to configure the Secondary PLC. First, the
Primary PLC will be configured.
While in the Configuration Software main menu, select I/O (F1). The default
configuration for the I/O Configuration Rack screen is displayed.
Position the cursor on rack 0, slot 1 and press the zoom softkey (F10) to zoom into the
CPU module currently configured in slot 1. Press the cpu softkey (F1) to have a catalog
list of the available CPU modules displayed. The currently selected CPU is highlighted
in reverse video.
44
Series 90-70 Hot Standby CPU Redundancy User’s Guide – December 1993
GFK-0827
3
Select the Redundancy CPU Module
Move the cursor to the line for the Redundant CPU, IC697CPU 780, and press the Enter
key. A message is displayed beneath the softkey selection strip: ”REPLACE displayed
module ? (Y/N)”. Press the Y key to replace the currently displayed CPU with the CPU
780. The detail screen (page 1) for the redundancy CPU module is displayed.
Press the PgDn (page down) key to go to the next page of the CPU module. The default
screen for page 2 is as follows:
GFK-0827
Chapter 3 Configuration
45
3
Press the PgDn key again to go to the next page of the CPU module. The default screen
for page 3 of the CPU detail screen appears as shown below:
Select an Expansion Memory Board
To configure a CPU expansion memory board for the CPU 780, press the expnd softkey
(F9), then the memory softkey (f1). The detail screen for selection of the expansion
memory board with the catalog list of the CPU expansion memory modules appears as
follows: Position the cursor on the desired memory board and press Enter.
46
Series 90-70 Hot Standby CPU Redundancy User’s Guide – December 1993
GFK-0827
3
Press the Esc key twice to return to the rack level display, which now appears as shown
below.
Configure the Redundant Communications Module
To configure an RCM in rack 0, slot 2, move the cursor to slot 2 and press the bem
softkey (F3). The configuration screen for bus communication modules will appear.
From this screen press the rcm softkey (F3). The catalog list screen for the RCM module
will be displayed. Press the Enter key to select the RCM module, IC697RCM711. The
RCM module detail screen appears as follows:
Press the Esc key to return to the rack level screen.
GFK-0827
Chapter 3 Configuration
47
3
Configure a Genius Bus Controller
To configure a Genius Bus Controller module in rack 0, slot 3, position the cursor on slot
3 and press the genius softkey (F2). To display the catalog list for the Genius Bus
Controller, press the gbc softkey (F1). Press the Enter key to select the Genius Bus
Controller module. The Genius Bus Controller detail screen will then be displayed as
shown below.
To change the Genius bus redundancy mode for redundancy, move the cursor to
Redund Mode: Press the Tab key until the value for the field changes to RED CTRL.
Note that in a Hot Standby CPU Redundancy system, the only values that are valid for
this parameter are NONE or RED CTRL.
48
Series 90-70 Hot Standby CPU Redundancy User’s Guide – December 1993
GFK-0827
3
Press the Esc key to return to the rack level screen. From the rack level screen press the
zoom softkey (F10). The following bus level screen is displayed:
To view the Genius Bus Controller (block level) at SBA 30, position the cursor on BUS
ADR 30 and press the zoom softkey. The Genius Bus Controller’s detail screen will
appear as shown below.
GFK-0827
Chapter 3 Configuration
49
3
At this point, Press the Esc key and the bus screen will appear as shown below.
Configure Genius I/O Blocks
We will now configure a block for Bus Address 29. Move the cursor to block 29 and
configure a bus block (Discrete Input block IC660BBD110 for this example) by selecting
the F1 function key (d in), then Enter. The bus block’s detail screen will appear as shown
below.
The Redundancy? parameter at the middle right of the screen is based on the Redund
Mode that was selected for the Genius Bus Controller. At this point, you may configure
the required type and number of blocks on the Genius bus.
50
Series 90-70 Hot Standby CPU Redundancy User’s Guide – December 1993
GFK-0827
3
When you have completed configuring Genius blocks, press the Esc key to go from the
block level display back to the bus level display. The bus display will now appear as
shown below.
Configure the Bus Transmitter Module
Press the Esc key to return to the rack level display. A message will be displayed
reminding you to configure a Bus Transmitter Module for this rack (since it had not been
configured earlier). Press Esc again. Move the cursor to slot 4, press the bem softkey
(F1), then press the btm softkey (F1) to select the Bus Transmitter Module, and press
Enter. The detail screen for the Bus Transmitter Module will appear.
Press the Esc key which will return you to the rack level display. At this point you have
completed the necessary configuration steps for the Primary PLC and can proceed to
configuring the Secondary PLC.
GFK-0827
Chapter 3 Configuration
51
3
Configuring a Secondary Redundant PLC
This section describes the steps for configuration of a Secondary PLC. The programmer
for Logicmaster 90-70 software must be connected to the Secondary PLC in order to
configure the Secondary PLC. There are several ways to configure a Secondary PLC in a
Hot Standby CPU Redundancy system. One method is shown here.
Create a new folder for the Secondary PLC system. Copy the data from the Primary
PLC system to the Secondary PLC system folder. This process will save time since you
will not need to re-enter the configuration parameters that are common to the two
redundancy systems.
This example shows how to change the Primary PLC redundancy configuration
described on the previous pages to a Secondary PLC redundancy.
Enter the I/O Configuration software by pressing the I/O softkey (F1). The configuration
for rack 0 appears as shown below (note that this is the configuration that you had
selected for the Primary PLC)
52
Series 90-70 Hot Standby CPU Redundancy User’s Guide – December 1993
GFK-0827
3
Position the cursor on rack 0, slot 1. Press the zoom softkey (F10) to zoom into the CPU
module configured in slot 1. The detail screen (page 1) for the CPU module appears as
shown below:
Change Redund Type
Change the Redund Type: parameter value from PRIMARY to SECNDARY by pressing
the Tab key then the Enter key. The message ”SBAs of all redundant GBCs in a secondary
system must be 30: modify (Y/N) ? will be displayed Press ”Y” at the prompt. At this time,
the SBAs of all redundant rack level GBCs will be changed to 30 and the SBAs of their
corresponding bus level GBCs will be changed to 31. After the changes have been made,
the screen will appear as follows:
GFK-0827
Chapter 3 Configuration
53
3
Press the Esc key twice to save the changes you have just made. This completes the
process of converting a Primary PLC redundancy system configuration to a Secondary
PLC redundancy system configuration. The differences between the Primary system
and the Secondary system are:
1.
The CPU module parameter Redund Type in a Primary system is PRIMARY and in a
Secondary system is SECNDARY.
2.
The Serial Bus Address (SBA) of a redundant GBC in a Primary system MUST be 31
and in a Secondary system MUST be 30.
The Genius Bus Controller bus level display in a Secondary PLC redundancy system is as
shown below.
54
Series 90-70 Hot Standby CPU Redundancy User’s Guide – December 1993
GFK-0827
Chapter
4 Operation
4
section level 1 1
figure bi level 1
table_big level 1
This chapter discusses:
H
H
H
H
the normal operation of a Hot Standby CPU Redundancy PLC system;
what happens when a fault is detected and the system does not operate normally;
how to restore the system to normal operation;
on-line repair procedures.
Section 1 describes normal system operation of a Series 90-70 Hot Standby CPU
Redundancy system, Section 2 describes what happens when a system failure is
detected, the actions taken by the system in response to detected faults and how to
restore the system to normal operation.
Section 5: System Operation
Power-Up Sequence of a Redundant CPU
When a CPU is powered up, it will perform a complete hardware diagnostic check and a
complete check of the user program and configuration parameters. This will cause the
power up time of a redundant CPU to be significantly longer than the normal power up
time of a simplex (non-redundant) Series 90-70 CPU. If the Primary and Secondary
systems are powering up together each CPU must recognize this fact so that the Primary
system will become the active and the Secondary system the backup.
The following sequence outlines each step in the power-up process. The only difference
in this sequence as compared to the power-up sequence of existing CPUs is that full
power-up tests are always performed instead of conditionally depending on whether STOP
mode is selected, and the detection of the other CPU along with initialization of each
RCM followed by synchronization.
GFK-0827
1.
Power-up self-test is performed.
2.
CPU operating system is initialized and PLC memory is validated.
3.
Diagnostics called for ”Full” power-up tests performed.
55
4
4.
System Configuration verified.
5.
System interrogated and initialized.
6.
Presence of other CPU detected and RCMs initialized.
7.
Complete user program verification.
8.
Synchronize with the Redundant CPU.
When powering up the unit configured as the Secondary Unit in a Redundant system
and no remote unit (the Primary Unit) is detected, the Secondary Unit will wait up to 15
seconds to see if the remote unit will also power up. If after 15 seconds, the remote unit
has not completed its power up sequence, then the Secondary Unit will assume that no
remote unit is present. If at this time, the Secondary Unit transitions to RUN mode, it
will do so as a stand-alone unit.
If the unit configured as the Primary Unit completes its power-up sequence before the
remote unit (the Secondary Unit) the Primary Unit does not wait for the remote unit to
complete its power-up sequence. If the Primary Unit is setup to transition to RUN on
power-up (that is, was powered-down in RUN mode), it will transition to a stand-alone
unit without waiting for the remote unit. When the remote unit completes its power-up
sequence, it will attempt to establish communications with the Primary Unit and will
synchronize if also transitioning to RUN mode.
In either case, if one CPU fails to notify the other CPU that it is either present or
powering up, this CPU will proceed to power-up as a stand-alone CPU and will become
the active CPU. The other CPU will resynchronize once the power-up sequence is
complete.
Note
In applications where it is desired to have a fully redundant system
upon power-up, the Secondary Unit must complete power-up first but
no more than 15 seconds before the Primary Unit. The way to be sure
that this happens is to apply power to the Secondary Unit first.
Incompatible Configurations
When two units have incompatible configurations stored (for example, both units
configured for PRIMARY or differing blocks for data transfer), then only one of the units
can go to RUN mode. If the other unit attempts to go to RUN mode or both units
attempt to go to RUN mode at the same time, a FATAL incompatible configuration fault
will be logged.
If one unit is configured for CPU Redundancy and the other has no configuration, then
both units may go to RUN mode at the same time but they will not be synchronized and
only the unit that has been configured will drive outputs.
56
Series 90-70 Hot Standby CPU Redundancy User’s Guide – December 1993
GFK-0827
4
Resynchronization of the Redundant CPU
Whenever a CPU is attempting to get back in synchronization with the currently active
CPU, a resynchronization process will occur. This resynchronization process will occur
any time a CPU performs a STOP to RUN mode transition. This process will start by
determining which role each CPU is to play. The Primary Unit (with Serial Bus Address
31) is always preferred and a switch will occur from the Secondary Unit anytime the
primary CPU performs a resynchronization. However, until the resynchronization is
complete, the primary CPU will play the role of the backup. The Primary unit will
switch to active just prior to logic execution. Outputs will be driven that sweep by the
primary unit.
If both systems are transitioning at the same time, then the primary CPU will become
the active CPU and the secondary will become the backup.
During the resynchronization process, data is exchanged between the CPUs regarding
roles and configuration. If the transitioning CPU detects that the role or configuration is
not in agreement, then that CPU will not be permitted to go to RUN mode. If both
CPUs are transitioning, then neither CPU will be permitted to go to RUN mode. The
following items must be in agreement:
1.
One CPU must be configured as Primary, the other as Secondary.
2.
Both CPUs must be configured for the same redundancy scheme; but not necessarily
the same release.
3.
Both CPUs must have the same Shared I/O redundancy points configured.
4.
Point fault configuration must match. If point faults are configured on one CPU,
they must also be configured on the other if %I, %Q, %AI, or %AQ data is
transferred.
At this point, the active unit is the one that has been in control and the backup unit is the
one that is resynchronizing. The transfer of all configured control data from the active
unit to the backup will occur provided both units are not transitioning at the same time
(the transfer always goes from the running unit to the resynching unit. In addition to
the configured control data, the FST_SCN and FST_EXE %S references as well as
internal timer information for each common (that is, present in both CPUs) sub-block are
transferred from active to backup. Only the internal timers and FST_EXE references for
program blocks with the same name will be transferred from the active to the backup
CPU. The result of this is that if one CPU is already on-line and the other is transitioning
to RUN mode, its FST_SCN and matching FST_EXE bits will not be set on its first scan.
These bits are considered system bits and will only be set if one unit comes up alone, or if
both units come up together.
No transfer of data occurs at this point if both units are transitioning. Instead, the
normal clearing of non-retentive data will happen and the FST_SCN and FST_EXE
references will be set as in the non-redundant simplex CPU models.
The timer information and the FST_EXE %S reference bits will not be continuously
transferred. The timer information and FST_EXE references will be transferred only at
resynchronization time and the timer information will be calculated each sweep from
the universal ”Start of Sweep Time” that is transferred every sweep.
GFK-0827
Chapter 4 Operation
57
4
Hot-Standby Redundancy Control Strategy
In the Hot-Standby Redundancy Control Strategy, the primary CPU (designated by all
GBCs addressed at bus address 31), is always the preferred CPU. The secondary CPU
(designated by all GBCs addressed at bus address 30) will have the outputs enabled to its
GBCs at all times whether it is in control or not. This is necessary to prevent glitching of
the outputs when a switch is made. The primary CPU on the other hand must disable
its outputs whenever control is manually switched to the backup CPU and then
re-enable them if it is again selected as the active unit. Glitching of the outputs will not
occur on a switch from the secondary to the primary CPU when it is done manually but
may occur if the switch is made automatically due to a failure in the secondary CPU.
For this reason, the primary CPU should normally be selected as the active unit. Anytime the
primary CPU performs a STOP to RUN mode transition, the primary CPU will assume
control from the secondary CPU after a resynchronization has occurred. This will be
done automatically by the control strategy firmware in the PLC CPU.
The primary unit in the hot-standby control strategy will become a functioning backup if
control is manually switched to the secondary unit. The system will remain with the
secondary unit as the active unit and the primary unit as the backup until either another
manual switch is commanded or either unit performs a STOP to RUN mode transition.
A STOP to RUN mode transition always occurs when the unit is power cycled and
proceeds directly to RUN mode or when commanded to transition by either the
programmer or the toggle switch. A failure of the secondary unit while it is active may
result in a glitch in the outputs.
To further clarify the above operation – when a resynchronization occurs for any
reason, the primary unit will become active. However, in order for resynchronization to
occur, one of the units must go to STOP mode and then back to RUN. If the secondary
unit goes to STOP, the primary unit will then become the active unit.
The control strategy is selected during configuration of the Redundant CPU. The
Control Strategy parameter is indicated by a three ASCII character identifier. For Hot
Standby CPU Redundancy this identifier is GHS. Although other values may be selected
and considered valid, any attempts to STORE them to the PLC will be rejected since
GHS is currently the only valid Control Strategy. GHS is the default value for the
Control Strategy parameter. For more information on selecting Redundancy CPU
parameters, refer to Chapter 3, Redundancy System Configuration.
58
Series 90-70 Hot Standby CPU Redundancy User’s Guide – December 1993
GFK-0827
4
Synchronous Scan
The figure below shows the sweep components for the active and the backup CPUs. It
shows the two communication points in the sweep. The first communication point is
immediately after the inputs are scanned. At this point in the sweep the newly read
inputs are sent from the active CPU to the backup CPU and synchronization information
is passed. In the second communication point, the rest of the data (outputs, internal
references, registers) is sent from the active PLC to the backup.
a47008
ACTIVE CPU
BACKUP CPU
Housekeeping
Housekeeping
Input Scan
ÉÉÉÉÉÉ
ÉÉÉÉÉÉ
ÉÉÉÉÉÉ
ÉÉÉÉÉÉ
ÉÉÉÉÉÉ
ÉÉÉÉÉÉ
Input Scan
1
Send Inputs
and
Synchronize
DAT
Logic Solution
Send Outputs
and
Other Data
Output Scan
Receive Inputs
and
Synchronize
A
Logic Solution
2
DAT
Windows
and
Run-Time Diagnostics
A
Receive Outputs
and
Other Data
Output Scan
Windows
and
Run-Time Diagnostics
1
First Data Transfer Occurs: %I, %AI and Synchronization
2
Second Data Transfer Occurs: %Q, %AQ, %R, %M
Figure 8. Active and Backup Sweeps
First Data Transfer %I, %AI and Synchronization
There are two points in the sweep where the active CPU will transfer data to the backup
unit. The first data transfer will occur immediately after the Input Scan has occurred.
The active unit will send all of the configured input data, both discrete (%I) and analog
(%AI), to the backup unit. For discrete data, the status, override, and transition
information is all transferred; if point faults are configured, point fault data is also sent.
This data will overwrite the current input data in the backup unit.
In addition to the input data transfer, a synchronizing message containing the ”Start of
Sweep Time” will be sent from the active unit to the backup unit as soon as the input
data has been transferred. The CPU’s will stay in synchronization because the active
unit will wait on the backup CPU to respond to the synchronizing message before
starting its sweep.
GFK-0827
Chapter 4 Operation
59
4
The transfer of the redundancy data during each sweep will be in blocks with each block
checked for data integrity. The transferred data will be held in a temporary area by the
backup CPU until all data has been received and verified from the active unit. Then the
backup CPU will copy that data from the temporary area to the actual PLC memories.
The transfer is capable of being performed on either RCM link. If one RCM link fails
then the transfer will switch to the other RCM without causing a loss of synchronization
in the system. If at any time during a transfer the active unit fails or the full transfer fails
to complete properly (both RCMs fail) then the backup unit will disregard the data that
has been transferred to the temporary area and proceed with the values it already
obtained during its input scan.
The last part of the input data transfer is the synchronizing message containing the
”Start of Sweep Time”. The ”Start of Sweep Time” is the universal start of sweep time
for the redundancy system. Normally each PLC CPU operates its elapsed time clock on
which timers are based independently and the clocks are always started over from zero
on a power cycle. Two independent clocks would cause time discontinuity at switch
over time. In addition the clocks will tend to drift from each other over time. The
redundancy system corrects for this by keeping a single elapsed time value for the entire
redundancy system. The time will be continuous as long as one of the two systems
continue to run and the active unit will continuously pass the time to backup unit to
correct for any natural drift in the clocks. When a switch over occurs, the same time will
continue to be kept in the new active unit.
Data Transfer from Backup Unit to Active Unit
Eight bytes (4 registers) of data can be transferred from the backup unit to the active unit
during the input data transfer before the logic solution. To initiate this transfer, the
backup unit executes SVCREQ #27 (Write to Reverse Transfer Area) to copy eight bytes
of data from the reference specified by PARM to a temporary buffer (SVCREQ #27 on
the active unit will have no effect). This transferred data will be stored in a temporary
buffer on the active unit.
In the active unit, SVCREQ #28 (Read from Reverse Transfer Area) is then executed to
copy the eight bytes of data from the temporary buffer to the reference specified by
PARM (SVCREQ #28 will have no effect on the backup unit).
Note
There is always a one sweep delay between sending data to the active
unit using SVCREQ #27 and reading the data using SVCREQ #28 on
the active unit.
This data copied from the buffer is not valid
H
H
H
during the first scan after either unit has transitioned to RUN;
while the backup unit is in STOP mode;
if the remote unit does not issue a service request to the sending unit.
An example of this data transfer is described below.
This data should not be used if REM_RDY is off or if REM_RDY is transitioning to on.
If the following two rungs are placed in the program logic of both units, the backup unit
will send %P0001 through %P0004 to the active unit. The active unit will read the data
into %P0005 through %P0008. %P0001 through %P0004 on the active unit and %P0005
60
Series 90-70 Hot Standby CPU Redundancy User’s Guide – December 1993
GFK-0827
4
through %P0008 on the backup unit will not change. %T0002 will be set whenever the
operation is successful and the data can be used.
|REM_RDY
%T00001
|——|↑|—————————————————————————————————————————————————————————————————————( )—
|
|
_____
|REM_ACT |
|
%M00001
|——| |———| SVC_|———————————————————————————————————————————————————————————( )—
|
| REQ |
|
|
|
| CONST —|FNC |
| 00027 |
|
|
|
|
|%P00001—|PARM |
|
|_____|
|
|
|
_____
|%T00001
REM_RDY LOC_ACT
|
|
%T00002
|——|/|————————| |——————| |——————| SVC_|————————————————————————————————————( )—
|
| REQ |
|
|
|
|
CONST —|FNC |
|
00028 |
|
|
|
|
|
%P00005—|PARM |
|
|_____|
|
|
Second Data Transfer %Q, %AQ, %R, and %M
Both CPUs will then proceed independently until the end of the logic solution before the
output scan begins. At this time the second data transfer will take place. In this data
transfer, all remaining control data (as configured) will be transferred from the active
unit to the backup unit. This includes the %Q, %AQ, %R, and %M memories, and point
fault data that has been configured. As with the input data, the backup unit will hold all
data until it is all received and verified before transferring it to the actual PLC memories.
After this second data transfer has been completed, both the active and the backup CPU
will then proceed to perform their output scans and run their programmer and system
communication windows independently of each other. Any remaining time for the
background window will also be run and then the sweep housekeeping and input scans
will be performed before synchronizing again at the start of the next sweep.
Switching Control to Backup Unit
The amount of time required for a switch in control from the active unit to the backup
unit is dependent on the nature of the switch. A switch from the active unit to the
backup unit will occur if:
1.
the active unit has a failure;
2.
the pushbutton switch on the RCM is depressed;
3. commanded by activating a Service Request (SVCREQ #26).
If the switch occurs due to a failure of the PLC CPU (including loss of power), then the
switch will occur after the backup unit determines that the active unit has failed to
rendezvous at the synchronization point. Failure to rendezvous may take up to 2
failwait timeouts (one for each link) to determine. Control will not transfer, in this case,
until both links have been tried unsuccessfully.
GFK-0827
Chapter 4 Operation
61
4
If the switch occurs due to a controlled condition such as toggling the RCM unit selection
switch, forcing a switch in the user logic program, or because of a fault detected by the
PLC CPU, then the switch-over will occur at the beginning of the subsequent sweep.
The delay will be up to 1 sweep with the possibility of an input and an output scan after
failure detection.
Role Switch SVCREQ
The role switch SVCREQ (SVCREQ #26) will cause the units to switch roles (active to
backup and backup to active) on the next sweep if the units are synchronized and the
timing requirements of the role switch request are met. That is, a manual role switch
may not occur within 10 seconds of a previous manual role switch. Role switches due to
failures or resynchronization are always allowed (the 10 second limitation does not
apply). Power flow from SVCREQ #26 indicates that a role switch will be attempted on
the next sweep. Note that power flow does not indicate that a role switch has occurred or
even that a role switch will occur on the next sweep. For example, the units could fall
out of synchronization due to a link timeout before the next sweep which would
prevent the role switch from occurring.
An example of the SVCREQ #26 function block is shown below. SVCREQ #26 function
has three input parameters and one output parameter. When SVCREQ #26 receives
power flow to its enable input, the PLC is requested to perform a role switch. The three
input parameters are the enable input, the service number FNC, and PARM, which is the
beginning reference for the function parameters. An output coil will be set ON if the
operation succeeds.
|
_____
|%I00001 |
|
%M00001
|——|↑|———| SVC_| —————————————————————————————————————————————————————————( )—
|
| REQ |
|
|
|
| CONST —|FNC |
| 00026 |
|
|
|
|
|%R00001—|PARM |
|
|_____|
|
A typical application can be to have a switch on a control console wired to %I0001, which
is the input to the SVCREQ #26 function block. When closed, the switch will activate
the SVCREQ #26, causing a role switch between units.
Note that the 10 second limitation allows these SVC_REQs to be in both units so that
only a single switch occurs if the input is seen by both units.
62
Series 90-70 Hot Standby CPU Redundancy User’s Guide – December 1993
GFK-0827
4
%S References for CPU Redundancy
There are seven special %S references which reflect the status of the Redundancy units:
%S33 through %S39. The definition of these LEDs is shown in the following table.
Table 7. Definition for% S Reference for Redundancy Status
%S Bit
Definition
Nickname
Description
LED
%S33
Primary Unit
PRI_UNT
Bit will be set if the local unit is configured as the primary unit: otherwise; it is cleared. For any given local unit, if PRI_UNT is set, then
SEC_UNT cannot be set.
no
%S34
Secondary Unit
SEC_UNT
Bit will be set if the local unit is configured as the secondary unit:
otherwise; it is cleared. For any given local unit, if SEC_UNT is set,
then PRI_UNT cannot be set.
no
%S35
Local Unit Ready
LOC_RDY
Bit will be set if local unit is ready to become the active unit; otherwise
it is cleared.
yes
%S36
Local Unit Active
LOC_ACT
Bit will be set if local unit is currently the active unit; otherwise it is
cleared. For any given local unit, if LOC_ACT is set, then REM_ACT
cannot be set.
yes
%S37
Remote Unit Ready
REM_RDY
Bit will be set if remote unit is ready to become the active unit; otherwise it is cleared.
yes
%S38
Remote Unit Active
REM_ACT
Bit will be set if remote unit is currently the active unit; otherwise it is
cleared. For any given local unit, if REM_ACT is set, then LOC_ACT
cannot be set.
yes
%S39
Logic Equal
LOGIC=
Bit will be set if the logic program for both units in the redundant system is the same; otherwise the bit is cleared.
no
Redundant Informational Message, Fault
Logged
RDN_MSG
Bit will be set if a redundant informational message was logged.
It can be cleared in reference tables or logic (you may want to do this
if logic will be monitoring the bit).
no
%SB18
These bits can be accessed from the user’s logic program, but cannot be altered or
overridden. These references are always OFF when no configuration has been stored.
Once you have completed configuration of the Redundancy system and STORED the
configuration, the state of these %S references is set and is maintained whether in STOP or
RUN mode. Four of these references %S35, %S36, %S37, and %S38 are displayed on LEDs
on the Redundancy Communications Module, as long as that module is not faulted.
If desired, external indicators other than those on the RCM could be used as status
indicators to monitor the status of %S35 through %S38 (Local Ready/Active, Remote
Ready/Active) by programming in ladder logic. These four bits in %S memory can be
copied to other points from the ladder logic. An example of the expected status of these %S
references for each unit (Primary and Secondary) in a Redundancy system is as follows:
Description
GFK-0827
Primary Unit
Secondary Unit
Primary Unit
ON
OFF
Secondary Unit
OFF
ON
Local Ready
ON
ON
Local Active
ON
OFF
Remote Ready
ON
ON
Remote Active
OFF
ON
LogicEqual
ON
ON
Chapter 4 Operation
63
4
Redundancy CPU Considerations
The Redundancy CPU (CPU 780) has several restrictions and differences in operation as
compared to other Series 90-70 CPUs. The following features are not available with the
CPU 780:
H
H
H
H
H
I/O Interrupts
Timed Interrupts
VME Integrator Racks.
Stop I/O Scan mode
Flash operation
Features not Available with CPU 780
I/O Interrupts
I/O Interrupts are not supported by the Redundancy CPU (CPU 780). This includes the single
edge triggered interrupts from the discrete input modules, the high alarm and low alarm
interrupts from the analog input modules, and interrupts from foreign VME modules, all of
which can be used to trigger a ladder diagram program block. In order to prevent I/O
interrupts from changing the data being transferred from one CPU to another, interrupts
would have to be disabled for the entire transfer time. Programs which declare I/O
Interrupt triggers cannot be stored to the CPU 780 (the program will be rejected causing an
abort of the store). In addition, any configuration containing an enabled I/O interrupt for a
discrete or analog input module will cause a fatal system configuration mismatch fault.
Timed Interrupts
Timed Interrupts are not supported by the Redundancy CPU (CPU 780). Timed Interrupts
would have the same interrupt latency problem as the I/O Interrupts. Programs which
declare Timed Interrupt triggers cannot be stored.
VME Integrator Racks
The VME Integrator Racks (IC697CHS782 and IC697CHS783) that support half size
modules are not supported with this release of the Hot Standby CPU Redundancy
product.
STOP/IOSCAN Mode
The STOP/IOSCAN mode is not valid in a redundant system. If an attempt is made to
place the PLC in this mode, the PLC will reject the selection and return an error. A
message will be displayed on the programmer with this information.
Flash Operation
Flash memory operation is not supported in this release of the CPU 780.
64
Series 90-70 Hot Standby CPU Redundancy User’s Guide – December 1993
GFK-0827
4
Differences in Operation for CPU 780
The following features operate differently with the CPU 780 than they do with other
Series 90-70 CPUs:
H
H
H
H
RUN/DISABLEDmode
Configuration of Fault Actions
STOP to RUN mode transition
Background Window Time (default is different)
RUN Disabled Mode
RUN/DISABLEDmode causes all physical outputs to go to their default state in that
PLC. Inputs are still scanned and logic is solved. A CPU in RUN/DISABLED mode may
be the active unit.
There are several guidelines that you should be aware of regarding the use of the
RUN/DISABLEDmode.
1.
If a unit is in RUN/DISABLED mode, its LOC_RDY %S reference and the remote
unit’s REM_RDY %S reference will not be set and the corresponding LEDs on the
RCMs will not be ON. This indicates that the unit (with LOC_RDY reference off) is
not available to drive outputs.
2.
You cannot command a role switch from an active unit that is in RUN/ENABLED
mode to a unit that is in RUN/DISABLED mode. The RCM role switch pushbuttons
and SVCREQ #26 will be ignored if a role switch is attempted in this situation.
3.
If the units are transitioned when the primary unit is active with outputs disabled
and the secondary unit is backup with outputs enabled, the primary unit will
continue to solve logic and transfer outputs to the backup, and the backup unit will
drive the transferred outputs.
4.
If units are transitioned in any manner where the secondary unit is active with
outputs disabled and the primary unit is backup with outputs enabled, then the
units will automatically role switch so that the primary unit becomes active in
RUN/ENABLEDmode.
5.
If a unit is in RUN/ENABLED and the other unit is in RUN/DISABLED, the unit in
RUN/ENABLED will not use its synchronized fault action table. Instead, it will use
the user-configurable fault actions since there is no backup available to drive
outputs.
Note
If the backup unit is in RUN/DISABLED mode, then the backup unit will
continue to NOT drive outputs upon failure of the active unit and
therefore is not a true backup.
GFK-0827
Chapter 4 Operation
65
4
Following are several examples that illustrate the above guidelines. Each example gives
the role of each unit, its current operating mode, and the state of the LEDs on the RCMs.
An X indicates that the corresponding LED and %S bit is ON.
A. Role switches allowed on both units.
Primary Unit
Active
RUN/ENABLED
Secondary Unit
Backup
RUN/ENABLED
X
X
X
X
X OK
X LOC_RDY
LOC_ACT
X REM_RDY
X REM_ACT
OK
LOC_RDY
LOC_ACT
REM_RDY
REM_ACT
B. Role switches allowed on both units.
Primary Unit
Active
RUN/DISABLED
Secondary Unit
Backup
RUN/ENABLED
X OK
LOC_RDY
X LOC_ACT
X REM_RDY
REM_ACT
X OK
X LOC_RDY
LOC_ACT
REM_RDY
X REM_ACT
Note that the Secondary unit drives the outputs in this case.
C. Role switches are not allowed on either unit.
Primary Unit
Active
RUN/ENABLED
Secondary Unit
Backup
RUN/DISABLED
X OK
X LOC_RDY
X LOC_ACT
REM_RDY
REM_ACT
X OK
LOC_RDY
LOC_ACT
X REM_RDY
X REM_ACT
D. Role switches are allowed on both units.
66
Primary Unit
Active
RUN/DISABLED
Secondary Unit
Backup
RUN/DISABLED
X OK
LOC_RDY
X LOC_ACT
REM_RDY
REM_ACT
X OK
LOC_RDY
LOC_ACT
REM_RDY
X REM_ACT
Series 90-70 Hot Standby CPU Redundancy User’s Guide – December 1993
GFK-0827
4
E. Role switches are allowed on both units.
F.
Primary Unit
Backup
RUN/ENABLED
Secondary Unit
Active (see NOTE below)
RUN/ENABLED
X OK
X LOC_RDY
LOC_ACT
X REM_RDY
X REM_ACT
X
X
X
X
OK
LOC_RDY
LOC_ACT
REM_RDY
REM_ACT
Role switches are not allowed on either unit.
Primary Unit
Backup
RUN/DISABLED
Secondary Unit
Active (see NOTE below)
RUN/ENABLED
X OK
LOC_RDY
LOC_ACT
X REM_RDY
X REM_ACT
X OK
X LOC_RDY
X LOC_ACT
REM_RDY
REM_ACT
G. Role switches allowed on both units.
Primary Unit
Backup
RUN/DISABLED
Secondary Unit
Active (see NOTE below)
RUN/DISABLED
X OK
LOC_RDY
LOC_ACT
REM_RDY
X REM_ACT
X OK
LOC_RDY
X LOC_ACT
REM_RDY
REM_ACT
H. The following situation is not valid. If detected, the units will switch roles
automatically and behave as in (C) above.
Primary Unit
Backup
RUN/ENABLED
Secondary Unit
Active (see NOTE below)
RUN/DISABLED
Note
* Secondary unit active is not a recommended mode of operation.
Configuration of Fault Actions
With the Redundancy CPU, you cannot select to configure certain faults to be FATAL
(causing the CPU to STOP). Whenever the system is in redundancy mode with a backup
unit available, the decision as to which faults are FATAL and therefore will cause a
switch to the backup CPU are made by the operating system and are not configurable.
GFK-0827
Chapter 4 Operation
67
4
Specific fault actions are described in Section 2 of this Chapter. However, you can
configure whether or not a stand-alone CPU (after failure of the other CPU) will stop if
another fault occurs.
You can select the fault actions (either diagnostic or fatal) for when a given CPU is
operating without a backup available. This will allow you to choose between fault
tolerant operation and a safety system where a shutdown is preferred.
If you do choose to set these fault actions to be diagnostic when the system is running,
but not synchronized, the unit may remain the active unit even after the backup unit has
been placed in RUN mode. Also, a unit with the fault actions set to diagnostic may be
placed in RUN mode and become the active unit even though it may have a diagnostic
fault which would be logged as fatal in a synchronized system.
For example, if you were to configure ”Loss of or Missing Rack” failures as diagnostic,
then the following conditions would apply:
H
If an expansion rack fails when the units are synchronized, the unit with the rack
failure will transition to STOP/FAULT mode and the other unit will become a
stand-alone unit.
H
If an expansion rack fails after a unit becomes a stand-alone unit, a diagnostic fault
will be logged on that unit but the unit will stay in RUN mode and continue to
control the process.
H
If after the above situation occurs, the other unit transitions to RUN, the unit with
the failed expansion rack will stay in RUN mode and may, depending on the
configuration, remain in control of the process. With this situation, you may want to
include logic to shut down the faulted unit if this is an undesired operation.
H
If an expansion rack fails while in STOP mode or while transitioning to RUN mode,
a diagnostic fault is logged; however, the unit will still transition to RUN and may,
depending on configuration, become the active unit. You may want to include logic
to shut down the faulted unit if this is an undesired operation.
STOP to RUN Mode Transition
A resynchronization will occur at all STOP to RUN mode transitions. The time to
perform this resynchronization may be very large and will exceed the current transition.
The STOP to RUN mode transition has two separate paths.
1.
If the CPU performing the transition is doing so alone or both CPUs are
transitioning at the same time, then a normal STOP to RUN mode transition is
performed (clear non-retentive memory and initialize FST_SCN and FST_EXE).
2.
If the other CPU is active when this CPU performs a STOP to RUN mode transition,
then non-retentive references will be cleared followed by a resynchronization with
the active CPU.
Background Window Time
In a redundancy system, this value may be set to zero. Unlike other CPU models which
have a default of 0 ms, the default value for the CPU 780 is 5 ms.
68
Series 90-70 Hot Standby CPU Redundancy User’s Guide – December 1993
GFK-0827
4
Background User Checksum and Background Window
Timing Instructions
The following information is provided to allow you to guarantee full coverage of the
number of program words verified by the User Program Checksum per sweep and the
Background Window Diagnostics within a certain amount of time. It is important to
understand that the more checksums performed and the larger the background
window, the longer the sweep will take. For example setting the number of words to
checksum to 176 will add 2.8 ms to each sweep.
First, you should determine the number of words to checksum per sweep.
(program size ÷ 2) x (sweep time) x maximum completion time
Words per Sweep =
[max. completion time – (program size x F)] x max. completion time – C) – (C x F x program size)
Where:
H Words per Sweep: The number of words to set in the PLC Configuration to be
checksumed each sweep. This number must be a multiple of 8.
H Program Size: The size of the user program in bytes. You can get this from the
Logicmaster 90 PLC Memory Usage screen, which is accessed by pressing the status
softkey (F3) from the Programmer Main menu, then the plcmem softkey (F5). Add
the ”USER PROGRAM” size on this screen to 10566 (this accounts for internal
memory usage not added to the user program memory.
H Sweep Time: The sweep time in milliseconds of the user program with checksums and
background window turned off. You can get this from the Logicmaster 90 status line
on any screen.
H Maximum Completion Time: The amount of time in milliseconds that you want to have
full coverage of background diagnostics.
H F: A constant that represents milliseconds per byte of user program checksumed.
This constant is dependent on the type of CPU module (that is CPUs with 80386
microprocessors are faster than CPUs with 80186 microprocessors). This constant is
0.008 ms/byte for the CPU 780.
H
C: A constant with units in milliseconds, which is also dependent on the type of
CPU. For the CPU 780 it is 4480 ms.
Following is an example of calculating the Words per Sweep, using the following data:
User program Size = 89434 bytes
Program Size =User program Size + 10566 = 89434 + 10566 = 100000 bytes
Sweep Time = 100 ms
Max. Completion Time = 120000 ms (2 minutes)
100000 ÷ 2 x 100 x 120000
Words per Sweep =
[120000 – 100000 x 0.008] x (120000 – 4480) – (4480 x 0.008 x 100000)
Words per Sweep = 174
You should round this answer (174) up to the nearest number divisible by 8 (8, 16, 24,
etc.) which is 176 since Logicmaster 90 only accepts numbers divisible by 8. Next use this
number in the following formula to determine how long to set the background window
time.
Background Window Time =
GFK-0827
Chapter 4 Operation
C x (sweep time + words per sweep x F x 2)
(maximum completion time – C)
69
4
Where the Background Window Time is the time in milliseconds that you should set the
background window timer. The other elements in the formula are described above in
the calculation for words per sweep. The constants (F and C) are for the CPU 780.
Background Window Time =
Background Window Time =
448 0 x (100 + 176 x 0.0008 x 2)
(120000 – 4480)
3.9 rounded up to 4 ms
Miscellaneous Operation Information
Timer and PID Function Blocks
These function blocks will remain in lock step between the two synchronized units
provided:
A. Enabling logic is identical on both units. This includes power flow, frequency of
calling sub-block, etc..
B. The sub-block in which the function block occurs has the same name in both
units. Note that __MAIN is always common.
C. Reference registers (3 for timers, 40 for PID) and reset references are copied
from the unit that was in stand-alone to the unit that just transitioned to RUN
for each timer and PID function block. This copy does not need to be performed
if both units transition to RUN in the same sweep.
For example, if the following ladder logic is identical in sub-blocks on both units,
then %M100, %R250, %R251, and %R252 must all be transferred on
resynchronization to keep both units running timers synchronously:
%M100
––––] / [–––––––––––
TMR
1.00s
%M100
–––––––––––––––––––( )
%L10 – PV
CV – %L20
%R250
Timed Contacts
When both systems are synchronized, timed contacts will have exactly the same value in
both units. That is, whenever T_SEC is on in one unit, it will also be on in the other unit
as long as both units are synchronized.
OVR_PRE %S Reference
The OVR_PRE %S reference which indicates whether one or more overrides is active is
not supported by the CPU 780. This reference should not be used in a redundancy
system.
70
Series 90-70 Hot Standby CPU Redundancy User’s Guide – December 1993
GFK-0827
4
Genius Bus Controller Switching
Genius Bus Controllers will stop sending outputs to blocks when no data has been
received from the PLC CPU for a period equal to two times the configured watchdog
timeout.
If the CPU on the active unit becomes inoperative in an uncontrolled fashion (for
example, because of a power failure), the Genius Bus Controllers will detect this within
twice the watchdog setting, and stop sending outputs to the Genius blocks. After three
Genius I/O bus scans of not receiving data from the Genius Bus Controllers, the Genius
blocks will start driving data from Serial bus Address 30 (that is, the backup unit). If no
data is available from SBA 30, the blocks revert to default or hold last state (as
configured).
For example, if the system has a 200 ms watchdog timeout and 5 ms Genius bus scan
time, then if the active unit loses power, the Genius Bus Controllers on expansion racks
will wait 400 ms and then stop updating outputs on Genius blocks. 15 ms later, the
blocks will begin driving outputs based on data from the backup unit. Note that any
Genius Bus Controllers in the main rack would stop driving outputs immediately since
they would also lose power. Genius blocks on these busses would begin driving data
from the backup unit within 15 ms.
Note
For fastest switching, all Genius Bus Controllers in the Hot Standby CPU
Redundancy system should be in the main rack, or in a rack driven by
the main rack’s power supply. This will cause the Genius Bus Controller
to lose power at the same time that the CPU loses power and allow the
backup unit to gain full control of the I/O as soon as possible.
GFK-0827
Chapter 4 Operation
71
4
Section 6: Fault Detection and Control Actions
This section describes how faults are handled in a Redundancy system. It discusses how
faults affect the operation of the Redundancy system, describes categories of faults,
describes how faults are detected, describes the actions taken when faults are detected,
and discusses on-line repair of individual components.
Fault Detection
The Hot Standby CPU Redundancy system requires that faults or failures in all critical
components be detected and reported so that appropriate control actions may be taken.
All components that are involved in the acquisition and distribution of I/O data or are
involved in the execution of the control logic solution are considered to be critical
components.
In a Redundancy system, fault actions are not configurable as they are in a
non-redundancy (Simplex) system. A FATAL fault will cause a switch from the active to
the backup unit; a DIAGNOSTIC fault will allow the currently active system to continue
operating as the active system.
Faults within the PLC may be such that (1) the PLC has a controlled shutdown, (2) the
PLC has an uncontrolled shutdown, or (3) the PLC continues to operate. If the PLC has
detected an internal fault and has a controlled shutdown, a fault will be logged in the
fault table, the backup system will be notified of the fault and the PLC will go to stop
mode and stop driving outputs. This does not normally occur until the top of the sweep
following the failure. The exception is when the failure occurs during the input scan.
Upon notification, the backup system will immediately take over and start driving
outputs.
If the PLC has an uncontrolled shutdown the PLC will log a fault if it can and proceed as
described above. If the backup PLC detects that the active PLC has failed to
synchronize, it will assume the active unit has failed after timing out all (both) available
links. The backup will then start driving outputs and controlling the process. If a fault
exists within the PLC, but has not been detected, the system will eventually detect the
fault through the background diagnostic procedure. When the fault is detected, the PLC
will proceed with the orderly shutdown process if it can.
If the two PLCs fail to synchronize, because the timeout is set too short, then the two
systems will begin to act independently. A fault will be logged at the time
synchronization failure occurs.
Fault Categories
The detection of faults and failures falls into three basic categories:
72
1.
faults and failures that are detected immediately;
2.
faults and failures that are detected as soon as possible, but not necessarily within
the current sweep;
Series 90-70 Hot Standby CPU Redundancy User’s Guide – December 1993
GFK-0827
4
3.
faults and failures that are detected in the background.
Faults and failures that are detected immediately are those that are identified within the
current sweep. These faults include I/O data corruption, single bit RAM failures, power
supply failures, processor failures, VME bus failures, and no response from an addressed
module.
Faults and failures that are detected as soon as possible, but not necessarily within the
current sweep, include a group of faults that are detected asynchronously to the PLC
sweep (Genius faults) or those faults that require a timeout larger than one sweep time
to detect the failure. These faults are typically detected within one second and include
all Genius faults (circuit faults, loss of block, etc.)
Faults and failures that are detected in the background can be detected within 30
seconds. These faults include address or data line failures, multiple bit RAM failures,
EPROM failures, and communication device failures.
Changing Fault Category Actions
Fault category actions can be changed for both non-redundant systems and redundant
systems that are not synchronized. When the redundant system is synchronized, the
fault category actions cannot be changed.
GFK-0827
Chapter 4 Operation
73
4
PLC Fault Table
The following table lists fault zoom Help text and messages for error codes associated
with the redundancy fault group.
Table 8. Fault Zoom Help Text for Redundancy Error Codes
Error
Code
Fault Description
Corrective Action
Primary Unit is Active and
Secondary Unit is Backup.
The primary and secondary units have
switched roles.
None required.
2
Secondary Unit is Active and
Primary Unit is Backup.
The secondary and primary units have
switched roles.
None required.
3
Primary Unit is Active;
No Backup Unit Available.
The primary unit has transitioned to RUN
mode and is running as a stand-alone unit.
Secondary unit MUST be placed in RUN mode with a
comparable configuration
in order to have a synchronized system.
4
Secondary Unit is Active;
No Backup Unit Available.
The secondary unit has transitioned to RUN
mode and is running as a stand-alone unit.
Primary unit MUST be placed in RUN mode with a
comparable configuration
in order to have a synchronized system.
5
Primary Unit Has Failed;
Secondary Unit is Active w/o
Backup.
Primary unit has recorded a fatal fault, has
been powered down, or has lost
ability to communicate with the secondary
unit while acting as the active or backup unit.
Secondary unit will continue running as a
stand-alone unit.
If primary unit has also logged the fault ”Secondary
Unit Has Failed: Primary Unit is Active w/o Backup”,
then communications has been broken between the
two units and must be repaired. If a fatal fault has
been logged in the primary unit, the indicated fault
must be repaired. Power may have to be cycled on one
of the units in order to re-establish communications
and return to a synchronized system.
6
Secondary Unit Has Failed;
Primary Unit is Active w/o
Backup.
Secondary unit has recorded a fatal fault, has
been powered down, or has lost ability to
communicate with the primary unit while
acting as the active or backup unit. The primary unit will continue running as a standalone unit.
If secondary unit has also logged the fault ”Primary
Unit Has Failed: Secondary Unit is Active w/o Backup”,
then communications has been broken between the
two units and must be repaired. If a fatal fault has
been logged in the secondary unit, the indicated fault
must be repaired. Power may have to be cycled on one
of the units in order to re-establish communications
and return to a synchronized system.
7
Synchronization Failure; Both
Units are Active.
A communications failure between
the two units has caused each unit to become
stand-alone units. Communications has since
been restored.
One of the units should be power cycled to return to a
synchronized system. NOTE: The Genius blocks will
respond to the unit that is using Serial Bus Address 31.
8
Unable to Switch Redundancy
Roles
An attempt to switch redundancy roles was
made when it was not possible to perform the
switch.
None required.
9
Primary and Secondary Units
are Incompatible
The local unit cannot be placed in RUN mode
when its redundancy configuration is incompatible with the remote unit. This error is
logged when (1) Store of an incompatible config is attempted and (2) going to RUN with an
incompatible config.
Modify the configuration.
10
CPU to CPU communications
terminated
Synchronization protocol has been violated.
If this fault is also accompanied by an RCM failed fault,
replace the failed RCM: otherwise power cycle the CPU
or CPUs.
11
Redundant Link has timed out
The RCM has timed out while waiting on communications from the other unit.
Power cycle the back-up CPU (CPU not
controlling the process); increase the fail wait time.
CPU Redundancy Status has
Changed
A change in the status of the system has occurred. Press Ctrl-F to determine the error
code.
Corrective action to be taken depends on the error
code.
Redundant link hard
failure occurred.
The RCM has been faulted due to an error
while accessing memory.
Power cycle the rack with the faulted RCM. If the
RCM’s BOARD OK LED is on, replace the cable between the RCM and the BTM. If the RCM’s BOARD
OK LED is off, replace the RCM.
>11
57
74
Message
1
Series 90-70 Hot Standby CPU Redundancy User’s Guide – December 1993
GFK-0827
4
Faulting RCMs, Losing Links, and Terminating Communications
There are distinct differences between losing a redundant communications link, faulting
an RCM, and terminating communications.
Faulting the RCM module occurs only when a hardware related failure occurs such as a
parity error or VME bus error.
Action taken when a board is faulted:
H
H
Module Failed fault is logged in the PLC Fault Table.
H
H
The module fault contact is set.
H
If no other communications link is available, then the unit functions as a stand-alone
unit when in RUN mode.
H
A power cycle, after replacement of the faulted RCM, is required to restore the RCM
to service.
All LEDs on the RCM module are turned OFF. The LEDs on the other RCM will
continue to be updated as long as that RCM is OK.
The corresponding communications link is no longer used. If the other link is still
operating, then that link will be used for all further data transfer and units can
remain in synchronization.
Losing a Link occurs when a link timeout occurs (that is, no data received in the expected
time period). Since the system is not certain that a lost link is due to a hardware failure,
the RCM is not faulted. Some possible causes for a link timeout are:
1.
Remote unit has failed and is unable to communicate.
2.
Configured fail-wait timeout is too short and a long sweep or communications
window has resulted in a link timeout. Normally the other link will continue to
function in this case and the systems remain synchronized. If the condition
continues, the remaining communications link will timeout in a subsequent sweep.
3.
A hardware problem is present that prevents data from being transferred but is not
detectable by error checking mechanisms such as parity errors (there are no known
problems in this category).
Action taken when a link has timed out.
GFK-0827
H
H
Link Timeout fault is logged in the PLC Fault Table.
H
H
The module fault contact is set.
H
If no other communications link is available, then the unit functions as a stand-alone
unit when in RUN mode.
H
A power cycle of either unit is required to restore the link to service.
The OK and Local LEDs on the RCM in the RCM to BTM link that failed will
continue to be maintained (that is, they will stay ON and the Local LEDs will reflect
the state of the Local unit) but the Remote LEDS will be turned OFF. The LEDs on
the other RCM will continue to be updated as long as that RCM is OK.
The corresponding communications link is no longer used. If the other link is still
operating, then that link will be used for all further data transfer and units can
remain in synchronization.
Chapter 4 Operation
75
4
H
In this case, if the RCM is at fault, it will need to be replaced before power is
restored.
Terminating Communications occurs when the two units get out of synchronization.
The action taken when communications is terminated is the same as when a link has
timed out, except that actions are taken on both links and the Communications
Terminated fault is logged rather than Link Timeout.
76
Series 90-70 Hot Standby CPU Redundancy User’s Guide – December 1993
GFK-0827
4
Fault Actions in a CPU Redundancy System
Fault actions in the Hot Standby CPU Redundancy System are handled differently than
those in a non-redundancy (Simplex) system. Whenever there is a ”ready” backup unit
configured in the system, the fault actions in the active unit will not be those normally
specified by the user. For an active unit with a ready backup, any fault which will cause
a degradation in performance, or loss of control of I/O which does not cause a similar
degradation of performance or loss of control of I/O in the backup will be considered a
FATAL fault in the active unit and cause the active unit to transition to STOP mode.
The configurable fault actions will be applied whenever the system is running in
stand-alone mode in case you prefer fault tolerance (availability) versus safety
(depending on the application). The following tables (1) define the Fault Groups and (2)
show the fault groups and their fault action defaults. There are three fault actions
shown in Table 11: Fatal, Non-Fatal, and Conditionally Fatal. Fatal always stops the PLC,
Non-Fatal never stops the PLC and Conditionally Fatal stops the PLC depending on
other information in the fault.
Table 9. Maskable Fault Group Descriptions
Fault Group
GFK-0827
Table
Type
Description
LOSS_RACK
CPU
Loss of or Missing Rack
LOSS_IOC
I/O
Loss of or Missing IOC
LOSS_IO_MOD
I/O
Loss of or Missing I/O Module
LOSS_OTHR_MOD
CPU
Loss of or Missing Option Module
ADD_RCK
CPU
Addition of or Extra Rack
ADD_IOC
I/O
Addition of or Extra IOC
ADD_IO_MOD
I/O
Addition of or Extra I/O Module
ADD_OTHR_MOD
CPU
Addition of, Reset of, or Extra Option Module
IOC_FAULT
I/O
IOC or I/O Bus Fault
IO_MOD_FAULT
I/O
I/O Module Fault
CNFG_MIS_MTCH
Both
System Configuration Mismatch
SYS_BUS_ERROR
CPU
System Bus Error
CPU_HARDWR
CPU
CPU Hardware Failure
MOD_HARDWR
CPU
Module Hardware Failure (e.g. Serial Port Failure on PCM)
IOC_SOFTWR
I/O
IOC Software Failure
MOD_OTHR SOFTWR
CPU
Option Module Software Failure
PRG_BLK_CHKSUM
CPU
Program Block Checksum Mismatch
LOW_BATTERY
CPU
Low Battery in the System
CNST_SW_EXCD
CPU
Constant Sweep Exceeded
PLC_FTBL_FULL
CPU
PLC System Fault Table Full
IO_FTBL_FULL
CPU
I/OFault Table Full
APPLICATION_FLT
CPU
User Application Fault
Chapter 4 Operation
77
4
Table 10. Maskable Fault Group Actions
Fault Action
SimplexMode
RedundantMode
User Configurable
LOSS_RACK
Non-Fatal
Fatal
Yes
LOSS_IOC
Non-Fatal
Fatal
Yes
LOSS_IO_MOD
Non-Fatal
Non-Fatal
Yes
LOSS_OTHR_MOD
Non-Fatal
Non-Fatal
Yes
ADD_RCK
Non-Fatal
Non-Fatal
No
ADD_IOC
Non-Fatal
Non-Fatal
No
ADD_IO_MOD
Non-Fatal
Non-Fatal
No
ADD_OTHR_MOD
Non-Fatal
Non-Fatal
No
IOC_FAULT
Non-Fatal
ConditionallyFatal
Yes
IO_MOD_FAULT
Fault Group
Non-Fatal
Non-Fatal
No
CNFG_MIS_MTCH
Fatal
Fatal
Yes
SYS_BUS_ERROR
Fatal
Fatal
No
CPU_HARDWR
Fatal
Fatal
No
MOD_HARDWR
Non-Fatal
Non-Fatal
No
Fatal
Conditionallyfatal
No
Non-Fatal
Non-Fatal
No
Fatal
Fatal
No
LOW_BATTERY
Non-Fatal
Non-Fatal
No
CNST_SW_EXCD
Non-Fatal
Non-Fatal
No
PLC_FTBL_FULL
Non-Fatal
Non-Fatal
No
IO_FTBL_FULL
Non-Fatal
Non-Fatal
No
APPLICATION_FLT
Non-Fatal
Non-Fatal
No
IOC_SOFTWR
MOD_OTHR SOFTWR
PRG_BLK_CHKSUM
The two fault groups IOC_FAULT and IOC_SOFTWR faults are Conditionally Fatal to
the system (forces the PLC to STOP FAULT mode) whenever the fault that is logged is
Fatal to the Genius Bus Controller that logged the fault. When a module logs a fault it
notifies the PLC whether or not it can continue by placing Fatal or Diagnostic in the fault
action of the fault entry. The PLC will shut the Genius Bus Controller down on all Fatal
faults.
Note
In a CPU redundancy system a Fatal fault from a GBC will cause the
active unit to transition to STOP FAULT mode. All Diagnostic faults will
allow the CPU to continue to operate.
78
Series 90-70 Hot Standby CPU Redundancy User’s Guide – December 1993
GFK-0827
4
Table 11. Non-Maskable Fault Group Descriptions
Fault Group
Table
Type
SYS_BUS_FAIL
CPU
System bus failure.
NO_USER_PRG
CPU
No User ’s Program on Power-up.
BAD_USER_RAM
CPU
Corrupted User RAM detected on Power-up.
WIND_CMPL_FAIL
CPU
Window Completion Failure in Constant Sweep Mode (i.e., all
windows failed to receive their allotted time).
PASSWD_FAIL
CPU
PasswordAccess Failure.
NULL_SYS_CNFG
CPU
NULL System Configuration for RUN Mode.
CPU_SOFTWR
CPU
PLC CPU Software Failure.
TOO_MANY_IOCS
CPU
More than the allowable number of I/O Bus Controllers were
found in the system.
SEQ_STORE_FAIL
CPU
Communicationfailure during a store operation by the programmer. This fault results when the start-of-store sequence was
received but not an end-of-store sequence.
Description
Table 12. Non-Maskable Fault Action Descriptions
Fault Actions
Fault Group
Redundant Mode
SYS_BUS_FAIL
Fatal
Fatal
NO_USER_PRG
Non-Fatal
Non-Fatal
Fatal
Fatal
WIND_CMPL_FAIL
Non-Fatal
Non-Fatal
PASSWD_FAIL
Non-Fatal
Non-Fatal
NULL_SYS_CNFG
Non-Fatal
Non-Fatal
CPU_SOFTWR
Fatal
Fatal
TOO_MANY_IOCS
Fatal
Fatal
BAD_USER_RAM
SEQ_STORE_FAIL
GFK-0827
Simplex Mode
Chapter 4 Operation
Fatal
fatal
79
4
On-Line Repair
With a Hot Standby CPU Redundancy system most system component failures can be
repaired by replacing the failed component while the system is on-line. These on-line
repair procedures are possible because of the role switching capability of the units in the
system. Status of the Primary and Secondary units is determined by observing the
LEDs on the Redundancy Communications Module. There are two basic situations
regarding the active and backup units that you should be aware of when a component
needs to be replaced.
1.
If the failure is in the active system, control will switch to the backup system. Power can
then be removed from the rack containing the failed component 2.
Note
If maintenance is to be performed on a unit when that unit is the active
unit in a synchronized system, then control should be switched to the
other unit before powering down. This will allow for an orderly transfer
of control.
After repairing a defective unit:
1.
Power-up the CPU rack in STOP mode.
2.
Verify that the Remote Ready and Remote Active LEDS are on while in STOP mode.
3.
Verify that the Local Ready and Local Active LEDs are on in the Active unit.
4.
Put the repaired unit in RUN mode.
Maintaining Parallel Bus Termination
It is important when doing on-line repair to maintain parallel bus termination on the
active unit. This is the reason that the terminated parallel cable (IC697CBL811 or
IC697CBL826) is used, and why the RCM must be the last device on the parallel bus. The
terminated end of the cable may be safely removed from a de-energized RCM. These
terminated cables should be considered an integral part of the unit it terminates.
On-Line Repair Recommendations
It is advised when doing on-line repair to power-off the entire PLC system (of the
suspect unit), including ALL RACKS. Change the suspect part, and power-up in STOP
mode. Verify that the links are operational before switching to RUN (%S bits and RCM
LEDs update in STOP mode).
80
Series 90-70 Hot Standby CPU Redundancy User’s Guide – December 1993
GFK-0827
4
Power Supply
The power supply has adequate internal fault detection which will cause it to
automatically shut down if there is a failure. In an orderly shut down, the power supply
will first assert the ACFAIL signal before it asserts the SYSREST signal. This will give the
active PLC time to notify the backup PLC that it can no longer control the process.
In the event of a power supply failure, the backup CPU takes control of the system. The
power supply can be replaced with power removed from its rack without interruption to
the application being controlled. When the power supply is replaced, power can be
returned to the rack and the CPU will then obtain synchronization with the active
system and either take control or become the backup CPU.
Racks
The only detectable rack failure is bad data across the backplane. This bad data can take
the form of a bad control line as well as a bad data or address line. In most cases bad data
lines will be detected by the data integrity checks associated with the data transfers. If
these occur the system will be faulted and control transferred to the backup unit. An
indication will be given that a data transfer error has occurred.
There is no single indication that a rack failure has occurred. The rack is a very reliable
component in the system and rack failures are extremely rare. A rack failure (other than
a catastrophic rack failure) will only be correctly diagnosed by process of elimination.
In the unlikely event that a rack failure does occur and is correctly diagnosed, the rack
can be replaced with power removed from the system. When the rack is replaced and
power restored to the system, the CPU will then obtain synchronization with the active
system and either take control or become the backup CPU.
Central Processor Unit
If the CPU 780 fails, the OK light on the CPU will be out or blinking. In addition, fault
information will be available in the Fault Table of one or both CPU’s.
In the event of a CPU failure control is transferred to the backup system. CPU
replacement can be accomplished by removing power from the rack and replacing the
CPU. When power is returned to the system, the program can be loaded into the CPU
and the CPU started. It will then obtain synchronization with the active system and
either take control or become the backup CPU.
Redundancy Communications Module and Cables
If a fault is detected in a single RCM or in its terminated I/O cable, the backup RCM will
be used. Control will not transfer to the backup CPU. An RCM fault will be logged in the
PLC Fault Tables of both PLCs. The loss of an RCM is not fatal. If there are expansion racks
within a system, and the cable fault is such that the system can no longer communicate
to the expansion racks, then the fault is fatal and the PLC will be halted. Control will
then transfer to the backup PLC.
GFK-0827
Chapter 4 Operation
81
4
If an RCM fault is detected, proceed as follows:
H
H
H
H
H
H
STOP the unit with the suspected bad RCM.
H
Switch the repaired unit to RUN.
Turn power off at that rack.
Unplug the terminated cable from the RCM and replace the module.
Reconnect the terminated cable.
Power-up the rack (mode switch is still in STOP).
Verify that the REMOTE ACTIVE and REMOTE READY LEDs are on, or look at the
%S bits in the stopped unit. Note that the RCM LEDs only update if the board is not
faulted.
Redundancy Communications Link Failures
There are two types of Redundancy Communications Link failures; a ”Link Timeout”
and a ”Hard Link Failure”. When a Link Timeout occurs, the RCM BOARD OK LED will
remain ON and the LOCAL READY and LOCAL ACTIVE LEDs will continue to reflect
the status of the Local unit. The REMOTE ACTIVE and REMOTE READY LEDs will not
be updated by the Remote unit until the link is reinitialized by storing a configuration or
power cycling either unit. When a Hard Link Failure occurs, all five RCM LEDs will be
OFF. A power cycle of the Local unit is required to attempt to reinitialize the failed link.
Bus Transmitter Module
A fault in the BTM is treated just like a fault in the RCM. It is only fatal if the fault
prevents communications to any expansion racks within the system.
Failure of the BTM module may not easily be distinguished from an RCM cable failure or
even an RCM failure. However, most failure modes of the BTM can be isolated to the
BTM. When a BTM fails, the system will respond as described for the RCM and cable
failure, it will only fault the active PLC if the active PLC has expansion racks with critical
components installed.
The BTM can be replaced by removing power from the rack and replacing the BTM.
When power is restored to the CPU, the CPU will obtain synchronization with the active
system and either take control or become the backup CPU.
Genius Bus Controller
In a synchronized Hot Standby CPU Redundancy system, all GBC faults are considered
fatal. The failure of a Genius bus controller will be detected and isolated by the PLC. If a
GBC fails in the active PLC, the active PLC will fail and the backup will assume control.
The GBC can be replaced by removing power from the rack and replacing the GBC.
When power is restored to the CPU, the CPU will obtain synchronization with the active
system and either take control or become the backup CPU.
82
Series 90-70 Hot Standby CPU Redundancy User’s Guide – December 1993
GFK-0827
4
Genius Bus
Genius bus faults are not fatal to the PLC. However, if a bus fault exists, it exists for both
systems. There may be situations where one controller can communicate to more blocks
than the other controller can. Since both controllers are running with the same outputs
and shared inputs, and both controllers are still synchronized, the blocks will choose
which controller to respond to, if either can be heard.
The Genius bus can be repaired without disturbing power to either system and thus
without disturbing which PLC is in control of the process. Replacement of a bus can be
done on line but is not recommended because all devices on that bus will be lost until
the bus is repaired.
Genius Blocks
The failure of a single block is not fatal to the PLC.
GFK-0827
Chapter 4 Operation
83
Appendix A Redundancy Alternatives
section level 1 1
figure_ap level 1
table_ap level 1
A
Redundancy Alternatives
There are several redundancy alternatives for the Series 90-70 Programmable Logic
Controller. These redundancy options consist of implementation of the redundancy
feature through a user logic program or through a redundancy product which consists of
both hardware and software. The type of redundancy product alternative that is used is
also referred to as the Control Strategy, which must be defined for configuration
purposes. Redundancy alternatives are:
H
H
H
H
H
Hot Standby Application Logic;
Hot Standby Product plus Application Logic;
Hot Standby Product (described in this manual);
ESD (Emergency Shutdown System) Duplex Application Logic;
ESD Duplex and Triplex GMR (Genius Modular Redundancy) (see GFK-0787, Genius
Modular Redundancy User’s Manual).
For your information the following Redundancy Selection Guide is provided which lists the
features desired through implementation of a redundancy system followed by a table
which further describes these redundancy options.
Note
Note that the redundancy option described in this
manual is the Hot Standby Product.
GFK-0827
85
A
a47009
START
No
HOT STANDBY
(2 CPUS) OPTIONS
SINGLE
BUS
REDUNDANT
BUS
ESD
SYSTEM
Yes
Redundancy
Option Key
(see Table 1)
FAILURE
STRATEGY
Fault
Tolerant
TRIPLEX
CPUS
Fail Safe
1, 2, 3
OPTIONS
1, 2
DUPLEX
CPUS
5B
4
LOW COST
1B
LOWEST COST
1D
APPLICATION
LOGIC
DUPLEX
CPUS
5A
PRODUCT
I/O COUNT
>512 IN/512 OUT
1A-C, 2, 3
VME
1A-C, 2, 3
ISO/ETHERNET
1A-C, 2, 3
THERMOCOUPLE/
RTD
1C, 3C
HIGH DENSITY
ANALOG IN
1A, 3A
Use This Guide to Select the
Redundancy Option Key for the
Available Redundancy Options
Figure 9. Guide to Selection of Redundancy Option Key for Table 1 (Redundancy Options)
86
Series 90-70 Hot Standby CPU Redundancy User’s Guide - December 1993
GFK-0827
A
Table 13. Redundancy Options
Key
PLC
Scan
Sync
Data
Sync
I/O System
Output
Selection
Method
1A
2 90-70s
no
Application
Logic [
90-70
(I/OScanner)
Hot Standby
1B
2 90-70s
no
Application
Logic [
Application
1C
2 90-70s
no
1D
2 90-70s
2
Option
Redund.
Bus
Redund.
I/O
Hot
Standby
yes - 2
no
Higher Density Analog Inputs
90-30
(GCM+)
Hot
Standby
yes - 2
no
More competitive I/O
Application
Logic [
GeniusI/O
Hot
Standby
yes - 2
no
Highly distributable with diagnostics. Thermocouple. RTD
no
Application
Logic [
90-30
(GCM+)
Hot
Standby
yes - 2
no
Least expensive. Limited to
512 Inputs, 512 Outputs
2 90-70s
yes
Operating
System
Function
90-30
(GCM+)
Hot
Standby
yes - 2
no
Redundant Bus Applications.
More competitive I/O.
3A
2 90-70s
yes
Operating
System
90-70
(I/OScanner)
Hot
Standby
no
no
Higher Density Analog Inputs
3B
2 90-70s
yes
Operating
System
90-30
(GCM+)
Hot
Standby
no
no
More competitive I/O.
3C
2 90-70s
yes
Operating
System
GeniusI/O
Hot
Standby
no
no
Highly Distributable with diagnostics. Thermocouple. RTD.
ESD Duplex
Application Logic
4
2 90-70s
no
no
GeniusI/O
Duplex
yes - 2
yes
For Fail-Safe ESD applications.
ESD Duplex
GMR Product
5A
2 90-70s
no
no
GeniusI/O
GMR
yes - 2
or 3
yes
For Fail–Safe or fault tolerant ESD
applications.
ESD Triplex
GMR Product
5B
3 90-70s
no
no
GeniusI/O
GMR
yes - 3
yes
For fault tolerant ESD applications.
Hot Standby
Product plus
Application Logic
Hot Standby Product
SelectionGuide
[ See list of restrictions below.
Explanation of terms used in the above Table of Redundancy Options.
GFK-0827
Hot Standby Redundancy
Two CPUs are connected to one or more I/O. One CPU is active; the other is in standby. If the active
unit fails, the standby unit takes control of the process (Hot Standby Redundancy is sometimes
known as Hot Backup Redundancy).
Scan Synchronization
Scan mechanisms may be synchronized to keep active and standby units in lockstep to minimize
”bumps” or upsets to the process when switching from active to standby unit.
Data Synchronization
Keeps standby unit refreshed with the current state of the active unit to minimize ”bumps” or upsets
to the process when switching from active to standby unit.
Emergency Shutdown System (ESD)
Two or three unsynchronized CPUs solve logic asynchronously based on common inputs. Output
state is voted on by the output devices. The inputs and outputs are normally energized and do not
change state. DUPLEX ESD is Failsafe while TRIPLEX ESD is fault tolerant.
Application Logic-Based Solutions
Has many restrictions (see the list of restrictions on page 13).
Product Solutions
Has functions built into the operating system that make the system easier to engineer and more
robust. Product solutions are preferable to application solutions from a support perspective.
Output Selection Method
Refers to the algorithm in the I/O device, such as Hot Standby, Duplex, or No Redundancy Modes.
These modes may refer to existing Genius I/O terminology. GMR (Genius Modular Redundancy)
mode is a voting algorithm available in Genius I/O DC blocks.
Fail Safe
An ESD system will fail such that the process under supervision will be shutdown.
Fault Tolerant
In an ESD system any single failure will not disrupt the process under supervision.
Appendix A Redundancy Alternatives
87
A
Series 90-70 Redundancy Through Application Logic
The following restrictions apply using the current Series 90-70 for redundancy
applications requiring synchronization (these restrictions do not apply to the Hot Standby
CPU Redundancy product).
88
H
Do not use transitional contacts or coils since this information cannot be transferred
across the link.
H
Avoid using timers, counters or PID in program blocks which are not called every
sweep otherwise timer durations may not match up when control is transferred.
H
Since PID keeps the actual real time clock in its data structure, you cannot simply
execute it all the time while updating its entire data structure. You must omit the
clock portion of the data structure when you do the transfer. Another safer method
would be to keep the backup unit in manual mode while forcing the manual register
to the output of the master. When the switch-over occurs, put the PID in auto.
H
The time of day clock cannot be shared between PLCs, therefore it cannot be used to
make program decisions.
H
Do not use MCRs since the internal value of the MCR cannot be transferred
between systems.
H
Do not expect information that comes in to the system from an external
communications device to be the same in both systems. The communications can
change data in one system before it is updated in another.
H
Avoid using fault contacts and fault table information to base critical program
decisions, some of the information is not available to be passed between systems.
H
Avoid using the timed contacts since the internal PLC’s real time clocks will not
match.
H
Local program block memory (%L) cannot be transferred between the PLCs,
therefore data that must be shared should be restricted to the transferred memories.
Series 90-70 Hot Standby CPU Redundancy User’s Guide - December 1993
GFK-0827
Index
A
C
Acronyms, list of, 12
Cable, programmer connection, 23
Active and backup sweeps, 59
Cable, programmer connection, connecting and disconnecting, 9
Active unit, 2 , 4 , 7 , 8 , 9 , 16 , 19 , 20 ,
21 , 25 , 57 , 58 , 59 , 60 , 61 , 65 , 68
, 71 , 72 , 77 , 78 , 80
Cable, terminated, 4 , 5 , 6 , 24 , 28
Appendix A, redundancy alternatives, 85
ASCII identifier for control strategy, 58
Calculations, background user checksum,
background window time, 69
Checksum, program memory, 18
COM1, 18
COM2, 18
B
Communications link failure, 82
Background user checksum, 69
Communications module, redundancy, 7
Background window, 69
Communications, terminating, 76
Background window time, 68
Components, system, 13
Backup and active sweeps, 59
Configurable backup data size, 9
Backup data size, 9
Configuration
background window time, 68
expansion memory board, 39
fault actions, 67
genius bus controller, 42
paired gbc parameter, 42
serial bus address, 43
I/O system, 28
Logicmaster 90, 28
parameters for cpu redundancy, 27
parameters, list of for redundancy, 10
primary redundant cpu, 44
bus transmitter module, 51
configure remote communications
module, 47
genius bus controller module, 48
genius I/O blocks, 50
select expansion memory board, 46
select redundancy cpu module, 45
redundancy cpu module, 31 , 40
constant sweep mode, 35
constant windows sweep mode, 35
fail wait time, 36
normal sweep mode, 34
redund type, 34
shared I/O reference and length, 36
requirements, 10
secondary redundant cpu, 52
change redund type, 53
with Logicmaster 90-70, 30
Backup unit, 2 , 7 , 8 , 9 , 19 , 20 , 21 ,
25 , 55 , 57 , 59 , 60 , 61 , 65 , 67 , 68
, 71 , 72 , 77 , 80 , 81
Basic redundancy system setup, 28
Battery connectors, CPU, 17
Battery, backup, 18
Blocks, genius, 83
BRM, 23
BTM, 22
Bumpless switching, 8
configurable backup data size, 9
effect on scan time, 8
switch to backup unit time, 8
synchronized cpus, 8
Bus controller, genius I/O, 4 , 5 , 24
Bus receiver module
cable description, 23
connectors, 24
LED status indicators, 24
Bus termination, 80
Bus transmitter module, 22
cable connections, 23
connectors, 23
faults, 82
LED status indicators, 22
Bus, I/O termination of, 24
GFK-0827
Commonly used acronyms, 12
Configurations, incompatible, 56
Configuring a hot standby cpu redundancy system, 27
89
Index
Connecting Logicmaster 90, 31
Connector, serial port, 18
Connectors, battery, 17
Considerations, programming, 10
Considerations, redundancy CPU, 64
Constant sweep mode configuration, 35
Constant window sweep mode configuration, 35
Contacts, timed, 70
Control actions, fault detection, 72
Control strategy, 5 , 58
CPU
features, 15
LEDs, 17
mode switch, 16
module for redundancy, 7
serial port connector, 18
watchdog timer, 14
F
Fail wait time, 8
Fail wait time configuration, 36
Failsafe operation, 2
Fault action, diagnostic fault action, 72
Fault actions
conditionally fatal, 77
configuration of, 67
fatal, 77
fatal fault action, 72
non-fatal, 77
table of, 77
Fault categories, 72
Fault category actions, changing, 73
Fault category configuration screens, 29
Fault detection, 72
Fault detection and control actions, 72
Fault group actions, maskable, 78
CPU 780 operating differences, 65
Fault group descriptions, maskable, 77
CPU mode selection, 16
Fault group descriptions, non-maskable,
79
CPU requirements for redundancy, 33
D
Fault zoom help text, redundancy error
codes, 74
Faulting RCMs, 75
Flash memory operation, 64
Data integrity check, 2
FST_EXE %S reference, 57
Data parameters, shared I/O, 37
FST_SCN %S reference, 57
Data size, backup, 9
Data transfer
%I, %AI, and synchronization, 59
%Q, %AQ, %R, %M, 61
Data transfer example, backup to active
unit, 61
Genius blocks, configuration, 50
Genius blocks, failure, 83
Expansion memory, 7 , 18 , 38
Genius bus controller, 4 , 5
configuration, 28
configuration example, 48
configuration of, 42
connectors, 26
description of, 24
faults, 82
LED status indicators, 25
redund type, 34
switching, 71
user features, 25
Expansion memory board, 39
Genius bus, faults, 83
Data transfer, backup to active unit, 60
Definition of terms, 11
E
Error checking, 18
90
G
GFK-0827
Index
Genius bus, multiple, 26
GeniusI/O, bus controller, 24
Genius I/O system, 4
Grounding, programmer, 9
Guidelines for run disabled mode, 66
H
Help text, redundancy error codes, 74
Hot standby CPU redundancy, 85
Hot standby cpu redundancy
basic description of, 1
benefits of, 3
features of, 3
I/Osystems
geniusI/O, 4
localI/O, 4
system configuration, 6
Hot standby redundancy control strategy,
58
I
Logicmaster 90 configuration, requirements, 28
Logicmaster 90 connection, 31
Logicmaster, serial COM port version, 18
Logicmaster, WSI version, 18
Losing links, 75
M
Maskable fault group actions, 78
Maskable fault group descriptions, 77
Memory protect keyswitch, 17
Memory, expansion, 18 , 39
Memory, flash, 64
Mode selection, 16
Mode, operating, 16
Mode, run disabled, 65
N
Non-maskable fault group descriptions,
79
I/O bus signal termination, 24
Normal sweep mode configuration, 34
I/O bus terminator plug, 24
Normal system operation, 55
I/O system configuration, 28
Incompatible configurations, 56
K
On-line programming, 9
Links, losing, 75
On-line repair, 9 , 80
central processor unit, 81
genius blocks, 83
genius bus, 83
genius bus controller, 82
power supply, 81
procedures, 80
racks, 81
recommendations, 80
redundancy communications module,
81
terminated parallel bus cable, 81
Lithium battery for memory backup, 18
Operating mode, selection of, 16
Local I/O configuration, example of, 5
Operating modes, valid
run w/ outputs enabled, 16
run w/outputs disabled, 16
stop, 16
Keyswitch, memory protect, 17
L
LEDs for redundancy communications
module, 7
Link failure, communications, 82
Local I/O system, 4
Lockstep of active and standby units, 2
GFK-0827
O
91
Index
Operation, differences for cpu 780, 65
Operation of a cpu redundancy system,
55
OVR_PRE %S reference, 70
local system ready, 20
remote system active, 21
remote system ready, 21
pushbutton for unit selection, 21
system status LEDs, 7
Redundancy CPU considerations, 64
P
Parallel bus termination, 80
PID and Timer function blocks, 70
PLC fault table, redundancy error codes,
74
Port, standard serial COM, 18
Power–up sequence, 55
Preferred unit, 25
Primary redundant plc, configuration, 44
Primary unit, 25
Programming considerations, 10
Prrogramming, on-line, 9
R
Rack, communications, 22
Racks
for redundancy systems, 26
standard Series 90, 26
VME, 26
RCMs, faulting, 75
Redund type, configuration of, 34
Redundancy
alternatives
esd duplex application logic, 85
esd duplex gmr application logic, 85
esd triplex gmr product, 85
hot standby application logic, 85
hot standby product, 85
hot standby product plus application
logic, 85
with multiple folders, handling, 30
Redundancy communications module
connectors, 21
description of, 19
illustration of, 19
LEDs, system status, 20
board ok, 20
local system active, 21
92
Redundancy cpu considerations
I/Ointerrupts, 64
timed interrupts, 64
vme integrator racks, 64
Redundancy CPU module, 7
architecture, 14
battery connectors, 17
capacities, 14
catalog number, IC697CPU780, 13
description of, 13
expansion memory board, 18
features of, 15
illustration of, 15
installation information, 13
location in racks, 14
memory protect keyswitch, 17
mode switch, 16
serial port connector, 18
status LEDs, 17
watchdog timer, 14
Redundancy cpu requirements, 33
Redundancy option key, 86
Redundancy options, table of, 87
Redundancy system requirements, 28
Redundancy system setup, basic, 28
Redundant cpu module, resynchronization, 57
Reference values, shared I/O, 37
Reference, OVR_PRE, 70
References, %S, 7
References, %S, definition of, 63
Repair, on-line, 9
Requirements for configuration, 10
Resynchronization, 9
Resynchronization, redundant cpu, 57
Role switch SVCREQ, 62
Run disabled mode, 65
Run disabled mode, guidelines, 66
Run/outputs disabled mode, 16
Run/outputs enabled mode, 16
GFK-0827
Index
S
S (%), references, 7
Scan time, effect of bumpless switching, 8
Scan, synchronous, 59
Screens for fault category, 29
Secondary unit, 25
Sequence, power-up, 55
Serial bus address 30, 4 , 6 , 9 , 25
Serial bus address 31, 4 , 6 , 9 , 25
Serial COM port, standard, 18
Sweeps, active and backup, 59
Switch to backup unit time, 8
Switching control to backup unit
from user program via SVCREQ, 61
manual switch via pushbutton, 61
on a failure, 61
switching, bumpless, 8
Synchronization, 59
restrictions for applications, 88
Synchronized cpus, 8
Serial port connector, 18
Synchronous scan, 59
Service request 27, 60
System components for redundancy, 13
Service request 28, 60
System operation, normal, 55
SharedI/O, 9
configuration, 36
data parameters, 37
reference values, 37
System setup, basic, 28
Simplex cpu, 57
Special references, 63
Start of sweep time, 57
Status LEDs, 3 , 7 , 17
Status references for redundancy systems,
63
STOP mode, 16
Stop to run mode transition, 68
Stop/I/O scan in a redundant system, 64
STOP/IOSCAN mode, 16
Strategy, control, 5
SVCREQ #26, 62
SVCREQ #26 example, 62
SVCREQ #27, 60
GFK-0827
Sweep mode
constant, 35
constant window, 35
normal, 34
T
Terminated parallel cable, 80
Terminated I/O cable, 4 , 5 , 6 , 24 , 81
Terminating communications, 76
Terminating I/O bus, 24
Terminator plug, 24
Terms, definitions of, 11
Text, help, 74
Time to switch to backup unit, 8
Timed contacts, 70
Timer and PID function blocks, 70
Transition, stop to run mode, 68
W
SVCREQ #28, 60
Wait time, fail, 8
SVCREQ 27/28 example, 61
Window time, background, 68
93