1
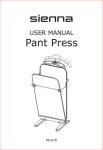
PANT PRESS
USER MANUAL
Model: F3
IMPORTANT SAFEGUARDS
When using an electric appliance, basic precautions should always be followed,
including the following:
WARNING: DANGER OF SCALDING
Read all instructions before using this pant press to reduce the risk of fire, electric
shock, or injury.
This product is designed for domestic use only.
? Do not use outdoors.
? Do not leave your pants press unattended while switched on. Turn off the switch
and unplug the electrical cord when not in use. To unplug, grasp the plug, not the
cord.
? Do not allow the pants press to be used as a toy. Close attention is necessary
when used near children, pets or plants.
? The appliance is not intended for use by any children or infirm persons without
supervision.
? Children should be supervised to ensure that they do not play with the appliance.
? Do not immerse the pant press into water or other liquids.
? Do not use with damaged cord or plug. If unit is not working as it should, has
been dropped, damaged, left outdoors, or immersed into liquid, contact a
licensed service technician for assistance.
? Do not pull or carry by cord, use cord as a handle, close a door on the cord, or
pull cord around sharp edges or coners. Keep cord away from heated surfaces.
? Do not use extension cords or outlets with inadequate current carrying capacity.
? Do not handle or use this unit while hands are wet.
? Use only as described in this manual. Operating unit in any way other than
recommended may result in damage to unit or injury to operator.
? Do not disassemble unit or attempt to make any repairs yourself. Incorrect
assembly or repair could result in a risk of fire, electric shock, or injury to
persons when operating.
? Store your pant press in a cool, dry place. Allow unit to cool completely, and
loop power cord loosely around unit before storing.
2
SAVE THESE INSTRUCTIONS
F3 pant press product information
A. Control panel
B. Storage for personal items (cuff link, keys ect.)
C. Safety chain
D. Press board bar
E. Press board
F. Front pressing plate
G. Foot
H. Cord wrap
I. Cord
J. Plug
K. Support
L. Fabric button
M. Power/Start button
N. Indication Light
O. Coat hanger
P. Hanger support
N
POWER
M
3
ASSEMBLY INSTRUCTIONS
Accessories
A. Attach the support to the feet.
B. Insert the attached screws into each hole in the feet, and tighten them securely
with a screwdriver.
C. Turn chrome supports 90 so that when you view the hanger from the back they
point away.
D. Push the hanger with supports into the back of the panel as illustrated. (Note this
will require firm pressure)
4
Operating Instructions
A. To open the front pressing plate
Slowly pull the press board bar to open the front pressing plate. The press
board bar will hold the front pressing plate in the open position.
B. How to insert the pants
1. Place the cuffs or bottom legs of the trousers as far down as possible
between the front pressing plate and the press board. The waistline of the
pants should be hung over top edge of the front pressing plate.
2. Tidy up the slack of pants.
3. Make sure to place the pants in the middle of the front pressing plate, with
the side seam (as indicated in Figure 3.) aligned with the groove (in the
padding - figure not shown) in the front pressing plate.
5
C. To close the front pressing plate
1. Pull the press board bar to the 2nd step ( 1st step is for thick trousers or pants).
2. Hold the waistline of the pants and gently pull upwards. This will smooth
out any wrinkles and ensure that the trousers are lying flat between the front
pressing plate and press board.
3. Pull the press board bar down firmly until the front pressing plate is fully
locked into the closed position.
* Pull the pants upwards once again.
D. Plug the cord into the power socket. The power indicator light will illuminate,
and the press will start automatically.
E. The press will automatically shut off when the job is completed, and the
power indicator light will also goes off. To restart the pressing, press the
"on" button, the power indicator light will illuminate again and start the
pressing cycle.
6
TROUBLESHOOTING GUIDE
Below is a chart detailing the most common problems, their causes and solutions.
Prior to troubleshooting, isolate the unit by removing the cord from the power socket.
PROBLEM
Unit fails to operate
properly.
Unit fails to heat up.
CAUSE
SOLUTION
Unit is not plugged in.
Plug into electric socket
and make sure the power
Indicator light is on.
please contact a
licensed technician.
Unit is damaged
or malfunctioning.
Unit is not plugged in.
Plug into electric socket.
The press board has
been damaged or is
malfunctioning.
Immediately stop use
and let the unit cool
down completely.
Contact a licensed
technician.
7