1
Sun Control Station
Administrator Manual
Sun Microsystems, Inc.
www.sun.com
Part No. 817-3603-10
September 2003, Revision A
Submit comments about this document at: http://www.sun.com/hwdocs/feedback
Copyright 2003 Sun Microsystems, Inc., 4150 Network Circle, Santa Clara, California 95054, U.S.A. All rights reserved.
Sun Microsystems, Inc. has intellectual property rights relating to technology that is described in this document. In particular, and without
limitation, these intellectual property rights may include one or more of the U.S. patents listed at http://www.sun.com/patents and one or
more additional patents or pending patent applications in the U.S. and in other countries.
This document and the product to which it pertains are distributed under licenses restricting their use, copying, distribution and
decompilation. No part of the product or of this document may be reproduced in any form by any means without prior written authorization of
Sun and its licensors, if any.
Third-party software, including font technology, is copyrighted and licensed from Sun suppliers.
Parts of the product may be derived from Berkeley BSD systems, licensed from the University of California. UNIX is a registered trademark in
the U.S. and in other countries, exclusively licensed through X/Open Company, Ltd.
Sun, Sun Microsystems, the Sun logo, Java, JavaServer Pages, JSP, JumpStart, Netra, Solaris, Sun Cobalt, Sun Cobalt RaQ, Sun Cobalt CacheRaQ,
Sun Cobalt Qube, Sun Fire and Ultra are trademarks or registered trademarks of Sun Microsystems, Inc. in the United States and in other
countries.
All SPARC trademarks are used under license and are trademarks or registered trademarks of SPARC International, Inc. in the U.S. and in other
countries. Products bearing SPARC trademarks are based upon an architecture developed by Sun Microsystems, Inc.
Netscape and Mozilla are trademarks or registered trademarks of Netscape Communications Corporation in the United States and other
countries.
The OPEN LOOK and Sun™ Graphical User Interface was developed by Sun Microsystems, Inc. for its users and licensees. Sun acknowledges
the pioneering efforts of Xerox in researching and developing the concept of visual or graphical user interfaces for the computer industry. Sun
holds a non-exclusive license from Xerox to the Xerox Graphical User Interface, which license also covers Sun’s licensees who implement OPEN
LOOK GUIs and otherwise comply with Sun’s written license agreements.
U.S. Government Rights—Commercial use. Government users are subject to the Sun Microsystems, Inc. standard license agreement and
applicable provisions of the FAR and its supplements.
DOCUMENTATION IS PROVIDED “AS IS” AND ALL EXPRESS OR IMPLIED CONDITIONS, REPRESENTATIONS AND WARRANTIES,
INCLUDING ANY IMPLIED WARRANTY OF MERCHANTABILITY, FITNESS FOR A PARTICULAR PURPOSE OR NON-INFRINGEMENT,
ARE DISCLAIMED, EXCEPT TO THE EXTENT THAT SUCH DISCLAIMERS ARE HELD TO BE LEGALLY INVALID.
Copyright 2003 Sun Microsystems, Inc., 4150 Network Circle, Santa Clara, California 95054, États-Unis. Tous droits réservés.
Sun Microsystems, Inc. a les droits de propriété intellectuelle relatants à la technologie qui est décrite dans ce document. En particulier, et sans la
limitation, ces droits de propriété intellectuelle peuvent inclure un ou plus des brevets américains énumérés à http://www.sun.com/patents et
un ou les brevets plus supplémentaires ou les applications de brevet en attente dans les États-Unis et dans les autres pays.
Ce produit ou document est protégé par un copyright et distribué avec des licences qui en restreignent l’utilisation, la copie, la distribution et la
décompilation. Aucune partie de ce produit ou document ne peut être reproduite sous aucune forme, par quelque moyen que ce soit, sans
l’autorisation préalable et écrite de Sun et de ses bailleurs de licence, s’il y en a.
Le logiciel détenu par des tiers, et qui comprend la technologie relative aux polices de caractères, est protégé par un copyright et licencié par des
fournisseurs de Sun.
Des parties de ce produit pourront être dérivées des systèmes Berkeley BSD licenciés par l’Université de Californie. UNIX est une marque
déposée aux États-Unis et dans d’autres pays et licenciée exclusivement par X/Open Company, Ltd.
Sun, Sun Microsystems, le logo Sun, Java, JavaServer Pages, JSP, JumpStart, Netra, Solaris, Sun Cobalt, Sun Cobalt RaQ, Sun Cobalt CacheRaQ,
Sun Cobalt Qube, Sun Fire et Ultra sont des marques de fabrique ou des marques déposées de Sun Microsystems, Inc. aux États-Unis et dans
d’autres pays.
Toutes les marques SPARC sont utilisées sous licence et sont des marques de fabrique ou des marques déposées de SPARC International, Inc.
aux États-Unis et dans d’autres pays. Les produits portant les marques SPARC sont basés sur une architecture développée par Sun
Microsystems, Inc.
Netscape et Mozilla sont des marques de Netscape Communications Corporation aux États-Unis et dans d'autres pays.
L’interface d’utilisation graphique OPEN LOOK et Sun a été développée par Sun Microsystems, Inc. pour ses utilisateurs et licenciés. Sun
reconnaît les efforts de pionniers de Xerox pour la recherche et le développement du concept des interfaces d’utilisation visuelle ou graphique
pour l’industrie de l’informatique. Sun détient une license non exclusive de Xerox sur l’interface d’utilisation graphique Xerox, cette licence
couvrant également les licenciées de Sun qui mettent en place l’interface d’utilisation graphique OPEN LOOK et qui en outre se conforment aux
licences écrites de Sun.
LA DOCUMENTATION EST FOURNIE «EN L’ÉTAT» ET TOUTES AUTRES CONDITIONS, DÉCLARATIONS ET GARANTIES EXPRESSES
OU TACITES SONT FORMELLEMENT EXCLUES, DANS LA MESURE AUTORISÉE PAR LA LOI APPLICABLE, Y COMPRIS NOTAMMENT
TOUTE GARANTIE IMPLICITE RELATIVE À LA QUALITÉ MARCHANDE, À L’APTITUDE À UNE UTILISATION PARTICULIÈRE OU À
L’ABSENCE DE CONTREFAÇON.
Please
Recycle
Contents
Preface
vii
How This Book Is Organized
Related Documentation
vii
viii
Accessing Sun Documentation
viii
Contacting Sun Technical Support
Sun Welcomes Your Comments
1.
Introduction
ix
1
Services on the Sun Control Station
General information
Schedule
2
3
Task Progress dialog
3
5
Online documentation
Icons
viii
6
7
Online Documentation
Logout
7
7
Resetting the Administrator Password
8
iii
2.
Station Settings
9
Station Settings menu
Active Monitoring
10
Status Alerts
10
Status Colors
11
Thresholds
10
11
Verifying Disk Usage and Removing Alarm Condition
Active Monitoring Information
Settings
15
Backups
16
Backup
13
16
Creating a backup
17
Modifying a scheduled backup
Deleting a scheduled backup
Restore
18
18
19
Disaster recovery
Information
20
21
Registering the Sun Control Station software
Password
22
Password guidelines
3.
Administration Functions
Selector window
23
25
26
Administration menu
Tasks and events
27
27
Run Task In Background
Schedule
iv
28
28
Sun Control Station—Administrator Manual • September 2003
21
12
Hosts
28
Viewing the managed hosts
Adding hosts
28
29
Adding a single host
29
Importing a list of hosts
Creating a list of hosts
Modifying a host
33
Creating a group
34
31
32
Viewing a report for installed control modules
Removing a host
Modules
35
37
38
Control Modules table
38
Adding a control module
39
Viewing details for a control module
41
Installing client-side components to selected hosts
42
Removing client-side components from selected hosts
Re-trying a failed installation
Removing a control module
Groups
43
44
45
46
Groups table
46
Adding a group
47
Modifying a group
48
Viewing details of a group
Adding a host to a group
48
49
Removing a host from a group
Removing a group
49
50
Contents
v
Tasks
51
Tasks table
Events table
Schedule
51
53
55
Cleanup
56
Viewing the details of a scheduled task
Modifying a scheduled task
Deleting a scheduled task
A.
Licenses
56
57
57
59
The BSD Copyright
59
GNU General Public License
SSL License
60
65
Intel BSD and Patent License
66
Apache License (Struts and Tomcat)
67
Java™ 2 Platform, Standard Edition (J2SE™) License
vi
Sun Control Station—Administrator Manual • September 2003
68
Preface
This user manual explains the functions and features available under the Station
Settings and Adminstration menu items of the Sun Control Station. The user of this
document should be the person administering the Sun Control Station software.
For information on the individual control modules, refer to the user manuals for
each control module. See “Related Documentation” on page viii.
How This Book Is Organized
This user manual contains the following chapters and appendix:
■
■
■
■
Chapter 1 introduces the Sun Control Station software and provides some general
information.
Chapter 2 explains the functions available under the Station Settings menu item
on the left side of the user interface (UI).
Chapter 3 explains the functions available under the Administration menu item
on the left side of the UI.
Appendix A contains the third-party licenses for technologies and software used
in this product.
vii
Related Documentation
The documents listed below include the Software Installation guide for the Sun
Control Station, and the documentation related to the individual control modules.
Application
Title
Part Number
Software Installation
Software Installation
817-3604-10
Control Module
AllStart Module
817-3605-10
Control Module
Health Monitoring Module
817-3607-10
Control Module
Inventory Module
817-3608-10
Control Module
Lights Out Management Module
817-3609-10
Control Module
Performance Module
817-3610-10
Control Module
Software Management Module
817-3611-10
Accessing Sun Documentation
You can view, print, or purchase a broad selection of Sun documentation, including
localized versions, at:
http://www.sun.com/documentation
Contacting Sun Technical Support
If you have technical questions about this product that are not answered in this
document, go to:
http://www.sun.com/service/contacting
viii
Sun Control Station—Administrator Manual • September 2003
Sun Welcomes Your Comments
Sun is interested in improving its documentation and welcomes your comments and
suggestions. You can submit your comments by going to:
http://www.sun.com/hwdocs/feedback
Please include the title and part number of your document with your feedback:
Sun Control Station—Administrator Manual, part number 817-3603-10
Chapter
Preface
ix
x
Sun Control Station—Administrator Manual • September 2003
CHAPTER
1
Introduction
The Sun™ Control Station is a software package that allows administrators to take
control of their hosts: tracking and applying software updates, deploying new
services, monitoring the health and performance of hosts. More than just a typical
“systems” management device, the Sun Control Station is a platform that will help
you in the “life-cycle” management of your hosts, from initial setup through
eventual redeployment at the end of useful life. As an added benefit, customers can
continue to use third-party or homegrown software in conjunction with the Sun
Control Station.
The Sun Control Station consists of two parts: a core framework that is the engine for
executing control modules, and the built-in control modules themselves. These
control modules can come from Sun Microsystems, Inc., from third-party vendors or
from your own in-house design team. The Sun Control Station ships with five
pre-installed modules: Performance Monitoring, Inventory, Software Management,
Health Monitoring and Lights Out Management (LOM).
Through the Sun Control Station, you can fully control the distribution of software
payloads, offering customized and tailor-made services to downstream and end-user
customers. Service Providers can offer unique payloads, data or software monitoring
services. By leveraging the Sun BlueLinQ technology, all available software updates
and patches can be accessed and distributed to your managed hosts, as designated
by the Administrator. Custom-built and third-party software can also be distributed.
Furthermore, software packages can be “published” so that BlueLinQ-enabled
clients—including other Sun Control Stations—can view and download these
packages.
1
The Sun Control Station can manage the following Sun servers and Sun Cobalt™
server appliances. At the time of printing, this list was complete.
Note – For managed hosts other than Sun Cobalt server appliances, you may first
need to install and enable the control-station agent on the host.
Refer to the PDF Software Installation for instructions on installing and enabling the
agent.
■
■
■
■
■
■
■
■
■
■
■
■
■
■
Sun LX50 servers, all languages
Sun Fire™ V60x servers and Sun Fire V65x servers
Netra™ T1 servers (Solaris™ Operating System 8 and Solaris OS 9)
Netra X1 servers (Solaris OS 8 and Solaris OS 9)
Netra T1120-1125 servers (Solaris OS 8 and Solaris OS 9)
Ultra™ 1 servers (Solaris OS 8 and Solaris OS 9)
Ultra 2 servers (Solaris OS 8 and Solaris OS 9)
Ultra 5-10 servers (Solaris OS 8 and Solaris OS 9)
Ultra 80 servers (Solaris OS 8 and Solaris OS 9)
any x86-based server running the following operating systems (OSs):
Red Hat 7.2
■
Red Hat 7.3
■
Red Hat 8.0
■
Red Hat 9.0
■
Red Hat Enterprise Linux AS 2.1
■
Red Hat Enterprise Linux ES 2.1
■
Red Hat Enterprise Linux WS 2.1
■
Sun
Sun
Sun
Sun
Cobalt
Cobalt
Cobalt
Cobalt
RaQ 550 server appliances, English and Japanese
RaQ XTR server appliances, English and Japanese
CacheRaQ™ 4 server appliances, English
Qube 3 appliances, all versions (English, Japanese, multilingual)
Services on the Sun Control Station
Here is a sample of what you can do with the Sun Control Station:
■
■
2
Inventory Management. You can obtain detailed information on the hardware
components installed in a managed host.
Software Management. The Administrator can keep systems current using the
version-tracking feature for software patches and updates. You can also deploy
custom software or data.
Sun Control Station—Administrator Manual • September 2003
■
■
■
■
Local Software Repository. In conjunction with Software Management, you can
use the local software repository to “publish” software package files and allow
the Administrator or end users of various hosts to install available package files
as desired or needed. You can configure your Sun Control Station to view
“published” package files and share package files with other BlueLinQ-enabled
servers.
OS Installation. The AllStart control module integrates both Kickstart (a Red Hat
feature) and Solaris JumpStart™ technologies to provide a quick and unified
method of installing and customizing Linux- and Solaris-based systems. The
control module provides a common user interface for creating software payloads,
defining client profiles, and monitoring and validating system installations and
updates.
Health and Performance Monitoring. These control modules provide system
alerts and the metrics of the basic operations of the hosts, allowing you to
pinpoint potential causes of failure.
Lights Out Management (LOM). The LOM control module allows you to perform
certain management functions remotely on hosts that are compliant with the
Intelligent Platform Management Interface (IPMI) version 1.5, such as powering
on or off a host, and viewing current System Event Log (SEL) information from a
a host.
These services can be used within an extranet or an intranet environment, or across
the Internet.
General information
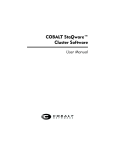
Task Progress dialog
When you launch a task (for example, when creating a backup file for the Sun
Control Station or adding a control module), a Task Progress dialog appears in the
user interface (UI). This dialog has a Status field indicating the current status of the
task and a progress bar. When the progress bar displays 100%, the task has
completed.
See FIGURE 1-1 for a sample.
If you want to perform another task in the UI while the current task is underway,
you can put the Task Progress dialog in the background. Simply click the button
labelled Run Task In Background below the progress bar.
Chapter 1
Introduction
3
To return to the Task Progress dialog, select Administration > Tasks on the left. The
Task table appears. If the task is still underway, a status message is displayed in the
Duration column. Click on the progress-bar icon in this column to re-display the Task
Progress dialog for this task.
Once the task is complete and the progress bar displays 100%, two buttons appear
below the Task Progress dialog: Done and View Events.
■
■
To view the list of events associated with the task just completed, click View
Events. The Events For <Task> table appears. If you then click the up-arrow icon in
the top-right corner, the Tasks table appears.
To return to the previous screen, click Done.
FIGURE 1-1
4
Sample Shot of a Task Progress dialog
Sun Control Station—Administrator Manual • September 2003
Schedule
The Schedule feature (also referred to as the Scheduler) allows you to schedule a task
or tasks to be performed at a later time.
Many of the tasks on the Sun Control Station can be scheduled. In this case, a button
labelled Schedule appears in the table or selector window of the final step.
The Scheduler works in the same way for any task:
1. Fill in the necessary fields for the task.
2. Click Schedule.
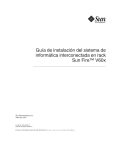
The Schedule Settings For <Task> appears; see FIGURE 1-2 for a sample.
3. Configure the schedule settings.
The following settings are available for any scheduled task:
■
Run Date And Time: Enter the date on which you want the task to run, in the
format: MM/DD/YYYY hh:mm.
You can also click the calendar icon next to this field. A separate browser window
opens. Choose the date and time for the scheduled task. Hit the Enter (or Return)
key on your keyboard. The date and time now appear in the field.
■
■
■
Email Address (Optional): Enter an email address of the person who will be
notified when the task runs.
Notify When Starting: Enable the check box to notify the person when the task is
starting.
Notify When Finished: Enable the check box to notify the person when the task
has completed.
4. For some functions, you can set the frequency of the task with a pull-down menu
above the table (for example, hourly or daily).
5. Click Cancel or Save.
If you click Cancel, the scheduled task is not saved. The Scheduled Tasks table
appears, but without the task you just cancelled.
If you click Save, the scheduled task is added to the list of scheduled tasks. The
Scheduled Tasks table appears with the new task.
6. In this table, you can view details for, modify or delete a scheduled task.
To view the details of a scheduled task, click the magnifying-glass icon.
To modify a scheduled task, click the pencil icon.
To delete a scheduled task, click the delete icon.
Chapter 1
Introduction
5
FIGURE 1-2
Sample of a Scheduler table
Online documentation
To access the PDF file for a user manual, click on the Online Documentation icon in
the top-right corner. A separate browser window opens displaying a list of PDF files
available. Click the link for a PDF file; you can open the PDF file in the browser
window or save it to your personal computer.
If you have installed third-party software on the Sun Control Station, the relevant
documentation is also available here.
6
Sun Control Station—Administrator Manual • September 2003
Icons
There are two icons in the top-right corner of the UI:
■
■
Online Documentation
Logout
Online Documentation
You can access the user manuals in PDF format from the UI.
Logout
Click the Logout icon to log out of the system.
Chapter 1
Introduction
7
Resetting the Administrator Password
Note – This procedure only resets the Administrator password for logging in to the
Sun Control Station UI.
To reset manually the Administrator password for logging in to the UI:
1. ssh in to the control station.
2. If you are not currently root, become root.
su -
3. Generate an encrypted password for the user name admin and password admin.
/usr/bin/htpasswd -n -s -b admin
admin
admin:{SHA}0DPiKuNIrrVmD8IUCuw1hQxNqZc=
4. Copy the entire string following admin:{SHA}.
0DPiKuNIrrVmD8IUCuw1hQxNqZc=
5. Paste this string into the password attribute for the user tag in the following file.
/var/tomcat4/webapps/sdui/WEB-INF/database.xml
6. Stop and then restart tomcat.
dtomcat4 stop
dtomcat4 start
You can now log in to the control station UI as the user name admin with the
password admin.
To change the Administrator password through the UI, see “Password” on page 22.
8
Sun Control Station—Administrator Manual • September 2003
CHAPTER
2
Station Settings
This chapter describes the station settings on the server running the Sun™ Control
Station software. The Administrator, with the user name admin, has full control of
the control station. The Administrator can:
■
■
■
■
■
view Active Monitoring information
perform maintenance functions (backup and restore)
view the system-information page
register the Sun Control Station software
change the Administrator password
Note – In most of the short procedures in this chapter, the first step is to click the
Station Settings tab in the left menu bar and the second step is to click on a selection
from the a sub-menu item.
To reduce the number of steps in each procedure, the menu commands are grouped
together and shown in Initial Caps. Right-angle brackets separate the individual
items.
For example, select Station Settings > Backups means to click the Station Settings tab
in the left menu bar and then click the Backups sub-menu item.
9
Station Settings menu
The following bullet items represent the fully expanded menu on the left side of
Station Settings screen. These are the functions and services that the Administrator
can manage from this screen. They are explained in this chapter.
■
■
■
■
■
Active Monitoring (see “Active Monitoring” on page 10)
Settings (see “Settings” on page 15)
Backups (see “Backups” on page 16)
Information (see “Information” on page 21)
Password (see “Password” on page 22)
Active Monitoring
Status Alerts
Active Monitoring is a cron job that runs on the system every 10 minutes to update
the status of the services and system components.
If one of the services or system components monitored by Active Monitoring
changes to a yellow or red status, a Status message (“Check Alerts”) appears in the
left menu bar with an icon below it.
When you click the icon, the Active Monitoring status tables appear.
If an email address for receiving Active Monitoring alerts has been entered under
Settings, an email is sent to that address; see “Settings” on page 15.
10
Sun Control Station—Administrator Manual • September 2003
Status Colors
The status of each service or hardware component is indicated by a colored circle
and icon—grey with dotted line, green with checkmark, yellow with exclamation
mark or red with X mark—beside each item. The colors have the following
significance:
Grey with dotted line—No information is available, or the service or the
monitoring feature is not enabled on the host.
Green with checkmark—The service or component is functioning normally.
Yellow with exclamation mark—There is moderate use on the host or a
component is recovering.
Red with X—There is heavy use on the host or a failure.
Thresholds
The thresholds for the Active-Monitoring alarms for are as follows:
■
CPU Yellow Alarm: Enter the threshold at which a yellow alarm is generated. This
value represents the average load of the CPU. The default value is 3.
■
CPU Red Alarm: Enter the threshold at which a red alarm is generated. This value
represents the average load of the CPU. The default value is 6.
■
Disk Yellow Alarm: Enter the threshold at which a yellow alarm is generated. This
value represents a percentage of hard-disk-drive usage. The default value is 80.
For example, a value of 80 means that a yellow alarm is generated when the 80%
of the capacity of the hard disk drive is used.
■
Disk Red Alarm: Enter the threshold at which a red alarm is generated. This value
represents a percentage of hard-disk-drive usage. The default value is 90.
For example, a value of 90 means that a red alarm is generated when the 90% of
the capacity of the hard disk drive is used.
■
Memory Yellow Alarm: Enter the threshold at which a yellow alarm is generated.
This value represents a percentage of memory usage. The default value is 50.
For example, a value of 50 means that a yellow alarm is generated when the 50%
of the memory is in use.
■
Memory Red Alarm: Enter the threshold at which a red alarm is generated. This
value represents a percentage of memory usage. The default value is 75.
For example, a value of 75 means that a red alarm is generated when the 75% of
the memory is in use.
Chapter 2
Station Settings
11
Verifying Disk Usage and Removing Alarm Condition
You are likely to receive a yellow or red alarm for hard-disk-drive usage if you select
to download automatically any available package files from a BlueLinQ server. For
more information, see “BlueLinQ Server Settings” in the PDF Software Management
Module.
You can log in to the control station and verify the disk usage. The Active
Monitoring cron job verifies only the root, /var and /home directories.
To remove the alarm condition from the UI, clean up the files in your partition(s) and
then update the Active Monitoring information.
1. ssh in to the Sun Control Station server.
2. Become the root user.
su -
3. Run the following command to check the root, /var and /home partitions.
df / /var /home
The information for each partition is displayed:
■
■
■
■
■
■
Filesystem
1k-blocks
Used
Available
Use %
Mounted on
If the value for “Use %” is higher than the threshold value, an alarm is generated.
4. Clean up the files in your partitions.
5. In the control station UI, select Station Settings > Active Monitoring.
The Active Monitoring status tables appear.
6. Click Update Now above the tables to begin updating the system and service
status information immediately.
The status should return to normal (green circle with checkmark).
12
Sun Control Station—Administrator Manual • September 2003
Active Monitoring Information
To view the Active Monitoring information for the server on which the Sun Control
Station software is running:
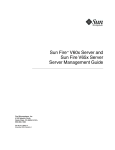
1. Select Station Settings > Active Monitoring.
The Active Monitoring status tables appear; see FIGURE 2-1.
■
■
■
The Base System Components table displays information on the CPU, Disk and
Memory.
The Base Services table displays information on the various services that are
running on that particular server, for example, FTP server, telnet server, Email
server or DNS server. These items can vary depending on the type of server you
are viewing.
The Other System Services table displays information on third-party or
customized services that the administrator has added to a server.
2. You can click Update Now above the tables to begin updating system and service
status information immediately.
This may take as long as several minutes and proceeds in the background.
Chapter 2
Station Settings
13
FIGURE 2-1
14
Active Monitoring Status tables
Sun Control Station—Administrator Manual • September 2003
Settings
You can configure the settings for an HTTP or FTP proxy server, and the number of
days to retain tasks and events. You can also enter an email address that will receive
Active Monitoring alerts.
Each of these settings is optional.
To configure the settings:
1. Select Station Settings > Settings.
The Settings table appears; see FIGURE 2-2.
2. Configure the following settings.
■
■
■
■
HTTP proxy server: Enter an IP address or fully qualified domain name.
FTP proxy server.: Enter an IP address or fully qualified domain name.
Days to keep tasks and events: The default value is two (2) days.
Active Monitor notification email: Enter an email address in the format
[email protected]. The default value is root@localhost.
3. Click Save.
FIGURE 2-2
Settings table
Chapter 2
Station Settings
15
Backups
The Backup Administration table allows you to back up and restore a Sun Control
Station.
Backup
You can perform both scheduled backups and manual backups on the Sun Control
Station.
You can back up your control station using either Windows File Sharing (SMB) or
Network File Sharing (NFS). You can also save the backup file to the local server but
this is not recommended.
The backup file name uses the following format:
bk_YYYYMMDD_hhmm.scs
where YYYYMMDD_hhmm represents the Year Month Day Hour Minute.
For example, the file name bk_20030426_1745.scs indicates that the backup was
created at 17:45 on April 26, 2003.
Note – For a Scheduled Backup, ensure that the target location is available and has
enough disk space to hold the backup archive. Failure to do this may result in
zero-length or truncated archives.
16
Sun Control Station—Administrator Manual • September 2003
Creating a backup
To create a backup of the data on the Sun Control Station:
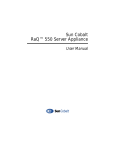
1. Select Station Settings > Backups.
The Backup Administration table appears; see FIGURE 2-3.
2. Enter a path in the field Backup File Path.
The default path is /var/mgmt/backups on the the local server.
We recommend that you not back up to the local server; you should back up to a
different server.
You can mount an external filesystem to which to write the backup file (either a
Windows File Sharing (SMB) server or Network File Sharing [NFS] server).
Note – You must have write permissions for this path.
3. Click Create Backup Now.
The Task Progress dialog appears.
Note – You can also schedule the creation of a backup file. For more information,
see “Schedule” on page 5.
FIGURE 2-3
Backup Administration table
Chapter 2
Station Settings
17
Modifying a scheduled backup
To modify the settings for a scheduled backup task:
1. Select Administration > Schedule.
The Schedule Administration table appears.
2. Click the pencil icon next to the backup task that you want to modify.
The Scheduled Settings For Create Backup table appears, showing the details about
the backup job.
3. Modify the settings.
4. Click Cancel to return without saving the changes or click Save to save the
changes.
The Scheduled Settings For Create Backup table appears.
Deleting a scheduled backup
To delete a scheduled backup task:
1. Select Administration > Schedule.
The Schedule Administration table appears.
2. Click the delete icon next to the backup task that you want to delete.
A confirmation dialog verifies the deletion.
3. Click Remove Schedule.
The Schedule Administration table appears, with the scheduled backup task
removed.
18
Sun Control Station—Administrator Manual • September 2003
Restore
Caution – Interrupting a restore can corrupt your data. If the restore process is
interrupted, the Administrator can try to restore again.
When a backup task runs, it creates a new file in the location specified in the Backup
File Path field in the Backup Administration table; see “Creating a backup” on
page 17. The file name is the time and date at which the backup was started and has
the form: Year Month Day Hour Minute. For example, the file name
bk_20030426_1745.scs indicates that the backup was run at 17:45 on
April 26, 2003.
To restore you Sun Control Station through a backup file:
1. Select Station Settings > Backups.
The Backup Administration table appears.
2. Click Restore From Backup... above the table.
The Restore Administration table appears; see FIGURE 2-4.
3. Click the radio button for the method by which to specify the location of the
backup file:
■
Upload: Click Choose File to locate the backup file.
■
/var/mgmt/backups: If you have a backup file in this directory on the Sun
Control Station, you can use the pull-down menu to choose the backup file.
4. To cancel this restore, click Cancel below the table.
5. To restore this backup file, click Prepare Restore below the table.
The Task Progress dialog appears.
Note – Administering the Sun Control Station while a restore is underway is not
recommended.
Chapter 2
Station Settings
19
FIGURE 2-4
Restore Administration table
Disaster recovery
To restore your Sun Control Station to a known state after a disaster:
1. Restore the server to a factory-fresh state with the CDs for your operating system.
2. Re-install the Sun Control Station software on your server.
You can now use a backup file to restore the control-station information to the server.
3. In the Sun Control Station UI, select Station Settings > Backups.
The Backup Administration table appears.
4. Click Restore From Backup... above the table.
The Restore Administration table appears.
5. Enter a path and file name for the backup file, or click Browse... to locate a backup
file.
6. To cancel this restore, Click Cancel below the table.
7. To restore this backup file, click Restore From File below the table.
The Task Progress dialog appears.
20
Sun Control Station—Administrator Manual • September 2003
Information
To view information about your Sun Control Station, select
Station Settings > Information. The System Information table appears and contains
the following information:
■
■
■
the product name
the product build number
the serial number of the product
Below the System Information table are three buttons: Register Now, License
Agreement and Sun Microsystems, Inc. Web Site.
■
Click Register Now to register your Sun Control Station software.
■
Click License Agreement to view the Binary Code License Agreement.
■
Click Sun Microsystems, Inc. Web Site to go to
http://www.sun.com/hardware/serverappliances/
Registering the Sun Control Station software
To register your Sun Control Station software:
1. Select Station Settings > Information.
The System Information table appears.
2. Click Register Now below the table.
The Registration Information table appears; see FIGURE 2-5.
3. Fill in the following information.
■
■
■
■
■
■
■
First name
Last name
Organization
Country
Job function
Telephone number
Email address
4. Click Send.
The System Information table re-appears.
Chapter 2
Station Settings
21
FIGURE 2-5
Registration Information table
Password
To change the password for the Administrator:
1. Select Station Settings > Password.
The Administrator Password table appears; see FIGURE 2-6.
2. Modify the password.
Enter the password twice for confirmation.
For more information on choosing a password, see “Password guidelines” on
page 23.
3. Click Change Password.
The system saves the configuration, refreshes the screen and displays the message
“Password changed successfully”.
22
Sun Control Station—Administrator Manual • September 2003
FIGURE 2-6
Administrator Password table
Password guidelines
Use the following guidelines when choosing a password:
1. Use between three and sixteen alphanumeric characters. The valid characters
include: a-z A-Z 0-9 % ! @ $ ^ & * - _ = \ | . , / ? ; : +
2. Use both upper- and lower-case letters.
Note – A password is case-sensitive.
3. Do not use a proper name.
4. Do not use a word found in a dictionary.
5. Do not use a date.
6. Do not use a UNIX® command word.
7. Do not use a string of consecutive keys on a keyboard (for example, “qwerty”).
Chapter 2
Station Settings
23
24
Sun Control Station—Administrator Manual • September 2003
CHAPTER
3
Administration Functions
This chapter describes the Administration functions. The Administrator can:
■
■
■
■
■
add or remove managed hosts
create groups of managed hosts
view tasks and events
install and administer the control modules
schedule a task or tasks to be performed at a certain time
Note – In most of the short procedures in this chapter, the first step is to click the
Administration in the left menu bar and the second step is to click on a sub-menu
item.
To reduce the number of steps in each procedure, the menu commands are grouped
together and shown in Initial Caps. Right-angle brackets separate the individual
items.
For example, select Administration > Tasks means to click the click Administration
in the left menu bar and then click the Task sub-menu item.
The Sun Control Station ships with six pre-installed modules:
■
■
■
■
■
■
Software Management
Health Monitoring
Performance Monitoring
AllStart
Lights Out Management (LOM)
Inventory
Each module is explained in detail in its own PDF document, available online
through the UI or on the software CD. For more information, see “Online
Documentation” on page 7.
25
Selector window
A number of functions in the Sun Control Station use a selector window. This section
describes the selector.
In the selector window, depending on the control module that you are using, you
select the managed hosts upon which to perform various tasks, for example:
■
■
■
■
■
■
remove or modify a host(s)
add a host(s) to a group
remove a host(s) from a group
view software package information
publish, install or download software packages
update performance or inventory information for a host
There are two options in the top frame of the selector:
■
■
Select All: This option allows you to select all of the managed hosts in the list for
that task.
Deselect All: This option allows you to de-select all of the selected hosts.
To select a host or hosts on which to perform a task, click on the items in the list or
click Select All at the top. You can also select all hosts within a group by clicking on
the group name.
A single selected item is highlighted in blue; if a single host within a group is
selected, the group name is highlighted in grey. If all hosts within a group are
selected, the group name is highlighted in dark blue.
To de-select a host or hosts, click on the highlighted host or click Deselect All at the
top. You can also de-select all the hosts within a group by clicking on the group
name.
Once you have selected the host(s), click the button at the bottom for the task that
you want to perform. In the top right corner, the selector displays the number of
hosts selected (for example, 3 of 10 items).
26
Sun Control Station—Administrator Manual • September 2003
Administration menu
Note – The control modules also appear in the menu on the left side of the Control
Modules screen.
For more information on an individual control module, refer to the relevant
document.
The functions and services available to the Administrator for managing the hosts,
modules and tasks are grouped together under the menu item labelled
Administration. These functions and services are explained in this chapter.
■
■
■
■
■
Hosts
Modules
Groups
Tasks
Schedule
Tasks and events
Operations performed on the Sun Control Station are called tasks and events.
A task is an executed operation that has a determined start and end point, such as
adding a host or uploading a control module. A task is invoked by a user.
Invoking a task generates one or more events. An event is a notification message
providing information on one part of a task. A task can comprise several events. An
event is generated by the control station or by an agent on a managed host.
You will find that, as a matter of convenience, you can perform a given task from
different locations in the Sun Control Station UI. For example, you can create a
group of hosts from the Managed Hosts table, as well as from the
Administration > Groups menu item on the left. The Schedule option appears on a
number of different screens or you can launch it from the Administration > Schedule
menu item. As well, you can launch control-module tasks from the Managed Hosts
table, rather than having to select that particular module from the menu on the left.
Chapter 3
Administration Functions
27
Run Task In Background
When there is a Task Progress dialog on the screen (for example, when adding a host
or updating the Inventory information), you can put this dialog in the background.
Simply click Run Task In Background below the dialog. You can then move to
another task in the UI while this task continues to run.
To return to the Task Progress dialog, select Administration > Tasks. The Task table
appears. If the task is still underway, a status message is displayed in the Duration
column. Click on the progress bar icon in this column to re-display the Task Progress
dialog for this task.
Schedule
The Schedule feature (also referred to as the Scheduler) allows you to schedule a task
or tasks to be performed at a later time.
If a task can be scheduled by the Sun Control Station, a button labelled Schedule
appears in the table or selector window.
Some of the tasks that you can schedule include: update information in the
Appliance Inventory or Performance modules; install a new control module; add a
new host(s) (individually or from a file).
For more information on Schedule, see “Schedule” on page 5.
Hosts
The Hosts menu item allows you, as the Administrator, to add, remove or modify
hosts to be managed by the Sun Control Station. You can also create groups of
managed hosts, administer the control modules on the control station, view
scheduled tasks or schedule new tasks, and view tasks and events that have
occurred on the control station.
Viewing the managed hosts
To view the hosts that are currently managed by the control station, select
Administration > Hosts. The Managed Hosts table appears in the selector window;
see FIGURE 3-1.
28
Sun Control Station—Administrator Manual • September 2003
Adding hosts
You can add a host to the Sun Control Station in two ways:
■
■
add a single host
import a file containing a list of hosts
Note – For managed hosts other than Sun Cobalt server appliances, you may first
need to install and enable the control-station agent on the host.
Refer to the PDF Software Installation for instructions on installing and enabling the
agent.
Adding a single host
To add a single host:
1. Select Administration > Hosts.
The Managed Hosts table appears in the selector window; see FIGURE 3-1 for an
example.
2. Click Add in the bottom right corner of the Managed Hosts table.
The Add Host table appears; see FIGURE 3-2.
3. Configure the following settings:
■
Host Network Address: Enter the host name or IP address or the fully qualified
domain name of the host.
Note – The host name of the host that you enter must be resolvable by a Domain
Name System (DNS) server that your Sun Control Station accesses.
■
User Name: Enter the user name of the Administrator of the host.
Note – Sun servers (such as the Sun LX50 server) do not have a user admin. You can
do one of two things:
a) create a user admin on the server before importing it, or
b) enter the user name root and the password for root
■
■
Password: Enter the password of the Administrator of the host.
Email Address (Optional): Enter the email address of the contact person for the
host.
Chapter 3
Administration Functions
29
■
■
Description (Optional): Enter a description of the host. For example, “Server in
Joe’s office”.
Install All Possible Modules: Enable this check box to have the control station
install all control modules that this host is eligible to receive.
4. Click Add Host.
The Task Progress dialog appears.
Note – You can also schedule the addition of the host(s) for a later time. For more
information, see “Schedule” on page 5.
FIGURE 3-1
30
Sample of a Managed Hosts table
Sun Control Station—Administrator Manual • September 2003
FIGURE 3-2
Add A Single Host table
Importing a list of hosts
For more information on creating the list of hosts, see “Creating a list of hosts” on
page 32.
To add a list of hosts from a file:
1. Select Administration > Hosts.
The Managed Hosts table appears in the selector window.
2. Click Add in the bottom right corner of the Managed Hosts table.
The Add Host table appears; see FIGURE 3-2.
3. From the pull-down menu above the table, select Add Hosts From A File.
The Add Hosts From A File table appears; see FIGURE 3-3.
4. Click Choose File to locate the file.
5. Enable the check box Install All Possible Modules if you want the control station
to install all control modules that these hosts are eligible to receive.
6. Click Add Hosts.
The Task Progress dialog appears.
Note – You can also schedule the addition of a list of hosts for a later time. For more
information, see “Schedule” on page 5.
Chapter 3
Administration Functions
31
FIGURE 3-3
Add Hosts From A File table
Creating a list of hosts
You can create a file containing a list of hosts, and then import this file into the Sun
Control Station.
The first step in importing a list of hosts is to generate a text file in the required
format. The order of the data fields is the following (enter the data on one
continuous line):
<hostname_or_IP_address>|<username>|<admin_password>|
<email_address>|<description>
The following criteria explain the structure of the file.
1. Include the following data for each host
a. host name or IP address of the host
Note – The host name of the host that you enter must be resolvable by a Domain
Name System (DNS) server that your Sun Control Station accesses.
If you have not specified a DNS server, you must import the host by IP address.
b. user name for the Administrator
Note – Sun servers (such as the Sun LX50 server) do not have a user admin. You can
do one of two things:
a) create a user admin on the server before importing it, or
b) enter the user name root and the password for root
32
Sun Control Station—Administrator Manual • September 2003
c. Administrator password
d. an email address for notifications (optional)
e. a description of the host (optional)
2. Use one line for each host in the file.
3. Separate the data fields with the “|” character. Do not insert a space before or
after the “|” character. You can use commas or tabs in the data string.
4. You must terminate each field with a “|” character, even if you leave the field
blank. This does not apply to the final field.
5. The control station does not verify that an email address is valid.
6. Save the file in plain-text format.
Example file
An example file with seven hosts might look like this:
raq4|admin|abc123||
raq3|admin|abc123|[email protected]
10.9.32.100|admin|abc123||
10.9.32.111|admin|abc123|[email protected]
10.9.32.114|admin|abc123|[email protected]|Sun Cobalt Qube 3 at home
10.9.32.115|admin|abc123||x86 RH7.3 server on top shelf
10.9.32.116|admin|abc123||Sun Fire V60x in my office
10.9.32.117|root|abc123|[email protected]|Ultra 80 in hardware lab
Modifying a host
You can modify the email address for notifications or the description of a host.
To modify a managed host(s):
1. Select Administration > Hosts.
The Managed Hosts table appears in the selector window.
2. In the selector, click to highlight the host(s) you want to modify. You can also click
Select All at the top to choose all hosts in the list.
3. Click Modify in the bottom right corner.
The Modify Host table appears.
Chapter 3
Administration Functions
33
4. You can modify the following settings:
■
■
Email Address (Optional): Enter the email address of the contact person for this
host.
Description (Optional): Enter a description of this host. For example, “Sun LX50
server in Room 2321”.
5. To cancel the task and return to the previous list, click Cancel.
6. To proceed with the task, click Save.
The Managed Hosts table appears displaying the modified information.
Creating a group
To create a group of managed host(s) from the Managed Hosts table:
1. Select Administration > Hosts.
The Managed Hosts table appears in the selector window.
2. In the selector, click to highlight the host(s) you want to include in the new group.
You can also click Select All at the top to choose all hosts in the list:
3. Click Group in the bottom right corner.
The Create A New Group table appears; see FIGURE 3-4.
4. Configure the follow settings:
■
■
Group Name: Enter the name of the group.
Description (Optional): Enter the description for the group (up to 255 character).
5. To cancel the task and return to the Managed Hosts table, click Cancel.
6. To proceed with the task, click Save.
The Groups table appears with the new group.
In the Groups table, you can view details for, modify or delete the group. You can
also add or remove hosts to or from the group. For more information, see “Groups”
on page 46.
34
Sun Control Station—Administrator Manual • September 2003
FIGURE 3-4
Create A New Group table
Viewing a report for installed control modules
You can view a report on the installed control modules for a host(s) selected in the
Managed Hosts table.
In the resulting table, you can launch control-module tasks for a given host without
having to select that control module from the menu on the left.
To view the installed-modules report for a host(s):
1. Select Administration > Hosts.
The Managed Hosts table appears in the selector window.
2. In the selector, click to highlight the host(s) for which you want to run a controlmodule task. You can also click Select All at the top to choose all hosts in the list:
3. Click Modules at the bottom.
The Control Module Installation Report For Hosts table appears; a sample table
appears in FIGURE 3-5.
This table displays the host(s) that you selected and the following information:
■
■
■
■
Host Name: The host name or IP address of the host.
Class: The class of the host (if available).
Eligible: The number of control modules for which this host is eligible (some
control modules apply only to a certain class of host).
Installed: The number of control modules installed on the host.
Chapter 3
Administration Functions
35
■
■
Failed: The number of control modules that failed to install on the host.
Actions: Click on an icon in this column to perform an action, including:
■
Magnifying glass icon: This action displays another table showing the control
modules for which the host is eligible, the version and vendor of the module,
the status of that module (installed or not installed) and another Action
column; see FIGURE 3-6.
If the client-side components of a module are installed on the host, you can
remove these components by clicking on the minus icon in the Action column;
If the client-side components are not installed, you can install these
components by clicking on the plus icon.
For more information, see “Installing client-side components to selected hosts”
on page 42 and “Removing client-side components from selected hosts” on
page 43.
■
■
Inventory icon: This action displays the inventory information for the host,
including IP address and host name, system memory, CPU, network interface
cards (NICs) and more.
Performance icon: This action displays the performance information for the host,
including IP address and host name, memory usage, filesystem usage and
more.
4. Click the up-arrow icon in the top right corner to return to the Managed Hosts
table.
FIGURE 3-5
36
Sample of a Control Module Installation report
Sun Control Station—Administrator Manual • September 2003
FIGURE 3-6
Eligible Control Modules For <Host> table
Removing a host
To remove a managed host(s):
1. Select Administration > Hosts.
The Managed Hosts table appears in the selector window.
2. In the selector, click to highlight the host(s) you want to remove. You can also
click Select All at the top to choose all hosts in the list:
3. Click Remove at the bottom.
A confirmation table appears, asking you to confirm the removal of the selected
host(s).
4. To cancel the task and return to the selector, click Cancel.
5. To proceed with the task, click Remove Host.
The Task Progress dialog appears.
Chapter 3
Administration Functions
37
Modules
To view the control modules installed on the Sun Control Station, select
Administration > Modules. The Control Modules table appears; see FIGURE 3-7 for a
sample table.
In this table, you can add the client-side components of the control module to a host
or remove them from a host, view the details on a particular control module, or
remove the control module from the Sun Control Station (along with the client-side
components from all hosts).
Control Modules table
The Installed Control Modules table has seven columns:
■
■
■
■
■
■
■
Name: the name of the control module
Version: the version number of the control module
Vendor: the vendor of the control module
Eligible: the number of hosts that are eligible for this control module
Installed: the number of hosts on which this control module is installed
Failed: the number of hosts on which this control module failed to install.
Actions: to add or remove the client-side components of the control module to or
from a host, view the details for a module or to delete a module from the control
station
FIGURE 3-7
38
Control Modules table
Sun Control Station—Administrator Manual • September 2003
You can sort the list of control modules according to the name of the module, the
version number, the vendor, the number of hosts that are eligible for the module, or
the number of hosts on which the module successfully installed or failed to install, in
ascending or descending order.
Ascending order means from lowest value to the highest value (a–z or 1–9).
Descending order means from highest value to the lowest value (z–a or 9–1). By
default, the Control Modules table is sorted by module name in ascending order.
In the heading of the column which has been sorted, a triangle icon points down
(ascending order) or up (descending order).
Adding a control module
When you add a control module to the control station, a menu item for this new
module appears in the list on the left side of the UI.
To add a control module:
1. Select Administration > Modules.
The Control Modules table appears.
2. Click Add Module at the bottom of the table.
The Add Module table appears; see FIGURE 3-8.
3. Click one of the radio buttons and enter the location from which the control
module package is obtained.
■
■
Enter a URL beginning with http:// or ftp:// to download the control module
from a location on the Internet.
Click Choose File to locate the control module.
4. Enable the check box Install On All Eligible Hosts if you want to install, in this
same procedure, the client-side components on all eligible hosts.
If you do not want to, you can select at a later time the hosts on which to install the
module components.
Chapter 3
Administration Functions
39
5. Click Install Now.
The Task Progress dialog appears.
Note – You can also schedule the installation of a new control module for a later
time. For more information, see “Schedule” on page 5.
Note – If the newly added control module does not appear in the menu on the left,
refresh your browser window.
If there is documentation available for this module, it is added to the list of online
documentation. For more information, see “Online Documentation” on page 7.
FIGURE 3-8
40
Add Module table
Sun Control Station—Administrator Manual • September 2003
Viewing details for a control module
To view the details for a control module:
1. Select Administration > Modules.
The Control Modules table appears.
2. Locate in the list the module for which you want to view the details.
3. Click the magnifying glass icon in the Actions column.
The Eligible Hosts For <Control Module> table appears; see FIGURE 3-9.
The table shows the IP address or host name of the host(s) on which the module has
been installed, the class of host and the installation status of the module for each
host.
If the client-side components of a module are installed on the host, you can remove
these components by clicking on the minus icon in the Actions column; If the
client-side components are not installed, you can install these components by
clicking on the plus icon.
For more information, see “Installing client-side components to selected hosts” on
page 42 and “Removing client-side components from selected hosts” on page 43.
4. Click the up-arrow icon in the top right corner to return to the Control Modules
table.
FIGURE 3-9
Eligible Hosts For <Control Module> table
Chapter 3
Administration Functions
41
Installing client-side components to selected hosts
If you have added a control module but not installed the client-side components on
the eligible hosts, you can install the client-side components to selected hosts.
You can install the client-side components to a single host or a number of hosts:
1. Select Administration > Modules.
The Control Modules table appears.
2. Locate in the list the module for which you want to install the client-side
components.
If there are eligible hosts that do not have the module, the plus icon is active in the
Actions column.
▼ To install the client-side components on more than one host
3. Click the plus icon.
The eligible hosts appear in the selector window; see FIGURE 3-9.
4. In the selector, click to highlight the host(s) on which you want to install the
client-side components. You can also click Select All at the top to choose all hosts
in the list.
5. Click Install Now at the bottom.
The Task Progress dialog appears.
Note – You can also schedule the installation of the client-side components for a
later time. For more information, see “Schedule” on page 5.
▼ To install the client-side components on a single host
6. If you click the magnifying glass icon, the Eligible Hosts For <Control Module>
table appears.
7. Click the plus icon next to the host on which you want to install the client-side
components for the module.
The Task Progress dialog appears.
42
Sun Control Station—Administrator Manual • September 2003
Removing client-side components from selected
hosts
You can remove the client-side components from a single host or from a number of
hosts.
1. Select Administration > Modules.
The Control Modules table appears.
2. Locate in the list the module for which you want to remove the client-side
components.
If there are eligible host(s) that have the module, the minus icon is active in the
Actions column.
▼ To remove the client-side components from more than one host
3. Click the minus icon.
The eligible hosts appear in the selector window; see FIGURE 3-9.
4. In the selector, click to highlight the host(s) from which you want to remove the
client-side components. You can also click Select All at the top to choose all hosts
in the list:
5. Click Uninstall Now at the bottom.
The Task Progress dialog appears.
Note – You can also schedule the removal of the client-side components for a later
time. For more information, see “Schedule” on page 5.
▼ To remove the client-side components from a single host
6. If you click the magnifying glass icon, the Eligible Hosts For <Control Module>
table appears.
7. Click the minus icon next to the host from which you want to remove the
client-side components for the module.
The Task Progress dialog appears.
Chapter 3
Administration Functions
43
Re-trying a failed installation
The client-side components of a control module may not always install successfully
on a host and this is indicated in the Control Modules table. The number of hosts on
which the install task failed appears in the Failed column. You can view a list of
these hosts and try to install the components again.
To try to install the client-side components again:
1. Select Administration > Modules.
The Control Modules table appears.
2. Locate in the list the module for which you want to view the failed-installation
report.
3. Click the exclamation-mark icon in the Actions column.
The hosts on which the client-side components failed to install appear in the selector
window.
4. In the selector, click to highlight the host(s) on which you want to try to install
again the client-side components. You can also click Select All at the top to choose
all hosts in the list:
5. Click Retry Now in the bottom right corner.
The Task Progress dialog appears.
Note – You can also schedule the re-installation of client-side components for a later
time. For more information, see “Schedule” on page 5.
44
Sun Control Station—Administrator Manual • September 2003
Removing a control module
Note – If you remove one of the five pre-installed control modules (for example,
Health Monitoring), you cannot re-install it later from the Sun Control Station (the
modules are not stored on the control station).
See page 25 for the list of the pre-installed control modules.
If you have the Sun Control Station 2.0 CD-ROM, you can find the control modules
in the directory /MAPPS.
To add the module to the control station; see “Adding a control module” on page 39.
To remove a control module:
1. Select Administration > Modules.
The Control Modules table appears.
2. Locate in the list the control module that you want to remove.
3. Click the delete icon in the Actions column.
The Confirm Removal Of Control Module table appears, asking you to confirm the
removal.
4. Click Remove Module.
The Control Modules table appears with the updated information.
This removal task removes all server-side components from the Sun Control Station
and, if the managed host is accessible, all client-side components from the host(s)) on
which the module was installed.
Chapter 3
Administration Functions
45
Groups
You can group together a number of hosts under a single group name. Groups can
help you manage your hosts according to, for example, geographical location or
class of host.
Groups table
The Groups table has four columns; FIGURE 3-10 shows an example of the table.
■
■
■
■
Name
Description
Hosts
Actions
FIGURE 3-10
Groups table
You can sort the list of groups according to the name of the group, the description of
the group or the number of hosts in a group, in ascending or descending order.
Ascending order means from lowest value to the highest value (a–z or 1–9).
Descending order means from highest value to the lowest value (z–a or 9–1). By
default, the List Groups table is sorted by group name in ascending order.
46
Sun Control Station—Administrator Manual • September 2003
In the heading of the column which has been sorted, a triangle icon points down
(ascending order) or up (descending order).
Action column
Once a group is created, you can perform various operations on that group. These
operations are found in the Actions column of the List Groups table and are
explained further along in this section.
■
■
■
■
■
Modify a group
View details of a group
Add a host(s) to a group
Remove a host(s) from a group
Remove a group
Adding a group
To create a group of managed hosts:
1. Select Administration > Groups.
The Groups table appears.
2. Click Create Group at the bottom of the table.
The Create A New Group table appears; see FIGURE 3-11.
3. Fill in the following fields:
■
■
■
Group Name: Enter a name for the group.
Description (Optional): Enter a short description for this group. The description
can contain up to 255 characters.
Choose Hosts To Add: Enable this check box if you want to add hosts to the group
in this same procedure.
4. Click Save.
If you did not click the check box Choose Hosts To Add, the Groups table appears
with the new group; the new group contains no hosts.
If you did click the check box Choose Hosts To Add, the selector appears, displaying
the list of managed hosts.
5. In the selector, click to highlight the host(s) you want to add to the group. You can
also click Select All at the top to choose all hosts in the list.
6. Click Add in the bottom right corner.
The Groups table appears with the new group added. The groups are sorted by
group name in ascending order.
Chapter 3
Administration Functions
47
FIGURE 3-11
Create A New Group table
Modifying a group
You can change the name or the description for a group.
To modify a group:
1. Select Administration > Groups.
The Groups table appears.
2. Locate in the list the group that you want to modify.
3. Click the pencil icon in the Action column.
The Modify Group table appears.
4. You can modify the group name or the description of the group. The Description
field is optional.
5. Click Save.
The Groups table appears with the modified information.
Viewing details of a group
You can see which hosts belong to a given group.
To view the details for a group:
1. Select Administration > Groups.
The Groups table appears.
2. Locate in the list the group for which you want to view the details.
48
Sun Control Station—Administrator Manual • September 2003
3. Click the magnifying glass icon in the Action column.
The selector appears, displaying the list of managed hosts within that group.
You can perform tasks from the Actions column.
4. To return to the list of groups, click the up-arrow icon in the top-right corner.
The Groups table appears.
Adding a host to a group
You can add a host or hosts to an existing group.
To add a host(s):
1. Select Administration > Groups.
The Groups table appears.
2. Locate in the list the group to which you want to add a host.
3. Click the plus icon in the Actions column.
The selector appears, displaying the list of managed hosts on the Sun Control
Station.
4. In the selector, click to highlight the host(s) you want to add to the group. You can
also click Select All at the top to choose all hosts in the list.
You can select a host in another group to add to the current group. The host will
then appear as a member of both groups.
5. Click Add in the bottom right corner.
The Groups table appears with the updated information. The groups are sorted by
group name in ascending order.
Removing a host from a group
You can remove a host or hosts from an existing group.
To remove a host(s):
1. Select Administration > Groups.
The Groups table appears.
2. Locate in the list the group from which you want to delete a host.
3. Click the minus icon in the Actions column.
The selector appears, displaying the list of managed hosts that belong to the group.
Chapter 3
Administration Functions
49
4. In the selector, click to highlight the host(s) you want to remove from the group.
You can also click Select All at the top to choose all hosts in the list.
5. Click Remove in the bottom right corner.
The Groups table appears with the updated information. The groups are sorted by
group name in ascending order.
Removing a group
You can remove an existing group.
Note – Removing a group does not remove the managed hosts in that group from
the Sun Control Station.
To remove a host(s), see “Removing a host” on page 37.
To remove a group:
1. Select Administration > Groups.
The Groups table appears.
2. Locate in the list the group that you want to remove.
3. Click the delete icon in the Actions column.
The Confirm Group Removal table appears, asking you to confirm the removal.
4. Click Remove Group.
The Groups table appears with the updated information.
50
Sun Control Station—Administrator Manual • September 2003
Tasks
For an explanation of tasks and events on the Sun Control Station, see “Tasks and
events” on page 27.
Tasks table
The Tasks table has five columns; FIGURE 3-12 shows an example of the table.
Note – If there are more than 10 entries in the Tasks table, the table lists the first 10
entries. There are buttons at the bottom of the table with which to choose different
ranges of entries.
To view the Tasks table:
● Select Administration > Tasks.
The Tasks table appears. The columns are:
■
Status: the status of the task:
■
■
■
■
■
■
■
Green with checkmark: Completed successfully
Yellow with exclamation mark: Completed with warnings
Red with X: Failed
Name: the string name of the functional component that created the task
Start Date/Time: the date and time that the task started
Duration: indicates how long a task took to complete (shown in the format
hh:mm:ss) or how far a task has progressed (in percentage)
Actions: Clicking the magnifying glass icon allows you to see the individual events
associated with a task. A new table appears listing the events. Click the up-arrow
icon in the top-right corner to return to the Tasks table.
You can sort the list of tasks according to the name of the task, the
start date/time of the task, or the duration of the task, in ascending or descending
order.
Ascending order means from lowest value to the highest value (a–z or 1–9).
Descending order means from highest value to the lowest value (z–a or 9–1). By
default, the Tasks table is sorted by start date and time in ascending order.
In the heading of the column which has been sorted, a triangle icon points down
(ascending order) or up (descending order).
Chapter 3
Administration Functions
51
FIGURE 3-12
52
Sample of a Tasks table
Sun Control Station—Administrator Manual • September 2003
Events table
You can view a list of the events generated for a given task in the system.
FIGURE 3-13 shows an example of the table.
Note – If there are more than 10 entries in the Events table, the table lists the first 10
entries. There are buttons at the bottom of the table with which to choose different
ranges of entries.
To view the Events tables:
1. Select Administration >Tasks.
The Tasks table appears. The columns are:
2. To view the events for a particular task, click the magnifying glass icon in the
Actions column.
The Events For <Task> table appears. The columns are:
■
Status: the status of the task:
■
■
■
■
■
Green with checkmark: Completed successfully
Yellow with exclamation mark: Completed with warnings
Red with X: Failed
Message: a message describing the event
Start Date/Time: the date and time that the event took place
You can sort the list of tasks according to the message or the start date/time of the
event.
Ascending order means from lowest value to the highest value (a–z or 1–9).
Descending order means from highest value to the lowest value (z–a or 9–1). By
default, the Tasks table is sorted by start date and time in ascending order.
In the heading of the column which has been sorted, a triangle icon points down
(ascending order) or up (descending order).
3. Click the up-arrow icon in the top-right corner to return to the Tasks table.
The Tasks table appears.
Chapter 3
Administration Functions
53
FIGURE 3-13
54
Sample of an Events table
Sun Control Station—Administrator Manual • September 2003
Schedule
For an explanation of the Schedule feature, see “Schedule” on page 5.
To view the Schedule table, select Administration > Schedule. See FIGURE 3-14 for a
sample table.
The Schedule table has four columns:
■
■
■
■
Name: the name of the scheduled task
Type: how often the scheduled task runs
Settings: the time and date on which the scheduled task runs
Actions: to view the details for a scheduled task, modify the settings for a
scheduled task or delete a scheduled task.
For certain tasks, you can also use the plus icon or the minus icon to add or
remove hosts to or from the scheduled task.
FIGURE 3-14
Schedule table
You can sort the list of scheduled tasks according to the name of the task, the type of
task or the settings for the task, in ascending or descending order.
Ascending order means from lowest value to the highest value (a–z or 1–9).
Descending order means from highest value to the lowest value (z–a or 9–1). By
default, the Scheduled Tasks table is sorted by module name in ascending order.
In the heading of the column which has been sorted, a triangle icon points down
(ascending order) or up (descending order).
Chapter 3
Administration Functions
55
Cleanup
Cleanup is a built-in scheduled task that allows you to clean up the list of tasks and
events retained by the Sun Control Station. The Cleanup task runs once per day.
Note – You cannot delete the Cleanup task from the table and you cannot disable it.
To configure the Cleanup task:
1. Select Administration > Schedule.
The Schedule table appears.
2. In the Action column, next to the Cleanup task, click the pencil icon.
The Schedule Settings For Cleanup table appears.
3. Configure the following settings:
■
Run Time: the time of day that the cleanup task runs. The system deletes all tasks
and events that are 14 days old.
The format is hh:mm (24-hour format).
■
■
■
Email Address (Optional): Enter an email address of the person who will be
notified when the Cleanup task runs.
Notify When Starting: Enable the check box to notify the person when the
Cleanup task is starting.
Notify When Finished: Enable the check box to notify the person when the
Cleanup task has completed.
4. Click Save.
The Schedule table appears with the updated settings.
Viewing the details of a scheduled task
To view the details of a scheduled task:
1. Select Administration > Schedule.
The Schedule table appears.
2. Click the magnifying glass icon next the task for which you want to see the details.
The Tasks table appears. For more information on this table, see “Tasks table” on
page 51.
3. Click the up-arrow icon in the top-right corner to return to the Scheduled Tasks
table.
56
Sun Control Station—Administrator Manual • September 2003
Modifying a scheduled task
To modify the settings for a scheduled task:
1. Select Administration > Schedule.
The Schedule table appears.
2. Click the pencil icon next to the task you want to modify.
The Schedule Settings for <Task> table appears.
3. Modify the settings.
4. Click Save.
The Schedule table appears with the updated settings for that task.
Deleting a scheduled task
To delete a scheduled task:
1. Select Administration > Schedule.
The Schedule table appears.
2. Click the delete icon next to the task that you want to delete.
A confirmation table appears, asking you to confirm the removal of the scheduled
task.
3. To cancel the task and return to the selector, click Cancel.
4. To proceed, click Remove Schedule.
The Schedule table appears, with the scheduled task removed from the table.
Chapter 3
Administration Functions
57
58
Sun Control Station—Administrator Manual • September 2003
APPENDIX
A
Licenses
The BSD Copyright
Copyright ©1991, 1992, 1993, 1994 The Regents of the University of California. All
rights reserved.
Redistribution and use in source and binary forms, with or without modification, are
permitted provided that the following conditions are met:
1. Redistributions of source code must retain the above copyright notice, this list of
conditions and the following disclaimer.
2. Redistributions in binary form must reproduce the above copyright notice, this
list of conditions and the following disclaimer in the documentation and/or other
materials provided with the distribution.
3. All advertising materials mentioning features or use of this software must display
the following acknowledgment: This product includes software developed by the
University of California, Berkeley and its contributors.
4. Neither the name of the University nor the names of its contributors may be used
to endorse or promote products derived from this software without specific prior
written permission.
THIS SOFTWARE IS PROVIDED BY THE REGENTS AND CONTRIBUTORS “AS IS”
AND ANY EXPRESS OR IMPLIED WARRANTIES, INCLUDING BUT NOT
LIMITED TO, THE IMPLIED WARRANTIES OF MERCHANTABILITY AND
FITNESS FOR A PARTICULAR PURPOSE ARE DISCLAIMED. IN NO EVENT
SHALL THE REGENTS OR CONTRIBUTORS BE LIABLE FOR ANY DIRECT,
INDIRECT, INCIDENTAL, SPECIAL, EXEMPLARY OR CONSEQUENTIAL
DAMAGES (INCLUDING, BUT NOT LIMITED TO, PROCUREMENT OF
SUBSTITUTE GOODS OR SERVICES; LOSS OF USE, DATA, OR PROFITS; OR
59
BUSINESS INTERRUPTION) HOWEVER CAUSED AND ON ANY THEORY OF
LIABILITY, WHETHER IN CONTRACT, STRICT LIABILITY, OR TORT
(INCLUDING NEGLIGENCE OR OTHERWISE) ARISING IN ANY WAY OUT OF
THE USE OF THIS SOFTWARE, EVEN IF ADVISED OF THE POSSIBILITY OF
SUCH DAMAGE.
GNU General Public License
Version 2, June 1991
Copyright (C) 1989, 1991 Free Software Foundation, Inc.
59 Temple Place - Suite 330, Boston, MA 02111-1307, USA
TERMS AND CONDITIONS FOR COPYING, DISTRIBUTION AND
MODIFICATION
0. This License applies to any program or other work which contains a notice placed
by the copyright holder saying it may be distributed under the terms of this
General Public License. The “Program,” below, refers to any such program or
work, and a “work based on the Program” means either the Program or any
derivative work under copyright law: that is to say, a work containing the
Program or a portion of it, either verbatim or with modifications and/or
translated into another language. (Hereinafter, translation is included without
limitation in the term “modification.”) Each licensee is addressed as “you.”
Activities other than copying, distribution and modification are not covered by
this License; they are outside its scope. The act of running the Program is not
restricted, and the output from the Program is covered only if its contents
constitute a work based on the Program (independent of having been made by
running the Program). Whether that is true depends on what the Program does.
1. You may copy and distribute verbatim copies of the Program’s source code as you
receive it, in any medium, provided that you conspicuously and appropriately
publish on each copy an appropriate copyright notice and disclaimer of warranty;
keep intact all the notices that refer to this License and to the absence of any
warranty; and give any other recipients of the Program a copy of this License
along with the Program.
You may charge a fee for the physical act of transferring a copy, and you may at
your option offer warranty protection in exchange for a fee.
60
Sun Control Station—Administrator Manual • September 2003
2. You may modify your copy or copies of the Program or any portion of it, thus
forming a work based on the Program, and copy and distribute such
modifications or work under the terms of Section 1 above, provided that you also
meet all of these conditions:
a. You must cause the modified files to carry prominent notices stating that you
changed the files and the date of any change.
b. You must cause any work that you distribute or publish, that in whole or in
part contains or is derived from the Program or any part thereof, to be licensed
as a whole at no charge to all third parties under the terms of this License.
c. If the modified program normally reads commands interactively when run,
you must cause it, when started running for such interactive use in the most
ordinary way, to print or display an announcement including an appropriate
copyright notice and a notice that there is no warranty (or else, saying that you
provide a warranty) and that users may redistribute the program under these
conditions, and telling the user how to view a copy of this License. (Exception:
if the Program itself is interactive but does not normally print such an
announcement, your work based on the Program is not required to print an
announcement.)
These requirements apply to the modified work as a whole. If identifiable
sections of that work are not derived from the Program, and can be reasonably
considered independent and separate works in themselves, then this License,
and its terms, do not apply to those sections when you distribute them as
separate works. But when you distribute the same sections as part of a whole
which is a work based on the Program, the distribution of the whole must be
on the terms of this License, whose permissions for other licensees extend to
the entire whole, and thus to each and every part regardless of who wrote it.
Thus, it is not the intent of this section to claim rights or contest your rights to
work written entirely by you; rather, the intent is to exercise the right to control
the distribution of derivative or collective works based on the Program.
In addition, mere aggregation of another work not based on the Program with
the Program (or with a work based on the Program) on a volume of a storage
or distribution medium does not bring the other work under the scope of this
License.
Appendix A
Licenses
61
3. You may copy and distribute the Program (or a work based on it, under Section 2)
in object code or executable form under the terms of Sections 1 and 2 above,
provided that you also do one of the following:
a. Accompany it with the complete corresponding machine-readable source code,
which must be distributed under the terms of Sections 1 and 2 above on a
medium customarily used for software interchange; or,
b. Accompany it with a written offer, valid for at least three years, to give any
third party, for a charge no more than your cost of physically performing
source distribution, a complete machine-readable copy of the corresponding
source code, to be distributed under the terms of Sections 1 and 2 above on a
medium customarily used for software interchange; or,
c. Accompany it with the information you received as to the offer to distribute
corresponding source code. (This alternative is allowed only for
noncommercial distribution and only if you received the program in object
code or executable form with such an offer, in accord with Subsection b above.)
The source code for a work means the preferred form of the work for making
modifications to it. For an executable work, complete source code means all the
source code for all modules it contains, plus any associated interface definition
files, plus the scripts used to control compilation and installation of the
executable. However, as a special exception, the source code distributed need
not include anything that is normally distributed (in either source or binary
form) with the major components (compiler, kernel, and so on) of the operating
system on which the executable runs, unless that component itself accompanies
the executable.
If distribution of executable or object code is made by offering access to copy
from a designated place, then offering equivalent access to copy the source
code from the same place counts as distribution of the source code, even
though third parties are not compelled to copy the source along with the object
code.
4. You may not copy, modify, sublicense or distribute the Program except as
expressly provided under this License. Any attempt otherwise to copy, modify,
sublicense or distribute the Program is void, and will automatically terminate
your rights under this License. However, parties who have received copies, or
rights, from you under this License will not have their licenses terminated, so
long as such parties remain in full compliance.
5. You are not required to accept this License, since you have not signed it. However,
nothing else grants you permission to modify or distribute the Program or its
derivative works. These actions are prohibited by law if you do not accept this
License. Therefore, by modifying or distributing the Program (or any work based
on the Program), you indicate your acceptance of this License to do so, and all its
terms and conditions for copying, distributing or modifying the Program or
works based on it.
62
Sun Control Station—Administrator Manual • September 2003
6. Each time you redistribute the Program (or any work based on the Program), the
recipient automatically receives a license from the original licensor to copy,
distribute or modify the Program subject to these terms and conditions. You may
not impose any further restrictions on the recipients’ exercise of the rights granted
herein. You are not responsible for enforcing compliance by third parties to this
License.
7. If, as a consequence of a court judgment or allegation of patent infringement or
for any other reason (not limited to patent issues), conditions are imposed on you
(whether by court order, agreement or otherwise) that contradict the conditions of
this License, they do not excuse you from the conditions of this License. If you
cannot distribute so as to satisfy simultaneously your obligations under this
License and any other pertinent obligations, then as a consequence you may not
distribute the Program at all. For example, if a patent license would not permit
royalty-free redistribution of the Program by all those who receive copies directly
or indirectly through you, then the only way you could satisfy both it and this
License would be to refrain entirely from distribution of the Program.
If any portion of this section is held invalid or unenforceable under any particular
circumstance, the balance of the section is intended to apply and the section as a
whole is intended to apply in other circumstances.
It is not the purpose of this section to induce you to infringe any patents or other
property right claims or to contest validity of any such claims; this section has the
sole purpose of protecting the integrity of the free software distribution system,
which is implemented by public license practices. Many people have made
generous contributions to the wide range of software distributed through that
system in reliance on consistent application of that system; it is up to the
author/donor to decide if he or she is willing to distribute software through any
other system and a licensee cannot impose that choice.
This section is intended to make thoroughly clear what is believed to be a
consequence of the rest of this License.
8. If the distribution and/or use of the Program is restricted in certain countries
either by patents or by copyrighted interfaces, the original copyright holder who
places the Program under this License may add an explicit geographical
distribution limitation excluding those countries, so that distribution is permitted
only in or among countries not thus excluded. In such case, this License
incorporates the limitation as if written in the body of this License.
Appendix A
Licenses
63
9. The Free Software Foundation may publish revised and/or new versions of the
General Public License from time to time. Such new versions will be similar in
spirit to the present version, but may differ in detail to address new problems or
concerns.
Each version is given a distinguishing version number. If the Program specifies a
version number of this License which applies to it and “any later version”, you
have the option of following the terms and conditions either of that version or of
any later version published by the Free Software Foundation. If the Program does
not specify a version number of this License, you may choose any version ever
published by the Free Software Foundation.
10. If you wish to incorporate parts of the Program into other free programs whose
distribution conditions are different, write to the author to ask for permission. For
software which is copyrighted by the Free Software Foundation, write to the Free
Software Foundation; we sometimes make exceptions for this. Our decision will
be guided by the two goals of preserving the free status of all derivatives of our
free software and of promoting the sharing and reuse of software generally.
NO WARRANTY
11. BECAUSE THE PROGRAM IS LICENSED FREE OF CHARGE, THERE IS NO
WARRANTY FOR THE PROGRAM, TO THE EXTENT PERMITTED BY
APPLICABLE LAW. EXCEPT WHEN OTHERWISE STATED IN WRITING, THE
COPYRIGHT HOLDERS AND/OR OTHER PARTIES PROVIDE THE PROGRAM
“AS IS” WITHOUT WARRANTY OF ANY KIND, EITHER EXPRESSED OR
IMPLIED, INCLUDING, BUT NOT LIMITED TO, THE IMPLIED WARRANTIES
OF MERCHANTABILITY AND FITNESS FOR A PARTICULAR PURPOSE. THE
ENTIRE RISK AS TO THE QUALITY AND PERFORMANCE OF THE PROGRAM
IS WITH YOU. SHOULD THE PROGRAM PROVE DEFECTIVE, YOU ASSUME
THE COST OF ALL NECESSARY SERVICING, REPAIR OR CORRECTION.
12. IN NO EVENT, UNLESS REQUIRED BY APPLICABLE LAW OR AGREED TO IN
WRITING, WILL ANY COPYRIGHT HOLDER, OR ANY OTHER PARTY WHO
MAY MODIFY AND/OR REDISTRIBUTE THE PROGRAM AS PERMITTED
ABOVE, BE LIABLE TO YOU FOR DAMAGES, INCLUDING ANY GENERAL,
SPECIAL, INCIDENTAL OR CONSEQUENTIAL DAMAGES ARISING OUT OF
THE USE OR INABILITY TO USE THE PROGRAM (INCLUDING BUT NOT
LIMITED TO LOSS OF DATA OR DATA BEING RENDERED INACCURATE OR
LOSSES SUSTAINED BY YOU OR THIRD PARTIES OR A FAILURE OF THE
PROGRAM TO OPERATE WITH ANY OTHER PROGRAMS), EVEN IF SUCH
HOLDER OR OTHER PARTY HAS BEEN ADVISED OF THE POSSIBILITY OF
SUCH DAMAGES.
64
Sun Control Station—Administrator Manual • September 2003
SSL License
Copyright (c) 1998-1999 Ralf S. Engelschall. All rights reserved.
Redistribution and use in source and binary forms, with or without modification, are
permitted provided that the following conditions are met:
1. Redistributions of source code must retain the above copyright notice, this list of
conditions and the following disclaimer.
2. Redistributions in binary form must reproduce the above copyright notice, this
list of conditions and the following disclaimer in the documentation
and/or other materials provided with the distribution.
3. All advertising materials mentioning features or use of this software must display
the following acknowledgment:
“This product includes software developed by Ralf S. Engelschall
<[email protected]> for use in the mod_ssl project
(http://www.engelschall.com/sw/mod_ssl/).”
4. The name “mod_ssl” must not be used to endorse or promote products derived
from this software without prior written permission. For written permission,
please contact [email protected].
5. Products derived from this software may not be called “mod_ssl” nor may
“mod_ssl” appear in their names without prior written permission of Ralf S.
Engelschall.
6. Redistributions of any form whatsoever must retain the following
acknowledgment:
“This product includes software developed by Ralf S. Engelschall
<[email protected]> for use in the mod_ssl project
(http://www.engelschall.com/sw/mod_ssl/).”
THIS SOFTWARE IS PROVIDED BY RALF S. ENGELSCHALL “AS IS” AND ANY
EXPRESSED OR IMPLIED WARRANTIES, INCLUDING, BUT NOT LIMITED TO,
THE IMPLIED WARRANTIES OF MERCHANTABILITY AND FITNESS FOR A
PARTICULAR PURPOSE ARE DISCLAIMED. IN NO EVENT SHALL RALF S.
ENGELSCHALL OR HIS CONTRIBUTORS BE LIABLE FOR ANY DIRECT,
INDIRECT, INCIDENTAL, SPECIAL, EXEMPLARY, OR CONSEQUENTIAL
DAMAGES (INCLUDING, BUT NOT LIMITED TO, PROCUREMENT OF
SUBSTITUTE GOODS OR SERVICES; LOSS OF USE, DATA, OR PROFITS; OR
BUSINESS INTERRUPTION) HOWEVER CAUSED AND ON ANY THEORY OF
LIABILITY, WHETHER IN CONTRACT, STRICT LIABILITY, OR TORT
Appendix A
Licenses
65
(INCLUDING NEGLIGENCE OR OTHERWISE) ARISING IN ANY WAY OUT OF
THE USE OF THIS SOFTWARE, EVEN IF ADVISED OF THE POSSIBILITY OF
SUCH DAMAGE.
Intel BSD and Patent License
Copyright (c) 2001-2002 Intel Corporation.
This software program is available to you under the following license.
Intel BSD and Patent License
Recipient has requested a license and Intel Corporation (“Intel”) is willing to grant a
license for the software entitled “panicsel” (the “Software”) being provided by Intel
Corporation. The following definitions apply to this License: “Licensed Patents”
means patent claims licensable by Intel Corporation which are necessarily infringed
by the use or sale of the Software alone or when combined with the operating
system referred to below. “Recipient” means the party to whom Intel delivers this
Software. “Licensee” means Recipient and those third parties that receive a license to
any operating system available under the GNU Public License version 2.0 or later.
Copyright (c) 1996-2002 Intel Corporation. All rights reserved.
The license is provided to Recipient and Recipient’s Licensees under the following
terms: Redistribution and use in source and binary forms of the Software, with or
without modification, are permitted provided that the following conditions are met:
Redistributions of source code of the Software may retain the above copyright
notice, this list of conditions and the following disclaimer. Redistributions in binary
form of the Software may reproduce the above copyright notice, this list of
conditions and the following disclaimer in the documentation and/or other
materials provided with the distribution. Neither the name of Intel Corporation nor
the names of its contributors shall be used to endorse or promote products derived
from this Software with out specific prior written permission. Intel hereby grants
Recipient and Licensees a non-exclusive, worldwide, royalty-free patent license
under Licensed Patents to make, use, sell, offer to sell, import and otherwise transfer
the Software, if any, in source code and object code form. This license shall include
changes to the Software that are error corrections or other minor changes to the
Software that do not add functionality or features when the Software is incorporated
in any version of a operating system that has been distributed under the GNU
General Public License 2.0 or later. This patent license shall apply to the combination
of the Software and any operating system licensed under the GNU Public License
version 2.0 or later if, at the time Intel provides the Software to Recipient, such
66
Sun Control Station—Administrator Manual • September 2003
addition of the Software to the then publicly available versions of such operating
system available under the GNU Public License version 2.0 or later (whether in gold,
beta or alpha form) causes such combination to be covered by the Licensed Patents.
The patent license shall not apply to any other combinations that include the
Software. No hardware per se is licensed hereunder.
THIS SOFTWARE IS PROVIDED BY THE COPYRIGHT HOLDERS AND
CONTRIBUTORS “AS IS” AND ANY EXPRESS OR IMPLIED WARRANTIES,
INCLUDING, BUT NOT LIMITED TO, THE IMPLIED WARRANTIES OF
MERCHANTABILITY AND FITNESS FOR A PARTICULAR PURPOSE ARE
DISCLAIMED. IN NO EVENT SHALL INTEL OR ITS CONTRIBUTORS BE LIABLE
FOR ANY DIRECT, INDIRECT, INCIDENTAL, SPECIAL, EXEMPLARY, OR
CONSEQUENTIAL DAMAGES (INCLUDING, BUT NOT LIMITED TO,
PROCUREMENT OF SUBSTITUTE GOODS OR SERVICES; LOSS OF USE, DATA,
OR PROFITS; OR BUSINESS INTERRUPTION) HOWEVER CAUSED AND ON
ANY THEORY OF LIABILITY, WHETHER IN CONTRACT, STRICT LIABILITY OR
TORT (INCLUDING NEGLIGENCE OR OTHERWISE) ARISING IN ANY WAY OUT
OF THE USE OF THIS SOFTWARE, EVEN IF ADVISED OF THE POSSIBILITY OF
SUCH DAMAGE.
Apache License (Struts and Tomcat)
The Apache Software License, Version 1.1
Copyright (c) 2000 The Apache Software Foundation. All rights reserved.
Redistribution and use in source and binary forms, with or without modification, are
permitted provided that the following conditions are met:
1. Redistributions of source code must retain the above copyright notice, this list of
conditions and the following disclaimer.
2. Redistributions in binary form must reproduce the above copyright notice, this
list of conditions and the following disclaimer in the documentation and/or other
materials provided with the distribution.
3. The end-user documentation included with the redistribution, if any, must
include the following acknowledgment:
“This product includes software developed by the Apache Software Foundation
(http://www.apache.org/).”
Alternately, this acknowledgment may appear in the software itself, if and
wherever such third-party acknowledgments normally appear.
Appendix A
Licenses
67
4. The names “Apache” and “Apache Software Foundation” must not be used to
endorse or promote products derived from this software without prior written
permission. For written permission, please contact [email protected].
5. Products derived from this software may not be called “Apache”, nor may
“Apache” appear in their name, without prior written permission of the Apache
Software Foundation.
THIS SOFTWARE IS PROVIDED “AS IS” AND ANY EXPRESSED OR IMPLIED
WARRANTIES, INCLUDING, BUT NOT LIMITED TO, THE IMPLIED
WARRANTIES OF MERCHANTABILITY AND FITNESS FOR A PARTICULAR
PURPOSE ARE DISCLAIMED. IN NO EVENT SHALL THE APACHE SOFTWARE
FOUNDATION OR ITS CONTRIBUTORS BE LIABLE FOR ANY DIRECT,
INDIRECT, INCIDENTAL, SPECIAL, EXEMPLARY, OR CONSEQUENTIAL
DAMAGES (INCLUDING, BUT NOT LIMITED TO, PROCUREMENT OF
SUBSTITUTE GOODS OR SERVICES; LOSS OF USE, DATA, OR PROFITS; OR
BUSINESS INTERRUPTION) HOWEVER CAUSED AND ON ANY THEORY OF
LIABILITY, WHETHER IN CONTRACT, STRICT LIABILITY, OR TORT
(INCLUDING NEGLIGENCE OR OTHERWISE) ARISING IN ANY WAY OUT OF
THE USE OF THIS SOFTWARE, EVEN IF ADVISED OF THE POSSIBILITY OF
SUCH DAMAGE.
This software consists of voluntary contributions made by many individuals on
behalf of the Apache Software Foundation. For more information on the Apache
Software Foundation, please see <http://www.apache.org/>.
Portions of this software are based upon public domain software originally written
at the National Center for Supercomputing Applications, University of Illinois,
Urbana-Champaign.
Java™ 2 Platform, Standard Edition
(J2SE™) License
Java™ 2 Platform, Standard Edition (J2SE™) Specification (“Specification”)
Version: 1.4.1
Status: FCS
Release: September 16, 2002
Copyright 2002. Sun Microsystems, Inc. 4150 Network Circle, Santa Clara, California
95054, U.S.A All rights reserved.
68
Sun Control Station—Administrator Manual • September 2003
Notice; Limited License Grants
Sun Microsystems, Inc. (“Sun”) hereby grants you a fully-paid, non-exclusive,
non-transferable, worldwide, limited license (without the right to sublicense), under
the Sun’s applicable intellectual property rights to view, download, use and
reproduce the Specification only for the purpose of internal evaluation, which shall
be understood to include developing applications intended to run on an
implementation of the Specification provided that such applications do not
themselves implement any portion(s) of the Specification.
Sun also grants you a perpetual, non-exclusive, worldwide, fully paid-up, royalty
free, limited license (without the right to sublicense) under any applicable
copyrights or patent rights it may have in the Specification to create and/or
distribute an Independent Implementation of the Specification that: (i) fully
implements the Spec(s) including all its required interfaces and functionality; (ii)
does not modify, subset, superset or otherwise extend the Licensor Name Space, or
include any public or protected packages, classes, Java interfaces, fields or methods
within the Licensor Name Space other than those required/authorized by the
Specification or Specifications being implemented; and (iii) passes the TCK
(including satisfying the requirements of the applicable TCK Users Guide) for such
Specification. The foregoing license is expressly conditioned on your not acting
outside its scope. No license is granted hereunder for any other purpose.
You need not include limitations (i)-(iii) from the previous paragraph or any other
particular “pass through” requirements in any license You grant concerning the use
of your Independent Implementation or products derived from it. However, except
with respect to implementations of the Specification (and products derived from
them) that satisfy limitations (i)-(iii) from the previous paragraph, You may neither:
(a) grant or otherwise pass through to your licensees any licenses under Sun’s
applicable intellectual property rights; nor (b) authorize your licensees to make any
claims concerning their implementation's compliance with the Spec in question.
For the purposes of this Agreement: “Independent Implementation” shall mean an
implementation of the Specification that neither derives from any of Sun's source
code or binary code materials nor, except with an appropriate and separate license
from Sun, includes any of Sun's source code or binary code materials; and “Licensor
Name Space” shall mean the public class or interface declarations whose names
begin with “java”, “javax”, “com.sun” or their equivalents in any subsequent
naming convention adopted by Sun through the Java Community Process, or any
recognized successors or replacements thereof.
This Agreement will terminate immediately without notice from Sun if you fail to
comply with any material provision of or act outside the scope of the licenses
granted above.
Appendix A
Licenses
69
Trademarks
No right, title, or interest in or to any trademarks, service marks, or trade names of
Sun or Sun’s licensors is granted hereunder. Sun, Sun Microsystems, the Sun logo,
Java, J2SE and the Java Coffee Cup Logo are trademarks or registered trademarks of
Sun Microsystems, Inc. in the U.S. and other countries.
DISCLAIMER OF WARRANTIES
THE SPECIFICATION IS PROVIDED “AS IS”. SUN MAKES NO
REPRESENTATIONS OR WARRANTIES, EITHER EXPRESS OR IMPLIED,
INCLUDING BUT NOT LIMITED TO, WARRANTIES OF MERCHANTABILITY,
FITNESS FOR A PARTICULAR PURPOSE, OR NON-INFRINGEMENT, THAT THE
CONTENTS OF THE SPECIFICATION ARE SUITABLE FOR ANY PURPOSE OR
THAT ANY PRACTICE OR IMPLEMENTATION OF SUCH CONTENTS WILL NOT
INFRINGE ANY THIRD PARTY PATENTS, COPYRIGHTS, TRADE SECRETS OR
OTHER RIGHTS. This document does not represent any commitment to release or
implement any portion of the Specification in any product.
THE SPECIFICATION COULD INCLUDE TECHNICAL INACCURACIES OR
TYPOGRAPHICAL ERRORS. CHANGES ARE PERIODICALLY ADDED TO THE
INFORMATION THEREIN; THESE CHANGES WILL BE INCORPORATED INTO
NEW VERSIONS OF THE SPECIFICATION, IF ANY. SUN MAY MAKE
IMPROVEMENTS AND/OR CHANGES TO THE PRODUCT(S) AND/OR THE
PROGRAM(S) DESCRIBED IN THE SPECIFICATION AT ANY TIME. Any use of
such changes in the Specification will be governed by the then-current license for the
applicable version of the Specification.
Limitation of Liability
TO THE EXTENT NOT PROHIBITED BY LAW, IN NO EVENT WILL SUN OR ITS
LICENSORS BE LIABLE FOR ANY DAMAGES, INCLUDING WITHOUT
LIMITATION, LOST REVENUE, PROFITS OR DATA, OR FOR SPECIAL, INDIRECT,
CONSEQUENTIAL, INCIDENTAL OR PUNITIVE DAMAGES, HOWEVER
CAUSED AND REGARDLESS OF THE THEORY OF LIABILITY, ARISING OUT OF
OR RELATED TO ANY FURNISHING, PRACTICING, MODIFYING OR ANY USE
OF THE SPECIFICATION, EVEN IF SUN AND/OR ITS LICENSORS HAVE BEEN
ADVISED OF THE POSSIBILITY OF SUCH DAMAGES.
70
Sun Control Station—Administrator Manual • September 2003
You will indemnify, hold harmless, and defend Sun and its licensors from any claims
arising or resulting from: (i) your use of the Specification; (ii) the use or distribution
of your Java application, applet and/or clean room implementation; and/or (iii) any
claims that later versions or releases of any Specification furnished to you are
incompatible with the Specification provided to you under this license.
Restricted Rights Legend
U.S. Government: If this Specification is being acquired by or on behalf of the U.S.
Government or by a U.S. Government prime contractor or subcontractor (at any
tier), then the Government’s rights in the Software and accompanying
documentation shall be only as set forth in this license; this is in accordance with
48 C.F.R. 227.7201 through 227.7202-4 (for Department of Defense (DoD)
acquisitions) and with 48 C.F.R. 2.101 and 12.212 (for non-DoD acquisitions).
Report
You may wish to report any ambiguities, inconsistencies or inaccuracies you may
find in connection with your use of the Specification (“Feedback”). To the extent that
you provide Sun with any Feedback, you hereby: (i) agree that such Feedback is
provided on a non-proprietary and non-confidential basis, and (ii) grant Sun a
perpetual, non-exclusive, worldwide, fully paid-up, irrevocable license, with the
right to sublicense through multiple levels of sublicensees, to incorporate, disclose,
and use without limitation the Feedback for any purpose related to the Specification
and future versions, implementations, and test suites thereof.
(LFI#116987/Form ID#011801)
Appendix A
Licenses
71
72
Sun Control Station—Administrator Manual • September 2003