1
9. MAINTENANCE
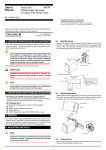
[Adjusted volume by adjustment switch]
One click changes about 0.005% of the output range.
The product starts running immediately when the power is turned on;
however, it needs 10 to 15 minutes of warm-up before it meets the
specified performance.
7.3.1 Adjusting output using the switches on the front panel
(1) Zero adjustment of output-1
Turn the selection switch to “1.” Rotate the adjustment switch
clockwise to increase the output, and counterclockwise to decrease the output.
(2) Span adjustment of output-1
Turn the selection switch to “2.” Rotate the adjustment switch
clockwise to increase the output, and counterclockwise to decrease the output.
Output 2 can be adjusted by the same operations as above.
(3) Zero adjustment of output-2
Turn the selection switch to “3.” An adjustment switch adjusts.
(4) Span adjustment of output-2
Turn the selection switch to “4.” An adjustment switch adjusts.
9.1
●
●
●
●
9.2
Calibration Apparatus
A DC voltage/current standard (Yokogawa 7651 or the equivalent)
A digital mutimater (Yokogawa 7561 or the equivalent)
A precision resistor of 250 ± 0.01%, 1 W
A setting tool for adjustment
(See Section 7.2, “Communication Connector.”)
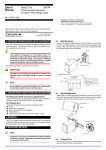
Calibration Procedure
(1) Connect the instruments as shown below. First adjust the output-1
signal and then the output-2 signal.
(2) Use the DC voltage/current standard and apply input signals
equivalent to 0, 25, 50, 75, and 100% of the input span to the distributor. When “with square root extractor” is selected, apply input
signals equivalent to 0, 6.25, 25, 56.25, and 100% of the input
span to the distributor.
(3) Check to see the corresponding output voltages are 0, 25, 50, 75,
and 100% respectively and within the specified accuracy rating.
“R” is used for current output.
● If the output signals are out of the accuracy rating range, adjust
the output signal level through a setting tool (VJ77 Parameter Setting Tool or JHT200 Handy Terminal), or using the selection
switch and adjustment switch on the front panel.
For adjustment through a setting tool, see each user's manual of
setting tool, and Chapter 10, “List of Parameters.” For adjustment
using the switches on the front panel, see Section 7.3, “Selection
Switch and Adjustment Switch.”
VJ77 user's manual: “VJ77 PC-based Parameter Setting Tool” (IM
77J01J77-01E)
JHT200 user's manual: “JHT200 Handy Terminal” (IM JF81-02E).
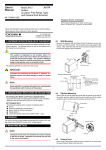
7.3.2 Adjusting input using the switches on the front panel
When performing the zero/span adjustment of input, be sure to rotate
the adjustment switch counterclockwise to reset the adjusted value at
first.
(1) Zero adjustment of input
Turn the selection switch to “5.” Rotate the adjustment switch
clockwise to adjust the input read value, and counterclockwise to
reset the adjusted value.
(2) Span adjustment of input
Turn the selection switch to “6.” Rotate the adjustment switch
clockwise to adjust the input read value, and counterclockwise to
reset the adjusted value.
IMPORTANT
● Make sure to turn the selection switch back to the
position "0" after each adjustment. The positions other
than "0" mean the adjustment modes, and it may cause
a wrong operation.
● When the selection switch is turned to the positions
other than "0", setting through the setting tool is
impossible.
Input
With SINK current
Power supply
DC voltge/
current
standard
4
L
7
5
N
8
GND
8
7
6
5
9
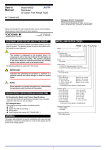
8. SETTING PARAMETERS
4
DC voltge/
current
standard
5
6
Set the parameters through a PC (VJ77 Parameter Setting Tool) or the
Handy Terminal. For details how to set, see Chapter 10, “List of Parameters”, User's manual “VJ77 PC-based Parameter Setting Tool”
(IM 77J01J77-01E), or User's manual “JHT200 Handy Terminal” (IM
JF81-02E). The description in the [ ] indicates the parameters.
8.1
Without SINK current
9
Output-2
10
R
11
Digital
multimater
R: 250 precision resistor
for current output
Setting Square Root Extractor
3
10 11
1
Output-1
2
1
R
2
Digital
multimater
R: 250 precision resistor
for current output
Set “with square root extractor” or “without square root extractor” in
[D14: LINEARIZE]. “SQR” for “with square root extractor” and “OFF”
for “without square root extractor.”
8.2
Setting Low-cut Point
Output signal (Y)
Set a numeric value in [D15:LOW CUT] when “with square root extractor” is selected.
Setting range: within 0.3 to 100% of the input range (setting resolution:
0.1%)
Y=X
Hysteresis
(Fixed to 0.2%)
Low-cut point
Input signal (X)
3
IM 77J03A01-02E
2nd Edition May 21, 2004-00