1
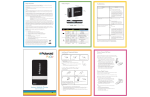
English For more information, consult the user manual on the included CDROM. Product Overview Front View 1 2 3 4 5 6 7 8 9 10 1. Shutter button 2. Power button 3. Speaker 4. Self-timer LED 5. Flash 6. Focus switch 7. Lens 8. USB terminal 9. Microphone 10. DC IN 9V terminal English Rear View 1 2 3 4 5 6 7 8 9 10 11 16 1. LCD display 2. Paper tray door latch 3. Zoom in button Zoom out button 4. Status LED 5. Mode button 6. Menu button 7. Up button Display button 8. OK Set button 9. Photo exit slot 15 14 13 12 10. Right button Flash mode button 11. Print button 12. Hand strap holder 13. Down button Delete button 14. Left button Self-timer button 15. Tripod socket 16. Battery / SD card door English Getting Started 1. Attach the camera’s hand strap as shown in the illustration. 2. Open the battery/SD card door. 3. Insert the battery in the correct orientation as shown in the illustration. 4. Insert an SD/SDHC memory card (Optional). The camera has 32MB internal memory (15MB available for image storage), but you can load an SD/ SDHC memory card to expand the camera’s memory capacity. Be sure to format the memory card with this camera before its initial usage. 5. Close the battery/SD card door and make sure it is locked securely. Charging the Battery The AC adapter charges the battery and also powers the camera. Make sure that the camera is turned off and the battery is inserted before starting. 1. Insert one end of the AC adapter into the DC IN 9V terminal of the camera. 2. Insert the other end of the AC adapter into a wall outlet. The status LED is red when charging and is green when charging is complete. Charging time varies according to the ambient temperature and the age of the battery. English Installing Polaroid PoGo™ Premium ZINK Paper™ Insert the photo paper before printing images. 1. Slide the latch on the paper tray door as shown in the illustration. 2. Unwrap the 10-pack of Polaroid PoGo™ Premium ZINK Paper™. 3. Slide the 10-pack of Polaroid PoGo™ Premium ZINK Paper™ into the paper tray. Make sure the ZINK Smart Sheet™ is placed and loaded with the bar code face down. Shiny side of paper faces up. 4. Close the paper tray door. The ZINK Smart automatically eject. Sheet™ will Turning the Camera ON and Off 1. Press and hold the button to turn the camera on. 2. Pressing the button again and the camera will shut off. English Choosing your Language Specify what language in the menus and messages are to be displayed on the LCD display. 1. Toggle the MODE button, and set the camera mode to [ button. 2. Press the MENU button. 3. Select the [Setup] at the end of the Menu with the c / d buttons, and press the OK button. 4. Select [Language] with the c / d buttons and press the OK button. 5. Select the displayed language with the e / f / c / d buttons and press the OK button. The setting will be stored. 6. To exit from the [Setup] menu, press the MENU button. ] or [ ]; or press the 7 Taking a Picture Your camera is equipped with a 3.0" full color TFT LCD display to help you compose images, playback recorded images/video clips or adjust menu settings. 1. Press the button to turn the power on. 2. Toggle the MODE button, and set the camera mode to [ ]. Set the focus switch to [ O ] if you want to capture a close-up image. Toggle the abutton to select the appropriate flash mode setting. 3. Compose your image in the LCD display. Pressing the + button zooms in on the subject, and enlarges the subject on the LCD display. Pressing the - button provides a wider angle image. 4. To take a picture press the shutter button. English Printing an Image 1. Press the button to enter the Print mode. 2. Select the image that you want to print with the e / f buttons. 3. Set the number of prints with the c / d buttons, and press the OK button. By default the print quantity is 0. 4. Select [Print] with the c / d buttons, and press the OK button. Select [Reset] the camera returns to print preview display without saving the settings. Press the MENU button to exit print setting, and the camera returns to print preview display. After the printing process is complete, the camera returns to print preview display. 5. Press to exit print setting, go back to Capture / Movie / Playback mode. That’s all it takes! For more information on how to use your new digital camera, please refer to your user guide found in the enclosed CD-ROM or visit www.polaroid.com. Please install Adobe® Acrobat® ReaderTM in order to read the user guide. "Polaroid", "Polaroid and Pixel", and "Polaroid PoGo" are trademarks of Polaroid Corporation.