1
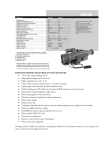
Use - This appliance is intended to be used in household and similar
applications such as
- staff kitchen areas in shops, offices and other working environments
- farm houses
- by clients in hotels, motels and other residential type environments
- bed and breakfast type environments.
Service
Refer all servicing to qualified personal.
Specifications
220-240V~ AC 50Hz 125 Watts
Warranty
This product is covered by a 12 month repair or replacement warranty
with proof of purchase. Return any faulty appliance to the retailer.
If for any reason the appliance does not function correctly or shows
signs of damage please return it immediately to the retailer or contact
the help line.
New Zealand call toll free 0508 ASIAPAC (274 2722)
Australia call +64 9 974 9206
Distributed by
Asia Pacific Brands Limited
PO Box 113001 Broadway
Newmarket, 1149
Auckland, New Zealand
STAINLESS RANGE HOOD
Model: MA0035RH
READ AND FOLLOW THESE INSTRUCTIONS. RETAIN FOR FUTURE REFERENCE
7
Features
Stainless steel
Three baffle grill filters
AC centrifugal fan
760m3/h air flow
125 watt power
Charcoal filters
Internal plastic oil cup
Front LED lamps – 2 x 2 watt
Operation Guide
Power Connection
Connect the supply plug to an earthed 220-240V ~ 50Hz socket outlet.
Operation Guide
Once connected and installed correctly simply select the desired air
extraction speed (Low – Medium – High) and light if required. The exhaust
fan will drag the cooking fumes and remove via the air vents leaving your
kitchen odour free. Always disconnect from the power supply if not using
for any length of time.
Parts Details
Bracket
Inner Duct
Outer Duct
Outlet Pipe (not supplied, you will
Need to purchase separately)
Air Outlet
Hood Body
Control Panel
Filters
1
Warning! Gas Flame - Ensure there are pots or pans on the gas cooker
elements when turned on so that any naked flame does not present a
hazard when the range hood is on.
Warning! Do not leave unattended pots or pans when frying. Oil may
overheat and ignite causing serious fire hazard. Re used oil creates a
greater risk of fire.
Warning! Never flame - cook food under this range hood.
Warning! Do not let grease build up on the appliance or filters as there
may be a risk of fire.
Warning! Ensure adequate ventilation.
Warning! Ensure the wall the appliance is fitted to can sustain the
weight of the range hood.
Warning! Do not use the top of the hood to store items.
Warning! Children
This appliance is not intended for use by persons (including, children)
with reduced physical, sensory or mental capabilities, or lack of
knowledge, unless they have been given supervision or instruction
concerning safe use of the appliance by a person responsible for
their safety. Young children must be supervised to ensure that they
do not play with the appliance. Safely dispose of any plastic bags or
other packaging that may present a hazard to young children of
suffocation or choke hazard.
Safety
For household indoor use only, do not use outdoors. Not for
commercial use.
Always allow a gap around the appliance and do not cover the
appliance.
Warning! Moisture
Do not immerse this appliance in any liquid. Do not splash the
appliance with water.
Power Cord
Do not abuse or damage the supply cord. If for any reason the cord
is damaged, it must be replaced by the manufacturer, its service
agent or a similarly qualified person in order to avoid a hazard. A
replaceable cord must be replaced with an authorised replacement
from an authorized service agent.
6
Installation(Note: Outlet Pipe is not supplied, you will need
to purchase separately)
Warning ! The hood should be installed by a suitably qualified person.
All fixing screws, nuts and bolts required are supplied.
Note. The flexible Outlet Pipe is not supplied with this rangehood unit
BUT must be included in installation, please purchase from the retailer.
The stainless range hood is attached with charcoal filters, on the
sides of the motor as below. To replace the charcoal filters please
see instructions below. Replacement charcoal filters can be
purchased from the retailer.
Height Recommendations
Gas Cooker - The unit should be fitted so that the lower edge of the hood is
approximately 75cm above the cooking plate surface minimum.
Electric Cooker - The unit should be fitted so that the lower edge of the
hood is approximately 65cm above the cooking plate surface minimum.The
hood should not be more than 80cm above the cooker surface to maintain
efficiency.
Step 1. Fix the outlet pipe to the hood as shown (ST 3.9 x 10 screw)
A
B
!
Important Safety Instructions
Before using this appliance please read and fully understand the
safety directions in this manual. Ensure that you know how to operate
the appliance. All electrical equipment presents a risk to the end user.
We ask that you use this appliance in a sensible safe manner in
accordance with the instructions supplied for your own safety.
If for any reason the appliance does not function correctly or shows
signs of damage please return it immediately to the retailer or contact
the help line.
Step 2. Note. The unit is supplied with a wall bracket and a bracket
that attaches to the Inner Duct. The wall bracket is secured to the
wall and the hood then simply hooks onto the wall bracket when
assembled.
To fit the hood bracket to the inner duct align the inner duct holes to
the wall bracket holes and secure together (M4 Screw)
New Zealand call toll free 0508 ASIAPAC (274 2722)
Australia call +64 9 974 9206
5
2
Step 3. Insert the inner duct cover into the outer duct cover
Step 7. Re-install the hood. Ensure the hood is level and at the
desired height. Raise the outer duct cover, fit the exit duct
into place, lower the outer duct cover.
Cleaning
Step 4. Fit the duct cover to the hood body (M4 Screws)
Step 5. Attach the wall bracket to the wall
Always disconnect the Range Hood from the power supply when
cleaning.
Do not use harsh abrasives, solvents or scouring material as they
may damage the metal or plastics. Warning! Do not allow water to
enter the range hood.
Casing
Wipe the outer surface with a damp cloth and dry with a dry cloth.
Filters
Warning! Do not wash the charcoal filters. Replace with authorised
replacements periodically. Replacement charcoal filters are sold in
stores.
Clean the outer filters once a week to maintain the efficiency of the
hood.
Remove the filters by pressing the release button. Wash in hot water
with a mild detergent and rinse clean. Warning! Allow to completely
dry before re-installing into the hood.
Expanding Tube
5x50
Metal Screw
Hook
230 B
256
A
Internal Plastic Oil Cup
Step 6. Hang the complete range hood on the wall bracket. Ensure
it is level.
Raise the outer duct cover and mark the position of the exit duct.
Remove the hood and complete the exit duct venting hole.
3
The stainless range hood has an internal plastic oil cup attached onto
the motor housing. This is clipped onto the motor housing by clicking
in the ends of the plastic oil cup onto the motor. From time to time the
internal plastic oil cup should be cleaned as there will be a build up
of oil into the plastic oil cup. To remove the internal plastic oil cup,
simply remove the baffle grill filters by pressing the release button.
Unclick the plastic oil cup from the motor housing by pulling off the
2 ends which are clicked onto the motor housing. Wash in hot water
with a mild detergent and rinse clean. Warning! Allow to completely
dry before re-installing back onto the motor housing. To re-install
simply click back the plastic oil cup onto the motor housing.
Re-insert the baffle grill filters.
4