Download user manual
Transcript
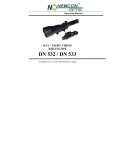
DISTINGUISHING FEATURES OF THE SENTINEL
• Two-color range finding reticle
• High quality image and resolution
• High magnification, 2.5x or 3x
• Close observational range of focus - 5 meters (5 yards)
• Lightweight and extremely durable titanium body
• Built-in high-power PULSE non-hazardous IR illuminator with beam focus
• Incremental reticle brightness adjustment
• IPX4 rating against water intrusion
• Precision internal windage/elevation adjustment
• Ergonomic design
• Quick power-up
• Vertical positioning of the battery ensures uninterrupted power supply when shooting
• Remote stabilized power supply
• ECLIPSE protective flip-up objective lens cover
• Weaver MIL-STD-1913 rail
• Protective carrying case
• Remote control with secure attachment
• Photo and video adaptable
Warning: Failure to follow the instructions and guidelines outlined in this instruction manual can cause damage to the
scope, and it will void any applicable warranty.
OPERATING INSTRUCTIONS
The SENTINEL night vision riflescope is intended for observation and shooting at dusk or during
nighttime hours. It is a passive starlight device, and in most conditions does not require an artificial
or IR light source. The scope is built with a high performance Gen1 image intensifier tube. The
built-in IR illuminator enhances a viewing ability in environments of absolute darkness. Power
supply, with the voltage stabilization, works up to 70 hours using 2 AA batteries. Low batteries do
not affect aiming ability. Additional remote stabilized power supply was designed for optimized
power consumption, which ensures a consistent aiming point in conditions of continuous power
draw or drop in temperature.
The SENTINEL is a universal night vision scope, which is ideal for night observation and hunting.
USING THE SENTINEL
The SENTINEL was designed to provide many years of reliable service. To ensure longevity and
performance, it is necessary to follow all procedures and guidelines outlined in this manual.
Warning:
The SENTINEL is not recommended for use with cartridges producing recoil rating higher than
3700 joules or calibers in excess of 7.62/.300. The manufacturer's warranty will be voided if damage
is caused by caliber cartridges greater than 7.62/.300, hand made cartridges or shooting from a
smooth-bore barrel.
•
•
•
•
•
•
•
•
Do not remove the lens cap in a lit area if the scope has been activated or if the eyepiece is
emitting a green glow.
Exposure to bright light can damage the image intensifier tube (IIT).
Do not remove the objective lens cover in a lit area immediately after using the scope. It will
stay activated for 20 minutes after the unit has been turned off.
The scope has an IPX4 water resistance rating. It is water resistant and can be used in
inclement weather conditions.
Do not attempt to repair or disassemble the scope!
Clean the scope's optical surfaces only if necessary, and use caution. Remove dust and sand
by blowing air across the optic surface, then apply lens cleaning fluid for multi layered optics
onto a soft cloth or tissue and wipe carefully. Do not pour any fluid, including alcohol, onto
the lenses directly.
The scope can be used in temperatures ranging from -30°С to +40°С. However, when it is
brought indoors from cold temperatures, wait 3-4 hours before using the unit.
Consult a qualified gunsmith if there is difficulty attaching the scope firmly to a rifle or if
there is uncertainty about the right type of mount. The weapon mount can be deformed or
destroyed by shooting with a riflescope that is not mounted correctly.
•
Regular maintenance of the scope will help keep the device free from malfunctions and
untimely wearing of parts and connectors.
Failure to observe these warnings will void the manufacturer's warranty.
BATTERY INSTALLATION
•
Turn the knob of the battery compartment cover 90º counterclockwise (1) to match the red
dot on the knob with the red dot on the battery compartment cover.
• Remove the cover by raising it by its lug.
• Slide in two АА batteries so that the “+” and “-” match the polarity on the inner side of the
cover; rechargeable AA batteries may be used.
• Close the cover of the battery compartment cover and turn the knob of the cover
90º clockwise.
OPERATING THE SENTINEL
Warning: It is strongly recommended to test and operate the SENTINEL in dark conditions or
at night time.
•
•
•
•
•
•
•
•
Install the batteries according to the directions in the section entitled “BATTERY
INSTALLATION”.
Enter a dark environment.
Remove the objective lens cap by sliding it up on top of the objective lens (2).
Activate the scope by turning the power switch to the “ON” position (3); the indicator
will turn green.
A red indicator means that batteries are low and the scope will be working with the IR
illuminator turned on for 30 more minutes.
Select the color of the reticle, green or red, by pushing the button (5).
Adjust the reticle brightness by rotating the switch (4).
Please select an object of observation at a distance of approximately 100 meters (about
110 yards) away.
•
•
•
•
•
•
•
Set up the objective focus ring knob (6) to be aligned with the mark "100"; it will
become tighter as it reaches the mark, which is normal.
Focus on the selected object by rotating the eyepiece ring (7).
If needed, turn on the IR illuminator (8) by turning the switcher (3) to the “IR” position.
IR red LED indicator lights up.
Rotate the IR illuminator lens ring until the IR illuminator beam is focused.
If after all the settings are completed and the image is still not clear, despite the distance
and conditions do not rotate the eyepiece ring (7). Refocus by turning the objective lens
ring (6) only and adjusting the IR illuminator (8) beam focus.
To turn off the SENTINEL, simply turn off the scope and close the cover over the
objective lens.
After mounting the scope onto a rifle for the first time, zero it by following the
instruction in section SIGHTING OF THE SENTINEL.
Note: The SENTINEL and its IR can be activated using the remote control.
SIGHTING IN THE SENTINEL
Warning: Be sure to follow proper safety instructions provided by the weapon manufacturer or
vendor.
To test the scope in a lighted area, protect the intensifier by keeping the lens cover over the
objective lens of the scope. Regardless of being in the “ON” or “OFF” position, the IR
illuminator will not have any effect in a lighted environment.
Note: The sighting of the scope should be performed under the same environmental and
temperature conditions as the ones that the scope will be exposed to during its use.
In case when the aiming point (the center of the reticle) does not match the center of target,
adjust by turning the windage/elevation knobs (11) RIGHT & UP until the aiming point (the
center of the reticle) matches the center of target.
Take 3-4 control shots trying to be as accurate as possible aiming at the center of the target.
Examine the results. If the results are noticeably skewed to one of the sides from the center,
adjust by turning the windage/elevation adjustment knobs RIGHT & UP as needed. Repeat
control shots until the aiming point matches the center of target. Remember: one click equals 20
mm (3/4 inch) at a distance of 100 meters (110 yards).
RETICLE AS A RANGEFINDER
The range finder reticle in your SENTINEL was designed to assist you in determining the range
of your target.
The range can be determined using marks (chevrons) on horizontal line as well as bars on
vertical line of the reticle.
Note: To utilize this feature, the SENTINEL needs to be sighted at 50 meters (55 yards).
HORIZONTAL SCALE
If a 0.5 meter (1.6') wide target fits between the two closest center marks on the horizontal line
of the reticle, the target is 50 meters (55 yards) away.
If the same target fits between the marks located just beneath the horizontal line of the reticle,
the target is 100 meters (110 yards) away.
If the same target fits between the marks located above the horizontal line of the reticle, the
target is 25 meters (27 yards) away. Please see a drawing below.
VERTICAL SCALE
The four short horizontal bars are located on the main vertical line. If a 0.5 meter (1.6') high
target fits between the top marks and the bottom mark right below the horizontal line, the target
is 25 meters (27 yards) away.
The other two horizontal bars on the vertical line correspond to 50 meters (55 yards) and 100
meters (100 yards) accordingly.
Note: If the determined range is 100 meters (110 yards), aim at the center of the target using the
horizontal bar below the center crosshairs.
Note: It is possible to select the color of the reticle of the SENTINEL.
Red is best when used in clear viewing conditions. Green is preferable for use when viewing is
obscured.
USE OF THE REMOTE-CONTROL CONSOLE
The Sentinel is supplied with a remote-control console. The console has three buttons:
1) “ON” button (13) turns on/off the riflescope (fixed when pressed).
2) “IR” button (14) - turns on/off the built-in IR Illuminator (fixed when pressed).
3) “Quick start” button (15) - quick start-up of the riflescope and IR illuminator (the device
works only when the button is kept pressed). After this button is released, the riflescope turns
off, IR Illuminator and reticle go out, but tube's residual green glow remains for some time
afterwards.
INSPECTION
It is recommended to inspect the SENTINEL before each use for:
• Body condition; cracks, deep dents and corrosion are not acceptable.
• Check that the scope is firmly attached to the rifle.
• Objective lens, eyepiece and IR illuminator condition; cracks, finger marks, dirt, water
drops and other stains are not acceptable.
• Make sure not to use depleted batteries or batteries that show stains of electrolyte, salt or
acid leaks; these conditions may result in damage to the scope.
• Check that the power switches (3) and the reticle brightness knob (4) are functioning
normally.
• Check that the objective lens ring (6) and the eyepiece ring (7) are movable.
MAINTENANCE
It is recommended that technical maintenance should be performed on the SENTINEL at least
2 times a year; tasks for technical maintenance include:
To clean the exterior of the scope of dust, dirt and moisture using a dry tissue with a few drops
of gun oil or similar substance applied.
To clean the electrical contact lead located in the battery housing using pure alcohol.
To examine the lenses of the eyepiece, objective lens and IR illuminator and blow off sizable
particles of sand and dust; clean the lenses only if necessary.
Do not pour liquids directly onto the lens surface when cleaning; apply solution to a clean, dry
cloth and then proceed to clean the lens.
Warning: Please use extreme caution when handling hazardous substances, such as alcohol.
THE SENTINEL MAGNIFIER LENS 2.5x50
The NVRS magnifier lens attachment accessory (#29091) helps increase magnification of the
SENTINEL with an objective lens diameter of 50mm up to 1.75 times. Screw the magnifier lens
onto the objective lens of the scope according to the instruction manual for the “NVRS 2.5x50
Doubler”. Sight in the scope after the magnifier lens is attached due to movement of the reticle.
ADDITIONAL WEAVER MIL-STD-1913 RAILS
The SENTINEL has an additional Weaver rail (12) on the left side of the body. With the help of
this mount it is possible to install:
•
•
The Yukon IR Flashlight with mount (# 29072);
The Yukon Directional Microphone with NVRS adapter (# 27022).
STORAGE
Always keep the scope in its carrying case in a dry, well ventilated space. Storage temperature
should not be below +10°С (+50°F), and humidity no higher than 70%. Remove the batteries if
the scope will not be used for more than 1 month.
TROUBLESHOOTING
Listed below are some potential problems that may occur when using the SENTINEL. Carry
out the recommended checks and troubleshooting steps in the order listed. Please note that the
table does not list all of the possible problems. If the problem experienced with the scope is not
listed, or if the suggested action meant to correct it does not resolve the problem, please contact
the manufacturer.
Problem
The riflescope
does not turn on.
The red reticle is blurred
and can not be focused
with the eyepiece.
With a crisp reticle image,
the image of the target
at least 30m away
is blurred.
With a crisp reticle image,
the image of the target
at least 30m away
is blurred.
Possible cause(s)
The batteries have
been installed incorrectly.
The total battery charge
is less than 2.0 V.
Oxidized contact points in the
battery compartment due to
“leaky” batteries or contact
points becoming exposed to
a chemically reactive solution.
The eyepiece is not adjusted
correctly.
Corrective action
Reinstall the batteries
with the correct
orientation.
Install fresh batteries.
polarity
Clean the battery compartment,
focusing on the contact points.
Adjust the eyepiece according
to the instructions in the
“OPERATING
THE
SENTINEL” section.
The eyepiece is not adjusted Adjust the eyepiece according
correctly.
to the instructions in the
“OPERATING
THE
SENTINEL” section.
Dust and moisture are covering
the
outside optical surfaces.
Condensation collects on the
inside of the objective and the
eyepiece lenses, or is on the
optical
surfaces
of
the
electronicoptical converter, and may be
caused by the scope fogging
due to a rapid change in
temperature; for example, when
the scope is brought from a
cold into a warm environment.
Distinct black dots or The
dots
are
cosmetic
specks
blemishes resulting from IIT
Clean the lens surfaces with a
soft cotton tissue or cloth.
Let the unit dry by leaving it in
a warm environment for 4
hours.
No need to take corrective
action
on the screen while the
image is focused.
production processes and do or return the scope.
not interfere with the reliability
or performance of the scope;
the size of the dots are
specified in the technical
requirements for IIT's and the
scope itself.
The scope or the IR do
The scope was activated by Turn off the scope and the IR
not turn off via the remote control.
by using the remote control.
“ON/OFF”
switch on the scope.
The displacement of
The scope is not mounted Check that the scope is firmly
the reticle while shooting. securely.
attached to the mount and
make sure
that the same type and caliber
bullets are being used as when
the scope was initially sighted
in; if the scope was sighted in
during
the summer, and is now being
used in the winter, or vice
versa, a small displacement of
the aiming point is possible.
The scope does not focus. Wrong settings.
Adjust the scope according to
the instructions in the
“OPERATING
THE
SENTINEL” section and
check the eyepiece and
objective lens condition; if
necessary, clean the lenses of
dirt, dust, condensation, frost,
etc. to prevent fogging in cold
weather and apply a special
anti-fog solution.


