1
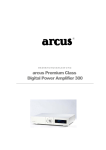
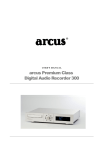
® USER’S MANUAL arcus Premium Class Digital Power Amplifier 300 D ear arcus customer, The “arcus” brand is synonymous with technically well-devised and highly innovative products. arcus opens up new perspectives which need to be experienced at close hand. Thank you for purchasing our DPA 300. We are delighted by your trust in our products. Your arcus team Contents SECTION Safety Information SECTION SECTION 1 1 7 Basic Function 14 Operation 15 2 Scope of Delivery 3 SECTION Environmental Protection Information 3 Troubleshooting SECTION 3 Operating Elements on the Front SECTION Installation 6 8 22 10 Technical Data SECTION 20 9 Terms and Conditions of Guarantee SECTION 5 Remote Control SECTION 5 4 Operating Elements on the Rear SECTION SECTION 8 23 11 Important Note 24 Accessories 24 6 10 SECTION Imprint 12 25 1 Section Safety Information Electrical devices are not toys Never let your children use electrical devices without supervision. Cells/rechargeble batteries can endanger life when swallowed. Therefore keep the device and batteries out of the reach of small children. If a battery has been swallowed, medical assistance must be sought immediately. Moisture and cleaning The device must be set up and operated in dry rooms only. Attention – this product is not waterproof. Do not immerse the device in water and do not allow it to make contact with water. Water seeping into the device can cause serious damage. Do not use any cleaning products that contain alcohol, ammonia, benzene or abrasive products, as these products may damage the device. The mains plug must be pulled out before the device is cleaned. To clean, only use a soft, dry cloth to wipe the surfaces of the device. Heat Do not expose the device to direct sunlight. Take care to ensure that the device is not exposed to any direct sources of heat, such as heating or an open fire. Ensure that the ventilation slits on the device are not obstructed. 1 Important information about hearing protection Caution: Your hearing is as important to us as it is to you. Therefore please be careful when using this device. The device has enormous power reserves and is capable of generating extreme volumes. If the device is used by children, take care to ensure that the device is not turned up too loud. Attention! Excessive volumes can cause irreparable damage in children and adults. SETTING A SAFE VOLUME LEVEL • When loud music is listened to on a continuous basis, your hearing gradually becomes used to this and gives you the impression that the volume is lower. • What appears normal to you can, however, be damaging in reality. • To protect yourself, set the volume to a low level. • Increase the volume slowly, until you can hear clearly and without effort. • Your hearing can undergo many types of damage, which cannot be reversed. • If you become aware of an ear complaint, please contact a doctor. 2 Additional safety instructions Do not allow any objects to fall onto, or any liquids to seep into the device. Place the device horizontally on a stable, even surface. Take care to ensure that the device’s cooling system is not impaired. Position the device so that the connections cannot be touched. When the device is exposed to low temperatures (during transportation, for example), it must only be switched on once it has reached room temperature and any condensation that may have formed has evaporated. The plug should be pulled out of the socket if the device is not in use for a while. Before operating the device again, ensure that there are no short-circuits at the connection points and that all connections are properly attached. The user should carry out no works on this device other than the measures described in this user’s manual. Apart from the manual interventions described in the user’s manual, no works of any kind must be performed on the device by the user. The device may only be opened by a qualified professional. Repairs and fuse changes must be carried out by a specialist repair shop. In the event of damage or if an irregular function is suspected, it is mandatory to pull out the plug immediately and have the device examined by a specialist repair shop. If you have sensitive furniture on which you wish to place the device, we recommend a neutral underlay in order to prevent potential colour staining by the device’s feet. Always switch off the device using the standby switch on the front before cutting it off from the electrical supply by activating the mains switch (on the rear of the housing) or pulling out the plug. If this occurs, pull the mains plug out of the socket and have the device examined by a professional. 3 2 Section Scope of Delivery When unpacking, check the system’s completeness in terms of: DPA 300 User’s manual Remote control (illustrated for demonstration purposes) and batteries (3 x AAA) Mains cable Environmental Protection Information P rofessional recycling Batteries and packaging materials have no place in domestic refuse. Batteries must be handed in at a collection point for used batteries. Conserve the environment by disposing of packaging material separately. T his product must not be disposed of via the normal household waste at the end of its useful life, but must be handed in at a collection point for the recycling of electrical and electronic devices. The symbol on the product, in the user’s manual or on the packaging recalls this fact. The materials can be used again according to their description. By reusing, recycling materials or using spent devices in any other form you make an important contribution to protecting our environment. Please ask your local municipality for information on the relevant disposal point. 4 3 Section Operating Elements on the Front 1 2 3 1. Control panel 2. Volume control 3. Remote window 4. Display 5 4 4 Section Operating Elements on the Rear Assignment of Cinch audio input ports 1. AUDIO INPUT PORTS 1-8 Your choice of high-volume devices such as tuners, CD players, tape decks etc. can be connected here. Record players cannot be connected as they require an extra amplifier stage in addition. However, special phono pre-amplifiers for record players can be connected to these inputs again. 2. AUDIO INPUT PORTS 9-10 Digital input for digital playback sources such as, for example, DAR 300 3. Record Out / Pre Out Assymetric pre-amplifier output. A output stage or an active loudspeaker with asymmetric inputs can be connected here. By switching the menu function (see item 4 Record page 19) you can also convert the device into a recording device. The RECORD input of a tape recorder, cassette recorder, minidisc player etc. is then connected to these ports. The respective audio signal of the selected input source then becomes active. 4. SPLIT In / Out A special device (equalizer, external tone control, surround decoder) can be connected to this input/output and thus looped into the signalling pathway. When using a surround decoder with your own volume control device please also pay attention to the special function “Unity Gain”, which is described in more detail under item 6.4 “Connecting to surround systems”. 6 5. 6. 7. Box right / Box left The loudspeaker is connected to these terminals. Please take care to ensure that the loudspeaker does not fall lower than a minimum impedance of 4 ohm. Also ensure that there is no short-circuit at this port, so that no damage results for the output stage. POWER SUPPLY SWITCH This is the amplifier’s principal mains connection switch. If the switch is ON the amplifier is connected with the electricity mains. Using the ON/OFF button on the front the amplifier can be switched to just standby, i.e. it is permanently supplied with electricity even when on standby. Please switch off the amplifier using the ON/OFF button on the front before cutting it off from the mains using the mains connection switch on the rear. POWER SUPPLY INPUT CORD The mains cable is inserted here When connecting the DPA 300 it is mandatory that you observe the following indications: • Never open the housing of the power supply unit. Your life is at risk from electrocution when the housing is open. There are no components to be cleaned or repaired inside the device. • Operate the device using only an earthed socket with 100-240V~/ 50-60 Hz alternating current. Information about your power supply ratings can be obtained from your local electricity provider. • Only use the supplied mains cable, or a derivative of identical construction. • The mains socket should be located in the vicinity of the device and within reach of the mains cable. AVOID a situation where you have to stretch the mains cable in order to reach the socket. • Arrange the cable of the DPA 300 so that it cannot be tripped over or trodden on. • Place no objects or furniture on the cable, in order to avoid damage. 7 5 Section Remote Control Volume control + Volume control – Rapid volume control + Rapid volume control – Display On/Off Mute Split Escape Mode Direct source selection On / Off Source selection + Volume control + On / Off Volume control - Source selection - 8 Inserting the batteries in the remote control Make sure that the polarities are correct. There should be no large objects blocking the way between the remote control and the DPA 300. Under normal circumstances the remote control should be used within a range of 6 metres, straight in front of the sensor and within a 30 degree range. To operate the device, direct the remote control towards the sensor window. There must be nothing blocking the way between the remote control and device. If the remote control sensor is exposed to direct sunlight, it may lose its reception function. In this case you should place the DPA 300 in a different location. If the remote control is not working or operating ranges are becoming shorter and shorter, you should check whether the remote control is still making contact or whether the batteries need to be changed. Never use batteries of different types together, or new batteries with used batteries. If the remote control is not going to be used for a while, remove the batteries in order to avoid damage due to battery fluid leakage. 9 6 Section Installation It is essential that you switch off the amplifier along with the rest of your system at all times when working on the cabling! Please take care to ensure that the loudspeaker does not fall lower than a minimum impedance of 4 ohm. Also ensure that there is no short-circuit at this port, so that no damage results for the output stage. Connecting the loudspeakers 1. Rotate the screwing terminal anti-clockwise until the cable opening becomes visible. 2. Insert the cable end into the opening and rotate the screwing terminal clockwise until the cable is secure. Attention! In doing so, make sure that each of the loudspeakers is correctly connected with the relevant amplifier output. Also pay attention to the correct polarity (+ -). 10 Connection examples What devices can be connected? The DPA 300 is designed as a straightforward high-volume amplifier. It can accommodate all audioelectronic devices that provide a linear analogue signal voltage between 0.2 Volt and 2 Volt. Examples of these devices: tuners, CD players with built-in DA converter, cassette decks, tape recorders etc. Effects devices such as equalizers, tone control amplifiers, surround decoders etc. can be connected to the twin SPLIT ports. Record players and microphones are not directly connectable. These devices require separate DA converters / pre- pre-amplifiers that amplify these devices’ very low volume to the input volume required by high-volume amplifiers like the DPA 300. The input ports The DPA 300 has 10 ports at its disposal. Inputs 9 and 10 are digital inputs. In addition, one of the SPLIT inputs is available as a special input. If this port is also used as an input, please take care to ensure that this input cannot be switched to the tape recorder outputs. 1. Connecting recording devices The DPA 300 has a Record output (16). Record inputs from cassette decks, tape recorders and the analogue inputs of a DAT / MD recorder can be connected here. For this purpose please switch on the Record function (see item 4 Record page 19) 2. Connecting external power amplifiers or an external subwoofer The DPA 300 has a volume-dependent output, the “Pre-Out”. This output is generally used to connect a power output stage or an active loudspeaker. For this purpose please switch on the Record function (see item 4 Record page 19) 3. Connecting an equalizer In order to integrate an equalizer in the signal pathway, the DPA 300 features a quartet of ports with the designation SPLIT. Connect the output of the equalizer with the INPUT ports and the input of the equalizer with the OUTPUT ports. In order now to integrate the equalizer in the signalling pathway, you simply need to press the SPLIT button on the DPA 300 or on the remote control. 4. Connecting to a surround system The DPA 300 offers the opportunity to integrate a surround decoder in your stereo system with ease. With a surround system, at least 5 independent loudspeakers generally need to be controlled. In order to enable you to use both principal loud speakers on the right and left channel without changing the plugs over, connect the surround decoder as follows: 11 You connect the input of the surround decoder with the ports at SPLIT OUT. The output ports for the principal channels left front and right front are connected with the ports at SPLIT IN. The SPLIT button is pressed and the principal loudspeakers are now connected with the surround decoder via the principal output stage. The output stages for the two rear channels and the middle channel are connected directly to the surround decoder. 12 In order to enable you to adjust the overall volume on the surround decoder, simply switch off the volume control on the DPA 300. The Unity Gain function can be activated by holding down the Split button. The following notification appears in the display: In order to activate the Unity Gain function, select “YES” by turning the volume control and hold the volume control down for about 5 seconds. ATTENTION! Activation means that the volume control is bypassed. The full volume is set when this function is switched on while music is playing. You can damage the loudspeakers this way. In addition, your hearing may be damaged due to the extreme volume. If you do not wish to activate the Unity Gain function, use the volume control to select “NO” and end the function by pressing the volume control. This adjustment option is only available to you if the Split button has been pressed on the pre-amplifier. “Split” lights up on the display as soon as Split is pressed. The amplifier is now set for surround operation. As soon as you press the “Split” button and cancel the split function again, the volume module becomes reactivated and you can control the principal loudspeakers’ playback volume on the DPA 300 again. If you switch the amplifier to Standby, for safety reasons the Unity Gain function is likewise switched off. 13 7 Basic functions 1. Switching DPA 300 on and off The central mains switch is located on the rear of the device above the mains plug. Turn this switch to ON (symbol I) once all components have been connected. On the remote control the device is put into standby mode via the button Fehler! Verweisquelle konnte nicht gefunden werden. and on the DPA 300 via the top-left On/Off button (both switch-on and standby). There are three operation statuses in total: 1) Switched off – the DPA 300 is not consuming electricity 2) Switched on – the DPA 300 is ready for operation 3) Standby – the DPA 300 is on standby and is consuming very little electricity. How to switch the device on and off and put it into standy mode: Switch on: PressFehler! Verweisquelle konnte nicht gefunden werden. Standby: Press Fehler! Verweisquelle konnte nicht gefunden werden. Switch off: Turn off mains switch on the rear 14 2. Operation First steps: Once all devices have been properly connected to the amplifier, turn on the mains switch on the rear of the device and press the “On/Off” button on the front of the device. You will hear a faint switch-on noise. Manually selecting the input source: Press the Input – and Input + buttons in order to select the desired audio source. Alternatively, you can also call up the input source directly via the remote control. Setting the main volume: You can increase or reduce the volume by turning the volume control, or pressing "VOL+" und "VOL-" on the remote control. The control range is -86dB to 0dB. Split Pressing briefly will switch the Split input on or off. Additionally, the Unity Gain function can be activated by a long press (hold). The following query appears in the display: In order to activate the Unity Gain function, select “YES” by turning the volume control and keep the volume control pressed down for about 5 seconds. ATTENTION! Activation means that the volume control is bypassed. The full volume is set when this function is switched on while music is playing. You can damage the loudspeakers this way. In addition, your hearing may be damaged due to the extreme volume. If you do not wish to activate the Unity Gain function, use the volume control to select “NO” and cancel the function by pressing the volume control. This adjustment option is only available to you if the Split button has been pressed on the pre-amplifier. “Split” lights up on the display as soon as Split is pressed. 15 Mute Mutes the input signal. The volume indicator appears as - - - dB on the display Escape Leave the menu / sub-menu items Display On/Off The display will automatically switch off about 6 seconds after the device has been switched off. Menu This button brings you to the menu. Alternatively, you can also press the volume control. 3. The Display Record function Active Split function Selected input Active Menu Structure Input name Volume 16 Menu Structure MAIN MENU BALANCE < ‐ ‐ ‐ > 0 dB BASIC VOLUME ‐ 70 dB BASS 0,0 dB TREBLE 0,0 dB INPUT LEVEL 0,0 dB INPUT NAME NAME: RECORD RECORD OFF BRIGHTNESS 100 % LANGUAGE DEUTSCH / ENGLISH FACTORY RESET NO 17 The desired menu item can be selected by turning the volume control. The menu item is marked with a red arrow in the process. You will arrive at the selected menu by pressing the volume control or pressing the menu button. Balance The channel balance can be adjusted using the volume control. The display shows to what degree the channels have been moved. Basic volume Opportunity to adjust the volume which will be automatically set when the full amplifier is switched on. Bass Bass increase or reduction by +/- 18dB in 1.8dB increments High frequencies High frequency increase or reduction by +/- 12dB in 1.5dB increments Input level Increase or reduction of the input level +/- 12dB in 1dB increments. The input can be selected using the Input- / Input+ buttons. Input name For easier identification, you can assign names to the individual inputs, e.g. CD player or DAR300. Press the volume control to arrive at the editing mode. 18 A letter or character can now be selected by turning the volume control. Press the volume control or the Input- / Input+ buttons to arrive at the next position; the selected character is applied and saved at the same time. Once the name has been set (max. 8 characters) you can leave the editing mode by pressing the Escape button. The other inputs can also be provided with a name by pressing the Input- / Input+ buttons. If you do not wish to assign additional names, you can leave the menu item by pressing Escape. Record The pre-amplifier output on the DPA 300 can be converted to a Record output. The Record function can be switched on and off by turning the volume control. You need to do this if you wish to connect a recording device (cassette deck, tape recorder, etc). Brightness The brightness of the DPA300 display can be adjusted in 4 stages (25% to 100%) by turning the volume control. Language German or English can be selected by turning the volume control. Basic setting The default status is restored by activating the basic setting. All adjusted values will be lost in the process. In order to activate the basic setting select “YES” using the volume control, and hold down the volume button for about 3 seconds. If you do not wish to activate the basic setting, you can leave the menu item again by pressing the Escape button or selecting “NO” and pressing the volume button. 19 8 Section Troubleshooting Reset system In rare cases, the amplifier or the display on the front of the device may not function as normal. Erroneous data transmissions / information in the amplifier may be the cause of this. Malfunctions of this type are remedied as follows: Pull out the mains plug, wait at least three minutes and then re-insert it in the socket. Problem: The device is not working, even though the mains switch is activated. Cause: No mains supply. Solution: Make sure that the mains plug is correctly inserted in the socket. Check whether the socket is conducting electricity. Problem: Display lights up, but no sound is played back Cause: Input connections are disrupted Solution: 1. Turn off the device at the mains switch. Make sure that all inputs and loudspeakers are correctly connected. Check whether there are any short-circuits anywhere. Switch on the device again. 2. Mute is activated. • Activate the Mute button. Volume control is on minimum. • Turn the volume up. Problem: “Temperature” is flashing on the display Cause: The device has overheated Solution: Switch off the device and wait a few minutes. Switch the device on again. Do not expose the device to direct sunlight. Take care to ensure that the device is not exposed to any direct sources of heat, such as heating or an open fire. Ensure that the ventilation slits on the device are not obstructed. 20 Problem: “DC-Offset” is flashing on the display Cause: There is an internal error Solution: Switch off the device and wait a few minutes. Switch the device on again. If “DCOffset” continues to flash on the display, please get in touch with an authorized arcus service partner. Problem: Device switches on, but display remains dark Cause: Display brightness is on “Off”. Solution: Press the Display button in order to adjust the brightness. Problem: Device does not react to commands from the remote control Cause: Batteries are too weak. Infrared sensor on the amplifier is obstructed Solution: Change batteries in the remote control. Remove object that is blocking the sensor. 21 9 Section Terms and Conditions of Guarantee arcus GmbH guarantees to the purchaser of this product that, under normal operating conditions, the product is free from material and processing detects. When claiming under the guarantee it is mandatory that the customer present the following documents and provide the following information. 1. The original purchase receipt showing date of purchase, name, address, serial number and model number of the product. 2. A detailed description of the defect. Note: A malfunction in the device does not automatically mean a defect. Before sending in the device contact our service hotline on + 49 (0)700 60 77 77 77 or send us a brief fault description via e-mail: [email protected]. In order to be able to claim our optimal guarantee and service performance, you have the option of registering. You will then also receive automatic updates on developments in your product and other products. All arcus products are subject to a full quality inspection before leaving the factory. However, should manufacturing and/or material defects emerge during normal use, we provide a 2-year guarantee on our products. You can extend your guarantee for electronic components to 3 years, and for loudspeakers to 5 years, by sending in the guarantee card and/or registering on our website (www.arcusvision.com - Contact / Registration). The guarantee period commences from date of purchase. The guarantee extension applies only for registered first-time buyers, and purchase must have taken place at an authorized arcus dealer. The guarantee will become invalid if a repair is carried out by a person or repair shop that is not authorized by arcus, or if the serial number is changed, removed or made illegible. Cases which do not fall under the guarantee: transport damage, and damage arising as a result of improper use or installation. There will be no extension of the guarantee period as a result of a performance under guarantee, and also not in the event of repaired or replaced parts. The provisions of the German product liability law and of comparable foreign regulations remain, insofar as they are indispensable, unaffected. We reserve the right to perform technical modifications for the purpose of advancement. 22 10 Section Technical Data Output: 2 * 250 Watt RMS an 4 Ohm Bandwidth: 1Hz - 45 kHz (+- 3dB) Distortion factor: < 0.02% Channel separation: > 85 dB (1 kHz) Signal-to-noise ratio: < 98 dBA Dynamics: >110dB Audio inputs analogue: 8 x Cinch Audio inputs digital: 2 x Cinch Input impedance: 47 kOhm Outputs: 1x Cinch Preamp Weight: 15 kg Dimensions (WxHxD): 440 x 88 x 380 mm Network voltages: 110-230 Volt; 50/60 Hz 23 11 Section Important Note We receive many enquiries concerning loudspeakers or playback devices recommended by us for our amplifiers. We therefore think you will be interested in reading our views on this. arcus amplifiers are NOT developed in order to function / resonate only with specific loudspeakers or CD players. arcus amplifiers are developed in order to amplify the music signal naturally. As long as your loudspeakers / playback devices follow the same principle, you will enjoy an outstanding sound experience at all times. : 24 12 Section Imprint Published by arcus GmbH Phone: +49 (0) 700 / 60 77 77 77 • Fax: +49 (0) 700 / 61 77 77 77 E-mail: [email protected] • http:// www.arcus-highend.de Errors and omissions reserved. arcus reserves the right to modify technical details without prior notice. arcus and the arcus logos are registered brands of arcus GmbH Reproduction, including reproduction of extracts, solely with the consent of arcus GmbH Fehler! Verweisquelle konnte nicht gefunden werden. 25