1
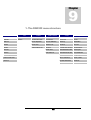
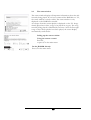
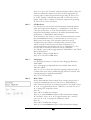
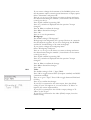
®
USER’S MANUAL
arcus Premium Class
Digital Audio Recorder 300
i
D
ear arcus Customer,
The “arcus” brands stands for technically well-designed, highly innovative products. arcus opens up
new perspectives which you simply have to experience for yourself. We congratulate you on the
purchase of a product from our company.
Your arcus Team
Table of Contents
I N T R O D U C T I O N
C H A P T E R
C H A P T E R
1
Safety instructions
1
Legal notice on copyright
2
Basic functions
13
1. Turning the DAR300 on and off
13
2. Play
14
C H A P T E R
C H A P T E R
2
Notice on environmental protection
C H A P T E R
C H A P T E R
Imprint
6
6
Installation
8
7
The DAR300 in a network
45
5
5
Remote control
1 1
Technical data
C H A P T E R
C H A P T E R
20
4
4
Connections and controls on the rear panel
1 0
Functions and settings
C H A P T E R
C H A P T E R
16
3
3
Introduction to the front panel keys
9
The DAR300 menu structure
C H A P T E R
C H A P T E R
8
9
ii
1 2
46
1
Chapter
Safety instructions
E
lectrical appliances should be kept out of the reach of children.
Never allow children to use electrical appliances unsupervised. Batteries can be
life threatening if swallowed. Ensure therefore that the appliance and batteries
are kept out of the reach of children. In the event of a battery being
swallowed, immediate medical attention must be sought.
The device may only be operated in dry rooms. Do not drop any objects onto
or spill any liquids into the device. If this happens, immediately remove the
mains plug from the socket and have the device checked by qualified technical
personnel.
The device is to be placed horizontally on a solid, even surface. Do not block
any ventilation openings. Position the device in such a way that any touching
of the connections (particularly by children) is avoided.
If the device has been exposed to low temperatures (e.g. during transport), do
not switch on the device until it has reached room temperature and any
condensation water has evaporated.
If the device is not to be used for longer periods, the device’s mains plug
should be removed from the socket.
Before cleaning the device, please remove the mains plug. The surfaces of the
device should only be wiped with a clean, dry cloth. Never use paint thinners,
pure alcohol or other strong cleaning agents or solvents.
Before switching the device back on, please ensure that there are no short
circuits at the contact points and that all connections are correctly linked.
Aside from the steps described in the User’s Manual, the user should not
undertake any other work on the device. The device may only be opened by
qualified technical personnel. Repairs and the replacement of fuses must be
done by a technical service centre.
1
In the event of damage or a suspicion that the device is not functioning
properly, immediately remove the mains plug and have the device checked by a
technical service centre.
Should you place the appliance on delicate furniture, we recommend that you
place a neutral pad under it to avoid staining from the base.
The device stores music and photos on an internal hard drive. Hard disks are
subject to a certain amount of wear. To prevent data loss, you should regularly
backup your data. arcus is not responsible for possible data loss!
arcus does not accept responsibility for damages caused by updates performed
improperly.
To prevent data loss, always switch the device off using the Standby button on
the front before you disconnect it from the mains supply by pressing the mains
switch (on the back of the housing) or pull out the mains plug.
Keep the device away from magnetic fields, e.g. unshielded speakers, which
can otherwise lead to data loss.
Legal notice on copyright
Intellectual property, including music, is subject to worldwide copyright
protection.
It is legal in most countries to create copies of legally acquired recording media
(e.g. CDs) or music files (e.g. from the Internet) for personal use.
It is prohibited to offer these copies commercially or to give them to a third
party.
Caution when downloading MP3 files from the Internet: Please make sure that
the files are properly licensed, i.e. that the provider also has rights to the
respective titles.
If you are not the originator yourself or you have not been grated the
appropriate rights of use by the originator or rights holder, you should note
that if you infringe on this right, there is a risk that beneficial owners may take
action against this possible criminal act and assert their rights.
2
2
Chapter
Notice on environmental
protection
P
rofessional Recycling Batteries and packaging materials do not belong
with household waste. Batteries must be taken to a collection point for old
batteries. Separate disposal of packaging material helps the environment.
This product cannot be disposed of as normal household rubbish at the end of
its life. It should be taken to a collection point for recycling electrical
appliances. The symbol on the product, the instruction manual or the
packaging gives advice on this. The materials are recyclable according to their
label. By recycling material or other forms of waste, you are making an
important contribution to protecting the environment. Please ask your local
government for the location of the nearest recycling point.
3
3
Chapter
Introduction to the front panel keys
1
2
3
4
1. CD tray
2. Control panel
3. Controller
4. Display
5. Remote window
4
5
4
Chapter
Connections and controls on the rear panel
German
English
S-Video
S-Video
Scart-Buchse für Anschluss an TV
Scart connection to connect to a TV
Video (FBAS)
Video (FBAS)
Analoge Ein- und Ausgänge
Analogue input and output
Digitale Ein- und Ausgänge
Digital input and output
Ethernet-Buchse für Anschluss an PC oder
Netzwerk-Hub
Ethernet connection to connect to a PC or
network hug
USB-Anschluss
USB connector
Netzschalter
Mains plug
Netzanschluss
Mains connection
5
5
Chapter
Remote control
6
German
English
Ein/Standby
On/Standby
Nummern- / Buchstabenblock
Number/letter block
Zurück zum Main Menu
Return to the main menu
Info
Info
z.Zt. noch nicht mit Funktion belegt
No function
Statusfenster aufrufen
Call up status window
OK / Auswahl bestätigen / eine Ebene Tiefer
OK / enter / one level deeper
Seitwärts-Scrollen / Im Menü zum
Vorherigen/nächsten Anfangsbuchstaben
springen
Scroll horizontally / Go to previous/next initial
Auswärts- / Abwärts-Scrollen
Scroll up / down
Zurück / eine Ebene höher / Kontektmenü
ausblenden
Back / one level higher / hide context menu
Kontektmenü einblenden
Show context menu
Wiedergabe
Play
Pause
Pause
Einen Titel zurück (Skip back)
One title back (skip back)
Einen Titel vor (Skip forward)
One title forward (skip forward)
Aufnahme
Recording
Stop
Stop
Aktuelle Playlist anzeigen
Display current playlist
Playmode wählen
Select play mode
Titel zur aktuellen Playlist hinzufügen
Add title to current playlist
Playlist löschen
Delete playlist
Putting batteries in the remote control
Make sure that the polarities are correct. There should be no large barriers between the remote
control and the DAR300.
Under normal conditions, the remote control should be used within a range of 6 metres,
in the direction of the sensor and in a area of 30 degrees. Point the remote control toward the
sensor window to operate the device. There should be no large barriers between the remote
control and the device.
The remote control sensor can lose its reception function if exposed to direct sunlight. In this
case, you should move the DAR300 to another location.
If the remote control does not work or the operating range becomes smaller and smaller, make
sure that the remote control still has contact or replace the batteries if necessary. Never mix
different battery types or new batteries with used batteries. To prevent damage from possible
battery fluid leaks, remove the batteries from the remote control, if not used for extended periods
of time.
7
6
Chapter
Installation
You should always switch off the DAR300 and
your other systems when working on the wiring!
To make sure that the DAR300 is working correctly, you should check
the time settings immediately after you first switch it on and correct if
necessary.
Use Cinch cables to connect the analogue inputs and outputs of the DAR300
to your Hi-fi amplifier. If using an amplifier with digital input and output, use
an appropriate cable to connect one of the digital inputs and outputs of the
DAR300 to the amplifier. If using a scart cable to connect the DAR300 to a
TV, you can use the extended menu display and view digital photos on the
screen. You must connect the DAR300 to an AV jack on your TV and
configure it there similar to a video recorder. More information is available in
the user's manual of your TV.
After connecting the DAR300, amplifier and TV, plug the DAR300 into the
mains switch (on the rear panel).
8
7
Chapter
The DAR300 in a network
Connecting to a individual computer
If you want to connect the DAR300 to a PC directly via Ethernet, please use a
cross-over cable.
Connecting to a network
Use a standard Ethernet cable to connect the DAR3000 to the switch or
router in an existing network.
You can also connect the DAR300 to a WLAN wireless network using the
USB WLAN adapter. Plug the USB WLAN adapter into the USB connection
on the rear panel.
!
Note: The USB WLAN adaptor is not part of the standard scope of
delivery. arcus accepts responsibility for the function of the USB
WLAN adapter offered by arcus only.
Configuring an individual computer to network with the DAR300
To connect the DAR300 to an individual PC that has not been configured for
a network, leave the DAR300 presettings as they are and change the following
settings on the PC:
!
Note: The DAR300 can also be manually configured to have a fixed
IP address. Basic knowledge of computer networks is required.
Experts familiar with computer networks can remove or set the
required settings and information for the configuration in the Network
menu. The following describes the configuration in AUTO mode,
which is also very easy to understand for the non-expert.
9
Under Windows (the example shows Windows XP)
Open "Network Connections" in the Control Panel.
Right click on "Local Area Connection" and select
"Properties".
The "Local Area Connection Properties" dialog box
appears. The "Client for Microsoft Networks" and
"Internet Protocol (TCP/IP)" points in the middle box
must be visible and enabled (checkmark).
Now select "Internet Protocol (TCP/IP)" and click on
"Properties".
Select "Obtain an IP address automatically".
This completes the basic network configuration. You must
now make a few settings changes for the network to
recognise the DAR300 as an external hard drive.
10
Accessing the DAR300’s hard drive on the network
Of the various options for accessing the DAR300's hard
drive from a PC, perhaps the easiest way is by using the
"Browse computer" function.
In the Control Panel, click on “Search” and then select
“Computers or people”. Enter “DAR300” as the computer
name and then click on “Search”. The DAR300 is
displayed on the right side after a few seconds.
Double-click on the "DAR300" icon in the results window
to display the content of the DAR300 hard drive in the
Windows Explorer.
You can now access the directories, files and file properties
with the mouse and keyboard as usual. You can also copy
any files from your PC hard drive to the DAR300 hard
drive (e.g. drag-n-drop, i.e. by "dragging" the files from one
window to another).
Please note the basic file structure of the DAR300.
All audio files are located in the "Music" directory. When
copying music files, make sure that you copy them into this
directory or a subdirectory of this main folder. Otherwise,
your music files will not be included in the music database
of the DAR300.
All picture files are located in the "Photo" directory.
When copying picture files, make sure that you copy them
into this directory or a subdirectory of this main folder.
Otherwise, your picture files will not be included in the
photo database of the DAR300.
Any files can be in the "Files" directory, e.g. video files
that should be played on video network players. The
DAR300 does not see the "Files" directory. You can save
files of any type there and also use the DAR300 hard drive
as a backup drive.
Note: The DAR300 can only see audio files (MP3, Ogg
Vorbis, FLAC and WAV) on the „Music“ drive and picture
files (bmp, jpg, Tiff, gif, png) on the “Photo” drive.
! Note: These three main directories cannot be renamed.
11
Moving music and photos between the computer and the DAR300
You can easily copy individual audio and picture files, as well as folders (incl.
subfolders) to the DAR300 “Music” or “Photo” drive by drag-n-drop. No
special software is required. Of course, you can also copy files from the
DAR300 back to the PC or listen to audio files or view picture files saved on
the DAR300 on the PC.
!
The DAR300 stores music and photos on an internal hard drive.
You should regularly back up your files to prevent data loss.
Assigning information to the music files (editing tags with the PC)
Tags (e.g. ID3 tag for MP3 format) can be used to assign information about
artist, title, album, genre, etc. to each audio file.
It is recommended that you carefully assign such information to your audio
files. The DAR300, like any other audio player, uses this
information to assign the files to categories, e.g. "Artist" or
"Genre" based on these tags. The tag is even used to identify
the title of the song.
Say, for example, you want to convert an audio CD to MP3
format. Without the ID3 tag for the songs, the CD is
displayed as "Unknown album" from an "Unknown artist"
with titles 01, 02, 03.
Online databases such as www. freedb.org, which contains
most CDs, are a big help when editing tags. Many software
products for
creating and managing MP3 files provide direct access to such
databases. How the tags are assigned depends on the software
on your PC that you use to create and manage audio files. The
software user guide contains
more information about this. The figure to left shows, for example, which
information can be saved in a tag.
Like files or folders, edited playlists can easily be copied via drag-n-drop to the
DAR300, although with playlists you should make sure that relative paths are
used. To avoid problems such as this, the easiest thing to do is create your
playlists on the music drive of the DAR300 directly. Playlists can be created on
the DAR300 directly or from a PC on the network.
12
8
Chapter
Basic functions
1. Turning the DAR300 on and off
The central mains switch is located on the rear panel above the mains plug.
Turn the switch to ON (symbol I) after connecting all your components.
The red
button on the remote control and the On/ Standby button on
the DAR300 are used to turn the device on or off, as well as to go into standby
mode.
There are three operating states:
1) Off – The DAR300 uses no power.
2) On – The DAR300 is ready to play music and/or show pictures,
etc.
3) Standby – The DAR300 is in standby mode and requires only
minimal power. The advantage of standby mode is that it take just
a few seconds to turn the device back on.
To turn the device on, off or go into standby mode:
Turn on: Press
briefly.
briefly.
Standby: Press
Turn off: Press
longer, regardless of whether the device is on or in
standby mode.
13
2. Play
2.1
Using the remote control:
Play: Press .
The selected song or songs contained in the selected album, genre, etc.
are played.
Pause: Press .
Play is interrupted.
Press again.
Play continues.
Index forward/fast forward:
Briefly press during play.
The next music file is selected.
Briefly press more than once to select the desired title (page
forward).
Press and hold during play.
Fast forward (scan mode) is enabled.
Index reverse/fast rewind:
Briefly press during play.
The current title begins from the start.
Briefly press more than once to select the desired title (page back).
Press and hold during play.
Fast rewind (scan mode) is enabled.
Stop: Press
during play.
2.2
On the DAR300 directly:
Play: Press .
The selected song or songs contained in the selected album, genre, etc.
are played.
Pause: Press
briefly.
Play is interrupted.
Briefly press
again.
Play continues.
Index forward/fast forward:
Briefly press
during play.
The next music file is selected.
Briefly press
more than once to select the desired title (page
forward).
Press and hold
during play.
Fast forward (scan mode) is enabled.
Index reverse/fast rewind:
Briefly press
during play.
The current title begins from the start.
14
Briefly press
more than once to select the desired title (page
back).
Press and hold
during play.
Fast rewind (scan mode) is enabled.
Stop: Press
longer during play.
Important: To prevent data loss, always turn the device off by
button for a few moments before you disconnect it
pressing the
from the mains supply by pressing the mains switch (on the back of
the housing).
2.3
Play modes
You can toggle between the play modes Normal, Scan, Repeat All,
Shuffle Repeat, Repeat Single and Shuffle.
You can select the desired play mode by pressing the button
(repeatedly) on the remote control or from the context menu (by
pressing ST on the remote control) if you have called up the status
window.
Normal (Continuous – CO – CONT):
The songs from the current playlist are played in sequence one after
another.
Scan (Scan – SC – SCAN):
The songs from the current playlist are played in sequence. Since many
songs may not have much music at the beginning, a sample is taken
from later in the song.
Repeat All (Repeat All – RA – all REP):
The songs from the current playlist are played in the given order until
the playback is complete.
Shuffle Repeat (Shuffle Repeat – SR – shuffle REP):
The songs from the current playlist are played in random order until
the playback is complete.
Repeat Single (Repeat Single – RS – single REP):
The current song is continually repeated.
Shuffle (Shuffle – SH – SHUFFLE):
The songs from the current playlist are played in random order one
after another.
15
9
Chapter
1. The DAR300 menu structure
Music
Playlist
CD
Tracks
Photo
Web Radio
Tools
Options
Thumbnail View
Favourites
Copy CD
Photo
Albums
Photo Explorer
Recent Stations
Backup
Webradio
Artists
Photo CD
Station List
Restore
Record
Songs
Extenal Devices
Suchen
Format ext. Device Screensaver
Genres
Enter URL
Rebuild Music-DB
CD-Import
Search
Get Stations
Rebuild Photo-DB
CD-Database
Musik Explorer
Statsistic
Languages
Externe Devices
Show Versions
Time / Date
Record
Update Software
Network
Update Database
Video
16
2. The menu functions
2.1.1
Using the remote control:
Scroll:
Scroll up or down using and .
Go to the next / previous initial using and
(if you are in a list
sorted alphabetically).
OK/enter/one level deeper: Press OK.
Back / one level higher: Press .
Calling up the context menu: Press .
Hiding the context menu: Press again (or press ).
Return to the main menu: Press M.
2.1.2
On the DAR300 directly:
Scroll:
Turn the control knob to the right to scroll down or right.
Turn the control knob to the left to scroll up or left.
OK/enter/one level deeper: Press the control knob.
Back / one level higher: Press .
Calling up the context menu: Press (or press ).
Return to the main menu: Press longer.
Note: Different context menus are available depending on the menu
you are in and what you have selected.
2.2
Enter text
You can enter or change text in some menus and context menus.
Proceed as follows:
2.2.1
Using the remote control:
Use
or
to select the respective entry.
Press OK.
The cursor is under the last field of the entry.
Use
or
to move the cursor left or right.
Press to delete individual fields from right to left.
Press longer to delete the entire entry.
Select letters or numbers for the field you are in using the
number/letter blocks on the remote control.
When the cursor is under the last field:
Press OK to insert a new field at the end of the entry.
When you are done:
Press OK longer or .
Press OK to confirm the changes.
Press Cancel to discard the changes.
P R E S S
O K .
Note: Press
longer in the number / letter block on the remote
control to toggle between small and capital letters.
17
2.2.2
On the DAR300 directly:
Turn the control knob to select the respective entry.
Press the control knob.
The cursor is under the last field of the entry.
Press to delete fields from right to left.
Press longer to delete the entire entry.
Select letters or numbers for the field you are in by turning the control
knob.
When the cursor is under the last field:
Press the control knob to insert a new field at the end of the entry.
When you are done:
Press .
Press OK to confirm the changes.
Press Cancel to discard the changes.
Press the control knob.
2.3
The icons
If you have connected the DAR300 to a TV, a small icon precedes
each menu item. At any time, you can clearly identify what the item
entails by the icon:
Playlist
Albums
Artists
Title
Genre
Folder
Photo
18
2.4
The status window
The status window displays all important information about the title
currently being played. If you have connected the DAR300 to a TV,
the status window is always visible. The status window is only
displayed on the DAR300 as needed.
An excerpt from the current playlist is displayed on the TV. Songs
already played are in blue, songs to be played are in grey. The song
currently being played is identified by an arrow. After the first eight
songs of the current playlist have been played, the screen display
automatically scrolls down.
Calling up the status window:
Using the remote control:
Press ST.
or press in the main menu.
On the DAR300 directly:
Press in the main menu.
19
10
Chapter
Functions and settings
10.1
The main menu
The main menu is displayed after turning the DAR300
on.
Use
or
to select the desired menu item and press
OK to go to sub-menu from the main menu.
10.2
Music menu
Use
or
to select the desired menu item and press
OK to go to sub-menu from the music menu.
10.2.1
Playlist
A list of all songs contained in the current playlist are
displayed in the Playlists window.
Add a song, album, etc. to the current playlist by
playing the song, album, etc. (press ), or
Press OK / "Add to playlist" from the respective
context menu to add the current song, album, etc. or
from the remote control directly (PL+).
20
A playlist can have a maximum of 999 entries. If this
number is exceeded, existing entries are automatically
overwritten (oldest first).
10.2.2
Selecting albums
An overview of all albums saved on the DAR300 hard
drive is displayed. To associate songs with an album,
the name of the album must be entered in its tags.
To play an entire album, use or
to select the
desired album and press .
To display a list of the songs on an album, use
or
to select the desired album and press OK.
10.2.3
Selecting artists
An overview of all artists is displayed. To assign a song
to an artist, the name of the artist must be entered in its
tag.
To play all the songs from a specific artist, use
or
to select the desired artist and press .
To display a list all the albums and/or songs from a
specific artist, use or
to select the desired artist
and press OK.
10.2.4
Selecting titles
An overview of all songs saved on the DAR300 hard
drive is displayed. To display a song with its title, the
title of the song must be entered in its tag.
To play a song, use or to select the desired song
and press .
21
10.2.5
Selecting a genre
An overview of all genres is displayed. To assign a song
to a genre, the genre must be entered in its tag.
To play all the songs from a specific genre, use
or
to select the desired genre and press .
To display a list of all songs from a specific genre, use
or
to select the desired genre and press OK.
10.2.6
Selecting
Search main catalogue
You can search for terms in the main catalogue (title,
artist, album) and display all hits that contain your
search term.
For example, if you are searching for "Beatles", all
songs whose tag includes "Beatles", "The Beatles" or
even "Beatles, the" are listed. When sorted
alphabetically by "Albums", these three entries are
displayed as three different artists.
Search file names
You can search by file name to display all hits that
contain your search term.
If you search for "Love", all songs whose tag contains
"Love" in the "Title" field (e.g. "Love hurts", "My one
and only love", etc.) are listed.
Search all categories
You can search for all entries in the database, even if
the entries do not correspond to any of the main
categories. All hits are displayed that contain your
search term.
If you have noted information such as year released or
composer in the ID3 tags, you can search for "2003" or
"Mozart" to display a list of all the songs released in
2003 or all works composed by W.A. Mozart.
22
10.2.7
Selecting Musik Explorer
The DAR300 Music Explorer displays the folder
structure of the "Music" drive as folders, subfolders
and files. The Music Explorer only displays audio files
in formats that the DAR300 can play.
Note: The Music Explorer does read any tags. It makes
sense to structure the content of the hard drive well in
order to make finding files using the Explorer easier.
One option, for example, would be to name the toplevel folder by the various artists and name the
subfolders by the album of the artists.
To display a list of all songs contained in a folder, use
or
to select the desired folder and press OK.
To play all the songs in a specific folder, use or
to select the desired folder and press .
Press to return to the next-highest level.
10.2.8
Externe Geräte Devices
If you have connected an external device to the USB
connection on the DAR300, you can import music
from the device into the DAR300.
The DAR300 searches for connected devices when you
select "External device". If a device is recognised, a list
of its folders and songs is displayed, e.g. as in Music
Explorer.
To prepare songs for import, use
or
to select the
desired song and press OK. You can select multiple
songs one after another. The selected songs are added
to the import list and marked by an arrow in the menu
(see Fig. "Amelia" and "Beware"). To remove a song
from the import list, select it and press OK again. Use
the context menu to import the songs into the import
list and to prepare folders for import.
23
10.2.9
Recording
The DAR300 can also rip music into MP3 format
directly and save it to the hard drive. Other available
formats include WAV and FLAC (Free Lossless Audio
Codec).
Aufnahme starten
When playing from CD, LP or radio:
Press for a few moments to start recording.
(or select "Start Recording" in the record menu and
press OK.)
Press to stop recording.
After you are finished recording, a text input field
appears that you can use to assign tags to the recording
(title, artist, etc.).
10.3
The context menus in the Music menu
Different context menus are available depending on the
menu you are in and what you have selected.
10.3.1
When in the status window:
Press . The context menu is called up.
Show Elapsed Time
Press OK.
The time elapsed for the current title is displayed.
Show Remaining Time
Press OK.
The time remaining for the current title is displayed.
Normal (Continuous) / Scan / Repeat All /
Repeat Shuffle / Repeat Single / Shuffle
Use
or
to select the desired play mode.
Press OK.
24
10.3.2
If you have selected an individual song:
Press . The context menu appears.
You have the following options:
Add to Playlist
Press OK.
Adds the selected song to the playlist.
Clear Playlist
Press OK. Deletes the current playlist.
Play Complete Album
Press OK.
Plays the complete album to which the song belongs (if
assigned to a song with a tag).
Delete Song
Press OK. Deletes the selected song.
Info
Press OK.
Displays information about the selected song (tag).
You can edit this information.
Use
or
to select the entry that you want to
modify.
Press OK. You can now edit the text.
Properties
Press OK.
Displays the song's properties (bit rate, etc.). You
cannot modify this information.
10.3.3
If you have selected an individual song in the playlist:
Press . The context menu appears.
You have the following options:
Load / Edit Playlists
Press OK.
A list of all saved playlists is displayed.
Use
or
to select the desired playlist.
Press to play the playlist.
Press OK to display a list of all songs contained in the
playlist.
Save Playlist
Press OK. An input screen appears.
You can now assign a name to the playlist.
Clear Playlist
Press OK.
All entries in the current playlist are deleted.
Move Entry
Press OK.
Use
or
to move the selected entry up or down.
You can change the order in which the songs are
played in your playlist.
25
Remove Entry
Press OK.
The selected entry is deleted from the playlist.
Export Playlist
Press OK.
All entries in the current playlist and an M3U playlist
that contains the order of the songs are copied to an
external media (memory card, portable player).
If there is more than one memory card in the DAR300
or a USB device is connected, a window appears in
which you can select the desired media.
Burn CD
Press OK.
You are then asked whether you want to burn a data
CD or audio CD.
If you select a data CD, the audio file is burned to the
CD blank in the existing digital format 1 to 1. If you
select an audio CD, the CD blank is burned as an audio
CD, so that it can be played on audio CD players. You
should note that CDs you burn yourself do not always
play on any audio CD player.
Use OK to select the CD type or to abort the
procedure.
When you start the procedure, you are asked to insert a
blank CD into the drive, if you have not done so
already. Once a blank CD with enough memory
capacity has been inserted, the burn procedure starts as
indicated on the display.
Note that the procedure can take a few minutes
depending on the file size and file format.
Info
Press OK.
Displays information about the selected song (tag).
You can edit this information.
Use
or
to select the entry that you want to
modify.
Press OK.
Properties
Press OK.
Displays the song's properties (bit rate, etc.). You
cannot modify this information.
26
10.3.4
If you have selected a saved playlist:
Press . The context menu appears.
You have the following options:
Load Playlist
Press OK. The playlist is loaded.
Press . The playlist begins to play.
Rename Playlist
Press OK.
You can change the name of the playlist.
Delete Playlist
Press OK.
Use
or
Select Yes if you want to really want to
delete the playlist.
Select No if you do not want to delete the playlist.
Press OK.
10.3.5
If you have selected an album:
Press . The context menu appears.
You have the following options:
Add to Playlist
Press OK. Adds the selected album to the playlist.
Clear Playlist
Press OK. Deletes the current playlist.
Rename Album
Press OK.
You can change the name of the album.
Delete Album
Press OK.
Use
or
Select Yes if you want to really want to
delete the album.
Select No if you do not want to delete the album.
Press OK.
10.3.6
If you have selected an artist:
Press . The context menu appears.
You have the following options:
Add to Playlist
Press OK.
Adds all songs from the selected artist to the playlist.
Clear Playlist
Press OK. Deletes the current playlist.
Rename Artist
Press OK.
You can change the name of the artist.
27
Delete Artist
Press OK.
Use
or
Select Yes if you want to really want to
delete all songs from the specific artist.
Select No if you do not want to delete the songs from
the specific artist. Press OK.
10.3.7
If you have selected a genre:
Press . The context menu appears.
You have the following options:
Add to Playlist
Press OK. Adds all songs from the selected genre to
the playlist.
Clear Playlist
Press OK. Deletes the current playlist.
Rename Genre
Press OK.
You can change the name of the genre.
Delete Genre
Press OK.
Use
or
Select Yes if you want to really want to
delete all songs from the specific genre.
Select No if you do not want to delete the songs from
the specific genre.
Press OK.
10.3.8
If you have selected a folder in the Music Explorer:
Press . The context menu appears.
You have the following options:
Add to Playlist
Press OK. Adds all songs contained in the selected
folder to the playlist.
Clear Playlist
Press OK. Deletes the current playlist.
Rename Folder
Press OK.
You can change the name of the folder.
Delete Folder
Press OK.
Use
or
Select Yes if you want to really want to
delete all songs contained in the selected folder.
Select No if you do not want to delete the songs
contained in the selected folder.
Press OK.
28
10.3.9
If you have selected a song from an external device:
Press . The context menu appears.
You have the following options:
Import Selection
Press OK. An input screen appears.
You can enter a path to which all selected songs and
folders should be imported. The default folder is
DAR300/Music. If you add, for example,
JoggingSongs to the end of the path, the selected
songs are copied to this folder. If you enter a folder
that does not yet exist, it is created. If you do not want
to change the default path, press OK for a few
moments to start the import. The selected songs are
imported into the "Music" directory.
Rename Song
Press OK.
You can change the name of the song.
Delete Song
Press OK.
Use
or
Select Yes if you really want to delete the
song on the memory card/external device.
Select No if you do not want to delete the song.
Press OK.
10.3.10
If you have selected a folder from an external device:
Press . The context menu appears.
You have the following options:
Select / Deselect Folder
Press OK.
The selected folder is added to the import list.
Press OK again.
The selected folder is removed to the import list.
Import Selection
Press OK. An input screen appears.
You can enter a path to which all selected folders
should be imported.
The default folder is DAR300/Music. If you add, for
example, JoggingSongs to the end of the path, the
selected folders are copied to this folder. If you enter a
folder that does not yet exist, it is created.
If you do not want to change the default path, press
OK for a few moments to start the import. The
selected folders are imported into the "Music"
directory.
Rename Folder
Press OK.
29
You can change the name of the folder.
Delete Folder
Press OK.
Use
or
Select Yes if you really want to delete the
folder on the memory card/external device.
Select No if you do not want to delete the folder.
Press OK.
10.4
CD menu
10.4.1 Selecting CD and importing / converting
Select the CD player function of the DAR300 with the CD option. If
there is not CD in the drive, the "CD cannot be read" error message is
displayed and you are prompted to insert a CD.
Use the buttons on the device itself or the remote control with the
familiar icons to operate the CD drive.
Play: The or
button on the remote control
Pause/Stop
or
button and
Fast forward Press
for a few moments or
Fast rewind Press
for a few moments or
Next title
Press the
button briefly or
Previous title Press the
button briefly or
Note: The CD can only be ejected by pressing the button on the
device itself.
Once a CD is placed in the tray and the drawer is closed, the following
information is read from the CD:
1. Total play time of the audio CD
2. Number of titles on the audio CD
3. Length of the individual titles on the audio CD
The information is then compared with the internally integrated title
database to gain an inference about the audio CD inserted. The name
of the album, name of the artist, genre, year and the individual names
of the songs on the audio CD are based on this information.
If there is more than one entry found, the first entry found is used.
You can edit and modify the title later, when you copy the CD to the
hard drive.
If no entry is found (i.e. the CD is unknown), the DAR300 attempts to
find the information on the Internet. "FreeDB" must be set in the
Options menu of the "Hard drive and Internet" setting. The DAR300
attempts to contact the Internet database and extract the necessary
information there only when this option also includes the Internet.
If access to the Internet is prohibited by the Options setting, an
Internet connection cannot be established or the CD is also not
recognised in the FreeDB Internet database, the default values
30
"Unknown artist", "Unknown album", etc. and "Track 01", Track 02",
etc. are used for the titles.
All title information about the CD is displayed and you can play the
entire audio CD by pressing the play button ( or on the remote
control) beginning with the first title. You can select a different starting
title using the dial or the
and arrow buttons. The
abovementioned buttons on the remote control or device are used to
operate the CD player itself.
10.4.2 Importing / converting audio CDs
Press the context menu and select the "Select All" option. To select
only individual titles, choose the "Select Entry" option in the context
menu of each title.
Press the context menu again and select the "Import Selection"
option.
The files are then converted, i.e. each title on the audio CD is
transferred to the hard drive in digital format. The conversion depends
on the parameters set in the "CD Selection" in the Options menu, e.g.
in MP3 format in CD quality. To abort the procedure, call the "CD"
menu in the "Music" menu item again. The system displays
information about which title is currently being converted and you
have the option to cancel the procedure entirely.
If you convert an audio CD more than once, the DAR300
automatically assigns new file names. No files or data is deleted.
It is best to use the File Explorer on your computer to modify the
directory names, the file names and the ID3 tags (for MP3 files) as
needed.
10.5
Foto menu
If you have connected a TV to your DAR300, you can view digital
photos. The DAR300 can display photos in the following formats:
bmp, jpg, Tiff, gif and png.
31
10.5.1 Selecting Thumbnails
The thumbnail view displays the folders of the "Photo" drive with the
folder icon. A small preview of the photos is displayed.
To select a folder or picture, use , ,
and to go to the
respective folder icon and press OK.
All four , ,
and
arrow buttons are used to go to the next or
previous photo. The file name of the currently displayed photo appears
on the display of the DAR300.
Press to return to the next-highest level.
10.5.2 Selecting Foto Explorer
The DAR300 Photo Explorer displays the folder structure of the
"Photo" drive as folders, subfolders and files. The Photo Explorer only
shows picture files in formats that the DAR300 can display.
To display a list of all photos contained in a folder, use
or
to
select the desired folder and press OK.
To display a photo on the screen, use
or
to select the desired
photo and press OK.
or
can be used to go to the next or previous photo. The file
name of the currently displayed photo appears on the display of the
DAR300.
Press to return to the next-highest level.
10.5.3 Photo CD
Identical to Photo Explore, except here the CD is used as a database.
10.5.4 Selecting Externe Geräte
If you have connected an external device to the USB connection on
the DAR300, you can import photos from the device or the memory
card into the DAR300.
Once the DAR300 recognises the device or memory card, a list of
folders and photos contained is displayed as in Photo Explorer.
To prepare photos for import, use
or
to select the desired photo,
press to open the context menu and choose "Select / Deselect".
You can select multiple photos one after another. The selected photos
are added to the import list and marked by an arrow in the menu (see
Fig. "Eide" and "Andreas"). To remove a photo from the import list,
press to open the context menu and choose "Select / Deselect". Use
the context menu to import the photos into the import list and to
prepare folders for import.
32
10.6
10.6.1
The context menus in the Photo menu
If you have selected a picture in the Photo Explorer:
Press . The context menu appears.
You have the following options:
Rename Picture
Press OK.
You can change the name of the picture.
Delete Picture
Press OK.
Use
or
Select Yes if you want to really want to delete the
picture.
Select No if you do not want to delete the picture.
Press OK.
Play Slideshow
Press OK.
The pictures in the selected directory are displayed in order. The
display time depends on the settings in the Options menu photo
selection. Stop the show (continuous loop) by pressing .
Set Slideshow (as a screensaver)
Press OK.
This directory with its pictures was designated as the directory
from which the pictures are displayed in the Set Slideshow mode
10.6.2
If you have selected a folder in the Photo Explorer:
Press . The context menu appears.
You have the following options:
Rename Folder
Press OK.
You can change the name of the folder.
.
Delete Folder
Press OK.
Use
or
Select Yes if you want to really want to delete the
folder.
Select No if you do not want to delete the folder.
Press OK.
Play Slideshow
Press OK.
The pictures in the selected directory are displayed in order. The
display time depends on the settings in the Options menu photo
selection.
Stop the show (continuous loop) by pressing .
33
Set Slideshow (as a screensaver)
Press OK.
This directory with its pictures was designated as the directory
from which the pictures are displayed in the Set Slideshow mode.
10.6.3
If you have selected a photo from an external device:
Press . The context menu appears.
You have the following options:
Select/Delete Picture
Press OK.
The selected picture is selected or deselected.
Import Selection
Press OK. An input screen appears.
You can enter a path to which all selected pictures should be
imported.
The default folder is DAR300/Photo. If you add, for example,
Vacation04 to the end of the path, the selected pictures are
copied to this folder. If you enter a folder that does not yet exist, it
is created.
If you do not want to change the default path, press OK for a few
moments to start the import. The selected pictures are imported
into the "Photo" directory.
Rename Picture
Press OK.
You can change the name of the picture.
Delete Picture
Press OK.
Use
or Yes if you want to really want to delete the picture.
Select No if you do not want to delete the picture.
Press OK.
34
10.6.4
If you have selected a folder from an external device:
Press . The context menu appears.
You have the following options:
Select / Deselect Folder
Press OK.
The selected folder is marked for import.
Press OK again. The folder is removed to the selection list.
Import Selection
Press OK. An input screen appears.
You can enter a path to which all selected folders (see above)
should be imported.
The default folder is DAR300/Photo. If you add, for example,
Vacation04 to the end of the path, the selected folders are
copied to this folder. If you enter a folder that does not yet exist, it
is created.
If you do not want to change the default path, press OK for a few
moments to start the import. The selected folders are imported
into the "Photo" directory.
Rename Folder
Press OK.
You can change the name of the folder.
Delete Folder
Press OK.
Use
or
Select Yes if you want to really want to delete the
folder.
Select No if you do not want to delete the folder.
Press OK.
10.7
Web Radio
An Internet connection is required for this function.
10.7.1
Favourites
Gives you a list of all of your favourite radio stations.
10.7.2
Last heard
Displays the last radio station you listened to.
10.7.3
Station list
Displays the list of all stations found. Can be sorted by genre.
10.7.4
Search
You can search for a radio station by entering the first letter of its
name.
10.7.5
Enter URL
You can enter the Internet site of the radio station (comparable to
the frequency setting for FM radio).
35
10.7.8
Get station list
The DAR300 creates a station list of the radio stations currently
being received.
10.8
Tools menu
Use
or
to select the desired menu item and press OK to go
to sub-menu from the Tools menu.
10.8.1
Copy CD
Copies the CD currently in the drive. Please observe copy
protection regulations.
10.8.2
Backup
The DAR300 saves files on an internal hard drive. You can save
the data externally in case you need to restore it later.
You can choose to backup all files, or just the music, pictures or
file folders. Once you have selected the folders for backup, the
DAR300 asks whether you want to save to your network or an
external USB hard drive. Follow the relative instructions on the
display.
The procedure can take several minutes depending on the amount
of data and the speed of your connection.
You cannot operate the DAR300 during the procedure for security
purposes.
10.8.3
Restore
If you have performed a data backup already, you can restore the
data from the Restore menu item.
You are first asked to specify the location of your backup.
The data is then restored.
The procedure can take several minutes depending on the amount
of data and the speed of your connection.
You cannot operate the DAR300 during the procedure for security
purposes.
10.8.4
Formatting an external device
If you want to save data on an external source (e.g. external hard
drive, USB stick), it must be formatted before it can be used for
the first time. Please note that any data already on the external
memory source will be deleted by this procedure.
10.8.5
Rebuild Music DB
The DAR300 automatically recognises audio files and adds them
to its database. However, if for some reason music files that you
have copied to the DAR300 are not displayed in the menus, you
can rebuild the database using this function.
The database must also be rebuilt after a firmware update.
Press OK.
36
Select Yes if you really want to rebuild the database.
Select No if you do not want to rebuild the database.
Press OK.
Note: It can take several hours to rebuild the database depending
on the number of files!
10.8.6
Rebuild Photo DB
The DAR300 automatically recognises pictures and adds them to
its database. However, if for some reason picture files that you
have copied to the DAR300 are not displayed in the menus, you
can rebuild the database using this function.
The database must also be rebuilt after a firmware update.
Press OK.
Select Yes if you really want to rebuild the database.
Select No if you do not want to rebuild the database.
Press OK.
Note: It can take several hours to rebuild the database depending
on the number of files!
10.8.7
Statistics selection
Displays the number of files on the "Music", "Photos" and "Files"
drives respectively. The free space on the DAR300 hard drive is
also displayed.
10.8.8
Versions selection
Displays the version number of the software, firmware, system and
hardware.
10.8.9
Update firmware
When new firmware versions are available, they are posted at
www.arcusaudio.com for download. Continuous development of
the firmware ensures that your DAR300 is always up-to-date, e.g.
new functions, etc.
Please find exact instructions for updating the firmware in the
installation instructions that come with the firmware when
downloaded.
Note: After the update is complete, the DAR300 database must
be rebuilt, as well as all individual settings (e.g. Language) in the
Options menu.
!
Important:
arcus does not accept responsibility for damages caused by
firmware updates.
37
10.8.10
Update FreeDB
If you put in an audio CD unknown in the integrated title
database, the database automatically adds information about the
CD if the DAR300 is connected to the Internet. This assumes that
the settings for FreeDB has been made in the Options menu for
"Hard Drive and Internet" and the DAR300 has access to the
Internet via a router (e.g. DSL router) at any time.
10.9
Optionen Menu
10.9.1
Photo
Enter your preferred settings for viewing pictures.
Press OK to toggle between ON and OFF for "Rotate
Automatically". The default setting is ON.
Press to go to the "Display Time" subitem, turn the dial or
press the number buttons on the remote control and press OK to
accept the desired display time (see also 0).
Use
or
to change the respective values.
Press to finish.
Press OK to confirm the changes.
Press to select Cancel and press OK to discard the changes.
Press to exit the Photo menu.
10.9.2
Web Radio
Enter the maximum number of stations listed in the station list.
The displayed number of stations last listened to.
The minimum and maximum bit rate of the stations received. The
higher the bit rate, the better the quality of the station. News
stations often transmit at lower bit rates. If you set the minimum
data rate too high, stations at lower bit rates are not longer
received.
38
10.9.3
Recording
First specify which connection is used to connect the DAR300 to
the stereo system.
Select "Options" and press OK.
Select "Source" and press OK.
Choose the connection being used and press OK.
The presetting is "Analog Input".
Then specify the desired recording quality:
Select "Quality" and press OK.
Select the desired level of quality and press OK.
The presetting is "High Quality".
The standard values for MP3 format are:
Radio Quality 96 kbps
High Quality 128 kbps
CD Quality 192 kbps
User-defined can be defined up to 320 kbps
10.9.4
Screensaver
You can specify a folder with pictures to be automatically
displayed as a continuous slideshow after a preset waiting period
elapses in which no action is performed by remote control or by
pressing a button on the device. This is interesting for automatic
presentations, and the DAR300 has already integrated such a
slideshow beyond the important production functions. If a button
on the device is pressed or the remote control is used, the
slideshow is immediately stopped and the DAR300 displays what
was on the screen before the slideshow started. This behaviour is
also described as a "screensaver", something you may already be
familiar with on your PC/Mac. Press OK to toggle between ON
and OFF for "Status". The default setting is ON. Only when the
status is ON do you go to the following submenus by pressing :
For "Waiting Period", enter when the slideshow should start if
there is not keyboard activity. The entry is similar to "Display
Time". Press to go to the "Display Time" subitem, where you
can set the time in seconds.
The last entry to be displayed is the directory (folder) from which
the pictures are displayed. The folder can only be specified from
the context menu in Photo Explorer.
Exit the Screensaver menu by pressing .
10.9.5
CD Import
The parameters for converting audio CDs into a digital file format
(e.g. MP3, WAV or FLAC) are set in this Options menu.
Converting audio files can also be "CD ripping".
Press OK to toggle between ON and OFF for "Error Correction".
The default setting is ON. If error correction is enabled, CDs that
are hard to read can take considerable more time to rip, because
areas on the CD that are hard to read must be read several times.
39
Press to go to the "Format" subitem and press OK to select the
format. Confirm the desired conversion format (rip format) by
pressing OK or cancel the procedure by pressing . Press to
go to the "Quality" subitem and press OK to select the level of
quality. Press OK to confirm or cancel the operation by pressing
. Press to exit the CD menu.
10.9.6
CD Database
Use this menu to set whether title information should be pulled
from the integrated title database (= "Hard Drive") only when a
CD is put in the drive, or if the title information is not in the
integrated title database, whether it should be downloaded from
the Internet (="Hard Drive and Internet").
If the Internet is also used as a source for title information, ensure
that the DAR300 has access to the Internet via a router (e.g. a
DSL router) at all times. If no Internet connection can be
established, the procedure is cancelled after a period of time,
which can lead to unnecessary wait times. Therefore, it is
recommended that this parameter be set to "Hard Drive" if you
are sure that no Internet connection can be established.
For "Mode", press OK to toggle between "Hard Drive" and "Hard
Drive and Internet".
The default setting is "Hard Drive".
Press to exit the FreeDB menu.
10.9.7
Languages
Use this Options menu to select the menu language. Default is
ENGLISH.
A list of languages is displayed that are available from the last
firmware update.
Press or to select the respective language and press OK to
confirm. The arrow shows which language has been selected. The
selected language is applied immediately.
Press to exit this menu.
10.9.8
Date/Time
Set the date and time. Please check these settings (and correct if
necessary) immediately after you first turn on the DAR300 to
make sure that the device is working properly. In "Set Time", press
or
to toggle between hours / minutes / seconds. Use or
to change the respective values.
Press .
Press OK to confirm the changes.
Press to select Cancel and press OK to discard the changes.
In "Set Date", press or
to toggle between day / month /
year. Use or
to change the respective values.
Press .
Press OK to confirm the changes.
Press to select Cancel and press OK to discard the changes.
40
10.10
Network
Every PC in a network has its own identification number, the IP
address. Depending on the configuration, this number is either
automatically or manually assigned to the individual PCs, or in this
case the DAR300.
!
Important: A DAR300 connected to a signal PC
(directly or via a router or hub) represents a "network".
The IP address allows any computer on the network to recognise
the DAR300 and the user can
copy, delete or rename the files or modify properties (e.g. title
information). Folders can be modified just the same.
The advantage of a fixed IPI address is that the DAR300 does not
receive a new IP address every time it is restarted, but is always
accessible at this address. The disadvantage is that the user has to
plan his network. No planning is required if an automatic IP
address is used.
The default setting for the DAR300 is to obtain the IP address
automatically.
Some of the following parameters should therefore only be
changed by users who have a basic knowledge of computer
networking.
Device: Ethernet or WLAN
If a WLAN adapter is connected to the USB port, press OK to
toggle between "Ethernet" and "WLAN".
Press OK to change the display to "WLAN".
Press OK again to change the display to "Ethernet".
Press to set the parameters.
Auto Config: On / Off
Press OK to change the display to "Off".
Press OK again to change the display to "On".
The Auto Config parameter allows the DAR300 to configure itself
in the network. This setting is preconfigured and recommended.
If Auto Config is set to "On", the following four parameters are
displayed in grey or on the display of the DAR300 with a plus sign
before the parameter name and cannot be changed.
Press to set the parameters.
IP Address
The IP address can only be entered if the Auto Config setting is
"Off". The DAR300 IP address is set to 192.168.001.101 in
the plant.
Important: The first six digits (here: 192.168.) are the same in all
private networks and cannot be changed. The next three digits
(here: 001) must match for all devices on the network, so that any
device on the network can "find" any other. The combination of
the last three digits (here: 101) can only be assigned once in a
network, so that each device can be uniquely identified by another
in the network.
41
So, if the IP addresses assigned in your network use
192.168.001.xxx and the last three digits of 101 have not
been assigned to any other device, you do not need to change the
IP address already assigned during manufacture. Attention: Your
operating system may not display zeros, i.e. the entry on your PC
can also be 192.168.1.1 (instead of 192.168.001.001).
If you want to change the IP address of the DAR300 because of
your network configuration:
Select "IP Address" and press OK.
Press or to go to the digits you want to change and enter the
desired digits using the number blocks on the remote control.
Press and confirm by pressing OK.
Press . A window is displayed with the question "Accept
changes?"
Press Yes to confirm the changes.
Press No to discard the changes.
Press OK.
Press to set the parameters.
Subnet screen
The IP address can only be entered if the Auto Config setting is
"Off".
The default setting is 255.255.255.000. This setting is used
in nearly all networks.
Press to set the parameters.
Gateway
The IP address can only be entered if the Auto Config setting is
"Off". The connection to the Internet title database or Internet
radio stations takes place via the gateway. The IP address of your
DSL router should be entered here.
The default setting is 192.168.1.1. This setting is used in
nearly all networks.
Press to set the parameters.
DNS server
The IP address can only be entered if the Auto Config setting is
"Off".
Enter the IP address of the DNS server.
Press to set the parameters.
Hostname
The default setting is "DAR300".
Devices can be identified on the network by their IP address and
their hostnames (e.g. using the "Browse computers" search
function in Windows XP).
The hostname can also be used to establish a network connection
under Windows:
Explorer -> Tools -> Map Network Drive...
\\DAR300\Music.
You should use a DHCP server for the configuration of your
network, if you want to establish a connection to the DAR300
instead of the IP address for the hostname.
42
If you want to change the hostname of the DAR300, please note
that hostnames cannot contain special characters or empty spaces.
Select "Hostname" and press OK.
Press or to go to the letters you want to change and enter
the desired name using the number / letter blocks on the remote
control (see also 0).
Press and confirm by pressing OK.
Press . A window is displayed with the question "Accept
changes?"
Press Yes to confirm the change.
Press No to discard the changes.
Press OK.
Press to set the parameters.
Workgroup
The default setting is "Workgroup".
Workgroup is the designation for a group of devices in a network
that should work together. If you use a workgroup, the DAR300
and the PC should belong to the same workgroup.
If you want to change the workgroup name:
Select "Workgroup" and press .
Press or to go to the letters you want to change and enter
the desired name using the number / letter blocks on the remote
control (see also 0).
Press and confirm by pressing OK.
Press . A window is displayed with the question "Accept
changes?"
Press Yes to confirm the change.
Press No to discard the changes.
Press OK.
10.11
Video
The default setting is: PAL / Type: FBAS.
Press OK to toggle between PAL (European standard) and NTSC
(American standard).
Press
to go to "Type". Press OK to toggle between FBAS and
S-Video.
Press to confirm the changes.
If your TV is connected to the scart output, leave the default
setting. If your TV supports it, you can switch to "S-Video" to
improve the screen representation.
If your TV is connected to the S-Video output, change to "SVideo" in the "Type".
If your TV is connected to the video (FBAS) output, leave the
default setting.
43
11
Chapter
Technical data
- Operating systems: Windows XP, 2000, ME, 98, 95; Linux; Mac OS X, Mac
OS 9 (OS 9 requires additional software for access to Sambe releases)
- Music management software: Windows Media Player, MusicMatch, WinAmp
Hard drive: 160 GB - individually scalable at any time
CD/DVD drive
- Read rate: Data CD max 52x, audio CD max 24x,
DVD max 16x
- Write speed: CD-R/-RW max 10x
- Media types: Media at 12cm or 8cm
- Tray motor driven
Conversion rate
- Audio CD to MP3: 2x, - Audio CD to FLAC: 4x
- Audio CD to WAV: 20x
Audio CD ripping:
Sampling rate always 44.1kHz, bit rates MP3 32kBit/s - 320kBit/s
Input recording:
WAV: 8 - 48 kHz
MP3: 32, 44.1, 48kHz;
Bit rates: 32kBit/s - 320kBit/s
FLAC: 44.1kHz
Play:
WAV: Sampling rates 8 - 48 kHz;
MP3: Sampling rates 32, 44.1, 48kHz;
Bit rates MP3 32kBit/s - 320kBit/s
FLAC: 44.1, 48kHz
Media, memory stick
- Supported file systems: FAT, FAT32
Power supply
- 110-230 Volt; 50/60 Hz
- Power consumption: Approx. 30W
44
12
Chapter
Imprint
Publisher
arcus GmbH
D- 33102 Paderborn • Augsburger Weg 53
Tel.: +49 (0) 700 / 60 77 77 77 • Fax: +49 (0) 700 / 61 77 77 77
Email: [email protected] • http:// www.arcus-audio.com
Errors and omissions excepted.
arcus reserves the right to make changes to the specifications without prior
announcement.
arcus and the arcus Logo are registered trademarks of arcus GmbH
Reproduction, in whole or in part, only with the permission of arcus GmbH
45