1
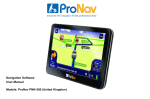
Navigation Software
Models: ProNav
PNN350 / PNN400
PNN350 WE / PNN420
Contents
Important safety notice
3
Prohibited areas
4
What’s in the box?
5
Hardware overview
6
Installing the ProNav in your vehicle
7
Hardware basics- Charging, Power On/Off, Reset
8
Hardware system settings
8
Settings list
9
Volume
9
Backlight
10
Date and Time
10
Screen calibration
10
FM Transmitter
11
System information
11
Language setting
11
Navigation Path settings
12
Default settings
12
GPS Information
12
Using the GPRS
13
Restrictions icons
19
Launching your ProNav software
20
Entering your vehicle details
21
Navigation options
21
Navigating using Post Code
22
Navigating using Town, Street
23
Navigating using Point Of Interest (POI)
24
Using the “Browse Map” function
25
How to add a favourite
25
Understanding the Drive Screen
27
Drive options
27
Colour scheme
30
Safety cameras
31
Connecting to the PC
33
Registering your ProNav
34
Caring for your ProNav
34
Frequently Asked Questions
35
2
IMPORTANT SAFETY NOTICE
PLEASE READ CAREFULLY BEFORE COMMENCING
USE OF YOUR PRONAV NAVIGATION SOFTWARE
Do not place your ProNav Personal Navigation Device (“PND”) where it may strike the driver or
passengers if the vehicle turns sharply or stops abruptly. Your PND should be installed securely
so it will not move and cause a distraction. Cables and hardware should not interfere with
driving and use of normal vehicle controls. Try to position the PND as close to your normal line
of sight as possible without obscuring your view of the road.
Safe control of your vehicle is of paramount importance. Program your destination and
configure your chosen drive screen and options before starting your journey. For safety reasons
DO NOT interact with your device until you have reached your destination or you have pulled
over and it is safe to do so.
All routing suggestions are advisory and may not take account of all temporary or permanent
traffic control measures or restrictions. Disregard any suggestion that is hazardous, or does not
comply with posted road signs or is otherwise illegal. Keep your eyes on the road and comply
with all traffic laws at all times.
Your personal judgment and common sense should always prevail over any instruction received
through the use of this device. Navevo Ltd cannot be held responsible for any loss, damage or
harm (direct or otherwise) caused as a result of using the software or placing any reliance on the
information provided to you while using the software.
3
Prohibited Areas
Do not operate your PND in hospitals or near any electrical medical equipment.
Do not operate your PND on an aircraft.
Do not operate your PND while sat in a petrol station forecourt.
Battery
Your PND uses a Li-Polymer battery. Do not use it in humid, wet or corrosive environments. Do not operate or store your PND in high
temperatures (>60 Degrees) or in direct sun light. Do not pierce or break the battery casing.
Failure to follow these cautions will invalidate the warranty and may cause the battery to leak acid,
become hot, explode or ignite and cause injury or damage.
If you come into contact with leaked battery acid wash the affected area thoroughly and seek medical
attention.
The Li-Polymer battery contained in this unit must be recycled or disposed of properly. Do not dispose of
in household waste or burn.
Please fully charge and discharge the battery two or three times on first use to assure a longer battery
life.
4
What’s in the box?
1.
ProNav Personal Navigation Device (PND)
2.
Windscreen Mount
3.
In-Vehicle Charger
4.
Back Plate
5.
USB Cable
6.
Support Card
5
Hardware Overview
1.
Power Button
2.
Headphone Jack
3.
SD/MMC Card Slot
4.
AV-IN
5.
Mini USB Power Port
6.
LCD Touch Screen
7.
Sim Card Slot
8.
Stylus
9.
Reset
Installing the ProNav into your vehicle
6
Firstly please connect the back plate (Fig 1) to the wind screen mount (Fig 2) by fastening it securely and sliding it into place as shown in
fig.3:
Fig 1
Fig 2
Fig 3
Next connect the windscreen mount to the glass in your vehicle. Flick the lever and it will then be secured (shown in fig. 4.) Attach the ProNav
bottom first using the mounting guides and clip the ProNav in fully. You will be able twist and turn the unit so your view is not obscured by the
device
Fig. 4
Hardware Basic – Charging, Power On/Off, Reset
7
Battery
Please fully charge the ProNav the first time you use it. You can use the in-vehicle adapter provided in the box to charge the ProNav in the
vehicle. The LED indicator located next to the Mini USB Power Port will be coloured red during charging and it will turn green when the
battery is fully charged.
Please fully charge and discharge the battery two or three times on first use to assure a longer battery life.
Power Off Mode & Sleep Mode
To turn the ProNav off fully, press and hold the power button. You will be presented with a “Shut” button and a “Sleep” icon. Press the “Shut”
button to turn the device off fully. If you do not press it the ProNav will turn itself off automatically after 5 seconds. To put your ProNav in sleep
mode press the “Sleep” button. When using the Power off Mode as opposed to “Sleep” the battery will hold its charge for much longer. The
“Sleep” mode function will put your ProNav in a hibernation state and will not be fully off. This can be useful as you can turn the ProNav back
on quickly and it will still retain a GPS fix.
Reset Button
If the software freezes or the PND becomes unresponsive you might need to reset your device. The reset button is located at the back of the
PND. Remove the stylus from the side and gently press the reset button for a few seconds to reset the device.
Hardware System Settings
Tap the ‘Setting’ icon on your PND’s start-up screen to access hardware system settings
Settings List
8
Adjust the volume
Volume
Turn “screen click tone” on / off
Adjust the screen backlight
Backlight
Set how long the Backlight will stay on
Time and date
Time set, Date set, Time zone set
Calibrate the screen
Calibrate the screen
Turn FM on/off function
FM Transmitter
Set the received frequency
System info
Show the system version and serial number etc
Language
Select the language for the system
Navigation path
Set navigation path
Default set
Return to default settings
GPS info
Display date of GPS signals received
Volume Setting
The speaker volume and screen click tone can be set using this feature. Use the left and right arrows to adjust.
Backlight setting
9
The backlight setting can be changed using the arrows provided. The “Auto Off” feature can also be changed depending on your preference
as to when the backlight will turn off.
Date and Time setting
The date and time settings include system time, system date and system time zone.
Calibrate the screen
The calibration setting allows you to change the alignment of the touch screen. It will move in a sequence off the centre, use your stylus and
press in the centre of the cross hair. You need to press in the centre of the cross hair each time it moves to its new location. Then click
anywhere on the screen to save the calibration and exit to the main interface automatically. If you do not want to save the new settings please
wait 30 seconds and the current interface will exit automatically.
10
FM Transmitter
The FM Transmitter will send out the audio signal to the radio devices. Take 76.0 MHZ frequency for example, both the GPS transmitting
frequency and the received frequency of the radio should be 76.0 MHZ, then all the sounds of the GPS will be omitted through the amplifier
system of the radio.
System information
The system information includes the firmware version, APP version and the system ID.
Language Setting
Simply single click your favourite language and then exit. Use this function to change the text language on the ProNav system. Please note:
this will not change any of the text or speech in the navigation section of the ProNav.
The languages available are:
English
French
German
Italian
Portuguese
Spanish
Sweden
Danish
Polish
Navi Path
11
This setting refers to the access of the device software. The correct setting will already be set and if this is changed it will cause the ProNav
software to stop functioning.
Default set
This setting will change all of your preferred settings back to how they originally were, i.e. Volume and backlight.
GPS Info
The GPS info will give you your current location via latitude and longitude as well as data on how many satellite signals you are receiving.
12
Using the SMS, Phone and Web Browsing Functions
Inserting a SIM Card
To utilise the communication functions all that is required is a SIM card and suitable airtime contract. To insert a SIM card into your ProNav,
open the SIM compartment located on the top back of the unit (shown in Fig 1. Below) by pushing the cover gently “up” to release it.
SIM Compartment
Fig. 1
Once open, gently slide the SIM into the metal holder (with the cut off corner of SIM positioned in the bottom right hand corner). When the
SIM is locked into place, you will hear a small click sound. To release the SIM gently push it in and it will then be ejected from the metal
holder. Ensure that the SIM compartment cover is closed before using the device.
Accessing the Phone, SMS and Web Browser Functions
On the main menu of the navigation system tap the “GPRS” button to access the communication features such as web browsing, SMS and
phone.
GPRS Button
SMS Function
To access the SMS function, tap the “SMS” button under the GPRS menu.
13
Click the SMS button to open the interface and the inbox will be automatically loaded. Users can create a new SMS by pressing the
icon and delete old messages by using the recycle icon.
When composing a new message the user will be presented with the screen shown below:
079914255233
Hello John can you call me please
Back
Back to message list interface
Keyboard
Click to pop-up or hide the keyboard
Send
Send the current edited text
Linkman
Select a contact number from phonebook
Use the icons to select the contact from the phonebook, enable the keyboard and send a message. To exit the SMS function, press the back
arrow.
Phone Function
14
To access the phone functions tap the “PhoneDial” button under the GPRS menu.
You will then be presented with a touch pad, similar to the one below, to allow you to make calls.
Back
Click exit the current interface
Backspace
Single click will delete the last number
Call
Click Call
Phonebook
Click the phonebook icon
Digital display
Shows current phone number
Keypad
Is made up of 10 numbers from 0 to 9 and “*”“#”
Contacts can be called by selecting them from the phonebook or alternatively, the number can be typed in using the keypad provided.
Once you have entered your number using the keyboard, tap the
button to start dialling.
During the phone call you will be presented with the following screen:
Back
Click to exit the current interface
15
Single click to decrease the volume
Volume Show volume
gradually
Show the current volume
Single click to increase the volume
Volume +
gradually
Keyboard
Enter the key for the call process
Home
Click to go back to home page
Answer call
Single click to answer the call
Hang up
Single click to hang up
Phone Book
The feature allows the user to add contact information. The contacts can then be accessed through the “Phone Dial” feature and will be listed.
To add a contact, press the
button and use the keyboard button
and type in the information for the contact.
Dial History
This feature will include a log of the previous incoming and outgoing calls. A number on the list can be dialled within this feature, deleted or
transferred to the contact list.
16
Web Browsing
Firstly before you can access the web browsing feature you need an airtime data contract (GPRS) and you need to correctly configure the
APN details (Access Point Name) with your networks user name, passwords and dialling numbers etc. The APN configuration parameters of
each country and airtime provider are different. A network can also have different access points for business, Pay-As You-Go accounts etc
Configuring an APN
To access the APN Information tap the “GPRS” button under the GPRS menu.
You will then be presented with a configuration area, similar to the one below, to allow you to set-up the APN.
Return
Back to the main interface GPRS
New APN
Select new APN interface
Delete
Delete the selected APN
If your airtime provider is not already list ed then tap t he
to add their APN detail s.
17
/
Return
Back to the list of interfaces or GPRS APN main interface
Keyboard
Click the pop-up or hide the keyboard
Connect/Disconnect
Connect or disconnect to the GPRS network connection
Save
Save the current configuration
You will need to contact your airtime prov ider f or their APN det ails and then use the APN Inf ormation interf ace to ent er
the detail s. Remember t o sav e the details and test using the Connect/Di sconnect butt on.
IMPORTANT: If a GPRS net work is det ected as av ailable, the s ystem should automatically connect to it howev er if the
net work has a poor signal strengt h, then GPRS might not connect and you may hav e to wai t until you are at a location
that has a st ronger signal strengt h.
Using the Web Browser
Once you have set-up the APN Information you can then use the web browser function.
To access the web browser tap the “Internet Browser” button under the GPRS menu.
Back
Back to previous page
Advance
To the next page
Refresh
Refresh the page
Stop
Stop opening page
Soft keyboard
Enter the soft keyboard
Address
Show Address Bar
Close
Exit the current interface
18
Restrictions
ProNav requires information about your vehicle in order to compare it to the physical and legal road restrictions it holds in its database. This
helps the ProNav software determine the most appropriate route for your vehicle to take.
ProNav allows you to save unlimited truck profiles so if you have a fleet of trucks, you do not need to keep entering all the vehicle details each
time you move from one truck to the other.
Any restrictions that apply to your vehicle will be displayed as an icon on the mapping.
Height
Weight per Axle
Width
Weight
No Trucks Allowed
19
Length
Flammable/Explosive Goods
Launching your ProNav Software and Entering your vehicle details
Before you use your ProNav out on the road you will need to enter the dimensions of the vehicle. This is a very important step as it will
determine which route the ProNav will create for you and will help you avoid any restrictions that are not suitable for your vehicle, e.g. height,
weight, length, and width.
IMPORTANT
If you enter incorrect vehicle details you can be navigated along routes that are unsuitable for your vehicle type.
Firstly turn your ProNav on and tap the “Navigation” button. Please read the disclaimer and tap the Accept button:
You will then be presented with the main navigation screen as shown in the image below:
Select the “Vehicle Details” button and enter all of the attributes of your vehicle.
If you wish to use your ProNav for Car Navigation then simply select “Enabled: Yes” and change it to “No” as shown in the image below. If
you are using the ProNav for Car Navigation we would recommend you use the “Prefer Main” method.
Please select each attribute and enter the relevant information for your vehicle as shown for “Height” below.
Type the height of the vehicle using the keys provided. In this case as the height is a 14’3’ inch. Type in “143”, the height will then be shown.
You can use the “ABC” and “123” buttons to switch between the alphabetic and numeric keyboard.
20
Once you have the height of your vehicle tap the box that appears at the top of the page. You will then be taken back to the “Vehicle Details”
page. As you can see, the “Height” now contains the number that was previously entered. Repeat the process for all of the vehicle details so
it is all entered.
When you have finished entering all of the vehicle details, press the arrow at the bottom right of the page pointing left. Your vehicle details will
now be saved and you will be taken back to the navigation menu.
Navigation Options
Drive To
Tapping the 'Drive To' button takes you to the Select Place menu. This allows you to set your end point/destination. When an end point has
been selected and a GPS signal received, your route will be calculated automatically.
Plan Route
Tapping this button takes you to the Plan Route menu. From this menu you can plan a route with or without the GPS connected. Once in the
Plan Route menu, if you wish to plan the journey from the current position, you do not need to change the ‘Start’ point. To change your start
or end location, tap the appropriate box.
Vehicle Details
This option allows you to amend your vehicle details in the navigation menu.
21
Setup
Options can be changed according to your preference.
Exit
Exits out of navigation and reverts back to the main menu.
Navigating to a destination
As you have now completed the vehicle details section you are ready to use your ProNav to navigate to a location of your choice.
On the navigation menu, select the “Drive To” option. You will then be presented with the “Select Place” page; this is where you choose your
preferred navigation method.
Navigating using a Post Code
If you wish to navigate to a particular post code, please tap the “Post Code” button. Use the keyboard and enter the post code. Once you
have completed this step the Post Code will appear in the top box. Simply press this and your device will begin to calculate the route for you.
22
Navigating using the Town, Street
Once you have selected the “Town, Street” the same as with the “Post Code” option, you will be presented with a keyboard. Firstly, type in the
town you wish to travel to. In this example we are travelling to London, Whitehall. You can press the “More” button to view a full list of
suggestions. When the desired location appears at the top, tap it to continue.
Once “London” appears in the top box, tap it. You will then be given the option to navigate to POI’s within London or to navigate to the town
centre. To navigate to a street name begin typing the road you wish to travel to.
You are then given the choice to enter the house number or to navigate to the road itself. If you wish to travel to the road and not a specific
house number press the space bar once followed by the empty box at the top of the page. Your ProNav will then begin to calculate the best
possible route for you.
23
Navigating using a POI (Point Of Interest)
Once you have selected the “POI” option on the navigation menu, you will be presented with a full list of POI’s that you can travel to.
In this example, we will be navigating to the A40 North Bound Service Station. From the POI list, select the “Rest Area” button. Then begin to
type the name of the Point Of Interest. Press the top box when it appears with the location in and your ProNav will begin to calculate the route
for you.
24
Using the “Browse Map” function
This option gives you the ability to see a bird’s eye view of a particular area. On the navigation menu, select “Drive to” followed by the
“Browse Map” option, you will then be presented with the screen shown below:
You can find a destination using the third icon down on the right of the page. The plus and minus buttons will allow you to zoom in and out.
The arrow located at the bottom of the page will take you back to the navigation menu.
Favourites and Recent
Your ProNav will save all locations you have previously entered and automatically add them into the “Recent” list. If you wish to navigate to a
destination you have been to before you can select it from a list instead of typing the location in again.
You are also able to add a location as a favourite on your unit. This can be very useful if it is a destination travelled on a regular basis i.e.
Home.
How to add a favourite
In this example, we will add the postcode SG64ET as a favourite. To add a favourite, simply select “Plan Route” on the main navigation menu
followed by the chequered flag in the second box.
25
Next select the “Post Code” option, as before, type in the post code using the keyboard provided and select it when it appears in the top box.
The previously selected Post Code will then appear in the second box on the “Plan Route” next to the chequered flag.
On the far right of the box, where the post code is displayed, you will notice a “Star Icon”. This is used to add the location to the favourites.
Simply press the star and you will notice it disappears. The location will now be in the favourite’s folder.
You are able to delete and change the name of the favourite it the favourites folder.
26
Understanding the Drive Screen
This is the screen you will be presented with when you are using the ProNav on the road, have planned a route and are receiving notifications
for directions.
Stop Navigating
To stop navigating simply tap the centre of the drive screen to view the “Navigation Options”, on this page press the “Stop Navigating” button
and the ProNav will exit the drive screen.
Drive Options
Point of Interest (POI)
Tapping this button will allow you to find a Point Of Interest close to your current location.
Route Text
The ‘Route Text’ button will show a simple text list showing direction arrows and accumulated mileage on the left and a road number and
name on the right. Use the ‘up’ and ‘down’ arrow buttons to read the full route.
27
Route Map
By tapping ‘Route Map’ an overview map appears showing your route, indicating the start and end points. This map can be zoomed in/out
and panned around.
Stop Navigating
This stops the Drive Mode and returns the user to the main menu.
Volume
Tap the ‘Volume’ button if you wish to change the volume. Use the “+” and “-“ buttons to adjust the volume to your desired level. Please Note:
Even with ‘Mute’ selected, the safety camera warning will still make a notification sound.
Night/Day Colours
This changes the background colour of the map screen for better visibility at night. It also reduces glare.
Additional options can be accessed using “+” button.
2D/3D Display
You can select the map view to display in either 2D or 3D map mode. Tap on the display button to change.
Map key
The map key will provide you with detailed information about the icons used for restrictions, warnings and parking. Tap the back arrow button
to return to the Drive Options screen.
Setup
Tapping the 'Setup' button takes you to the Setup main menu which has a number of options.
Route Type
Select required type of routing:
Fastest Route (Not advisable for use with HGV’s)
Tapping this box provides the fastest route
Prefer Main Roads
Tapping this box provides a route which prefers use of motorways and main roads.
Avoid Highway
28
Tapping this box provides a route which avoids Motorways
HGV Routing
Tapping this provides routes most suited for HGV’s.
Route Options
Avoid Tolls
Tap this box to avoid toll roads on your route.
Ignore Tolls
Tap this box to allow routing on all toll roads.
Warn on Toll
Tap this box and the system will give you the choice of whether to avoid or allow tolls at the point of route calculation. This is
the default option.
Map/Drive Options
Miles and KM
Tap the appropriate box to select whether you would like your distances shown in miles or km.
Road Names and Numbers
Select whether you prefer to see road names or road numbers on the mapping or in text directions. The default is set to road
names.
QWERTY Keyboard
Select whether you prefer an alphabetic or QWERTY keyboard.
Voice
Select from the available voices by tapping the box next to your selection.
Volume
Use the “+” and “-“ buttons to adjust the volume to your desired level. Volume can also be adjusted via the ‘Drive Options’ screen.
Vehicle Details
This will allow you to change the vehicle details within the navigation.
POI
Selecting this option allows you to enable which POI types are shown as ‘Your Favourites’. Only POI’s you have selected as Favourites will
be displayed on the mapping.
Time
Selecting this option will allow you to set the international time zone that you are located in.
If the software is set to GPS Time it will acquire its date and time information automatically from the GPS satellite. Switching it to Trust
Device Time means that you will need to set the date and time yourself and you should refer to the hardware guide for instructions.
29
Favourites
Selecting this option will display a list of the favourites you have added.
GPS
Selecting this option displays GPS signal status.
About
This option will display information on the software version.
Colour Scheme
There are five colour schemes for you to choose from. Just tap the button and choose from the list to enable the colour scheme you require.
The current colour scheme that is being used is displayed on the ‘Colour Scheme’ button.
Map Colour 1
Map Colour 2
Map colour 3
Map Colour 4
Map Colour 5
Safety Cameras
30
Your ProNav software also comes with safety camera warning software. This will provide you with both audible and visual alerts for fixed
safety cameras along your route.
How the Safety Camera software works
The software will automatically provide intelligent audible alerts based on the speed that you are travelling when you are approaching a safety
camera.
These are;
When approaching a safety camera at a speed below the known speed of the camera, then an audible sonar ping will sound every five
seconds up to and through the camera zone.
When approaching a fixed safety camera at a speed above the known speed of the camera, a sharper ping warning will sound for a preset
number of seconds up to and through the camera zone, along with the visual warning (shown above). The warning will tell you the type of
camera ahead (if known), along with the speed of the camera (if known), the camera distances and the bearing on where the safety camera is
approximately located on the road. If you reduce your speed to below that of the known speed of the camera, the sonar ping will replace the
sharp ping noise.
Important: Some camera types, such as mobile or variable limit safety cameras, do not have speed limits associated with them so
you might receive an audible warning for those even if you are driving below the speed limit.
Understanding the Safety Camera Warning
31
Setting the Options for Safety Cameras
There are a number of options available when using the safety camera software and these are located under ‘Setup’, ‘Safety Cameras’ in
the navigation mode.
The options available are:
Enabled / Disabled
This will turn the safety camera software on or off. Please note that if this is set to ‘Disabled’ you will not receive any visual or
audible alerts for any safety cameras on your route. Tap the button to change.
Warn At 5 Secs
This will allow you to change the time that you receive the first warning before you reach a safety camera. The options are
‘No Warning’, ‘Warn at 5 Seconds’, ‘Warn at 10 Seconds’, ‘Warn at 15 Seconds’ and ‘Warn at 20 Seconds’.
Smart Warnings
When set to ‘ON’ this will warn you about safety cameras on your side of the road only. When set to ‘OFF’ the safety camera
software will warn you about cameras on both sides of the road.
Show on Map
When this is enabled, the safety camera icon
depicting the location of a safety camera will be shown on your map
while you drive. To disable, please tap the button to select ‘Don’t Show on Map’
Warning Sounds
This will turn the audible alerts on or off. Tapping the button will change it accordingly.
View Info
This will tell you when your subscription is due to expire and the date that your safety camera database was created.
For information on buying safety camera database updates please go to www.pronav.co.uk
Click OK to return.
If you wish to purchase a one or three camera alerts license with monthly camera database updates, please go to www.pronav.co.uk and
select “Online Shop” followed by “Safety Camera Updates”.
32
Connecting your ProNav to your computer
Please then turn your ProNav on and wait for the main screen to load up. Then, using the USB lead provided in the box, connect one end to
the USB slot on your PC and the other Mini USB connector into the side of your ProNav. After approximately 3 seconds your ProNav will
automatically connect to your computer and you will be presented with the image shown below:
Once you have finished installing any necessary updates please be sure to safely remove your ProNav from your PC. If you do not safely
remove your ProNav you may risk damaging it. To safely remove please click on the arrow which is located next to the time display on your
computer screen and select safely remove hardware. Once you are prompted you can now disconnect the ProNav from the computer.
33
Registering your ProNav online
The advantage of registering your ProNav with Navevo is that you will receive a notification if there are any updates or offers available.
To register, you will need your email address, contact name, product serial number and purchase information. Please visit the website shown
below to register your ProNav.
http://www.pronav.co.uk/support.html
Support
To view a list of FAQ’s (Frequently Asked Questions) please also visit:
http://www.pronav.co.uk/support.html
If you believe your device is faulty or you simply require any assistance or further information, please contact us using the information shown
below:
Email:
[email protected]
Phone:
0844 5616 772
Caring for your ProNav
Your ProNav contains sensitive electronic components that can be damaged from impact, excessive vibration and water.
If you need to clean the screen of your unit, please use a dry soft clean cloth only.
34
Frequently asked questions
What video formats does my ProNav support?
The video player of the PNN350/PNN350WE/PNN400/PNN420 supports files types: WMV, 3GP, MPG4, FLV, AVI, ASF, DIVX 5.0, 4.0, 3.11,
XVID and MPEG2 up to 480x272 resolutions.
Why does the screen of my ProNav turn itself off frequently after a few minutes?
If your ProNav keeps turning itself off, then it may simply be down to incorrect system settings. Please ensure that the “backlight” settings are
set to “always on” and not set to “off after 1 minute, 2 minutes etc”. You can find the backlight setting under the Settings menu on the main
menu screen of the device.
My ProNav cannot obtain a satellite fix?
If your ProNav appears to be having difficulty acquiring a GPS fix, firstly ensure that you are located outside with a clear view of the sky. If you
are inside or under cover, your ProNav may not be able to acquire a GPS fix. Adverse weather conditions may also make it more difficult to
acquire an adequate GPS fix, as well as being located near tall buildings or in heavily built-up areas.
The sound does not appear to be working on my ProNav?
First check that your ProNav is not set to mute and that the volume is turned up to maximum. If your system has an FM Transmitter, make
sure that this is NOT enabled as this will disable the speaker on the unit. Simply set the "FM Setting" slider to "0" to disable it. (This is located
the under the FM button under the Settings menu, accessed from the main screen of the device). If you are not receiving voice commands
when driving, please ensure that the speaker icon is not muted, (this is located in the bottom right of the drive screen). Please also check that
the volume on the navigation section after “Setup” is set to 100 and not muted.
My ProNav does not appear to be able to connect to my computer?
If your computer is running Windows XP or an earlier Windows operating System, you may need to download a free copy of Microsoft
ActiveSync from a number of websites on the internet. If your computer is running Windows Vista or Windows 7, you will need Windows
Mobile Device Centre. Once you have installed the program, turn your unit on and wait for the main screen to load and connect the unit to
your laptop or PC using the USB cable. If you have a PNN220, PNN300, PNN350 or PNN400 you will need to press the green button in the
centre of your screen when it appears on your ProNav.
What audio formats does my ProNav support?
The audio player of the PNN350/PNN350WE/PNN400/PNN420 supports files types: WMA, MP3 and WAV.
When I switch on my ProNav a popup message appears telling me that the software is out of date?
This message appears approximately one year after your ProNav is first used and is merely advisory, suggesting that you might want to
update your mapping. Your unit will work as normal; however, the message will now appear every time you turn your system on. If you wish to
purchase a map update please go to www.pronav.co.uk and go to the “Online Shop” and select “Mapping updates”.
35
When I turn on my ProNav a popup message appears telling me that the camera alerts have expired or are due for renewal?
Each ProNav comes with a six month safety camera alerts trial and if you see this popup message, it means that your six month trial has now
expired. If you wish to purchase a one or three camera alerts license with monthly camera database updates, please go to www.pronav.co.uk
and select “Online Shop” followed by “Safety Camera Updates”.
I do not appear to be getting safety cameras warnings whilst driving?
To see if your Safety Cameras have been correctly installed click “Setup” in the main menu and then tap the “Safety Cameras” button. Ensure
that the safety cameras are enabled and “Show on Map” needs to be selected and warning sounds need to be switched to “On”. To check
that your license has not expired tap, “View Info” and the date the database was created will be displayed. If you require an update or a new
license go to www.pronav.co.uk and select “Online Shop” followed by “Safety Camera Updates”.
The touch screen does not appear to work properly and is misaligned?
Occasionally, the touch screen of your ProNav needs to be recalibrated. To do this tap the Calibration button (This is located under the
Settings menu, accessed from the main screen of the device) and follow the on screen instructions. It is important to use the stylus and not
your finger when re-calibrating your touch screen.
36