1
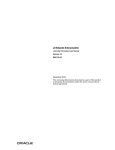
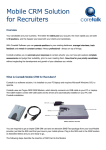
XT-300 USER GUIDE
XtremeTrakGPS XT-300 User Guide
2
XT-300 USER GUIDE
INTRODUCTION
Thank you for purchasing the XtremeTrakGPS XT-300
battery-powered live GPS tracking device!
The XT-300 is one of the most technologically advanced
battery-operated GPS tracking device on the market,
providing location updates every 20 feet when walking
(speed less than 10mph) or every 10 seconds if the speed
exceeds 10mph.
The truly LIVE tracking methods employed by the XT-300
enable it to perform under a wide variety of applications,
providing GPS tracking for everyone from Alzheimer’s
patients to athletes (cyclists and runners), from toddlers
to teens, from freight shipments to airport luggage. The
applications for the XT-300 are limited only by the human
imagination.
Options for the XT-300 GPS tracking unit include
extended-life battery kits providing up to 75 hours of
actual movement on a single charge. We offer runners’
and cyclists’ pouches for tracking athletic events such
as cycling circuits and marathons, and even magnetic
weather-resistant boxes enabling covert placement
under a vehicle.
Not surprisingly, the XT-300 has garnered rave product
reviews in the press. GPS Magazine calls it “The most
accurate, easy to use GPS Tracker available.” It’s a
testament to our staff and their dedication to design and
build nothing less than the best product of its kind on
the market, without exception. At XtremeTrakGPS, we
go to extremes to deliver a world-class product, and are
equally dedicated delivering of a comparably world-class
customer service experience.
XtremeTrakGPS XT-300 User Guide
Figure 3.0 XT-300 Live Tracker
For this reason, LIVE support is embedded directly into
our tracking system. If you encounter difficulties, have
additional questions, or simply want to say “job well
done”, we’re always delighted to hear from you.
Use common sense when cleaning your XT-300 – use a
soft damp cloth, do not use solvents or alcohol-based
cleaning agents. The XT-300 is not waterproof, so
don’t submerge it in water. And the housing - like any
plastic - can melt under extreme heat, so don’t subject
it to environments where temperatures exceed 160°F.
Given proper care, your XT-300 GPS Tracking device will
provide reliable service for years to come.
Thank you for choosing the XT-300. We sincerely
appreciate your business!
3
XT-300 USER GUIDE
DEVICE ACTIVATION
Your XT-300 tracking service needs to be activated prior
to use. To activate, simply call us at 405-749-1105
between the hours of 7am-7pm Monday through
Friday, and 9am-5pm on Saturday.
Once your device has been activated, it can take between
2-3 hours for it to start transmitting.
If you wish to cancel your service, simply contact us
before the 25th of the month.
BATTERY CONSIDERATIONS
The single biggest dilemma confronting a batteryoperated product of this nature is managing the delicate
balance between battery life and update performance.
Everyone wants the fastest update possible so they can
see the device as it moves in real-time. The problem is
that faster updates utilize more battery, and packing
additional battery into a device increases cost, weight,
and size.
Other products on the market are comparatively
primitive, solving the battery dilemma by providing
2-minute, 5-minute, or even 15-minute updates. Some
are even “ping” based, updating their location only when
you specifically ask for it. The problem with such slow
updates is that they cannot provide an historical playback
to enable you to see (with any degree of accuracy) where
the GPS tracking device has been.
Conversely, the XT-300 provides real-time 10-second
updates, recording history for later playback so that
you can see everywhere the device has been – even if
you weren’t watching at the time. We balance the need
for long battery life by embedding an on-board motion
XtremeTrakGPS XT-300 User Guide
sensor, enabling the device to power off and conserve
power after 120 seconds of no movement.
The instant the device moves, it powers back up,
reconnects, and resumes transmission.
Using this method, the XT-300 doesn’t last “X” number
of hours after a charge. Rather, it lasts 8 to 10 of actual
movement time with the standard battery. If a device
on a vehicle moves 1 hour per day, the battery will last
approximately 8-10 days on a single battery charge. If it
moves 2 hours per day, the battery will last roughly 4-5
days. If it moves nonstop, it will last between 8 and 10
hours. Bearing this in mind, we must also mention that
the motion sensor is incredibly sensitive to vibration –
even a passing vehicle may vibrate the vehicle on which
the XT-300 is installed enough to wake it. Under normal
circumstances this isn’t a problem, as the XT-300 will go
back to sleep after 120 seconds of no movement, but
if the vehicle is parked on a busy street it can lead to a
dramatically reduced operating period for that specific
battery charge. For extended tracking, an extended
battery kit is available to extend the battery life to up to
75 total hours of movement. With the extended battery,
and driving approximately 1 hour per day, the extended
battery would last about 75 days on a single charge.
WEB TRACKING INTERFACE
In order to access the live tracking features of the XT-300,
simply load your web browser on your PC (or Mac) and
go to http://live.xtremetrakgps.com.
Make sure to have your login details handy that you
received during your device activation. To enter your
information, look for the login box, as shown on the next
page in Figure 5.0.
4
XT-300 USER GUIDE
and the speed at which the vehicle is traveling.
The location(s) of your vehicle(s) on the map are updated
every 10 seconds.
Figure 5.0 Web Interface Login
In the Authorization Tab on the left side of the screen,
enter your login ID and password you selected during
activation, then click the LOGIN button.
Once login is complete, the map will immediately jump
to your area and the location of your vehicle(s). You
may move your mouse over the vehicle to show specific
information about the vehicle such as latitude, longitude,
You may move the map within the browser by clicking on
the map, holding the mouse button down, and dragging
the map. Double-click on an area to zoom in on it, or roll
the wheel on the back of your mouse to zoom in and out
on the center of the map. Clicking on a vehicle marker
(not the flag, but the vehicle marker itself) will open a a
“Device Options” window (Figure 6.0, next page) which
gives you the ability to change the vehicle marker, change
the name on the flag, change the color of the flag or flag
text color, retrieve the address of the vehicle’s current
location, or auto-center (follow) the vehicle. To change
the vehicle marker, click on the vehicle marker image
below the save button. A window will appear giving a
selection of different vehicle icons you may use.
To change the text which appears on the flag, simply
change the text in the field labeled FLAG TEXT. You may
change the color of the flag or text by clicking the COLOR
button to the right of each field, respectively. When
you’ve finished making your changes to the flag color,
text color, flag text or vehicle marker, simply click the
SAVE button.
The phone driver feature is available with paid access
to the SKYPE network, allowing you to phone the driver
through your PC. Other options listed are not applicable
to the XT-300, such as locking and unlocking doors,
enabling and disabling the starter, honking the horn,
and remote starting the vehicle - these are available only
with hard-wired devices which must be physically wired
under the dash of the vehicle to perform these functions
(such as the XtremeTrakGPS XT-100 or XT-200), thus do
not apply to a battery-operated device like the XT-300.
Figure 5.1 GPS Tracking Web Interface
XtremeTrakGPS XT-300 User Guide
5
XT-300 USER GUIDE
area. In larger metro areas, high-resolution aerial images
(also known as Bird’s Eye images) are available; in more
rural areas, even Hybrid view may not provide the same
level of detail as larger metro areas.
If you live in a rural area, you may find it more useful to
select “Map View” in lieu of Hybrid or Bird’s Eye view.
Figure 6.0 GPS Device Options
CONTROL PANEL
On the left side of the map screen you will find a Control
Panel, providing tabs for Authorization, Map Control,
Vehicles, Reports, Alert System, Search, Directions and
Routing, Address Markers, Live Support, and Historical
Playback. Clicking on any of these tabs will provide
access to each group of functions. This control panel is
the key to all functions and features of the web-based
tracking system. Through it the system provides access
to reports, alerts, live support, 90-day historical playback
and an unending array of other features – with more
new features constantly being added.
MAP CONTROL TAB
You may select the “Map Control” tab from the control
panel to the left, and the map control panel will open,
providing controls to zoom, pan, and set map rendering
options. The XtremeTrakGPS system relies on Microsoft
Virtual Earth Maps to provide mapping of the coverage
XtremeTrakGPS XT-300 User Guide
Figure 6.1 Map Control Interface
When fully zoomed, the maps provide detailed streetlevel information, enabling you to see the precise location
from which your XT-300 tracking device is transmitting.
When zoomed out completely, you have a complete view
of the world. If you have only one device, the “Center
Map” checkbox will automatically center the map on
that unit. If you have multiple devices, “Center Map” will
position the center of the group of devices at the center
of the browser. If you select a single vehicle (under the
vehicles tab), the “Center Map” checkbox will tell the
system to center on the selected vehicle. “Optimize
Zoom” will zoom as closely as possible while still keeping
the device or group of devices on the viewable map at
6
XT-300 USER GUIDE
once. “Show Traffic” will show traffic flow and congestion
levels over major interstates and highways. Measured
areas will be highlighted in green for normal traffic flow.
Areas experiencing moderate slow-downs in traffic flow
will be highlighted in yellow, and areas with major traffic
snarls will be highlighted in red. Areas highlighted in black
indicate complete blockages and traffic at an absolute
standstill. By default, your login will show ALL the devices
associated with your account – up to a maximum of 512
units on screen at once.
In viewing all vehicles, you manually control the area of
the map you wish to view by using the zoom and pan
features to move the map within the view port. Clicking
the Map View button will show a simple view of the map.
Satellite will show satellite imagery. Hybrid combines the
most useful features of both Map and Satellite views,
superimposing street lines and names over the top of
the Satellite imagery. The N, S, E or W setting allows you
to select between four different angles to view Birds’ Eye
imagery for a better indication of surrounding terrain.
In order to select an individual vehicle, you may
select the “Vehicles” tab from the control panel,
and select a specific vehicle from the dropdown list.
TRACKING OPTIONS
Selecting a single vehicle from the dropdown list on the
VEHICLES tab enables you to turn all other markers off,
enabling quick isolation of the target from among a large
fleet of vehicles. This feature is often used in conjunction
with the “center map” checkbox on the map control to
“follow” a vehicle wherever it goes. Individual vehicle
selection is also used to specify which specific vehicle to
replay under the historical playback control. Specifying a
single vehicle to track has implications under a number
of different controls. Check each section of the manual
XtremeTrakGPS XT-300 User Guide
for the impact of individual vehicle selection on each
function.
REPORTS
Currently there are 20 different report options available.
More reports are being added regularly. There are two
types of reports – online reports which appear onscreen,
and offline (Excel) reports which are emailed to the
address you specify. Some reports - such as the vehicle
mileage by state report or vehicle operating report – are
available only via email largely due to the time required
to generate the report.
Another major difference between online reports and
offline reports is the fact that an online report is typically
run for a single vehicle for a single day. Offline reports
can be run for ALL your vehicles for a period of several
months. Note: When you request an offline report for
multiple vehicles, bear in mind the ramifications of your
request. An Excel spreadsheet only supports a maximum
of 65,535 rows. If you have more data over a period of
several months than can fit in 65,535 rows, the report
will be truncated at row 65535. When a report is selected
from the Reports control, a semi-transparent overlay
appears on the map. Note that the device markers
continue to move, always reflecting their locations on
the map beneath. On this reports overlay, you may select
the specific parameters used for the selected report.
When reading a report, you will typically see a series
of dates/timestamps, along with the physical address
(or lat/lon, if the vehicle is continuing on a more-or-less
straight course), as well as vehicle speed and heading.
Headings are expressed in the range of 0 – 359, indicating
thedirection in which the vehicle is pointing. Zero is
north; the value increments clockwise. Reports may be
highlighted and copied/pasted into Excel spreadsheets.
7
XT-300 USER GUIDE
while the Alert Notification Editor is open. An Alert Zone
can be as small as a driveway, or as large as an entire
continent. Note: While an Alert Zone can be as small as
a driveway, the functionality of an Alert Zone depends
on the device making one transmission on one side of
the box, and a second transmission on the opposite side
(inside vs. outside). Select the notification method that
you prefer.
Figure 8.0 Reporting Interface
TEXT AND EMAIL ALERTS
Imagine, for a moment, that you’re a homebuilder, HVAC
installation contractor, electrical or plumbing contractor.
You want to know what time your guys are arriving on
the job site each morning…. and what time they leave
in the afternoon. With the Zone Alert feature of the US
Fleet Tracking system, you can easily define an unlimited
number of “Alert Zones” (also known as “geo-fences”)
and the system will automatically notify you – by e-mail
or SMS text message (or both) – any time one of your
vehicles enters or exits the zones you define. Defining
Alert Zones couldn’t be easier. First, zoom in on the area
in which you want to create a zone notification. From
here, it’s as simple as clicking the Alert System tab on the
Control Panel and selecting the option to “Show Alert
Editor”. A window similar to that shown in Figure 8.1
(right) will appear at the bottom of your screen. Click the
“Add Zone Alert” button. In the first field, select a name
for your zone, and then click and drag the pushpins at
each corner of the highlighted zone on the screen.
Figure 8.1 Geo-Fence Alert Settings
You can have XtremeTrakGPS send an SMS text message
to your cell phone, or e-mail to any address you specify.
When you’ve finished specifying the e-mail address
or SMS address, simply click the option to “Save Alert
Zone”, and the zone you’ve created will be added to the
list at the left. It’s that easy!
It’s possible to draw a zone so small that the device is
unlikely to make a transmission from within the defined
area. When in doubt, to increase reliability of Alert Zone
notifications, it is recommended that you make the
box larger than the simple edges of a driveway. A area
of 100 feet square is the recommended minimum size.
You may roll the wheel on the back of the mouse to zoom
in or out on the map, or click and drag to move the map
XtremeTrakGPS XT-300 User Guide
8
XT-300 USER GUIDE
Note: SMS addresses are like email addresses. Some
wireless carriers define their SMS addresses as
1 + areacode + cellnumber@[yourcarrier.com] (e.g.
[email protected]). Others do not recognize
the address if there exists a 1 before the area code. If
your SMS alerts are not arriving at your cell phone, try
changing the SMS address without the 1 and saving the
change to see if it makes a difference.
SEARCH
The “Search” feature enables the user to find locations
of selected subjects within a certain area. For instance, if
you were to type in “pizza” or “gas stations” in the “Find”
window pushpins would populate on the map of the
closest locations that matched your search criteria.
With a correctly defined zone, you receive notification
anytime a vehicle enters or exits the area you’ve
specified.
The Speed Alert is a close relative of the Zone Alert.
Speed Alert enables you to define speeds at which you
are notified. Speeds (like Alert Zones) can be defined for
specific vehicles, or for every vehicle in your fleet. Any
time one of the specified vehicles exceeds the defined
speed; the XtremeTrakGPS system will notify you with an
SMS text message to your cell phone, an e-mail, or both.
From the same Alert Editor window, select the option
to “Add Speed Alert”. Specify a name for your alert (so
that you can find it later in the list at the left), and select
whether you want the alert to apply to all vehicles or a
specific vehicle by selecting a vehicle from the dropdown
list. Fill in the speed in the next field, and you’re almost
finished. Check the appropriate box and populate the
fields for SMS text message or e-mail notifications
(depending on the method you prefer), and select the
option to “Save Speed Alert”. You’ll see your alert added
to the list box at the left. Alerts are easily removed by
selecting the items in the Alerts list on the left side of
the Alert Editor Window and clicking the “Remove”
button. When you are finished creating or editing Alert
Zones and Speed Alerts, click the [X] at the upper right
corner of the Alert Editor Window to close it and resume
normal operation.
XtremeTrakGPS XT-300 User Guide
Figure 9.0 Local Search Results for “Gas”
A “Search Results” box will open on the right side of
your screen (See Figure 9.0) with addresses and phone
numbers for the locations appearing on the screen. In
the simplest of terms, if it is in the phone book, the
XtremeTrakGPS tracking system will show it to you on
the map.
DIRECTIONS AND ROUTING
Directions and Routing The “Directions and Routing”
feature enables the user to enter a start and stop
address, along with up to 20 additional stops on a route.
The system will plot the route with driving directions. By
default, “no optimization” is checked. This will show the
route in the order in which the stops were entered.
Note: Popups must be enabled on your browser in order
to receive driving directions. Most browsers (IE, FireFox,
9
XT-300 USER GUIDE
Safari, Chrome, etc.) allow you to enable popups from
our site specifically while continuing to block popups
from unwanted sites.
If the checkbox is turned on for “Fastest Time”, the route
will be optimized and the stops reordered in such a
manner as to allow the driver to complete all stops in the
shortest amount of time.
If the checkbox is turned on for “Shortest Distance”, the
route will be optimized and the stops reordered in such a
manner to allow the driver to complete all stops with the
lowest possible mileage. Please note that the shortest
mileage is not always the fastest time – for example,
interstate travel might predicate slightly higher mileage,
but also higher speed and thus shortest time. In order
to receive driving directions, the popup blocker on your
browser may need to be disabled temporarily to enable
the pop-up window with driving directions to appear.
ADDRESS MARKERS
The Address Markers tab exists to enable the placement
of user-defined markers on the map. These markers can
provide quick and easy location of warehouses, offices,
and other landmarks relevant to your daily use of the
US Fleet Tracking vehicle tracking system. To access
this feature, select the “Address Markers” tab and click
“Show Address Editor”. After typing the name you wish
to appear on the marker label, type the address into the
address field and click the “Find Lat:Lon” button. The
system will find the closest match in the database and
populate the latitude and longitude with that location.
Alternatively, if you know the latitude and longitude
(based on the position of a vehicle), you can simply type
the latitude and longitude and click the “Find Street
Address” button. To place the marker on the map, click
the “Add Address” button at the lower right corner of
XtremeTrakGPS XT-300 User Guide
the Address Editor window. A target icon will appear at
the location specified. When your mouse is placed over
this target icon on the map, a small window will appear
providing complete address information. To remove an
address marker, simply select that item in the list on
the left side of the Address Editor Window and click the
“Remove” button. When you are finished creating or
editing your address markers, click the [X] at the upper
right corner of the Address Editor Window to close and
resume normal operations.
LIVE CHAT SUPPROT
In yet another of our continuing pattern of industry firsts
(and our undying dedication to world-class customer
support), XtremeTrakGPS provides LIVE on-line chat
support from within the vehicle tracking interface.
With LIVE Chat Support embedded directly into our
tracking system (See Figure 11.0, next page), you can ask
questions or be given direction on how to use specific
parts of our system even while you continue to interact
with the system. There is no need to close the chat
window or go try something and come back. In fact, you
can leave the Live Support window open even while you
manipulate the map – zoom in, zoom out, pan the map,
select an individual vehicle or all vehicles, or even run
reports or historical playback. No other vehicle tracking
product on the market provides such an advanced level of
technical support and assistance to the user community
– because no other vehicle tracking company cares as
deeply about the satisfaction of its clients.
To talk with a LIVE support engineer, simply select the
Live Support tab on the control panel, and click the
button labeled “Live Support System”. A window will
appear at the top of your screen similar to Figure 11.0.
10
XT-300 USER GUIDE
Figure 11.0 Live Chat Support Window
To send a message to Tech Support, simply type your
question into the lower box, and hit “enter” when you
are finished. The upper box will show the conversation
between yourself and US Fleet Tracking support as each
question is answered. Currently, we provide live online
support between 7am and 7pm (Central Time) Monday
through Friday and 9am through 4pm on Saturday.
HISTORICAL PLAYBACK
The Historical Playback feature enables you to
geographically reanimate the path taken by a specific
vehicle based on historical (report) data. Before we can
begin an historical playback, we must first select the
specific device we intend to replay from the VEHICLES
list on the Vehicles Tab. Once this is complete, select
the HISTORICAL PLAYBACK tab, and click the date on the
calendar for which you’d like to see a playback.
Next, click the PLAY button on the top of the Historical
Playback control. Once the PLAY button has been clicked,
the vehicle marker will begin reanimating the precise
path taken on the date selected.
XtremeTrakGPS XT-300 User Guide
Figure 11.1 Historical Playback Panel
The marker will leave a vapor trail over the route taken
to enable you to easily view the route. At the lower left
corner of the browser (on the browser status bar) you
will see the date and timestamp corresponding to the
vehicle’s marker placement. This value will increment
as records are read from the historical database as the
vehicle moves about the map. As with the normal (live)
playback, you may zoom or pan the map even as the
playback continues to run. Likewise, you may mouse
over the vehicle to see its speed at any point during the
playback.
The playback will begin at midnight on the date selected
and continue until the last record transmitted that day
has been rendered. To terminate the playback and
return to LIVE mode, simply click the button labeled
“Return to Live View”. While the playback is running,
you may zoom in or out on the map – either by going to
the MAP CONTROL tab, or by rolling the wheel on the
11
XT-300 USER GUIDE
back of your mouse. You may also PAUSE the playback by
clicking the PAUSE button on the HISTORICAL PLAYBACK
tab. You may play forward or reverse, jump to the end
or the beginning. To play high-speed forward or reverse,
click quickly multiple times on the >> or << buttons on
the playback control.
Figure 12.1 Activity Panel Window
FOR ADDITIONAL INFORMATION
Figure 12.0 Historical Route Playback
For additional information, please visit us at
www.xtremetrakgps.com for the latest information,
tips, and upgrades available for your XT-300 GPS Tracking
device.
ACTIVITY PANEL
When clicked, the ACTIVITY PANEL slides open or closed
from the bottom of the browser (See Figure 12.1) to
show the flow of data transmitted from your device(s).
If you have only one device, you will see one row of data
flow through the activity panel roughly once every 10
seconds any time the vehicle is moving. If the vehicle is
not moving, no data will flow. If you have more vehicles
(devices) moving, you will see a much faster flow of data.
The purpose of the activity panel is to provide an at-aglance list of the vehicles which are moving, and how fast
they’re moving.
XtremeTrakGPS XT-300 User Guide
12
XT-300 USER GUIDE
FREQUENTLY ASKED QUESTIONS
I just activated my service. Why doesn’t my device show
on the map?
I got onto Live Chat Support at 4am and nobody
answered.
The device cannot show its location on the map until
after it makes its first transmission. Take the device for a
drive and it should immediately begin tracking.
Live Chat is staffed from 7am to 7pm Monday through
Friday, and 9am to 4pm on Saturdays. Our intent here is to
fully support business hours throughout the continental
US, opening at 8am New York time and closing at 5pm
California time.
My map screen shows where the device was yesterday.
Today it’s in a completely different place, but the map
still shows the old location. Are the satellites down?
As we continue to grow, we may well evolve into a 24x7
technical support schedule. At this time, however, tech
support is only staffed from 7am to 7pm.
The satellites don’t go down. The problem is that the
device has not transmitted its location to the server since
the last location shown on the map.
My SMS alerts and/or email alerts aren’t coming
through. What’s wrong with the system?
Either (A) the device does not have power, (B) it doesn’t
have a view of the sky (and therefore cannot calculate its
location), or (C) the device is in an area with no wireless
data service, and therefore cannot transmit its location.
We recommend a physical inspection of the device. It’s
possible the SIM door (the tab on the right side of the
device which covers the SIM card) may be open, the
device may be turned off, or the GPS receiver may be
turned off on the device.
There are several possible reasons for this problem.
Either (A) you did not check the box in front of the SMS
entry on the Alert Editor, (B) you have a 1 in front of your
number (14057491105) when the 1 is not supported by
your wireless carrier, (C) you do NOT have a 1 in front
of your number and the carrier requires it, (D) the SMS
text message was caught by a spam filter at your local
wireless carrier (they decided it was spam), or (E) the
wireless carrier simply failed to deliver the message.
My device/devices were moving on the map at 60mph
and suddenly they stopped moving in the middle of the
highway. Is your system down?
Wireless carriers do not guarantee delivery of SMS text
messages. We’ve seen cases where some messages were
delivered in 20 seconds, while others were delivered
days later.
Our system has approximately 99.99% uptime, so it’s far
more likely your browser has disconnected from (lost its
socket connection to) our server.
To confirm Alert notifications are being sent properly, set
up an email alert (and make sure the email isn’t going
into your spam filter).
Users of wireless networks are more likely to experience
this problem than users on physical wired connections.
When I go into Directions & Routing, I don’t get the
directions.
Simply log back into the website to reconnect to our
server and see current locations of your vehicles.
Your browser is disabling pop-ups. Enable pop-ups (either
once, or for the entire site) and a separate browser will
appear with turn-by-turn driving directions when you
XtremeTrakGPS XT-300 User Guide
13
XT-300 USER GUIDE
request a route.
When I search for any item – tires, food, fuel, etc nothing comes up on the map.
The map will show telephone book entries for the area
viewed on the map. You may want to zoom the map out
slightly to encompass a larger area to ensure the viewed
map area includes businesses like those for which you’ve
searched.
My activity panel doesn’t show anything moving.
What’s wrong?
The activity panel shows the flow of data as it is received
from your devices. If you have only a single device which
is not moving, you will see nothing scrolling. When the
vehicle moves, you will see one line scroll past each time
the vehicle updates its position.
The more moving vehicles you have on the map, the
more data is transmitted, thus the data will transmit
more frequently and scroll through the Activity Panel
faster. The purpose of the Activity Panel is to enable you
to quickly see which vehicles are moving.
XtremeTrakGPS XT-300 User Guide
14