1
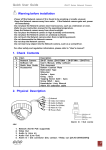
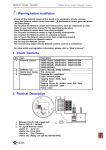
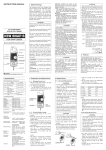
YH301B tuning fork level switch user manual 1. Terminal Diagram 2. Wiring Diagram 3. Operating Instructions Unlock: press "SET" for about 10 seconds alternating lights lit. Already unlock and move through the menu selection screen! Lights alternate flashing until you release the SET key. Lock: unlock State, if within 60 seconds of no key presses, which automatically locked. Set of NO and NC: unlock or unlock long press SET key for 3 seconds, alternating lights bright, when in a "green" light up the release button to enter set mode normally open normally closed, single at this time by pressing the "SET" button to set the desired state. Self-test mode: first the forks into the medium to be measured, steady for 5 seconds. Unlock or unlock long press SET key for 3 seconds, alternating lights lit. "Red light" light release button, red light blinks once to indicate the waiting for 1 second to confirm a self-test. Then, press the "SET" button, the lights out 2 times says it is a self-test. When the traffic light rapid flashing, indicating self-test is successful. When traffic lights are both flashing, self test unsuccessful. Need to post at this time, whenever you press the "SET" button, that is, enter the second selftest. Note: the self-test to within 3 seconds after pressing can again enter the self-test State, otherwise have to reselect the self-test mode, this feature in order to prevent maloperation. 4. Special Note YH-301B have a self-test feature, one is to overcome the forks vibration absorption phenomenon occurs after you install the barrel wall, is designed to prevent noise interference on the other hand, to avoid misoperation. The factory set value is based on the density of water (1g/cm m³), as a benchmark for State switching when the object to be tested when the density is greater than or equal to 1g/cm ³, you do not need to relearn to normal use. When the density of the object to be tested is less than 1g/cm ³, you will need to test settings. 5. Status Indication 6. Technical Parameters Power supply 19…60VDC 19…250VAC 50/60Hz Switch time 2~3s Ambient temperature -40~70℃ Working temperature -40~150℃ Working pressure -1~4.0MPa Medium Powder and particle: diameter=10mm, density>0.1g/cm³ Liquids: viscosity=10000mm2/s, density>0.7g/cm³ Process connection G1-N11* Electrical interface M12×P1.0 Housing material SS304 Fork material SS304/SS316 Relay AC250V/4A,DC60V/4A Output NPN 400mA PNP 400mA Power Consumption DC: 0.25W AC: 1.5W 7. Storage tank installation dimensions, instance and points for attention During installation, you can switch to level down a 15-20 degree angle of installation in order to reduce the occurrence of shocks and attachment materials. Installation should probably stay away from tank inlet to avoid material impact and incidence of false alarms. Such as these cannot be avoided shall be installed between the inlet and level partition protection. The junction box into the hole must be pointing down, the power supply cord into the line port of the fixing nuts must be locked. Staff when working inside the tank, prohibit the use of vibrators to climb or hang any rope and articles. 8. Installation Top mounted: vibrating vertically downward, and can be mounted on the top (away from inlet) anywhere. Horizontal installation: vibrator downward tilt 15-20 degree in order to reduce the impact of the material and occurrence of attachment. Horizontal installation: vibrator downward tilt 15-20 degree, level switch top bezel (length of about 10 in (250mm), width of about 8 in (200mm) can be prevented (d) improperly stacked around the material at the material level switches, and can reduce the impact of material for switches. Install inside the unloading hopper: level switches maximum distance between the bottom of the screw and barrel wall does not exceed 2.4”(60mm), you can avoid the improper accumulation of material false alarm condition occurs. 9. Accessories Specifications Wire Flange