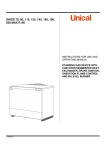
1
Operation manual
DUOMIX 333 PFP
Type:
230 V
❍ 400 V
❍ 440 V
❍
Serial-No.
⸏⸏⸏⸏⸏⸏⸏⸏
Translation of the original operation manual
PFP_Version 2_DBK_en_1205 · rs
Contents
Contents
1 Foreword........................................................................................................6
2 Safety..............................................................................................................7
2.1 Explanation of symbols.................................................................................7
2.2 Safety notes..................................................................................................9
2.2.1 Operating pressure.............................................................................9
2.2.2 Risks caused by the spray jet.............................................................9
2.2.3 Hazard from electrostatic charging...................................................10
2.2.4 Hazards from hot or cold surfaces....................................................10
2.2.5 Explosion protection......................................................................... 11
2.2.6 Risks due to the rams....................................................................... 11
2.2.7 Health risks.......................................................................................12
2.3 Information signs on the equipment............................................................13
2.4 Safety features............................................................................................13
2.4.1 Main switch and stop button on control cabinet ...............................13
2.4.2 Safety valves....................................................................................14
2.4.3 Compressed air shut-off valves........................................................14
2.4.4 Safety rupture discs..........................................................................15
2.4.5 Ground cable....................................................................................15
2.4.6 Spray gun lock..................................................................................15
2.4.7 Thermistor-motor protection-trigger..................................................15
2.5 Operating and maintenance personnel.......................................................16
2.5.1 Obligations of the plant owner..........................................................16
2.5.2 Personnel qualification......................................................................16
2.5.3 Authorized operating personnel........................................................16
2.5.4 Personal Protective Equipment........................................................16
2.6 Notes on warranty.......................................................................................17
2.6.1 Conversions and alterations.............................................................17
2.6.2 Accessories and spare parts.............................................................17
2.7 Emergency procedures...............................................................................18
2.7.1 Leakages..........................................................................................18
2.7.2 Injuries..............................................................................................18
2.7.3 Fires..................................................................................................18
3 Unit description...........................................................................................19
3.1 Intended use...............................................................................................19
3.2 Unit configuration........................................................................................20
3.3 System control components.......................................................................22
3.3.1 Control cabinet..................................................................................22
3.3.2 Pressure and dosing control.............................................................23
3.3.3 Control unit for metering pump, flushing pump
and pressure vessels.......................................................................23
Translation of the original operation manual DUOMIX 333 PFP3
PFP_Version 2_BAoDB_en_1410 · rs
Contents
3.3.4 Ram control......................................................................................24
3.3.5 Regulator cluster for feed pumps......................................................24
3.4 Material feed components..........................................................................25
3.4.1 Flow diagram....................................................................................25
3.4.2 Rams with feed pumps.....................................................................25
3.4.3 Pressure vessels with agitators........................................................26
3.4.4 Metering pump..................................................................................27
3.4.5 Material Flow Heaters.......................................................................27
3.4.6 Intermediate piece............................................................................28
3.4.7 Mixing unit.........................................................................................29
3.5 Flushing unit...............................................................................................30
3.6 Water circulation components.....................................................................30
3.6.1 Flow diagram....................................................................................30
3.6.2 Provision tank...................................................................................31
3.6.3 Circulation pumps.............................................................................31
3.7 Air maintenance unit...................................................................................32
4 Transport, installation and assembly........................................................33
4.1 Transport.....................................................................................................33
4.2 Installation location.....................................................................................34
4.3 Assembly....................................................................................................35
4.3.1 Assembling the hose package..........................................................35
4.3.2 Assembling spray hose and spray gun.............................................36
4.3.3 Grounding the unit............................................................................36
4.3.4 Connecting the compressed air supply.............................................36
4.3.5 Connecting to the electric power supply...........................................37
4.3.6 Opening the ventilation screw on the contact pressure gauge.........37
5 Operation......................................................................................................38
5.1 Taking the system into service....................................................................38
5.1.1 Starting the system...........................................................................39
5.1.2 Put the flushing unit and the water circulation into operation...........39
5.1.3 Flush mixing unit and spray gun.......................................................39
5.1.4 Cleaning the system.........................................................................40
5.1.5 Fill the pressure vessels with material to be applied........................41
5.1.6 Bleed the system..............................................................................42
5.1.7 Adjust the deicing system.................................................................42
5.1.8 Put the material flow heaters into operation.....................................42
5.1.9 Filling the hose package...................................................................43
5.1.10 Checking the mixing ratio...............................................................43
5.2 Coating.......................................................................................................44
5.2.1 Adjusting spraying pressure..............................................................44
5.2.2 Adjusting the pressure and dosing control .......................................44
5.2.3 Tips on coating..................................................................................45
4
Translation of the original operation manual DUOMIX 333 PFP
PFP_Version 2_BAoDB_en_1410 · rs
Contents
5.2.4 Changing material drums..................................................................45
5.3 Flushing......................................................................................................46
5.4 Cleaning the static mixer............................................................................46
5.5 Work breaks................................................................................................47
5.5.1 Short interruption of work..................................................................47
5.5.2 Longer work break............................................................................47
5.6 Placing the system out of operation............................................................47
5.7 Storage.......................................................................................................48
5.8 Waste disposal............................................................................................48
6 Maintenance.................................................................................................49
6.1 Regular inspections....................................................................................49
6.2 Maintenance plan.......................................................................................50
6.3 Air maintenance unit...................................................................................50
6.3.1 Checking the lubricant level in the fog oiler......................................50
6.3.2 Checking and adjusting the fog oiler.................................................50
6.3.3 Checking and cleaning the water separator.....................................51
6.4 Metering pump............................................................................................51
6.4.1 Checking release agent for material residues..................................51
6.5 Feed pumps................................................................................................51
6.5.1 Checking the release agent level in the feed pumps........................51
6.5.2 Readjust the upper packing of the feed pumps................................52
6.5.3 Changing the upper packing of the feed pumps...............................52
6.5.4 Replacing the seals on the follow plate............................................52
6.6 Recommended operating materials............................................................53
6.7 Special tools...............................................................................................53
7 Rectification of faults..................................................................................54
8 Technical data..............................................................................................57
8.1 Machine card..............................................................................................57
8.2 Type plates..................................................................................................57
Translation of the original operation manual DUOMIX 333 PFP5
PFP_Version 2_BAoDB_en_1410 · rs
Foreword
1 Foreword
Dear Customer!
We are delighted that you have decided in favour of a DUOMIX 333 PFP from our
company.
This operating manual is intended for the operating and maintenance personnel. It contains all the information required to working with this unit.
The owner of the unit must ensure that the operator of the unit always has
an operating manual at his/her disposal in a language he/she understands!
Safe and reliable operation of the system requires further information in addition to this operating manual.
➤➤ Read and comply with the applicable guidelines for your country.
In Germany, these are the “Richtlinien für Flüssigkeitsstrahler” (Guidelines
for Liquid Jets), issued by: the Hauptverband der Gewerblichen Berufsgenossenschaften.
➤➤ Moreover the manufacturer’s instructions and guidelines for coating or
feeder materials are to be respected at all times.
We strongly recommend to add all relevant guidelines and accident prevention
instructions to this operating manual.
However, if you have any questions, please do not hesitate to contact us.
Excellent work results with your WIWA DUOMIX 333 PFP wishes
WIWA Wilhelm Wagner GmbH & Co. KG.
Copyright
© 2014 WIWA
The copyright for this operating manual lies with
WIWA Wilhelm Wagner GmbH & Co. KG
Gewerbestraße 1-3 • 35633 Lahnau • Germany
Phone: +49 6441 609-0 • Fax.: +49 6441 609-50 • E-mail: [email protected] • Internet: www.wiwa.de
This operating manual is solely intended for personnel involved in preparation, operation and servicing.
It is prohibited to pass on this operating manual for reproduction, utilisation or communication of its
contents, unless this has been explicitly permitted. Infringements incur an obligation to pay damage
compensation. All rights reserved in the event of registration of the patented design, industrial design or
registered design.
6
Translation of the original operation manual DUOMIX 333 PFP
PFP_Version 2_BAoDB_en_1410 · rs
Safety
2 Safety
This unit has been designed and manufactured while taking into consideration
all safety-related aspects. It corresponds to the current standard of technology
and to applicable accident prevention regulations. The unit left the factory in
perfect condition and guarantees a high level of technical reliability and safety.
Nevertheless, there are certain risks that can arise from incorrect operation or
misuse:
➤➤ to life and limb of the operator or third party,
➤➤ to the machine and other material assets of the owner,
➤➤ to the efficient working capacity of the unit.
In principle you should refrain from any work method that could affect the safety
of operating personnel and equipment. All persons involved in set-up, commissioning, operation, maintenance, repair and servicing of the unit must have
read and understood the operating manual beforehand, especially the chapter
“Safety”.
Your safety is at stake! We recommend to the owner of this unit to have this
confirmed in writing.
2.1 Explanation of symbols
Safety notes warn of potential accident hazards and identify the necessary
measures to prevent accidents. In the operating manuals from WIWA safety
notes are particularly highlighted and marked as follows:
DANGER
Highlights accident hazards which if disregarding the safety note will result
most likely in severe or even fatal injuries!
WARNING
Highlights accident hazards which if disregarding the safety note can result
in severe or even fatal injuries!
CAUTION
Highlights accident hazards which if disregarding the safety note can result
in injuries!
Highlights important information for the proper use of the equipment.
Disregarding this information can result in damage to the equipment or to the
environment.
Depending on the hazard source different pictograms are used in safety notes
about accident hazards with risk of injury – examples:
General accident hazard
Risk of explosion from explosive atmospheres
Translation of the original operation manual DUOMIX 333 PFP7
PFP_Version 2_BAoDB_en_1410 · rs
Safety
Risk of explosion from explosive substances
Accident hazard from voltage or static electricity
Risk of crushing by moving unit parts
Risk of burns from hot surfaces
Risk of frostbite from cold surfaces
Security orders primarily indicated to wear protective equipment. They are also
highlighted and marked as follows:
Wear protective clothing
Highlights the order to wear the prescribed protective clothing to protect
against skin injuries caused by spraying material or gases.
Use eye protection
Highlights the order to use eye protection in order to prevent your eyesigh
from being damaged by material splatter, gases, vapors or dust.
Wear ear defenders
Highlights the order to use ear defenders in order to prevent your sense of
hearing from being damaged by noise.
Use a respiratory protection mask
Highlights the order to use a respiratory protection mask in order to prevent
your respiratory tract from being damaged by gases, fumes or dusts.
Wear protective gloves
Highlights the order to wear protective gloves with lower arm protection to
protect against burn injuries caused by heated materials.
Wear protective footwear
Highlights the order to wear protective footwear to prevent injuries to the feet
due to tumbling, falling or rolling objects, and a slip on slippery surfaces.
Reading is an absolute must
Highlights references to guidelines, work and operating manuals, which must
be strictly followed.
8
Translation of the original operation manual DUOMIX 333 PFP
PFP_Version 2_BAoDB_en_1410 · rs
Safety
2.2 Safety notes
Please remember that the DUOMIX 333 PFP works with extremely high pressures
and may cause life threatening injuries if used inappropriately!
Always observe and follow the information in this operating manual as well
as in the separate operating manuals for individual system components or
the optionally available accessories.
The accident prevention instructions „Application of Coating Materials“ (BGR
500, chapt. 2.25) and the guidelines for liquid jets ZH1/406 of the employer‘s
liability insurance association must strictly be complied with.
2.2.1 Operating pressure
WARNING
Components that do not comply with the maximum permissible operating
pressure may burst und cause severe injuries.
➤➤ The specified maximum operating pressures must generally be complied with for all components. In case of varying operating pressures
the lowest value is always valid as the maximum admissible operating
pressure for the entire system.
➤➤ Material hoses and hose assemblies must comply with the maximum working pressure, including the required safety factor.
➤➤ Material hoses must be leak tight and free of kinks, signs of abrasion or
bulges.
➤➤ Hose connections must be tight.
2.2.2 Risks caused by the spray jet
WARNING
The material is discharged from the spray gun under very high pressure.
Due to its cutting effect the spray jet can cause severe injuries by penetrating the skin or entering into the eyes.
➤➤ Never point the spray gun at yourself, other persons or animals!
➤➤ Do not hold your fingers or hands in front of the spray gun!
➤➤ Do not reach with your hands into the spray jet!
WARNING
Unintentional material release from the spray gun may cause personal injury
or damage to property.
➤➤ Always secure the spray gun, even for shortest work breaks!
➤➤ Always make sure that the spray gun is properly secured before each use!
Translation of the original operation manual DUOMIX 333 PFP9
PFP_Version 2_BAoDB_en_1410 · rs
Safety
2.2.3 Hazard from electrostatic charging
WARNING
The high flow velocities associated with the Airless spraying method may
cause static charging. Static discharges can cause fire and explosion.
➤➤ Ensure that the unit has been properly grounded outside of explosive
atmosphere areas!
➤➤ Also ground the object to be coated.
➤➤ Always use open containers!
➤➤ Never spray solvents or materials containing solvent into cone-top cans
or drums with a bunghole!
➤➤ Place the containers on a grounded surface.
➤➤ Always use electrically conductive containers.
➤➤ Achten Sie stets auf Kontakt der Spritzpistole mit der Behälterwand.
➤➤ Watch out for contact between spray gun and container wall.
➤➤ Only use conductive material hoses. All original material hoses from
WIWA are conductive and perfectly adapted to our equipment.
WARNING
If the unit is contaminated by material during operation, the increased
coating thickness can lead to electrostatic charging. Static discharges can
cause fire and explosion.
➤➤ Clean the unit immediately to remove any contamination.
➤➤ Carry out cleaning work outside areas with explosive atmospheres.
2.2.4 Hazards from hot or cold surfaces
CAUTION
The use of material heaters can cause the surfaces of the unit to become
hot. Risk of burns.
➤➤ Always wear protective gloves with lower arm protection (gauntlet) when
working with heated materials!
CAUTION
The air motors become very cold during operation. There is a high risk of
local frostbite.
➤➤ The air motors should warm up to a temperature above 10 °C before
starting any work on the unit.
➤➤ Always wear suitable protective gloves!
10
Translation of the original operation manual DUOMIX 333 PFP
PFP_Version 2_BAoDB_en_1410 · rs
Safety
2.2.5 Explosion protection
WARNING
Equipment designed without explosion protection must not be used in workshops that come under the explosion protection ordinance!
Explosion protected systems fulfil the explosion protection requirements of the
Directive 94/9/EC for the explosion group, unit category and temperature class
specified on the type plate or in the declaration of conformity.
The operator is responsible for determining the zone allocation according to the
Directive of EC 94/9/EC, Appendix II, no. 2.1-2.3 when observing the measures
of the responsible inspecting authority. The operator is responsible for checking
and ensuring that all technical data and markings according to ATEX correspond with the necessary requirements.
Please note that several components have their own type plate with separate
marking according to ATEX. In this case the lowest explosion protection of
all attached markings applies for the entire system. Applications where the
malfunction of the unit can lead to danger to personnel must be provided with
respective safety measures by the operator.
However, if agitators, heaters or other electrically accessories are additionally
mounted, one must check the explosion protection. Plugs for heaters, agitators,
etc. that do not have explosion protection, may only be plugged in outside of
areas that fall under the explosion protection ordinance, even if the accessory
equipment as such is explosion protected.
2.2.6 Risks due to the rams
WARNING
While the rams are lifting, the moving components can crush your fingers,
hands or other parts of the body.
➤➤ Do not reach in between the follow plate and the material container, the
traverse and the cover of the pneumatic cylinder or the clamping piece
and and the cover of the pneumatic cylinder.
WARNING
While the rams are lifting, loose clothing can get between the follow plate or
the follow cover and the material drum or catch on other machine parts or be
pulled upwards.
➤➤ Wear tight-fitting working clothes that are not very tear-resistant, that
have tight-fitting sleeves and no protruding parts.
WARNING
While the rams are lifting, the moving components can cause crushing and
impact injuries.
➤➤ Persons should not remain in the stroke area of the rams while the rams
are lifting!
Translation of the original operation manual DUOMIX 333 PFP11
PFP_Version 2_BAoDB_en_1410 · rs
Safety
WARNING
Accidental starting of the rams can result in crushing and impact injuries.
➤➤ At every interruption whether intentional or due to a disturbance, always
set the control lever to the “Stop” position.
WARNING
Objects placed on the rams may fall down during a stroke movement and
cause injuries.
➤➤ Never place any objects on the rams!
2.2.7 Health risks
Follow the safety notes and dosing information of the manufacturer and the
generally applicable regulations when handling paints, solvents, oils, greases and other chemical substances. Rests of paints, solvents, oils, greases
and other chemical substances must be collected in accordance with statutory provisions concerning recycling and waste disposal. The official local
waste water laws are valid.
CAUTION
Depending on the materials being applied solvent vapours may be generated which could cause damage to health and objects.
➤➤ Always ensure sufficient aeration and ventilation at the workplace.
➤➤ Always observe the processing instructions issued by the material manufacturers.
CAUTION
Solvents or other harmful substances are not suitable to clean your skin and
can result damage to health.
➤➤ Use only appropriate skin protection, skin cleaning and skin care products.
In closed or pressurized systems dangerous chemical reactions may occur
if parts made of aluminium or galvanized parts come into contact with 1.1.1 trichloroethane, methylene chloride or other solvents containing halogenated
hydrocarbons (CFC’s). If you want to process materials containing the afore
mentioned substances, we recommend to consult the material manufacturer to
clarify the usability of such substances.
For these materials we have a range of rust and acid proof versions available.
12
Translation of the original operation manual DUOMIX 333 PFP
PFP_Version 2_BAoDB_en_1410 · rs
Safety
2.3 Information signs on the equipment
Information signs attached to the equipment,
such as safety information (see Fig. 1) refer to
possible danger areas and must be strictly followed.
They must not be removed from the equipment.
Damaged and illegible information signs must be
replaced immediately.
Apart from this you should also read and follow
the safety notes in the operating manual.
Fig. 1: Safety Information
2.4 Safety features
Safety features must be checked with the system depressurized:
➤➤ before initial commissioning,
➤➤ always before starting work,
➤➤ after completion of setup work,
➤➤ after cleaning, maintenance and repair work!
Check list:
55 Main switch and stop button on control cabinet moveable?
55 Lead seal on the safety valve still intact?
55 Safety valves externally free of damage?
55 Function of compressed air shut-off valve correct?
55 Correct functioning of safety levers on spray gun?
WARNING
If one of the safety features is missing or not fully functional, the operating
safety of the system cannot be guaranteed!
➤➤ If you discover any faults on the safety features or other deficiencies on
the system, stop operation of the system immediately.
➤➤ Only resume operation of the system after the fault has been completely
rectified.
2.4.1 Main switch and stop button on control cabinet
The electric system of the device can be switched on and off with the main switch
on the control cabinet (see chapter 3.3.1 on page 22) .
The stop button allows you to interrupt the compressed air supply for the metering pump and thus shut it down.
Translation of the original operation manual DUOMIX 333 PFP13
PFP_Version 2_BAoDB_en_1410 · rs
Safety
2.4.2 Safety valves
The DUOMIX 333 PFP is equipped with safety valves:
➤➤ in the air intake of the air maintenance unit to
the metering pump (see Fig. 2),
➤➤ in the air motors of the feed pumps and the
flushing pump,
➤➤ in the pressure vessels for both components.
The safety valves ensure that the max. permissible
air inlet pressure is not exceeded. If the air inlet
pressure exceeds the fixed limiting value at one
of the points mentioned above, the corresponding
safety valve will blow off.
Fig. 2: Safety valve
WARNING
If the maximum permissible air inlet pressure is exceeded, components may
burst. This may result in damage to persons and property.
➤➤ Never allow the system to run without or with defective safety valves!
➤➤ If a safety valve needs to be replaced, you can find the corresponding
order number on the machine card.
➤➤ When using new safety valves make sure that the valves have been
set to the max. permissible air inlet pressure of the DUOMIX 333 PFP as
required for the mixing ratio (see type plate or machine card) and sealed
with a lead seal.
Changing the mixing ratio may cause a change in pressure ratio and thus require the adaptation of the max. permissible air inlet pressure of the metering
pump. In this case you would have to replace the safety valve of the metering pump and the type plate – you should absolutely contact WIWA.
2.4.3 Compressed air shut-off valves
The compressed air shut-off valve on the air maintenance unit interrupts the air
supply for the entire system.
Open
Closed
Fig. 3: Compressed air shut-off valve opened
Fig. 4: Compressed air shut-off valve closed
Furthermore, the system is equipped with further compressed air shut-off
valves for interrupting the air supply to individual system components, like e.g.
to feed pumps or pressure vessels.
14
Translation of the original operation manual DUOMIX 333 PFP
PFP_Version 2_BAoDB_en_1410 · rs
Safety
The functional principle of all pressure and material shut-off valves is identical:
➤➤ Set in flow direction to open,
➤➤ Set across the flow direction to close.
Once the air supply is cut off, the system is still under pressure.
Before starting work on the system you must therefore relieve the pressure
completely.
2.4.4 Safety rupture discs
The safety rupture discs make sure that the
permissible operating pressure is not considerably exceeded. They are located in the screw
fitting behind the intermediate piece.
If a safety rupture disc is damaged material will
escape from the hose of the safety rupture disc
safety device.. In this case the safety rupture
disc must be replaced immediately.
Fig. 5: Safety rupture disc seat
You find the corresponding ordering data on the machine card A new safety
rupture disc must be installed with the coloured side facing towards the pressure.
2.4.5 Ground cable
The ground cable is used to prevent electrostatic charging of the unit. The ground
cable is already connected to the cart of
the unit when it is delivered. In order to
ground the unit, connect the clamp of the
ground cable to an electrically conductive object outside explosive atmosphere
areas.
Fig. 6: Ground cable
Replace the ground cable immediately if lost or damaged!
2.4.6 Spray gun lock
The spray gun must always be secured against
unintended operation, even for the shortest of
work breaks.
Set the safety lever horizontally to secure the
spray gun.
Fig. 7: Spray gun lock
2.4.7 Thermistor-motor protection-trigger
This relay serves to monitor temperature in the agitators’ motors When overheating occurs, the agitator will shut down and a fault will be signalised at the
control cabinet.
Translation of the original operation manual DUOMIX 333 PFP15
PFP_Version 2_BAoDB_en_1410 · rs
Safety
2.5 Operating and maintenance personnel
2.5.1 Obligations of the plant owner
The owner of the plant:
➤➤ is responsible for training the operating and maintenance personnel,
➤➤ must direct the operating and maintenance personnel to handle the plant
appropriately and to wear correct work clothes and protective equipment,
➤➤ must make the user manual accessible to the operating and maintenance
personnel and ensure that it remains available at all times,
➤➤ must ensure that the operating and maintenance personnel have read and
understood the user manual.
Only then the system may be taken into service.
2.5.2 Personnel qualification
A differentiation is made between two groups of people in dependence on their
qualifications:
➤➤ Instructed operators have been verifiably instructed by the plant owner in
the activities they are tasked with and the potential risks connected with
them in the case of incorrect behaviour.
➤➤ Trained personnel have been instructed by the plant manufacturer such
that they are capable of carrying out maintenance and repair work on the
system and recognising potential risks on their own initiative and of avoiding these risks.
2.5.3 Authorized operating personnel
Activity
Qualification
Setup and operation
Instructed operators
Cleaning
Instructed operators
Servicing
Trained personnel
Repair
Trained personnel
Juveniles under the age of 16 have no permission to operate this equipment.
2.5.4 Personal Protective Equipment
Wear protective clothing
Always wear the protective clothing prescribed for your work environment
(mining, closed rooms, etc.) and follow the recommendations in the safety
data sheet issued by the material manufacturer.
Use eye protection
Wear protective goggles to protect against eye injuries caused by material
splatter, gases, vapors or dust.
16
Translation of the original operation manual DUOMIX 333 PFP
PFP_Version 2_BAoDB_en_1410 · rs
Safety
Wear ear defenders
Operating personnel should be provided with suitable noise protection equipment. The operator is responsible for adhering to the accident prevention
regulation “Noise” (BGV B3). For this purpose, pay special attention to the
conditions of the installation location – the noise burden will increase if the
system is installed in or on hollow bodies.
Use a respiratory protection mask
We strongly recommend to wear a respiratory protection mask, even though
the paint mist has been minimized in Airless spray painting applications with
correct pressure setting and working mode.
Wear protective gloves
When applying heated materials you should wear protective gloves with
lower arm protection to prevent burns.
Wear protective footwear
Wear protective footwear to prevent injuries to the feet due to tumbling, falling or rolling objects, and a slip on slippery surfaces.
2.6 Notes on warranty
2.6.1 Conversions and alterations
➤➤ Unauthorized conversions or alterations should not be undertaken on
safety grounds.
➤➤ Protective equipment should not be dismantled, converted or bypassed.
➤➤ Use of components which have not been manufactured or delivered by
WIWA renders any warranty null and void.
➤➤ The unit should only be operated within the prescriptive limit values and
machine parameters.
2.6.2 Accessories and spare parts
➤➤ If you use original accessories and spare parts from WIWA, their suitability
for use with our equipment is guaranteed.
➤➤ It is, however, mandatory to respect the safety regulations of the accessories and spare parts. You will find these safety regulations in the corresponding operating manuals for the accessories and spare parts.
➤➤ If foreign accessories or spare parts are used, the company WIWA cannot
guarantee the safety of the entire system. Liability for damages or injuries
incurred because of the use of those accessories and spare parts becomes
null and void.
Translation of the original operation manual DUOMIX 333 PFP17
PFP_Version 2_BAoDB_en_1410 · rs
Safety
2.7 Emergency procedures
2.7.1 Leakages
WARNING
In case of leakages material can escape under very high pressure and
cause serious bodily injuries and material damage.
➤➤ Shut down and depressurize the system immediately.
➤➤ Switch off the electric power supply by the master switch on the control
cabinet.
➤➤ Re-tighten the connections and replace defective components (only by
trained personnel).
➤➤ Do not seal leakages on connections and high pressure hoses by hand
or by wrapping fabric around them.
➤➤ Do not repair material hoses!
➤➤ Check hoses and connections for leaks before restarting.
2.7.2 Injuries
In case of injuries you should immediately consult a physician or visit the
nearest hospital. If injured by processing materials or solvents always have the
safety data sheet (address, phone number, material designation and material
number of supplier or manufacturer) available for the attending physician.
➤➤ Always remember where you can call for help.
➤➤ Keep a list of the local emergency telephone numbers at hand.
➤➤ You should in any case make yourself familiar with First-Aid measures.
2.7.3 Fires
➤➤ Read and comply with the instructions for fire alarm and escape routes,
which are displayed in your factory or at any work place.
➤➤ Keep a list of the local emergency telephone numbers at hand.
➤➤ Become acquainted with the locations and operation of fire alarms and fire
extinguishers within your reach.
➤➤ Ensure a sufficient amount of information signs for the avoidance of fire.
➤➤ Only use the extinguishing substances stipulated by the material manufacturer.
18
Translation of the original operation manual DUOMIX 333 PFP
PFP_Version 2_BAoDB_en_1410 · rs
Unit description
3 Unit description
The WIWA DUOMIX 333 PFP is a dual-component coating system for insulating
layer forming flame retardants in commercial and industrial applications.
The system was designed to meet special customer requirements (material to
be applied, mixing ratio, transfer quantity, etc.). Exact metering of both components is assured by the fixed mixing ratio. The mixing ratio can be changed by
exchanging the fluid pumps.
The WIWA DUOMIX 333 PFP is used for coating steel parts in structural engineering, as weil as in the oil and gas industry.
Please refer to the enclosed machine card (technical data) for the machine
specifications of your machine.
3.1 Intended use
The WIWA DUOMIX 333 PFP is intended for the application of insulating layer
forming flame retardants in commercial and industrial applications.
Any other use is considered unintended. Should you intend to use the system for other purposes or with other materials and thus not for the purpose it
is intended for, you must ask WIWA for permission – otherwise warranty will
become null and void.
Intended use also includes compliance with the technical documentation
and adherence to the prescribed operating, servicing and maintenance
guidelines.
Translation of the original operation manual DUOMIX 333 PFP19
PFP_Version 2_BAoDB_en_1410 · rs
Unit description
3.2 Unit configuration
6
8
1
2
9
10
11
3
4
5
7
Fig. 8: Front view of the DUOMIX 333 PFP
No. Designation
1
Control cabinet
3
Contact pressure gauge of pressure and dosing control
5
Material Flow Heaters
2
4
6
7
8
9
10
11
20
Control unit for metering pump, flushing pump and pressure vessels
Intermediate piece to connect the hose package
Agitators
Fork lift pick-up points
Regulator cluster for feed pumps
Flushing pump
Pressure vessel for B component (capacity depending on unit configuration 45 l or 60 l)
Water circulation provision tank (capacity 30 l)
Translation of the original operation manual DUOMIX 333 PFP
PFP_Version 2_BAoDB_en_1410 · rs
Unit description
18
12
21
13
14
15
16
17
19
Fig. 9: Rear view of the DUOMIX 333 PFP
20
No. Designation
12
Feed pump for A-component
14
Ram for B-component
13
15
16
17
Feed pump for B-component
Ram control
Ram for A-component
Cleaning agent tank (capacity 50 l)
18
Maintenance unit
20
Water circulation pump
19
21
Pressure vessel for A component (capacity 60 l)
Metering pump
Translation of the original operation manual DUOMIX 333 PFP21
PFP_Version 2_BAoDB_en_1410 · rs
Unit description
3.3 System control components
3.3.1 Control cabinet
1
2
3
4
Paintheating
Watercirculation
Agiator Comp A
Agiator Comp B
auto 0 manual
auto 0 manual
auto 0 manual
Off
On
5
error fuse
6
Start
Stop
7
8
9
manual / auto
10
Fig. 10: Control cabinet
No. Designation
1
2
3
On/Off switch material flow heaters
Three-position switch for water circulation and water heating
(circulation pump and heaters for circulation water and cleaning agent)
Three-position switch for the agitator of component A 4
Three-position switch for the agitator of component B
6
Timer to set the operating time for automatic operation
5
7
8
9
10
Signal lamp for fault messages
Start button for pressure and dosing control (see chapter 3.3.2)
Stop button of pressure and dosing control
Selector switch “Manual/Automatic” of pressure and dosing control
Main switch to switch the system electrics on and off.
The three-position switches (no. 2, 3 and 4) have 3 positions:
➤➤ In position “auto” the corresponding system component is automatically
switched on and off, in accordance with the operating times set by the
timer.
➤➤ In position “0” the corresponding system component is switched off – the
operating times set on the timer are of no relevance.
➤➤ In position “manual” the corresponding system component is switched on –
also in this case the operating times set on the timer are of no relevance.
22
Translation of the original operation manual DUOMIX 333 PFP
PFP_Version 2_BAoDB_en_1410 · rs
Unit description
3.3.2 Pressure and dosing control
The 3 buttons on the control cabinet below the timer and the contact pressure
gauge belong to the pressure and dosing control.
4
1
2
3
Start
Stop
manual / auto
Fig. 12: Buttons on the control cabinet
Fig. 11: Contact pressure gauge
No. Designation
1
The “Start” button is used to restart the system after a shutdown. Regulate
the air inlet pressure of the metering pump completely back beforehand!
2
The “Stop” button is used to shutdown the system manually.
3
With the selector switch “Manual/Automatic” you decide whether both
operation limits should be monitored (= “Automatic”), or only the upper
one (= “Manual”). For start-up, set the selector switch to “Manual”.
For spray operation, set the selector switch to “Automatic”.
4
The contact pressure gauge monitors the pressure of the B-component
(hardener) and switches the system off when the operation limits are
reached.
3.3.3 Control unit for metering pump, flushing pump and pressure vessels
7
1
2
8
9
10
11
3
4
5
6
No. Designation
1
Pressure gauge metering pump
2
Pressure gauge flushing pump
4
Air pressure regulator
pressure vessel A
3
5
6
7
Pressure gauge pressure vessel A
Pressure gauge pressure vessel B
Air pressure regulator
pressure vessel B
Air pressure regulator metering pump
8
Air pressure regulator flushing pump
10
Temperature indicator for A component,
with Fahrenheit and Celsius scales
9
11
Temperature indicator for water circulation, with Fahrenheit and Celsius scales
Temperature indicator for B component,
with Fahrenheit and Celsius scales
Fig. 13: Control unit for metering pump, flushing pump
and pressure vessel
Translation of the original operation manual DUOMIX 333 PFP23
PFP_Version 2_BAoDB_en_1410 · rs
Unit description
The functional principle of all air pressure regulators is identical:
➤➤ Turn clockwise to increase the pressure,
➤➤ turn anti-clockwise to reduce the pressure.
3.3.4 Ram control
1
5
2
6
Up
Stop
3
4
Down
Fig. 14: Ram control
No. Designation
1
Air pressure regulator for the B-component ram
3
Control lever for the B-component ram
2
4
5
6
Pressure gauge for the B-component ram
Control lever for the A-component ram
Air pressure regulator for the A-component ram
Pressure gauge for the A-component ram
The control Ievers (no. 3 and 4) are used to move the rams up and down or
stop it when placing or changing the material containers.
3.3.5 Regulator cluster for feed pumps
1
3
4
2
5
Fig. 15: Regulator cluster for feed pumps
6
No. Designation
1
Air pressure regulator for the B-component feed pump
3
B-component shut-off valve
2
24
Air pressure regulator for the A-component feed pump
Translation of the original operation manual DUOMIX 333 PFP
PFP_Version 2_BAoDB_en_1410 · rs
Unit description
No. Designation
4
Pressure gauge for the B-component feed pump
6
A-component shut-off valve
5
Pressure gauge for the A-component feed pump
The two shut-off valves are controlled by the level monitoring in the pressure
vessels. Once the minimum quality is reached in one of the pressure vessels,
the shut-off valve for this component is automatically opened. The corresponding feed pump then keeps delivering material into the pressure vessel, until
the maximum level is reached. The shut-off valve is then automatically closed
again and the feed pump switched off.
3.4 Material feed components
3.4.1 Flow diagram
Rams
with feed
pumps
Pressure
vessels
Main
pump
Material
flow heater
Intermediate
piece
Mixing
unit
Spray
gun
Return flow
3.4.2 Rams with feed pumps
The two rams support the feed
pumps in the transfer of material to be processed. You can
place the material drums here
once you have run up the rams.
The feed pumps deliver the
material to be applied from
the drums into the pressure
vessels.
No. Designation
1
2
3
4
Compressed air shut-off
valve of feed pump
2
4
3
Feed Pump
Ram
5
Ball valve for the
container ventilation
Breather valve
7
Follower plate
6
1
5
6
Ventilation ball valve
7
Fig. 16: Ram with feed pump
Translation of the original operation manual DUOMIX 333 PFP25
PFP_Version 2_BAoDB_en_1410 · rs
Unit description
3.4.3 Pressure vessels with agitators
2
3
4
5
6
1
No. Designation
1
Agitator
3
Compressed air connection with stop cock
2
Pressure relief valve with stop cock
4
Safety valve (6 bar)
5
Fig. 17: Pressure vessels
Safety valve (8 bar)
6
Inspection hole with cover
CAUTION
Open the inspection hole only after all pressure has been relieved from the
pressure vessel!
The pressure vessels are double-walled – circulation water flows through the
area between the outer and the inner container, the inner container is used to
store and treat the material to be applied.
In units that are equipped with only
one circulation pump (see chap. 3.6.3
on page 31), a thermostatic valve
is installed at the inlet of the hot
water circulation into the A-component pressure vessel, which can be
used to adjust the temperature of the
circulation water in the two pressure
vessels.
Observe and follow the notes in
the separate operating manual of
the thermostatic valve.
Fig. 18: Thermostatic valve
The agitators installed in the pressure vessels ensure uniform heating and
consistency of the material by drawing it from the wall into the middle of the
container, rather than stirring it up from the bottom. They are switched on and
off on the control cabinet (see chapter 3.3.1 on page 22).
Observe and follow the notes in the separate operating manuals for pressure
vessels and the agitators.
26
Translation of the original operation manual DUOMIX 333 PFP
PFP_Version 2_BAoDB_en_1410 · rs
Unit description
3.4.4 Metering pump
No. Designation
1
Silencer
3
Fluid pumps for A component
2
4
4
1
Air motor with deicing system
Fluid pump for B component
Material shut-off valves
The metering pump delivers the material to be
applied from the pressure vessels through the
material flow heaters to the intermediate piece
and from there, depending on the position of
the return flow ball valve, through the mixing
unit to the spray gun, or back into the pressure
vessel.
The air motor drives usually 3 fluid pumps – two
for A component and one for B component. The
mixing ratio results from the ratio of pump sizes.
Units with mixing ratio 1 : 1 are equipped with
two equal-sized fluid pumps – the middle pump
(No. 4) is omitted.
Depending on the material requirements, the
mixing ratio can be adjusted by exchanging the
fluid pumps. All you need are the proper tools
and the appropriate fluid pumps.
2
3
3
4
5
Fig. 19: Metering pump
The deicing system on the air motor reduces icing of the air motor during
operation. The deicing adjusting screw is located on the air outlet of the air
maintenance unit for the metering pump (see chapter 3.7 on page 32).
3.4.5 Material Flow Heaters
On its way from the metering pump
to the intermediate piece the material to be applied is depending on
unit configuration guided through 3
or 4 material flow heaters, where it is
heated up.
Pressure gauges
The material flow heaters are
switched on and off on the control
cabinet.
The temperature regulators are
directly located on the material flow
heaters.
Temperature control
Fig. 20: Material Flow Heaters
You can read the material temperature of both components on the regulator
cluster for metering pump, flushing pump and pressure vessels.
Pressure gauges are installed at the inlet of the material flow heaters, where
you can read the material pressure of the A and B component.
Translation of the original operation manual DUOMIX 333 PFP27
PFP_Version 2_BAoDB_en_1410 · rs
Unit description
Observe and follow the notes in the separate operating manual of the material flow heaters.
3.4.6 Intermediate piece
The intermediate piece serves the purpose of connecting the hose package
(see chapter 4.3.1). Furthermore, there are the levers to open and close the
circulation an the material outlets to the hose package as well as the shut-off
valves for the hose heating.
4
1
2
5
3
Fig. 21: Levers for circulation and material outlets
Fig. 22: Shut-off valves for the hose heating
No. Function
1
Opening and closing the circulation (return flow to pressure vessels)
2
Opening and closing the material outlet of A component
4
Opening and closing the return flow of hose heating
3
5
Opening and closing the material outlet of B component
Opening and closing the flow of hose heating
Fig. 24: Circulation closed, material outlets open
28
Fig. 23: Circulation open, material outlets closed
Translation of the original operation manual DUOMIX 333 PFP
PFP_Version 2_BAoDB_en_1410 · rs
Unit description
Set the shut-off valves for the hose heating in flow direction to open (as shown
in Fig. 22). Set the shut-off valves for the hose heating across the flow direction
to close.
3.4.7 Mixing unit
The mixing unit has 4 levers for switching the ball valves on the mixing unit:
1
2
3
No.
Function
2
To switch “Spraying” mode
on and off.
1
3 + 4
To switch “Ratio check”
mode on and off.
To switch “Flushing” mode
on and off.
4
Fig. 25: Lever on mixing unit
With these levers you can set the operating modes “Spraying”, “Flushing”,
“Ratio check” and “Stop” as follows:
Fig. 26: Operating mode “Spraying”
Fig. 27: Operating mode “Flushing”
Fig. 28: Operating mode “Ratio check”
Fig. 29: Operating mode “Stop”
Alternately open and close the flushing levers several times during flushing,
to ensure that each component is separately flushed. Finally flush with both
ball valves at the same time.
You can extend the lifetime of the ball valves on the mixing unit
➤➤ if you do not switch the levers over under pressure
➤➤ if you always push the levers to the end stop of the desired position.
Translation of the original operation manual DUOMIX 333 PFP29
PFP_Version 2_BAoDB_en_1410 · rs
Unit description
3.5 Flushing unit
The flushing unit serves the purpose of flushing the components, which had
contact with the mixed material, before the potlife has expired.
The unit is designed for flushing with water. For flushing with solvent you need
the appropriate mounting kit.
1
2
7
4
6
5
3
Fig. 30: Flushing unit
Fig. 31: Cleaning agent connection and floater
No. Designation
1
Flushing pump
3
Drain valve
2
4
5
Cleaning agent tank
Heater
Temperature control
The cleaning agent tank can be attached directly
to a cleaning agent supply (Nr. 6).
In this case the floater (Nr. 7) regulates the cleaning agent supply automatically.
The heater (Nr. 4) is switched on and off by the
switch for water circulation and water heating at
the control cabinet.
To maintain an adequate supply of heated water for flushing, it is recommended that the water circulation remains “On” during system operation!
3.6 Water circulation components
3.6.1 Flow diagram
Depending on the version, the unit is equipped with one circulation pump and a
thermostatic water valve or with two circulation pumps. This results in different
flow diagrams:
Pressure
vessel
comp B
Pressure
vessel
comp A
Thermostatic water valve
Provision
tank
Feed
Circulation pump
Intermediate
piece
Hose package
Return flow
Fig. 32: Flow diagram with one circulation pump and a thermostatic water valve
30
Translation of the original operation manual DUOMIX 333 PFP
PFP_Version 2_BAoDB_en_1410 · rs
Unit description
Pressure
vessel
comp B
Pressure
vessel
comp A
Provision
tank
Circulation pumps
Feed
Intermediate
piece
Hose package
Return flow
Fig. 33: Flow diagram with two circulation pumps
3.6.2 Provision tank
The provision tank serves the purpose of storing
and heating the circulation water.
No. Designation
1
2
3
Heater (is switched on and off by the
switch for water circulation and water
heating at the control cabinet)
Temperature control
Drain valve
1
2
3
Fig. 34: Provision tank
You can read the circulation water temperature on the regulator cluster for metering pump, flushing pump and pressure vessels.
3.6.3 Circulation pumps
The circulation pumps circulate the water through the circulation circuit. They
are switched on and off by the switch for water circulation and water heating
at the control cabinet. Depending on the version, the unit is equipped with the
following circulation pumps:
➤➤ 1 Diaphragm pump in article no. 0656968,
➤➤ 1 Peripheral pump in article no. 0656967 and 0657036,
➤➤ 2 Diaphragm pumps in article no. 0657916.
Fig. 35: Peripheral pump
Fig. 36: Diaphragm pumps
Observe and follow the notes in the separate operating manual of the
peripheral or diaphragm pumps.
Translation of the original operation manual DUOMIX 333 PFP31
PFP_Version 2_BAoDB_en_1410 · rs
Unit description
3.7 Air maintenance unit
The maintenance unit prevents condensation water and dirt particles from
entering into the motor and supplies the compressed air with oil for lubrication
of moving parts.
2
3
6
7
1
4
5
Fig. 37: Front view of air maintenance unit
8
9
10
11
12
Fig. 38: Rear view of air maintenance unit
No. Designation
1
Adjusting screw from deicing system
3
Adjusting screw of the fog oiler
2
4
5
6
Fog oiler
Regulator for level monitoring air supply (pre-set in factory – please do
not change)
Water separator / filter
7
Compressed air shut-off valve
9
Oil filler plug
8
Compressed air connection
10
Locking slide
12
Oil tank
11
32
Sight glass of fog oiler
Container of water separator
Translation of the original operation manual DUOMIX 333 PFP
PFP_Version 2_BAoDB_en_1410 · rs
Transport, installation and assembly
4 Transport, installation and assembly
The machine has left the factory in flawless condition and was appropriately
packed for transport.
Upon arrival you should check the machine for completeness and any
apparent transport damage.
4.1 Transport
The WIWA DUOMIX 333 PFP is equipped as standard with wheels and a drawbar
as well as with fork lift pick-up points. The attachment points for lifting equipment are located on the suspension of the chassis.
1
2
4
3
Fig. 39: Transport equipment of the DUOMIX 333 PFP
3
No. Designation
1
Attachment points for lifting equipment
3
Wheels
2
4
Drawbar
Fork lift pick-up points
Please follow these notes when transporting the equipment:
➤➤ Ensure sufficient load bearing capacity of lifting gear and lifting tackle when
loading the machine. You find the dimensions and weights of the equipment
on the machine card.
➤➤ The machine must only be lifted by the attachment points for lifting equipment.
Translation of the original operation manual DUOMIX 333 PFP33
PFP_Version 2_BAoDB_en_1410 · rs
Transport, installation and assembly
➤➤ When using a forklift truck make sure that the fork tines are long enough.
The fork tines must reach completely through each of the two opposite
forklift lifting points on the rack.
➤➤ Attention! Danger of tipping over! Ensure even load distribution to secure
the system against tipping over.
➤➤ Do not transport any other objects (e.g. material containers) when lifting the
equipment.
➤➤ Never stand under suspended loads or inside the loading area.
This poses a life hazard!
➤➤ Secure the load on the transport vehicle against slipping and falling off.
If the system has already been in use, you should observe the following notes:
➤➤ Disconnect the entire system power supply – even for short transport distances.
➤➤ Empty the system before transportation – fluid residues may escape during
transport, despite this measure.
➤➤ Remove all loose components (e.g. tools) from the unit.
➤➤ Assemble the parts or fittings dismantled for transport purposes before start
up and in compliance with the intended use of the system.
4.2 Installation location
As-standard, the DUOMIX 333 PFP is intended for installation outside areas subject to explosion hazards. Only machines of special explosion-protected design
may be installed inside areas subject to explosion hazards.
Ambient temperature
Minimum of
0 °C
32 °F
Maximum of
40 °C
104 °F
The DUOMIX 333 PFP can be installed inside and outside spray booths. However,
outdoor installation should be preferred in order to avoid contamination.
WARNING
If operating an outdoor system during a thunderstorm, a lightning can cause
a life-threatening situation for the operating personnel.
➤➤ Do not operate an outdoor system during a thunderstorm!
➤➤ The owner must protect the system by applying appropriate lightning
protection measures.
Place the system horizontally on a surface which is level, firm and free of
vibration. The system must not be tilted or inclined. All controls and safety
features must be easily accessible.
Safety measures at the place of installation:
➤➤ This system requires a solid base and sufficient free space for safe
operation. The access to the safety features must be kept clear.
34
Translation of the original operation manual DUOMIX 333 PFP
PFP_Version 2_BAoDB_en_1410 · rs
Transport, installation and assembly
➤➤ Secure the equipment at its final location to protect it against unintended
movement. For this purpose use the
brake wedges attached to the rack
(see Fig. 40).
➤➤ As a measure to avoid danger of
stumbling, injury or damage to property
caused by the drawbar falling down,
adjust the drawbar vertically after transFig. 40: Brake chocks
port and secure it with the cotter pin.
➤➤ Always keep the working area, especially all walkways and standing areas,
clean and tidy. Immediately remove any spilled material and solvents immediately.
➤➤ Always ensure adequate ventilation at the work place to avoid damage to
health and material objects. Always observe the processing instructions issued by the material manufacturers.
➤➤ Even though there are no legal directives for low-mist Airless spraying methods, all hazardous solvent vapours and paint particles should be extracted.
➤➤ Protect objects adjacent to the spraying object against possible damage
caused by the material mist.
4.3 Assembly
Hose package, mixing unit, spray gun material hose and spray gun were separately packed for transport. Please assemble these parts again before using
the equipment for the first time.
WARNING
Components that do not comply with the maximum permissible operating
pressure may burst und cause severe injuries.
➤➤ Before assembling, check the maximum permissible pressure for the separately packaged components and accessories. lt must be higher than
or equal to the maximum operating pressure of the system as specified
on the machine type plate.
➤➤ Compare the maximum operating pressure of the safety valves with the
specifications in the machine card or on the type plate. These data must
match!
4.3.1 Assembling the hose package
WARNING
If the hose package couplings are subjected to tensile load, these assemblies may be torn out. Material escaping under high pressure can cause
injuries and material damage.
➤➤ If tensile loads on the hose package couplings are to be expected (e.g.
by positioning the mixing unit), a strain relief is required!
If the hose package is too tightly bent, hoses may buckle inside the hose
package.
➤➤ The minimum bending radius of 30 cm must not be fallen short of!
Translation of the original operation manual DUOMIX 333 PFP35
PFP_Version 2_BAoDB_en_1410 · rs
Transport, installation and assembly
1
2
3
4
5
5
Fig. 41: Connections on the intermediate piece
2
1
Fig. 42: Connections on the mixing unit
No. Connection
No. Connection
2
5
1
A-component
3
Return flow from the hose
heater
B-component
4
Feed to the hose heater
Flushing
4.3.2 Assembling spray hose and spray gun
Spraying hose
Spray gun
4.3.3 Grounding the unit
WARNING
The high flow velocities associated with the Airless spraying method may
cause electrostatic charging. Static discharges can cause fire and explosion.
➤➤ Ensure that the unit has been properly grounded outside of explosive
atmosphere areas!
➤➤ Also ground the object to be coated.
The ground cable is already connected to the cart of the unit when it is delivered. In order to ground the unit, connect the clamp of the ground cable to an
electrically conductive object outside explosive atmosphere areas.
4.3.4 Connecting the compressed air supply
To ensure an adequate air supply, the compressor capacity must match the
air requirements of the unit and the diameters of the air supply hoses must
match the inlet connections.
➤➤ The maximum air consumption is 5000 litres per minute at 8 bar,
or 150 cfm at 116 psi.
➤➤ You can use either a compressed air supply hose with a diameter of 1“
or 2 with 3/4“ diameter. Please observe the maximum permissible pressure for the compressed air hoses used!
36
Translation of the original operation manual DUOMIX 333 PFP
PFP_Version 2_BAoDB_en_1410 · rs
Transport, installation and assembly
Operation with contaminated or moist compressed air causes damage to the
pneumatic system.
➤➤ Use only dried and oil-free air!
➤➤ Make sure that the compressed air fed into the system corresponds with
compressed air quality class 4 acc. to DIN ISO 8573-1.
1. Make sure that the compressed air shut-off valves are closed and all air
pressure regulators have been fully regulated back.
2. Connect the compressed air supply hose to the air maintenance unit.
4.3.5 Connecting to the electric power supply
WARNING
The connection to the electric power supply must only be performed by a
skilled electrician.
Electrical connection
data
Article No. Article No. Article No. Article No.
0656967
0657916
0656968
0657036
Max. rated current
35 A
Max. rated voltage
Frequency
400 V
400 V
230 V
440 V
50 Hz
50 Hz
50 / 60 Hz
60 Hz
35 A
55 A
30 A
1. Check if the factory-set electric power supply is unlocked.
2. Make sure that the main switch on the control cabinet is in “OFF” position.
3. Connect the cable by following the wiring diagram in the control cabinet.
4. Check the sense of rotation of the agitators – if the connecting cable is correctly connected, the sense of rotation matches the direction of the arrow
on the agitator housing.
4.3.6 Opening the ventilation screw on the contact pressure gauge
Open the venting screw on the contact pressure
gauge with a screwdriver before starting up the
system.
Detailed instructions can be found on the Iabel
on the contact pressure gauge.
Fig. 43: Venting screw
Translation of the original operation manual DUOMIX 333 PFP37
PFP_Version 2_BAoDB_en_1410 · rs
Operation
5 Operation
Before starting operation, check:
55 Are all safety features of the system present and fully functional (see
chapter 2.4 on page 13)?
55 Are all system components leak tight? If necessary, re-tighten the
connections.
55 Is the oil reservoir of the fog oiler filled with an appropriate amount of
lubricant for the air motor (see chapter 6.3.1 on page 50)?
WARNING
If fluid pumps run dry, the generated friction heat can cause fire or an explosion.
➤➤ Always make sure that the material drums do not run dry during operation.
➤➤ However, should this happen, stop the corresponding pump immediately
and feed material.
5.1 Taking the system into service
Requirements:
➤➤ The system must be properly placed (see chapter 4.2 on page 34)
and completely assembled (see chapter 4.3 on page 35).
➤➤ Do not start commissioning the system unless you have the specified
protective equipment. For details on this topic, refer to chapter 2.5.4 on
page 16.
➤➤ The material to be applied must be available in sufficient quantities.
Furthermore you need two appropriate containers for collecting excess
material. These containers are not included in the scope of delivery.
Observe the technical notes of the respective material manufacturer.
Overview of the work sequence for commissioning:
1. Start the system
2. Put the flushing unit and the water circulation into operation
3. Flush mixing unit and spray gun
4. Clean the system (only before initial commissioning)
5. Fill the pressure vessels with material to be applied
6. Bleed the system
7. Adjust the deicing system
8. Put the material flow heaters into operation
9. Fill the hose package
10.Check the mixing ratio
38
Translation of the original operation manual DUOMIX 333 PFP
PFP_Version 2_BAoDB_en_1410 · rs
Operation
5.1.1 Starting the system
Before starting the system, check:
55 Have all compressed air shut-off valves been closed?
55 Have all air pressure regulators been regulated completely back?
55 Are the control levers of both rams in “Stop” position?
55 Is the spray gun secured?
1. Open the compressed air shut-off valve on the air maintenance unit.
2. Set the main switch on the control cabinet to “On”.
3. Set the switch “Manual / Automatic” on the control cabinet to “Manual” and
press the start button.
5.1.2 Put the flushing unit and the water circulation into operation
During work the flushing pump should always be ready for use, so that all
components, which come in contact with the mixed material, can be flushed
within the specified potlife!
1. Attach the cleaning agent tank to the cleaning agent supply or fill it manually
with cleaning agent (usually water).
The unit is designed for flushing with water. For flushing with solvent you
need the appropriate mounting kit.
2. Fill a mixture of 3 parts water and 1 part antifreeze to 10 cm below the top of
the water heating reservoir.
3. Switch on the water circulation and water heating with the respective threeposition switch at the control cabinet. Both water heaters will be switched on
simultaniousely.
4. lf you use only water as a cleaning agent, set the desired temperature on
the heater of the cleaning agent tank. lf a cleaning agent other than water
is used, ensure that the temperature controller is adjusted to “0”.
5. Open both shut-off valves of the hose heating on the intermediate piece.
6. On the heater of the provision tank adjust the desired water circulation
temperature.
5.1.3 Flush mixing unit and spray gun
1. Remove the nozzle from the spray gun.
2. Set the mixing unit to operating mode “Flushing”.
3. Set a pressure of 1 bar on the pressure regulator of the flush pump.
4. Hold the spray gun into a collection container.
5. Unlock the spray gun and operate it, until clean release agent runs out.
6. Close and secure the spray gun.
7. Set the mixing unit to operating mode “Stop”.
Translation of the original operation manual DUOMIX 333 PFP39
PFP_Version 2_BAoDB_en_1410 · rs
Operation
5.1.4 Cleaning the system
After assembly, this unit was factory tested for flawless function by means of a
test substance. During initial start-up you must therefore perform a complete
cleaning in order to flush out any test medium residues.
Before cleaning the system, check:
55 Are the compressed air shut-off valves on both feed pumps closed?
55 Are the control levers of both rams in “Stop” position?
1. Regulate a pressure of 1.5 - 2 bar on the air pressure regulators of both
rams.
2. Set the control Iever of the B component ram to position “Up”, to move the
ram with the feed pump up.
3. Once there is sufficient space under the follow plate for the flushing agent
container, set the ram control lever to “Stop”.
4. Place the container with flushing agent on the centering under the feed
pump.
5. Open the ventilation ball valve on the B component follow plate.
6. Set the ram control lever to position “Down” to move it down again.
7. Once all air has escaped from the flushing agent container, close the ventilation ball valve on the follow plate.
8. Open the compressed air shut-off valve on the B component feed pump.
9. Regulate the air pressure regulator for the B component feed pump to a
low pressure.
10.Pump approx. 30 I flushing agent from the flushing agent container into the
B component pressure vessel.
11.Close the compressed air shut-off valve on the B component feed pump.
12.Regulate the air pressure regulator for the B component feed pump completely back.
13.Repeat the work steps 2 - 12 for the A component.
14.Open the shut-off valves on both metering pump material inlets.
15.Open the return flow on the intermediate piece.
16.Regulate a pressure of 1 - 1.5 bar on the air pressure regulator of the metering pump.
17.Let the flushing agent circulate through the system for about 1 min.
18.Close the return flow on the intermediate piece and open the material outlets.
19.Set the mixing unit to operating mode “Spraying”.
20.Hold the spray gun into a collection container.
21.Unlock the spray gun and operate it, until clean release agent runs out.
22.Close and secure the spray gun.
The metering pump will stop.
23.Set the mixing unit to operating mode “Stop”.
40
Translation of the original operation manual DUOMIX 333 PFP
PFP_Version 2_BAoDB_en_1410 · rs
Operation
24.Hold the ratio check outlets of the
mixing unit into separate empty
containers.
25.Set the mixing unit to operating
mode “ratio check”.
26.Let the system run until no flushing agent comes out any more.
27.Regulate the compressed air
pressure regulator on the metering
pump fully back.
Fig. 44: Ratio check outlets on mixing unit
28.Set the mixing unit to operating mode “Stop”.
29.Open the ball valve for the container ventilation at the B component ram.
30.Set the control Iever of the B component ram to position “Up”, to move the
ram with the feed pump up.
31.Once the sealing lip of the follow plate reaches the top of the container,
quickly close the ball valve for the container ventilation.
32.Once there is sufficient space for removing the flushing agent container, set
the ram control lever to position “Stop”.
33.Remove the flushing agent container.
34.Repeat the work steps 29 - 33 for the A component.
5.1.5 Fill the pressure vessels with material to be applied
After the system is cleaned, you fill the pressure vessels of both components
with material to be applied.
Make sure that the components are assigned correctly. Both components
must only come into contact with the system components intended for this
purpose – standard components (A) = BLUE, hardener (B) = RED.
1. Place a container with the hardener on the centering plate under the B
component feed pump.
2. Open the ventilation ball valve on the B component follow plate.
3. Set the ram control lever to position “Down” to move it down.
4. Once all air has escaped from the material container, close the ventilation
ball valve on the follow plate.
5. Open the compressed air shut-off valve on the B component feed pump.
6. Regulate a pressure of 1 - 2 bar on the air pressure regulator for the B component feed pump.
As a result, the hardener will be pumped into the B component pressure vessel.
To fill up the pressure vessel completely with material, several drums of the B
component are needed. Therefore, the procedure just shown needs to be repeated several times. At the time when the Ievel monitoring switches off the feed
pump automatically, the pressure vessel is filled up completely with material.
7. Switch on the agitator for the B component at the control cabinet.
8. Repeat the work steps 1 - 7 for the A component
Translation of the original operation manual DUOMIX 333 PFP41
PFP_Version 2_BAoDB_en_1410 · rs
Operation
5.1.6 Bleed the system
1. Open the shut-off valves on the metering pump material inlets.
2. Open the return flow on the intermediate piece and make sure that the
material outlets on the intermediate piece are closed.
3. Use a 27 mm open end wrench to disconnect the return flow hose from the
pressure vessel of the B component and a 24 mm open end wrench to
prevent loosening of the nipple.
4. Guide the return flow hose for B component into a collection container and
secure it against accidentally slipping out.
5. Use a 27 mm open end wrench to disconnect the return flow hose from the
pressure vessel of the A component and a 24 mm open end wrench to
prevent loosening of the nipple.
6. Guide the return flow hose for A component into a collection container and
secure it against accidentally slipping out.
7. Set a pressure of 1 - 2 bar on the air pressure regulator of the metering
pump – the pump should run slowly.
8. Once clean material of both components comes out of the return flow
hoses close the return flow on the intermediate piece.
9. Use a 27 mm open end wrench to connect the return hose to the pressure
vessel of the B component. Use a 24 mm open end wrench on the nipple to
counter-tighten it.
10.Use a 27 mm open end wrench to connect the return hose to the pressure
vessel of the A component. Use a 24 mm open end wrench on the nipple to
counter-tighten it.
5.1.7 Adjust the deicing system
1. Turn the deicing system adjusting screw on the air outlet of the air maintenance unit to the metering pump slowly counterclockwise – minimum one
and maximum three turns.
Exact settings should be made individually and as required because the degree
of icing depends on various factors, such as e.g. pressure, number of double
strokes per minute, air humidity, ambient temperature.
When interrupting work or in case of decommissioning the adjusting screw
of the deicing system remains open.
5.1.8 Put the material flow heaters into operation
1. Switch on the material flow heaters on the control cabinet.
2. Set the desired material temperature for both components on the temperature regulators of the material flow heaters.
3. Close the pressure relief valves on both pressure vessels.
4. Open the shut-off valves on the compressed air connections of both pressure vessels.
5. Set the desired air pressure on the regulators of the two pressure vessels
to a maximum of 6 bar or 87 psi.
42
Translation of the original operation manual DUOMIX 333 PFP
PFP_Version 2_BAoDB_en_1410 · rs
Operation
6. Open the return flow valve on the intermediate piece.
7. Allow the material to circulate until the processing temperature recommended by the material manufacturer has been reached.
5.1.9 Filling the hose package
1. Close the return flow on the intermediate piece and open the material outlets
to the hose package.
2. Hold the ratio check outlets of the mixing unit into separate empty containers.
3. Set the mixing unit to operating mode “ratio check”.
The hose package slowly fills up with material. The air inlet pressure on the
metering pump may need to be increased slightly to overcome the resistance in
the hose package.
4. Once clean material exits the ratio check outlets on the mixing unit, set the
mixing unit to operating mode “Stop”.
5.1.10 Checking the mixing ratio
With the ratio check, you can check the actual mixing ratio of the components.
Always perform a ratio check before starting work!
1. Place clean, weighed containers under the volumetric measurement outlets
of the mixing unit.
2. Set the mixing unit to operating mode “Ratio check”.
3. Fill the containers with a certain quantity of material.
4. Set the mixing unit to operating mode “Stop”.
5. Use the filled quantities to calculate the actual mixing ratio and check
whether this complies with the nominal value.
If the actual mixing ratio differs from the nominal value:
1. Check the material temperatures of both components.
2. Check the pressure in the pressure vessels for the both components.
3. Check the mixing ratio again.
lt is possible to slightly adjust the mixing ratio by changing the settings for
temperature and / or the pressure on the pressure vessels of the components.
The system is now ready for operation and you can start the coating work.
Translation of the original operation manual DUOMIX 333 PFP43
PFP_Version 2_BAoDB_en_1410 · rs
Operation
5.2 Coating
Prior to coating, a system start-up must be performed.
We recommend to preheat the mixing unit, spray hose and spray gun by
flushing with hot water. Select the “Flush” operating mode at the mixing unit,
unlock and trigger the spray gun. Heat up the system until you reached the
appropriate temperature and switch the flushing ball valves to “Stop”.
1. Set the mixing unit to operating mode “Spray”.
2. Unlock the spray gun and operate it until clean processing material runs out.
3. Close and lock the spray gun.
4. Screw the nozzle back into the spray gun.
5. Adjust the optimal spraying pressure using the air pressure regulator for the
metering pump (see chapt. 5.2.1).
6. Set the operation limits for the current work process on the contact pressure
gauge of the pressure and dosing control (see chapt. 5.2.2).
7. Switch the pressure and dosing control to “Automatic” position.
5.2.1 Adjusting spraying pressure
Please observe the following instructions when adjusting the spraying pressure:
➤➤ Optimal spraying pressure is indicated by a uniform application of material
with feathered peripheral zones.
➤➤ Operate the unit with an air pressure only as high as necessary to achieve
a good atomization at the recommended spraying distance of approx. 3040 cm or 12-16 inches.
➤➤ Excessive spraying pressure causes increased material consumption and
paint fogging.
➤➤ lnsufficient spraying pressure results in the appearance of stripes and a
varying coating thickness.
5.2.2 Adjusting the pressure and dosing control
The black pointer in the contact pressure gauge shows the actual pressure.
Once you have set the optimal spraying pressure, you use the two red pointers
to set the operation Iimits for the current work process as follows:
1. Insert the attached key into the contact pressure
gauge.
2. Use the driver needle to turn the lower red slave
pointer to a value of approx. 20 bar below the
minimum pressure that is indicated when the
spray gun is opened.
- 20 bar
+ 20 bar
3. Use the driver needle to turn the upper red slave
pointer to a value of approx. 20 bar above the
maximum pressure that is indicated when the
spray gun is closed.
4. Pull the key back out.
44
Fig. 45
Translation of the original operation manual DUOMIX 333 PFP
PFP_Version 2_BAoDB_en_1410 · rs
Operation
The pressure and dosing control must be readjusted each time the spraying
pressure has been changed. lf the pointer of the contact pressure gauge
does not move or moves only insignificantly, the system must not be put into
operation due to the danger of mixing fau!ts!
5.2.3 Tips on coating
➤➤ Hold the spray gun at a right angle (90°) to the
spraying area. lf the spray gun is held at a different angle, the coating becomes irregular and
blotchy (see Fig. 46).
➤➤ Ensure an even speed and move the spray
gun parallel to the area to be coated. Waving
the spray gun causes irregular coating (see
Fig. 47).
➤➤ Move the spray gun with your arm and not with
your wrist.
➤➤ Begin moving the spray gun before pulling the
trigger. This way you will achieve perfect, soft
and smooth overlapping of the spray jet and
excessively thick application of material at the
beginning of the spraying process is avoided.
➤➤ Release the trigger before stopping the movement.
➤➤ Replace the spray nozzle before it is worn.
30-40 cm
right
ng
wro
Fig. 46
thin
layer
Fig. 47
thick
layer
wall
thin
layer
wrong
Worn nozzles cause higher paint consumption and have a negative effect on
the quality of the paint finish.
5.2.4 Changing material drums
1. Set the control lever for the corresponding ram to position “Stop”.
2. Close the compressed air shut-off valve on the feed pump.
3. Open the ball valve for the container ventilation.
4. Set the ram control lever to position “Up” to move the ram up.
5. Once the sealing lip of the follow plate reaches the top of the material drum,
quickly close the ball valve for the container ventilation.
6. Once there is sufficient space for removing the material drum, set the ram
control lever to position “Stop”.
7. Remove the old material drum.
8. Place the new material drum on the centering under the feed pump.
9. Open the ventilation ball valve on the follow plate.
10.Set the ram control lever to position “Down” to move the ram down again.
11.Once all air has escaped from the material drum, close the ventilation ball
valve on the follow plate.
12.Open the compressed air shut-off valve on the feed pump.
Translation of the original operation manual DUOMIX 333 PFP45
PFP_Version 2_BAoDB_en_1410 · rs
Operation
5.3 Flushing
The purpose of flushing it to flush the mixed material out of the system before it
cures during an interruption in spraying operation.
1. Regulate the compressed air pressure regulator for the metering pump fully
back.
2. Press the trigger of the spray gun until the pressure at the gauge drops
below 150 bar.
3. Close and lock the spray gun.
4. Set the mixing unit to operating mode “Stop”.
5. Remove the nozzle from the spray gun.
6. Hold the spray gun into a collection container.
7. Unlock the spray gun and operate it.
8. Open and close with opened spray gun the flushing ball valves at the
mixing unit several times alternately (at least 5 times), to clean the mixing
block properly.
9. Open both flushing ball valves at the mixing unit simultaneously and operate the spray gun, until clean release agent runs out.
10.Close and lock the spray gun.
11.Screw the nozzle back into the spray gun and briefly flush to clean it.
12.Lock the spray gun and close both flushing ball valves at the mixing unit.
5.4 Cleaning the static mixer
For daily maintenance you have to clean the static mixer manually. This is usually done after flushing as just described.
WARNING
All maintenance works require a completely pressureless system.
1. Dismantle the spray gun from the spray hose and the spray hose from the
static mixer.
2. Dismantle the static mixer from the mixing block.
3. Pull out the mixing element from the static mixer.
4. Clean the static mixer parts with the appropriate solvent. We recommend
using a brass brush for the mixing element and a round brush for the tube
of the static mixer.
5. Clean the exposed threads in the mixing block by alternately opening and
closing the flushing ball valves at the mixing unit. We recommend using a
round brush here for proper cleaning, as well.
WARNING
The adjusted pressure of the regulator for the flush pump must be very low
(approx. 1 bar).
6. Reassemble the mixing element to the static mixer.
7. Reassemble the static mixer to the mixing block.
46
Translation of the original operation manual DUOMIX 333 PFP
PFP_Version 2_BAoDB_en_1410 · rs
Operation
5.5 Work breaks
5.5.1 Short interruption of work
When interrupting work for just a short time (up to 30 minutes) you should
flush all components that had contact with the mixed material, within the potlife
specified by the manufacturer (see chapt. 5.3 on page 46).
5.5.2 Longer work break
1. Flush the system as described in chapt. 5.3 on page 46.
2. Switch the pressure and dosing control to “Manual”.
3. Close the material outlets on the intermediate piece and open the return
flow ball valve.
4. Regulate the compressed air pressure regulator on the metering pump so
that the material circulates slowly in the system.
During a longer work break, the material cools in the hose package. When you
return to work, drain off material through the ratio check outlets on the mixing
unit until the material exits with the correct working temperature.
5.6 Placing the system out of operation
For placing the system out of operation you flush the system, relieve the system pressure completely and switch off the system electrics.
1. Flush the system as described in chapt. 5.3 on page 46.
2. Switch the pressure and dosing control to “Manual”.
3. Through the ratio check outlets on the mixing unit drain off 2 buckets of
component A and the mixing ratio compliant material quantity of component B.
4. Regulate the compressed air pressure regulator for the metering pump fully
back.
5. Close the material outlets on the intermediate piece and open the return
flow ball valve.
6. Adjust all other air pressure regulators on the system (flushing agent pump,
pressure vessels, feed pumps, etc.) completely back.
7. Set both ram control levers to position “Stop”.
8. Close all compressed air shut-off valves (air maintenance unit, pressure
vessels, feed pumps, etc.).
9. Open the pressure relief valves on the pressure vessels.
10.On the control cabinet turn the switch for the material flow heaters, the
switch for the water heater, the switches for agitators and the main switch
to “0”.
11.Unlock the spray gun and operate it instantaneously, in order to relieve the
residual pressure.
12.Close and secure the spray gun.
13.Close the shut-off valves on the metering pump material inlets.
14.Clean the static mixer as described in chapt. 5.4 on page 46.
Translation of the original operation manual DUOMIX 333 PFP47
PFP_Version 2_BAoDB_en_1410 · rs
Operation
5.7 Storage
Store the machine at a location at which it is protected from dirt, damp, frost
and heat.
Storage temperature
Minimum of
0 °C
32 °F
Maximum of
40 °C
104 °F
5.8 Waste disposal
At the end of use you must shut down, disassemble and dispose of the equipment in accordance with legal regulations.
➤➤ Clean the unit thoroughly of all material residues.
➤➤ Disassemble the system and separate all materials – dispose metal together with scrap metal, plastic parts can be disposed of as domestic waste.
➤➤ Rests of spraying material, cleaning agent, oils, greases and other chemical substances must be collected in accordance with statutory provisions
concerning recycling and waste disposal. The official local waste water
laws are valid.
48
Translation of the original operation manual DUOMIX 333 PFP
PFP_Version 2_BAoDB_en_1410 · rs
Maintenance
6 Maintenance
WARNING
If maintenance and repair work is carried out by persons who have not been
trained for this work you endanger yourself, other persons and impair the
safety and reliability of the system.
➤➤ Maintenance and repair work on the control cabinet and other live
components must only be performed by skilled electricians – any other
maintenance and repair work only by the WIWA Customer Service or
specially trained personnel.
Before maintenance and repair work:
1. Shut off the compressed air supply.
2. Switch off the electric power supply.
3. Depressurize the system completely.
WARNING
In case of material congestion or agglomeration of material in the spraying
system, residual pressures can still be present despite pressure discharge.
When disassembling residual pressures can escape suddenly and cause
serious injury.
➤➤ Be extremely careful when disassembling!
➤➤ When disconnecting material hoses you should cover the screw fitting
with a cloth to catch any escaping material sprays.
After completing work check the function of all safety features and the correct
functioning of the system.
6.1 Regular inspections
According to the accident prevention instructions for “Work with fluid spraying equipment” BGV D15 the unit needs to be inspected and serviced regularly by an expert (WIWA Customer Service).
The unit needs to be inspected:
➤➤ before initial commissioning,
➤➤ after the modification or repair of parts of the system, which could affect
safety,
➤➤ after work breaks longer than 6 months,
➤➤ but at least every 12 months.
For decommissioned units the inspection can be postponed until the next commissioning.
The inspection results must be recorded in writing and kept until the next inspection. The inspection report or a copy thereof must be available at the place
of use of the equipment.
Translation of the original operation manual DUOMIX 333 PFP49
PFP_Version 2_BAoDB_en_1410 · rs
Maintenance
6.2 Maintenance plan
The information in the maintenance plan are recommendations. The intervals may vary in dependence on the condition of materials used and outer
influences.
Interval
Activity
before each start-up
Check the release agent level in the feed pumps
before each start-up
1 x per week
1 x per week
1 x per week
every 50 operating hours
Check the lubricant level in the fog oiler
Check and adjusting the fog oiler
Check and cleaning the water separator
Readjust the upper packing of the feed pumps
Check release agent of the metering pump for
material residues
6.3 Air maintenance unit
6.3.1 Checking the lubricant level in the fog oiler
Operation of the system must only be started if the oil reservoir of the fog
oiler contains a sufficient amount of oil for the air motors.
In case of high humidity you should use an antifreeze agent for lubrication, to
avoid icing of the air motor.
Check the lubricant level every day as follows:
1. Press up the locking slide on the oil reservoir and unscrew the oil reservoir
by turning it anti-clockwise.
Take care of the O-ring that seals the oil reservoir. It may be displaced or
even fall out when disassembling.
2. Check whether the O-ring fits correctly – if necessary fit it correctly.
3. Check whether there is enough lubricant – maximally filled the lubricant
reaches to a point approx. 2 cm below the upper edge of the oil reservoir.
4. To up lubricant, if necessary. We recommend to use pneumatic oil (order
number 0632579) or the antifreeze agent (order number 0631387) from
WIWA.
5. Reattach the oil reservoir to the air maintenance unit.
6.3.2 Checking and adjusting the fog oiler
1. Let the metering pump run slowly under load.
2. Check in the fog oiler inspection glass whether 1 drop of lubricant is fed
after each 10 to 15 double strokes of the air motor.
3. If this is not the case, adjust the metering by turning the regulating screw
on the fog oiler with a screwdriver.
50
Translation of the original operation manual DUOMIX 333 PFP
PFP_Version 2_BAoDB_en_1410 · rs
Maintenance
6.3.3 Checking and cleaning the water separator
The accumulated condensation water is automatically drained off through the
drain valve. For this purpose hold the hose into an empty collecting vessel.
Check the bowl regularly for dirt residues and clean it as required (disassembly
and assembly as with the oil reservoir).
6.4 Metering pump
6.4.1 Checking release agent for material residues
Each of the fluid pumps on the metering pump contains approx. 100 ml of release agent. In order to check the release agent for material residues you must
drain off a small amount of release agent from the drain screws.
Filler openings
Drain screws (the drain screw for
the middle fluid pump is located on
the opposite side)
Fig. 48: Filler openings and drain screws for release agent
If the release agent is found to be contaminated with material residues you
must assume that the packing of the related fluid pump is worn. In this case
have the pump packing replaced as soon as possible.
After the examination top up the amount of fresh release agent through the
filler openings. We recommend to use release agent from WIWA (order-nr.
0163333).
6.5 Feed pumps
6.5.1 Checking the release agent level in the feed pumps
Before each start-up check the release agent level in the
feed pumps and replenish as required.
With a maximum filling level the release agent will reach
the bottom edge of the filler opening. The adjusting cups
must be at least half full.
Fig. 49
Translation of the original operation manual DUOMIX 333 PFP51
PFP_Version 2_BAoDB_en_1410 · rs
Maintenance
6.5.2 Readjust the upper packing of the feed pumps
Since the upper packing of the feed pumps suffers from wear during operation,
it must be readjusted on a regular basis – for initial commissioning after the first
3 working days and later approx.once per week.
This interval can only serve as a recommended guide value, because readjustment becomes even more necessary with increasing speed of the pump and
abrasiveness of the material. You must adapt the exact interval period to the
prevailing operating conditions.
This is how you must readjust the packing:
1. Close the compressed air shut-off valve on the feed pump when the piston
is moving up.
2. Insert the attached stud driver into a free bore in the adjustment cup.
3. Turn the adjusting cup it in clockwise direction, until resistance can be felt
and then turn it with another jerk.
6.5.3 Changing the upper packing of the feed pumps
You need to have the upper packing of the feed pumps replaced when:
➤➤ material penetrates into the release agent,
➤➤ release agent comes out through the packing (can be noticed by a permanent loss of release agent),
➤➤ the packing can no longer be adjusted,
➤➤ there is no play between adjusting cup and high pressure head.
6.5.4 Replacing the seals on the follow plate
You must replace seals on the follow
plate when they are worn. You find
the order numbers of the seals in the
spare parts list.
No. Designation
1
Fastening screws
3
Clamping ring
2
Seals
1
2
1
1
1
1
3
Fig. 50: Seals on the follow plate
1. Loosen all screws which fasten the seals and the clamping ring on the follow plate.
2. Take off the clamping ring and the old seals.
3. Slightly wet the first thread pitches of the fastening screws with a screw
retention agent.
4. Turn the clamping ring with the new seals on to the follow plate.
52
Translation of the original operation manual DUOMIX 333 PFP
PFP_Version 2_BAoDB_en_1410 · rs
Maintenance
6.6 Recommended operating materials
Use only original operating materials from WIWA:
Operating materials
WIWA order number
Release agent for isocyanate (0.5 l)¹
0640651
Release agent (0.5 l)¹
0163333
Anti-freeze agent (0.5 l) ²
0631387
Retention agent (50 ml)³
0000015
Pneumatic oil (0.5 l) ²
Lubricant (acid-free grease, 0.4kg)²
Lubricant for stainless steel²
0632579
0000025
0000233
¹Plasticizer to fill into the release agent cups of the metering pump, feed
pumps and flush pump.
²For air maintenance unit
³Materials required for maintenance and repair work (see information in spare
parts lists)
The release agents and the pneumatic oil are also available in larger containers.
6.7 Special tools
Key to open the control cabinet
Attention:
The Control cabinet must only be opened for
repairs by expert personnel with profound
knowledge about electrical engineering.
Key to adjust the operation limits on the contact pressure gauge
Pin spanner for readjusting the packings of the
feed pumps
Tool kit
1
2
3
No. Designation
1
2
3
4
5
6
Assembly aid for mounting the fluid
pumps
Mould hoop for exchanging the needle
of automatic spray guns
Miscellaneous allen keys
Hook spanner for mounting / dismantling
the fluid pumps
Ring spanner
Miscellaneous spanner wrenches
4
5
6
Translation of the original operation manual DUOMIX 333 PFP53
PFP_Version 2_BAoDB_en_1410 · rs
Rectification of faults
7 Rectification of faults
Fault
Possible cause/s
Remedy
The feed pumps work without interruption.
1. Material drum empty.
2. Feed pump(s) defective.
ðð Replace the material drum.
ðð Repair the feed pump(s).
The feed pumps do not deliver any
material into the system.
1. Compressed air is switched off.
2. Filling level sensor is defective.
ðð Secure compressed air supply.
ðð Check filling level sensor, repair
or replace if necessary.
ðð Repair or replace pump.
3. Pump is defective.
The hardener pump does not generate pressure in down stroke. The
pressure of standard components
rises.
1. The bottom valve of the hardener ðð Disassemble and clean the botpump is defective.
tom valve, replace ball or valve
plate if defective.
The hardener pump does not generate pressure in up stroke.
1. The piston valve of the hardener
pump is leaking.
ðð Disassemble and clean the
piston valve, replace ball or valve
plate if defective.
The hardener pump does not generate pressure in up and down stroke.
1. The hardener pump does not
receive any material.
2. Safety rupture disc defective.
ðð Check the material supply.
During the up stroke the pressure of
hardener and standard components
is considerably higher than during
the down stroke, or the pressure of
both components slowly increases
synchronously.
1. A piston valve of the two standard component pumps does not
work.
ðð Check and clean both piston
valves, replace ball or valve plate
if defective.
Both standard component pumps
do not generate any pressure in up
stroke. The pressure in the hardener
side is very high.
1. Both piston valves do not work.
ðð Check and clean both piston
valves, replace balls or valve
plates if defective.
In the up stroke the pressure of
hardener and standard components
is considerably higher than during
the down stroke.
1. A bottom valve on the standard
component pump does not work.
ðð Check and clean both bottom
valves, replace balls or valve
plates if defective.
No pressure generated for the
standard component during up and
down stroke. The pressure in the
hardener component is very high.
1. Standard component pumps do
not receive any material.
2. Safety rupture disk defective.
ðð Check the material supply.
ðð Check the safety rupture disc of
the hardener component .
3. The return flow valve of the hard- ðð Check the return flow valve for
ener component is leaking.
the hardening component for
function and leak tightness.
4. The ball valve on the material
ðð Open the ball valve.
inlet is closed.
3. The return flow valve for the
standard component is leaking.
4. The ball valve on the material
inlet is closed.
The ram press does not perform lifting movements.
54
1. The air supply has not been connected.
2. The control lever is still in “Stop”
position
3. The adjusted air pressure is too
low.
4. Seals on piston rods are worn.
ðð Check the safety rupture disc of
the standard component.
ðð Check the return flow valve for
the standard component for function and leakage.
ðð Open the ball valve.
ðð Connect air supply.
ðð Set the control lever to position
“Up” or “Down”
ðð Increase air pressure on compressed air regulator.
ðð Replace seals (first smear pistons with acid-free grease).
Translation of the original operation manual DUOMIX 333 PFP
PFP_Version 2_BAoDB_en_1410 · rs
Rectification of faults
Fault
Possible cause/s
Remedy
When circulating the pressure
of the standard component does not
drop.
1. Return flow valve for the standard component does not open.
2. Return flow hose is clogged.
ðð Check the return flow valve.
When circulating the pressure
of the hardener component does
not drop. The pressure of standard
components drops.
1. Return flow valve for the hardening component does not open.
2. Return flow hose is clogged.
ðð Check the return flow valve.
When spraying the pressure of
the standard component always
increases in comparison to the hardener component.
1. The packings of the hardener
pump are leaking.
ðð Repair the hardener pump (renew the packings).
When spraying the pressure of
the hardener component always
increases in comparison with the
standard component.
1. The packings of the standard
component pumps are leaking.
ðð Repair the standard component
pumps (renew the packings).
ðð Check free flow of return flow
hose.
ðð Check free flow of return flow
hose.
1. Mixing block, static mixer,
ðð Clean the mixing block. Clean
When spraying not enough presmaterial hose or spray gun have
or replace static mixer, material
sure or material is transferred to the
become overgrown.
hoses and spray gun.
spray gun, even though the pressure
2. The spray gun nozzle is clogged. ðð Replace the nozzle in the spray
in the system is high enough.
gun.
3. Material outlets on intermediate
ðð Open the material outlets.
piece closed.
4. Recirculation valves in front of
ðð Replace check valves.
ball valves of material hoses
clogged.
When flushing the mixing block
with a pressure-relieved system
and closed ventilation, the contact
pressure gauge indicates rising
pressure.
1. The lever “Spraying” on the
mixer is in position “On”.
ðð Set the lever “Spraying” to “Off”.
The air motor of the system ices
very quickly and and the power
of the system drops. The material
pressure in the system fluctuates
strongly.
1. The deicing system has not been ðð Switch on the deicing system
switched on.
and, if necessary, the material
flow heater.
2. Water separator full.
ðð Drain the water separator.
3. System overloaded.
ðð Make sure the system does not
run too fast (reference value:
approx. 25 double strokes per
minute).
Compressed air escapes from the
air motor at the guide axes behind
the protective gratings and at the
intermediate body.
1. The air motor seals are worn.
The air motor no longer works, even
though the compressed air supply is
assured. No material pressure available in the system.
1. The air motor control is defective. ðð Have the air motor repaired in
the WIWA Service workshop.
The system cannot be started.
However, the pressure gauge on
the air maintenance unit indicates
pressure.
1. The STOP button has been
pressed and locked.
ðð Seal the air motor again.
ðð Unlock the STOP button.
Translation of the original operation manual DUOMIX 333 PFP55
PFP_Version 2_BAoDB_en_1410 · rs
Rectification of faults
Fault
Possible cause/s
The system can only be started for a
short while (only as long as the Start
button is held depressed).
1. The switch “Manual/Automatic” is ðð Set the switch “Manual/Autoin position “Automatic”.
matic” to “Manual”.
2. The material pressure of one
ðð Relieve the material pressure.
component is higher than the red
contact indicator for high pressure warning.
3. The contact pressure gauge
ðð Replace the defective contact
submits an incorrect signal.
pressure gauge.
Remedy
The contact pressure gauge indicates pressure, even though the
system pressure has been relieved.
1. Contact pressure gauge defective.
ðð Replace the defective contact
pressure gauge.
The contact pressure gauge does
not indicate any pressure or only up
to a certain pressure. The system is
under full air intake. When spraying
the pointer sticks at certain pressure
and does not pulsate.
1. The contact pressure gauge is
defective (oil has run out of the
pressure transmitter of the pressure gauge).
ðð Replace the defective contact
pressure gauge.
The system does not stop after having pressed the Stop button.
1. The 3-2 way valve on the maintenance unit does not function
properly.
ðð Check if pilot hoses are connected properly according to the
circuit diagram. Check function
of valves (the membranes could
be swollen through use of wrong
pneumatic oil).
ðð Replace defective parts.
2. The STOP button is defective.
The system no longer works in
switch positions “Spray” and “Flush”.
1. Mixing unit, material hoses and
spray gun were not flushed
within the potlife.
The material has cured.
ðð Clean the components that had
been hardened by the mixed
material, replace if necessary.
Material runs out from the the intermediate body below the air motor.
1. The packings on the fluid pumps
are worn.
ðð Replace packings and seals on
the fluid pumps.
A material flow heater does not heat
up.
1. Power supply interrupted.
2. Ambient temperature below
5-8 °C.
ðð Check the electric power supply.
ðð Press the button of the overload
protection until the glowing lamp
stays on.
ðð Have the material flow heater
checked by expert personnel
with profound knowledge in the
field of electrical engineering.
3. Material flow heaters defective.
Fault message – the signal lamp on
the control cabinet lights up.
1. Agitator, material flow heater, hot
water heating or flushing water
heating defective.
2. The floating ball of the level
monitor is stuck with material
because the protective liners are
defective.
56
ðð Have the fault sources checked
by expert personnel with profound knowledge in the field of
electrical engineering.
ðð Remove all protective foils, clean
the float ball,
clean the underside of the level
monitor,
attach new foils to the bottom part
of the float ball.
Translation of the original operation manual DUOMIX 333 PFP
PFP_Version 2_BAoDB_en_1410 · rs
Technical data
8 Technical data
You can find the technical data for your DUOMIX 333 PFP in the attached machine
card, the type plate or in the documentation for the individual components.
8.1 Machine card
The machine card contains all important and safety relevant data and
information about the unit.
➤➤ exact designation and manufacturer data,
➤➤ technical data and limiting values,
➤➤ equipment and test certificate,
➤➤ data of purchasing,
➤➤ machine identification (machine components and accessories with article
and spare parts numbers),
➤➤ a list of the attached documentation.
8.2 Type plates
The type plate of the DUOMIX 333 PFP
is located at the rack. It contains the
most important technical data for the
DUOMIX 333 PFP.
The technical data of the metering
pump may change by exchanging the
fluid pumps. For this case, the type
plate for the metering pump is easily
replaceable mounted in a rail. It contains the following data:
➤➤ the supply rate per cycle for the
fluid pumps of base (A component) and hardener (B component),
➤➤ the pressure ratio,
➤➤ the mixing ratio,
➤➤ the entire supply rate per cycle for
the metering pump,
➤➤ the maximum permissible air inlet
and operating pressure as well as
➤➤ the year of construction.
35633 Gewerbestr.
Lahnau Germany
1-3
D-35633 Lahnau
Gewerbestraße
www.wiwa.de 1-3
Druckluftbetriebene Kolbenpumpe/Air operated piston pump
Fleximix 2
Geräte-Type/Unit
Geräte-Type/Unit
Duomix 333 PFP
0,5:1 - 17:1
Misch.Verhältnis/MixingRatio
FM p. DH/Output p. cycle
fl/oz
cm³
Übers.-Verhältnis/Ratio
:1 cm³ 9,3 fl/oz
275
FM p. DH/output
p cycle
Max. Lufteingang/Air
PSI
Übers.-Verhältnis/Ratio
/U
75bar :1
230 V
Max. Betriebsdruck/Fluid
bar
PSI
Max.Lufteingang/Air
bar
6
87 psi
Max. Temperatur
°C
°F
Max.Betriebsdruck/Fluid
450 bar- 2014
6525 psi
38700046
Serial-no. - Model year
Max.Temperatur
80 °C
176 °F
Fig. 51: Type
plate
of the DUOMIX
333 PFP
Serial-no.Model
year
2KED0220 - 2013
(example)
WIWA 2K Duo-Mix
Base (Komp. A):
Hardener (Komp. B):
2x 115
ccm
ccm
1x 99
Pressure Ratio (Druckübers.):
:1
61
Mixing Ratio (Mischungsverh.):
:1
2,33
Displacement per Cycle
(Fördermenge/DH):
ccm
329,2
max. Inlet Pressure
(max. Eingangsdruck):
bar
7
max. Working Pressure
max. (Betriebsdruck):
Year of Construction / B aujahr:
bar
427
2013
Fig. 52: Type plate for the metering pump
(example)
Please check that the data on the type plates are identical to the specifications on the machine card. Please notify us immediately in case of discrepancies or if a type plate is missing.
Additionally, some unit components have a separate type plate, such as:
➤➤ the air motor of the metering pump,
➤➤ the fluid pumps for the A- and B component,
➤➤ the pressure vessels,
➤➤ the rams,
Translation of the original operation manual DUOMIX 333 PFP57
PFP_Version 2_BAoDB_en_1410 · rs
Technical data
➤➤ the feed pumps,
➤➤ the flush pump and
➤➤ the material flow heaters.
These type plates contain the technical data and serial numbers of the affected
components
58
Translation of the original operation manual DUOMIX 333 PFP
PFP_Version 2_BAoDB_en_1410 · rs

Translation of the original operation manual DUOMIX 333 PFP59
PFP_Version 2_BAoDB_en_1410 · rs
WIWA Service +49 (0)6441 609 140
Headquarters and production
WIWA Wilhelm Wagner GmbH & Co. KG
Gewerbestr. 1 - 3
35633 Lahnau, Germany
Phone: +49 6441 609-0
Fax: +49 6441 609-50
E-Mail: [email protected]
Homepage: www.wiwa.de
WIWA Partnership USA
WIWA LP
107 N. Main St.
P.O. Box 398, Alger, OH 45812
Phone: +1 (419) 757-0141
Fax: +1 (419) 549-5173
Toll Free: +1(855) 757-0141
E-Mail: [email protected]
Homepage: www.wiwalp.com
WIWA Subsidiary China
WIWA (Taicang) Co., Ltd.
Building A of Huaxin Industrial Park
No.11 East Qingdao Road, Taicang City
Jiangsu Province 215400, P.R.China
Phone: +86 512-5354 8857
Fax: +86 512-5354 8859
E-Mail: [email protected]
Homepage: www.wiwa-china.com
WIWA Middle East General Trading LLC
Mohd Farhan Khan
Jebel Ali Industrial 1, Dubai, UAE
Phone: +9714 884 8220
E-Mail: [email protected]
WWW.WIWA.DE