1
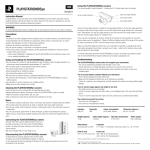
Rev 12/17/07
119784 50 Cent PS3 Manual Cover.pdf 11/14/08 6:20:02 AM
Use destruction to your strategic
advantage, turning the entire world
into your weapon
Continue the battle online in a variety
of destructive multiplayer modes
THE REVOLUTION BEGINS SPRING 2009
WWW.REDFACTION.COM
© 2008 THQ Inc. Developed by Volition, Inc. Red Faction: Guerrilla, THQ, Volition Inc., and their respective logos are
trademarks and/or registered trademarks of THQ Inc. All rights reserved. All other trademarks, logos and copyrights
are property of their respective owners. “PlayStation”, “PLAYSTATION” and “PS” Family logo are registered trademarks
of Sony Computer Entertainment Inc.
119784
WARNING: PHOTOSENSITIVITY/EPILEPSY/SEIZURES
A very small percentage of individuals may experience epileptic seizures or blackouts when exposed
to certain light patterns or flashing lights. Exposure to certain patterns or backgrounds on a television
screen or when playing video games may trigger epileptic seizures or blackouts in these individuals.
These conditions may trigger previously undetected epileptic symptoms or seizures in persons who
have no history of prior seizures or epilepsy. If you, or anyone in your family, has an epileptic condition
or has had seizures of any kind, consult your physician before playing. IMMEDIATELY DISCONTINUE
use and consult your physician before resuming gameplay if you or your child experience any of the
following health problems or symptoms:
• dizziness
• eye or muscle twitches
• disorientation
• any involuntary movement
• altered vision
• loss of awareness
• seizures
or convulsion.
RESUME GAMEPLAY ONLY ON APPROVAL OF YOUR PHYSICIAN.
_____________________________________________________________________________
Use and handling of video games to reduce the likelihood of a seizure
• Use in a well-lit area and keep as far away as possible from the television screen.
• Avoid large screen televisions. Use the smallest television screen available.
• Avoid prolonged use of the PLAYSTATION®3 system. Take a 15-minute break during each hour of play.
• Avoid playing when you are tired or need sleep.
_____________________________________________________________________________
Stop using the system immediately if you experience any of the following symptoms: lightheadedness,
nausea, or a sensation similar to motion sickness; discomfort or pain in the eyes, ears, hands, arms, or
any other part of the body. If the condition persists, consult a doctor.
NOTICE:
Use caution when using the SIXAXIS™ wireless controller motion sensor function. When using the
SIXAXIS™ wireless controller motion sensor function, be cautious of the following points. If the
controller hits a person or object, this may cause accidental injury or damage. Before using, check
that there is plenty of space around you. When using the controller, grip it firmly to make sure it
cannot slip out of your hand. If using a controller that is connected to the PS3™ system with a USB
cable, make sure there is enough space for the cable so that the cable will not hit a person or object.
Also, take care to avoid pulling the cable out of the PS3™ system while using the controller.
WARNING TO OWNERS OF PROJECTION TELEVISIONS:
Do not connect your PLAYSTATION®3 system to a projection TV without first consulting the user manual
for your projection TV, unless it is of the LCD type. Otherwise, it may permanently damage your TV screen.
LIMITED WARRANTY
Publisher warranty required here.
Table of Contents
Getting Started.......................................................................................... 2
Game Controls.......................................................................................... 3
Main Menu................................................................................................ 5
New Game................................................................................................. 6
Story.......................................................................................................... 7
HUD............................................................................................................ 8
Missions.................................................................................................... 9
Weapons.................................................................................................... 9
Counter-Kills............................................................................................ 10
Scoring.................................................................................................... 10
Multiplayer.............................................................................................. 11
Shop......................................................................................................... 11
Music Player............................................................................................ 12
Limited Warranty.................................................................................... 17
HANDLING YOUR PLAYSTATION®3 FORMAT DISC:
• Do not bend it, crush it or submerge it in liquids. • Do not leave it in direct sunlight or near a radiator
or other source of heat. • Be sure to take an occasional rest break during extended play. • Keep this
disc clean. Always hold the disc by the edges and keep it in its protective case when not in use. Clean
the disc with a lint-free, soft, dry cloth, wiping in straight lines from center to outer edge. Never use
solvents or abrasive cleaners.
“PLAYSTATION” is a registered trademark and “PS3” is a trademark of Sony Computer Entertainment Inc. The ratings icon is a trademark of the
Entertainment Software Association. SIXAXIS is a trademark of Sony Computer Entertainment Inc. © 2008 Sony Computer Entertainment Inc.
119784 50 Cent PS3 Manual Guts.indd 2-1
11/18/08 4:13:34 AM
GETTING STARTED
GETTING STARTED
GETTING STARTED
PLAYSTATION®3 system front
®
®
PLAYSTATION
3 system front
PLAYSTATION
3 system ®front
GETTING STARTED
PLAYSTATION 3 Slot
system
front
cover
Slot cover
CF*1 slot
CF*1 slot
Eject button
Eject button
SD*2 Memory
2
SD*
Memory
Card
slot
Card slot
Memory
Memory
Stick™ slot
Stick™ slot
*1 CompactFlash®
®
*1 CompactFlash
*2 Secure Digital
*2 Secure Digital
Slot cover
CF*1 slot
Eject button
SD*2 Memory
Card slot
Memory
Stick™ slot
Insert the disc with the
Insert
theside
discfacing
with the
label
up.
label side facing up. Insert the disc with the
label side facing up.
*1 CompactFlash®
*2 Secure Digital
Disc
Disc
slotslot
Power
button Disc slot
Power
button
Power button
Vent
Vent
Vent
Eject
button
Eject
button
Eject button
WLAN
access
indicator
WLAN
access
indicator
WLAN access indicator
HDD
indicator
HDDaccess
access
indicator
HDD access indicator
USB
USBconnectors
connectors
USB connectors
GETTING STARTED
GETTING STARTED
GETTING STARTED
Using the SIXAXIS™ wireless controller (for PLAYSTATION®3)
® PLAYSTATION®3)
Using wireless
the SIXAXIS™
wireless
controller (for
Using the SIXAXIS™
controller
(for
PLAYSTATION
3)
™
GAME CONTROLS
Using the SIXAXIS wireless controller
(for PLAYSTATION®3)
USB connector
Port indicators
Port indicators
Port indicators
L2 button
L2 button
L1 button
L2 button
L1 button
L1 button
Directional
Directionalbuttons
buttons
Left stick/
Left stick/
L3 button*
L3 button*
SELECTSELECT
button button
Directional
buttons
Left stick/
L3 button*
SELECT button
USB connector
R2 button
R2 button R1 button
R1 button
button
button
button
button
button
button
button
button
USB connector
R2 button
R1 button
button
button
button
button
Right stick/
Right stick/
R3 button*
R3 button*
Right stick/
R3 button*
START
button
START button
START button
PS
button
PS button
PS button
R3 buttons
function
when
theare
sticks
are pressed.
* The *L3The
andL3
R3and
buttons
function
when the
sticks
pressed.
* The L3 and R3 buttons function when the sticks are pressed.
Note:
use
the controller,
youfirst
must
first register
“pair”
the controller
Note:
To useTothe
controller,
you must
register
or “pair”orthe
controller
with the with the
®
®
Note:
use
controller,
you
firstFor
register
“pair”
the
PLAYSTATION
3 system
andToassign
a number
to the
controller.
details,
to the
PLAYSTATION
3 system
andthe
assign
a number
tomust
the controller.
Fororrefer
details,
refercontroller
to the with the
®
PLAYSTATION
3 system.
system and assign a number to the controller. For details, refer to the
instructions
supplied
with the
system.
instructions
supplied
with
the
instructions supplied with the system.
dodo
notnot
include
media
slots.
For specific
Saved data for®PLAYSTATION®3
format software
Note: Some
Somemodels
modelsofofthe
thePLAYSTATION
PLAYSTATION3®3system
system
include
media
slots.
For specific
®
Saved
datadata
for PLAYSTATION
3 format
software
®
®
Saved
for PLAYSTATION
3 format
software
®
features included,
refer
totothe
instructions
use
of of
your
model
of the
PLAYSTATION
3 system.
Note:
Some
models
of thefor
PLAYSTATION
3model
system
not
include media
slots. For specific
features
included,
refer
the
instructions
for
use
your
of do
the
PLAYSTATION
3 system.
®
®
Saved
data
for
PLAYSTATION®3
format
software
ishard
saved
on the system’s hard disk. The data
®
Saved
data
for
PLAYSTATION
3
format
software
is
saved
on
the
system’s
hard
disk.
data for
PLAYSTATION
3 format
software
®
Saved data forSaved
PLAYSTATION
3 format
software is saved
on the
system’s
disk.
featuresBefore
included, refer
to the
instructions
for use
of your
model
of the PLAYSTATION
3 system.
®
Startingaaagame:
game:
read
thethe
instructions
supplied
with
the PLAYSTATION
is
displayed
Utility”
the Game
® Game
The data
displayed
underdata
“Saved
Game “Saved
Utility”
in
Game
menu.
Starting
use,
carefully
read
the
instructions
supplied
with the3 ®3
Starting
game:Before
Beforeuse,
use,carefully
carefully
read
instructions
supplied
with
the PLAYSTATION
Saved
forunder
PLAYSTATION
3the
format
software
is
saved
on themenu.
system’s hard disk.
The is
data
is displayed
under
“Saved
Game Utility”
in the
Gamein
menu.
computer entertainment
system.
The
contains
information
on setting
up and
®
Starting
a game:
Before
use, carefully
read
the
instructions
with
the PLAYSTATION
3
PLAYSTATION®3
computer
entertainment
system.
The
documentation
contains
information
computer
entertainment
system.
Thedocumentation
documentation
contains
information
onsupplied
setting
up
and
The data is displayed under “Saved Game Utility” in the Game menu.
using
your system
as well
as important
safety
information.
computer
entertainment
system.
The
on setting up and
on
setting
up
and
system
as
welldocumentation
as importantcontains
safety information
information.
using
your system
as using
well
asyour
important
safety
information.
CONTROLS (DEFAULT)
using
your
system
as well
as important
safety
information.
Check that
MAIN
POWER
switch
(located
on the system
rear)
is turnedrear)
on. Insert
the (title
Check
thatthe
the
MAIN
POWER
switch
(located
on the
system
is Insert
turned
Insert the
Check that
the
MAIN
POWER
switch
(located
on the system
rear)
is turned on.
theon.
(title
name) disc with the label facing up into the disc slot. Select the icon for the software title under
Right
stick
50
Cent:
onlabel
thethe
Sand
disc
the label
facing
into
discis slot.
Select
the the
icon
for
Check
that
MAIN
POWER
(located
on
the
system
turned
on.
Insert
(title
Turn
name)
discBlood
with
the
facing
up
intowith
the switch
disc
slot.
Select
theup
icon
for the
therear)
software
title
under
[Game] in the PLAYSTATION®3® system’s home menu, and then press the S button. Refer to this
the
software
title under
[Game]
infacing
the PLAYSTATION®3
system’s
home
menu,
and then
press
name)
disc with
label
up
intoand
the then
disc slot.
Select
icon for
thetosoftware
title under
[Game]
in the
PLAYSTATION
3the
system’s
home
menu,
press
the Sthe
button.
Refer
this
manual for
information
on using
the software.
Left stick
®
Move (steer Vehicle in Driving Missions)
[Game]
inon
the
PLAYSTATION
3 system’s
home menu,
and then
press the S button. Refer to this
the
S button.
Refer
to using
this
manual
for
information
on using
the software.
manual
for information
the software.
Quitting a game:
During
gameplay,onpress
down the PS button on the wireless
manual for
information
usingand
thehold
software.
Quitting
aagame:
press
and
PS is
button
on the wireless
E button Fire Weapon (Accelerate Vehicle in Driving Missions)
Quitting
game:
Duringgameplay,
gameplay,
press
and
holdhold
down
thescreen
PSthe
button
on
the wireless
controller for
at
least During
2 seconds.
Then select
“Quit
Game”
from down
the
that
displayed.
controller
least
Then
select
“Quit
Game”
from
the
screen
is displayed.
Quitting
a2 seconds.
game:
During
pressfrom
andthe
hold
downthat
the PS
buttonthat
on the
wireless
controller forfor
at at
least
2 seconds.
Then
selectgameplay,
“Quit Game”
screen
is
displayed.
To remove a disc, touch the eject button after quitting the game.
Hint
Q button Aim Weapon (Brake / Reverse Vehicle in Driving Missions)
controller
fortouch
at least
2 seconds.
Then
selectthe
“Quit
Game” from the screen that is displayed.
To remove
a disc,
the ejectthe
button
afterbutton
quitting after
game.
Hint To
remove
a disc,
touch
eject
quitting the game.
®
Hint
To remove a disc, touch the eject button after quitting the game.
2
119784 50 Cent PS3 Manual Guts.indd 2-3
R button
Throw Grenade (Shoot Missiles in Helicopter Mission)
3
11/18/08 4:13:36 AM
Main Menu
W button
Select Grenade
S button
Action Button (Revive friend)
A button
Counter Kill
F button
Reload (Hold to pick up weapon)
D button
Activate or deactivate Gangsta Fire Mode
B (click)
Taunt
Choose Mission: These missions will be
unlocked as you complete them.
[ button
Pause/Option in-game Menu
Join Co-op: Search for open Co-op games
to join.
] button
Objective Screen (This will show the name and a brief description of the
objective)
Directional button C
Sidearm category (Hand guns)
Directional button Z
CQB category (Sub machineguns and Shotguns)
Directional button X
Assault category (Assault Rifles and Machineguns)
Directional button V
Special Weapon category (Sniper Rifles, Grenade Launchers and Rocket
Launchers)
Holding the Q button will put the weapon in ‘ironsight mode’, releasing the
Q button will resume back to normal view.
Pressing the directional buttons C and V during ‘ironsight mode’ will zoom in (If
the weapon’s scope has more than one zoom, each click will cycle through each
magnification level.
Play Game: This will take you to the Play
Game menu and contains the following
options:
New Story: Start a new Story mode game.
Continue Story: Load your previous saved
game/checkpoint.
Unlockables: View the contents you have
unlocked during the game like 50 Cent / G-Unit Music Videos, Artwork and Cheats.
Music Player: Customize Playlist featuring current, classic and exclusive 50 Cent / G-Unit
Tracks (see page 12 for details).
Leaderboards: Pulls up online leaderboards and displays player high scores.
Options: Adjust controls, audio, and video settings for the game.
Control Options
Invert Y: Adjust the Y-axis (looking up and down).
Sensitivity: Adjust speed of controls.
Presets: Choose from four different control layout schemes.
Audio
Sound Effects Volume: Adjust sound effect loudness.
Music Volume: Adjust music volume.
Dialogue Volume: Adjust voice volume.
Subtitles: Turn on/off subtitles in game.
Video
Brightness: Adjust the brightness of the game.
4
119784 50 Cent PS3 Manual Guts.indd 4-5
5
11/18/08 4:13:37 AM
NEW GAME
Once you start a new Story game, you will be asked to choose the following:
Difficulty Settings: Easy, Normal, and Hard.
Online Settings (Co-Op Game Online only)
Solo Play (Default): This single player mode does not allow for others to join your game.
Friends Only: Only players on your Friends list can join your game.
Open Game: Anyone can join your game.
Choose G-Unit Member
On this screen you are allowed to select the following G-Unit Members. Your G-Unit member
will help with combat as well as help you overcome environmental obstacles like opening a
heavy door or helping you get to higher ground.
G-Unit Members
Tony Yayo
Born: Jamaica, Queens
Raised: Jamaica, Queens
Favorite Rapper: Notorious B.I.G
Favorite Album: Ready to Die
What don’t you like to do? Not working
What do you like to do? Make music
Favorite place: Hawaii
Who do you look up to? GOD
Where do you see yourself 5 years from now? Filthy rich
Greatest accomplishment? 1st Album selling gold and I was in house arrest
Lloyd Banks
6
Born: Maryland
Raised: Southside Jamaica Queens
Favorite Rapper: Notorious B.I.G
Favorite Album: “Life After Death”: Notorious B.I.G
What don’t you like to do? Pretend
What do you like to do? Make music
Favorite place: The recording studio
Who do you look up to? GOD
Where do you see yourself 5 years from now? A legend...
Greatest accomplishment? 1st week sales for my 1st album “Hunger For More”
119784 50 Cent PS3 Manual Guts.indd 6-7
DJ Whoo Kid
Born: Brooklyn
Raised: Queens Village
Favorite Rapper: 50 Cent
Favorite Album: Get Rich or Die Tryin’
What don’t you like to do? Waking up in the morning
What do you like to do? Pizzle
Favorite place: Thailand
Who do you look up to? Obama
Where do you see yourself 5 years from now? In Haiti Broke
Greatest accomplishment? Meeting Nelson Mandela
Pause Menu
Resume Game – Go back to the current game.
Load last checkpoint – This will load up your previous checkpoint.
Restart Chapter – This will reload the current mission from the beginning.
Options – These are similar to the main menu options.
Quit to main menu – This will exit the current game to the main menu.
Music Player – Create a playlist of G-Unit songs to listen to in-game.
STORY
50 Cent just played to a soldout crowd for a guaranteed $10
million cash, but when he goes to
collect, the money’s been stolen. The
promoter offers 50 Cent and G-Unit
something more valuable than
money: a diamond-encrusted skull.
However on their way back to the
airport, their convoy was ambushed
and the skull was taken. 50 Cent and
G-Unit go on a rampage to recover
their prized diamond-encrusted skull.
Become 50 Cent and go up against a
murderous, double-dealing, bloody
cast of criminals—the sleazy concert
promoter, the vengeful strip club owner,
the shadowy arms dealer, the ruthless drug lord, the
cruel henchwoman and the dark, death-dealing organ harvester.
7
11/18/08 4:13:38 AM
HUD
Grenade: Indicates which type of grenade you currently have selected. This also indicates the
number of grenades remaining. The grenade icon will change when you are cycling through
other grenades types.
Aiming crosshair: Marks the area where 50 Cent will shoot.
Weapon Pick up Icon: Appears when you walk over a useable weapon.
Counter Kill Icon: This icon will appear in the bottom center of the screen when you’re in
close proximity to your enemy.
MISSIONS
You will travel to over 20 different missions that cross through six different environments,
taking in slums, foothills and a fortress encampment.
WEAPONS
Select and equip up to four classes of weapons before you start a mission. There are 21 field
weapons, which have been separated into four different classes: Pistols, SMG, Assault Rifles and
Special Weapons (Rocket Launchers, Sniper Rifles, Grenade Launchers).
Cash: Shows how much money you’ve collected.
Points/Score: Indicates your current score. Combo awards will appear here.
Scenario/Objective Indicators: At the beginning of a mission and when you receive a new
objective, a brief description of the objective will appear on the HUD. While the objective
remains active, a more complete description can be found by pressing the ] button.
There are three grenade and explosive types. You can only carry a maximum of five for each type.
• Fragmentation Grenades—Once it lands there is a short delay before it explodes.
• Molotov Cocktail—Explodes a fiery burst upon contact and sets fire to anyone nearby.
• Sticky Timed Explosive—This IED sticks to surfaces and explodes after a short delay.
Gangsta Fire Bar: You can only activate Gangsta Fire by pressing the Gangsta Fire button.
Note: The amount of fire indicates how much time you have with the Gangsta mode.
Health Bar: Indicates your current health. The screen’s color will fade as 50 Cent’s health bar
drops down too close to zero. 50 Cent will automatically heal if you take cover from fire for a
certain amount of time.
G-Unit Action Icon: These icons appear if you are near areas that you can interact with.
These actions include activating levers, switches, Co-op moves, placing C4 Explosives and
reviving your teammate.
Popup Weapon Selector: Press the directional buttons for the weapon class you wish to choose.
Weapon: Indicates the currently equipped weapon.
Ammo: Displays ammo in the current weapon’s clip, and in reserve. This icon animates
when you’re rewarded with powerup ammo (please see Weapons on pg. 9 for more details).
8
119784 50 Cent PS3 Manual Guts.indd 8-9
9
11/18/08 4:13:39 AM
Bonus Power-ups
When completing scenarios within the given time limit, you will receive power-up ammo for
your handguns. These include Incendiary and Explosive ammunition power-ups.
Incendiary Ammo: Sets targets on fire instantly.
High Explosive Ammo: Highly explosive round that blows up within a short period of time
after impact.
Note: There are ammo pick-ups for your weapons. Please note there is a maximum
amount of ammunition for each type of weapon. You will not be able to pick up more
ammo if your weapon is full.
COUNTER-KILLS
These are melee attacks that require
perfectly timed button presses to
perform. To execute a counter kill,
you must be within a certain range
of the enemy and facing them. Once
you have initiated the counter kill
sequence by pressing the A button
(default), you will be prompted with
a yellow halo effect and a button
icon to indicate when to press the
A button again to perform the next
move. If you press the A button
too early or too late, the counter kill
sequence will fail and you will lose
some health.
You will start with five counter-kills and as you complete missions and earn more money,
you can purchase more counter-kill moves in the shop.
SCORING
Points are based upon the type of enemy being killed and how you killed them. There are
many ways of taking down enemies which gives the player more opportunities to score
points. For example, fire at the exploding barrels to kill enemies, or perform a headshot, or
even taunting after the enemy is taken down can rack up a significant amount of points.
Points are also based on your current difficulty setting. Scores will only be entered into
Online Leaderboards when you have completed the entire chapter without changing the
difficulty setting.
10
119784 50 Cent PS3 Manual Guts.indd 10-11
Bonus Points will be awarded for doing any “scenarios” in a certain time limitation.
Scenarios are timed events that are triggered during a mission. You will be rewarded for the
amount of time remaining after you complete the event.
To gain modifiers and multipliers, you must meet certain criteria during the missions. Some
examples are: Headshot, Not in Cover, Explosive Damage, Death by Fire, Environmental
Damage, Player Almost Dead, Snap Shots, Overkill and Taunting.
Multiplayer
The PLAYSTATION®Network is required for an Online Co-Op Game.
The Co-Op mode for 50 Cent: Blood on the Sand allows players to join in the Story mode
game at any time. Online players can also drop in and out at any time during your game.
Hosting an Online Co-Op Game
When you start the game, there are three options for the Co-Op Game (please see Online
Settings on page 6 for more details).
Joining an Online Co-Op Game
Before you join another player’s game, you must choose your G-Unit member (50 Cent will
always be the host). Once you have entered the game, the host will be notified that a new
player has joined.
ShOP
The shop can be accessed at the
weapons selections screen or at the
phone booth during a game (default
S button). The shop is basically a
black marketplace where 50 Cent and
G-Unit can spend their hard-earned
cash on more weapons, counter-kills
and taunt packs.
As you defeat enemies and break
crates, you will find valuable items like
gold and jewels that will automatically
convert to cash. This cash can be use
to purchase more weapons, counter
kills, and taunts at the shop.
11
11/18/08 4:13:41 AM
MUSIC PLAYER
The music player menu can be accessed at any time during the game from within the Pause
Menu. Here you can change and organize the music content to suit your taste.
The music player will allow you to scroll through a list of tracks available to the player and
listen to them, or cue them. You can add and delete tracks from custom mix tapes. You can
also select the music track or mix tape that is desired and play it.
12
119784 50 Cent PS3 Manual Guts.indd 12-13
Blood and Gore
Intense Violence
Sexual Content
Strong Language
Use of Drugs
© 2008 THQ Inc. GameSpy and the “Powered by GameSpy” design are trademarks of GameSpy Industries, Inc. All rights reserved.
Developed by Volition, Inc. Saints Row 2, Volition, Inc., THQ and their respective logos are trademarks and/or registered trademarks
of THQ Inc. All Rights Reserved. All other trademarks, logos and copyrights are property of their respective owners. “PlayStation”,
“PLAYSTATION” and “PS” Family logo are registered trademarks of Sony Computer Entertainment Inc.
11/18/08 4:13:43 AM
“Ultimate Fighting Championship,” “Ultimate Fighting,” “UFC,” “The Ultimate Fighter,” Submission,” “As Real As It Gets,” “The Octagon” and the eight-sided cage design are registered
trademarks, trademarks, trade dress or service marks owned exclusively by Zuffa, LLC in the United States and other jurisdictions. All other marks referenced herin may be the property of
Zuffa, LLC or other respective owners. Any use, in whole or in part, of the preceding copyrighted program, trademarks, or service marks or other intellectual property owned by Zuffa, LLC
shall not occur without the express written consent of Zuffa, LLC and all rights of Zuffa, LLC with respect to any such unauthorized use are hereby expressly reserved.
©2007 Zuffa, LLC All rights reserved. THQ and the THQ logo are trademarks and/or registered trademarks of THQ Inc. All Rights Reserved. All other trademarks, logos and copyrights are
property of their respective owners. “PlayStation”, “PLAYSTATION” and “PS” Family logo are registered trademarks of Sony Computer Entertainment Inc.
14
119784 50 Cent PS3 Manual Guts.indd 14-15
15
11/18/08 4:13:43 AM
NOTES
LIMITED WARRANTY
Warranty and Service Information
In the unlikely event of a problem with your product (“Product”), you may only need simple instructions to correct the problem. Please contact the THQ Inc. (“THQ”)
Customer Service Department at (818) 880-0456 or on the web at http://www.thq.com before returning the Product to a retailer. Live Customer Service Representatives are
available to help you Monday through Friday 9am to 5pm PST or you can use our automated systems by phone or on the web 24 hours a day, 7 days a week. Please do not
send any Product to THQ without contacting us first. Your 5 digit Product Code is 99095. Please use this code to identify your Product when contacting us.
Limited Warranty
THQ warrants to the best of THQ’s ability to the original consumer purchaser of the Product that the medium on which the Product is recorded shall be free from defects in
materials and workmanship for a period of ninety (90) days from the original date of purchase. The Product is sold “as is,” without express or implied warranty of any kind, and
THQ is not responsible for any losses or damages of any kind resulting from use of this Product. If a defect occurs during this ninety (90) day warranty period, THQ will either
repair or replace, at THQ’s option, the Product free of charge. In the event that the Product is no longer available, THQ may, in its sole discretion, replace the Product with a
Product of comparable value. The original purchaser is entitled to this warranty only if the date of purchase is registered at point of sale or the consumer can demonstrate, to
THQ’s satisfaction, that the product was purchased within the last ninety (90) days.
To receive warranty service:
Notify the THQ Customer Service Department of the problem requiring warranty service by calling (818) 880-0456 or on the web at http://www.thq.com. If the THQ service
technician is unable to solve the problem by phone or on the web via e-mail, he will authorize you to return the Product, at your risk of damage, freight and insurance prepaid
by you, together with your dated sales slip or similar proof-of-purchase within the ninety (90) day warranty period to:
THQ Inc.
Customer Service Department
29903 Agoura Road
Agoura Hills, CA 91301
THQ is not responsible for unauthorized returns of Product and reserves the right to send such unauthorized returns back to customers.
This warranty shall not be applicable and shall be void if: (a) the defect in the Product has arisen through abuse, unreasonable use, mistreatment or neglect; (b) the Product
is used with products not sold or licensed by Sony Computer Entertainment America or THQ (including but not limited to, non-licensed game enhancement and copier
devices, adapters and power supplies); (c) the Product is used for commercial purposes (including rental); (d) the Product is modified or tampered with; (e) the Product’s
serial number has been altered, defaced or removed.
Repairs after Expiration of Warranty
After the ninety (90) day warranty period, defective Product may be replaced in the United States and Canada for US$25.00. The original purchaser is entitled to the
replacement of defective Product for a fee, only if proof of purchase is provided to THQ. Make checks payable to THQ Inc. and return the product along with the original proof
of purchase to the address listed above.
Warranty Limitations
THIS WARRANTY IS IN LIEU OF ALL OTHER WARRANTIES AND REPRESENTATIONS. NO OTHER WARRANTIES OR REPRESENTATIONS OR CLAIMS OF ANY NATURE
SHALL BE BINDING ON OR OBLIGATE THQ OR ITS LICENSORS. ANY APPLICABLE IMPLIED WARRANTIES OR REPRESENTATIONS, INCLUDING WARRANTIES OF
MERCHANTABILITY AND FITNESS FOR A PARTICULAR PURPOSE ARE HEREBY LIMITED TO NINETY (90) DAYS FROM THE DATE OF PURCHASE AND ARE SUBJECT TO
THE CONDITIONS SET FORTH HEREIN. IN NO EVENT SHALL THQ OR ITS LICENSORS BE LIABLE FOR CONSEQUENTIAL OR INCIDENTAL DAMAGES RESULTING FROM THE
BREACH OF ANY EXPRESS OR IMPLIED WARRANTIES.
The provisions of this warranty are valid in the United States only. Some states do not allow limitations on how long an implied warranty lasts or exclusion of consequential
or incidental damages, so the above limitations and exclusions may not apply to you. This warranty gives you specific legal rights, and you may also have other rights, which
may vary, from state to state.
Warning
Copying of this Product or any of its contents or elements is illegal and is prohibited by United States and international copyright laws. Back-up or archival copies of this
Product or any of its contents or elements are not authorized and are not necessary to protect your Product. United States and international copyright laws also protect this
manual and other printed matter accompanying this Product. Violators will be prosecuted.
“PLAYSTATION” is a registered trademark and “PS3” is a trademark of Sony Computer Entertainment Inc. The ratings icon is a trademark of the Entertainment Software
Association. SIXAXIS is a trademark of Sony Computer Entertainment Inc. © 2008 Sony Computer Entertainment Inc.
16
119784 50 Cent PS3 Manual Guts.indd 16-17
“50 Cent: Blood on the Sand” interactive game © 2008 THQ Inc. All rights reserved. THQ and the THQ logo are trademarks and/or registered trademarks of THQ Inc., in the
U.S. and/or other countries. Developed by Swordfish Studios. The Swordfish Studios logo is a trademark of Swordfish Studios Limited. Unreal® Engine, Copyright 1998–
2008, Epic Games, Inc. All rights reserved. Unreal® is a registered trademark of Epic Games, Inc. NVIDIA, AGEIA and PhysX are trademarks and/or registered trademarks
of NVIDIA Corporation in the United States and other countries. Uses Bink Video Technology. Copyright © 1997-2008 by RAD Game Tools, Inc. FMOD Sound System,
copyright © Firelight Technologies Pty, Ltd. This product contains software technology licenseed from GameSpy Industries, Inc. © 1999-2008 GameSpy Industries, Inc.
GameSpy and the “Powered by GameSpy” design are trademarks of GameSpy Industries, Inc. All rights reserved. Portions of this software utilize SpeedTree®RT technology
© 2006 Interactive Data Visualization, Inc. SpeedTree® is a registered trademark of Interactive Data Visualization, Inc. All rights reserved. “Portions of this software are
Copyright © 2000-2008 Engenuity Technologies Inc. All master recordings and music videos courtesy of Shady / Aftermath / G-Unit / Interscope Records. © 2003-2008
Shady / Aftermath / G-Unit / Interscope Records. All rights reserved. All other trademarks are property of their respective owners.
17
11/18/08 4:13:44 AM