1
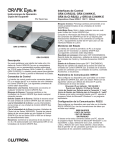
GRAFIK Eye®
IAISON
Operating Instructions
for GRAFIK Eye® LIAISONTM Software
TM
L I G H T I N G C O N T R O L S O F T WA R E
LIAISON Software
lets you . . .
PROGRAM the following:
■
■
■
■
■
■
■
■
■
■
GRAFIK Eye Control Units*
Scenes–intensities and fade
times
Load types–includes
non-dim options
Temporary Mode switch setting
Control Unit communication
assignments
Temporary, on-line scenes
Accessory Controls*
Control Unit communication
assignments
Power Panels*
Control Unit and Zone assignment for each circuit
Load types for each circuit
Installing GRAFIK Eye LIAISON
System Requirements:
In order to use GRAFIK Eye
LIAISON, you will need the
following:
Timeclock Events
Real-time and astronomic event
scheduling
Super Sequence
Automated, synchronized
dynamic scene selection
throughout the system
■
■
■
■
■
■
■
INTERROGATE the system
for:
■
The above information
Number of Control Units and
Accessory Controls present in
system
Control Unit type*
Number of Control Units zones
(2–24)
Accessory Control type
■
BACK UP an entire programmed
system, including Timeclock
events, for archival purposes.
* Requires the use of 3500 and/or 4500
series Control Units and GRX-PRG or
GRX-CI-PRG.
For use with 3100, 3500, 4100, and/or
4500 series Control Units. Requires
GRX-PRG or GRX-CI-PRG.
■
■
HARDWARE
IBM® compatible PC,
Pentium® 266 MHz or higher
recommended
32 MB RAM
15 MB of free space on your
hard drive
VGA Graphics
SOFTWARE
Microsoft® Windows® 95 or
later operating system, or
Microsoft® Windows® NT
version 4.0 or later
LIAISON does not support
Microsoft® Windows® Vista
■
■
■
■
■
CD INSTALLATION
Quit all other applications,
including any anti-virus
programs by:
1. Right-clicking on its icon in
the System Tray and quitting the
program, or
2. Pressing Cntrl-Alt-Delete,
selecting the process, and
clicking on the button labeled
“End Process.”
Insert the GRAFIK Eye
LIAISON CD into the CD-ROM.
From Windows START menu,
select RUN.
In the RUN box, type the letter
for your computer’s CD-ROM
drive (usually D:or E:), and
SETUP. Click OK.
After installation is complete,
click on the LIAISON icon to run
LIAISON.
To download the latest version of LIAISON,
visit our website at www.lutron.com.
GRAFIK Eye® LIAISON™ Software
Operating Instructions
START-UP SCREEN
GRAFIK Eye LIAISON Lighting Control Software can be used to Create, Edit, Go Online with, or
Back up a GRAFIK Eye system. Select the mode you wish to use:
Create or Edit a Project from File
This mode can be used without being connected to a GRX-PRG or GRX-CI-PRG. Select this
mode if: you are in the design stage of a project or wish to edit an existing project; you have
created a project and need to download the data for the first time; or, you want create a
project in your office for future downloading to a GRAFIK Eye system.
Go Online with System
Select this mode after you have transferred data using Create or Edit a Project from File to
monitor and operate your GRAFIK Eye system. This mode requires interfacing with the GRXPRG or GRX-CI-PRG (refer to instruction sheet P/N 040-135 or 040-228). See Page 18.
CREATE OR EDIT A PROJECT FROM FILE
FILE MENU
Open
■
If you have already created a job file, open that file using Open. LIAISON files have the extension “.lia”
and, by default, are saved in the same directory as LIAISON.
New
■
From the File menu, select New. Select the type of system that you will be designing. There are three
options when creating a new file:
1. Timeclock Only
Schedule real-time and/or astronomic events for the entire system. Use the super sequence
for dynamic, synchronized scene selections throughout the system. Requires a GRX-PRG or
GRX-CI-PRG and 3100 and/or 4100 series Control Units.
2. Programmable System
Includes all the Timeclock Only features, plus the ability to program all aspects of the system
operation using LIAISON.
Program all Control Unit information:
■
■
■
■
scenes (intensities and fade times), load types, communication assignments, and temporary
mode options.
Program Control Unit and zone assignments to the circuits in the system.
Program the Control Unit communication assignments for Accessory Controls.
Also, program all the Timeclock events and super sequence events; available with Timeclock
Only.
Note: Programming Requires a GRX-PRG or GRX-CI-PRG. To program directly from a Control
Unit, a 3500 and/or 4500 series Control Unit is necessary.
3. Lutron Lighting Wizard
If you are still in the process of designing your system, let the Lutron Lighting Wizard assist
you in creating a New file. After answering the questions presented by the Wizard and
2
Operating Instructions
GRAFIK Eye® LIAISON™ Software
clicking Finish, those screens that apply to your project will be shown. If you want to add to
or edit your system at a later time, simply use the menus to reopen the needed screen. The
equipment required is based upon choices selected using the Wizard.
Save
■
■
From the File menu, select Save to save the file.
Import - GRAFIK Eye Timeclock (.GTC)
GRAFIK Eye LIAISON can also be used to create Timeclock Only systems. Timeclock systems that
have been created by GRAFIK Eye Timeclock (P/N GRXTC-WIN) can be imported to LIAISON. From
the File menu, select Import -> GRAFIK Eye Timeclock (.GTC). After selecting the file to import,
click on OK. The file extension will be changed from .gtc to .lia and the imported file will be opened
for editing. The original file created by GRAFIK Eye Timeclock will not be changed.
Print
■
From the File menu, select Print to print information about the currently opened file. All system information or selected information can be printed. Select the information to be printed and then click OK.
Exit
■
To exit LIAISON, select Exit from the File menu. If changes have been made to the currently opened
file, or a new file was created that has not been saved, a prompt to save will be issued before exiting.
VIEW MENU
Enter Project Information
By default, the Project Information screen is shown every time a new file is created. This information
can be viewed or edited at any time. From the View menu, select Project Information.
■
■
■
For future reference, enter the job name, location, and description in the corresponding boxes.
Enter the name of individuals and companies for whom the
system was designed. Include addresses for future reference.
Click Done to exit the screen.
Set Preferences
Customize LIAISON by setting preferences for the user and
hardware interface. Preferences
for toolbar views, desktop color, and communication settings are set by selecting
Preferences from the View menu.
■
Toolbar. The toolbar below can be displayed by selecting “Buttons Without Text” from the
Preferences screen. Also, “Large Buttons With Text” and “No Buttons” are options in the
Preferences screen. The toolbar provides a shortcut means of selecting menu items.
3
GRAFIK Eye® LIAISON™ Software
Operating Instructions
■
Desktop Color. Change the default color of the LIAISON desktop by selecting a color from the
palette. The selection will be saved to an initialization file and used every time LIAISON is run.
■
Communications Type - Specify how LIAISON will communicate with a PRG box. GRX-CI-PRG
supports RS232 and Ethernet communication. LIAISON versions 4.0 and later support both RS232
and Ethernet communication. The “DeviceIP” button launches Lutron’s Ethernet device discovery
program, installed from CD separately. This program enables you to set and get the IP information
from GRX-CI-PRG units that are connected over Ethernet and connected on the same Ethernet
switch (or hub), or connected directly to the PC.
■
Communications Port - If serial communication is present, transferring data to the GRAFIK Eye
system requires the use of a PC serial COM port. From the Preferences screen, you may select the
COM port through which data will be transferred. The selection will be saved in an initialization file and
will only need to be set the first time you use LIAISON to program your system or if you change the
hardware configuration of your PC. The COM port can also be selected from the Set COM Port of
the Online Options menu.
■
Device IP Information - If Ethernet communication is selected, you must specify the IP address, Port
number, and login of the GRX-CI-PRG box from the Preferences screen. The following is the default
setting of a GRX-CI-PRG:
IP Address: 192.168.250.1
Port Number: 23
login: nwk
■
Advanced
Set redirection connecting time - By default port redirection connecting time is 0. If a longer
connecting time is needed (i.e the user tries to use LIAISON to control a GRAFIK Eye system via a
network by network-enabling the serial device or via telnet to a remote location), the user can click
Advanced button and specify the connecting time via the Connection and Communication Time
screen. This time is used when establishing communication.
■
Set response timeout - By default the response timeout is set to 0.5 second. During
communication, LIAISON will wait for a response from the PRG after sending out a command.
LIAISON will stop waiting if it receives a response or times out.
■
Log communications - If this option is checked, the communication between LIAISON software and
the PRG will be logged to a file. Note that this option may slow down the communication process
and should be used for troubleshooting only.
By default the communication will not be logged. If you want to log communication, reselect this
option each time you start LIAISON.
The log file is named “LiaCommunication.log” and is located in the LIAISON application directory.
New records are appended to the log file. If you need a clean log file, you can delete or rename the
existing log file and the software will create a new log file for you.
NOTE: LIAISON is designed to communicate with the GRX-PRG, GRX-CI-PRG or GRX-RS232
via serial communication or Ethernet. If the user decides to network-enable the serial device, the
communication quality and port redirection connecting time may vary depending on the system setup
(i.e. the network adapter, device server, redirector software, operating system, etc.). Not all port
redirector software and device servers will work with LIAISON. It is the user’s responsibility to test the
communication.
4
Operating Instructions
GRAFIK Eye® LIAISON™ Software
Enter Geographical Location
The geographical location of a job must be defined
if any astronomic events are to be scheduled.
1. Select the Location item found in the View
menu.
2. Select the city where the job is located using the
pull-down lists for Country, State (if applicable),
and City. The location value, time zone, and
daylight savings information associated with the
chosen city will appear on the screen.
3. If the desired city is not present in the list, select “User Defined Location” and enter the latitude
and longitude in the appropriate locations on the screen. Latitude and longitude are in units of
degrees. For example, 12.5 = 12 degrees, 30 minutes. Now enter the correct time zone and
Daylight Savings information.
4. Click on Done to return to the start-up screen. Select Save from the File menu to save the
changes.
SETUP MENU
Specify Control Units
NOTE: Programming directly from a Control Unit requires 3500 and 4500 series Control Units.
Control Units are specified based upon the type of system that you are designing. If Timeclock Only
was specified when the file was created OR the Wizard decisions did not require programmable
Control Units, models will be limited to 3100 and 4100 series Control Units. If Programmable System
was specified OR the Wizard decisions included creating scenes for GRAFIK Eye Control Units, the
model list will include 3500 and 4500 series Control Units.
1. From the Set Up menu, select Specify
Control Units. Click on the menu under
the Model column to select or change the
GRAFIK Eye model numbers for your system.
2. Use your pointer to highlight the Description
section and name your Control Units by
entering a description, such as “Conference
Room” or “Lobby”, on the line corresponding
to each Control Unit.
3. If the Control Units are 3500 and 4500 series, check off the addresses of all the Control Units you
want each Control Unit to “talk to” by clicking each corresponding box. For example, click A2 on
the first line if you want Control Unit A1 to “talk to” Control Unit A2.
4. Once you have specified each Control Unit, click Done to exit the screen.
If Timeclock Only was specified when the file was created OR the Wizard decisions did not
STOP require programmable Control Units, skip the rest of this Section and proceed to Timeclock
Menu on Page 13.
5
GRAFIK Eye® LIAISON™ Software
Operating Instructions
Specify Accessories (For Programmable Systems using GRX-PRG or GRX-CI-PRG Only)
Many GRAFIK Eye systems include Accessory Controls that allow for remote control of Control
Unit(s). These accessories must be told which Control Unit(s) to “talk to.” Some accessories are programmed such that all buttons “talk to” the same Control Unit(s). Others, such as partition controls,
are programmed on a button by button basis. These differences are based upon Accessory model
and functionality. For this reason, Accessory Controls must be specified and then programmed.
NOTE: Model information and functionality will not be programmed. This information is used to determine whether programming will be for all buttons or each individual button.
IMPORTANT! Accessory Control details are only available from accessory controls with a minimum
code revision. To determine the code revision level, inspect the back of the accessory control. If you
have questions, please contact the Lutron Hotline for assistance.
Minimum Code Revision of Accessory Controls For Getting Details
Type Minimum
Code Revision
Standard Accessory Control
2-0
Shade Accessory Control
1. From the Set Up menu, select Specify
Accessories. Click the Accessories tab on
the “Accessory Controls in this System” form.
Click on the drop down menu under the Model
column, and select the Accessory Control model
numbers for your system.
1-1
2. The functions listed for each address are
dependent on the model selected in the first
column. Click on the drop down menu under
the Function column, and select the function for
the Accessory Control. The button table at the
bottom of the screen may change from “ALL”
to individual buttons based on the selected
function.
NOTE: The bottom of this screen may have a different appearance for certain Accessory Controls.
3. Name your Accessory Control by highlighting the Description section and entering a description,
such as “Conf Rm Entrance” or “Conf Rm Podium”, on the line corresponding to each Accessory
Control. Descriptions are for reference only and will not be downloaded to the Programmer
Interface (GRX-PRG or GRX-CI-PRG).
4. Indicate which Control Units you want each Accessory Control to “talk to” by checking each
corresponding box. For example, click A1 on the first line of the Button table if you want the
NTGRX-4S Accessory Control at Address 2 to “talk to” A1.
5. For Fine Tuning Accessory Controls and Shade Accessory Controls, individual zone control is
available. To program which zones of a Control Unit you want the Accessory to control, click on
the corresponding box. This action will bring up a list box of zones for the selected Control Unit.
Select or de-select zones by clicking on the zones of the list box, or select / de-select all zones of
the Control Unit by clicking the Select All / Clear All button, and then click Done to exit the screen.
(SG-3WD is a dual 3-button shade control, the top 3 buttons and the bottom 3 buttons can be
programmed separately on a zone by zone basis).
6. Once you have specified each Accessory Control and Controllers, click Done to exit the screen.
6
Operating Instructions
GRAFIK Eye® LIAISON™ Software
Specify Controllers (For Programmable Systems using GRX-PRG or GRX-CI-PRG Only)
1. From the Set Up menu, select Specify Accessories. Click the Controllers tab on the “Accessory
Controls in this System” form. Click on the drop down menu under the Model
column, and select the Controller model numbers for your system.
2. The functions listed for each address are dependent on the model selected in the first column. Click
on the drop down menu under the Function column, and select the function for the Accessory
Control.
3. Name your Controller by highlighting the Description section and entering a description, such
as “Conf Rm Entrance” or “Conf Rm Podium”, on the line corresponding to each Controller.
Descriptions are for reference only and will not be downloaded to the Programmer Interface (GRXPRG or GRX-CI-PRG).
NOTE: The bottom of this screen may have a different appearance for certain Accessory Controls.
4. Using the table at the bottom of the screen to program the selected controller.
GRX-SVC:
Specify a zone to control.
GRX-GC:
For each channel of the unit, specify a zone to control.
GRX-CCO (Zone mode):
For each relay group of the unit, specify a zone to control.
■
Click on the drop down menu under the Control Unit column of the bottom table, select the Control
Unit that you want the selected unit/channel/relay group to “talk to” from the list.
■
Click on the drop down menu under the “Zone” column of the bottom table, select the zone that you
want the selected unit/channel/relay group to “talk to” from the list.
GRX-CCO (Scene mode):
■
Indicate which Control Units you want the controller to “talk to” by checking each corresponding box.
For example, click the box under A1 if you want the controller to “talk to” A1.
5. Once you have specified each Controller and Accessories, click Done to exit the screen.
NOTES:
■
Each Controller in a system must be assigned a unique Controller address by setting the DIP switches on the unit. There are a maximum of 8 Controllers per system. (These Controllers do
not occupy the 16 standard Accessory Control addresses).
■
GRX-SVC, GRX-GC and GRX-CCO (Zone mode) can only control zones on GRAFIK Eye Control Units
with software revision 7-0 or higher, these controllers will not function correctly with Control Units with
lower software revisions.
■
Each GRX-SVC unit, each channel of a GRX-GC, each relay group of a GRX-CCO (Zone mode) can
“talk to” one zone in a system.
7
GRAFIK Eye® LIAISON™ Software
Operating Instructions
Program Control Units (For Programmable Systems using GRX-PRG or GRX-CI-PRG Only)
In addition to specifying Control Unit model numbers and communications, scene names, zone names,
scenes, and load types are all programmable using LIAISON.
1. Scenes are made up of zone intensities and fade times. There are 16 scenes plus an Off scene for
each Control Unit.
2. Light intensities for all scenes except Off can be adjusted from 0 to 99 or unaffected (UA).
AC shade positions for all scenes can be set to Open, Close or unaffected (UA).
Sivoia shade positions for all scenes can be set to Open, Preset 1, Preset 2, Preset 3, Close or
unaffected (UA).
The light level or shade position of an unaffected zone will not change when that scene is selected.
3. Fade times are adjustable for all scenes and can range from 0 to 59 seconds or 1 to 60 minutes. The
fade time is the time it will take for the zone intensities to raise or lower to the scene’s preset level
from their current intensities.
4. Load types are the type of fixture(s) that will be controlled on a zone-by-zone basis. It is important to
specify the correct load type for each zone to achieve the best dimming performance.
■
From the Set Up menu, select Program Control Units. Click on the list box in the upper left-hand
corner of the window and choose from the units specified previously. For example, click on Conference Room to program the Conference Room Control Unit.
Zone Names
■
Click on the Zones button
to label your zones. Enter the names of your zones, e.g., “Downlights”
or “Sconces”, in the Zones text boxes.
Presets
■
Fade window
Master Raise/Lower buttons
Click on the Presets button to set up your
scenes. Select the scene you want to create in
the Scenes list box. To change the name of the
scene, highlight the Scenes list box and enter Zone
Raise/
the new scene name.
Lower
buttons
Fields
To create a scene, set the intensities of the
for
entering
zones in that scene by clicking on the Zone
intensities
Raise and Lower buttons of each zone OR by
typing in the value of intensity in the box below
each zone. For example, for Scene 1, click on
the Zone 1 Raise button to increase the light
intensity of that zone or type in 90 in the box if
you want the intensity at exactly 90%. Repeat
the procedure for each zone in the scene.
Lighting Zones:
Clicking on Raise/Lower button or typing in intensity value to set lights intensity.
AC Shade Zones:
Clicking on Raise/Lower button or typing in the following key to set shade position (Open and Close),
Or: Typing in “O” or “o” for Open
Typing in “C” or “c” for Close
8
Operating Instructions
GRAFIK Eye® LIAISON™ Software
Sivoia Shade Zones:
Clicking on Raise/Lower button or typing in the following key to set shade position (Open, Preset 1,
Preset 2, Preset 3 and Close),
Or: Typing in “O” or “o” for Open; Typing in “C” or “c” for Close
Typing in “1” for Preset 1; Typing in “2” for Preset 2; Typing in “3” for Preset 3
Fade Time
■
Modify the Fade Time for the scene by clicking on the Raise/Lower buttons in the Fade box OR by
typing in the exact value in the Fade window.
■
Follow the same procedure for each scene.
■
Fade time will not be applied to non-lighting zones.
Select Load Types
■
To select Load Types, click on the Load Types button
in the Program Control Units window.
■
Click on the Raise/Lower buttons of each zone until
the correct number of LEDs corresponding to the
appropriate load type (as defined in the chart at the
bottom of the screen) are lit. For example, for electronic low-voltage loads, use the Raise/Lower buttons
to light two LEDs. Repeat for each zone.
Load Type Legend
LED Display
Load Type Description
GRX -3xxx
GRX-4xxx
Integrale
GXI-3xxx
GRX units:
Incandescent
Magnetic low voltage
HP 2, 4, 6 loads (120v
supply only)
Yes
Yes
Yes
Yes
N/A *
Yes
rev 5-5 or
higher
N/A *
N/A
Integrale:
Magnatic Low Voltage
(MLV)
GRX units:
Electronic low voltage
Lutron Hi-lume or Eco-10
fluorescent
Integrale:
GRX-TVI
Tu-wire compact fluorescent
9
GRAFIK Eye® LIAISON™ Software
Operating Instructions
Neon/Cold cathode
Yes
N/A
*
Yes
Non-dim (last on, first off)
Yes
Yes
Yes
Non-dim (first on, first off)
Yes
Yes
Yes
AC shade
rev 7-0 or
higher
rev 7-0 or
higher
N/A
Sivoia shade
rev 7-0 or
higher
rev 7-0 or
higher
N/A
Unassigned/Non Dim
N/A
N/A
Yes
N/A
N/A
Yes
This setting is the default for
GXI Control units.
Auto Phase
Last LED ON: Reverse/
Trailing edge
Last LED OFF: Forward/
Leading edge
Note: LIAISON will always
display Reverse/Trailing edge
10
Operating Instructions
GRAFIK Eye® LIAISON™ Software
Electronic Low Voltage (ELV)
Incandescent
GRX-ELVI
N/A
N/A
Yes
0-10v ballasts
N/A
N/A
Yes
DSI compatible ballasts
N/A
N/A
Yes
DALI (intensity broadcast
only) ballasts
N/A
N/A
Yes
PWM ballasts
N/A
N/A
Yes
Key:
Yes:
All versions support the LoadType
Rev #: All versions of that code rev or higher
*:
GRX-4000 units should be set to Load Type 1 for those Load Types
■
■
Temporary Mode
To set the Temporary Mode, click on the Temporary Mode button.
Use the Master Raise/Lower buttons to select a Temporary Mode: Sd to Save by default; Sb to
Save by button; Sn to Save never; 4S for Scene selection and Master Raise/Lower only; and bd for
Buttons disabled. The Temporary Mode selected appears in the Fade window. Press F1 for descriptions.
11
GRAFIK Eye® LIAISON™ Software
Operating Instructions
Program Power Panels (For Programmable Systems using GRX-PRG or GRX-CI-PRG Only)
If your system requires the use of GRAFIK Eye dimming or switching panels, use LIAISON to
program Control Unit and Zone assignments plus the load type for each circuit. It will be necessary
to Program Power Panels if 4100 or 4500 series Control Units have been included in the system.
Each circuit of a dimming panel receives its light level from a Control Unit and Zone in the system.
Each circuit will have an individual Zone assigned; however, multiple circuits may have the same Zone
assignment. Load types are the type of fixture(s) that will be controlled on a zone-by-zone basis. It is
important to specify the correct load type for each zone to achieve the best dimming performance.
NOTE: Power Panels must be uniquely addressed to allow for programming. If you have any
questions regarding panel addressing, circuit capacities, or load types, please contact the Lutron
Hotline for assistance.
IMPORTANT! Power Panel details are only available from circuit selectors with a code revision
level of 2-50 or newer. The code revision is available on the circuit selector of the panel. If you have
questions, please contact the Lutron Hotline for assistance.
■
From the Set Up menu, select Program Power
Panels. Choose the Panel to program by specifying the address in the table at the top of the screen.
For example, click on Address 1 to program the
Conference Room GP4.
■
To modify the name of the panel, select the Name
cell of the panel address you are modifying. Enter in
the new panel name. This name is for reference only
and will not be downloaded to the system.
■
To modify the number of circuits in a panel, select
the Number of Circuits cell of the panel address
you are modifying. Use the pull-down list box to select the number of circuits for the panel being programmed. If the new number of circuits is greater than the original number, the circuits will be added
to the current load schedule. If the new number is less than the original number, the circuits will be
deleted. If any circuits to be deleted have already been programmed, you will have to confirm the
deletion when prompted.
■
The load schedule table at the bottom of the screen lists the circuits in the panel and allows the user
to program the Control Unit, zone assignments, and the load type for each circuit. In addition, customer circuit information can be provided for reference. Select Customer Circuit # or Customer
Circuit Name to enter customer-specific information.
■
Click on the Control Unit cell and select from the pull-down list the Control Unit of the Zone that
will be dimmed by this circuit. Only those Control Units that have been included in the system (see
Specify Control Units) will be listed. After selecting the Control Unit, click on the Zone cell and select
a zone from the list. This is the zone that will control the light level of the loads attached to the circuit.
■
Finally, click on the Load Type cell and select from the pull-down list the load type of the fixtures of
the circuit. The load type must be specified at the power panel in addition to specifying load type on
the Control Unit (see Program Control Units).
■
Program the remaining circuits of the panel in the same manner. To add additional panels to the system, click Add New Panel. A new panel will be added to the bottom of the panel table.
■
Once you have programmed all the Power Panels, click Done to exit the screen. Remember to save
your changes while working by selecting Save from the File menu.
12
Operating Instructions
GRAFIK Eye® LIAISON™ Software
TIMECLOCK MENU
NOTE! For each schedule, there is a
maximum of 60 events allowed.
Create a Timeclock Schedule
Select Schedules from the Timeclock menu to open the Schedule Events screen. Follow the steps
below to define a schedule.
1. Select a Schedule. There are four schedule options: Weekday, Weekend, Special 1 and Special
2. The Weekday and Weekend options allow schedules to be defined that will run every weekday
or every weekend day by default. The Special 1 and Special 2 schedules are used to define schedules of events for a unique day (e.g., Holiday, Party, etc.). Select a schedule to program by clicking
on an item from the “Schedule” list.
2. Select Event type: Time of Day or
Astronomic - Select the Time of Day or
Astronomic tab of the schedule. If the
Time of Day tab is selected, events can
be scheduled to occur at a particular
time of day or night. Astronomic
events can be defined by selecting the
Astronomic tab. Events can be set to
occur up to 2 hours before or up to 2
hours after sunrise OR sunset. The time
scale corresponding to the event type
will be listed in the schedule.
NOTE: For both event types, the time
resolution is to the nearest minute.
Figure 1. Time of Day Events
Figure 1 displays Time of Day events.
All four schedules can include both
real-time and astronomic events (though they cannot be viewed simultaneously on the Schedule
Events screen).
3. Add an event. The Schedule Events screen utilizes the “drag and drop” method of adding items
to a list. To add an event, begin by adding an action to the list of events. Select an action in the
“Actions” list. Click on this item by pressing and holding the left button of your mouse. Continue
to hold the left button down and drag the action to a time in the Time of Day or Astronomic
event list. To drop the action, release the mouse button when the time for the event is highlighted.
Actions can be dropped on times or other actions. For example, to change the action of a
previously defined event, you would drag and drop the new action onto the original action.
After adding an action, you must specify at which GRAFIK Eye Control Units the action will occur.
The only actions that do not require a Control Unit are “SUPER SEQUENCE ON” or “OFF.” To add
a Control Unit or Units to an action, click on the Control Unit in the “Control Units” list. Press and
hold the left button of your mouse and drop the Control Unit to an action in the list. Control Units
can be dropped on actions or other Control Units. If the Control Unit is already included in the
action, it will not be added a second time. Multiple Control Units can be listed under an action by
dragging additional items from the “Control Units” list to an action in the event list.
NOTE: Only those Control Units that have been included in Specify Control Units will be available
for selection.
NOTE: To schedule a “START AFTER HOURS MODE” or “CANCEL AFTER HOURS MODE” event,
After Hours Mode must be enabled.
4. Change an event time. To change the time that an event will occur, again use the “drag and
drop” method. Click on the action in the event list. Press and hold the left button of your mouse.
13
GRAFIK Eye® LIAISON™ Software
Operating Instructions
Create a Timeclock Schedule (continuation)
Drag this action to the new time in the event list. If the time is not listed, follow the procedures
below to add the new time and then relocate the action.
5. Add New Time. If you wish to schedule an event for a time not included on the list, you will need
to add the time. In the “Enter New Time” text box, type the time of the event. For Time of Day
events, type in the time, formatted based on the computer’s international settings. For Astronomic
events, type in the desired amount of time Before or After sunRise or sunSet (up to 2 hours) followed by the appropriate code: BS, AS, BR, AR. After entering the time, click on Add New Time.
The new time will be added to the list. For Time of Day, if AM or PM was omitted (but included in
the computer’s international setting), the AM or PM extension will automatically be added based on
the current event selected in the list.
6. To remove any events, highlight the event and then select Delete from the Edit
menu.
7. To copy one schedule to another, click on the Copy Schedule button. The
Copy Schedule screen gives the user the option to copy real-time events,
astronomic events, or both, to another schedule. There is also the option to
overwrite the events or to append the events to the end of the “Copy To”
schedule.
8. The “Copy From” list is the schedule of events that will be copied. The “Copy
To” list is the schedule to which the events will be copied. Use the options to
set which events will be copied. Click and drag a schedule from the “Copy
From” list to a schedule in the “Copy To” list. When the copy is complete, click on Done.
9. To change schedules, select a new item from the “Schedule” list. When the Weekday, Weekend
and any Special schedules have been defined, click on the Done button to exit the Schedule
Events screen.
10. Select Save from the File menu to save your system changes.
Default Schedule for Day
By default, weekday schedules will run Monday through
Friday and weekend schedules will run Saturday and Sunday.
If your system requires modifications to this default week
definition, proceed as follows.
■
To change the week definition, select Default Schedules
from the Timeclock menu. The days that constitute weekdays and weekend days can be modified in the Default
Schedule for Day screen. For example, to run the weekend
schedule every Monday select the “Weekend” button.
■
When modifications have been completed, click on Done to return to the main screen.
■
Select Save from the File menu to save the changes.
14
Operating Instructions
GRAFIK Eye® LIAISON™ Software
View and Modify Calendar Exceptions
After creating and transferring a schedule of events, the
weekday and weekend schedules will run, by default,
every weekday and weekend, as defined in the Default
Schedule for Day screen (see Default Schedule
for Day). Special 1 and Special 2 schedules can be
used for special events or exceptions to the default. In
addition, schedules can be suspended or overridden
using Calendar. Suspending scheduled events on a
specific day will only suspend the schedule for that day.
Any scheduled events will resume the following day.
Exceptions are saved by date in memory indefinitely,
therefore, annual maintenance may be needed for
holidays that do not fall on the same day every year
(e.g., Thanksgiving, Labor Day, etc...). Fixed-date
holidays, such as New Year’s Day, do not require maintenance.
1. Select Calendar from the Timeclock menu.
2. The Schedule Exceptions screen displays a one year
calendar. To add an exception, drag a schedule from
the list and drop it on any day of the year.
3. To view the events in a schedule, select the schedule
in the list and click Show Events.
4. To view an individual month, the button in the top
right corner of each month can be selected. Using the
month view, you can add exceptions to every day or every weekday in a single “drag and drop”
action. For example, to create exceptions for every Sunday, select the schedule, drag and then
drop on “Sunday.” To create exceptions for the entire month, select the schedule, drag and then
drop on “April.”
5. To delete an exception, highlight the day and select Delete from the Edit menu.
6. When the calendar modifications are complete, click on Done to return to the main screen.
Create a Super Sequence
A Super Sequence is a collection of up to 60 system scene selects, called steps, and their corresponding hold times. The elements involved with a Super Sequence event are the scene, the
selected GRAFIK Eye units, and the Hold Time.
■
To define a Super Sequence, select Super Sequence from the Timeclock menu.
■
Set a Step. Steps that have not yet been defined will have “No Step/End” in the Scene to Select
column. From the first unused step, select the desired scene number from the pull-down list. Select
the Units at which the scene will be selected by checking the appropriate Control Units.
15
GRAFIK Eye® LIAISON™ Software
Operating Instructions
NOTE: The selected scene will be activated on
each of the Control Units selected for that step. For
example, if Scene 2 and Control Units 1 and 2 (A1
and A2) are chosen for a step, Control Units 1 and
2 will go to their respective Scene 2 levels, using
their respective Scene 2 fade times, when the step
occurs.
■
Set a Hold Time. The Hold Time defines the
amount of time the system will wait before executing
the next Super Sequence step. The range of hold
times are 0 to 60 seconds and 0 to 99 minutes. If a
Hold Time of 0 seconds is used, that step and the
next step will occur simultaneously.
NOTE: The hold time begins as soon as the scene is selected, not after the scene has completed its
fade. If your application requires that a scene remains for a given time after it has completed its fade,
you must add the scene’s fade time to the hold time. For example, you require that Scene 1 remains
for 20 seconds after it has completed its fade. Scene 1 has a fade of 5 seconds, therefore, a Hold
Time of 25 seconds should be set.
■
Editing Steps. From the Edit menu, use the Cut, Copy, Delete, and Paste options to edit steps of
the Super Sequence. To edit a step, select from the Step column and choose the appropriate edit
function. In addition, an edit menu will appear by clicking the right mouse button when an event is
highlighted. This pop-up menu also includes Insert. Inserting a step will shift the highlighted step and
all steps following down one step and paste the copied step to the current step. If a step 60 has been
defined, it will be shifted off the list.
■
Click on Done to leave the Program Super Sequence screen.
■
Select Save in the File menu to save the defined Super Sequence.
After Hours Mode
After Hours Mode of the GRX-PRG or GRX-CI-PRG and LIAISON software allows the user to
create timeclock schedules that minimize energy usage during off-peak periods or periods of nonoccupancy. After a user-defined delay, following the start of After Hours mode, a user-defined scene
will be selected. Any scene selection during this delay period will reset the delay period and “lease”
the lighting for the space.
The user-defined delay can range from two minutes to two hours. After Hours mode can be cancelled
via a scheduled event. After Hours mode can be initiated and cancelled on any combination of
Control Units. The delay time is the same for all Control Units. The scene to be selected is the same
for all Control Units.
After Hours Scene
A user designated scene that is automatically selected after a user-defined delay following a scene
selection during After Hours Mode. While in After Hours mode, the system can automatically return to
the desired energy efficiency level during periods of non-occupancy or off-peak usage.
After Hours Timeout
A user-defined time period, between two minutes and two hours, that the system will stay in a
selected scene during After Hours Mode. When the time expires, the system will automatically select
the After Hours Scene.
16
Operating Instructions
■
GRAFIK Eye® LIAISON™ Software
Configure After Hours Mode:
1. In Edit Mode, from the Timeclock menu, select After Hours Mode.
2. On the After Hours Mode screen, check Enable After Hours Mode to enable the After Hours
Mode; or uncheck the box to disabled it.
3. Specify the After Hours Timeout. The valid timeout range is 2 minutes to 2 hours. Default timeout is
2 hours.
4. Select an After Hours Scene. After Hours Mode Scene can be any Scene from Scene 1 to16 or
Scene Off, the default is Scene 15.
5. Click Done to exit the After Hours Mode screen
■
After Hours Mode events:
Start After Hours Mode
Cancel After Hours Mode
These events can be scheduled as timeclock events.
■
View System After Hours Mode Configuration:
In online mode, from Online Options menu, select After Hours Mode.
NOTE: After Hours Mode requires a GRX-PRG (with minimum code revision of 4.2) or GRX-CI-PRG.
Assign Controls for Super Sequence and Timeclock Events
GRAFIK Eye Accessory Controls, NTGRX-2B-SL and GRX-AV, can be assigned to manually control
the Timeclock interface by providing the following functions: start, pause and resume a Super
Sequence, and turn on or off Timeclock events.
■
To assign an Accessory Control, select Wallstation Control
from the Timeclock menu. Choose the appropriate system
address for the Accessory Control and the Wallstation type,
NTGRX-2B-SL or GRX-AV.
NOTE: The Accessory Controls must have the function DIP
Switches set for Scene 1 selection.
■
Assign a button for the function required.
■
Select Save from the File menu to save the changes.
17
GRAFIK Eye® LIAISON™ Software
Operating Instructions
ONLINE OPTIONS MENU
Communicating with the GRX-PRG or GRX-CI-PRG Interface Control
■
Establish communication with the Interface Control. Review the
GRX-PRG or GRX-CI-PRG instruction sheet before attempting to
communicate with the Interface Control. For serial connection, verify
that the provided cable is connected on the Interface Control to a
COM port on your computer.
For Ethernet connection, verify that the PC and the GRX-CI-PRG are
connected via an Ethernet network.
NOTE: At this time, it is assumed that all system wiring has been
completed correctly.
■
For Serial connection, select Set COM Port from the Online Options
menu or Preference form. Select the COM port that corresponds to
the port on your computer to which the GRX-PRG or GRX-CI-PRG is connected.
For Ethernet connection, specify IP address, Port number, and login of the GRX-CI-PRG from the
Preference form.
■
■
Click the Advance button on the Preference form to open the Connection or Communication
Time form. Specify Connection Timeout and Response Timeout from this form.
Select Establish Communication from the Online Options menu. LIAISON will attempt to locate
a GRX-PRG or GRX-CI-PRG Interface Control. If one exists, and is connected properly, you will be
notified that the unit was found. If an error message is displayed, check the wiring to the Interface
Control and the PC.
Transfer Data to the GRX-PRG or GRX-CI-PRG Interface Control
■
Once communication has been established between the PC and the Interface Control, select Transfer Data from the Online Options menu. The Transfer Options screen allows the user to selectively
transfer portions of data to the system. This feature is useful when only a portion (e.g., Timeclock
events) of the system information has been modified. An initial transfer of any system requires that
all system information be programmed and will take longer than selectively transferring data. After
selecting OK, the GRAFIK Eye LIAISON Compiler screen will contain messages pertaining to the
current status of the transfer. The messages shown during compilation will be dependent on the
options chosen in the Transfer Options screen. After the data has been compiled and transferred,
the message will read “System Compiled Successfully.” After transferring data, you will be prompted
to switch to Online Mode. If you would like to monitor the currently installed system, switch to Online
Mode; otherwise, if additional editing to the system file is required, remain in the Edit Mode.
Congratulations! You have completed programming using LIAISON Lighting Control Software for
GRAFIK Eye. To monitor the status of your system, continue to the next section, Go Online with
System.
GO ONLINE WITH SYSTEM
After you have transferred data using the first mode (Create or Edit a Project from File), select this
mode to monitor and operate your GRAFIK Eye system. System status is available for each Control
Unit in the system. System status includes current scene selected, Timeclock status,
Super Sequence status, and scheduled events. Monitoring an installed project does not require a
database file (files with extension .lia). The only system information that will not be available will be
panel names. All other information can be monitored and/or retrieved from any installed system.
18
Operating Instructions
GRAFIK Eye® LIAISON™ Software
Set the Time and Date in the GRX-PRG or GRX-CI-PRG
1. Select Set Time and Date from the Online Options
menu.
2. The current time and date in the Interface Control will be
displayed. If the time or date needs to be modified, type
in the correct information and click the Synchronize button. Do not include the day of the week
when entering the date.
3. Click on Done after the time and date have been set.
Check the Status of your System
1. The current status of your system can be viewed by
selecting System Status from the Online Options
menu. The System Status screen will display current
information, such as the currently selected scene at
each Control Unit. With LIAISON, Timeclock events
can be enabled and disabled on a Control Unit-byControl Unit basis. By disabling the timeclock for a
specific Control Unit, timeclock events will still occur,
but will not affect the specified Control Unit.
2. If a wallstation control has been configured to turn
Timeclock Events on and off (Create or Edit a
Project from File), the Timeclock Status shown in the
System Status screen will be affected. The Timeclock
ON and OFF functions will enable and disable, respectively, the timeclock events of all Control
Units in the system. In addition, DIP Switch 8 (Timeclock ON/OFF) on the GRX-PRG or GRXCI-PRG will also affect timeclock status. However, timeclock status cannot be enabled on
any Control Unit if the timeclock has been turned off using DIP Switch 8.
3. Click on Done to close the System Status screen.
View the Details of your System
The details of your system can be viewed in the System Details screen. System details include
Control Unit model number, software revision (ideal for troubleshooting), communications information,
and temporary mode settings.
1. Select System Details from the Online Options menu.
2. If any changes are made to the system, click Update Details to refresh the list of Control Units.
This feature can be useful during
installation or troubleshooting.
3. Click on Done to close the System Details screen.
19
GRAFIK Eye® LIAISON™ Software
Operating Instructions
View the Accessory Control Details of your System
The details of the Accessory Controls in your system can be viewed in the Accessory Control Details
screen (include Accessory Control model number, function, and communications information).
IMPORTANT! Accessory Control details are only available from accessory controls with
a minimum code revision. To determine the code revision level, inspect the back of the
accessory control. If you have questions, please contact the Lutron Hotline for assistance.
Minimum Code Revision of Accessory Controls for Getting Details
Type
Minimum Code Revision
Standard Accessory Control
2-0
Shade Accessory Control
1-1
1. Select Accessory Controls Details from the Online Options menu.
· Click the Accessories tab on the Accessory Control
Details screen to view Accessory details.
· Click the Controllers tab on the Accessory Control
Details screen to view Controller details.
2. The function is derived from the DIP switch settings
of the Accessory Control. Refer to the installation and
instruction sheets of the Accessory Controls for more
information.
3. If any changes are made to the system, click
Update Details to refresh the list of Accessory Controls.
This feature can be useful during installation or troubleshooting.
4. Click on Done to close the Accessory Control Details screen.
Modify Scenes Online
Online Scenes, located in the Online
Options menu, enables you to modify
preset data from your PC. Using your PC,
temporarily adjust your lights through the
familiar GRAFIK Eye Interface to create
new scenes by adjusting fade times and
zone intensities. Use this screen to “tweak”
the light levels in the space, just as you
would use the physical Control Unit.
■
To adjust the current light levels or make
modifications to presets, select Online
Scenes from the Online Options menu.
■
Any modifications to the light levels using
Online Scenes will make “TEMPORARY
SCENE” the currently selected scene on
the Control Unit. This protects you from
inadvertently changing presets unless you are sure of the modifications. To save a temporary preset,
use the Save Options to select the scene and then press Save.
20
Operating Instructions
GRAFIK Eye® LIAISON™ Software
NOTE: All preset and system information in online mode is real time and does not require a file to be
opened. Saving a preset in this screen saves the data to the Control Unit in the system. To retrieve
and save this information to a file, refer to Decompile.
■
To change the Control Unit being viewed, select from the “Unit Currently Being Monitored” list. The
list of Control Units are the names last programmed using LIAISON.
■
To change the current scene of the Control Unit being viewed, select from the “Scene Currently
Selected” list. Remember, the zone intensities shown reflect the current intensities in the space. They
may not be the preset for the current scene if someone has adjusted light levels from an Accessory
Control or directly at the Control Unit.
■
Click on Done to close the Online Scenes screen.
View the Events for Today
■
To view the events scheduled for the current day, select
Today’s Events from the Online Options menu. The
screen will display the current day, what schedule is
to run, and the events in the specified schedule. If any
events are astronomic, the time the event will occur will
be shown followed by an * indicating that the time has
been calculated based on sunrise or sunset.
■
Click on Done to close Today’s Events.
Monitor the Super Sequence
■
If a super sequence (Creating or Editing a Project
from File) has been created and transferred, the current status of your system can be viewed by selecting
Online Super Sequence from the Online Options
menu. The Online Super Sequence screen will display
the status of the super sequence. Additionally, all steps
of the sequence will be shown, but cannot be edited.
From this screen, the user can start, resume, and stop
the loaded super sequence.
■
Selecting Start will begin the super sequence at the
first step. If Start is selected while a super sequence
is running, the super sequence will immediately go to
Step 1 and continue. Selecting Start, for a super sequence that is Paused (see next page), will continue the super sequence at the next step following the event when the super sequence was Paused.
■
Selecting Pause will halt the super sequence at the current step. This function may be ideal in a
showroom application where specific areas are illuminated in a sequential manner and then stepped
through to highlight specific areas.
■
Selecting Stop will halt the super sequence. Any Start command or Resume from a Wallstation
Control (Creating or Editing a Project from File) will begin the super sequence at the first step.
Any status change to the super sequence made by a Wallstation Control, will affect the status viewed
in Online Super Sequence.
■
Click on Done to close Online Super Sequence.
21
GRAFIK Eye® LIAISON™ Software
Operating Instructions
View the Power Panels of your System
The details of the power panels in your system can be viewed in the Online Power Panels screen.
Panel details include Control Unit and zone assignment, and load type for each circuit of a panel.
IMPORTANT! Power Panel details are only available from circuit selectors with a code revision
level of 2-50 or newer. The code revision is available on the circuit selector of the panel. If you have
questions, please contact the Lutron Hotline for assistance.
■
Select Online Power Panels from the Online Options menu.
■
LIAISON will search for the first four addresses of power panels. For
each panel located, circuit information will be received.
■
To check for more panel addresses, click More Panels. LIAISON will
search for the next four addresses.
■
If any changes are made to the system, click Update Details to
refresh the Control Unit and Zone and load type assignments. This
feature can be useful during installation or troubleshooting.
■
Click on Done to close Online Power Panels.
Communicate with the GRX-PRG or GRX-CI-PRG in Real Time
All commands available through the user interface can also be sent using a terminal or equivalent
device. To use the terminal interface available with LIAISON:
■
Select Terminal from the Online Options menu.
■
Refer to the GRAFIK Eye RS232 Protocol
help file installed in the LIAISON program group for commands that
can be entered and data that can be received from this screen.
For a complete set of printed commands,
refer to the GRAFIK Eye RS232 Protocol (Lutron P/N 040-138).
Get System Location Information from the PRG
■
Select Location from the Online Options menu.
■
LIAISON will display the project location information that was stored in the GRX-PRG or GRX-CIPRG.
■
Click on Done to close online System Location form.
Operating Instructions
GRAFIK Eye® LIAISON™ Software
Get After Hours Mode Information from the PRG
■
Select After Hours Mode from the Online Options menu.
■
LIAISON will display the after hours mode information that
was stored in the GRX-PRG or GRX-CI-PRG.
■
Click on Done to close online After Hours Mode form.
Retrieve the Current System Configuration from the GRX-PRG or GRX-CI-PRG
In many instances, the programming of the GRAFIK Eye system may be done using conventional
programming methods instead of LIAISON. Or perhaps, LIAISON may be used for the initial
programming and final adjustments to the lighting are done in the space. In these instances, it would
be desirable to recover the system configuration in a format that could be reviewed or reused at a
later time. Most system information can be recovered; including presets, communication information,
Timeclock events, Super Sequence data, calendar exceptions, and default schedules configuration.
The only data that cannot be retrieved are Accessory Control names, system location, and customer
circuit information. To retrieve the current system configuration:
■
Once communication has been established between the PC and the Interface Control, select
Decompile from the Online Options menu. The LIAISON Decompiler screen will contain messages
pertaining to the current status of the retrieval. The first step of decompiling is to select a file name for
saving the configuration. A warning will appear if the file already exists. After retrieving the data, you
will be prompted to switch to Edit Mode. If you would like to view or edit the currently installed system, switch to Edit Mode where the decompiled file will be open; otherwise, if additional monitoring to
the system file is desired, remain in the Online Mode.
Finally . . .
Switching between Edit Mode and Online Mode
After starting LIAISON, it is still possible to switch between Create or Edit a Project from File and
Go Online with System modes. From either mode, select the File menu. Depending on the current
mode of operation, select either Go to Online Mode or Go to Edit Mode.
23
TERMS AND CONDITIONS
The Grafik Eye LIAISON software is provided “AS IS.” Lutron makes no claims, warranties, or
promises as to its performance. This software is provided without charge.
DISCLAIMER OF WARRANTIES
EXCEPT FOR THE FOREGOING EXPRESS WARRANTY, LUTRON HEREBY DISCLAIMS ALL OTHER
WARRANTIES AND CONDITIONS, EITHER EXPRESS, IMPLIED OR STATUTORY, INCLUDING,
BUT NOT LIMITED TO, ANY (IF ANY) IMPLIED WARRANTIES, DUTIES OR CONDITIONS
OF MERCHANTABILITY, OF FITNESS FOR A PARTICULAR PURPOSE, OF ACCURACY OR
COMPLETENESS OF RESPONSES, OF RESULTS, OF WORKMANLIKE EFFORT, OF LACK
OF VIRUSES, AND OF LACK OF NEGLIGENCE, ALL WITH REGARD TO THE SOFTWARE,
AND THE PROVISION OF OR FAILURE TO PROVIDE SUPPORT SERVICES. ALSO, THERE
IS NO WARRANTY OR CONDITION OF TITLE, QUIET ENJOYMENT, QUIET POSSESSION,
CORRESPONDENCE TO DESCRIPTION OR NON-INFRINGEMENT WITH REGARD TO THE
SOFTWARE.
EXCLUSION OF INCIDENTAL, CONSEQUENTIAL AND CERTAIN OTHER DAMAGES
TO THE MAXIMUM EXTENT PERMITTED BY APPLICABLE LAW, IN NO EVENT WILL LUTRON
OR ITS SUPPLIERS BE LIABLE TO YOU FOR ANY SPECIAL, INCIDENTAL, INDIRECT, OR
CONSEQUENTIAL DAMAGES (INCLUDING, BUT NOT LIMITED TO, DAMAGES FOR LOST
PROFITS, LOSS OF DATA, LOSS OF CONFIDENTIAL OR OTHER INFORMATION, BUSINESS
INTERRUPTION, PERSONAL INJURY, LOSS OF PRIVACY, LOST SAVINGS, FAILURE TO MEET
ANY DUTY INCLUDING OF GOOD FAITH OR OF REASONABLE CARE, FOR NEGLIGENCE, AND
FOR ANY OTHER PECUNIARY OR OTHER LOSS WHATSOEVER) ARISING OUT OF YOUR USE OR
INABILITY TO USE THE SOFTWARE, THE PROVISION OF OR FAILURE TO PROVIDE SUPPORT
SERVICES, OR OTHERWISE UNDER OR IN CONNECTION WITH ANY PROVISION OF THIS
LICENSE AGREEMENT; EVEN IN THE EVENT OF THE FAULT, TORT (INCLUDING NEGLIGENCE),
STRICT LIABILITY, BREACH OF CONTRACT OR BREACH OF WARRANTY OF LUTRON OR ANY
SUPPLIER; AND EVEN IF LUTRON, OR AN AUTHORIZED LUTRON REPRESENTATIVE OF LUTRON,
OR ANY SUPPLIER HAS BEEN ADVISED OF THE POSSIBILITY OF SUCH DAMAGES, OR FOR
ANY CLAIM BY ANY OTHER PARTY. YOU HAVE THE SOLE RESPONSIBILITY FOR ENSURING
ADEQUATE PROTECTION AND BACKUP OF YOUR DATA USED IN CONNECTION WITH THE
SOFTWARE, AS WELL AS ENSURING ADEQUATE PROTECTION OF THE SOFTWARE AND YOUR
SERVERS, INCLUDING, WITHOUT LIMITATION, SECURING YOUR SERVERS WITH APPROPRIATE
PASSWORDS, FIREWALLS, AND OTHER RESTRICTIONS ON WHO CAN ACCESS THE SERVERS,
THE SOFTWARE, AND THE DATA.
LIMITATION OF LIABILITY AND REMEDIES
NOTWITHSTANDING ANY DAMAGES THAT YOU MIGHT INCUR FOR ANY REASON WHATSOEVER
(INCLUDING, WITHOUT LIMITATION, ALL DAMAGES REFERRED TO ABOVE AND ALL DIRECT
OR GENERAL DAMAGES), THE ENTIRE LIABILITY OF LUTRON AND ANY OF ITS SUPPLIERS
UNDER ANY PROVISION OF THIS LICENSE AGREEMENT AND YOUR EXCLUSIVE REMEDY
FOR ALL OF THE FOREGOING SHALL BE LIMITED TO THE AMOUNT ACTUALLY PAID BY YOU
FOR THIS SOFTWARE, OR U.S. $100.00, AT LUTRON’S SOLE DISCRETION. THE FOREGOING
LIMITATIONS, EXCLUSIONS AND DISCLAIMERS SHALL APPLY TO THE MAXIMUM EXTENT
PERMITTED BY APPLICABLE LAW, EVEN IF ANY REMEDY FAILS OF ITS ESSENTIAL PURPOSE.
SOME STATES OR JURISDICTIONS DO NOT ALLOW THE EXCLUSION OR LIMITATION OF
INCIDENTAL OR CONSEQUENTIAL DAMAGES, SO THE ABOVE LIMITATIONS MAY NOT
APPLY TO YOU. THE WARRANTY CONTAINED IN THIS LICENSE AGREEMENT GIVES YOU
SPECIFIC RIGHTS. YOU MAY HAVE OTHER RIGHTS WHICH VARY FROM STATE TO STATE OR
JURISDICTION TO JURISDICTION.
Lutron and GRAFIK Eye are registered trademarks, and LIAISON is a trademark of Lutron Electronics
Co., Inc.
IBM is a registered trademark of International Business Machines Corporation. Windows and
Microsoft are registered trademarks of Microsoft Corporation. Pentium is a registered trademark of
Intel Corporation.
© 1998-2001 Lutron Electronics Co., Inc.
Internet: www.lutron.com
E-mail: [email protected]
WORLD HEADQUARTERS
Lutron Electronics Co. Inc.,
TOLL FREE: (800) 523-9466
(U.S.A., Canada, Caribbean)
Tel: (610) 282-3800;
International ++1- 610-282-3800
Fax: (610) 282-1243;
International ++1-610-282-1243
FRANCE
Lutron LTC
International ++33-(0)1-44-70-71-86
Int’l Fax: ++33-(0)1-44-70-70-97
ASIAN HEADQUARTERS
Lutron Asuka Corporation (Japan)
Tel: (03) 5405-7333;
International ++81-3-5405-7333
Fax: (03) 5405-7496;
International ++81-3-5405-7496
GREAT BRITAIN
Lutron EA Ltd.,
Tel: (171) 702-0657;
International ++44-(0)207-702-0657
Fax: (171) 480-6899;
International ++44-(0)207-480-6899
HONG KONG SALES OFFICE
Lutron GL (Hong Kong)
Tel: 2104-7733;
International ++852-2104-7733
Fax: 2104-7633;
International ++852-2104-7633
GERMANY
Lutron Electronics GmbH
Tel: (309) 710-4590;
International ++49-30-97-10-4590
Fax: (309) 710-4591;
International ++49-30-97-10-4591
SINGAPORE
Lutron GL (Singapore)
Tel: ++65-220-4666
Fax: ++65-220-4333
Lutron Electronics Co., Inc.
Made and printed in U.S.A. 03/07
P/N 040-139 Rev. E
Lutron Technical
Support Hotline
(24 hrs.):
1-800-523-9466