1
User's Manual
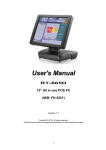
Mega POS MP-3000 Series
MP-3525
15” ULV Fanless POS system
Copyright Notice
This document is copyrighted, © 2008. All rights are reserved. Firich Enterprise Co., Ltd reserves
the right to make improvements of the product described in this manual at any time without notice.
No part of this manual may be reproduced, copied, translated, or transmitted in any form or by
any means without the prior written permission from Firich Enterprise Co., Ltd. Information
provided in this manual is intended to be accurate and reliable. However, Firich Enterprise Co.,
Ltd assumes no responsibility for its use, nor for any infringements upon the rights of third parties,
which may result from its use.
The material in this document is for product information only and is subject to change without
notice. While reasonable efforts have been made in the preparation of this document to assure its
accuracy, Firich Enterprise Co., Ltd, assumes no liabilities resulting from errors or omissions in
this document, or from the use of the information contained herein.
Safety and Warranty
1. Read these safety instructions carefully.
2. Keep this user's manual for later reference.
3. Disconnect this equipment from any AC outlet before cleaning. Do not use liquid or spray
detergents for cleaning. Use a damp cloth.
4. For pluggable equipment, the power outlet must be installed near the equipment and must be
easily accessible.
5. Keep this equipment away from humidity.
6. Put this equipment on a reliable surface during installation. Dropping it or letting it fall could
cause damage.
7. The openings on the enclosure are for air convection. Protect the equipment from overheating.
DO NOT COVER THE OPENINGS.
8. Make sure the voltage of the power source is correct before connecting the equipment to the
power outlet.
9. Position the power cord so that people cannot step on it. Do not place anything over the power
cord.
10. All cautions and warnings on the equipment should be noted.
11. If the equipment is not used for a long time, disconnect it from the power source to avoid
damage by transient over-voltage.
12. Never pour any liquid into an opening. This could cause fire or electrical shock.
13. Never open the equipment. For safety reasons, only qualified service personnel should open
the equipment.
14. If any of the following situations arises, get the equipment checked by service personnel:
a. The power cord or plug is damaged.
b. Liquid has penetrated into the equipment.
c. The equipment has been exposed to moisture.
d. The equipment does not work well, or you cannot get it to work according to the user’s manual.
e. The equipment has been dropped and damaged.
f. The equipment has obvious signs of breakage.
15. DO NOT LEAVE THIS EQUIPMENT IN AN UNCONTROLLED ENVIRONMENT WHERE
THE STORAGE TEMPERATURE IS BELOW -20° C (-4°F) OR A BOVE 60° C (140° F). IT MAY
DAMAGE THE EQUIPMENT.
Table of Content
Chapter 1
Introduction
1
1
MP-3525 Introduction........................................................................................................... 1
A Quick Tour for MP-3525 ................................................................................................... 2
MP-3525 Dimension ..................................................................................................... 3
Rear I/O Panel..................................................................................................................... 4
Packing List ......................................................................................................................... 4
Chapter 2
Hardware Installation and Upgrading
5
5
2.5” Hard Disk Drive Installation.................................................................................... 5
Pole-Type VFD Installation ........................................................................................... 6
Memory (DDRII RAM) / CPU / DOM Installation ........................................................... 7
Compact Flash Card (CF) Installation ........................................................................... 7
MCR Configuration Modification.................................................................................... 8
Cash Drawer Installation............................................................................................... 9
Chapter 3
Software Installation and Setup
10
10
Please follow this installation sequence. ............................................................................ 10
Chipset Driver Installation ................................................................................................. 10
Chipset Installation Utilities for Windows XP .............................................................. 10
VGA Driver Installation....................................................................................................... 14
VIA/S3G driver installation Windows 2000/XP ............................................................ 14
LAN Driver Installation ....................................................................................................... 15
Realtek RTL8139/810x LAN Driver Installation Windows XP ..................................... 15
Audio Driver Installation ..................................................................................................... 17
Audio Driver Installation for all Windows Operating Systems ...................................... 17
ELO Touch Tools Installation ............................................................................................. 20
ELO Touch Tools Installation for all Windows Operating Systems .............................. 20
ELO Control Panel...................................................................................................... 23
Fuji TouchKit Tools Installation .......................................................................................... 26
TouchKit Tools Installation for all Windows Operating Systems .................................. 26
Fuji TouchKit Control Panel ........................................................................................ 29
Wireless LAN Driver Installation......................................................................................... 30
Wireless LAN Driver Installation for all Windows Operating Systems (Optional) ......... 30
Chapter 4
Specifications
31
31
MP-3525 Specifications ..................................................................................................... 31
Chapter 5
Troubleshooting
33
33
Touch Panel Does Not Work....................................................................................... 33
ELO Touch Panel Cannot Calibrate Correctly ............................................................. 33
Cannot Detect HDD .................................................................................................... 33
PS/2 Keyboard Is Not Functioning Normally ............................................................... 34
LAN Is Not Functioning Properly ................................................................................. 34
COM1, COM2, COM5 Are Not Functioning Properly................................................... 34
Cash Drawer Port Is Not Functioning Properly............................................................ 34
USB Device Is Not Functioning Properly..................................................................... 34
MP-3525
Chapter 1
Introduction
MP-3525 Introduction
To reach the balance of budget-saving and strong requirement for product quality, MP-3525 is
designed with quality-oriented and cost-effective concept. Fanless as it is, MP-3525 provide a
decent choice for noise-free environment applications with optimized product reliability.
Main Features:
•
•
•
•
•
•
The most cost-effective solution with built-in customer display and 12VDC out for 2nd
display connection without extra adaptor needed.
Fanless solution for green and noise-free environment.
Easy maintenance for system parts, such as HDD, CF, and RAM…etc.
Sufficient I/O access for various connection requirements.
Integrated cable cover for supporting pole-type VFD / LCD display.
Compliant with IP54 front panel standard
MP-3525 w/ cable cover & MCR
1
MP-3525
A Quick Tour for MP-3525
Before you start, take a moment to become familiar with MP-3525.
1st Display
Identification Device
System Venting Hole
Power Switch with
LED
HDD LED / LAN LED / USB Port
Built-in Customer
Display (LCM)
Antenna Location
2nd Display Stand for
Pole-Type VFD/LCD
(attached with 2nd
display option)
HDD Location
(in the bottom)
Cable Cover
External I/O
(inside the cable cover)
2
MP-3525
MP-3525 Dimension
3
MP-3525
Rear I/O Panel
I/O Port
Connector Type
Description
Earphone connector
Connect the speakers to this port
USB type A connector
Standard USB connector for external device
DC-in connector
Connect the power adaptor to this port
12V DC-out connector
RJ11 connector
This DC-out port can sustain the power of the
monitor or any other devices which need 12V DC
power input.
This RJ45 port can be used to attach a VFD
customer display or serve as an additional serial
port (switching cable provided).
Cash Drawer Connector, 12 V actuation support
PS2 connector
Connect the keyboard or mouse to this port
D-SUB 9 connector
Parallel 25-pin LPT
Connector
RJ45 connector
The serial ports COM1/COM2 can be used to
connect devices such as a printer or a
fax/modem.
The standard LPT (D-SUB 25 pin) connector for
connecting POS printers or KeyPro solution
Connect MP-3525 to the Ethernet
D-Sub 15 Pin
Connector
The VGA port is used for connecting LCD or CRT
monitors
VFD / RJ45 connector
Packing List
Optional:
•
MP-3525 Main System x 1
•
Pole-type Customer Display
•
Power Adaptor x 1 / AC Power Cord x 1
•
MCR
•
Driver & Manual CD x 1
•
Built-in
LCM
Display Module
•
COM port switching cable (RJ45 to D-SUB 9
•
WiFi Wireless Module
pin) x 1
4
Customer
MP-3525
Chapter 2
Hardware Installation and Upgrading
Do not remove the rear cover until you have verified that no power is
supplied to the system. Power must be switched off and the power cord
must be unplugged. Every time you service the system, you should be
aware of this.
2.5” Hard Disk Drive Installation
1. Turn off power and remove power cord from the system
2. Unscrew the
maintenance door at
the bottom of the unit
3. Remove the door and
flip it over
5
MP-3525
4. Place HDD kit on the
door, fasten it with 4
screws and connect
with the SATA cable.
2.5”
HDD
SATA cable
5. Restore the maintenance door to the system.
6. Fix the door with the screw.
7. Connect the power cord to the system.
Pole-Type VFD Installation
1. Remove the plastic
cover on the cable
cover
2. Fix the pole stand with
screws and place the
pole-type customer
display to the stand
3. Connect the RJ45 or RS-232 (D-Sub 9) cable to the system.
6
MP-3525
Memory (DDRII RAM) / CPU / DOM Installation
1.
Unscrew and remove
the top cover
2.
Install the DDRII RAM or CPU you require
3.
Restore the top cover
Compact Flash Card (CF) Installation
4.
Unscrew and remove
the maintenance door
5.
Install the CF you require
6.
Restore the maintenance door
7
MP-3525
MCR Configuration Modification
This option is for users who need to customize the MCR configurations for a particular task.
To enter the Configuration Mode, please execute text editor program (such as Microsoft Word,
Notepad…etc.) first, and then press [Ctrl] + [Alt] + [F10]. The following menu will appear
accordingly.
For detailed instruction, please refer to the MSR212 Programmer’s Manual under the path below
in the driver CD: Utility\Pos Utility\MCR util\Uniform
8
MP-3525
Cash Drawer Installation
Before connecting the cash drawer to the MP-3525, please make sure the drive voltage and cable
pin assignment of the cash drawer matches the definition of the cash drawer port of MP-3525.
Please refer to the mother board (FEB-7100) manual GPIO part for more information. For
programmers, please refer to the folder “Utility” “Pos Utility” “Cash Drawer” in the driver CD,
where you may find the test programs and DLL Library files for your application.
Plug cash drawer cable into the cash drawer port.
Note: If the cash drawer cannot be detected by the system, please refer to troubleshooting.
Up to two cash drawers may be driven from this port. Driving voltage of the solenoid is DC+12V.
I/O port 2F is used for drawer operation. A test program is supplied, for Linux and Windows,
source code of which is available on request by software developers.
To test for drawer open, read port 2F, if bit 0=1 then drawer is open, if bit 0=0 drawer is closed.
Before testing the cash drawer function, ensure to initiate the GPIO port first referring to the
command sets below:
initGPIO=2e,87,2e,87,2e,07,2f,07,2e,f1
( 2e stands for the address while ‘87’, ‘07’, ‘f1’ stands for the value to the address. All the values here are
hexadecimal.)
9
MP-3525
Chapter 3
Software Installation and Setup
MP-3525 comes with a variety of drivers for different operating systems.
You may find the system CD with all the necessary drivers and utilities.
Please follow this installation sequence.
Driver installation sequence:
Chipset Driver -> VGA Driver -> LAN Driver -> Audio Driver ->Touch Tools
The reason to follow our sequence is that IRQ settings will be changed by Windows XP to non
supported values, and you may encounter unnecessary problems later.
Chipset Driver Installation
Chipset Installation Utilities for Windows XP
1. Locate :\Chipset folder
2. Run Setup.exe
3. Click Next
10
MP-3525
4. Click “I Agree”
5. Click Next
11
MP-3525
6. Click Next
7. Click Next
12
MP-3525
8. Click Finish to complete the installation.
13
MP-3525
VGA Driver Installation
VIA/S3G driver installation Windows 2000/XP
1. Open D:\VGA\VIA\ Twister\WIN2K&XP folder.
2. Run Setup.exe.
3. Select Next to continue.
4. Click Finish to complete the installation procedure and restart the system.
14
MP-3525
LAN Driver Installation
Realtek RTL8139/810x LAN Driver Installation Windows XP
1. Open Device Manger in the System Properties.
Select PCI Ethernet Controller
2. Click Next
3. Wait for the installation procedure.
15
MP-3525
4. Click Finish to complete the installation procedure and restart the system.
16
MP-3525
Audio Driver Installation
Audio Driver Installation for all Windows Operating Systems
1. Open D:\AUDIO
2. Run SETUP.EXE
3. Click Next
17
MP-3525
4. Click Next
5. Click Next
18
MP-3525
6. Wait for the installation procedure.
5. Click Finish to complete the installation procedure and restart the system.
19
MP-3525
ELO Touch Tools Installation
ELO Touch Tools Installation for all Windows Operating
Systems
1. Locate D:\TOUCHSCREEN\ELO Touch
2. Select the relevant ELO folder for the operating system that you are using.
Example. If you are installing for a Windows 98 system, then select Elo Win9x_Me. If you are
installing under Windows 2000 or XP then select Elo Touch 2K_XP
3. Run Setup.exe
4. Click Next
5. Check “Install serial Touch screen Drivers.” And Click Next.
20
MP-3525
6. Read the “License Agreement” and click Yes if you accept it.
7. Select “Auto-detect Elo devices.” and click Next.
8. Select the COM port for the touch monitor. It is recommended that you select COM3 for
the touch screen, as this port is internally configured for touch operation.
21
MP-3525
9. Wait until the ELO Touch Tools have been installed.
10. Select “View ELO touch screen control panel” and click Finish.
IT MAY BE NECESSARY TO RESTART YOUR COMPUTER TO UTILIZE
YOUR TOUCHSCREEN FEATURES.
11. Click NEXT while this window appears after the system finishes rebooting.
12. Click YES to restart your computer again.
After the system finishes rebooting, follow the directions to calibrate ELO Touch Tools.
22
MP-3525
ELO Control Panel
This section explains the different options in the ELO control Panel.
General tab
The general tab allows you to:
•
Change the COM port your touch screen is set to.
•
Calibrate the touch screen with the Align button.
23
MP-3525
Mode tab
The Buttons tab allows you to:
•
Adjust all mouse emulation controls.
•
Change cursor properties
•
Enable or disable right mouse button utility.
Sound tab
The Sound tab allows you to:
•
To change sound properties for ELO touch tools.
24
MP-3525
Properties tab
The Diagnostics tab allows you to:
•
View Controller Information.
About tab
The About tab displays Information about ELO Touchsystems
25
MP-3525
Fuji TouchKit Tools Installation
TouchKit Tools Installation for all Windows Operating
Systems
1. Locate D:\TOUCHSCREEN\eGalax Touch\Driver
2. Select the relevant eGalax folder for the operating system that you are using.
Example: If you are installing for a Windows 98 system, then select Win9x_Me. If you are
installing under Windows 2000 or XP then select Win2000_XP
3. Run Setup.exe
4. Click Next
5. Click Next
26
MP-3525
6. Click Next
7. Click Next
8. Click Next
27
MP-3525
9. Click Yes
10. Click Finish to restart your computer again.
After the system finishes rebooting follow the directions to calibrate the Touch screen.
28
MP-3525
Fuji TouchKit Control Panel
This section explains the different options in the TouchKit control Panel.
General tab
The general tab allows you to:
•
Change the COM port your touch screen is set to.
•
Calibrate the touch screen with the 4 pts Cal button.
29
MP-3525
Wireless LAN Driver Installation
Wireless LAN Driver Installation for all Windows Operating
Systems (Optional)
1. Open D:\Wireless LAN folder
2. Run Setup.EXE
3. Click Next
4. Click Next
30
MP-3525
Chapter 4
Specifications
MP-3525 Specifications
System Configuration
CPU (On Board)
Chipset
Memory
VGA controller
VIA Eden ULV 1.6GHz
- VIA® CX700M
- Winbond W83627EHG
- One 240-pin Long-DIMM DDRII socket (2nd DIMM as optional)
- Supports DDRII 400/533 SDRAM up to 1GB per channel
- CX700M Integrated 3D / 2D / Video Processors
- Pixel Resolution up to 1920x1400
- Support D-Sub 15Pin Connector
Primary LCD Panel
15” TFT LCD Panel (1024x768).
Primary Touch
Panel
15” with 4-wire / 5-wire Resistive Touch Panel
Storage
Internal 2.5” Serial ATA 80GB hard disk drive as default
Support type II Compact Flash™ Disk. IDE interface
Support IDE-44 pin DOM
Speaker
Integrated 2W x 2 stereo system speakers
Power
150 watts external power adaptor
I/O Port
Serial Port
3 User available COM ports (COM1, COM2, COM5).
2 System assigned COM ports (COM3 & COM4).
COM3 for primary touch screen.
COM4 for built-in LCM customer display
1 Reserved (COM6).
Enhanced Parallel
Port
Support EPP/SPP/ECP
USB port
6 USB 2.0 ports (1*Internal, 5*External)
31
MP-3525
Cash drawer port
RJ11 Cash drawer port,12V actuation.
Keyboard Port
One PS/2 keyboard port.
LAN Port
10/100M Base-T Ethernet Controller, Realtek RTL8100C
VGA Port
Standard D-SUB 15 Pin VGA Port
Audio Port
VIA VT1708B HD Audio CODEC
Optional Features
Customer display
MSR
External Magnetic Stripe Card Reader track 1/2/3
Wireless
Built-in LCM module
Pole-type VFD customer display
Pole-type LCD customer display
Internal WiFi Module(USB)
Power Consumption
Power
consumption
20 – 30W
(Standard system while running programs and accessing HDD).
Operating temperature
Operating
temperature
0 ℃ ~ 40 ℃
32
MP-3525
Chapter 5
Troubleshooting
Please note that the following troubleshooting guide is designed for people with strong computer
hardware knowledge such as System Administrators and Engineers.
Touch Panel Does Not Work
A)
Check CMOS settings, COM3 needs to be “Enabled”.
B)
Check if there are no conflicts between COM3 and any other devices.
C)
Check if the ELO driver or the TouchKit driver has been properly installed. Or try to reinstall again (Please refer to the ELO driver installation or the TouchKit driver).
D)
Check if the ELO controller or the TouchKit driver on COM3 has been detected during
the ELO driver or the TouchKit driver installation. If yes, then check if the flat cable from
the ELO touch screen or the TOUCHKIT touch screen has been properly connected to
the ELO controller or the TouchKit controller (Attention: Pin1 mark should be on the
same side as the ELO controller).
E)
Check if the ELO controller Green LED is blinking?
If no, there is no DC+5V support for the ELO controller from the motherboard.
F)
Touch screen controller could be defective or the touch panel could be defective.
ELO Touch Panel Cannot Calibrate Correctly
A)
Please replace the ELO controller, and re-calibrate. If this works, change back to the
original ELO controller, and re-calibrate.
B)
If the ELO touch panel still cannot calibrate correctly after changing to a new ELO
controller, the touch panel may be not installed properly or it could be defective.
Cannot Detect HDD
A)
SATA cable is not connected properly to main board or it could be defective.
B)
HDD power cable is not connected properly to the main board or it could be defective.
C)
Check CMOS setup, set SATA HDD to Auto Detect.
D)
On-board SATA port could be defective.
33
MP-3525
PS/2 Keyboard Is Not Functioning Normally
A)
Make sure the keyboard is properly connected to the PS/2 keyboard port before the
system is powered up. If the keyboard is connected after Windows2000 has been booted,
the keyboard will not work.
B)
Check that the LED on the keyboard goes on then off after power on. If yes, the
keyboard is getting power correctly.
C)
The main board could be defective.
LAN Is Not Functioning Properly
A)
Check if the LAN driver is installed properly.
B)
Check if there are any IRQ conflicts.
C)
Check if the RJ45 cable is properly connected.
D)
The on-board LAN chip could be defective.
COM1, COM2, COM5 Are Not Functioning Properly
A)
Check if the I/O ports are enabled in the CMOS setup.
B)
Check if there are any IRQ conflicts.
C)
The main board or I/O cable could be defective.
Cash Drawer Port Is Not Functioning Properly
A)
Make sure the pin assignment matches between the cash drawer and the RJ11 cash
drawer port.
B)
Verify if the digit I/O port address and bit are correct.
C)
The main board could be defective.
USB Device Is Not Functioning Properly
A)
Ensure that the USB controller is “enabled” in the CMOS setup.
B)
Ensure that the USB Legacy is “enabled” in the CMOS setup. (Windows 2000、Window
XP Professional)
C)
Ensure that the USB Legacy is “Disabled” in the CMOS setup. (Embedded OS:
Windows XP Embedded、Window CE. NET、Linux RedHat 9)
34