1
HE-760
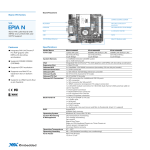
Half-size Embedded Miniboard
User’s Manual
Edition: 1.00
2005/4/20
HE-760 User’s Manual
Copyright
Copyright 2004 - 2005. All rights reserved. This document is copyrighted and all rights are
reserved. The information in this document is subject to change without prior notice to
make improvements to the products.
This document contains proprietary information and protected by copyright. No part of this
document may be reproduced, copied, or translated in any form or any means without
prior written permission of the manufacturer.
All trademarks and/or registered trademarks contains in this document are property of
their respective owners.
Disclaimer
The company shall not be liable for any incidental or consequential damages resulting
from the performance or use of this product.
The company does not issue a warranty of any kind, express or implied, including without
limitation implied warranties of merchantability or fitness for a particular purpose.
The company has the right to revise the manual or include changes in the specifications
of the product described within it at any time without notice and without obligation to notify
any person of such revision or changes.
Trademark
All trademarks are the property of their respective holders.
Any questions please visit our website at http://www.commell.com.tw
TU
2
UT
HE-760 User’s Manual
Packing List:
Please check the package before you starting setup the system
Hardware:
HE-760 motherboard x 1
Cable Kit:
ATA33 IDE Cable x1
ATA133 IDE Cable x1
Floppy Cable x 1
Dual USB cable with bracket x 1
Audio cable with bracket x 1
SATA Cable x 2
PS/2 keyboard & mouse cable x 1
Parallel cable x 1
COM port Cable x 2
Printed Matters:
User’s Manual x 1
Driver CD x 1
Packing List
3
HE-760 User’s Manual
Index
Chapter 1 <Introduction> .................................................................................. 7
1.1 <Product Overview>.............................................................................. 7
1.2 <Product Specification> ........................................................................ 8
1.3 <Mechanical Drawing>........................................................................ 11
1.4 <Block Diagram>................................................................................. 12
Chapter 2 <Hardware Setup>.......................................................................... 13
2.1 <Connector Location>......................................................................... 13
2.2 <Jumper Location & Reference> ........................................................ 14
2.3 <Connector Reference>...................................................................... 15
2.3.1 <Internal Connector>............................................................... 15
2.3.2 <External Connector>.............................................................. 15
2.4 <CPU & Memory Setup>..................................................................... 16
2.4.1 <CPU>..................................................................................... 16
2.4.2 <Memory> ............................................................................... 16
2.5 <CMOS Setup> ................................................................................... 17
2.6 <Enhanced IDE & CF interface>......................................................... 18
2.7 <Floppy Port>...................................................................................... 19
2.8 <Ethernet Interface> ........................................................................... 20
2.9 <Onboard Display Interface> .............................................................. 21
2.9.1 <Analog Display Interface> ..................................................... 21
2.9.2 <Digital Display Interface>....................................................... 22
2.10 <Onboard Audio Interface>............................................................... 26
2.11 <GPIO Interface> .............................................................................. 27
2.12 <Power Supply & Fan> ..................................................................... 28
2.12.1 <Power Input> ....................................................................... 28
2.12.2 <Fan connectors>.................................................................. 28
2.13 <Switch & Indicator> ......................................................................... 29
Chapter 3 <System Setup> ............................................................................. 30
4
HE-760 User’s Manual
3.1 <Display Configuration>...................................................................... 30
Chapter 4 <BIOS Setup> ................................................................................. 32
Appendix A <I/O Port Pin Assignment>......................................................... 33
A.1 <IDE Port> .......................................................................................... 33
A.2 <Floppy Port> ..................................................................................... 35
A.3 <IrDA Port> ......................................................................................... 35
A.4 < VGA Port >....................................................................................... 35
A.5 <Serial Port>....................................................................................... 36
A.6 <LAN Port> ......................................................................................... 38
A.7 <PS/2 Keyboard & Mouse Port> ........................................................ 38
A.8 <USB Port>......................................................................................... 38
Appendix B <Flash BIOS> .............................................................................. 39
B.1
BIOS Auto Flash Tool ................................................................... 40
B.2
Flash Method ............................................................................... 40
Contact Information......................................................................................... 41
5
HE-760 User’s Manual
(This Page is Left For Blank)
6
HE-760 User’s Manual
Introduction
Chapter 1 <Introduction>
1.1 <Product Overview>
HE-760 is the 3.5 inches embedded miniboard based on VIA CN400 platform, with
onboard VIA Eden ESP8000 processor, VGA, LAN, Audio, USB2.0, CF, LVDS, the board
provides economic fanless solution for multimedia applications.
VIA CN400 & VT8237R Chipset
The board integrates VIA CN400 & VT8237R chipset, to provide built-in UniChrome Pro
3D / 2D Graphics with MPEGII/MPEG4 decoder, and supports DDR266/333/400 memory
up to 1G of capacity. The CN400 and VT8237 has Ultra V-Link Host interface with 1
GB/sec total bandwidth to enhance the system performance.
18/24-bit LVDS LCD interface
The board provides onboard 18/24-bit LVDS LCD interface, supports up to 1600 x 1200
of UXGA high resolution.
Flexible Extension Interfaces
The board provides one Mini-PCI socket for wireless LAN module, video capture card and
IEEE1394 add-on card.
Expanded UCR for remote Operating SETUP Bios Feature
Expanded Universal Console Redirection (UCR) is a feature for monitoring POST
messages and running Setup and an operation system from a remote serial terminal.
Product Overview
7
HE-760 User’s Manual
Introduction
1.2 <Product Specification>
General Specification
Form Factor
CPU
Memory
Chipset
BIOS
Green Function
Watchdog Timer
Real Time Clock
Enhanced IDE
Half-size PCI CPU card
Embedded VIA Eden ESP8000 processor
Front side bus: 133MHz(FSB)
Fanless with heatsink only
1 x 184-pin DDR 266/333/400 SDRAM up to 1GB
Unbufferred, none-ECC memory supported only
VIA CN400 and VT8237R
Phoenix-Award v6.00PG 4Mb PnP flash BIOS
Power saving mode includes doze, standby and suspend modes.
ACPI version 1.0 and APM version 1.2 compliant
System reset programmable watchdog timer with 1~ 255 sec./min.
of timeout value
VIA VT8237R built-in RTC with lithium battery
Enhanced UltraDMA133 IDE interface supports dual channels
and up to 2 ATAPI devices
One 44-pin IDE port onboard
One 40-pin IDE port onboard
Two SATA port
Multi-I/O Port
Chipset
Serial Port
USB Port
Parallel Port
Floppy Port
IrDA Port
K/B & Mouse
GPIO
Hardware
Monitor
VIA VT8237R with Winbond W83697UG controller
Four internal RS-232 serial ports with RS-422 and RS-485
Two Hi-Speed USB 2.0 ports with 480Mbps of transfer rate
One internal parallel port with SPP/ECP/EPP mode
One stantard type Floppy port
One IrDA compliant Infrared interface supports SIR
External PS/2 keyboard and mouse ports on rear Lan
One 12-pin Digital I/O connector with 8-bit programmable I/O
interface
Fan speed, CPU temperature and voltage monitoring
VGA Display Interface
Chipset
Core Frequency
Memory
Display Type
Connector
VIA CN400 built-in S3 Graphics UniChrome Pro IGP graphics core
200MHz
BIOS selectable 16/32/64MB shard with system memory
CRT, LCD monitor with Digital display
External DVI female connector on rear Lan
LCD Interface
Chipset
Interface
8
VIA CN400 with VT6103 transmitter
18/24-bit LVDS interface
Product Specification
HE-760 User’s Manual
Introduction
12V backlight inverter connector
Panel voltage 3.3V/5V jumper selectable
Ethernet Interface
Chipset
Type
Connector
RTL 8100B
Intel 82541PI
10Base-T / 100Base-TX
100Base-T/1000Base-TX
auto-switching Fast Ethernet
Full duplex, IEEE802.3U compliant
External RJ45 connectors with LED on rear I/O panel
Audio Interface
Chipset
Interface
Connector
REALTEK ALC201A
2 channel 3D audio with Line-in, Line-out and MIC-in
Onboard audio connector with pin header
Onboard CD-IN connector
Expansive Interface
Mini-PCI
PCI
Solid State Disk
DOM
CompactFlash
1 x 32-bit 5V/3.3V Mini-PCI socket
1 x optional PCI interface supports up to two PCI devices through
riser card
IDE1 supports 40-pin DOM (DiskOnModule)
IDE2 supports 44-pin DOM (DiskOnModule)
1 x CompactFlash Type 1 socket on solder side
Power and Environment
Power
Requirement
Dimension
Temperature
DC 5V input
1 x DC jack near DVI connector onboard
146 (L) x 101 (H) mm
Operating within 0 ~ 60oC (32 ~ 140oF)
Storage within -20 ~ 85oC (-4 ~ 185oF)
P
P
P
P
P
P
P
P
Software support
Operation
System
Windows 98SE/ME, Windows 2000, Windows XP
Windows CE 4.0 or later, Windows XP Embedded
Linux (Fedora Core 1, Mandrake 9.2 and Red Hat 9.0)
Product Specification
9
HE-760 User’s Manual
Introduction
Ordering Code
HE-760GED
HE-760GEX
VIA CN400 with Embedded Eden ESP8000 processor, VGA,
AC97 Audio, DVI, CF, PCI, Mini-PCI, 2 x RS232, 2 x LAN,
2 x SATA
VIA CN400 with Embedded Eden ESP8000 processor, VGA,
AC97 Audio, LVDS, CF, PCI, Mini-PCI, 2 x RS232, 2 x LAN,
2 x SATA
The specifications may be different as the actual production.
For further product information please visit the website at http://www.commell.com.tw
TU
10
UT
Product Specification
HE-760 User’s Manual
Introduction
1.3 <Mechanical Drawing>
Mechanical Drawing
11
HE-760 User’s Manual
Introduction
1.4 <Block Diagram>
Embedded VIA Eden ESP8000 processor
CRT/LCD Monitor
LVDS
1 x 184-pin
DDR266/333/400
Up to 1GB
CN400
Ultra V-Link
1GB/s
2 x USB2.0 Ports
PCI
VT6103 PHY
VT8237R
Realtek ALC201A
Mini-PCI
4 x Serial ports
1 x Floppy ports
BIOS
8-bit GPIO
IrDA
1 x Parallel port
12
Block Diagram
HE-760 User’s Manual
Introduction
Chapter 2 <Hardware Setup>
2.1 <Connector Location>
FLOPPY JBITSEL
JRTC
IDE1
DIMM
IR
IDE2
CN_PS
JFRNT
DC_IN
DVI
CN_VGA
Mini PCI
LAN
CN_INV
CN_USB
PS2
CN_ATKB
LPT
CN_COM1/2/3/4
CN_DIO CN_USB
CD_IN CN_WOL
CF
Connector Location
13
HE-760 User’s Manual
Hardware Setup
2.2 <Jumper Location & Reference>
Jumper
JRTC
JVLCD
JBITSEL
Function
CMOS Operating/Clear Setting
LCD panel voltage setting
LCD panel 18-bit/24-bit selection
JBITSEL
JRTC
JVLCD
14
Connector Location
HE-760 User’s Manual
Hardware Setup
2.3 <Connector Reference>
2.3.1 <Internal Connector>
Connector
DIMM
IDE1
IDE2
SATA
FDD
CN_5V
CDIN
CN_DIO
CN_USB
CPUFAN
SYSFAN
CN_COM1/2
CN_COM3/4
CN_IR
CF
MINI_PCI
CN_LVDS
CN_INV
LPT
JFRNT
CN_SPWR
Function
184-pin DDR SDRAM DIMM
40-pin primary IDE connector
44-pin slim type IDE connector
SATA HD connector
34-pin floppy connector
4-pin DC input connector
4-pin CD-ROM audio input connector
6 x 2-pin digital I/O connector
5 x 2-pin USB connector
3-pin CPU cooler fan connector
3-pin system cooler fan connector
10 x 2-pin RS232 serial port
10 x 2-pin RS232 serial port
5-pin IrDA connector
Compact Flash Type I socket
Mini-PCI interface
40-pin LVDS LCD interface
5-pin LCD backlight inverter connector
26-pin parallel port interface
14-pin front panel switch/indicator connector
4-pin DC 5V/12V output connector
Remark
Standard
Standard
Slim
Standard
Standard
Standard
Standard
Standard
Standard
Standard
Standard
Standard
Standard
Standard
Standard
Standard
Standard
Standard
Standard
Standard
Standard
CN_VGA
16-pin VGA Output connector
Standard
CN_AUDIO
10-pin AUDIO Output connector
Standard
CN_ATKB
5-pin ATKB inverter connector
Standard
2.3.2 <External Connector>
Connector
CRT
RJ45
PS2
DC_IN
Function
DVI VGA connector
RJ45 LAN connector
PS/2 Keyboard/Mouse connector
DC input jack
Jumper Location & Reference
Remark
Standard
Standard
Standard
Standard
15
HE-760 User’s Manual
Hardware Setup
2.4 <CPU & Memory Setup>
2.4.1 <CPU>
The board comes with Embedded VIA Eden ESP8000 processor of 133MHz front side
bus, to provide low power consumption and fanless solution.
2.4.2 <Memory>
The board supports one 184-pin DDR266/333/400 SDRAM and up to 1GB of capacity,
only non-ECC, unbuffered memory is supported.
DIMM
Please check the pin number to match the socket side well before
installing memory module.
16
Connector Reference
HE-760 User’s Manual
Hardware Setup
2.5 <CMOS Setup>
The board’s data of CMOS can be setting in BIOS. If the board refuses to boot due to
inappropriate CMOS settings, here is how to proceed to clear (reset) the CMOS to its
default values.
Jumper: JRTC
Type: Onboard 3-pin jumper
JRTC
1-2
2-3
Default setting
Mode
Clear CMOS
Normal Operation
3
1
JRTC
COMS Setup
17
HE-760 User’s Manual
Hardware Setup
2.6 <Enhanced IDE & CF interface>
The board supports two UltraDMA133 IDE interface, and one CompactFlash Type 1
socket with secondary IDE mode, the 40-pin and 44-pin IDE connector can support up to
2 ATAPI devices through IDE cable, and the CompactFlash socket can support IDE DMA
mode (depends on the CF card specification).
39
40
1
43
1
44
2
2
CF
18
Enhanced IDE & CF interface
HE-760 User’s Manual
Hardware Setup
2.7 <Floppy Port>
The board provides a standard type floppy port; please use the 34-pin cable in the
package to connect the floppy device.
Floppy connecter
33
1
34
Floppy Port
2
19
HE-760 User’s Manual
Hardware Setup
2.8 <Ethernet Interface>
The board integrates Ethernet controller with VIA VT6103 PHY, full compliance with IEEE
802.3u 100Base-T specifications and IEEE 802.3x Full Duplex Flow Control, the board
supports Wake-Up-On-LAN by BIOS configurable.
RJ45
For Wake Up On LAN function, please enable this option in the BIOS
20
Ethernet Interface
HE-760 User’s Manual
Hardware Setup
2.9 <Onboard Display Interface>
Based on VIA CN400 with built-in S3 Graphics UniChrome Pro IGP graphics, the board
provides onboard VGA display interface, and one 18/24-bit LVDS LCD interface with VIA
VT1631, supports up to 1600 x 1200 of resolution. The two display interfaces can be set
for dual display with extended desktop mode or clone mode.
Below are the main features lists:
128-bit 2D/3D graphics engine
Supports 16 / 32 / 64 MB Frame Buffer sizes (BIOS Selectable)
MPEG-2 hardware VLD (Various Length Decode), iDCT, and motion compensation
for full speed DVD and MPEG-2 playback
MPEG-4 ASP (Advanced Simple Profile) Level 5 with GMC (Global Motion
Compensation) L0/L1 and 1/4-pixel MC support for high video quality and
performance.
2.9.1 < Digital Visual Interface>
The onboard VGA display comes with standard DVI connector near Lan port .
DVI ( Digital Visual Interface )
Onboard Display Interface
21
HE-760 User’s Manual
Hardware Setup
2.9.2 <Digital Display Interface>
The onboard digital display interface comes with a 40-pin header connector to provide
18/24-bit LVDS LCD interface, and one backlight inverter connector for powering and
enable/disable control, the jumper JVLCD is to set the panel voltage, and the JBITSEL is
to configure the 18-bit or 24-bit outputting.
1
JBITSEL
3
1
39
1
40
2
CN_INV
5
22
JVLCD
3
1
CN_LVDS
Onboard Display Interface
HE-760 User’s Manual
Hardware Setup
Connector: CN_INV
Type: 5-pin LVDS Power Header
Pin
1
2
3
4
5
Description
+12V
GND
GND
GND
ENABKL
Connector: JVLCD
Type: 3-pin Power select Header
Pin
1
2
3
Description
VCC( 5V)
LCDVCC
VCC3 (3.3V)
Jumper: JBITSEL
Type: onboard 3-pin header
JBITSEL
Mode
1-2
18-bit panel
2-3
24-bit panel
Default setting
Connector: CN_LVDS
Type: onboard 40-pin connector for LVDS connector
Connector model: HIROSE DF13-40S
Pin
2
4
6
8
10
12
14
16
18
20
22
24
26
28
30
32
34
36
38
40
Onboard Display Interface
Signal
LCDVCC
GND
A0A0+
GND
A1A1+
GND
A2A2+
GND
CLK1CLK1+
GND
A3A3+
GND
N/C
N/C
N/C
Pin
1
3
5
7
9
11
13
15
17
19
21
23
25
27
29
31
33
35
37
39
Signal
LCDVCC
GND
A4A4+
GND
A5A5+
GND
A6A6+
GND
A7A7+
GND
CLK2CLK2+
GND
N/C
N/C
N/C
23
HE-760 User’s Manual
Hardware Setup
To setup the LCD, you need the component below:
1. A panel with LVDS interfaces.
2. An inverter for panel’s backlight power.
3. A LCD cable and an inverter cable.
For the cables, please follow the pin assignment of the connector to make a cable, because
every panel has its own pin assignment, so we do not provide a standard cable; please find a
local cable manufacture to make cables.
LCD Installation Guide:
1.
Preparing the HE - 760, LCD panel and the backlight inverter.
2.
Please check the datasheet of the panel to see the voltage of the panel, and set the
jumper JVLCD to +5V or +3.3V, and the JBITSEL for 18-bit or 24-bit.
3.
You would need a LVDS type cable.
Panel side
Board side
For sample illustrator only
4.
24
To connect all of the devices well.
Onboard Display Interface
HE-760 User’s Manual
Hardware Setup
Panel Type Supported Table:
Please enter the BIOS and setup the panel type to fit your panel
Panel ID
Resolution
Channel
Dithering
0
640x480
1
Enable
1
800x600
1
Enable
2
1024x768
1
Enable
3
1280x768
1
Enable
4
1280x1024
2
Enable
5
1400x1050
2
Enable
6
1600x1200
2
Enable
7
1280x800
1
Enable
8
800x480
1
Enable
9
1024x768
2
Enable
A
1024x768
1
Disable
B
1024x768
2
Disable
C
1280x768
1
Disable
D
1280x1024
2
Disable
E
1400x1050
2
Disable
F
1600x1200
2
Disable
Entering Advanced Chipset Features of
BIOS Setup
Onboard Display Interface
Entering AGP & P2P Bridge Control for
Option of panel type selection
25
HE-760 User’s Manual
Hardware Setup
2.10 <Onboard Audio Interface>
The board integrates onboard AC97 audio with REALTEK ALC201A, supports 18-bit ADC
and DAC resolution, and Line-out, Line-in and MIC-in input/output interfaces.
Connector: CN_AUDIO
Type: 10-pin (2 x 5) 1.27mm x 2.54mm-pitch header
Pin
Description
Pin
Description
1
Line – Left
2
Ground
3
Line – Right
4
MIC1
5
MIC2
6
Ground
7
N/C
8
Line Out – Left
9
Line Out – Right
10
Ground
Connector: CDIN
Type: 4-pin header (pitch = 2.54mm)
Pin
Description
1
CD – Left
2
Ground
3
Ground
4
CD – Right
9
1
10
2
4
1
CN_AUDIO
CDIN
26
Onboard Display Interface
HE-760 User’s Manual
Hardware Setup
2.11 <GPIO Interface>
The board offers 8-bit digital I/O to customize its configuration to your control needs. For
example, you may configure the digital I/O to control the opening and closing of the cash
drawer or to sense the warning signal from a tripped UPS.
Connector: CN_DIO
Type: onboard 2 x 6-pin 1.27mm x 2.54mm-pitch header
Pin
Description
Pin
Description
1
Ground
2
Ground
3
GP0
4
GP4
5
GP1
6
GP5
7
GP2
8
GP6
9
GP3
10
GP7
11
+5V
12
+12V
11
1
12
2
CN_DIO
GPIO Interface
27
HE-760 User’s Manual
Hardware Setup
2.12 <Power Supply & Fan>
2.12.1 <Power Input>
The board requires DC 5V input with onboard DC jack or 4-pin 5V DC connector.
Connector: CN_12V
Type: 4-pin standard ATX2.0 +12V power connector
Pin
Description
Pin
Description
1
+12V
2
Ground
3
+5VV
4
Ground
2.12.2 <Fan connectors>
Connector: CPUFAN, SYSFAN
Type: 3-pin fan wafer connector
Pin Description
Pin
1
Ground
2
Description
+12V
Pin
3
Description
Fan Control
CPUFAN
SYSFAN
28
Power Supply & Fan
HE-760 User’s Manual
Hardware Setup
2.13 <Switch & Indicator>
The JFRNT provides front control panel of the board, such as power button, reset and
beeper, etc. Please check well before you connecting the cables on the chassis.
Connector: JFRNT
Type: onboard 14-pin (2 x 7) 2.54-pitch header
Function
Signal
PIN
Signal
VCC
1
2
VCC
Active
3
4
N/C
Reset
5
6
GND
GND
7
8
VCC
N/C
9
10
N/C
Power
PWRBT
11
12
N/C
Button
Ground
13
14
SPKIN
IDE LED
Function
Power
LED
Reset
Speaker
14
1
13
2
JFRNT
Switch & Indicator
29
HE-760 User’s Manual
Hardware Setup
Chapter 3 <System Setup>
3.1 <Display Configuration>
The board provides onboard VGA with DVI digital visual interface, and LVDS LCD
interface for digital display, when connecting two display devices, you can enable dual
display function with clone mode or extended desktop mode.
Before setup the video setting, please install the VGA driver well.
Two controllers for each display device
There are two options for secondary display device
For more display properties setting, please click “Advanced” button.
30
Display Configuration
HE-760 User’s Manual
Hardware Setup
Please select S3Display for advanced device setting.
Connected Devices
Click check box to
enable/disable device
Specified display setup if available
When you set dual display clone mode, you’ll see the same screen display on two
devices.
When you set the dual display for extended desktop mode, you can have the independent
desktop on the second device.
IDE Port
31
HE-760 User’s Manual
Hardware Setup
Chapter 4 <BIOS Setup>
The single board computer uses the Award BIOS for the system configuration. The
Award BIOS in the single board computer is a customized version of the industrial
standard BIOS for IBM PC AT-compatible computers. It supports Intel x86 and
compatible CPU architecture based processors and computers. The BIOS provides
critical low-level support for the system central processing, memory and I/O
sub-systems.
The BIOS setup program of the single board computer let the customers modify the
basic configuration setting. The settings are stored in a dedicated battery-backed
memory, NVRAM, retains the information when the power is turned off. If the battery
runs out of the power, then the settings of BIOS will come back to the default setting.
The BIOS section of the manual is subject to change without notice and is provided
here for reference purpose only. The settings and configurations of the BIOS are
current at the time of print, and therefore they may not be exactly the same as that
displayed on your screen.
To activate CMOS Setup program, press <DEL> key immediately after you turn on
the system. The following message “Press DEL to enter SETUP” should appear in the
lower left hand corner of your screen. When you enter the CMOS Setup Utility, the
Main Menu will be displayed as Figure 3-1. You can use arrow keys to select your
function, press <Enter> key to accept the selection and enter the sub-menu.
Figure 3-1. CMOS Setup Utility Main Screen
32
Display Configuration
HE-760 User’s Manual
Hardware Setup
Appendix A <I/O Port Pin Assignment>
A.1 <IDE Port>
Connector: IDE1
Type: 40-pin (20 x 2) box header
Pin
1
3
5
7
9
11
13
15
17
19
21
23
25
27
29
31
33
35
37
39
IDE Port
Description
Reset
D7
D6
D5
D4
D3
D2
D1
D0
Ground
REQ
-IOW
-IOR
IORDY
DACK
IRQ14
A1
A0
-CS1
-HD LED1
Pin
2
4
6
8
10
12
14
16
18
20
22
24
26
28
30
32
34
36
38
40
39
1
40
2
Description
Ground
D8
D9
D10
D11
D12
D13
D14
D15
N/C
Ground
Ground
Ground
Ground
Ground
N/C
GPI1
A2
-CS3
Ground
33
HE-760 User’s Manual
I/O Port Pin Assignment
A.2 <IDE Port>
Connector : IDE2
43
1
44
2
Type: 44-pin (22 x 2) box header
Pin
1
3
5
7
9
11
13
15
17
19
21
23
25
27
29
31
33
35
37
39
41
43
34
Description
Reset
D7
D6
D5
D4
D3
D2
D1
D0
Ground
REQ
-IOW
-IOR
IORDY
DACK
IRQ14
A1
A0
-CS1
-HD LED1
+5V
Ground
Pin
2
4
6
8
10
12
14
16
18
20
22
24
26
28
30
32
34
36
38
40
42
44
Description
Ground
D8
D9
D10
D11
D12
D13
D14
D15
N/C
Ground
Ground
Ground
Ground
Ground
N/C
GPI1
A2
-CS3
Ground
+5V
Ground
Serial port
HE-760 User’s Manual
I/O Port Pin Assignment
A.2 <Floppy Port>
Connector: FDD
Type: 26-pin connector
Pin
Description
1
VCC
3
VCC
5
VCC
7
DRV1
9
MTR1
11
RPM
13
N/C
15
Ground
17
Ground
19
N/C
21
N/C
23
Ground
25
Ground
Pin
2
4
6
8
10
12
14
16
18
20
22
24
26
Description
INDEX
DRV0
DSKCHG
N/C
MTR0
DIR
STEP
WRITE DATA
WRITE GATE
TRACK 0
WRPTR
RDATASEL
A.3 <IrDA Port>
5
Connector: CN_IR
Type: 5-pin header for SIR Ports
Pin
Description
1
Vcc
2
N/C
3
IRRX
4
Ground
5
IRTX
A.4 < VGA Port >
Connector: CRT
Type: 1-pin D-sub female connector on bracket
Pin
Description
Pin
Description
1
BR
6
GROUND
2
BG
7
GROUND
3
BB
8
GROUND
4
N/C
9
N/C
5
GROUND
10
GROUND
Floppy Port
1
15
1
16
2
Pin
11
12
13
14
15
Description
N/C
5VCDA
5HSYNC
5VSYNC
5VCLK
35
HE-760 User’s Manual
I/O Port Pin Assignment
A.5 <Serial Port>
Connector: CN_COM1/2
Type: 20-pin D-sub male connector on bracket
Pin
Description
Pin
Description
1
MDCD12
MSIN13
MSO14
MDTR15
COMGND
6
MDSR1
7
MRTS18
MCTS19
MRI110
11
DCDBTXC12
SINBTXC13
SOUTBRXC
14
DTRBRXC15
COMGND
16
MDSR217
MRTS218
MCTS219
MRI2-t
20
Connector: CN_COM3/4
19
1
20
2
Type: 10-pin (2 x 5) 1.27mm x 2.54mm-pitch header
Pin
Description
Pin
Description
1
MDCD32
MSIN33
MSO34
MDTR35
COMGND
6
MDSR37
MRTS38
MCTS39
MRI310
11
MDCD412
MSIN413
MSO414
MDTR415
COMGND
16
MDSR417
MRTS418
MCTS419
MRI420
36
19
1
20
2
Serial port
HE-760 User’s Manual
I/O Port Pin Assignment
<How to choose RS-422 and RS-485>
RS-232
RS-422
RS-485
JCSEL2
JCSEL2
JCSEL2
PS/2 Keyboard & Mouse Port
37
HE-760 User’s Manual
I/O Port Pin Assignment
A.6 <LAN Port>
Connector: RJ45
Type: RJ45 connector with LED on bracket
Pin
Description
1
TX+
2
TX-
3
RX+
4
RX-
5
N/C
6
N/C
7
N/C
A.7 <PS/2 Keyboard & Mouse Port>
1
Connector: PS2
Type: 6-pin Mini-DIN connector on bracket
Pin
Description
1
KBD
2
MSD
3
Ground
2
4
VCC
5
KBC
8
N/C
3
5
6
4
6
MSC
Note: The PS/2 connector supports standard PS/2 keyboard directly or both PS/2 keyboard and
mouse through the PS/2 Y-type cable.
A.8 <USB Port>
Connector: CN_USB
Type: 10-pin (5 x 2) header
Pin
Description
1
VCC
3
Data05
Data0+
7
Ground
9
Ground
38
10
1
Pin
2
4
6
8
10
Description
VCC
Data1Data1+
Ground
N/C
Serial port
HE-760 User’s Manual
Flash BIOS
(This Page is Left for Blank)
PS/2 Keyboard & Mouse Port
39
HE-760 User’s Manual
Appendix B <Flash BIOS>
B.1 BIOS Auto Flash Tool
The board is based on Award BIOS and can be updated easily by the BIOS auto flash
tool. You can download the tool online at the address below:
http://www.award.com
http://www.commell.com.tw/support/support.htm
File name of the tool is “awdflash.exe”, it’s the utility that can write the data into the
BIOS flash ship and update the BIOS.
B.2 Flash Method
1. Please make a bootable floppy disk.
2. Get the last .bin files you want to update and copy it into the disk.
3. Copy awardflash.exe to the disk.
4. Power on the system and flash the BIOS. (Example: C:/ awardflash XXX.bin)
5. Re-star the system.
Any question about the BIOS re-flash please contact your distributors or visit the
web-site at below:
http://www.commell.com.tw/support/support.htm
40
HE-760 User’s Manual
Contact Information
Contact Information
Any advice or comment about our products and service, or
anything we can help you please don’t hesitate to contact with us.
We will do our best to support you for your p
Taiwan Commate Computer Inc.
Address
8F, No. 94, Sec. 1, Shin Tai Wu Rd., Shi Chih
Taipei Hsien, Taiwan
TEL
+886-2-26963909
FAX
+886-2-26963911
http://www.commell.com.tw
Website
TU
UT
[email protected] (General Information)
E-Mail
TU
UT
[email protected] (Technical Support)
TU
UT
Commell is our trademark of industrial PC division
Contact Information
41