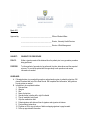
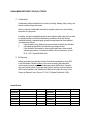
1
Clinical Services Policies and Procedures Reviewed June 2014 Please Note! Clicking on a title in the following Table of Contents will take you to that page. Table of Contents Clinical Services Statement ADDVantage Med Policy Allergy Injections Policy Blood Glucose Testing-One Touch Ultra Procedure Bloodborne Pathogens Policy Cleaning of Exam and Procedure Rooms Procedure Conjunctivitis Test Kit Consent for Procedure Policy Cryo Cuff Procedure Dietary Services Procedure Ear Irrigation Procedure EKG Procedure Eye irrigation Procedure HIV Testing Procedure Hydrocollator Procedure Immunization Administration Procedure Immunization VAERS Procedure Injectable Training Arm Procedure Instrument Processing and Sterilization Procedure International Travel Consult Procedure Itradermal Injection Simulator Procedure Isolation of Patients Policy Isotretinoin (Accutane) Therapy Policy IV Therapy_ Procedure Kinetic Performa (CPM) Procedure Liquid Nitrogen Procedure Medical Directives Procedure Medical Emergency Response/Emergency Carts Policy Medical Emergency Cart Procedure Narcotic Counts in Inpatient Unit Nebulizer Treatment Procedure Notification of Laboratory Test Results On Call HC Staff Policy Oxygen Delivery & Cylinder Change Procedure Pain Management Policy Pulse Oximeter Procedure Suction, Hand Held (Res-Q-Vac) Procedure TB Screening for International Students Procedure Vacutainer Urine Culture Procedure CLINICAL SERVICES STATEMENT It is the policy of University Health Services at the University of Notre Dame to provide professional and quality nursing care to qualified students. Nursing personnel meet the requirements of their position descriptions, and demonstrate knowledge and skill attained through formal training, education, and experience. Nursing procedures are performed according to best practice guidelines, and equipment specific recommendations for use. Clinical policies and procedures are reviewed by the Assistant Director, Clinical Services, on an annual basis. Revisions and updates are made as necessary and communicated to appropriate staff. Medical records are reviewed annually for compliance with standards of nursing documentation. The Procedure Manual does not represent an all-inclusive list of nursing procedures, but serves as a reference for those procedures that are considered high volume and/or high risk potential. March 2011 Issued Approved by: ______________________________________ Office of Student Affairs ______________________________________ Director, University Health Services ______________________________________ Medical Director SUBJECT: POLICY ADD-VANTAGE INTRAVENOUS MEDICATION Whenever financially and clinically advisable, the Ad-Vantage Intravenous Administration System will be used, particularly in administration of antibiotic solutions. PURPOSE To reduce waste and reduce nursing time necessary in the administration of Intravenous therapy. PROCEDURE and/or GUIDELINES A. Using aseptic technique, the seals should be broken and the vial attached to the bags immediately before use, if possible. If non-activated bags are to be stored, a 30-day expiration date should be attached. B. To assure a tight fit, twist the vial on the bag until a click is felt. C. To activate the bag, pull down on the cap covering the additive, to release medication powder, shaking the bag and squeezing solution into the vial until the solution is fully dissolved. D. Attach appropriate IV set and use immediately. E. If activated (mixed) bags cannot be used immediately, affix expiration dates according to manufacturers directions and refrigerate. Discard after expiration. ADD-VANTAGE INTRAVENOUS MEDICATION Annual Review Signature Date Signature Reviewed: Reviewed: Reviewed: Reviewed: Reviewed: Reviewed: Reviewed: Reviewed: Reviewed: Reviewed: Reviewed: Reviewed: Date July, 2013 Issued Approved by: ______________________________________ Director, University Health Services ______________________________________ Medical Director ______________________________________ Assistant Director, Clinical Services SUBJECT: ALLERGY INJECTIONS POLICY: It is the policy of University Health Services(UHS) to provide allergy immunotherapy to currently enrolled students at the University of Notre Dame based on the guidelines set by their Allergist. University Health Services will not be responsible for skin testing, the initial dose for new serum, or immunotherapy to students who are resuming therapy after an extended delay in treatment. Incomplete dosing information from the Allergist may result in a delay in treatment. Any immediate treatment for reactions will be directed by a University Health Services Physician or Physician Assistant. PURPOSE: To maintain the management of patients requiring allergy injections. To assist in providing optimum results from allergy immunotherapy. SPECIAL INSTRUCTIONS: A. Incoming students who request the continuation of allergy immunotherapy are identified by the information on the Medical History & Physical Report. Information is mailed to the student prior to their arrival on campus informing them of the procedure to have therapy continued at University Health Services. This information is available on UHS website. (http://uhs.nd.edu/services/allergy-injections/) ALLERGY INJECTIONS B. Current students receiving injections are given instructions for serum pick-up prior to the end of each academic year. PROCEDURE: A. Administration of Injections 1. Injections are administered by an RN following the guidelines sent by the patient’s physician ONLY when a UHS physician or physician assistant is in the clinic. 2. Used supplies are discarded according to Infection Control/Universal Precautions guidelines. 3. Suggestions to decrease the risk of a local reaction include: Wipe the needle with an alcohol swab to remove excess extract. Change needle. Apply firm pressure over the injection site for 15-20 seconds. Avoid rubbing or scratching the area of injection. 4. At the first appointment for injections: Have the student sign a Patient Information sheet (Exhibit Ic). Place a copy with their Allergy Folder, and provide a copy for the patient. 5. Schedule and/or confirm next appointment with patient and in Medicat. B. Withholding of Injections The RN will withhold an injection if the patient: Is taking a beta-blocker medication (i.e., Inderal, Inderide, Timoptic, Lopressor, Corgad, Tenormin, etc.) Has a fever of 100 or more in the past 24 hours. Has severe asthma or hay fever symptoms. Has received immunizations (excluding influenza) in the past 24 hours Has any swelling remaining from the previous injection. Is acutely ill Is overheated from strenuous physical activity. These items are addressed on the Pre-therapy Questionnaire (Exhibit IX) Injections that are withheld are documented on the Allergy Injection Schedule. C. Observation Time 1. All patients are required to remain in clinic for 30 minutes following their injections and to have the site of injection inspected before leaving the clinic. 2. Non-compliance will result in discontinuation of services at UHS. ALLERGY INJECTIONS D. Treatment of Reactions The immediate measures for treatment are directed by the allergist’s protocol and UHS Medical Directives, and may include: 1. Local reactions Ice bag to injection site. Benadryl or hydrocortisone topical cream to injection site prn. Extended observation time and recording of vital signs. Possible dose adjustment for next injection. Notification of UHS Physician, and Allergist prn. 2. Systemic reactions – MEDICAL EMERGENCY Position patient in supine position with head lower than rest of body if possible. Placement of tourniquet above the site of the injection. Remove every 10 minutes for 1-2 minutes. Epinephrine 0.3cc SQ. Notify UHS Physician or Physician Assistant. Extended observation time and recording of vital signs. Document reference to systemic reaction event in medical record on clinic data sheet. Inform Allergist per telephone. All instructions must be followed by written verification before next dose is given. Reactions requiring medical intervention should also be documented on the organizational “Adverse Event” paperwork and given to the Assistant Director of Clinical Services or Department Director. E. Forms and Documentation 1. General Instructions A sticker is placed on the front of the student’s medical record indicating that there is additional allergy immunotherapy documentation in the Allergy Room file. All instructions received from the Allergist will be dated and initialed in the lower right hand corner upon receipt and become a permanent part of the patient’s medical record. Information is reviewed for complete and clear instruction. If not clear, fax request for clarification of orders to Allergist. (Exhibit III). Significant information is identified using a yellow highlighter. All discontinued instructions are identified by the placement of a diagonal line across the paper using a pink highlighter. All Allergy forms for the current year are maintained in a locked file in the Allergy Room. At the end of each academic year (or summer session) all Allergy documentation is tabbed into the medical record, in front of the H&P and after the Clinic Data Sheets. Verbal orders for dose adjustments due to previous reactions or length of interval between injections shall be faxed to the ordering doctor for signature within 24 hours (Exhibit III). 2. Patient Information Sheet (Exhibit lc) Patient must sign this form before therapy is administered. No injections will be given if the patient refuses to sign the form. 3. Consents to Release or Acquire Medical Information Consent to Release or Acquire Medical Information is not required for office to office communications according to HIPPA guidelines. 4. Allergy Immunotherapy Checklist (Exhibit IV) Complete annually and whenever new vials of extract are received. It is the patient’s responsibility to obtain written clarification for any items checked “NO”. In some instances this may delay car. Upon clarification the corresponding “YES” box will be checked, dated and initialed by RN. 5. Allergy Injection Protocol (Exhibit V) Criteria on checklist must be met before and after administering allergy injection(s). 6. Off Campus Injection If the student is going off campus to receive allergy injection(s), copy their current Allergy Injection Schedule to take with them, and return when completed. 7. Allergy Injection Schedule (Exhibit VI) All allergy injections administered at UHS are documented on this form. All extracts should be recorded on one form. Note the content of each extract using A,B,C,etc. Note the dilution (concentration) of each extract. Note the site of injection, using the arm code, next to each extract when multiple extracts are to be given and specific sites of injections are identified. Note important information in the additional information section (i.e., alternate arms, change needles after withdrawal of serum, previous systemic reaction, frequency, etc.) When giving the injection: - Note date and time of injection(s) - Note extract using letter code (i.e.,A,B,C,etc.) - Note dilution (concentration) (i.e., 1:10,000, 1:100,5000 AU) - Note does given and site of injection using the arm code After a 30 minute observation period: - Note the time of site check and record any reactions under remarks F. Receipt of Extracts (Exhibit VII) Place extracts in a plastic bag. Label the bag with the patient’s name and DOB. Store in alphabetical boxes in the Allergy Clinic refrigerator. Obtain Allergist’s instructions. Date and initial receipt in lower right hand corner. Note patient name, status (Frosh, Soph, Jr, Sr) and contact phone number on the Allergy Patient List. (Exhibit II) Initiate Allergy Injection Schedule (Exhibit VI) and Immunotherapy checklist (Exhibit IV). See procedures for reference. (The patient does not need to wait while this is done. Initiation of these forms will expedite their first visit.) If information is missing from Allergist’s instructions (items checked “NO” on checklist) initiate letter to the doctor. (Exhibit VIII) Highlight the areas of importance on the Allergist’s instructions. Place all forms and instructions in a plastic folder. File in Allergy Room cabinet. Provide student business card with Allergy Office contact information. Instruct student to call Allergy Office phone line to set up and request changes in appointment times. Plan first appointment for student if the student knows their schedule. Otherwise, remind the student that it is their responsibility to contact the Allergy nurse to make their appointment. G. Extract Pick up Document pickup of extracts on the Allergy Injection Schedule Their original injection schedule and/or doctor’s guidelines may be given upon request. Make a copy of their schedule for our chart. After giving the packet to the student, note it on the Allergy Injection Schedule (Exhibit VI). Also note whether or not they are expecting to return for allergy injections when they return to campus. If student is returning for summer school, indicate this on Allergy Injection Schedule. (ExhibitVI). Place their name on the summer list. H. Unclaimed or Expired Extracts When extracts go unclaimed after the academic year, the patient is notified via their ND email address, and disposed of it expired. Expired serum is discarded according to organizational guidelines. Annual Review Signature Reviewed: Reviewed: Reviewed: Reviewed: Reviewed: Reviewed: Date Signature Reviewed: Reviewed: Reviewed: Reviewed: Reviewed: Reviewed: Date TO: Notre Dame Students on Allergy Immunotherapy FROM: Mary Ellen McCaslin, RN, BSN Assistant Director, Clinical Services RE: Allergy Injections University Health Services at the University of Notre Dame (located in Saint Liam Hall) is pleased to administer allergy injections to our students who are under an immunotherapy regimen prescribed by their private physicians. Our records indicate that you are either a new or returning student receiving allergy injections. To assure a standard of quality care, we ask for your cooperation. The continuation of this therapy at University Health Services requires specific instructions from your physician. It is imperative for us to have this information before we will provide care for you. Please give your physician the enclosed letter and verification forms. You are responsible for obtaining the following from your physician: 1. 2. 3. 4. Date and dose of last injection. Vials that are labeled/coded with your name, contents of vial, dilution and expiration date. Single dose vials are to be numbered or dated. Guidelines that clearly state the recommended doses, interval of injections, route and site of administration. 5. Instructions for missed/late injections, new vials and reactions. 6. The physician's signature who is authorizing the therapy. IT IS YOUR RESPONSIBILITY TO BE CERTAIN THAT ALL THE INFORMATION REQUESTED IS WITH YOUR EXTRACTS WHEN YOU ARRIVE ON CAMPUS. INCOMPLETE INFORMATION MAY RESULT IN A DELAY IN TREATMENT. You may bring in the extracts and instructions at your convenience and schedule your first appointment. Saint Liam Hall is open 24 hours a day. Please note however, that allergy injections are given by appointment only and a physician must be in the building. For your first injection, please make a 1 hour appointment. It is MANDATORY for you to remain in our clinic for 30 minutes after each injection. Non-compliance will result in termination of services at our clinic. If you or your physician has any questions regarding our policy and procedure for allergy injections at University Health Services, please feel free to contact the allergy nurse at (574) 631-3738. INFORMATION FOR PATIENTS RECEIVING ALLERGY INJECTIONS 1. Allergy injections are given by appointment only and can be scheduled by calling (574) 631-3738. 2. To assure you optimum results of your therapy, you are responsible for obtaining the information we require and to follow the schedule provided by your Allergist. 3. It is important to inform the nurse if you have any current health problem or if you had any reaction to your previous injections. 4. Avoid strenuous exercise 1 hour before and after your injection(s). 5. You will NOT receive an injection if you: a. Had a fever of 100 degrees or more in the past 24 hours. b. Are acutely ill. c. Have severe asthma or hay fever symptoms. d. Had an immunization (excluding influenza vaccine) in the past 24 hours. e. Have any swelling remaining from the previous injection. f. Are taking any beta blocker medications. 6. You are expected to wait in University Health Services (UHS) for 30 minutes following the injection(s), and report any reactions that occur: a. LOCAL - may consist of redness, itching and/or swelling at site of injection. b. SYSTEMIC OR GENERALIZED - report any distress IMMEDIATELY. Symptoms may include, but not limited to, hives, tightness in chest, coughing, wheezing, excessive sneezing, itching, extreme redness in face and/or eyes, nausea, dizziness, headache or fainting. If you have any questions please check with the nurse. 7. A copy of your injection schedule will be provided upon request. 8. Your extract is stored alphabetically in the refrigerator in the allergy clinic. The Allergy Nurse will work with you to order and obtain new extract. Expired serum will be discarded. Unless you are receiving injections at UHS in the summer, all unclaimed serum will be discarded after July 1. 9. Non-compliance with instructions given will result in the discontinuation of your allergy injection(s) at University Health Services. I have read the above information and acknowledge its contents. ____________________________________ Printed Name _____________________________________ Patient Signature ________________ Date TO: PHYSICIAN Prescribing Allergy Immunotherapy to Notre Dame Student FROM: Mary Ellen McCaslin, RN, BSN Assistant Director, Clinical Services RE: Allergy Injections University Health Services, at the University of Notre Dame, provides the service of administering allergy injections to those students who are presently being treated by an Allergist. We will NOT be responsible for skin testing the initial dose for new patients or those resuming therapy after an extended delay in treatment. The administration of extracts is based on the guidelines that you send to us. The continuation of therapy requires specific instructions. The following criteria are necessary: 1. 2. 3. 4. Date and dose of last injection. Vials that are labeled/coded with patient name, contents of vial, dilution and expiration date. Single dose vials are to be numbered or dated. Guidelines that clearly state the recommended doses, interval of injections, route and site of administration. When injections can be given more than once a week, please note specific time frame between doses. 5. Dosage adjustment instructions for missed/late injections, reactions and new vials. Please note if local reaction is defined by size of induration and/or erythema. 6. A physician’s signature authorizing the therapy. INCOMPLETE INFORMATION WILL RESULT IN A DELAY IN TREATMENT Injections will be given only when a physician is on the premises. All patients will be expected to remain in our clinic for 30 minutes following the injection(s). Any significant reaction and its treatment will be reported to you. If the patient has had a previous systemic reaction, please share that information with us. Optimum results of therapy depend on patient compliance plus clear and concise guidelines from you. Together we can provide the best possible patient care. Should you have any questions regarding our policy and procedure for allergy injections at University Health Services, please feel free to contact the allergy nurse at (574) 631-3738. University Health Services, University of Notre Dame Pre-Therapy Questionnaire Sample _________________________________________________________ ____________ To be completed at each immunotherapy visit NDID DOB Student Name Date Any fever in last 24 hours? Yes No Yes No Yes No Yes No Yes No Yes No Yes No Yes No Yes Any SOB in last 2 days? Yes No Yes No Yes No Yes No Yes No Yes No Yes No Yes No Yes Any current beta – blockers? Yes No Yes No Yes No Yes No Yes No Yes No Yes No Yes No Yes Any change in medication? Yes No Yes No Yes No Yes No Yes No Yes No Yes No Yes No Yes Any problems with previous injection? Yes No Yes No Yes No Yes No Yes No Yes No Yes No Yes No Yes Any increase in allergy symptoms? Yes No Yes No Yes No Yes No Yes No Yes No Yes No Yes No Yes Staff initials Staff initials / Signature Student Health Center Notre Dame, Indiana 46556 DATE: TO: Telephone (574) 631-7497 Facsimile (574) 631-6047 ______________________ Dr. ____________________________________ FAX: _______________________ RE: ___________________________________ DOB:__________ Dear Doctor, Please verify the recent phone order regarding the above patient and his/her dosage change or adjustment. ________________________________________________________________________________ ________________________________________________________________________________ ________________________________________________________________________________ ________________________________________________________________________________ ____________________________________________ (Physician Signature) Please correct and sign, then fax back to me at (574) 631-6047. If you have any questions, I can be reached at (574) 631-7497 or directly at (574) 631-3738. Thank you, Allergy Nurse _______________________________________ DOB Name ___________________ ND ID # ___________ Date ALLERGY IMMUNOTHERAPY CHECKLIST Complete checklist before administering allergy injections. This checklist is completed yearly and whenever new vials of extract are received. 1. Number of vials: 1 2 3 4 5 6 Other:_____________________________ 2. Vials are labeled with PATIENT NAME. Yes__________ No__________ 3. Vials are labeled/coded as to CONTENT and correspond with written instructions. Yes__________ No__________ 4. Vials are labeled/coded as to DILUTION. Yes__________ No__________ 5. EXPIRATION DATES are indicated. Yes__________ No__________ 6. SIGLE DOSE vials are numbered or dated. N/A ______ Yes__________ No__________ 7. ROUTE and SITE of administration are indicated. Yes__________ No__________ 8. RECOMMENDED DOSES are indicated. Yes__________ No__________ 9. INTERVAL of injections are indicated. Yes__________ No__________ 10. Instructions for MISSED/LATE injections are present. Yes__________ No__________ 11. Instructions for REACTIONS are present. Yes__________ No__________ 12. Instructions for NEW VIALS are present. Yes__________ No__________ 13. PHYSICIAN SIGNATURE authorizing therapy is present. Yes__________ No__________ *If there are any items checked “NO”, it is the patient’s responsibility to obtain written clarification. In some instances this may delay care. Upon clarification, the corresponding “YES” box will be checked and dated by the RN. RN completing this checklist: ______________________________________________________________ Name Exhibit IV ALLERGY INJECTION PROTOCOL 1. Sign on to Medicat. Click on “Appointments.” Select “Trav/Allergy 2. Check each chart for: a. Injection schedule and interval of injections. b. Crosscheck this with last dose given to assure proper dosage. If interval is too long, follow the allergist’s schedule for decreasing amount. If unclear or interval falls longer than orders include, place a call to the allergist’s office and ask to speak to the nurse. (Identify yourself as ND Allergy Nurse.) c. Check reaction orders for each individual patient. 3. Check serum in the refrigerator: a. For expiration date. b. Check volume of serum. Note if new serum needs to be ordered. 4. When student arrives: a. Recheck orders. b. Assess health status of student. Document findings on “Pre-Therapy Questionnaire” (Exhibit IX). Do not give if: - Temp>100 - appears acutely ill - asthma or hay fever symptoms - had tetanus or other immunization in past 24 hours, excluding influenza vaccine. - if any swelling remains from last injection - taking any beta-blocker medications. c. Draw up proper dosage, recheck with orders, and give injections Sub-q. It should already be noted on the Allergy Injection Schedule regarding special instructions, including which arm, dry needles, etc. Use cotton ball to wipe site after injection, applying pressure for 10-20 seconds. DO NOT RUB INJECTION SITE. d. Use Benadryl cream, ice, and/or band-aids per patient comfort and preference. e. Have student go to waiting area for 30” wait. f. Document on Allergy Injection schedule and allergist sheet. g. Document on encounter form noting number of injections. h. After 30” check injection site and document any reaction on brown sheet and allergist sheet. i. Confirm next appointment with patient and in Medicat. j. Any reactions requiring significant medical intervention should be noted on the patient chart, as well as filing an “Adverse Event“ organizational report. University of Notre Dame Health Center ALLERGY INJECTION SCHEDULE ___________________________________________________________________________________ Name NDID DOB EXTRACTS A____________________________________________________ Alternate Arms B____________________________________________________ Benadryl Cream C____________________________________________________ Ice Additional Information: Frequency Pt Year Exp Date Date Time Extract Dilution Dose & Site Time of Check Yes Yes Yes No No No Arm Code: = upper R = Right = middle L = Left = lower Remarks __________________________________________________________________________________________ . RECEIPT OF EXTRACTS 1. Place extracts in a plastic bag. Label the bag with the patient’ s name and DOB and place it, in alphabetical order, in the boxes in the refrigerator. 2. Obtain Allergist’s instructions from the student. Date and initial the papers in lower right hand corner. 3. Note patient name, phone number, year in school, and preferred appointment time & day on Allergy Patient Listing. (Exhibit II). 4. Initiate Allergy Injection Schedule and Immunotherapy Checklist (Exhibits VI and IV) by checking off each listed item. The patient does not need to wait while this is being done. Initiation of these forms will expedite their first visit. If information is missing from the Allergist’s instructions, (item checked “no” on the checklist) start the form letter to the doctor to request the missing information. 5. With yellow highlighter, mark the areas of importance on the Allergist instructions. 6. Place all forms and instructions in a plastic folder and place tab with patient’s name on folder. Schedule first appointment in Medicat, under Travel/Allergy screen. Remember appointments are Monday through Friday mornings during Fall semester, and Monday through Friday afternoons during Spring semester. Appointment availability is indicated in Medicat. If patient is not sure of their schedule, make sure to note their phone number on Allergy Patient Listing. Give them an allergy card with Allergy Nurse contact info, and remind them that it is their responsibility to contact the Allergy Nurse to set up their appointment. If you have any questions, please contact Mary Ellen McCaslin Note: At a minimum, complete numbers 1, 2, 3, 6 and 7. Keep the mailing containers. Store them in the bin under the sink. ALLERGY PATIENT LISTING Name (Last, First) Phone Number Year in school Student Health Center Notre Dame, Indiana 46556 Telephone (574) 631-7497 Facsimile (574) 631-6047 TO:_____________________________________________________ Date_______________________ Fax Number:_______________________________________________ Dear Doctor: University of Notre Dame Health Services has received instructions and schedule for: _______________________________________________ Patient Name ______________________________ DOB Please provide the following information for our records as we provide continued allergy injections for your patient while they are attending the University of Notre Dame: Type of extract or dilutions of extract Recommended interval of injections Recommended maintenance dose or dose schedule Expiration date of extract Guidelines for reactions, including dose adjustments due to any reactions Method we should use to obtain new extract when needed Guidelines for dose adjustments due to lapses in therapy Signature of Prescribing Doctor authorizing therapy _____________________________________________________________________________ Other:_______________________________________________________________________________ _________________________________________________________________________________________ University Health Services will await your written clarification of these matters before attempting to provide care for your allergy patient. Please send your recommendations to University Health Services, University of Notre Dame, Notre Dame, Indiana 46556-5693 or FAX to (574) 631-6047. Thank you. Allergy Nurse (574) 631-3738 March 2011 Reviewed Approved by: ______________________________________ Office of Student Affairs ______________________________________ Director, University Health Services ______________________________________ Medical Director SUBJECT: BIOMEDICAL EQUIPMENT AND MAINTENANCE POLICY: University Health Services ensures that all biomedical equipment function properly y scheduling annual maintenance with a reputable vendor. PURPOSE: To ensure accurate and consistent diagnostic results and patient care support and to comply with all applicable standards of maintenance of biomedical equipment. GUIDELINES: A. Inspection and maintenance of biomedical equipment is ordered annually and on an as needed basis throughout the year. B. Records of scheduled maintenance inspections and repairs are kept on file in the office of the Director of University Health Services for at least the current and previous year. PROCEDURE: 1. Equipment used by UHS for the provison of patient care shall be maintained by: TriMedx 6325 Digital Way #400 Indianapolis, IN 46278 317-275-1591 877-874-3339 TriMedx.com Dan Swain, BMET3 574-224-1288 572-241-2890 (fax) BIOMEDICAL EQUIPMENT AND MAINTENANCE 1. Annual inspection is provided in January of each year. 2. It is the using person’s responsibility to notify their immediate supervisor or the UHS pharmacy when there is an equipment failure or malfunction. 3. If the user’s supervisor determines that a repair is required, the UHS pharmacy shall be contacted. The pharmacy shall serve as a resource for department managers in evaluating service needs. 4. TriMedx shall be contacted for service and be responsible for documenting service on equipment for which they are responsible. Documentation shall include: Equipment description (manufacturer, model and serial #) Location Description of repairs Description of maintenance and preventive maintenance. 5. TriMedx shall be responsible for compliance with laws and regulations governing the performance of equipment and shall be able to provide documentation of compliance. Annual Review Signature Reviewed: Reviewed: Reviewed: Reviewed: Reviewed: Reviewed: Date Signature Reviewed: Reviewed: Reviewed: Reviewed: Reviewed: Reviewed: Date SUBJECT: Blood Glucose Testing (ONE TOUCH Ultra System) AUTHORIZATION: Assistant Director, Clinical Services DATE: March 2011 _____________________________________________________________________________________ PURPOSE: To establish safe, accurate bedside capillary blood glucose results that are used in decision making for patient care. PROCEDURE: A. Testing NOTE: Prior to patient testing, be sure that the system has been checked. Reference Quality Control Tests procedure. 1. Explain the purpose of the test and the procedure to the patient. 2. Perform test procedure following defined steps in owner’s booklet. a. Insert a test strip to turn on the meter. The display check will appear, then the code number, which should match that of the test strip vial. b. If the code numbers do not match, or “-----“ appears, press the C button until the correct code number appears. It will flash for 3 seconds, then appear solid for 3 seconds. c. Watch for the blood drop symbol to appear. d. Lance patient finger. e. Apply blood sample. f. Obtain test result in 5 seconds. Remove strip only after result is displayed. B. Universal Precautions 1. 2. 3. 4. Wash hands before and after procedures for testing and cleaning. Wear disposable gloves for testing and cleaning. Always use a new, sterile lancet. Lancets are for single use only. Discard lancet and test strip into sharps container immediately after use. Blood Glucose Testing (ONE TOUCH Ultra System) 5. C. Clean the meter after each patient. Remove test strip holder and discard. Quality Control Measures 1. Test Strips a. Use only ONE TOUCH Ultra test strips. b. Store at room temperature. c. Check expiration date of unopened vials. d. Record a discard date on the vial once opened. Discard the test strips 4 months after opening. e. Replace vial cap immediately after removal of test strip. f. Do not touch the test spot on the test strip. g. Code number on the meter display must match the code number on the vial of ONE TOUCH strips in use. h. Check the amount of blood on the test strip after meter reading is ascertain that the test spot was covered completely. 2. Control Solutions a. Use only ONE TOUCH Ultra control solutions; shake well. b. Record a discard date on the control solutions once opened. Discard the solutions 3 months after opening. c. A control solution test will be performed every month, per Owner’s booklet procedure and documented on the One Touch Ultra Log (Exhibit I) 3. Replace the battery when the battery symbol appears on the meter display. 4. A system check will be performed: Once a month and: a. b. c. d. 5. When a new vial or test strips is opened. Any time a problem is suspected with the meter or test strips. Any time to improve technique. After dropping the meter. Any control result that falls outside of acceptable control range, the owner’s booklet will be referenced and the problem will be corrected before proceeding with the patient testing. a. Infection control measures will be followed for the cleaning and disinfection of the monitor. b. A log will be maintained to record this action. (Exhibit I). 6. A Quality Control Log will be maintained by the Assistant Director, Clinical Blood Glucose Testing (ONE TOUCH Ultra System) Services for a period of 3 years. EQUIPMENT/SUPPLIES: AUTHORIZED PERSONS: ONE TOUCH Ultra Blood Glucose Meter ONE TOUCH Ultra Test Strips ONE TOUCH Ultra Control Solution ONE TOUCH Ultra Owner’s Booklet Lancet device Alcohol pad Cotton ball Disposable gloves RN (Test performance) RN or PCA (Equipment Cleaning) ADDITIONAL CONSIDERATIONS: (Other documents to reference, other approval needed, etc) This facility uses the ONE TOUCH Ultra system. Meters brought in by patients may be used for that individual only. Manufacturer’s guidelines for use will be followed, unless otherwise defined. FORMS or REFERENCES: One Touch owners manuel – see next page. ANNUAL REVIEW Signature Date Signature Reviewed: Reviewed: Reviewed: Reviewed: Reviewed: Reviewed: Reviewed: Reviewed: Reviewed: Reviewed: Reviewed: Reviewed: Date DATE TIME CODE HIGH CONTROL STRIP LOW RN SIGNATURE SAMPLE OF LOG March 2011 Issued Approved by: ______________________________________ Office of Student Affairs ______________________________________ Director, University Health Services ______________________________________ Medical Director SUBJECT: BLOODBORNE PATHOGENS EXPOSURE CONTROL PLAN POLICY: All employees of University Health Services will comply fully with the Bloodborne Pathogen Standard requirements as part of their continuing commitment to health and safety in the workplace. It is the responsibility of the Department of Risk Management and Safety to initiate and revise the University's Exposure Control Plan. The Clinical Services Administrator will be responsible to develop an Exposure Control Plan as it relates to the Health Center and to review and update the plan at least annually and whenever necessary to: a. reflect technology that eliminate or reduce exposure to bloodborne pathogens; b. document annually the consideration and implementation of appropriate commercially available and effective safer medical devices designed to eliminate or minimize occupational exposure. PURPOSE: To eliminate or minimize occupational exposure to the Hepatitis B virus (HBV), Human Immunodeficiency virus (HIV), and other bloodborne pathogens. SUBJECT: BLOODBORNE PATHOGENS EXPOSURE CONTROL PLAN EXPOSURE CONTROL PLAN Reference the University of Notre Dame's plan (Exhibit I) TRAINING Training will be provided as outlined in the Exposure Control Plan. An educational verification form will be completed upon annual training. (Exhibit II) TERMINOLOGY 1. Bloodborne Pathogens (BBP): Pathogenic microorganisms that are present in human blood and can cause disease in humans. These pathogens include, but are not limited to Hepatitis B virus (HBV) and Human Immunodeficiency virus (HIV). 2. Contaminated: The presence or the reasonably anticipated presence of blood or other potentially I infectious materials. 3. Decontamination: The use of physical or chemical means to remove, inactivate, or destroy bloodborne pathogens on a surface or item to a point where they are no longer capable of transmitting infectious particles and the surface or item is rendered safe for handling, use or disposal. 4. Exposure Incident: A specific eye, mouth, other mucous membrane, non-intact skin, or parenteral contact with blood or other potentially infectious materials that results from the performance of an employee's duties. 5. Occupational Exposure: Reasonably anticipated skin, eye, mucous membrane, or parenteral contact with blood or other potentially infectious materials that may result from the performance of an employee's duties. 6. Other Potentially Infectious Materials (OPIM): The following human body fluids: semen, vaginal secretions, cerebrospinal fluid, synovial fluid, pleural fluid, pericardial fluid, peritoneal fluid, amniotic fluid, saliva in dental procedures, any body fluid that is visibly contaminated with blood, and all body fluids in situations where it is impossible to differentiate between body fluids. Any fixed tissue or organ (other than intact skin) from a human (living or dead). SUBJECT: BLOODBORNE PATHOGENS EXPOSURE CONTROL PLAN 7. Parenteral: Piercing mucous membranes or the skin barrier through such events as needlesticks, human bites, cuts and abrasions. 8. Personal Protective Equipment (PPE): Specialized clothing or equipment used by workers to protect themselves from direct exposure to blood or OPIM. 9. Regulated Waste: Liquid or semi-liquid blood or OPIM; contaminated items that would release blood or OPIM in a liquid or semi-liquid state if compressed; items that are caked with dried blood or OPIM and are capable of releasing these materials during handling; contaminated sharps; and pathological and microbiological waste containing blood or OPIM. 10. Universal Precautions: An approach to infection control. According to the concept of Universal Precautions, all human blood and certain human body fluids are treated as if known to be infectious for HIV, HBV, and other bloodborne pathogens. METHODS OF PROTECTION COMPLIANCE A. Universal Precautions Universal Precautions is an approach to infection control. (See Terminology) There is no practical way to determine the health status of all patients who may be sources of bloodborne pathogens. Using this assumption when dealing with infectious materials eliminates the need for decision making to determine the extent of actual or potential disease hazards and establishes minimum standards for contamination control which will effectively control bloodborne pathogens if they are present. This approach includes the use of barrier precautions by employees to prevent direct skin, parenteral, or mucous membrane contact with blood or other body fluids that are visibly contaminated with blood. Universal precautions shall be observed to prevent contact with blood or other potentially infectious materials. In situations where differentiation between body fluid types is difficult or impossible, all body fluids shall be considered potentially infectious materials. COMPLIANCE IS MANDATORY. Failure to follow Universal Precautions will result in corrective action. B. Engineering Controls Engineering controls includes all control measures that isolate or remove a hazard from the workplace encompassing not only sharps with engineered injury protections and needleless systems but also other medical devices designed to reduce the risk of percutaneous exposure to bloodborne pathogens. This may include, but is not limited to: SUBJECT: BLOODBORNE PATHOGENS EXPOSURE CONTROL PLAN a. Handwashing facilities b. Sharps containers c. Specimen containers d. Regulated waste containers e. Safer medical devices, such as sharps with engineered sharps injury protections and needleless systems. Engineering controls shall be examined and maintained or replaced on a regular schedule to ensure their effectiveness. Appropriate engineering controls should be used in preference to other control methods in order to limit occupational exposure. C. Work Practice Controls Work practice controls reduce the likelihood of exposure by altering the manner in which a task is performed. This may include but is not limited to: 1. Handwashing Hands and any other exposed skin surfaces should be washed with soap and running water and mucous membranes should be flushed with water as soon as possible after contact with blood or OPIM. Handwashing should occur: - Whenever there is visible contamination with blood or body fluids; - After completion of work; - After removing gloves and between glove changes; - Before leaving the work area; - Before and after eating, drinking, smoking, applying cosmetics or lip balm, changing contact lenses; - After using bathroom facilities; - Before all activities which involve hand contact with mucous membranes, eyes or breaks in the skin. When handwashing facilities are not available, employees shall be provided antiseptic towelettes or hand cleanser and clean paper towels. When these alternatives are used, employees shall wash their hands with soap and running water as soon as possible. 2. Handling Contaminated Sharps Any object which is contaminated with blood or OPIM and is capable of penetrating the skin is considered a contaminated sharp. Breakable equipment or supplies are potential sharps if they can create surfaces capable of penetrating the skin. Examples of sharps include needles, scalpels, broken glass and exposed ends of dental wires. Needle sticks are an efficient means of transmitting bloodborne diseases. Because of their high potential for transmitting bloodborne pathogens to employees, contaminated sharps should be handled as follows: SUBJECT: BLOODBORNE PATHOGENS EXPOSURE CONTROL PLAN - Contaminated needles and other contaminated sharps or potential sharps shall not be recapped, removed or bent unless no alternative is feasible or unless required by a specific medical procedure (i.e., inoculation of blood culture bottle). - In situations where recapping or needle removal is required, it shall be accomplished only by means of mechanical device or a one-handed technique. - All contaminated sharps shall be transferred to rigid, puncture-resistant, labeled, leak-proof containers immediately or as soon as possible after use. They may not be stored or handled prior to decontamination in such a way as to require employees to reach their hands into the container to retrieve the item. 3. Other Work Practice Controls - All procedures involving direct handling or OPIM should be accomplished in a manner which minimizes splashing, spraying, spattering or aerosol production of OPIM. - Mouth pipetting/suction of blood/OPIM and all other material is prohibited. - Specimens of blood or OPIM must be placed in labeled containers which prevent leakage and are of sufficient strength to prevent expulsion during collection, handling, processing, storage, transport or shipping. The following container requirements must be met: a. The containers must be closed prior to storage, transport or shipping. b. Biohazard labeling or color-coding is required on each container which leaves the University. c. The specimen must be placed in a second container which meets the same provisions as above if the outside of the primary container becomes contaminated or if the specimen could puncture the primary container. d. Contaminated equipment must be decontaminated, if feasible, using approved methods prior to servicing or shipment. When not feasible, the equipment must be clearly labeled as a biohazard to alert employees, as well as transportation and service people of the need to use Universal Precautions. e. Eating, drinking, smoking, applying cosmetics, and handling contact lenses are prohibited in work areas where there is a reasonable likelihood of occupational exposure. f. Food or drink storage is prohibited in work areas (i.e., refrigerators, freezers, shelves, cabinets, countertops) where blood or OPIM are used or stored. Refrigerators used for storage of blood or specimens may not be used for storage of food or drink. D. Personal Protective Equipment (PPE) PPE refers to specialized clothing or equipment used by workers to provide barrier protection of the skin or mucous membranes from direct exposure to blood or OPIM. The use of appropriate PPE is required as supplementary protection in all situations where occupational exposure remains after use of both engineering and work practice controls. The Health Center requires the use of appropriate PPE for all employees for whom SUBJECT: BLOODBORNE PATHOGENS EXPOSURE CONTROL PLAN occupational exposure is reasonably anticipated when engaged in tasks involving contact with blood, body fluids or any potentially infectious material. Appropriate PPE shall be readily accessible to all employees for whom it is required, shall be available in appropriate sizes and shall be disposed of at no cost to the employee. Immediately after removal, all PPE must be discarded into a biohazard container. Training and certification for PPE shall be conducted as specified in the University's PPE Policy. 1. Gloves Gloves must be worn by all employees when performing tasks involving contact with blood, body fluids, OPIM or when handling or touching contaminated items or surfaces. The types of gloves selected (i.e., latex, nitrile or utility) should be impervious to liquids and strong enough to withstand the rigors of the task to be performed. Use of latex or vinyl gloves is intended to cover defects in the skin on the hands and is not intended to provide protection from wounds caused by sharps. The following guidelines are recommended by the Center for Disease Control (Morbidity and Mortality Weekly Report, Vol. 24, 6/24/88): a. Sterile gloves should be used for procedures involving contact with normally sterile areas of the body. b. Examination gloves should be used for procedures involving contact with mucous membranes, unless otherwise indicated, and for other patient care or diagnostic procedures that do not require the use of sterile gloves. c. Surgical and examination gloves may not be reused. Washing gloves with soap or detergents may cause enhanced penetration of liquids through undetected holes in the glove. Disinfecting agents may cause deterioration. d. Use general-purpose utility gloves (e.g., rubber household gloves) for housekeeping chores involving potential blood contact and for instrument cleaning and decontamination procedures. Utility gloves may be decontaminated and reused but should be discarded if they are peeling, cracked, discolored, punctured, torn, or if there is other evidence of deterioration or leakage. Gloves shall be changed under the following circumstances: a. Between patient contacts. b. If visibly contaminated with blood or body fluids (although certain repetitive tasks in laboratory settings may be completed before gloves are changed, i.e., wiping the probe on a whole blood analyzer. SUBJECT: BLOODBORNE PATHOGENS EXPOSURE CONTROL PLAN c. When physical damage to the integrity of the glove is observed (i.e., tearing, surface defects). Employees with known minor skin defects (i.e., cuts, abrasions, burns, dermatitis or exudative lesions) on arms, hands, face or neck must cover these areas with a water-resistant bandage in addition to the use of PPE. Employees with weeping or exudative lesions or dermatitis, which cannot be Securely covered, shall refrain from direct patient care and handling clean or soiled patient equipment. (Indiana State Board of Health 410 IAC 1-4-8 Precautions) 2. Face Shields This barrier device is intended to protect eyes, nose and mouth from coming in contact with blood or body fluid droplets. Employees shall wear protective face shields whenever splashes, spray, splatter or droplets of blood or OPIM may be generated and eye, nose or mouth contamination can be reasonably anticipated. 3.Gowns Protective body clothing shall be provided to cover and protect work clothing and exposed skin from contamination with blood/body fluids. Use of protective clothing may be required during patient treatment or when handling contaminated materials. Protective gowns are disposable and made of impervious material. They should be long-sleeved and kept fastened at all times to maximize protection of exposed skin and work clothes. 4. Cardiopulmonary Resuscitation Masks When performing mouth-to-mouth resuscitation, a mouth shield with a one-way valve or an ambu-bag shall be provided and made readily available whenever the need for CPR may be reasonably expected to occur. All PPE shall be removed before leaving the work area. Contaminated PPE may not be worn in public areas. Public areas include, but are not limited to, employee break rooms, lounges, eating areas, storage areas and restrooms. PPE shall be changed immediately, or as soon as possible, after becoming visibly contaminated with blood/body fluids. PPE should be discarded in biohazard containers/bags. PPE may not be taken home to be washed or discarded. HOUSEKEEPING Although microorganisms are a normal contaminant of walls, floors, and other surfaces, these environmental surfaces are rarely associated with the transmission of infections to patients or staff. Therefore extraordinary attempts to disinfect or sterilize these surfaces are rarely indicated. SUBJECT: BLOODBORNE PATHOGENS EXPOSURE CONTROL PLAN However, the Health Center will be maintained in a clean and sanitary condition. To reduce the risk of transmission of infections, the clinic and inpatient areas will be cleaned on a regular basis. 1.Appropriate PPE shall be worn during all cleaning of blood or OPIM, during decontamination procedures and when handling contaminated laundry or infectious waste. 2. Exam tables, countertops, Mayo stands, other work surfaces, or equipment that may have been contaminated with blood or OPIM shall be cleaned, then decontaminated with an appropriate disinfectant: - After completion of procedures, - Immediately when overtly contaminated, - After any spill of blood or OPIM, - At the end of a work shift when surfaces have become contaminated since the last cleaning. 3. Procedure for handling blood and OPIM spills: a. Put on disposable gloves. b. Use paper towel or a sanitary absorbent to absorb the spill. c. Place used towels or absorbent in a leak-proof red plastic bag. d. Decontaminate the area by flooding the area with an approved disinfectant.* e. Remove gloves. f. Wash hands thoroughly with soap and water. NOTE: If vacuum cleaner was used on carpeted areas to pick up the absorbent material, vacuum bag must be discarded after use.*Solutions which are acceptable disinfectants include, but are not limited to the following: a. Sodium hypochlorite (common household bleach) in 10% concentration in water. Thesolution shall be labeled with date and time of preparation and shall not be used if it is more than 24 hours old. b. Isopropyl alcohol (rubbing alcohol) at a seventy percent (70%) concentration by volume (Indiana State Board of Health; 410 IAC 1-4-8 Precautions, Oct. 6, 1989). c. Other chemical agents which have an Environmental Protection Agency (EPA) registration number and that meet hospital level disinfection standards. 4. Patient beds, tables, phones, etc., shall be cleaned with a hospital grade detergent/disinfectant between patient use or more frequently as needed. 5. Trash cans shall be inspected daily and decontaminated weekly. However, when contamination is visible, clean and decontaminate receptacles immediately or as soon as possible. 6. All hard surface floors shall be cleaned daily and as needed with a hospital grade detergent/disinfectant. 7. Carpeted areas shall be vacuumed daily and thoroughly cleaned yearly, more frequently as needed. 8. Blinds shall be cleaned yearly or when visibly soiled. SUBJECT: BLOODBORNE PATHOGENS EXPOSURE CONTROL PLAN 9. Walls shall be cleaned when visibly soiled. 10. Equipment shall be decontaminated prior to servicing or shipping. Otherwise, it must be appropriately labeled. 11. Reusable utility gloves shall be decontaminated after each use. 12. Broken glassware shall be picked up by mechanical means (i.e., tongs, dust pan and broom). These items should then be disposed of with contaminated sharps. 13. Contaminated reusable sharps shall not be stored or processed in such a way that employees are required to reach by hand into containers where these sharps have been placed. Reusable sharps shall be cleaned and processed before reuse in a way that ensures safe handling: a. Wear gloves. b. Place contaminated sharps in a rigid leak-proof container (with lid) and take to the utility room for cleaning. c. Clean and package heat stable sharps. Use care when handling so as not to injure self. d. Follow directions for autoclaving for all heat stable instruments. e. If the package integrity of sterilized instruments has been compromised, the instrument must be re-sterilized. NOTE: GLOVES ARE MANDATORY DURING ANY HANDLING OF NON-STERILIZED INSTRUMENTS. 14. Contaminated disposable sharps shall be discarded immediately after use. Never manually open, empty or clean contaminated sharps containers. Securely close and discard container as regulated waste when 3/4 full. 15. All regulated waste should be removed routinely per established procedure. 16. The only designated refrigerator/freezer for storage of blood/body fluids is in the lab. It shall be labeled with a biohazard symbol. 17. Laboratory work areas shall be cleaned/decontaminated by lab personnel per South Bend Medical Foundation protocols. 18. Laundry shall be bagged at its location of use and stored in a designated area with no public access. Contaminated laundry shall be handled as little as possible and with a minimum of agitation. 19. Laundry shall be placed in plastic leakproof containers. No color code or labeling is necessary as all employees of St. Michael's Laundry are trained in Universal Precautions and treat all laundry ascontaminated. LABELS AND SIGNS Warning labels shall be applied to containers of regulated waste, refrigerators and freezers containing blood or OPIM. Labeling also applies to other outer containers used to store, transport or ship blood or OPIM. Labels are also required for equipment to be serviced or transported that have parts that are unable to be decontaminated. These labels must identify which portions of the equipment remain contaminated. These labels must meet the following criteria: SUBJECT: BLOODBORNE PATHOGENS EXPOSURE CONTROL PLAN 1. Include the Biohazard symbol. 2. Have a fluorescent orange or orange-red colored background with lettering or symbols in a contrasting color. 3. Be affixed as close as possible to the container by string, wire, adhesive, or other method that prevents loss or unintentional removal. Exceptions to the warning label: 1. Individual containers of blood or OPIM that are placed in a labeled container during storage, transport, shipment or disposal. 2. Red bags or red containers may be substituted for labels. CONTAINING AND HANDLING REGULATED WASTE Biohazard/Infectious waste shall be disposed of in accordance with applicable regulations. Infectious waste generated in the Health Center is removed by the Dept. Of Risk Management and Safety. All contaminated sharps and potential sharps must be discarded immediately after use, or as soon as possible into containers which meet the following requirements: a. Closeable and not able to be opened except by use of tools. b. Puncture-resistant. c. Leak-proof on bottom and sides to prevent leakage of contaminated liquids. d. Labeled using the universal biohazard symbol and the word “biohazard.” Sharps containers must be easily accessible for use, maintained in an upright position during use, and replaced routinely so that they are not overfilled. When moving containers of contaminated sharps, the containers must be closed so that their contents do not spill or protrude. If leakage of the primary container is possible, it must be placed into a secondary container which is closeable, labeled, and shall safely contain all contents without leaking. Reusable containers should not be opened, emptied, or cleaned manually or in any manner which would expose employees to the risk of injury. Regulated waste shall be placed in containers which are closeable and labeled using the universal biohazard symbol and the word “biohazard.” Containers must be constructed to contain all contents and prevent leakage of fluids during handling, storage, transport or shipping. Containers must be closed prior to being stored, or transported. LAUNDRY All employees who have contact with contaminated laundry must wear protective gloves and other appropriate PPE. All contaminated laundry shall be handled as little as possible with minimum SUBJECT: BLOODBORNE PATHOGENS EXPOSURE CONTROL PLAN agitation during handling. All contaminated laundry shall be bagged or put into containers at the location where it is used. Bags are not labeled since all laundry from the Health Center is considered to be contaminated. A laundry cover on the cart identifies this potential biohazard. Laundry is cleaned and disinfected on campus and all laundry employees are trained in Universal Precautions. Laundry is placed and transported in bags which prevent liquids from soaking through or leaking to the exterior. Linens not identified as contaminated with blood/OPIM in the clinic areas may be placed directly in containers at point of use. The contents of these containers will be consolidated into the laundry bags by gloved and gowned staff. RECORDKEEPING University Health Center will establish and maintain for each employee of the University an accurate record of occupational exposure according to OSHA's rule governing access to employee exposure and medical records, Title 29 Code of Federal Regulations, Part 1910.20 and under the Bloodborne Pathogen standard. Medical records shall include: a. Name and social security number of the employee. b. All documents pertaining to the employee's Hepatitis B vaccination status. c. All information which was provided to the healthcare professional making a post-exposure evaluation. d. Results of examinations, medical testing and follow-up procedures related to a specific occupational exposure. e. Healthcare professional's written opinion for post-exposure evaluation and follow-up. 2. Medical records must be kept confidential and maintained for at least the duration of employment plus thirty (30) years. The record will be identified by the placement of an orange sticker on the file. Medical records shall not be disclosed or reported without the employee's written consent to any person within or outside the workplace except as required by this plan or by law. 3. The medical record will be maintained separate from the personnel file. 4. Training records will be maintained for three (3) years and include: a. Training dates b. Content or summary of the training. c. Name(s) and qualifications of the trainer(s). d. Names, social security numbers and positions of employees attending each session. A contaminated sharps injury record shall be established and maintained to record percutaneous injuries from contaminated sharps and to serve as a tool for identifying high risk areas and evaluating devices. (Exhibit IX) The contaminated sharps injury record will be recorded and maintained in such a manner to protect the confidentiality of the injured employee. SUBJECT: BLOODBORNE PATHOGENS EXPOSURE CONTROL PLAN The contaminated sharps injury record will be maintained for at least the duration of employment plus thirty (30) years. HEPATITIS B VACCINATION The Hepatitis B vaccine shall be made available to all Notre Dame employees who are identified by Risk Management and Safety as having potential occupational exposure to bloodborne pathogens. (Reference the University's Exposure Control Plan.) Vaccinations shall be available after receiving training regarding the risk of exposure to bloodborne pathogens and within 10 days of initial assignment to job with occupational exposure. Complete consent form (Exhibit III). Vaccination is not indicated for employees who have already had the HBV series, who have had antibody testing documenting immunity to HBV, or who have medical contraindications to the vaccine. An employee who initially declines vaccination shall be required to sign a declination form (Exhibit IV). Employees who decline the vaccination initially may elect to accept it at a later date if still employed in a position with potential occupational exposure to blood/OPIM. POST-EXPOSURE EVALUATION & FOLLOW-UP A. Medical Examination After Exposure Employees exposed to bloodborne pathogens as a result of their employment duties are entitled to all necessary counseling, testing, and treatment related to the incident. These services will be provided at no cost to the employee. Employees are instructed to report all exposure incidents to their supervisor Initial evaluation and treatment of the injury will be performed at UHS. Upon authorization of a UHS physician, the referral physician shall be contacted immediately. Medical evaluation and counseling for the exposed employee shall occur within 24 hours of exposure. Immediate first-aid treatment 1. Minor injuries, cuts, needlesticks: Allow to bleed and clean wound with soap & water. Apply antibacterial ointment and bandage as needed. 2. Mucous membrane exposure (eye, mouth, etc.): Flush with large amounts of water or saline. 3. Non-intact skin exposure (open wounds, dermatitis, etc.): Wash thoroughly with soap & water. An Exposure Incident Report (Exhibit V) should be completed by an RN at UHS. The exposed employee should bring a copy of this report to the appointment with the referral doctor. The content of all reports must be kept confidential, including the information about the source individual. SUBJECT: BLOODBORNE PATHOGENS EXPOSURE CONTROL PLAN The referral physician shall complete and forward to the UHS physician an Exposure to Bloodborne Pathogen Report. This document shall be placed in the employee's medical record. The employee shall be informed of the results of the evaluation and told of any medical conditions resulting from exposure to blood which require further evaluation or treatment. B. Collection and Testing of Blood Consent must be documented before HIV testing can be performed. (Exhibit VI) Consents and requested lab tests shall be obtained at UHS as soon as possible . All testing for source and exposed employees will be done confidentially using number coded specimens and the Requisition/Anonymous Laboratory Tests, SBMF form no. 13111 (Exhibit VII). Additionally, affix the numbered label to the Exposure Incident Report for reference. Lab tests should be drawn within 24-48 hours of exposure. A copy of the test results for the exposed employee and source individual shall be forwarded to the referral doctor. Test results must be identified with case number and whether it is the exposed employee (A) or the source (B). Additional sources will be identified as C, D, etc. Each individual has the right to refuse testing. The employee should be informed that worker's compensation benefits may be jeopardized if testing is refused. If the employee consents to baseline blood collection, but does not give consent at that time for HIV serologic testing, the sample shall be preserved for at least 90 days. If, within 90 days of the exposure incident, the employee elects to have the baseline sample tested, such testing will be done as soon as possible. NOTE: Under Indiana Code 16-1-9.5-7, it is unlawful for any person to disclose medical information involving a communicable disease without a release. Therefore, when consent is sought from a source individual, the source individual must be informed that the result will be released only to the exposed employee and the healthcare professional evaluating the employee after exposure. Likewise, the employee and healthcare professional evaluating the employee after exposure shall be informed of confidentiality requirements. Any positive HIV test result must be reported to the Indiana State Board of Health (I.C. 16-1-9.5-2). SOURCE INDIVIDUAL Requested tests include: HIV antibody Hepatitis B surface antigen Hepatitis C antibody NOTE: If the source individual is known to be infected, testing does not need to be repeated to SUBJECT: BLOODBORNE PATHOGENS EXPOSURE CONTROL PLAN determine the known infectivity. EXPOSED EMPLOYEE Requested tests include: HIV antibody Hepatitis B antibody Hepatitis C antibody C. Post-Exposure Prophylaxis and Follow-Up The referral physician shall counsel the exposed employee regarding the potential risk of HIV infection from the exposure in question, the advantages and disadvantages of post-exposure prophylaxis, possible medication side effects, possible symptoms of early HIV infection, and the need to observe precautions to prevent potential secondary HIV transmission. Hepatitis B immunoglobulin (HBIG) and the Hepatitis B vaccine series will also be offered, when indicated. A written evaluation of the exposure incident shall be provided to the employer within 15 days of the completion of evaluation. (Exhibit VIII) Evaluation of any reported post-exposure illnesses shall be made available through UHS. Follow-up medical evaluations and lab testing shall be coordinated by a UHS physician. In addition to medical follow-up, the Dept. of Risk Management & Safety or Clinical Services Administrator at UHS will conduct an evaluation of the exposure incident to determine whether changes in policies or practices are needed to prevent recurrences of similar incidents. NOTE: The RN completing the Exposure Incident Report must inform the Clinical Services Administrator, in writing, about the exposure incident. Information should include patient name and social security number and date and time of the exposure incident. ANNUAL REVIEW Review Reviewed: Signature Date Signature Reviewed: Reviewed: Reviewed: Reviewed: Reviewed: Reviewed: Reviewed: Reviewed: Reviewed: Reviewed: Reviewed: Date SUBJECT: CLEANING OF EXAM AND PROCEDURE ROOMS AUTHORIZATION: Assistant Director, Clinical Services DATE: March 2011 ____________________________________________________________________________________________ PURPOSE: To minimize risk of contamination between patients who use exam and/or procedure rooms EQUIPMENT/SUPPLIES: 1. Approved disinfectant cleaner 2. Paper towels 3. Gloves PROCEDURE AND/OR GUIDELINES RN or PCA performs task at completion of patient exam/procedure room use. 1. Don gloves 2. Remove and discard exam table paper that has been in contact with patient 3. Remove and discard all items used for patient care/exam. a. Discard biohazard items in red waste container 4. Spray all (potentially) contaminated horizontal surfaces with disinfectant 5. Allow to remain wet for at least 10 seconds 6. Wipe dry with paper towels 7. Discard paper towels and gloves in proper waste container. ANNUAL REVIEW Signature Date Signature Reviewed: Reviewed: Reviewed: Reviewed: Reviewed: Reviewed: Reviewed: Reviewed: Reviewed: Reviewed: Reviewed: Reviewed: Date SUBJECT: Conjunctivitis Test Kit (Adeno Detector) AUTHORIZATION: Assistant Director, Clinical Services DATE: November, 2011 _____________________________________________________________________________________ PURPOSE: To aid in the rapid differential diagnosis of acute adenoviral conjunctivitis. EQUIPMENT/SUPPLIES: RPS Adeno Detector test kit Gloves Timer PROCEDURE AND/OR GUIDELINES 1. Tear open each foil pouch in the kit package. Do not touch the collector pad to any surface except the collection site (conjunctiva) and the sample transfer window. 2. Locate the sample pad on the underside of the sample collector-the pad will appear yellow prior to testing. Apply examination gloves. 3. Gently lower the patient’s lower eyelid to expose the inside pocket (inferior fornix). 4. Swab or dab the sampling pad inside the lower eyelid 6-8 times around the conjunctiva. Allow the sampling pad to rest against the conjunctiva for an additional 3 seconds to ensure saturation of the sampling pad with the eye fluid. The pad will turn red upon saturation with tear fluid. 5. Begin the test by gently placing the sampling pad of the sample collector into the sample transfer window of the test cassette body. 6. Press firmly where indicated until the test feels secure. A double click means that test is properly assembled. 7. Open the buffer vial and remove the protective cap from the test. Do not allow any portion of the cassette besides the absorbent tip to touch the buffer vial. 8. Immerse the absorbent tip into the buffer vial for 15 seconds. 9. Remove the absorbent tip from the buffer vial. Replace the protective cap and place the test cassette horizontally on a flat surface for 10 minutes. Do not interpret test prior to completing 10 minutes of development time. 10. Once the background of the result window is white again (it may be pink during testing time) and 10 minutes has elapsed, the test may be accurately read. If there is a streaky pink background 11. 12. 13. 14. after 10 minutes, allow an additional 5 minutes of running time. Results are indicated through two lines which appear in the result window-the result line and the control line. The control line appears as a red line the control line zone. It indicates the correct application and performance of the test and must appear for the test to be valid. a. Negative result: only the control line appears. A negative result should be reported as a presumptive negative for the presence of adenovirus antigens. b. Positive result: the result line appears as a red line in the result window. It indicates a positive result. An uneven or incomplete result line is due to an uneven distribution of eye fluid on the sample pad. Even if the result line is faint in color, incomplete over the width of the test strip , or uneven in color, it must be interpreted as positive for the presence of adenovirus antigens. c. Invalid result-if the control line does not appear, the test must be discarded and the patient retested by re-sampling the eye using a new test kit. i. Note: if a second sampling is required, eye fluid may be reduced and inadequate for testing. If both eyes are affected, and second sample needed, use other eye. If only one eye is affected, the sample may be repeated immediately if adequate secretions are available or it may be repeated several hours later. Refer to package insert for color photographs and illustrations on proper use of test kit. Document results of test in medical record; notify physician as indicated. Document charge for test on encounter form. FORMS or REFERENCES: Conjunctivitis label for assessment. Encounter form ANNUAL REVIEW Signature Date Signature Reviewed: Reviewed: Reviewed: Reviewed: Reviewed: Reviewed: Reviewed: Reviewed: Reviewed: Reviewed: Reviewed: Reviewed: Date March 2011 Reviewed Approved by: ______________________________________ Office of Student Affairs ______________________________________ Director, University Health Services ______________________________________ Director of Risk Management SUBJECT: CONSENT FOR PROCEDURE POLICY: Written, signed consent will be obtained from the patient prior to any operative procedure being performed PURPOSE: To inform patient of procedure to be performed, the risks, alternatives, and the expected outcome. To provide the patient with the opportunity to ask questions and receive information as needed. GUIDELINES: A. Following decision to proceed with procedure, and explanation given to patient by physician, RN places Procedure label onto Clinic Data Record. RN completes label information, with guidance from physician as needed. B. Information to be completed includes: 1. Date and time 2. Allergies 3. Site 4. Name of physician 5. Operative area, including left or right if indicated 6. Type of anesthetic being used 7. Any other medication used 8. Patient signature with date and time of signature and signature of witness 9. Post procedure instructions. 10. Physician or RN to sign at bottom of label overlapping signature to page beneath. 11. Follow up appointment information CONSENT FOR PROCEDURE Annual Review Signature Reviewed: Reviewed: Reviewed: Reviewed: Reviewed: Reviewed: Date Signature Reviewed: Reviewed: Reviewed: Reviewed: Reviewed: Reviewed: Date SUBJECT: Conjunctivitis Test Kit (Adeno Detector) AUTHORIZATION: Assistant Director, Clinical Services DATE: November, 2011 _____________________________________________________________________________________ PURPOSE: To aid in the rapid differential diagnosis of acute adenoviral conjunctivitis. EQUIPMENT/SUPPLIES: RPS Adeno Detector test kit Gloves Timer PROCEDURE AND/OR GUIDELINES 1. Tear open each foil pouch in the kit package. Do not touch the collector pad to any surface except the collection site (conjunctiva) and the sample transfer window. 2. Locate the sample pad on the underside of the sample collector-the pad will appear yellow prior to testing. Apply examination gloves. 3. Gently lower the patient’s lower eyelid to expose the inside pocket (inferior fornix). 4. Swab or dab the sampling pad inside the lower eyelid 6-8 times around the conjunctiva. Allow the sampling pad to rest against the conjunctiva for an additional 3 seconds to ensure saturation of the sampling pad with the eye fluid. The pad will turn red upon saturation with tear fluid. 5. Begin the test by gently placing the sampling pad of the sample collector into the sample transfer window of the test cassette body. 6. Press firmly where indicated until the test feels secure. A double click means that test is properly assembled. 7. Open the buffer vial and remove the protective cap from the test. Do not allow any portion of the cassette besides the absorbent tip to touch the buffer vial. 8. Immerse the absorbent tip into the buffer vial for 15 seconds. 9. Remove the absorbent tip from the buffer vial. Replace the protective cap and place the test cassette horizontally on a flat surface for 10 minutes. Do not interpret test prior to completing 10 minutes of development time. 10. Once the background of the result window is white again (it may be pink during testing time) and 10 minutes has elapsed, the test may be accurately read. If there is a streaky pink background 11. 12. 13. 14. after 10 minutes, allow an additional 5 minutes of running time. Results are indicated through two lines which appear in the result window-the result line and the control line. The control line appears as a red line the control line zone. It indicates the correct application and performance of the test and must appear for the test to be valid. a. Negative result: only the control line appears. A negative result should be reported as a presumptive negative for the presence of adenovirus antigens. b. Positive result: the result line appears as a red line in the result window. It indicates a positive result. An uneven or incomplete result line is due to an uneven distribution of eye fluid on the sample pad. Even if the result line is faint in color, incomplete over the width of the test strip , or uneven in color, it must be interpreted as positive for the presence of adenovirus antigens. c. Invalid result-if the control line does not appear, the test must be discarded and the patient retested by re-sampling the eye using a new test kit. i. Note: if a second sampling is required, eye fluid may be reduced and inadequate for testing. If both eyes are affected, and second sample needed, use other eye. If only one eye is affected, the sample may be repeated immediately if adequate secretions are available or it may be repeated several hours later. Refer to package insert for color photographs and illustrations on proper use of test kit. Document results of test in medical record; notify physician as indicated. Document charge for test on encounter form. FORMS or REFERENCES: Conjunctivitis label for assessment. Encounter form ANNUAL REVIEW Signature Date Signature Reviewed: Reviewed: Reviewed: Reviewed: Reviewed: Reviewed: Reviewed: Reviewed: Reviewed: Reviewed: Reviewed: Reviewed: Date DATE: TIME: PROCEDURE Explanation of Procedure given Consent signed for Procedure ALLERGIES: Release of Information consent form signed (optional) Specimen sent to Pathology SITE: MEDICATIONS USED: Local: 1% Xylocaine 2% Xylocaine Marcaine I hereby give my permission for the above listed Procedure to be performed on me by the physician, _______________________________________________ M.D. I have identified the operative area/wound as:___________________________________________; the location for the procedure as: LEFT RIGHT ___________________________________. The proposed Procedure and the expected outcome, risks, and reasonable alternative of the proposed procedure have been explained to me. I have had the opportunity to obtain answers to all questions I have 2% w/epinephrine regarding the Procedure. 1% w/epinephrine Topical:____________________ _________________________ Patient Signature Liquid Nitrogen AgNo3 Sticks Other medication used: Date and Time ___________________________________________________________________________ TIME: ________________________________________________ PROCEDURE Explanation of Procedure given Consent signed for Procedure Release of Information consent form signed (optional) Specimen sent to Pathology SITE: MEDICATIONS USED: 1% Xylocaine 2% Xylocaine Marcaine I hereby give my permission for the above listed Procedure to be performed on me by the physician, _______________________________________________ M.D. I have identified the operative area/wound as:___________________________________________; 1% w/epinephrine the location for the procedure as: LEFT RIGHT ___________________________________. The proposed Procedure and the expected outcome, risks, and reasonable alternative of the proposed pro2% w/epinephrine cedure have been explained to me. I have had the opportunity to obtain answers to all questions I have regarding the Procedure. Topical:________________________ _________________________ Patient Signature Liquid Nitrogen AgNo3 Sticks Other medication used: ___________________________________________________________________________ TIME: ________________________________________________ PROCEDURE Explanation of Procedure given Consent signed for Procedure Release of Information consent form signed (optional) MEDICATIONS USED: 2% Xylocaine Specimen sent to Pathology Marcaine I hereby give my permission for the above listed Procedure to be performed on me by the physician, _______________________________________________ M.D. I have identified the operative area/wound as:___________________________________________; 1% w/epinephrine the location for the procedure as: LEFT RIGHT __________________________________. The proposed Procedure and the expected outcome, risks, and reasonable alternative of the proposed pro2% w/epinephrine cedure have been explained to me. I have had the opportunity to obtain answers to all questions I have regarding the Procedure. Topical:________________________ _________________________ Patient Signature Liquid Nitrogen Other medication used: Witness (Physician or RN) Follow-up appt: ___________________________ WOUND CARE Hand-out R.I.C.E. Other Instructions: ____________________________________________________________________________ SITE: 1% Xylocaine _________________ POST PROCEDURE INSTRUCTIONS: ALLERGIES: Local: ________________ Date and Time MD or Ns signature: DATE: Witness (Physician or RN) Follow-up appt: ___________________________ WOUND CARE Hand-out R.I.C.E. Other Instructions: ____________________________________________________________________________ ALLERGIES: Local: _________________ POST PROCEDURE INSTRUCTIONS: MD or Ns signature: DATE: ________________ AgNo3 Sticks ________________ Date and Time _________________ Witness (Physician or RN) Follow-up appt: ___________________________ WOUND CARE Hand-out R.I.C.E. Other Instructions: ____________________________________________________________________________ POST PROCEDURE INSTRUCTIONS: ___________________________________________________________________________ MD or Ns signature: ________________________________________________ SUBJECT: CRYCO-CUFF AUTHORIZATION: Assistant Director, Clinical Services DATE:: March 2012 _____________________________________________________________________________________ PURPOSE: To provide safe compression to minimize swelling and cold to minimize pain. EQUIPMENT/SUPPLIES: Cryo/cuff which includes cuff (ankle or knee), cooler and tube. Stockinette. PROCEDURE: 1. Prepare cooler a. Add water to the appropriate line indicated inside the cooler b. Add ice to the minimum ice line for a 30 minute treatment, to the top for 6 to 8 hours. c. Allow 5 minutes with agitation to chill water. 2. Minimize underdressings, if any. Use stockinette to protect the skin. a. Apply underdressings with minimal tension, particularly around the popliteal and pretibial area. b. Do not use with elastic wraps, because the pressures are cumulative. 3. Apply cuff – always apply with cuff empty. KNEE a. Adjust infrapatellar opening so the cuff conforms to the slightly flexed knee. b. Secure the proximal strap, tight but not constrictive. Filling provides the compression c. Apply distal strap loosely. To minimize upper calf constriction, do not stretch the elastic. The distal strap can be quite loose. A tight distal strap may cause constriction. CRYCO-CUFF ANKLE a. Disengage Velcro on bottom so flaps lay open. Slide foot through and zip up. b. Close bottom flaps together for a comfortable but snug fit. Velco can be adjusted to control the width and angle of the sole from heel to toe. c. Fasten top strap. 4. Fill and pressurize cuff. a. Connect tube to cuff. b. Open air vent on the cooler. c. Elevate the cooler about 15 inches (30mm hg) and hold for about 30 seconds to pressurize the cuff. Avoid pressures above 30mm hg. Reduce pressure with any sense of discomfort, numbness or tingling of the limb. d. Press the metal tab on the quick-disconnect while cooler is elevated to seal the pressure. The tube can be left in place or disconnected. e. Rest cooler on floor or table. 5. “Rechill” the water in the cuff once an hour or as needed. Initially rechill after 15-30 minutes to quickly cool the area. a. Connect the tube, lower the cooler, and the water will drain from the cuff. b. After a minute or two for mixing with the ice, elevate the cooler and repeat the filling process. 6. Contraindications Cryotherapy should not be used if a patient has Reynaud’s or other vasospastic disease, cold hypersensitivity or compromised local circulation. 7. Care a. After use, drain water from the tube by pressing spring on quickdisconnect and elevating tube. b. Spray cuff with approved disinfectant and allow to dry. c. Store jug with top off to allow drying. d. Clean cuff, tube and cooler routinely every 6 months (January and August) using a few ounces of liquid soap added to hot water in the cooler. Recycle water between cooler and cuff a few times to clear tube. May be cleaned more often when necessary.. AUTHORIZED PERSONS: RN or PCA CRYCO-CUFF ANNUAL REVIEW Signature Date Signature Reviewed: Reviewed: Reviewed: Reviewed: Reviewed: Reviewed: Reviewed: Reviewed: Reviewed: Reviewed: Reviewed: Reviewed: Date SAMPLE ( reduced size) CRYOCUFF CLEANING SCHEDULE #1 - COT RM A / SIGNATURE/ DATE 2012 JANUARY AUGUST 2013 JANUARY AUGUST 2014 JANUARY AUGUST 2015 JANUARY AUGUST 2016 JANUARY AUGUST 2017 JANUARY AUGUST 2018 JANUARY AUGUST 2019 JANUARY AUGUST 2020 JANUARY AUGUST / / / / / / / / / / / / / / / / / / #2 - COT RM A/SIGNATURE/ DATE / / / / / / / / / / / / / / / / / / #3 - IOU TREATMT RM /SIGNATURE/ DATE / / / / / / / / / / / / / / / / / / SUBJECT: DIETARY SERVICE AT UNIVERSITY HEALTH CENTER AUTHORIZATION: Assistant Director, Clinical Services DATE: March 2011 _____________________________________________________________________________________ PURPOSE: University Health Services will provide dietary services to infirmed students with the cooperation of University Food Services and North Dining Hall. PROCEDURE AND/OR GUIDELINES A. The name of the student and ND ID number will be provided on the menu. B. Food Services will insure that all meals are delivered. C. Health Services staff will dispose of unused food and disposable products, and food Services will be responsible for picking up dirty dishes and carts and washing them at the North Dining Hall within 24 hours. D. Meals ordered will include food plated to order, utensils and napkins. E. Health Services employees will provide a beverage served in paper or Styrofoam which will be stored at the Health Center. F. Food Services will be responsible for maintaining a stock of supplies and food items for Health Services throughout the school year according to prescribed inventory. Two Grab-n-Go lunches are kept in stock at the Health Center by Food Services for nourishment in between meals. They are delivered Monday and Friday. Sandwiches good for 48 hours and milk has expiration date listed. Ordering Meals/Stock A. Meals will be ordered according to physician order and designated menu selection. B. A Health Services representative will fax completed menus to the Dining Hall at 1-4529,and call extension 1-5775 at the following times to alert dietary staff of faxed menus and to verify receipt of the order: 1. Monday – Friday Breakfast – call at 6:30am for a 8:00am delivery Lunch - call at 10:00am for a 11:30am delivery ANNUAL REVIEW DIETARY SERVICE AT UNIVERSITY HEALTH CENTER Dinner – call at 4:30pm for a 5:00pm delivery 2. Saturday and Sunday Continental Breakfast call at 6:30am for a 8:00am delivery Brunch – call at 10:00am for a 11:30am delivery Dinner – call at 3:30pm for a 5:00pm delivery C. If any other meals are needed due to late admission, etc., the following is the schedule of meal hours at North Dining Hall. Call extension 1-5775 and speak to the Manager on duty. 1. Monday – Friday Breakfast 7:00am – 9:15am Lunch 10:30am – 2:00pm Dinner 4:30pm – 7:00pm Grab-n-Go 7:00am – 7:00pm 2. Saturday and Sunday Continental Breakfast 8:00am – 10:30am Brunch 10:30am – 11:30am Dinner 4:30pm – 7:00pm D. Student menu selections are obtained from the ND food service website at http://fsntserv.foodserv.nd.edu/dh_menus/ndh_menu_today.cfm. Orders must be faxed to 1-4529 prior to or at the designated times of ordering. E. Orders for Grab-n-Go meals, or other food items needed prior to the next routine inventory order, are to be placed on a separate menu selection sheet with the name “UHS”. F. Food services will check inventory at the Health Center twice per week during the Academic year on Tuesdays and Fridays. 1. The RN on duty in Inpatient/Observation Unit is responsible for daily review of inventory, and placing order with Food Services in basement on Tuesday and Wednesday. 2. Inhouse food service items will be restocked according to inventory levels and patient needs q day or q shift prn. 3. The PCA role is responsible for assembling patient care kits from the Food Services inventory: sore throat kits, GI kits. G. Food services will check inventory at the Health Center once per week during the summer. 1. Health Services nursing staff will maintain inventory, and order prn. H. Concerns related to Dietary Service will be routed through the Assistant Director, Clinical Services to the appropriate person(s). Signature Date Signature Reviewed: Reviewed: Reviewed: Reviewed: Reviewed: Reviewed: Reviewed: Reviewed: Reviewed: Reviewed: Reviewed: Reviewed: Date SUBJECT: EAR IRRIGATION AUTHORIZATION: Assistant Director, Clinical Services March 2011 _____________________________________________________________________________________ DATE: PURPOSE: Safely remove impacted cerumen from ear canal. EQUIPMENT/SUPPLIES: Refer to Medical Directives before initiating procedure. Manufacturer’s guidelines will be followed for any of the three acceptable devices. Water Pik machine OR Elephant Ear OR WelchAllyn Ear Wash System Otoscope Ear lavage basin Towels Plastic drape PROCEDURE AND/OR GUIDELINES A. Before Procedure 1. Refer to Medical Directives before initiating procedure. Manufacturer’s guidelines will be followed for any of the three acceptable devices. 2. Consider use of a wax softener prior to irrigation. 3. Explain procedure to patient. 4. Drape patient with plastic drape and towel. Position patient near sink. 5. Have patient hold ear basin under ear. 6. Test for comfortable water temperature by running water over lobe of ear. Ideal water temperature is 98.6 F. Water that is too hot or cold can stimulate the inner ear and cause dizziness. 7. Pull top of ear up and back. EAR IRRIGATION B. Procedure: 1. WelchAllyn Ear Wash System a. Prepare equipment. b. Begin water flow through the system, adjust to an approximate body temperature. If water temp exceeds 110, water will stop flowing from the eartip. Reduce/adjust the faucets. If water temp is too cool, the thermal sensor is blue. Adjust the faucet. c. Attach eartip to the handle with the tab side up and the ridge on the inside lining up with the grooves on the handle. d. Insert the eartip into the ear canal, pulling gently up and back on the pinna. e. Continually assess water temperature by checking the thermal sensor, and assessing the patient’s comfort. f. Release the actuator and keep the eartip in the canal for 5-10 seconds to vacuum any remaining water. 2. Water-Pik a. Fill Water Pik container with warm water. Prime tubing. b. Insert tip of Water Pik at the opening of the ear canal. c. Turn on Water Pik to allow water to flow freely into ear. Keep dial on 2-3; no higher than 4-5. If the patient experiences discomfort, adjust water pressure. If discomfort continues, stop procedure. d. Refill water and empty ear basin prn. 3. Elephant Ear Wash System a. Fill Container with warm water. May use small amount of shampoo soap. b. Install disposable tip to tubing. c. Squeeze trigger. 4. After Procedure: a. Document patient’s response to treatment. b. Examine ear to assess ear status. Refer to physician if: Painful irrigation. Redness or pus in ear canal. Tympanic membrane invisible. Unable to remove cerumen. 5. Clean equipment. a. Rinse and dry device. b. Wash ear basin and irrigation tip in warm soapy water. Rinse. c. Drain water from plastic tubing. d. Store equipment and cover with a towel. NOTE: To remove lime build-up in tubing, place full strength vinegar in reservoir, turn machine on and flush tubing until scale is removed. Repeat prn. Flush well with tap water. To disinfect the tubing, rinse with 10% bleach solution, or soak tubing in disinfectant. Maintenance/Breakdown: Notify Assistant Director, Clinical Services. EAR IRRIGATION ANNUAL REVIEW: Signature Date Signature Reviewed: Reviewed: Reviewed: Reviewed: Reviewed: Reviewed: Reviewed: Reviewed: Reviewed: Reviewed: Reviewed: Reviewed: Date SUBJECT: EKG (Electrocardiogram) AUTHORIZATION: Assistant Director, Clinical Services PURPOSE: To provide information concerning the electrical activity of the heart, valuable in the diagnosis of abnormal cardiac rhythm and myocardial damage. DATE: March 2012 ________________________________________________________________________________________________________________________________ PROCEDURE: 1. Explain procedure to the patient. 2. Turn machine on. Program patient data if patient stable, or document demographic information on the printout after the procedure. 3. Lead Placement (see diagram Exhibit 1). Place sensors and attach leads as indicated. a. b. c. d. e. f. g. RA, LA, RL, LL leads – match to appropriate extremity. V1 lead – 4th intercostal space at right sternal border. V2 lead – 4th intercostal space at left sternal border. V3 lead – midway between V2 and V4. V4 lead – 5th intercostal space on left midclavicular line. V5 lead – on left anterior axillary line at the same level as V4. V6 lead – on left mid-axillary line at same level as V4 Note: For patients with chest hair that interferes with good contact of the sensors, any one of the following techniques may be used: a. Spread the hair between thumb and forefinger, apply the sensor to the exposed skin. b. Use a water dampened towelette to moisten the skin area to enhance the adhesive tack prior to applying the sensor. If methods a. and b. do not work, shaving may be necessary. EKG (Electrocardiogram) 4. EKG Training. a. Allow at least 30 seconds after lead placement before performing a tracing to allow the system to stabilize and patient to relax. Automatic operation: 12 lead EKG and Lead II Rhythm strip: a. Turn machine ON prior to lead placement. b. After lead placement, push AUTO. c. Then, push YES Manual operation: Rhythm strip only. (Lead II) a. Turn machine ON prior to lead placement. b. After lead placement, push MANUAL. – one sheet of paper equals 10 seconds tracing. c. Push STOP when desired strip is obtained. Note: Machine will indicate “loose lead” if one or more leads are loose or off. Check all sensors and lead wires and repeat steps for automatic or manual operation. d. Remove and discard sensors after procedure is completed. e. Turn machine off. 5. Paper Refill Use Burdick thermally responsive paper. a. Remove Z-fold paper from the package. b. Open paper compartment on machine, touch pad facing you. c. Place paper into compartment. The queueing holes are to the right of the unit. d. Lift top sheet and feed it into the slot in front of the roller. e. Close the compartment cover. f. Press ON button. g. Press LOAD PAPER button. 6. Troubleshooting a. Refer to Operator’s Manual which is kept with the machine. b. Report problems to Assistant Director, Clinical Services. EKG (Electrocardiogram) EQUIPMENT/SUPPLIES: EKG machine/paper Sensors (electrodes) Chest and extremity leads Disposable razor Alcohol wipes AUTHORIZED PERSONS: RN ANNUAL REVIEW Signature Date Signature Reviewed: Reviewed: Reviewed: Reviewed: Reviewed: Reviewed: Reviewed: Reviewed: Reviewed: Reviewed: Reviewed: Reviewed: Date SUBJECT: Eye Irrigation AUTHORIZATION: Assistant Director, Clinical Services DATE: March 2011 _____________________________________________________________________________________ PURPOSE: For lavage of the cornea and conjunctiva to remove foreign substance from eyes. EQUIPMENT/SUPPLIES: Lactated Ringers or NS IV solution 1000cc IV tubing Towels Ophthalmic topical anesthetic (Tetracaine) with physician order Morgan Therapeutic Lens – May use when indicated per Medical Directives PROCEDURE AND/OR GUIDELINES 1. Explain purpose and procedure to the patient. 2. Have the patient lie in supine position with head tilted towards the affected side. Place towels around head to absorb flow of IV fluid. 3. Check patient allergies. Instill topical anesthetic (Tetracaine) to affected eye. 4. Irrigate by one of these methods with 1000cc fluid: a. Prime IV tubing and begin to irrigate the affected eye(s) with the IV solution at a rapid/free flow rate. Direct flow of IV solution at the inner canthus, to then wash laterally, not directly over anterior surface of the eye. 5. If the Morgan Lens is indicated, follow instructions for use a. Attach IV tubing and prime tubing. b. Instruct the patient to look down, insert lens under the eyelid. Have the patient look up, retract lover lid, drop lens in place. c. Release the lower lid over lens and start flow slowly and adjust flow as necessary. Tape tubing to the patient’s forehead to prevent accidental lens removal. Absorb outflow. Eye Irrigation 6. Removal a. Continue flow, have patient look up, retract lower lid and hold position. b. Slide the lens out. Terminate flow. c. Reassess and document response to treatment. Annual review Signature Date Signature Reviewed: Reviewed: Reviewed: Reviewed: Reviewed: Reviewed: Reviewed: Reviewed: Reviewed: Reviewed: Reviewed: Reviewed: Date March 2011 Issued Approved by: ______________________________________ Office of Student Affairs ______________________________________ Director, University Health Services ______________________________________ Medical Director SUBJECT: HUMAN IMMUNODEFICIENCY VIRUS (HIV) TESTING POLICY: The University Health Services provides confidential HIV antibody testing to Notre Dame students. Included in this service are pre-and post-test counseling by a University Health Services physician. PURPOSE: It is important to provide on campus confidential HIV testing and counseling due to the increase of occurrence of HIV disease in the United States and more specifically, among young adults. PROCEDURE: A. The student must see a physician to request HIV testing. B. Pre- and post-test counseling will be done by a UHS physician if testing is done at the Health Center. It is expected that counseling would include discussion of: 1. Determination of whether the student is at high risk; risk factors for HIV infection; risk reduction strategies. 2. Determine whether this is an appropriate time period to be tested. 3. Education about HIV disease. 4. Explanation of HIV testing: purpose, procedure for paying, performing and reporting results, type of test performed (i e ELISA, Western Blot), interpretation and safer sex practices. 5. Availability of treatment for HIV infection. HUMAN IMMUNODEFICIENCY VIRUS (HIV) TESTING 6. Possible psychological and socioeconomic consequences of testing and results. 7. Information to ensure that the student understands the risks, benefits, and alternatives to testing. 8. Information that anonymous testing is available at the Health Department. C. The physician must document on the chart whether or not the student has consented. D. A confidential lab requisition form will be utilized when results of the testing are not recorded in the student’s medical record. The top copy of the form, noting patient name and code number and the lab report noting a corresponding code number may be stored in a file maintained by the ordering physician or placed in the student’s medical chart. A standard lab requisition form will be used when the student requests a name identified HIV test. Results will be placed in the student’s medical chart. E. All test results must be obtained in person from the physician. F. A “Release of Information” form must be signed prior to any copy of the test leaving the Health Center, even if the results are given to the student. G. The student will be directed to the billing department to make arrangements for payment. Options include placing it on the student account as a Health Services charge, or paying by cash or check to University Health Services. H. In the event of a positive HIV antibody test, it is the responsibility of the physician to complete the reporting form required by the Indiana State Department of Health. (Exhibit I) Special Considerations A. Anonymous Testing 1 In Indiana, the State Board of Health must grant permission for an agency to perform anonymous testing. This Health Center does not perform anonymous testing. In South Bend, the St Joseph County Health Department performs anonymous testing. 2 3 In anonymous testing, no records are kept which could identify the person tested. In Indiana, results of anonymous testing are reported to the State Board of Health. B. Confidential Testing 1 2 3 In confidential testing, records identifying the patient are kept confidential. The names of persons who test positive for HIV are reported to the State Board of Health by the South Bend Medical Foundation. This Health Center offers confidential testing which may be requested on an anonymous testing form (DYDLIDEOHDWWKHIURQWGHVN) or on the standard lab requisition form in use. HUMAN IMMUNODEFICIENCY VIRUS (HIV) TESTING C. Confidentiality Confidentiality will be maintained in the process of ordering, drawing, billing, storing, and later the release of these test results. Failure to maintain confidentiality may result in disciplinary action up to and including termination of employment. In addition, stringent confidentiality provisions are included in Indiana law which provides for disciplinary action and Class A misdemeanor penalties for those who divulge confidential medical or epidemiological information except fewer than three specified circumstances as follows: 1 If the information is for statistical purposes and does not identify any individual. 2 If all individuals identified in the information give written consent. If the information is necessary to enforce public health laws, certain criminal sentencing provisions, or to protect the health or life of named party. Source: IC 16-1-9.5-7 (Senate Enrolled Act 9 D. HIV Reporting Indiana law requires the reporting of cases of Human Immunodeficiency Virus (HIV) to the State Board of Health except for anonymous counseling and testing sites, certain research projects and other providers approved by the Board for exemption from name reporting. Even if a site is exempt from HIV reporting, confirmed cases of AIDS must be reported to the State Board of Health which must in turn report to the Centers for Disease Control. Source IC 16-1-9.5-2 (Senate Enrolled Act 9,429 Annual Review Signature Reviewed: Reviewed: Reviewed: Reviewed: Reviewed: Reviewed: Date Signature Reviewed: Reviewed: Reviewed: Reviewed: Reviewed: Reviewed: Date Confidential Report of Communicable Disease SUBJECT: HYDROCOLLATOR AUTHORIZATION: Assistant Director, Clinical Services PURPOSE: Provide moist heat therapy. DATE: March 2012 _____________________________________________________________________________________ EQUIPMENT/SUPPLIES: Hydrocollator heating unit Hydrocollator pack 4 bath towels Thermometer PROCEDURE AND/OR GUIDELINES *Note: Hydrocollator heating unit to be checked q shift for water level to the fill line and clarity.Fill tank with distilled water only. Water temperature to be checked daily and recorded on log. Contraindictions: Acute injuries, areas of impaired circulation or sensation, anesthetized areas, over keloid skin, peripheral vascular disease. 1. Prepare patient a. Assess for fever or severe pain radiating distally or impaired circulation or sensation. If so, consult physician prior to therapy. b. Explain procedure to patient. 2. Prepare equipment a. Use tongs to obtain Hydrocollator pack from not water bath. b. Wrap pack in at least four (4) large bath towels, to cover the pack with a minimum of six layers on both sides. c. Use tape to close towel wrapped pack. d. You may place towel wrapped pack in a pillowcase. 3. Treatment a. Apply towel wrapped pack to patient as ordered/indicated. b. Adjust position of patient to maintain contact of pack to affected area. c. For application to lower back, have patient lie on their side or sit upright in HYDROCOLLATOR a chair and apply pack to designated area. Use pillows to support pack. DO NOT ALLOW PATIENT TO LIE ON HYDROCOLLATOR PACK. the packs are filled with sand and they maintain their heat for long periods of time. d. Recheck patient and Hydrocollator pack frequently for placement and skin response. e. Limit treatment to 30 minutes q 2 hours, or as ordered by a physician. f. Assess and document patient’s response to treatment. 4. Remove pack a. Unwrap hydrocollator pack from towels, return pack to hot water bath. Maintainence 1. Use distilled water to fill Hydrocollator heating unit. 2. Maintain water level in Hydrocollator heating unit to designated line. Check this level every shift. 3. Clean heating unit at the end of each semester (December, May and August) and as needed. Shut off Hydrocollator Heating Unit and unplug it. Remove packs from unit. Place packs in a plastic bag and place in the freezer to maintain moisture. Do not allow them to dry out. Allow water to cool, then empty unit. Cleanse inside of unit with approved solution and steel wool. Rinse with water. Disinfect inside of unit with approved solution. Rinse with water. Refill heating unit with DISTILLED WATER. Plug unit in and turn unit to the on position. Replace packs into unit to heat. ANNUAL REVIEW Signature Date Signature Reviewed: Reviewed: Reviewed: Reviewed: Reviewed: Reviewed: Reviewed: Reviewed: Reviewed: Reviewed: Reviewed: Reviewed: Date Sample log ( reduced size): SUBJECT: IMMUNIZATION ADMINISTRATION AUTHORIZATION: Assistant Director, Clinical Services DATE: July 2013 _____________________________________________________________________________________________ PURPOSE: To update immunity for enrollment or athletic eligibility, or to protect from illness or injury. To provide vaccination information describing the potential benefits and risks as required by law. EQUIPMENT/SUPPLIES: Disposable needles and syringes, gloves, alcohol wipes, VIS sheets. PROCEDURE AND/OR GUIDELINES A. RN to perform B. Follow immunization manufacturer prescribing information C. As required under the National Childhood Vaccine Injury Act (42 U.S.C. 300aa-26), all health care providers in the United States who administer any vaccine containing diphtheria, tetanus, pertussis, measles, mumps, rubella, polio, Hepatitis B, Haemophilus influenza type b (Hib), or varicella shall, prior to administration of each does of the vaccine, provide a copy of the relevant vaccine information materials that have been produced by the Centers for Disease Control and Prevention (CDC). a. To the parent of legal representative of any child to whom the provider intends to administer such a vaccine, and b. To any adult to whom the provider intends to administer such vaccine. D. Administration of vaccines a. Wash hands b. Gloves are optional. c. To minimize risk of contamination, disposable needles and syringes will be used. The size of each will depend on amount and route of delivery. d. Needles and syringes will be discarded in labeled, puncture proof containers. e. Different vaccines will not be mixed in same syringe. IMMUNIZATION ADMINISTRATION E. Storage, handling and reconstitution of vaccines. a. Follow recommendations included in the product packaging to assure F. Documentation a. On clinic data record to include: i. Date and time ii. Name of vaccine including dose, route, site, manufacturer vaccine number with expiration date, signature of RN. iii. Vaccine label for documentation recommended. b. Charge for each vaccine given is documented on encounter form. G. Immunizations for international travel a. Refer to Travel Nurse consultant at UHS. ) ANNUAL REVIEW Signature Date Signature Reviewed: Reviewed: Reviewed: Reviewed: Reviewed: Reviewed: Reviewed: Reviewed: Reviewed: Reviewed: Reviewed: Reviewed: Date SUBJECT: IMMUNIZATIONS: VACCINE ADVERSE EVENT REPORTING SYSTEM (VAERS) AUTHORIZATION: Assistant Director, Clinical Services DATE: March 2011 _____________________________________________________________________________________ POLICY University Health Center staff will report all reports of adverse events following the administration of any US licensed vaccine, in all age groups, including but not limited to the events mandated for reporting by the National Childhood Vaccine Injury Act of 1986 (NCVIA). PURPOSE To establish an accurate database of adverse events associated with vaccines. To provide feedback which helps direct initiatives in the development of vaccines and improving the safety and effectiveness of current vaccines. SPECIAL INFORMATION The National Childhood Vaccine Injury Act (NCVIA) requires health care providers to report adverse events (possible side effects) that occur following vaccination, so the Food and Drug Administration (FDA) and Centers for Disease Control and Prevention (CDC) established the Vaccine Adverse Events Reporting System (VAERS) in 1990. VAERS is a national passive vaccines licensed in the United States. VAETS data are monitored to: Dectect new, unusual, or rare vaccine adverse events. Monitor increases in known adverse events. Identify potential patient risk factors for particular types of adverse events. Identify vaccine lots with increased numbers or types of reported adverse events. Assess the safety of newly licensed vaccines. The Vaccine Injury Table defines the events that are legally reportable (EXHIBIT I). The table lists specific injuries or conditions and the time frame in which they occur after the vaccine administration. PROCEDURE A. Encourage patients to inform UHC professional staff of adverse events following immunization. B. The NCVIA requires the following events to be reported: 1. Any event set forth in the Vaccine Injury Table that occurs within the time period specified or within seven (7) days. a. Access table on CDC website, VAERS related quick links. 2. Any event listed in the manufacturer’s package insert as a contraindication to subsequent doses of the vaccine. In addition, VAERS accepts all reports of any suspected clinically significant adverse event occurring after the administration of any vaccine. Reporting of an event does not necessarily imply that a vaccine(s) caused the event. C. A report is made by completing and mailing a VAERS report form (EXHIBIT II) The report form is a single page, pre-addressed, postage-paid form for pertinent information including a narrative description of the adverse event. The forms are located in Clinic I desk drawer. D. Reports may also be filed online by accessing CDC website, VAERS related quick links. E. Call 1-800-822-7967 (24 hour recording) for questions regarding the reporting requirements, completion of VAERS report form or if additional forms are needed. Annual Review Signature Date Signature Reviewed: Reviewed: Reviewed: Reviewed: Reviewed: Reviewed: Reviewed: Reviewed: Reviewed: Reviewed: Reviewed: Reviewed: Date SUBJECT: INJECTABLE TRAINING ARM AUTHORIZATION: Assistant Director, Clinical Services PURPOSE: To simulate the human condition to teach and practice venipuncture and injection Techniques for IV catheter insertions and intramuscular injections. DATE: March 2011 _____________________________________________________________________________________ PROCEDURE AND/OR GUIDELINES A. General Instructions for Use. Refer to Instruction Manual. B. Care of Simulator 1. Treat with care to avoid damage. 2. Remove pinch clamps and IV sets from arm. 3. Use tap water to flush venous system. 4. Wash outside of arm with a mild solution of Ivory liquid detergent and water. 5. Remove excess water from the arm by raising the hand, lowering the shoulder and draining it into a sink. 6. Always remove the metal pinch clamps from shoulder tubing and drain excess Water from the veins before storing. 7. Do not place simulator on any kind of printed paper or plastic as this will permanently stain the arm. C. Cautions 1. DO NOT use dull or burred needles as these will cause leaks in the system. burred needles will cause permanent damage. Use smaller needles (20-25 gauge). 2. Use only 500cc of Infusion Fluid as a larger amount will increase the pressure of the venous system, resulting in leaks. 3. DO NOT clean the simulator with solvents or corrosive material as they will damage it. 4. DO NOT use the subcutaneous injection. INJECTABLE TRAINING ARM SPECIAL INSTRUCTIONS: A. B. C. D. E. F. Use 20-25 gauge needles only, to prolong the life of the skin and veins Not to be used for Intradermal injection practice. For IM injections, use air as the injectant since distilled water cannot be drained. Treat with care and follow care instructions to prolong use. Arm may be used for practice without the setup of fluid. Arm to be kept with clinical services training materials. ANNUAL REVIEW: Signature Date Signature Reviewed: Reviewed: Reviewed: Reviewed: Reviewed: Reviewed: Reviewed: Reviewed: Reviewed: Reviewed: Reviewed: Reviewed: Date SUBJECT: INSTRUMENT PROCESSING AND STERILIZATION AUTHORIZATION: Assistant Director, Clinical Services DATE: March 2011 _____________________________________________________________________________________ POLICY Sterilization of reusable sharps and other equipment having contact with blood or other potentially infectious materials (OPIM) is an important aspect of infection control. Steam sterilization will be used for all heat stable, nondisposable instruments requiring sterilization before each use. Records documenting equipment description, maintenance, monthly biological testing, length of timing plus temperature for the sterilization cycle will be maintained. PURPOSE To provide guidelines for the cleaning, packaging and steam sterilization of items requiring sterilization. To assure sterility of items. To assure proper functioning of the sterilizer. PROCEDURE A. CLEANING AND LUBRICATION Instruments must be thoroughly cleaned prior to sterilization. Soaking contaminated Instruments will prevent drying of blood and OPIM and will facilitate cleaning. 1. Each morning (Mon-Fri; weekends, prn) night shift PCA or designee will prepare a fresh solution of the enzymatic presoak following the manufacturer’s instructions, and place in soaking pans. Discard the used solution each evening. Wear gloves and a face shield. 2. Transport instruments immediately after use in a closed rigid plastic container to the utility room. With the instruments in a wide open position, carefully place them into the enzymatic solution. Gloves must be worn as minimum PPE. INSTRUMENT PROCESSING AND STERILIZATION 3. The RN will pre-label the new package using a permanent marker with; a. Name of instrument (i.e. curved or straight scissors; hemostat, forceps with or without teeth). b. Date of sterilization. c. Clinic location. 4. Soak instruments for a minimum of five (5) minutes and up to twenty (20)minutes. 5. Inspect and manually clean each instrument to remove any residual soil. Instruments should be cleaned underwater using a nonabrasive brush. Spatter or aerosols generated during hand scrubbing must be minimized. Rinse instruments thoroughly. Wear utility gloves, face shield and a protective gown. 6. Place instruments on an absorbent towel. Allow to dry thoroughly. 7. Lubricate hinged instruments with spray lube. 8. Decontaminate utility gloves, cleaning brush, and containers for transporting and soaking instruments each evening. B. PACKAGING Packaging will permit sterilization to take place and provide delivery of its contents without contamination. Cleaned instruments are still considered contaminated. Wear gloves. 1. Place dried instruments into pre-labeled packages. Place with the handle towards the end which opens. Place a small gauze square over any sharp edges. Hinged instruments must be held in an opened position with gauze. Place the gauze and sharp edge toward the opaque side, allowing view of the instrument through the clear side. This should keep the package from being punctured and contaminated. 2. Seal the bags following the package instructions. C. SHELF LIFE Sterilized instruments have a shelf life of one (1) year unless the integrity of the package has been compromised. 1. Sterile items dropped into any type of liquid or items with liquid spots anywhere should be considered contaminated. 2. Any item with packaging material that is damaged, torn stained or heavily Wrinkled should be considered contaminated. D. STERILIZATION PROCESS Sterilization provides the highest level of assurance that an item is free of viable microbes. Manufacturer’s directions will be followed. INSTRUMENT PROCESSING AND STERILIZATION 1. Reservoir Fill reservoir using distilled water to reach the base of the safety valve, without covering it. 2. Preparation of Materials Clean and package instruments following protocol as above. 3. Load Place packages on the tray(s) in the chamber, one level deep only. CAUTION: Never overload or crowd chamber. Do not let packages come in contact with door or sides of chamber. 4. Close the door securely and check that the “DOOR CLOSED” light is on. 5. Turn on the ROCKER SWITCH on the bottom right front panel. 6. Press the START key. The “dress” symbol should be lit on the top row of the control panel. WATER INLET is displayed until the correct volume of water is automatically introduced into the chamber. The sequence of operations (fill, heat, steam, vent and dry) happen automatically. The time and temperature and pressure parameters are pre-programmed. 7. When the cycle is complete a TONE will sound for five seconds and the START light will turn off. 8. Open the door and remove the contents, using thick cotton gloves. 9. Turn off the ROCKER SWITCH (front lower right). E. BIOLOGICAL INDICATORS A biological indicator is a highly resistant bacterial endospore. Biological indicators are used to monitor mechanical function and operator technique to determine sterilization efficiency. If the culture does not grow, the autoclave was effective in sterilization. 1. The adequacy of the autoclave is checked by having “Autoclave Check Cultures” performed monthly on ampules of bacterial spores that have been subjected to the sterilization process. 2. The kits are stored in the 1st floor dirty utility room at room temperature. 3. Follow the procedure for “Autoclave Check Culture: A Means of Verifying Sterilization Equipment Adequacy”. (Exhibit I) 4. Complete a lab requisition form to process the Check Culture (Exhibit II). Keep the pink copy of the requisition in UHS Medical Director orange lab folder until results are returned. 5. A print-out from the autoclave of that sterilization cycle which includes the biological testing date, length of timing and temperature for the sterilization cycle should be kept with the pink copy (above). 6. When results of the autoclave culture return from South Bend Medical Foundation, document on the Autoclave Maintenance Record (P:Nursing/NursingForms/Autoclave Maintenance Record) in the cabinet in the autoclave room. Then forward the results and pink copy of the requisition to the Assistant Director, Clinical Services. INSTRUMENT PROCESSING AND STERILIZATION Records of all autoclave check cultures will be retained for at least 2 years. 7. If a culture grows the enospore, all packages with that date of testing and all subsequent packages will be removed from patient care areas and will need to be resterilized. The nurse will submit a written documentation of the failure to the Assistant Director, Clinical Services. The autoclave manufacturer will be notified and requested to immediately check for proper use and function and the spore test repeated. G. MAINTENANCE AND CLEANING 1. DAILY: Clean door gasket with alcohol and a soft cloth. 2. WEEKLY: Clean the water sensor located in the rear of the inside of the chamber with a damp cloth or sponge. It is especially important to wipe the sides and the tip, to remove any dirt or debris. Clean the safety valve located in the water reservoir. (It is necessary to allow the steam pressure to escape, to prevent it from becoming blocked. a. Operate the sterilization cycle. b. Allow a pressure of 30 psi to build up in the chamber (check printout). c. Turn the unit off. Use the padded gloves provided and keep clear of steam discharge to avoid burns. d. Remove the cover from the water reservoir. e. Pull the ring of the safety valve using a tool, open for 10 seconds, then release. f. Turn the unit back on and press the STOP key to abort and vent the cycle. g. Wait until pressure decreases to zero, then open the door. h. Document on Autoclave Maintenance Record. 3. Monthly: a. Remove trays and holder and clean with mild detergent and soft cloth, rinsing immediately. b. Clean inside of chamber, copper tubes and reservoir with “Chamber Brite”. c. Spread the contents of a packet in a straight even line along the bottom of the chamber, from back to front. d. Select program with scissor symbol on the top row of the control panel. e. At the end of the exhaust cycle water will self drain. f. Fill the reservoir with distilled water. g. Repeat the sterilization cycle (as in “d”, above). 1. During this second cycle, clean the air jet located in the water reservoir by manipulating the air trap wire in and out 10 times. INSTRUMENT PROCESSING AND STERILIZATION h. At the end of the exhaust cycle the water must be manually drained. i. Turn off and allow to cool. j. Remove the tray holder, rinse and wipe the interior of the chamber with a damp cloth. k. Fill the reservoir with distilled water. l. Press the manual water fill button (next to START on control panel) and allow a small amount of water (2-4 ounces) to fill chamber and flush out the fill tube. m. Put 2 drops of oil on the two door pins and door tightening bolts. n. Wipe outside and electrode with soft cloth. o. Drain water from reservoir and refill with fresh distilled water. 4. Semi-Annually: Check air filter in June and December of each year. Replace as needed. ANNUAL REVIEW Signature Date Signature Reviewed: Reviewed: Reviewed: Reviewed: Reviewed: Reviewed: Reviewed: Reviewed: Reviewed: Reviewed: Reviewed: Reviewed: Date SUBJECT: INTERNATIONAL TRAVEL CONSULTATION PROCEDURE AND PATIENT EDUCATION PROTOCOL AUTHORIZATION: Assistant Director, Clinical Services DATE: June 2014 _____________________________________________________________________________________ PURPOSE: To provide educational resources for students traveling to international travel destinations for University purposes. To recommend and administer immunizations to patients seeking protection from vaccine preventable diseases. To provide appropriate documentation to individuals receiving vaccinations. To research the patient’s personal medical history and offer appropriate prescriptions for prevention or treatment of various diseases associated with the country traveling to. PROCEDURE AND/OR GUIDELINES The CDC travel site is used for all travel vaccine recommendations given in the travel clinic. Travax (Shoreland) and Stay Healthy When You Travel (Sanofi Pastueur) websites are also used for patient information and education purposes. Immunization dosages, intervals, routes of administration, etc. are based upon manufacturers’ recommendations. The travel clinic record will be completed by a travel nurse consultant and co-signed by the travel physician. Patients with special medical needs, or who require alteration in vaccines, dosages, intervals, etc., must be referred to a physician. For All Immunizations RN will: Explain procedure(s) to patient. Review previous immunization records and provide vaccine recommendations. Provide patient with written Vaccine Information Statement (VIS) sheets for each vaccine needed. Address questions and concerns patient may have about vaccinations, travel, etc. Complete Travel Clinic Record to rule out any contraindications prior to administration of any vaccines. If there are any contraindications to any vaccine do not administer the vaccine and recommend patient contact primary care provider or consult with UHS physician. Administer vaccines. Complete travel clinic sheet, sign, and stamp travel physician signature if all responses are negative and no follow up care needed. If not,send to appropriate physician for review and signature. Review Health Questionnaire brought to appointment by student and complete necessary documentation. Form is sent back to appropriate department by interoffice mail. Any concerns regarding physical health, refer to UHS physician. Complete and provide patient with International Travel Certificate of Vaccination for Yellow Fever Vaccine. Instruct patient to wait 20 minutes after vaccine administration. For All Prescription Medications: RN will: Review medication allergy history and current medication list. For any concern regarding possible medication allergy, contraindication, or potentially negative interaction consult with or refer back to travel physician. Travel prescriptions for medication will be provided using the CDC guidelines and recommendations for the country specific destination. All exceptions or concerns regarding medication dosage, contraindications or related questions will be routed to the travel physician. ANNUAL REVIEW: Signature Date Signature Reviewed: Reviewed: Reviewed: Reviewed: Reviewed: Reviewed: Reviewed: Reviewed: Reviewed: Reviewed: Reviewed: Reviewed: Date SUBJECT: INTRADERMAL INJECTION SIMULATOR AUTHORIZATION: Assistant Director, Clinical Services PURPOSE: To provide realistic means of demonstrating and practicing intradermal injections. DATE: March 2011 _____________________________________________________________________________________ EQUIPMENT/SUPPLIES: (List Equipment or Supplies involved here) PROCEDURE AND/OR GUIDELINES A. General Instructions for Use 1. Insert a 27-gauge needle , ½” long, at a 10-15 degree angle to the skin. 2. Inject fluid (0.1cc distilled water) into 1 of the 8 spots on the arm. The injected fluid should produce a small bleb just under the skin which causes a visible welt on the outer skin surface. 3. Remove fluid from welt by reinserting a needle without the syringe attached. B. Care of the Simulator 1. Should leakage occur, inject the supplied sealant fluid into the blistered dot. 2. Allow to set overnight before withdrawing excess fluid and using the site again. 3. Clean with a mild solution of Ivory liquid detergent and water. 4. Do not use abrasive or chemical cleaner. 5. Do not place simulator on any kind of printed paper or plastic. 6. Do not use ball-point pen on simulator. 7. Do not use dull or burred needles as these will cause leaks. SPECIAL INSTRUCTIONS A. The arm features eight (8) spots for practicing injections. B. Use distilled water as the injection fluid. C. Simulator to be stored with other clinical teaching materials in original case. INTRADERMAL INJECTION SIMULATOR ANNUAL REVIEW Signature Date Signature Reviewed: Reviewed: Reviewed: Reviewed: Reviewed: Reviewed: Reviewed: Reviewed: Reviewed: Reviewed: Reviewed: Reviewed: Date March 2011 Reviewed Approved by: ______________________________________ Office of Student Affairs ______________________________________ Director, University Health Services ______________________________________ Medical Director SUBJECT: Isolation of Patients POLICY: Patients who are suspected to be contagious to others will be separated from the rest of the University Health Services patient population PURPOSE: To prevent the transmission of infectious/contagious illness. GUIDELINES: Visual alerts are posted in waiting and reception locations requesting patients with symptoms to sit in designated and separate area. Inpatients and observation patients with known or suspected contagious illness will be placed in singlepatient rooms on IOU. Patient education is posted in common areas on topics of respiratory hygiene practices. Hand hygiene products and tissues are available in waiting and reception locations. Annual Review Signature Reviewed: Reviewed: Reviewed: Reviewed: Reviewed: Reviewed: Date Signature Reviewed: Reviewed: Reviewed: Reviewed: Reviewed: Reviewed: Date March 2011 Issued Approved by: ______________________________________ Office of Student Affairs ______________________________________ Director, University Health Services ______________________________________ Medical Director ______________________________________ Assistant Director, Clinical Services SUBJECT: ISOTRETINOIN (ACCUTANE) THERAPY POLICY: Isotretinoin Prescriptions will be initiated according to the iPLEDGE recommendations. PURPOSE: In order to comply with prescribing requirements for this medication, students who are prescribed Isotretinoin by a University Health Services (UHS) physician will have their required information kept up to date on the iPLEDGEprogram.com website by physicians (or their designee) and the pharmacist. PROCEDURE: A. Students make an appointment with a University Health Services physician. 1. Gender-Specific iPLEDGE educational kit is given and explained, proper forms are completed. a. Isotretinoin forms kept at Triage A, bottom drawer in red folders. b. Nurse initiates forms prior to student seeing physician. c. Kits kept in Dr. Moskwinski’s office and are ordered by physician as needed. d. The iPLEDGE forms are assembled and fastened to the inside back cover of the student’s medical report with vertical clip in the following order: iPLEDGE first visit form (Exhibit I) Clinic data sheet with Isotretinoin Transcription Label (Exhibit II) ISOTRETINOIN (ACCUTANE) THERAPY e. Isotretinoin label placed on front of medical record, lower left corner. 2. Appropriate (gender-specific) labs are ordered (per Exhibit II) a. Diagnosis code “Acne 7060” is noted on lab requisitions with comment: “return q month.” 3. Physician marks diagnosis “Acne on Isotretinoin” on encounter form. a. Diagnosis code V5869 entered into Medicat by Front Office staff. 4. Lab results a. Reviewed by UHS physician Annual Review Signature Date Signature Reviewed: Reviewed: Reviewed: Reviewed: Reviewed: Reviewed: Reviewed: Reviewed: Reviewed: Reviewed: Reviewed: Reviewed: Date SUBJECT: INTRAVENOUS THERAPY AUTHORIZATION: Assistant Director, Clinical Services PURPOSE: To provide access for the delivery of IV fluids and medications. To maintain or restore fluid and electrolyte balance. To provide intravenous access when frequent lab draws are necessary. DATE: March 2011 _____________________________________________________________________________________ PROCEDURE AND/OR GUIDELINES A. VENIPUNCTURE 1. Equipment a. Gloves-unsterile (minimum PPE) b. Waterproof drape c. Tourniquest or BP cuff d. Povidone – iodine prep e. Alcohol prep pads f. IV device of choice g. Plastic tape h. Tegaderm dressing (small) i. IV fluids and tubing (premed) or Reseal cap and 1 syringe sterile saline. j. IV pole or pump k. Gauze sponges l. Sharps container 2. Selection of Veins and IV Site Preparation (Exhibit I) a. Wash hands – wear gloves. b. Provide patient instructions. c. Distend the vein before venipuncture is attempted. Apply d. 3. B. LABELING tourniquet 6-8 inches above insertion site or apply BP cuff and inflate it to approximately 80-90mm/HG. (Apply tight enough to occlude venous return while maintaining arterial flow.) To further distend the vein when necessary, have the patient open and close fist; lower the patient’s arm and gently pat the skin over the vein; wet the skin well with alcohol; or apply warm, moist compress for 10-15 minutes. Examine the arm and select possible infusion site. Place a drape under the arm. Using friction, cleanse site with Povidon – iodine and allow to dry for 30 seconds. If necessary for visibility, wipe away partially with alcohol and dry completely. Work in circular motion from the center outward. Do not touch the site prepped. Note: If the patient has an allergy to Povidone-iodine, use only alcohol swabs (2-3). Use a vigorous scrub for at least one (1) minute. Start the IV at the distal end of the vein if possible. Avoid veins that feel hard or have nodules above the intended site, previously used veins or areas distal to previous sites. Refer to picture of accessible sites in the hand and arm (metacarpal, cephalic, basilica or median). Do not shave over the insertion site. Shaving may cause micro abrasions, exposing the skin to bacteria. The antiseptic will clean the skin effectively. Shaving, however may be necessary where the tape is applied. Insertion of device a. Technique is dependent on infusion device selected. See attached procedures for catheters currently in use. (Exhibit II & III) b. Always use aseptic technique. c. Always inspect the needle for integrity. d. Change sites every 72 hours. e. If venipuncture is unsuccessful after two attempts, ask another RN or physician or ND Fire Department staff to assist. f. Upon completion, discard stylet into sharps container, discard gloves and supplies appropriately and wash hands. g. Document in Nurses Notes & IV Therapy Record per procedure. 1. IV site a. Label Tegaderm dressing with date and time the IV is started, the gauge, length, and type of IV device and initials of the person starting the IV. Change site routinely every 72 hours. 2. Tubing a. Label tubing with start and discard date and time an RN initials. Change tubing every 72 hours. Tubing used for intermittent administration of IV meds should be changed every 72 hours. b. If patient is an outpatient, designate and label tubing and pump for re-use for individual patient. Change tubing prn and q 72 hours. 3. IV Bag a. Label bag with start and discard date and time, rate of flow and RN initials. IV bags must be changed at least every 24 hours. b. Any medications added to the IV bag must be identified. Label IV bag with name of medication, amount, date, time and initials of RN. c. IV solution used for intermittent medication administration must be labeled with start and discard time and RN initials or discarded after initial use. C. DOCUMENTATION 1. Nurse Notes: Documentation is required for initiation of IV Therapy, Rational for restarts and when the expected outcome is not met. a. Date and time b. Number of insertion attempts c. Reference use IV Therapy Record (eg: 7-19-07 0800 IV started x 2 attempts. Tolerated________. See IV Therapy Record) D. 2. IV Therapy Record: See Exhibit. Documentation in Nurses Notes is required when expected outcome is not met. The RN must initial and sign IV Therapy Record. REMOVAL OF IV DEVICE 1. Equipment a. Gloves – unsterile b. Alcohol prep pad c. Gauze sponges or cotton ball. d. Tape or bandage e. Sharps container. 2. Procedure a. Wash hands – wear gloves b. Stop IV infusion when applicable. c. Remove site dressing being careful not to dislodge catheter. d. Remove catheter: 1. Place gauze sponge over insertion site and carefully remove catheter and inspect integrity of catheter. 2. Apply pressure over site until bleeding stops. 3. Apply tape or bandage. e. Cleanse any dried blood on skin. f. Document on IV Therapy Record. Additional entry is necessary in Nurses Notes if site does not meet expected outcome. E. ADDITION OF MEDICATIONS TO IV SOLUTIONS 1. 2. 3. 4. 5. Mixing should be done in a low traffic area. Wipe countertop with alcohol or germicidal solution. Wash hands. Check physician’s order/allergy history. Use asceptic technique in adding diluent to additive, adding medication to IV solution or using the ADD-Vantage system. 6. Gently agitate the solution to mix the medication upon dilution or when adding medication to IV solution. 7. Label IV solution: a. Patient’s name b. Room number c. Date & time d. Name of additive and does e. Rate of administration f. Nurse’s initials F. ADMINISTRATION OF INTRAVENOUS MEDICATIONS 1. Professional RN staff may administer IV medications in the following ways as ordered by a physician: a. IV push If administering med through a reseal, flush site with 1cc NS to check Patency, administer medication, flush with 1cc NS.. b. IVPB (secondary infusion) Set up with 50-100cc of NS or D5W to primary tubing and “piggyback” antibiotic with secondary tubing. Check patency of site prior to infusion of med. Post infusion of med, flush tubing with NS or D5W. Directly into the IV bag. 2. Document on IV Therapy Flowsheet G. H. ADD-VANTAGE SYSTEM (See Procedure) IV RESEAL or INT This intravenous access is for intermittent or periodic infusions of medications or fluids. It may also be used for some blood samples for lab analysis. Maintain patency by flushing site with 1cc NS every 8-12 hours. If patient is outpatient with visits>q12 hours, flush with 2cc Heparin 1:100u. NOTE: If there is redness at site or if resistance is met, do not flush. Remove reseal and restart prn or contact physician to discontinue as appropriate. Document on IV Therapy Flow Sheet. I. IV INFUSION PUMPS J. 1. Model: Baxter Flo-Gard 6201 Volumetric Infusion Pump. Reference Operator’s Manual, Inpatient Unit Clean Utility Room. 2. Store unused pumps OFF, covered and plugged into a standard outlet. COMPLICATIONS 1. Infiltration a. Causes – Displaced catheter, enlarged puncture wound b. Signs and Symptoms – Swelling, tenderness above IV site, decreased skin temperature around site, fluid continues to infuse even when vein is occluded, backflow of blood absent, and flow rate slow or stopped. c. Interventions – Apply warm, moist heat, elevate arm, restart the infusion at another site, and document observations and actions. 2. Infection a. Causes – underlying phlebitis, contaminated equipment, prolonged placement of an IV device (catheter, tubing or solution), and faulty aseptic techniques. b. Signs and Symptoms – Redness, warmth, tenderness and swelling at site. Possible exudate of purulent material. c. Interventions – Discontinue the infusion, obtain culture of drainage at the insertion site and tip of catheter, cleanse site and apply bacteriostatic ointment, wash hands and replace gloves, restart infusion if indicated, and document observations and actions. Notify physician. 3. Phlebitis a. Causes – Movement of catheter within vein and medications that irritate the vein. b. Signs and Symptoms – Area along vein red, tender and warm, vein hard and cordlike when palpated, decreased flow rate, and irritation with infusion. c. Interventions – Remove IV device, apply warm soaks, notify doctor, restart IV infusion in a different arm and document observations and actions. 4. Hematoma a. Causes – Result from uncontrolled bleeding at a venipuncture site, and not enough pressure at site when removing IV catheter. b. Signs and Symptoms – Hard, painful lump at site. c. Interventions – Apply direct pressure with a sterile dressing and elevate affected arm, check site frequently for any impairment and apply ice immediately to prevent enlargement. 5. K. Mechanical Failure (Sluggish IV flow) a. Causes – Catheter may be lying against the side of the vein cutting off fluid flow, there may be a clot at the end of the catheter, infiltration, and kinking of the tubing or catheter. b. Signs and Symptons – Possible swelling, redness, etc. at site of infusion. c. Interventions – Assess for signs of local infiltration, remove tape and check for kinking of catheter tubing, pull back catheter because it may be lying against the wall of the vein, move the patient’s arm to a new position, lower solution container below the level of the patient’s heart and observe blood flowback, and may need to restart infusion at another site. CALCULATIONS OF FLOW RATE 1. When calculating the flow rate of IV solutions, the number of drops required to deliver 1 ml varies with type of administration set used. Check directions on set. 2. Calculate infusion rate utilizing the following formula: Drop/minute = total volume infused x drops/ml total time for infusion in minutes Example: Infuse 150ml. of D5W in 1 hour (set indicates 10 drops/ml) 150 x 10 = 25 drops/minute 60 minutes 3. As a quick guide, refer to the chart below: Drops/Minute To Infuse Company Name Baxter Interlink Drops/ml 10 500 ml/24hr 21 ml/hr 1,000 ml/24hr 42 ml/hr 1,000 ml/20hr 50 ml/hr 1,000 ml/10hr 100 ml/hr 1,000 ml/8hr 125 ml/hr 1,000 ml/6hr 166 ml/hr 3 gtts/min 7 gtts/min 8 gtts/min 17 gtts/min 21 gtts/min 28 gtts/min INTRAVENOUS THERAPY ANNUAL REVIEW Signature Date Signature Reviewed: Reviewed: Reviewed: Reviewed: Reviewed: Reviewed: Reviewed: Reviewed: Reviewed: Reviewed: Reviewed: Reviewed: Date University of Notre Dame University Health Services Name:_____________________________ IV THERAPY ND ID#:______________________________ Site Codes: R-Right UA-Upper arm L-Left FA-Forearm H-Hand A/C-Antecubital Date Initials Time Bag# Signature Activity Codes: S-Start D-Discontinue R-Restart C-Rate Change B- Bag Change Activity Site Initials Catheter type: A-Insyte B-Intima Catheter size type Signature Change schedule: Site - Q72 hours Bag - Q24 hour Solution/INT Rate Initials Initials Amt. Infused Signature SAS 12/5/2011 University of Notre Dame University Health Services Name:_______________________ NDID#:________________________ IV THERAPY Primary Tubing Date Time Initial Date Secondary Tubing Time Initial Date Time Initial Date Time Initial Site checks are done at a minimum of every 2 hours. Documentation is required once per shift when status meets expected outcome. All exceptions, restarts or discontinuation of therapy require additional entry. EXPECTED OUTCOME: Site is without redness, swelling, pain, hardness, drainage or palpable venous cord. Date Initials Time = Meets expected outcome Key Signature Initial KEY: I = IV/INT removed, catheter intact Date Initials Time Key Signature Initials * = See nurse's notes Date Initials Time Key Initials Signature SAS 12/5/2011 SUBJECT: KINETEC Performa Continuous Passive Motion (CPM) Exerciser AUTHORIZATION: Assistant Director, Clinical Services DATE: March 2012 _____________________________________________________________________________________ PURPOSE: Decrease pain, swelling, joint stiffness, adhesions and contractions during rehabilitation following knee surgery. PROCEDURE: 1. Physician writes orders for use of CPM: (See Exhibit 1: P:\NURSING\NURSING FORMS\Inpatient Chart forms/CPM_PhysicianOrders) a. Extension limit (-3 to 125) NOTE: Full extension = -3. There is a 5 limit between extension and flexion. b. Flexion limit (130 to 2) c. Speed (1 to 7) d. Force (movement inversion load 0-6, mini to maxi) e. Times (duration and frequency) f. Foot plate position in position of comfort for patient 2. Prepare CPM Machine (refer to user manual) a. Plug in, turn power on (“on” is the minus sign), turn patient lock-out switch off (“off” is without “X”). b. Enter prescribed settings into handset: Simultaneously press keys PAUSE EXT and PAUSE FLEX to unlock the hand control settings. Select EXTENSION limit by pressing the top left extension key, then + or - arrow. Select FLEXION limit by pressing the top right flexion key, then + or - arrow. Select the SPEED button, then + or - arrow. Select FORCE button, then + or - arrow. Simultaneously press keys PAUSE EXT and PAUSE FLEX to lock the hand control settings. Turn the patient lock-out switch on, switch to picture without “x”, on the base of the exerciser. c. Place the thigh slide on the same side as the leg to be mobilized. To change legs: withdraw the hip bar from thigh support bar and slide the hip bar to the correct side of the exerciser. Tighten all 3 knobs. KINETEC Performa Continuous Passive Motion (CPM) Exerciser d. e. Place protective padding over CPM. Set CPM @ 30 of flexion. 3. Prepare patient (refer to user manual) a. Instruct patient in purpose and use of apparatus. b. Measure in cm. or inches the length of the patient’s femur. Adjust the thigh support to this measurement. c. Push the foot plate up to the patient to a position of comfort and tighten the knob. d. Make sure all knobs are tight. e. Instruct patient in Start/Stop/Reverse function of the hand control. 4. Notify the attending or on-call physician as appropriate if the patient experiences increasing pain, swelling, etc. 5. Document CPM therapy on Flow Sheet. 6. Safety Measures a. The hand control should always be given to the patient. b. The switch on the base of the unit should be kept in a locked position when the hand control is given to the patient. 7. Cleaning/Infection Control a. Turn unit off, disconnect from power source. b. Spray approved disinfectant onto the surfaces (plastic leg support, plastic covers, and metal parts). c. Use a new padding system for each patient. d. The Adjust-a-Cinch straps are reusable and only need to be replaced when soiled. These may be washed in soap and water. 8. Maintenance/Breakdown Notify Clinical Services Administrator. 9. Charges Daily use charge Padding EQUIPMENT/SUPPLIES: KINETIC Performa Universal Quilted Pad System Adjust-a-Cinch Straps AUTHORIZED PERSONS: Physician prescribes settings for set up, duration and frequency of each session per written orders. RN: programs and implements settings, instructs patient in use. RN and PCA: monitors use, measures patient response and follows infection control measures KINETEC Performa Continuous Passive Motion (CPM) Exerciser ADDITIONAL CONSIDERATIONS: Manufacturer’s guidelines for use will be followed, unless otherwise defined. Remember you are programming the machine’s angle - NOT THE PATIENT’S KNEE. ASSOCIATED POLICIES or PROCEDURES or FORMS: CPM_Physician Orders CPM_Flow Sheet Kinetec Performa Manual located in the IOU Nurses’ Station and the Clinical Nurses’ Station ANNUAL REVIEW Signature Reviewed: Reviewed: Reviewed: Reviewed: Reviewed: Reviewed: Date Signature Reviewed: Reviewed: Reviewed: Reviewed: Reviewed: Reviewed: Date SUBJECT: LIQUID NITROGEN AUTHORIZATION: Assistant Director, Clinical Services DATE: June 2014 PURPOSE: Liquid nitrogen is available for physician use in the treatment of certain dermatologic conditions and wart removal. PROCEDURE AND/OR GUIDELINES The physician will apply the liquid nitrogen to the affected area using one of two methods. A cotton tipped applicator. Nitrospray cryosurgery instrument with a reusable tip. Appointments for procedures requiring the use of liquid nitrogen will be scheduled on Tuesdays through Fridays. Liquid nitrogen will be obtained from the Radiation Laboratory on campus by the Assistant Director, Clinical Services or other designated staff member. Liquid nitrogen is obtained on Mondays or early Tuesday morning. Using Personal Protective Equipment (PPE) (goggles and leather insulated gloves), fill the large isotherm liquid nitrogen container with 2 liters of liquid nitrogen. Amount of liquid nitrogen obtained must be signed for in the Radiation Laboratory on the appropriate form. RN will fill Nitrospray device 2/3 full using PPE (face shield and leather insulated gloves) when needed. To dispense the liquid nitrogen via the Nitrospray device: Choose appropriate tip. Squeeze trigger to dispense to site. To dispense the liquid nitrogen via cup: Pour a small amount of the nitrogen into a 6-8 oz Styrofoam cup from the Nitrospray device or from the large isotherm container. NOTE: When pouring the nitrogen into the cup, the following PPE is required to be worn. Face shield or goggles. LIQUID NITROGEN Leather or insulated glove on hand holding the cup. The nitrogen will dissipate from the cup in several minutes. If any product remains in the cup after use, allow it to dissipate completely before disposing of the cup. Nitrogen must never be discarded into a sink, or on asphalt, grass or shrubs. All equipment can then be placed in cupboard of Procedure Room. A Material Safety Data Sheet is on file. See “Quick Tips for Nitrospray Instrument” (EXHIBIT I). ANNUAL REVIEW Signature Date Signature Reviewed: Reviewed: Reviewed: Reviewed: Reviewed: Reviewed: Reviewed: Reviewed: Reviewed: Reviewed: Reviewed: Reviewed: Date SUBJECT: MEDICAL DIRECTIVES AUTHORIZATION: Assistant Director, Clinical Services DATE: March 2011 PURPOSE: To ensure safe, consistent, quality patient care while maintaining medical/legal standards. GUIDELINES A. University Health Services (UHS) Medical Directives will be reviewed and approved annually by the UHS physicians before the start of each academic year. B. It is the responsibility of the Assistant Director, Clinical Services to inform the UHS RN’s of any changes in the Medical Directives annually, and whenever changes are made thereafter. C. A Medical Directives manual will be available at the clinic workstations and at the nurses’ station on the inpatient unit. In addition, the Medical Directives manual will be given to all newly hired Registered Nurses upon orientation at UHS. D. Any nonconformity to this policy/procedure may result in disciplinary action, leading up to and including termination of employment. PROCEDURE A. The UHS RN will have a current and accurate knowledge base of the medical Directives before providing care to a patient. B. Each RN will be responsible to periodically review the Medical Directives manual in order to maintain a current knowledge base. C. Any questions concerning treatment procedures that are not answered in the manual should be referred to a UHS physician or the Administrative staff as n\appropriate. D. Any suggested additions, deletions, or clarifications to the Medical Directives should be place in a written memo to the Assistant Director, Clinical Services. MEDICAL DIRECTIVES ANNUAL REVIEW Signature Date Signature Reviewed: Reviewed: Reviewed: Reviewed: Reviewed: Reviewed: Reviewed: Reviewed: Reviewed: Reviewed: Reviewed: Reviewed: Date SUBJECT: MEDICAL EMERGENCY RESPONSE/EMERGENCY CARTS AUTHORIZATION: Assistant Director, Clinical Services DATE: March 2011 PURPOSE: To provide prompt, efficient medical response to emergency situations. To assure that appropriate supplies and equipment are readily available in the event of a medical emergency. EQUIPMENT/SUPPLIES: Emergency Cart Automatic External Defibrillator PROCEDURE AND/OR GUIDELINES Health Center staff will respond immediately to a medical emergency. When a physician is available, he/she will direct emergency care. A physician must be contacted for specific orders not covered in the Medical Directives or provided by emergency support personnel Responding to 911. 1. Call for help; have the Emergency Cart brought to the location of the patient. 2. Assess the patient: a. Check Airway, Breathing, Circulation (ABC’s) b. Initiate CPR as needed. c. Monitor vital signs. d. Maintain safe environment. 3. Call 911 a. Inform Security Department of the emergency situation. b. Request ambulance. 4. Initiate O per nasal cannula, mask or ambu-bag as needed. 5. Suction as needed. 6. Notify the following: a. Physician b. Administrator on call MEDICAL EMERGENCY RESPONSE/EMERGENCY CARTS c. Family, unless appropriate for physician or Administrator to notify. d. Rector. 7. Accurately document the event on an Emergency Medical Report form (Exhibit I): a. Date and time. b. Circumstances/status of the patient. c. Vital signs. d. Treatment provided; patient response to treatment. e. Notification of security, physician, Administrator, family, rector. f. Arrival time of Emergency Support persons and treatment provided. g. Disposition of patient. h. Charges. Maintenance of Emergency Cart 1. An inventory sheet, listing contents and the expiration of dates of medications and IV fluids, will be maintained on each cart (Exhibit II and III). 2. Each cart will be sealed with a device that can be readily released when needed. 3. Each cart will be checked once a day by the Night Shift RN or designated RN. 4. A log listing date, time and signature of the RN checking the cart will be maintained (Exhibit IV). Signing the log indicates that: a. the cart is sealed b. the medications and supplies in the cart have not expired and are present c. IV pole, backboard and sharps container are present. O tank is present and psi is checked for minimum sufficient volume of ¼ tank d. the AED is present and working on the 1st floor cart e. the ER Cart Log (Exhibit IV) will be monitored by the Assistant Director, Clinical Services, and maintained for three years. 5. Immediately after use or if the seal is unlocked or absent, the cart must be inventoried, restocked prn, and sealed. Sign the cart log when complete or communicate the status of the cart to the next shift. 6. The interior of the cart will be cleaned yearly at the end of the academic year, or as needed. FORMS or REFERENCES: Emergency Medical Report (Exhibit I) Emergency Cart Inventory – IOU (Exhibit II) Emergency Cart Inventory - Triage (Exhibit III) Emergency Cart Log (Exhibit IV) MEDICAL EMERGENCY RESPONSE/EMERGENCY CARTS ANNUAL REVIEW Signature Date Signature Reviewed: Reviewed: Reviewed: Reviewed: Reviewed: Reviewed: Reviewed: Reviewed: Reviewed: Reviewed: Reviewed: Reviewed: Date INPT/OBS Emergency Cart DRAWER #1 MEDICATION AMT EXP. DATE DRAWER #3: SUPPLY AMT. 4X4 Topper Dressing sponges 4 Ammonia Ampules 5 4X4 Gauze Sponges (pkg. of 10) 2 Atropine Sulfate 1mg(0.1mg/ml) 10ml 1 Kerlix: 1ea. 50% Dextrose 25gm (0.5g/ml) 50ml 1 Surgipad 2 8.4% Sodium Bicarbonate 50mEq(1mEq/ml) 50ml 1 Scalpel 1 Epinephrine 1:10,000 1mg. (o.1mg/ml) 10ml 1 Tape: 1” adhesive, 1” paper, 1” transpore 1ea. Adrenaline 1:1000 (1mg/ml) 1ml 2 Tongue blades 2 Benadryl (50mg/ml) 1ml single dose syringe 1 Scissors 1 5” – 3” – 2” Decadron (Dexamethesone) 20mg (4mg/ml) 1 Towel/drape, non-fenestrated, sterile 3 Glucagon ER kit 1 Gloves, sterile:sizes 6, 6 ½, 7, 7 ½, 8 1pr/ea. Glutose 15 Oral Gel (15gm of Glucose) 2 Lanoxin 500ug (0.5mg) in 2 ml 1 Lasix 40mg (10mg/ml) 4 ml 1 Narcan 0.4 (0.4mg/ml) 1 ml (Naloxone HCL) Unsterile 3pr. Sutures 3-0 Silk (FS-1) & 4-0 Ethilon (P-3) 1ea. 1 DRAWER #4: AMT. Nitrostat 0.4mg (1/150gr) Multiple tablet bottle 1 IV SOLUTIONS: 1000CC 5%Dextrose 1 Nubain 10mg/ml 1ml (Nalbuphine) 1 1000cc 0.9% Sodium Chloride (NaCl) 1 Solu-Cortef 100mg 1 1000cc 5% Dextrose and 0.45% NaCl 1 Solu-Cortef 250mg 1 IV Tubing – primary set 2 Valium (Diazepam 10mg/2ml) 2 ml 2 DRAWER #5 SUPPLY AMT. O2 mask – Adult, Ped, Nasal cannula 1ea. EXP DATE SUPPLY DRAWER #2: SUPPLY AMT SYRINGES: (BD Brand 3ml)22gX 1 ½” 3ea. Bitestick 1 3ea. Suction set & refill unit 1 23g X 1” 25g X 5/8” 5cc, 10cc, catheter tip 1ea. Plastic gown 1 NEEDLES: 18g X 1”, 22g X 1 ½”, 25g X 1” 2ea. Face Shield 1 IV CATHETERS: Insyte- 22g 1” & 20g 1 ¼” 16g 2ea. Laceration tray 1 Tegaderm 3 Alcohol pads 10 DRAWER #6 SUPPLY AMT. Betadine preps 4 Airway kit (set of asst. sizes) 1 NaCl 0.9% 2ml 4 Tracheal Tube 7.0, 8.5 1ea Tourniquet 1 Laryngeal Mask w/ 60cc syringe 1ea 3,4,5 Bandaids 1” 4 Blood pressure cuff 1 Reseal Valve 2 Stethoscope 1 BLOOD DRAW SUPPLIES: Locks and sealing links 1 Auto drop tube holder & disks (set) 1 Flashlight 1 Vacutainer needles 21g 4 Nu trach Emergency kit Vacutainers: Red top 2 OUTSIDE ON HOOK Purple top 2 Ambu Bag - Adult Gold top 2 Biohazard labeled lab bag Revised 08/21/08 1 EXP. DATE EXP. DATE EXP. DATE EXP. DATE Triage Emergency Cart DRAWER #1 MEDICATION Benadryl (50mg/ml) 1ml single dose syringe DRAWER #4: AMT EXP. DATE 1 Calcium Gluconate Gel (!st Floor Triage Only) IV BAGS/TUBING EXP. DATE 1000CC 5%Dextrose-D5W 1 1000cc 0.9% Sodium Chloride (NaCl) 1 1000cc 5% Dextrose & 0.45% NaCl D5 ½ NS 1L 1 2 50% Dextrose 25gm (0.5g/ml) 50ml 1 IV Start Kit Epinephrine 1:10,000 1mg. (0.1mg/ml) 10ml 1 Tegaderm / Ultrasite valve Epinephrine1:1000 (1mg/ml) 1ml 2 2 ml NS/ Betadine prep pad Glucagon Emergency kit 1 IV Tubing – primary set Glutose 15 Oral Gel (15gm of Glucose) 2 Narcan 0.4 (0.4mg/ml) 1 ml (Naloxone HCL) 1 DRAWER #5: SUPPLY Nitrostat 0.4mg (1/150gr) Multiple tablet bottle 1 4X4 Topper Dressing sponges 4 4X4 Gauze Sponges (pkg. of 10) 2 Kerlix: 1ea. 2 DRAWER #2 SUPPLY AMT. O2 mask – Adult, Pediatric, Nasal cannula 1ea. Surgipad 2 Bitestick 1 Tape: 1” adhesive, paper, transpore 1 ea. Airway kit (set of asst. sizes) 1 Tongue blades 2 EXP. DATE 5” – 3” – 2” Suction set & refill unit 1 Gloves, Sterile sizes 6, 6 ½, 7, 7 ½, 8 1 pr. ea Plastic gown 1 Sutures 3-0 Silk (FS-1) & 4-0 Ethilon (P-3) 1 ea. Face Shield 1 Vaseline gauze 2x2, 3x9, 5x9 3 ea Gloves Unsterile S, M, L 3 ea Laceration tray 1 Scissors 1 Sterile Field pads 3 DRAWER #3: IV START/LAB SUPPLY AMT SYRINGES: (BD Brand 3ml) 22gX 1 ½” 4 ea. EXP. DATE 23g X 1” 25g X 5/8” 4 ea. DRAWER #6 SUPPLY AMT. 5cc, 10cc, catheter tip 2 ea. Blood pressure cuff 1 Alcohol pads/ Betadine prep pads 10 Stethoscope 1 Tegaderm 2 Locks and sealing links 1 NEEDLES: 18g X 1”, 22g X 1 ½”, 25g X 1” 2ea. Flashlight 1 st NS for injection 10cc vial 2ml x 2 4 Ambu spur- infant & child ( 1 Floor only) IV CATHETERS: Insyte- 22g 1” & 20g 1 ¼” 16g 2 ea. IV Start Kits 2 OUTSIDE ON HOOK IV Reseal 2 Ambu Bag - Adult 1 BLOOD DRAW SUPPLIES: O2 Tank 1 Lab Draw Kit Sharps Container 1 Vacutainers/needles/ 21g 4 ea CPR Backboard Specimen Tubes: Red top 2 Clipboard Purple top 2 AED (1st Floor Triage Only) Gold top 2 Biohazard labeled lab bag 2 REFRIGERATED Ativan 2 mg/ml 1 EXP. DATE University of Notre Dame University Health Services EMERGENCY CART LOG MONTH/YEAR _________________________________ IOU / TRIAGE DAY TIME RN SIGNATURE LOCK # 1 2 3 4 5 6 7 8 9 10 11 12 13 14 15 16 17 18 19 20 21 22 23 24 25 26 27 28 29 30 31 Completed monthly log to Assistant Director, Clinical Services SUBJECT: NARCOTIC COUNTS IN INPATIENT UNITS AUTHORIZATION: Medical Director DATE: June 2014 PURPOSE: To maintain an exact inventory and dispensing record of controlled drugs dispensed at the Health Center. PROCEDURE AND/OR GUIDELINES: Controlled drugs are kept in double locked cabinets in the Inpatient Unit. Two nurses (or a nurse and a pharmacist) count controlled drugs, verify with the logged inventory and sign the log book. This is done every shift during the academic year. Signature logs and inventory sheets are returned to the Pharmacy for storage at the end of each month and when more medication is required, respectively. ANNUAL REVIEW Signature Date Signature Reviewed: Reviewed: Reviewed: Reviewed: Reviewed: Reviewed: Reviewed: Reviewed: Reviewed: Reviewed: Reviewed: Reviewed: Date SUBJECT: NEBULIZER TREATMENTS AUTHORIZATION: Assistant Director, Clinical Services DATE: March 2011 _____________________________________________________________________________________________ PURPOSE: To deliver medications directly into the respiratory tract. To provide a sage and effective method of administration of therapy. EQUIPMENT/SUPPLIES: Pulmo-Aid compressor Nebulizer Kit Unit Dose medication packet per physician order. PROCEDURE AND/OR GUIDELINES A. RN to perform. B. Wash hands. C. Assemble equipment, following package instructions for assembly of the Nebulizer Kit. D. Place medication, as ordered by physician, into nebulizer bottle. Order must include name, dose , and frequency of medication. E. Place compressor onto a steady, level surface. With power switch in the off position, plug cord into outlet. F. Position patient for comfort, in sitting position. G. Instruct patient a. Place mouthpiece between teeth. With mouth closed, inhale deeply and slowly through mouth as the aerosol begins to flow, then exhale slowly through the mouthpiece. Breathing through the nose will reduce the quantity of drug delivered to the lungs. It will also prevent the drug from deeply penetrating the airways. b. Encourage the patient to drop their shoulders and relax. Encourage inspiratory holds, if possible. About every 10 breaths or approximately one minute, encourage the patient to take a slow deep breath, hold for 5-10 seconds, then exhale slowly. This will help the drug reach the lower NEBULIZER TREATMENTS airways. c. Advise the patient to continue the treatment until the medication in the nebulizer has been aerosolized.. This should take approximately 15-20 minutes. d. If the treatment needs to be interrupted for a cough spasm, have the patient turn off the machine until the coughing subsides. e. Encourage the patient to cough at the end of the treatment to remove secretions. H. Assess patient pre and post treatment. a. Note color b. Check pulse and respiratory rate. i. A resting pulse over 120 bpm is cause for concern. Notify physician or if possible, delay treatment until pulse rate slows. c. Auscultate breath sounds. d. Observe for retractions, labored respirations, or use of accessory muscles. e. After treatment, retain patient for further observation if incicated. I. Evaluate patient response to treatment after 5-7 minutes of treatment initiation. a. Check pulse b. Observe patient chest for adequate expansion c. Observe patient breathing rate and pattern: i. If too rapid, instruct patient to slow breathing. ii. If breathing without sustained inspiration, reinstruct. iii. Remind patient to relax shoulders. J. Monitor patient for any adverse response. a. Color change b. Diaphoresis c. Nausea d. Abnormal sensations,i. e. numbness or tingling* e. Pulse change of 20 bpm* f. Dizziness* *These symptoms may be due to hyperventilation. Observe closely. K. If you suspect adverse patient reaction: a. Stop therapy immediately b. Check vital signs. c. Monitor SaO2 prn d. Do not leave patient unless stable or another staff is with pt. e. Notify physician for further orders. f. Document in patient medical record. g. Complete incident report. NEBULIZER TREATMENTS L M. Cleaning and Maintenance a. Discard disposable nebulizer and tubing after each treatment. b. When necessary, wipe the outside of the compressor cabinet with a clean, damp cloth to keep it dust free. c. Change air inlet filter routinely or when the filter turns gray in color. Small filters every month. Remove filter retaining cap by turning counterclockwise. Remove dirty filter with a toothpick and discard. Replace with the new filter and reattach retaining cap by turning clockwise. Large filters every six months. Remove filter cap by grasping it firmly and pulling it out of the front of the unit. Remove fulter with fingers and discard. Replace filter and push retaining cap into position. Document completely on Nurses’ Notes for inpatient, on Clinic Data Record for outpatient. (May use Respiratory Flow Sheet) a. Date and time of treatment b. Medication: name, dose. c. Length of treatment d. Pulse, respirations, and breath sounds pre and post treatment. e. Patient response to treatment f. Cough effort g. Amount and type of sputum h. Any other significant information i. Charges ANNUAL REVIEW Signature Date Signature Reviewed: Reviewed: Reviewed: Reviewed: Reviewed: Reviewed: Reviewed: Reviewed: Reviewed: Reviewed: Reviewed: Reviewed: Date SUBJECT: Notification of Laboratory Test Results AUTHORIZATION: Assistant Director, Clinical Services DATE: September, 2012 _____________________________________________________________________________________ PURPOSE: To assure that test results are communicated to patients in a timely and efficient manner; to establish a timeframe and process for attempted notifications that are not responded to by the patient. PROCEDURE AND/OR GUIDELINES A. B. C. D. E. Upon direction of physician, RN will call patient to notify of test results and provide instructions. RN will make three attempts to notify patient over a two week course; medical record with test result is kept in file cabinet drawer in first floor clinic area. After three unsuccessful attempts over a two week period of time, medical record with test result will be taken to front office work room to be filed. Letter will be sent by RN (via Medicat ICM ) to notify patient of unsuccessful attempts to call. (Exhibit !) Normal test results may be given to patient by leaving a voice message if patient has given permission to UHS to do so. Designated phone number provided by patient and documented on face sheet will be used for this notification. FORMS or REFERENCES: ICM letter ANNUAL REVIEW Signature Date Signature Reviewed: Reviewed: Reviewed: Reviewed: Date Reviewed: Reviewed: Reviewed: Reviewed: Reviewed: Reviewed: Reviewed: Reviewed: March 2011 Reviewed Approved By: ____________________________________________Director, University Health Services ____________________________________________Assistant Director, Clinical Services ____________________________________________Medical Director SUBJECT: ON-CALL HEALTH CENTER STAFF REQUIREMENTS PURPOSE: To provide appropriate competent healthcare to meet the staffing needs of University Health Services. PROCEDURE AND/OR GUIDELINES Those persons hired as on-call staff members for University Health Services (UHS) Student Health Center will maintain their position status by working at least 16 hours each Fall and Spring semester. Those who cannot fulfill this requirement will be removed from the on-call list. Those persons hired as on-call staff members for special events only such as Pre-participation sports physicals and flu shot clinics and coverage for special events, With no other role at the Health Center, will have active status only for special events. 1. Staffing levels will be determined by the Assistant Director, Clinical Services, with input from other managers, as appropriate, or the UHS Administrator on call. 2. Attendance and performance of on-call staff members will be reviewed at the end of each semester, and names will be continued or removed from the staff list. 3. On-call staff members for University Health Services Student Health Center will have preferential consideration over those who only work for special events when full or part time positions become available in the Student Health Center. ON-CALL HEALTH CENTER STAFF REQUIREMENTS ANNUAL REVIEW Signature Date Signature Reviewed: Reviewed: Reviewed: Reviewed: Reviewed: Reviewed: Reviewed: Reviewed: Reviewed: Reviewed: Reviewed: Reviewed: Date SUBJECT: OXYGEN DELIVERY AND CYLINDER CHANGE AUTHORIZATION: Assistant Director, Clinical Services March 2011 DATE: _____________________________________________________________________________________ PURPOSE: To assure proper oxygen therapy as ordered. To maintain safe handling of oxygen cylinders. Oxygen Delivery: 1. Slowly turn green cap or wrench handle counter clockwise one full turn. 2. Check pressure gauge to determine amount of pressure in cylinder. Replace cylinder if REFILL is indicated. 3. Attach the plastic tubing of the delivery device (mask or cannula) to oxygen port near the flowmeter. 4. Adjust flowmeter to desired flow rate. 5. Verify delivery of oxygen by listening and feeling for O2 flow through the delivery device. 6. Place delivery device on patient; adjust for proper fit and comfort. After Use: Bleed the System 1. Turn the green cap or wrench handle clockwise to close the pressure regulator. 2. Turn the flowmeter knob clockwise until the pressure regulator and flowmeter read zero. 3. Turn knob counter-clockwise until tight. To Remove Cylinder: 1. Bleed the system 2. Remove green cap (lift off) or wrench handle from the cylinder 3. Unscrew pressure regulator and remove. Remove the plastic or metal gasket (O-ring) from the valve and discard. 4. Loosen the set screw on the side of the tank holder frame. 5. Remove cylinder and place on floor, lying down on side. 6. Label the tank as empty and take to O2 storage area located in UHS Pharmacy general supply area. Transport tank by cart or wheelchair, secured to avoid falling. OXYGEN DELIVERY AND CYLINDER CHANGE NOTE: NEVER place oxygen cylinder upright without support of a stand or in a storage unit. Handle cylinder with care. Avoid damage to the valve tip as severe injury may result. To Replace Cylinder: 1. Obtain unopened cylinder from Pharmacy general supply area. 2. Remove protective covering and save gasket (O-ring). 3. Using green cap or wrench handle, open cylinder for one second to remove any dirt from the valve. 4. Place gasket into valve at top of cylinder. Place regulator on cylinder and seat the three metal prongs into valve. 5. Tighten screw until regulator is snug. 6. Open cylinder one full turn and check pressure gauge to determine amount of pressure is in cylinder and if there are leaks in the system. ANNUAL REVIEW: Signature Date Signature Reviewed: Reviewed: Reviewed: Reviewed: Reviewed: Reviewed: Reviewed: Reviewed: Reviewed: Reviewed: Reviewed: Reviewed: Date March 2011 Issued, Approved by: ______________________________________ Office of Student Affairs ______________________________________ Director, University Health Services ______________________________________ Medical Director SUBJECT: Pain Management POLICY: University Health Services utilizes the numeric scale of one through ten to assess patients’ level of stated pain. PURPOSE: To determine the level of pain a patient is having as described by that patient. To monitor effectiveness of analgesic medication. GUIDELINES: A. The RN or physician will ask the patient to rate the amount of pain they are having, using a scale of one through ten; one described as very minimal discomfort and ten described as the most severe pain. B. Following administration of analgesic medication, and within a reasonable period of time, the patient will be monitored for effectiveness of the medication by being asked to rate their pain, using the numeric scale. C. Medical Directives will be followed in the assessment and management of acute pain. Annual Review Signature Reviewed: Reviewed: Reviewed: Reviewed: Reviewed: Reviewed: Date Signature Reviewed: Reviewed: Reviewed: Reviewed: Reviewed: Reviewed: Date SUBJECT: PULSE OXIMETER AUTHORIZATION: Assistant Director, Clinical Services DATE: March 2011 PURPOSE: To provide fast reliable Sp02 and pulse rate measurements. EQUIPMENT/SUPPLIES: Oximeter PROCEDURE AND/OR GUIDELINES 1. Attach the sensor to the oximeter. 2. Attach the finger sensor to the patient’s index finger allowing the cable to lay across the palm of the hand and parallel to the arm of the patient. 3. Press the 1 key, the oximeter will go through its power sequence. Verify that all LED’s on the display light up upon start up of the device. 4. After a few seconds the %Sp02 value, pulse rate and pulse strength bar graph should be shown. 5. Press the 0 key to turn off oximeter. Whenever the oximeter is on, it stores one Sp02 and pulse rate reading every 30 seconds. The stored readings are called spot check data. The oximeter Remembers spot check data for up to 99 patients and 17° of run time. Clearing all Spot Check Data Press and hold the 1 key for about 6 seconds while the oximeter is on to clear all spot check data and reset the patient number to P1. Cleaning Oximeter and Sensor Clean or disinfect the sensor before attaching a new patient. Clean the sensor with a soft cloth moistened in water or a mild soap solution. To disinfect the sensor, wipe the sensor with isopropyl alcohol. Do not allow any liquid to enter any of the oximeter openings. PULSE OXIMETER Unplug the sensor from the monitor before cleaning or disinfecting. Do not autoclave, ethylene oxide sterilize, or immerse the sensors in liquid. FORMS or REFERENCES: ANNUAL REVIEW Signature Date Signature Reviewed: Reviewed: Reviewed: Reviewed: Reviewed: Reviewed: Reviewed: Reviewed: Reviewed: Reviewed: Reviewed: Reviewed: Date SUBJECT: Suction, Portable Hand Held (Res-Q-Vac) AUTHORIZATION: Assistant Director, Clinical Services DATE: March 2011 ______________________________________________________________________ PURPOSE: To provide for the suction of fluids from the oropharyngeal and nasopharyngeal cavities EQUIPMENT/SUPPLIES: Res-Q-Vac Kit containing reusable vacuum pump handle, collection canister and Yankauer suction tube PROCEDURE AND/OR GUIDELINES 1. Remove contents form package.. 2. Test the vacuum handle before using to ensure that the unit produces a vacuum. Place a finger over the vacuum port and squeeze the handle. As the handle is squeezed, a vacuum should be felt and the handle becomes difficult to squeeze. Do not use the device if a vacuum is not felt. 3. Tighten canister cap. If required., attach catheter to canister cap by gently twisting catheter luer fitting onto the cap luer fitting until secure. Snap the 55 ml canister into the pump handle by aligning the vacuum fitting on the canister cap or the 300 ml adapter with the vacuum port; the 300 ml canister requires the adapter. 4. Introduce the catheter into the patient's airway and suction the airway. GENTLY INTRODUCE THE CATHETER TO AVOID TRAUMA TO THE PATIENT. If the pump handle becomes difficult to operate, an obstruction may have occurred. Do not continue suctioning until the source of the obstruction is determined. Either remove the plastic plug at the canister top or remove the canister from the pump to release vacuum and help clear a blockage at the catheter tip. When the tip is clear, reattach the plug and the canister. If the catheter becomes obstructed, it may be cleared by repeatedly squeezing the pump handle to move the obstruction through the catheter and into the canister. When the obstruction is cleared, continue suctioning of the patient. FORMS or REFERENCES: American Red Cross reference material MANUAL SUCTIONING Note: Always follow standard precautions when providing care. If needed, assemble the device according to manufacturer’s instructions. POSITION THE VICTIM ■ Roll the body as a unit onto one side. the mouth. ■ Open REMOVE DEBRIS FROM THE MOUTH ■ With a gloved fi nger, sweep out any visible large debris. MEASURE AND CHECK THE SUCTION TIP ■ Measure from the victim’s earlobe to the corner of the mouth. Note the distance to prevent inserting the suction tip too deeply. ■ Check that the suction is working by placing your fi nger over the end of the suction tip as you squeeze the handle of the device. SUCTION THE MOUTH ■ Insert the suction tip into the back of the mouth. the handle of the suction device repeatedly to provide ■ Squeeze suction. ■ Apply suction as you withdraw the tip using a sweeping motion, if possible. ■ Suction for no more than 15 seconds at a time for an adult, 10 seconds for a child and 5 seconds for an infant. Suction, Portable Hand Held (Res-Q-Vac) ANNUAL REVIEW Signature Reviewed: Reviewed: Reviewed: Reviewed: Reviewed: Reviewed: Date Signature Reviewed: Reviewed: Reviewed: Reviewed: Reviewed: Reviewed: Date SUBJECT: TB SCREENING OF INTERNATIONAL STUDENTS AUTHORIZATION: Assistant Director, Clinical Services DATE: March 2011 _____________________________________________________________________________________________ PURPOSE: To provide screening, surveillance, and appropriate referral to Notre Dame students at risk for Tuberculosis (TB). Tuberculosis continues to be a highly infectious, potentially life threatening disease. Because of the increase in tuberculosis worldwide, and in response to the Center for Disease Control and Prevention’s (CDC) recommendation regarding strategies and along with Indiana Statues for TB control, the University of Notre Dame is initiating this policy. PROCEDURE AND/OR GUIDELINES 1. All new international students (foreign-born, non U.S. citizens who are not U.S. permanent residents) enrolled for on-campus coursework must be screened before the first semester of attendance at the university. New graduate students who were previously enrolled as undergraduates, will again be tested if they have traveled outside the U.S. to a high risk area since their initial admission as an undergraduate and were previously negative. 2. All new international students must prove that they are free of active, infectious tuberculosis either through a negative skin test or a negative Quantiferon – Gold (QTF-G) lab test done in the U.S. The only TB skin test accepted is a Mantoux purified protein derivative (PPD) test that is read within 48 to 72 hours. Documented negative TB tests or X-Rays performed outside the U. S. are not acceptable. 3. Failure to comply with the testing requirement will result in a hold being placed on the student’s account, and they will be unable to register for future classes until the requirement is met. 4. Students with a positive TB skin test result or QTF-G results are positive must have a chest X-ray. Students with an indeterminate chest x-ray may remain registered for classes with the physician’s approval. Chest x-rays and x-ray reports from outside the United States will not be accepted, except for clinical comparison at the discretion of the physician. 5. Students with a positive chest x-ray: Will be referred to the St Joseph County Health Department (SJCHD) for possible additional testing and treatment. Will maintain compliance with a treatment regimen, as determined by the SJCHD, or be reported to the Health Center by that agency. Section I-Population Testing Parameters Tuberculin screening is required for the following groups of students. All new students who are foreign born, or are non-U.S. citizens who have been U.S. permanent residents for less than 4 years and are enrolled for on campus course work will be screened for Tuberculosis by the following: 1. Country of origin: Those who are from low-risk countries will be screened out. Those from high-risk countries will be screened in. Those US citizens living in high-risk countries should be screened in. 2. Those from high-risk countries will be required to: Provide proof of a negative Mantoux skin test performed in the United States within the last 12 months. Undergo TB testing through Health Services within the first month of the first semester of attendance at the university. Show certification of completed INH therapy if previous positive TB skin test. Mantoux tuberculin skin testing is highly recommended for the following persons: All international postdoctoral fellows and visiting scholars. Any Notre Dame student who has participated in international travel to a high-risk area for more than one month as part of an official university program. Testing is recommended 3 months after the student’s return. Any student not included in groups listed above who has traveled for >one month to a country outside the U.S. which is identified as high-risk. Exceptions – a delay for tuberculosis testing will be permitted for: If tuberculin skin test or live vaccine (MMR, varicella, BCG, yellow fever) administered< one month ago, the student is to wait 30 days for QTF-G test. Section II – NOTIFICATION OF STUDENTS All new international students (foreign-born, non U.S. citizens who are not U. S. permanent Residents) enrolled for on campus course work will be notified of the requirement for tuberculosis testing upon arrival at the University of Notre Dame by International Student Services. The following consequences of non-compliance with this testing requirement will also be communicated by the International Studies Office. Hold on their “account” by Registrar’s office. Tuberculosis testing will be offered by Student Health Services. The Registrar’s office will provide a current demographic file of international students for download to Student Health Services prior to each testing clinic date. Students will be required to have testing completed by September 30 th of the Fall semester, February 15th for the Spring semester and July 15th for the Summer session. Student Health Services will communicate names of students not yet tested to the Office of International Studies in an attempt to verify presence on campus and to seek updated information concerning email addresses, telephone numbers and current residence. Student Health Services will attempt to notify any student who has not met the testing requirement by email; by personal telephone call; and, if email and telephone numbers are not available; by letter. Student Health Services will forward the name of any student who has not met the testing requirements to the Office of International Studies and to the Office of Student Affairs. International Student Services will attempt to make a personal contact with any noncompliant student. Section III – Screening for Tuberculosis Disease and Infection Class attendance is contingent upon the student providing documentation of negative results of a valid PPD test. To be accepted as valid, the tuberculin skin test must meet the following requirements: The testing process used must be the Mantoux purified protein derivative (PPD) test. This test must be administered by an intradermal injection of the purified protein derivative (PPD) tuberculin containing 5 tuberculin units injected into the underside of the forearm. After the PPD test is placed it must be read at least 48 hours and no more than 72 hours after being administered. If the test is not read within this 48-72 hour time frame, a negative test must be repeated. A positive test will be accepted even if greater than 72 hours after administration. A student having a prior history of a positive Mantoux PPD test without certification of completion of INH therapy will be required to have a Quantiferon-Gold serum blood test. Students who have had PPD tests done and read as negative at another health care facility in the United States and have not traveled outside the U.S. subsequently do not need to be re-tested. The results of the PPD must be documented on a PPD form that is signed or stamped by a U.S. physician or other authorized official. A Mantoux PPD test administered in a foreign country that yielded a negative result will not be accepted, even with a validated PPD form or other documented test results. These student will be re-tested by QTF-G at the Health Center. A student with a Mantoux PPD test administered in a foreign country that yielded a positive result and without certificate of completion of INH therapy will be required to have QTF-G test, or a chest x-ray and offered medications. Only exception for TB screening is if certification of completion of pharmaceutical (INH) therapy for the appropriate period of time. Section IV – Classifying Tuberculin Reaction The area of swelling around the site of the PPD injection is the reaction to tuberculin. The PPD test is read by taking a measurement in millimeters of the induration (hardness under skin), not the redness of the skin, perpendicular to the long axis of the forearm. 1. A reading of five or more millimeters is positive for the following groups: Persons who have close contact with an individual with infectious tuberculosis. Persons with HIV infection. Persons who have chest x-rays with fibrotic lesions likely to represent old, healed tuberculosis Persons who inject drugs if HIV status is unkown. 2. A reading of ten or more millimeters is positive for the following groups: Foreign-born persons from areas with reportedly high occurrence rates of TB. American born students who have traveled abroad to a high-risk country for more than one month. Intravenous drug users. Persons with known medical risk factors. Children younger than four years of age 3. A reading of fifteen or more millimeters is positive for all American born students who have no known risk factors. Section V – Follow up of PPD Test If the QTF-G test result is negative, no further testing or treatment is required. The student is informed of the signs and symptoms of tuberculosis and encouraged to seek medical care if these symptoms develop. If the QTF-G result is positive, the student is required to have a chest x-ray. (any films or x-ray reports from a foreign country will not be accepted.) If the chest x-ray is negative for active TB disease, the student will be managed according to CDC guidelines with possible preventive treatment. If the student decides to follow the recommended medication therapy, the SJCHD will provide the medication through University Health Services Pharmacy on a monthly basis. The student will be screened for side effects monthly. If at least 6 months of medications are completed within 9 months or 9 months of medication within 12 months, a certificate of completion (Exhibit I) will be issued to the student for verification. If the student decides NOT to follow this recommendation, this will be documented, a refusal form will be completed and she/he will be taught the signs and symptoms of tuberculosis and encouraged to seek medical care if these symptoms develop. A risk assessment (Exhibit II) will be done at the beginning of each academic year while attending school here. If the chest x-ray is abnormal and suggestive of active TB, the student will be required to follow up with the SJCHD and have further testing done including sputum smears for TB germs and TB culture. A student may NOT attend class. Any student diagnosed with active tuberculosis disease will be required to follow the recommendations of the SJCHD and the Medical Director of the Health Center regarding attendance in class. Failure to comply with these standards will result in a report to Student Affairs. If other abnormal findings on the chest x-ray, films are to be repeated in 6 months at the discretion of the Medical Director of the Health Center. ANNUAL REVIEW Signature Date Signature Reviewed: Reviewed: Reviewed: Reviewed: Reviewed: Reviewed: Reviewed: Reviewed: Reviewed: Reviewed: Reviewed: Reviewed: Date SUBJECT: VACUTAINER URINE CULTURE KIT Authorization: Assistant Director, Clinical Services DATE: March 2011 _____________________________________________________________________________________ PURPOSE: To stabilize a sampling of urine for culture. PROCEDURE: 1. Obtain urine specimen from patient according to procedure for collection of urine. See Laboratory Manual. 2. Open bag and remove transfer device and vacutainer tube. Tube contains a white, freeze-dried preservative to stabilize the specimen. 3. Submerge straw of transfer device below the surface of urine to the bottom of the urine container. 4. Place vacutainer tube in holder portion and advance tube over puncture point to pierce the stopper. 5. Hold in position until urine stops flowing into the tube. 6. Remove the tube from the device and set aside, leaving transfer device in the container. 7. Lift transfer device and allow the urine to drain from the straw. Discard into sharps container. 8. Shake vacutainer tube to dissolve the preservative. 9. Label specimen with name, social security number, date and time. Complete lab requisition. Send to SBMF in biohazard bag. NOTE: Refrigerate specimen until lab pick-up VACUTAINER URINE CULTURE KIT EQUIPMENT/SUPPLIES: Urine Specimen Vacutainer kit Disposable gloves AUTHORIZED PERSONS: RN or PCA ANNUAL REVIEW Signature Reviewed: Reviewed: Reviewed: Reviewed: Date Signature Date