Transcript
EN
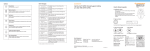
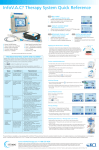
1. If required, irrigate the wound bed thoroughly with approximately 20ml of
Fig. 1
normal saline (Fig. 1). Ensure surrounding wound edges are dry.
2. Place the drain in the wound bed / sinus to calculate length required.
Remove and trim as necessary to fit.
3. If a non-adherent wound contact layer is used, cut a single layer to the
approximate size and shape of the wound. Lay the wound contact layer
across the wound bed.
Fig. 2
4. Lay a single layer of saline-moistened gauze in the wound bed (Fig. 2) and
place the drain on top of the gauze, ensuring the drain is approximately
1cm (1/2") from the wound edge / bottom of the sinus to allow for wound
contraction (Fig. 3). Alternatively the saline-moistened gauze can be
wrapped around the drain, if more suited to the wound. The drain is never
placed directly on the wound bed, unless managing a sinus, when the
Fig. 3
drain can be placed directly down the sinus tract.
5. With the remaining saline-moistened gauze, fill the wound bed
and fluff to completely cover the drain and fill the defect to skin
level (Fig. 4). CAUTION! It is critical that the gauze is moistened
rather than saturated with normal saline prior to filling the wound.
6. Place the transparent dressing over the filled wound, ensuring contact
Fig. 4
with at least 2.5cm of intact skin beyond the wound edges. Crimp or pinch
the edges of the transparent dressing around the drain tubing to secure a
proper seal. Lift the drain slightly and pinch the dressing underneath the
drain to create a seal.
7. At the tubing exit site you can apply a small amount of sealant gel where
the dressing meets the tube to seal and ensure an airtight closure.
8. Connect drain tubing to connection tubing. Attach connection tubing to the VENTURI™ power unit
canister by lining up locator stud on tubing connector with notch on canister tubing receptacle located
on top corner of canister, twisting clockwise to lock.
9. Turn on power unit to initiate suction (see main User Manual for information). Once power unit is
running, observe the wound site. The dressing should contract noticeably, become firm to the touch
and 'raisin-like'. If the dressing fails to contract, the dressing has not been completely sealed. Reinforce
the dressing seal and/or adjust the drain and initiate suction again.
10. Check for dressing integrity every 2-3 hours and at every shift change.
11. Depending on patient status and clinical judgement, the initial dressing change should take place after
48 hours and then 48-72 hours thereafter. For infected wounds the dressing may need to be changed
initially every 24 hours.
12. After use, dispose of wound care set according to local clinical waste policy.
FR
NL
FI
DA
SV
NO
PT
EL
INDICATIONS
ADVANTAGES
INFORMATION
• Wounds with minimal to
heavy drainage
• Medium depth wounds
• Wounds with tunnelling
or undermining
• Sinuses
• One-piece design ensures safe
• Requires a layer of moistened
intact removal
gauze between the drain
• Minimal suction loss when drain
and the wound bed, unless
twisted or crimped
a sinus, when the
• May be cut to length or coiled to fit managing
drain can be placed directly
undermined wounds
down the sinus tract.
• Soft and flexible silicone
RO
• All purpose drain
• May be cut to length for a
custom fit
• Soft and flexible silicone
CZ
• Wounds with minimal to
heavy drainage
• Shallow or deep
wounds
PL
• Suction may decrease when
drain is twisted, crimped or
occluded
• Requires a layer of moistened
gauze between the drain
and the wound bed
TR
CHANNEL
DRAIN
IT
FLAT DRAIN
ES
Drain Guide
DRAIN TYPE
DE
CAUTION! The medical professional is responsible for using his/her best medical judgement when using
this kit. Prior to use, the medical professional(s) treating the wound must assess how to best use the kit
for an individual wound.