Transcript
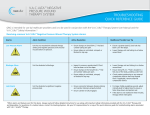
InfoV.A.C. Therapy System Quick Reference
®
NEW SEAL CHECK™
A
D
Helps Locate and Resolve Leaks
B
•
•
•
E
Provides instant feedback to help identify leaks
Saves time trying to locate and resolve leaks
Helps ensure accurate seals
NEW THERAPY HISTORY REPORT
Real-Time Information
•
C
F
•
NEW REDESIGNED THERAPY UNIT
G
NEW DIGITAL WOUND IMAGES
Lighter, Smaller, Smarter
•
H
J
A. Power On/Off Button
B. Touch Screen User Interface
C. Power Cord Connection
D. Canister Release Button
E. InfoV.A.C.® Canister
Allows clinicians to monitor and track V.A.C.® Therapy usage
Can be easily downloaded to a computer
•
I
F. Data Door/Connection Ports*
G. V.A.C.® WhiteFoam Dressing
H. V.A.C. GranuFoam® Dressing
I. V.A.C.® Drape
J. SensaT.R.A.C.® Pad
*SD memory card and USB flash drive not included
TROUBLESHOOTING ALERTS AND ALARMS*
•
Simple touch screen controls
More than 50% lighter and smaller
Convenient IV pole or bedside positioning
Standardized Documation
•
•
Improves documentation of the wound
healing process
Standardized measurements help maintain
consistency
Applying the SensaT.R.A.C.® Dressing
SensaT.R.A.C.® Pad
1. Cut the V.A.C.® foam to fit the size and shape of the wound, including tunnels and
undermined areas. Do not place foam over intact tissue. Do not cut foam directly over
wound. Make a note in the patient’s record and on the drape as to the number of foam
pieces used in the wound. Dressing change time, date and number of foam pieces can
also be logged using the log tool that is accessed from the Therapy Start Screen.
V.A.C.® Drape
V.A.C.®
GranuFoam
Dressing
2. Trim the drape to cover the foam, plus 3-5cm border of intact skin.
Wound
3. Pinch drape and cut a 2cm hole through the drape. Apply the SensaT.R.A.C.® Pad
opening directly over hole in the drape. Do not just cut a slit in the drape.
Alarms: Detect conditions that require immediate clinician attention to ensure the prescribed
therapy is being delivered. Alarms will be accompanied by a repeating audible tone.
Press
for more information on how to resolve Alerts and Alarms.
Press
Canister Installation/Removal
1. To install canister, slide canister into right side of therapy unit and push canister firmly into place.
to silence the audible tone for two minutes.
If alarm condition cannot be resolved after attempting these resolutions, contact KCI at
1-800-275-4524 and consult treating physician on use of alternative dressing if therapy is off
for 2 hours or more.
2. To connect the dressing tubing to the canister tubing, push the tubing connectors together and
twist clockwise.
3. Open clamps on both sides of tubing before turning therapy on.
1. Installation
4. To remove canister, turn therapy off.
Type
Condition
CANISTER FULL,
THERAPY
INTERRUPTED
ALARM
Unit detects that the
canister is full and
should be replaced
CANISTER NOT
ENGAGED
ALARM
Unit detects that the
canister is not fully
seated and properly
latched
LEAK ALARM
BLOCKAGE
ALARM,
THERAPY
INTERRUPTED
LOW-PRESSURE
ALARM,
THERAPY
INTERRUPTED
Unit detects a
significant negative
pressure leak
Unit has determined
that a blockage is
present
Unit has not reached
the selected therapy
setting pressure and
negative pressure at
the wound is below
therapeutic value
Resolution
1. Determine fluid level of canister
2. If canister is not full, press Reset
3. If canister is full, change canister and
press Reset
4. Restart therapy by pressing Exit,
then On/Off button
1. Remove the canister
2. Inspect the canister and InfoV.A.C.® unit
for foreign objects or debris interfering
with canister and unit mating surface
3. Ensure both seals are present. If seals are
missing or damaged, contact KCI
4. Re-attach the canister. An audible click
indicates that the canister is properly
installed
5. Press Reset on screen
6. Restart therapy by pressing Exit,
then On/Off button
1. Ensure connector between dressing tubing
and canister tubing is properly locked
2. Ensure canister is fully engaged
3. Press Seal Check™ and apply light pressure
around dressing to use the Seal Check™
Tool to help identify leaks
4. Use excess drape material to seal leak area
5. Press Exit, then Reset on screen
6. Ensure V.A.C.® Therapy is on by observing
that the dressing is collapsed
1. Ensure both clamps on dressing and
canister tubing are open
2. Ensure tubing is not kinked, crimped or
blocked in any way
3. If Blockage Alarm continues, lowering unit
and tubing to be level with or below the
wound site may resolve this alarm
4. Press Reset on screen to return to
Home Screen
1. Ensure both clamps on dressing and
canister tubing are open
2. Ensure tubing is not kinked, crimped or
blocked in any way
3. If Blockage Alarm continues, lowering unit
and tubing to be level with or below the
wound site may resolve this alarm
4. Press Reset on screen to return to
Home Screen
5. Close clamps on both sides of tubing.
6. To disconnect the dressing tubing from the canister tubing, twist the tubing connectors
counterclockwise.
7. Press the Canister Release button
. Lift to remove canister.
8. Dispose of canister according to hospital or facility protocol.
7. Removal
Initiating Therapy
1. Press and hold the Power On/Off button
InfoV.A.C.® Therapy Unit On/Off.
for approximately two seconds to turn the
2. Press On/Off to start/stop therapy, Default settings are 125mmHg and Continuous Therapy.
3. Once started, “Therapy Start” screen appears, allowing access to Seal Check™ and
Item Log tool.
Clinician/Patient Screens
InfoV.A.C.® is preset to “Clinician Mode”.
To access “Patient Mode”:
1. Press the
icon for the help screen.
2. Select “Patient Mode.”
3. Press
for 3 seconds.
Repeat process to access “Clinician Mode.”
Therapy Settings
1. Select “Settings” in Therapy screen to access Pressure,
Intensity and Continuous/Intermittent Therapy settings.
2. To adjust “Pressure,” use arrow keys to set from 25mmHg
to 200mmHg in increments of 25mmHg.
3. For Intermittent Therapy, use the arrow keys to increase
or decrease On/Off settings between 1 and 10 minutes.
Attaching the InfoV.A.C.® Therapy Unit to an IV Pole
1. Before pulling out the Hanger Arm, the Arm must be in the horizontal position.
2. Hold the InfoV.A.C.® Therapy Unit by the carry handle. Grip the Hanger Knob and pull the
Hanger Arm out.
1.
3. Place the Hanger around the IV pole, ensuring that the pole is in the vertical rubber groove on the
rear of the InfoV.A.C.® Therapy Unit. Allow the Hanger to close, pulling the unit onto the pole.
4. Turn the Hanger Knob clockwise to lock the Hanger Arm in place. When the lock symbol on the
Hanger Knob aligns with the arrow on the Therapy Unit, this indicates that the mechanism is
locked. An audible click also indicates that the mechanism is locked.
*Table is not inclusive of all Alerts and Alarms. Consult InfoV.A.C.® User Manual for more information on specific Alerts or Alarms.
2.
4.
This quick reference is provided as a basic overview. Refer to InfoV.A.C.® Therapy Unit User Manual for complete, detailed instructions. For medical emergencies, consult treating physician or call emergency
services. Carefully read and follow the KCI V.A.C.® Therapy Clinical Guidelines and all literature and labeling accompanying product. Contact KCI if you have questions before initiating therapy.
www.InfoVACTherapy.com • 1-800-275-4524
IMPORTANT: As with any prescription medical device, failure to consult a physician and carefully read and follow all therapy unit and dressing instructions and safety information prior to each use
may lead to improper product performance and the potential for serious or fatal injury. Do not adjust therapy unit settings or perform therapy applications without direction from and/or
supervision by a healthcare professional. Detailed instructions and safety information are provided with the therapy unit and in the dressing cartons. Safety information and KCI’s V.A.C.®
Therapy Clinical Guidelines (for clinicians) are available at www.kci1.com or 800-275-4524.
©2007 KCI Licensing, Inc. All Rights Reserved. All trademarks herein are property of KCI, its affiliates and licensors. The InfoV.A.C.® System is subject to patents and pending patents. Lit# 29-H-198 Rev. 7-08