1
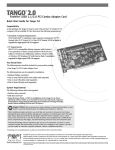
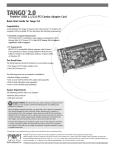
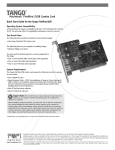
FireWire®/USB 1.1/2.0 PCI Combo Adapter Card
Quick Start Guide for Tango 2.0
Compatibility
Tango 2.0 may be used with any Mac® or Windows® OS computer with an
available PCI slot that meets the following requirements:
• Macintosh Computer Requirements:
Power Macintosh® or Macintosh clone computer running
Mac OS ® 9.0 through Mac OS X Version 10.3.x. Mac OS X
Version 10.2.8 or higher is required for high-speed USB 2.0
support.
• PC Requirements:
IBM PC/AT or compatible desktop computer with Pentium® II
(or equivalent) or better running Windows 2000 or Windows X
Windows 2000 with Service Pack 3 installed or Windows X
with Service Pack 1 (or later) installed is required for highUSB 2.0 support.
You Should Have
The following items should be included in your product package
• One Tango 2.0 PCI Combo Adapter Card
The following items may be required for installation:
• Medium Phillips screwdriver
• One or more FireWire (IEEE 1394) cables (sold separately)
• One or more USB cables (sold separately)
• One or more USB hubs (sold separately)
System Requirements
The following software drivers are required:
• FireWire driver software*
• USB driver software*
• Tango Firmware Patch—ONLY for installation of the Tango 2.0 in Power
Macintosh 5500 or 6500, or in Twentieth Anniversary Macintosh computers.
(Download the Tango Firmware Patch from www.sonnettech.com/support/tango;
install it before installing FireWire and USB drivers.)
.
Support Notes: We recommend you make a backup of important information on your
system’s current hard drive(s) prior to installing new hardware or software.
When handling computer products, you must take care to prevent components from being
damaged by static electricity. Before opening your computer or removing parts from their packages, always ground yourself first by touching a metal part of the computer, such as a port
access cover, and work in an area free of static electricity; avoid carpeted areas. Handle all electronic components by their edges, and avoid touching connector traces and component pins.
Technical knowledge may be required to gain access to the expansion card slots in certain
computer models. We recommend you first consult your computer’s user manual. If you feel
you are unable to install the computer hardware, contact a qualified technician.
* Depending on your operating system, you may need to install these drivers; instructions follow.
Remember to register your product online at http://registration.sonnettech.com to be informed of future upgrades and product releases.
Software updates and links are available from the Sonnet web site at www.sonnettech.com. • Online support form available at http://supportform.sonnettech.com
Sonnet Technologies Customer Service hours are Mon.–Fri., 7 a.m.–5 p.m. Pacific Time • Customer Service Phone: 1-949-472-2772 • E-mail: [email protected]
Sonnet Technologies, Inc., California USA • Tel: 1-949-587-3500 Fax: 1-949-457-6350
©2003 Sonnet Technologies, Inc. Revised 2005. All rights reserved. Sonnet, the Sonnet logotype, Simply Fast, the Simply Fast logotype, and Tango are trademarks of Sonnet Technologies, Inc. Macintosh and Mac are trademarks
of Apple Computer, Inc., registered in the United States and other countries. Other product names are trademarks of their respective owners. Product specifications subject to change without notice. Printed in the USA.
QS-FWUSB2-2G-E-A-011905
Installation Steps—Mac OS Computers
The following three pages cover the procedure for installing the Tango 2.0
card into a Mac OS computer. If you have a Windows PC, skip to page 5.
Hardware Installation Preparation
Sonnet strongly recommends that you read the sections in your computer’s
user manual that address PCI card installation, prior to installing the Tango 2.0
card.
Tango 2.0 Card Installation Steps
1. Shut down your computer.
2. Open your computer to access the expansion card area (PCI slots); refer to
your computer’s user manual for specific information.
3. Locate an available PCI slot inside your computer and remove its port
access cover, if present, from the rear of the computer.
4. Remove the Tango 2.0 card from its packaging.
5. Install Tango 2.0 into the PCI slot; make sure the card is firmly seated
and secured.
6. Close your computer and carefully replace its cover.
Tango Firmware Patch Information
Only For Power Macintosh 5500 and 6500, and Twentieth Anniversary
Macintosh users. You must install an open firmware patch that enables your
system to fully support Tango 2.0 before you install any FireWire or USB drivers. Log onto the Internet, go to www.sonnettech.com/support/tango, and then
locate and click on the Tango Firmware Patch link. Download the file, and then
follow the included instructions to install the patch.
FireWire/USB Driver Installation Steps
The following section covers the installation of FireWire and USB driver software in Mac OS computers; refer to the heading that describes your setup on
this or the next two pages. If you have a Windows PC, go to page 5 to find
Windows driver installation information.
Support Notes: High-speed USB 2.0 is supported only under Mac
OS X Version 10.2.8 and higher. However, USB 2.0 peripherals are backward-compatible, and Tango 2.0 will support them at USB 1.1 speeds (12 Mb/
sec. maximum) when they are used under Mac OS 9.x through Version 10.2.6.
Mac OS X Version 10.2.8 and Higher
Mac OS X Versions 10.2.8 and higher support high-speed USB 2.0, USB 1.1 and
FireWire (400) without the installation of additional drivers; your installation is
complete.
2
Installation Steps—Mac OS Computers
Mac 9.2 through OS X Version 10.2.6
The drivers that enable Tango 2.0 to support FireWire (400), and the drivers
that enable it to support all USB devices at USB 1.1 speeds are installed automatically when you upgrade your Mac operating system software to 9.2 through
OS X Version 10.2.6; your installation is complete.
Mac OS 9.1, Existing Installation
Complete these steps only if you installed Mac OS 9.1 before installing the
Tango 2.0 card. Please note, if your system has built-in USB and FireWire ports,
you may skip these steps.
1. Insert the Mac OS 9.1 CD into your computer’s CD-ROM drive. In the
finder menu, select Special: Restart, then immediately press and hold
down the C key on your keyboard until your system restarts and the
Welcome to Mac OS screen appears.
2. Double-click the Mac OS Install application icon. In the Select Destination
window, click the Select button. Proceed through the next several screens
until you reach the Install Software window. Click the Customize button. In
the Custom Installation and Removal window, deselect all the Software component check boxes (click on each check or dash until the box is empty),
except Mac OS 9.1. Click the pop-up menu to the right of Mac OS 9.1.
Change from “Recommended Installation” to “Customized Installation.”
The Select Mac OS 9.1 Features to Install window will appear shortly.
3. Change “Recommended Installation” to “Customized Installation” from
the pop-up menu. Deselect all the feature check boxes except “Network
and Connectivity.” Click the arrow next to “Network and Connectivity”
to view the features. Deselect all the features except “FireWire” and “USB
Adapter Card Support”. Click OK, Start, then Continue to complete the
installation. After the software is installed, quit the Mac OS Install application and restart your computer from the hard drive where Mac OS 9.1 is
installed. Your installation is complete.
Mac OS 9.1 (Upgrade From Lower Mac OS Version)
Complete these steps only when upgrading your system to Mac OS 9.1 from a
lower Mac OS version; FireWire and USB driver software will be installed automatically. Please note, if your system has built-in USB and FireWire ports, you
may skip these steps.
1. Insert the Mac OS 9.1 CD into your computer’s CD-ROM drive. In the
finder menu, select Special: Restart, then immediately press and hold
down the C key on your keyboard until your system restarts and the
Welcome to Mac OS screen appears.
2. Double-click the Mac OS Install application icon. In the Select Destination
window, click the Options button and click the Perform Clean Installation
check box that appears in the subsequent screen. Click the Select button. Proceed through the next several screens until you reach the Install
Software window. Click OK, Start, then Continue, and complete the
installation. After the software is installed, quit the Mac OS Install application and restart your computer from the hard drive where Mac OS 9.1 is
installed. Your installation is complete.
3
Installation Steps—Mac OS Computers
Mac OS 9 (Existing Installation)
If Mac OS 9.0.x is installed in your computer, you must download and install
the appropriate FireWire and USB driver software. Please note, if your system
has built-in USB and FireWire ports, you may skip these steps.
1. Turn on your computer.
2. Log on to the Internet and type in www.sonnettech.com/support/tango.
3. Locate and click on the link for FireWire and USB drivers.
4. Read the information on the page, then click on each link to download
both drivers.
5. Install the drivers, then restart your computer from the hard drive where
Mac OS 9 is installed. Your installation is complete.
Mac OS 9 (Upgrade From Lower Mac OS Version)
Complete these steps only when upgrading your system to Mac OS 9.0 from a
lower Mac OS version.
1. Insert the Mac OS 9 CD into your computer’s CD-ROM drive. In the
finder menu, select Special: Restart, then immediately press and hold
down the C key on your keyboard until your system restarts and the
Welcome to Mac OS screen appears.
2. Double-click the Mac OS Install application icon. In the Select Destination
window, click the Options button and click the Perform Clean Installation
check box that appears in the subsequent screen. Click the Select button. Proceed through the next several screens until you reach the Install
Software window. Click OK, Start, then Continue, and complete the
installation. After the software is installed, quit the Mac OS Install application and restart your computer from the hard drive where Mac OS 9 is
installed.
3. Log on to the Internet and type in www.sonnettech.com/support/tango.
4. Locate and click on the link for FireWire and USB drivers.
5. Read the information on the page, then click on each link to download
both drivers.
6. Install the drivers, then restart your computer; your installation is
complete.
4
Installation Steps—Windows PCs
For
Windows
This page covers the procedure for installing for the Tango 2.0 card into a
Windows PC. If you have a Mac OS computer, return to page 2.
Installation Preparation
Prior to installing Tango 2.0 into your system, you should read the section in
your computer’s user manual that addresses PCI card installation.
Tango 2.0 Card Installation Steps
1. Shut down your computer.
2. Open your computer to access its expansion card area (PCI slots); refer to
your computer’s user manual for specific information.
3. Remove the Tango 2.0 card from its packaging.
4. Locate an available PCI slot inside your computer and, if present, remove
its port access cover from the rear of the computer.
5. Install the Tango 2.0 card into the PCI slot; make sure the card is firmly
seated and secured.
6. Close your computer and carefully replace its cover.
FireWire/USB Driver Installation Steps
Support Note: High-speed USB 2.0 is supported only under Windows
2000 with Service Pack 3 installed or Windows XP with Service Pack 1
or later installed. However, USB 2.0 peripherals are backward-compatible, and
Tango 2.0 will support them at USB 1.1 speeds (12 Mb/sec. maximum) when
they are used under any other supported version of Windows.
The following section covers the installation of FireWire and USB driver software in a Windows PC. If you have a Mac OS computer, go back to page 2 to
find Mac OS driver installation information.
Windows XP
1. Turn on your computer; during Windows startup, Found New Hardware
pop-ups will appear.
2. When the Found New Hardware Wizard window appears, click Next.
3. When the Completing the Found New Hardware Wizard window appears,
click Finish.
4. When the next Found New Hardware Wizard window appears, click Next.
5. When the Completing the Found New Hardware Wizard window appears,
click Finish.
6. A Found New Hardware pop-up will appear, stating that the software for
the new device has been installed; your installation is complete.
Windows 2000
1. Turn on your computer; during Windows startup, several New Hardware
Found windows will appear, and the appropriate drivers will be installed.
Your installation is complete.
5
Using FireWire and USB Devices With The Tango 2.0
Known Issues and Advice
FireWire and USB interfaces have many technological advantages over older
interfaces such as ADB, Serial, and SCSI, not the least of which is hot-plugging
capability. However, there are some limitations you should be aware of, and we
have listed some additional advice here. Refer to the peripheral manufacturers’
web sites and user’s guides for more specific information.
• Many peripherals require additional drivers and application software to
operate or have full functionality. Software should be included with the
device, or available to download from the manufacturer’s web site. Check the
peripheral’s user’s manual for information about necessary software.
• Mac Users: While USB keyboards and mice are compatible with Tango 2.0,
certain functions cannot be supported on pre-G3 machines; this is an Apple
ROM issue and not a problem with the Sonnet Tango 2.0. Because pre-G3
Macintosh computers were built before Apple added onboard USB support,
certain features, including keyboard startup, wake from sleep (by pressing a
key or moving the mouse), and others, will not work. We recommend that
you keep an ADB keyboard and mouse connected to your system to support
such functionality.
• Mac Users: When the Tango 2.0 is installed in a pre-G3 Macintosh computer,
connected FireWire drives cannot be used as the system startup (boot) drive.
• Mac Users: Always unmount a drive from the desktop (“eject” it or drag it to
the trash) before disconnecting it from its cable or the Tango 2.0 card.
• Windows Users: Always “stop”, “unplug”, or “eject” any drive connected to the
USB or FireWire ports before disconnecting it from its cable or the Tango 2.0
card.
• Disconnecting USB or FireWire peripherals (including external storage devices, cameras, memory card readers, printers, etc.) while they are transferring or
receiving data, may result in damage to the file(s) being transferred or cause
your system to hang.
• Remember to connect external power supplies to the peripherals that require
them. Although many peripherals may draw power directly from the Tango
2.0 card, other devices require an external power source.
• When a high-speed USB 2.0 peripheral is connected to a USB 1.1 peripheral,
which is in turn connected directly to the Tango 2.0, the high-speed USB 2.0
peripheral will operate at USB 1.1 speeds. Keep USB 2.0 and USB 1.1 devices
connected separately.
• Should you need to connect high-speed USB 2.0 peripherals to a hub, be sure
to use a USB 2.0 hub; high-speed USB 2.0 peripherals connected to a standard
USB hub will operate at USB 1.1 speed.
• When transferring data from a digital video camera using a FireWire port on
the Tango 2.0, we do not recommend using another FireWire device at the
same time.
• Do not connect FireWire devices in a loop, nor terminate a FireWire chain;
there are no terminators or ID settings required for any FireWire device.
6