1
BioVision
rev. 2/13
For research use only
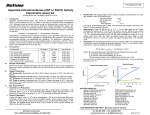
Alanine Colorimetric/Fluorometric Assay Kit
(Catalog #K652-100; 100 reactions; Store kit at –20°C)
Components
K652-100
Cap Code
Part No.
Alanine Assay Buffer
Alanine probe (in DMSO)
Alanine Converting Enzyme
Alanine Development Mix
Alanine Standard (10 µmol)
25 ml
0.2 ml
lyophilized
lyophilized
lyophilized
WM
Red
Purple
Green
Yellow
K652-100-1
K652-100-2A
K652-100-4
K652-100-5
K652-100-6
III. Storage and Handling:
Store the kit at -20°C, protect from light. Allow Assay Buffer to warm to room temperature
before use. Briefly centrifuge vials before opening. Read the entire protocol before performing
the assay.
IV. Reagent Reconstitution and General Consideration:
Alanine Probe: Ready to use as supplied. Warm to room temperature to melt frozen DMSO
prior to use. Protect from light and moisture. Stable for 2 months at -20°C.
Alanine Converting Enzyme, Development Enzyme Mix: Dissolve separately with 220 µl
Assay buffer. Pipette up and down to dissolve. Aliquot into portions and store at –20°C. Avoid
repeated freeze/thaw cycles. Use within two months.
Alanine Standard: Dissolve in 100 µl dH2O to generate 100 mM (100 nmol/µl) Alanine
Standard solution. Keep cold while in use. Store at -20°C.
Ensure that the Assay Buffer is at room temperature before use. Keep the Alanine Enzyme
Mix on ice during the assay and protect from light.
V. Alanine Assay Protocol:
1. Alanine Standard Curve:
Colorimetric: Dilute 10 µl of the 100mM Alanine standard with 990 µl DI H2O to generate
1 mM standard Alanine. Add 0, 2, 4, 6, 8, 10 µl of the diluted Alanine standard into a 96well plate to generate 0, 2, 4, 6, 8, 10 nmol/well standard. Bring the volume to 50 µl with
Assay buffer.
Fluorimetric: Dilute standard as for the colorimetric procedure, then take 100 µl of the 1
mM standard and add to 900 µl DI H2O to make 0.1mM Alanine standard. Add 0, 2, 4, 6,
8, 10 µl of the diluted Alanine standard into a 96-well plate to generate 0, 0.2, 0.4, 0.6,
0.8, 1.0 nmol/well standard. Bring the volume to 50 µl with Assay buffer.
2. Sample Preparation:
Tissues or cells (1×10⁶) can be homogenized in 100 µl Assay Buffer centrifuge to remove
insoluble material at 13,000 g, 10 minutes. 10-50 µl deproteinized serum samples can be
directly diluted in the Assay Buffer. Bring sample wells to 50 µl/well with Assay Buffer in a
96-well plate. For unknown samples, we suggest testing several doses of your
sample to make sure the readings are within the standard curve range.
BioVision Incorporated
155 S. Milpitas Boulevard, Milpitas, CA 95035 USA
3. Reaction Mix:
Mix enough reagent for the number of assays to be performed. For each well, prepare
a total 50 µl Reaction Mix containing:
Alanine Measurement
Background Control*
Assay Buffer
44 µl
46 µl
Alanine Converting Enzyme
2 µl
-----Alanine Development Mix
2 µl
2 µl
Alanine Probe**
2 µl
2 µl
* Use background control if high levels of pyruvate are suspected to be in the samples.
** For the fluorescent assay dilute the probe 5-10X to reduce background.
Add 50 µl of the Reaction Mix to each well containing Alanine standard, test and
background control samples. Mix well. Incubate the reaction for 60 min at 37°C, protect
from light.
4. Measure O.D. at 570 nm in a microplate reader or fluorescence using Ex/Em 535/587
nm.
5. Calculation: Correct background by subtracting the value derived from the 0 Alanine
control from all sample readings (The background reading can be significant and must
be subtracted from sample readings). Plot Alanine standard Curve, Alanine
concentrations of the test samples can then be calculated:
nmol/µl or mM
C = Sa/Sv
where Sa is the sample amount of unknown (in nmol) from standard curve,
Sv is sample volume (µl) added into the wells.
L-Alanine Molecular Weight is 89.1 g/mol.
1.2
6
1
0.8
4
y = 7142.6x - 150.29
2
OD 570nm
Introduction:
Alanine is the 2nd most abundant of the 20 proteinogenic amino acids. Nonessential, it plays a
key role in the glucose-alanine cycle between tissues and liver. In muscle and other tissues
that degrade amino acids, amino groups are pooled as glutamate by transamination.
Glutamate then transfers the amino group to pyruvate via alanine aminotransferase, forming
alanine and α-ketoglutarate. The alanine is passed into the blood and transported to the liver.
A reverse of the alanine aminotransferase reaction takes place in liver. Pyruvate can be used
in gluconeogenesis, to form glucose which may return to other tissues through the circulatory
system. There appears to be a correlation between alanine levels and higher blood pressure,
energy intake, cholesterol levels, and body mass index. BioVision’s Alanine Assay Kit
provides a simple, sensitive detection method of alanine. In the kit, alanine is converted to
pyruvate which is specifically detected leading to proportional color (λ=570nm: 0-10 nmol) or
fluorescence (Ex/Em 535/587nm: 0-1 nmol) development. Serum concentration: ~24-76 µg/ml
(~3-9 nmol/10 µl).
II. Kit Contents:
RFU 535/587 nm x 10-3
I.
0.6
0.4
y = 0.1232x - 0.0203
0.2
0
0
0
0.2
0.4
0.6
0.8
L-Alanine (nmol)
1
0
2
4
6
8
10
L-Alanine (nmol)
RELATED PRODUCTS:
NAD/NADH Quantification Kit
ADP/ATP Ratio Assay Kit
Glucose Assay Kit
Ethanol Assay Kit
Pyruvate Assay Kit
Creatine Assay Kit
Ammonia Assay Kit
Triglyceride Assay Kit
Choline/Acetylcholine Quantification Kit
Nitric Oxide Assay Kit
NADP/NADPH Quantification Kit
Ascorbic Acid Quantification Kit
Fatty Acid Assay Kit
Uric Acid Assay Kit
Lactate Assay Kit/ II
L-amino Acid Assay Kit
Free Glycerol Assay Kit
Hemin Assay Kit
Total Antioxidant Capacity (TAC) Assay Kit
Glutathione Detection Kit
FOR RESEARCH USE ONLY! Not to be used on humans.
Tel: 408-493-1800 | Fax: 408-493-1801
www.biovision.com | [email protected]
Page 1 of 2
BioVision
rev. 2/13
For research use only
GENERAL TROUBLESHOOTING GUIDE:
Problems
Cause
Assay not working
• Use of ice-cold assay buffer
• Assay buffer must be at room temperature
• Omission of a step in the protocol
• Refer and follow the data sheet precisely
• Plate read at incorrect wavelength
• Check the wavelength in the data sheet and the filter settings of the instrument
• Use of a different 96-well plate
• Fluorescence: Black plates (clear bottoms) ; Luminescence: White plates ; Colorimeters:
Clear plates
Samples with erratic readings
Lower/ Higher readings in Samples
and Standards
Readings do not follow a linear
pattern for Standard curve
Unanticipated results
Solution
• Use of an incompatible sample type
• Refer data sheet for details about incompatible samples
• Samples prepared in a different buffer
• Use the assay buffer provided in the kit or refer data sheet for instructions
• Samples were not deproteinized (if indicated in datasheet)
• Use the 10 kDa spin cut-off filter or PCA precipitation as indicated
• Cell/ tissue samples were not completely homogenized
• Use Dounce homogenizer (increase the number of strokes); observe for lysis under
microscope
• Samples used after multiple free-thaw cycles
• Aliquot and freeze samples if needed to use multiple times
• Presence of interfering substance in the sample
• Troubleshoot if needed, deproteinize samples
• Use of old or inappropriately stored samples
• Use fresh samples or store at correct temperatures till use
• Improperly thawed components
• Thaw all components completely and mix gently before use
• Use of expired kit or improperly stored reagents
• Always check the expiry date and store the components appropriately
• Allowing the reagents to sit for extended times on ice
• Always thaw and prepare fresh reaction mix before use
• Incorrect incubation times or temperatures
• Refer datasheet & verify correct incubation times and temperatures
• Incorrect volumes used
• Use calibrated pipettes and aliquot correctly
• Use of partially thawed components
• Thaw and resuspend all components before preparing the reaction mix
• Pipetting errors in the standard
• Avoid pipetting small volumes
• Pipetting errors in the reaction mix
• Prepare a master reaction mix whenever possible
• Air bubbles formed in well
• Pipette gently against the wall of the tubes
• Standard stock is at an incorrect concentration
• Always refer the dilutions in the data sheet
• Calculation errors
• Recheck calculations after referring the data sheet
• Substituting reagents from older kits/ lots
• Use fresh components from the same kit
• Measured at incorrect wavelength
• Check the equipment and the filter setting
• Samples contain interfering substances
• Troubleshoot if it interferes with the kit
• Use of incompatible sample type
• Refer data sheet to check if sample is compatible with the kit or optimization is needed
• Sample readings above/below the linear range
• Concentrate/ Dilute sample so as to be in the linear range
Note: The most probable list of causes is under each problem section. Causes/ Solutions may overlap with other problems.
BioVision Incorporated
155 S. Milpitas Boulevard, Milpitas, CA 95035 USA
Tel: 408-493-1800 | Fax: 408-493-1801
www.biovision.com | [email protected]
Page 2 of 2