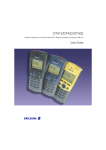
1
Backup Scanner
1747-BSN
User Manual
Important User Information
Because of the variety of uses for the products described in this
publication, those responsible for the application and use of this
control equipment must satisfy themselves that all necessary steps
have been taken to assure that each application and use meets all
performance and safety requirements, including any applicable laws,
regulations, codes and standards.
The illustrations, charts, sample programs and layout examples
shown in this guide are intended solely for purposes of example.
Since there are many variables and requirements associated with any
particular installation, Allen-Bradley does not assume responsibility
or liability (to include intellectual property liability) for actual use
based upon the examples shown in this publication.
Allen-Bradley publication SGI-1.1, Safety Guidelines for the
Application, Installation and Maintenance of Solid-State Control
(available from your local Allen-Bradley office), describes some
important differences between solid-state equipment and
electromechanical devices that should be taken into consideration
when applying products such as those described in this publication.
Reproduction of the contents of this copyrighted publication, in
whole or part, without written permission of Allen-Bradley Company,
Inc., is prohibited.
Throughout this manual we use notes to make you aware of safety
considerations:
!
ATTENTION: Identifies information about
practices or circumstances that can lead to personal
injury or death, property damage or economic loss.
Attention statements help you to:
• identify a hazard
• avoid a hazard
• recognize the consequences
Important: Identifies information that is critical for successful
application and understanding of the product.
Publication 1747-6.22
Table of Contents
Preface
Who Should Use This Manual . . . . . . . . . . . . . . . . . . . . . . . . . P-1
How to Use This Manual . . . . . . . . . . . . . . . . . . . . . . . . . . . . . P-1
Manual Contents . . . . . . . . . . . . . . . . . . . . . . . . . . . . . . . . . P-1
Related Documentation . . . . . . . . . . . . . . . . . . . . . . . . . . . . P-2
Conventions Used in This Manual . . . . . . . . . . . . . . . . . . . . . . P-3
Allen-Bradley Support . . . . . . . . . . . . . . . . . . . . . . . . . . . . . . . P-3
Local Product Support . . . . . . . . . . . . . . . . . . . . . . . . . . . . . P-3
Technical Product Assistance . . . . . . . . . . . . . . . . . . . . . . . P-3
Your Questions or Comments on the Manual . . . . . . . . . . . P-3
Chapter 1
Overview
System Overview . . . . . . . . . . . . . . . . . . . . . . . . . . . . . . . . . . . 1-1
Scanner I/O Image Division . . . . . . . . . . . . . . . . . . . . . . . . . 1-3
How the Scanner Scans Remote I/O . . . . . . . . . . . . . . . . . . . . 1-4
SLC and Scanner Asynchronous Operation . . . . . . . . . . . . . . 1-5
How the Scanner Interacts with Adapters . . . . . . . . . . . . . . . . 1-6
Scanner I/O Image Concepts. . . . . . . . . . . . . . . . . . . . . . . . 1-6
Example Scanner I/O Image. . . . . . . . . . . . . . . . . . . . . . 1-7
Transferring Data with RIO Discrete and Block Transfers 1-8
Physical and Logical RIO Link Specifications . . . . . . . . . 1-9
Extended Node Capability . . . . . . . . . . . . . . . . . . . . . . . 1-9
Complementary I/O. . . . . . . . . . . . . . . . . . . . . . . . . . . . . 1-9
Guidelines for Configuring Complementary I/O . . . . . . 1-10
Complementary I/O: Placing Modules with
2-Slot Addressing . . . . . . . . . . . . . . . . . . . . . . . . . . 1-11
Complementary I/O: Placing Modules with
1-Slot Addressing . . . . . . . . . . . . . . . . . . . . . . . . . . 1-12
Complementary I/O: Placing Modules with 1/2-Slot
Addressing . . . . . . . . . . . . . . . . . . . . . . . . . . . . . . . . 1-13
Summary for Placing Modules Used In
Complementary I/O . . . . . . . . . . . . . . . . . . . . . . . . . 1-13
Discrete Modules . . . . . . . . . . . . . . . . . . . . . . . . . . . . . 1-13
Block Transfer Modules. . . . . . . . . . . . . . . . . . . . . . . . . 1-14
Complementary I/O Application Considerations . . . . . . 1-16
Complementary 1771 I/O Module Details. . . . . . . . . . . 1-16
Hardware Features . . . . . . . . . . . . . . . . . . . . . . . . . . . . . . 1-17
Status LEDs . . . . . . . . . . . . . . . . . . . . . . . . . . . . . . . . . . . . 1-17
Configuration Dip Switch Settings . . . . . . . . . . . . . . . . . . . 1-18
Module Address Switch . . . . . . . . . . . . . . . . . . . . . . . . 1-19
Compatible Devices . . . . . . . . . . . . . . . . . . . . . . . . . . . 1-19
Backup Concepts for the SLC 500 System . . . . . . . . . . . . . . 1-20
Why Use a Backup System? . . . . . . . . . . . . . . . . . . . . 1-20
Applying 1747-BSN Backup Scanner Modules
to the SLC-500 Programmable Controller . . . . . . . . 1-20
A Typical SLC 500 Backup Configuration . . . . . . . . . . . 1-21
Publication 1747-6.22
vi
Table of Contents
How the SLC 500 Backup System Works. . . . . . . . 1-22
Chapter 2
Quick Start for Experienced Users
Required Tools and Equipment . . . . . . . . . . . . . . . . . . . . . 2-1
Procedures . . . . . . . . . . . . . . . . . . . . . . . . . . . . . . . . . . . . . 2-2
Chapter 3
Installation and Wiring
Compliance to European Union Directives . . . . . . . . . . 3-1
EMC Directive . . . . . . . . . . . . . . . . . . . . . . . . . . . . . . . . 3-1
Configuration Selection . . . . . . . . . . . . . . . . . . . . . . . . . . . 3-1
Baud Rate Settings. . . . . . . . . . . . . . . . . . . . . . . . . . 3-2
Module Address Switch . . . . . . . . . . . . . . . . . . . . . . 3-2
Backup Scanner Installation . . . . . . . . . . . . . . . . . . . . . 3-3
Insertion . . . . . . . . . . . . . . . . . . . . . . . . . . . . . . . . . . 3-3
Removal . . . . . . . . . . . . . . . . . . . . . . . . . . . . . . . . . . 3-4
Wiring. . . . . . . . . . . . . . . . . . . . . . . . . . . . . . . . . . . . . . . 3-4
Terminal Wiring . . . . . . . . . . . . . . . . . . . . . . . . . . . . . 3-4
Status LEDs . . . . . . . . . . . . . . . . . . . . . . . . . . . . . . . 3-6
Chapter 4
Operating Your SLC 500
Backup System
Chapter Objectives . . . . . . . . . . . . . . . . . . . . . . . . . . . . . . . 4-1
How the 1747-BSN Module Operates . . . . . . . . . . . . . . . . 4-1
Automatic Transfer of Remote Input Data
Over the HSSL . . . . . . . . . . . . . . . . . . . . . . . . . . . . . 4-1
RS-232/485 Communication Channel . . . . . . . . . . . 4-2
RIO/DH+ Communication Channel. . . . . . . . . . . . . . 4-2
Secondary Processor Remote Programming . . . . . . 4-4
Data Table Transfer . . . . . . . . . . . . . . . . . . . . . . . . . . . . . . 4-5
How the Backup System Operates . . . . . . . . . . . . . . . . . . 4-5
Primary Program . . . . . . . . . . . . . . . . . . . . . . . . . . . . . . 4-6
Secondary Program . . . . . . . . . . . . . . . . . . . . . . . . . . . . 4-6
Backup System Theory of Operation . . . . . . . . . . . . . . . 4-6
Startup Sequencing . . . . . . . . . . . . . . . . . . . . . . . . . 4-7
Power-up Sequencing . . . . . . . . . . . . . . . . . . . . . . . . . . . . 4-7
Processor Mode Change Sequencing . . . . . . . . . . . . . . . . 4-7
Fail-over Sequencing . . . . . . . . . . . . . . . . . . . . . . . . . . . . . 4-8
Power Down Sequencing . . . . . . . . . . . . . . . . . . . . . . . . . . 4-8
Restarting a failed system . . . . . . . . . . . . . . . . . . . . . . . . . 4-8
Publication 1747-6.22
Table of Contents vii
Chapter 5
Scanner Configuration and
Programming
Understanding Remote Input and Output Image Files . . . 5-1
RIO Configuration Using G Files . . . . . . . . . . . . . . . . . . 5-2
Rules for Configuring the Scanner . . . . . . . . . . . . . . . . . . . 5-5
General . . . . . . . . . . . . . . . . . . . . . . . . . . . . . . . . . . . . . 5-5
Concerning Complementary I/O . . . . . . . . . . . . . . . 5-5
Considerations When Configuring Remote I/O . . . . . . . . . 5-9
G File Considerations . . . . . . . . . . . . . . . . . . . . . . . . . . 5-9
Crossing Logical Rack Boundaries . . . . . . . . . . . . . . . . . . 5-9
Examples of Crossing Logical Rack Boundaries. . . . . . 5-9
Understanding M Files . . . . . . . . . . . . . . . . . . . . . . . . . . . 5-10
M Files Overview. . . . . . . . . . . . . . . . . . . . . . . . . . . . . 5-10
M0 Control File Description . . . . . . . . . . . . . . . . . . . . . 5-13
M0 File - RIO Device Inhibit Control . . . . . . . . . . . . . . . . 5-14
M0 File - RIO Device Reset Control . . . . . . . . . . . . . . . . 5-15
M0 File - Remote Output Reset Control . . . . . . . . . . . . . 5-16
Device Reset and Remote Output Reset
Considerations From this mode . . . . . . . . . . . . 5-17
M1 Status File Description . . . . . . . . . . . . . . . . . . . . . . . . 5-19
General Communication Status - Enable Device
Fault Bit . . . . . . . . . . . . . . . . . . . . . . . . . . . . . . . . . . . . . . 5-19
General Communication Status - Communication
Attempted Bit . . . . . . . . . . . . . . . . . . . . . . . . . . . . . . . . . 5-20
RIO Baud Rate Status . . . . . . . . . . . . . . . . . . . . . . . . . . . 5-20
Logical Device Starting Address Status . . . . . . . . . . . . . . 5-21
Logical Device Image Size Status . . . . . . . . . . . . . . . . . . 5-21
Active Device Status . . . . . . . . . . . . . . . . . . . . . . . . . . . . 5-22
Logical Device Fault Status . . . . . . . . . . . . . . . . . . . . . . . 5-23
RIO Status Example . . . . . . . . . . . . . . . . . . . . . . . . . . . . 5-25
SLC/Scanner Configuration . . . . . . . . . . . . . . . . . . . . . . . 5-29
Chapter 6
Module Control and Status
Word
System Status Word . . . . . . . . . . . . . . . . . . . . . . . . . . . . . 6-2
Module Status Word . . . . . . . . . . . . . . . . . . . . . . . . . . . . . 6-4
Transferring Data over the High-Speed Serial Link
(HSSL) . . . . . . . . . . . . . . . . . . . . . . . . . . . . . . . . . . . . . . . 6-5
Data Transfer Control Word . . . . . . . . . . . . . . . . . . . . . . . . 6-6
Data Transfer Status Word . . . . . . . . . . . . . . . . . . . . . . . . 6-7
Data Transfer Handshake Word . . . . . . . . . . . . . . . . . . . . 6-8
Program File 2 . . . . . . . . . . . . . . . . . . . . . . . . . . . . . 6-9
Publication 1747-6.22
viii
Table of Contents
Program File 3 . . . . . . . . . . . . . . . . . . . . . . . . . . . . 6-10
Program File 4 . . . . . . . . . . . . . . . . . . . . . . . . . . . . 6-11
Switch Assemblies Status Word . . . . . . . . . . . . . . . . . . . . 6-12
Module Status Counters . . . . . . . . . . . . . . . . . . . . . . . . . . 6-13
Data Block Counters . . . . . . . . . . . . . . . . . . . . . . . . . . . . 6-14
Chapter 7
RIO Block Transfer
RIO Block Transfer Theory of Operation . . . . . . . . . . . . . . 7-1
What Is RIO Block Transfer? . . . . . . . . . . . . . . . . . . . . . 7-1
RIO Block Transfer General Functional Overview . . . . . . . 7-5
Scanner I/O Image Allocation For Block Transfer . . . . . 7-6
Examples of BT I/O Image File Allocation . . . . . . . . . . . 7-6
Scanner’s Block Transfer Buffer Layout . . . . . . . . . . . . . . . 7-8
M0 File - Block Transfer Output/Control Buffers . . . . . . 7-8
M0 File BT Control Buffer Layout . . . . . . . . . . . . . . . 7-9
BT Control Flag Definitions . . . . . . . . . . . . . . . . . . . 7-9
M1 File - Block Transfer Input/Status Buffers . . . . . . . . 7-9
M1 File - Input/Status BT Buffer Layout
(M1:e.100... M1:e.3200). . . . . . . . . . . . . . . . . . . 7-10
M1 File - BTR/BTW Error Codes (M1:e.103 ...
M1:e.3203) . . . . . . . . . . . . . . . . . . . . . . . . . . . . . 7-10
M1 File - BTR/BTW Status Flag Definitions
(M1:e.100 ... M1:e.3200) . . . . . . . . . . . . . . . . . . 7-11
Detailed Operation of RIO Block Transfer . . . . . . . . . . . . 7-12
Block Transfer Timing Diagrams . . . . . . . . . . . . . . . . . 7-14
Successful Block Transfer. . . . . . . . . . . . . . . . . . . . 7-14
Successful Block Transfer Read/Write . . . . . . . . . . 7-14
Block Transfer Failure at Startup. . . . . . . . . . . . . . . 7-15
Block Transfer Failure at Startup. . . . . . . . . . . . . . . 7-15
Block Transfer Failure After Startup of
Transmission Across RIO Link . . . . . . . . . . . . . . 7-16
Block Transfer Failure after Startup of
Transmission Across the RIO Link . . . . . . . . . . . 7-16
SLC Control Program Cancelling a Block
Transfer Once Transmitted Across RIO Link . . . 7-17
SLC Control Program Canceling a BT Once
Transmitted Across RIO Link . . . . . . . . . . . . . . . 7-17
SLC Control Program Cancelling a Block
Transfer Prior To Transmission Across RIO Link 7-18
SLC Control Program Canceling a BT Prior to
Transmission Across RIO Link . . . . . . . . . . . . . . 7-18
Setting Up A Block Transfer . . . . . . . . . . . . . . . . . . . . . . . 7-20
Quick Reference to Status and Control Bits . . . . . . . . . . . 7-20
Status Bits. . . . . . . . . . . . . . . . . . . . . . . . . . . . . . . . 7-20
Control Bits . . . . . . . . . . . . . . . . . . . . . . . . . . . . . . . 7-21
Block Transfer Read Control Logic Example . . . . . . . . . . 7-21
Directional Continuous Block Transfer Example . . . . . 7-27
Directional Repeating Block Transfer Example . . . . . . 7-31
Publication 1747-6.22
Table of Contents
ix
Directional Non-Continuous Block Transfer
Example . . . . . . . . . . . . . . . . . . . . . . . . . . . . . . 7-34
Bidirectional Continuous Block Transfer Example . 7-37
Bidirectional Alternating Block Transfer . . . . . . . . . 7-42
Bidirectional Alternating Repeating Block Transfer 7-48
Chapter 8
Switchover Considerations
Timing Requirements . . . . . . . . . . . . . . . . . . . . . . . . . . . . . 8-1
Input Signal Update Time . . . . . . . . . . . . . . . . . . . . . . . 8-2
Time-out on Remote I/O Link . . . . . . . . . . . . . . . . . . . . 8-2
Data Table Transfer Time on HSSL . . . . . . . . . . . . . . . 8-2
Divergence . . . . . . . . . . . . . . . . . . . . . . . . . . . . . . . . . . . . . 8-3
Forcing I/O . . . . . . . . . . . . . . . . . . . . . . . . . . . . . . . . . . . . . 8-3
Data Highway Plus Switching . . . . . . . . . . . . . . . . . . . . . . 8-4
Remote I/O Switching . . . . . . . . . . . . . . . . . . . . . . . . . . . . 8-6
Chapter 9
Programming Techniques
Chapter Objectives . . . . . . . . . . . . . . . . . . . . . . . . . . . . . . 9-1
Getting Started . . . . . . . . . . . . . . . . . . . . . . . . . . . . . . . . . . 9-1
Program File 2 . . . . . . . . . . . . . . . . . . . . . . . . . . . . . 9-2
Program File 3 . . . . . . . . . . . . . . . . . . . . . . . . . . . . . 9-3
Program File 4 . . . . . . . . . . . . . . . . . . . . . . . . . . . . . 9-8
Data Transfer Schemes . . . . . . . . . . . . . . . . . . . . . . . . . . 9-13
Data Transfer Method 1. . . . . . . . . . . . . . . . . . . . . . . . 9-13
Data Transfer Method 2. . . . . . . . . . . . . . . . . . . . . . . . 9-14
Other transfer methods . . . . . . . . . . . . . . . . . . . . . . . . 9-15
Accounting for Instructions That Could Cause
Problems During Switchover . . . . . . . . . . . . . . . . . . . . . 9-16
Timer Instructions . . . . . . . . . . . . . . . . . . . . . . . . . . . . 9-16
Counter Instructions . . . . . . . . . . . . . . . . . . . . . . . . . . 9-17
Programming Techniques . . . . . . . . . . . . . . . . . . . . . . 9-18
Diagnostic, Sequencing, File Arithmetic and Logic
File Search and Compare, File Copy
and Fill Instructions. . . . . . . . . . . . . . . . . . . . . . . . . 9-18
FIFO and Bit Displacement Instructions . . . . . . . . . . . 9-18
Block Transfer Instructions . . . . . . . . . . . . . . . . . . . . . 9-19
Message Instructions. . . . . . . . . . . . . . . . . . . . . . . . . . 9-19
PID Control Files . . . . . . . . . . . . . . . . . . . . . . . . . . . . . 9-20
Summary of Programming Considerations . . . . . . . . . . . 9-20
Publication 1747-6.22
x
Table of Contents
Appendix A
Specifications
Backup Scanner Operating Specifications . . . . . . . . . . . . .A-1
Network Specifications . . . . . . . . . . . . . . . . . . . . . . . . . . . .A-1
Throughput Introduction . . . . . . . . . . . . . . . . . . . . . . . . . . .A-2
RIO Network Throughput Components . . . . . . . . . . . . .A-2
Calculating Throughput . . . . . . . . . . . . . . . . . . . . . . . . . . .A-3
Discrete I/O Throughput without Block Transfers
(Tdm-nbt) Present . . . . . . . . . . . . . . . . . . . . . . . . . . .A-3
RIO Scan Time Calculation (TRIO) . . . . . . . . . . . . . . . .A-4
Example Discrete I/O Throughput without Block
Transfers Present. . . . . . . . . . . . . . . . . . . . . . . . . . . .A-4
Discrete I/O Throughput with Block Transfers
(Tdm-bt) Present . . . . . . . . . . . . . . . . . . . . . . . . . . . .A-6
Determining TSNo-bt . . . . . . . . . . . . . . . . . . . . . . . .A-6
Determining Tbtx . . . . . . . . . . . . . . . . . . . . . . . . . . .A-7
Example Discrete I/O Throughput with Block Transfers
Present. . . . . . . . . . . . . . . . . . . . . . . . . . . . . . . . . . . .A-7
Block Transfer Throughput. . . . . . . . . . . . . . . . . . . . . . .A-9
Backup Scanner Output Delay Time (TSNo) Tables . .A-11
Determining the Number of Logical Racks
Configured . . . . . . . . . . . . . . . . . . . . . . . . . . . . .A-11
Appendix B
M0-M1 Files and G Files
M0-M1 Files . . . . . . . . . . . . . . . . . . . . . . . . . . . . . . . . . . . .B-1
Configuring M0-M1 Files . . . . . . . . . . . . . . . . . . . . . . . .B-1
Addressing M0-M1 Files . . . . . . . . . . . . . . . . . . . . . . . .B-2
Using M0-M1 Data File Addresses . . . . . . . . . . . . . . . .B-2
Monitoring Bit Addresses . . . . . . . . . . . . . . . . . . . . . . . .B-3
M0/M1 Monitoring Option Disabled . . . . . . . . . . . . . . . .B-3
M0/M1 Monitoring Option Enabled. . . . . . . . . . . . . . . . .B-4
Transferring Data Between Processor Files
and M0 or M1 Files . . . . . . . . . . . . . . . . . . . . . . . . . .B-4
Access Time . . . . . . . . . . . . . . . . . . . . . . . . . . . . . . . . .B-5
SLC 5/02 Processor Example. . . . . . . . . . . . . . . . . .B-5
SLC 5/03 Processor Example. . . . . . . . . . . . . . . . . .B-6
SLC 5/04 Processor Example. . . . . . . . . . . . . . . . . .B-6
Minimizing the Scan Time . . . . . . . . . . . . . . . . . . . . . . .B-6
Capturing M0-M1 File Data . . . . . . . . . . . . . . . . . . . . . .B-7
Specialty I/O Modules with Retentive Memory. . . . . . . .B-8
G Files . . . . . . . . . . . . . . . . . . . . . . . . . . . . . . . . . . . . . . . .B-8
Configuring G Files . . . . . . . . . . . . . . . . . . . . . . . . . .B-9
Editing G File Data. . . . . . . . . . . . . . . . . . . . . . . . . . . .B-10
Publication 1747-6.22
Table of Contents
xi
Appendix C
RIO Configuration Worksheet . . . . . . . . . . . . . . . . . . . . C-1
Directions . . . . . . . . . . . . . . . . . . . . . . . . . . . . . . . . . . . . . . C-1
Glossary
Index
Publication 1747-6.22
xii
Table of Contents
Publication 1747-6.22
Preface
Read this preface to familiarize yourself with the rest of the manual.
This preface covers the following topics:
• who should use this manual
• how to use this manual
• related publications
• conventions used in this manual
• Allen-Bradley support
Who Should Use This
Manual
Use this manual if you are responsible for designing, installing,
programming, or troubleshooting control systems that use
Allen-Bradley small logic controllers.
How to Use This
Manual
As much as possible, we organized this manual to explain, in a taskby-task manner, how to install, configure, program, operate and
troubleshoot a control system using the 1747-BSN Backup Scanner.
Manual Contents
If you want...
See
An overview of the system including backup scanner/SLC interaction, compatible devices, and features
Chapter 1
A quick start guide for experienced users
Chapter 2
Installation and wiring guidelines
Chapter 3
Operating your SLC 500 backup system
Chapter 4
Backup scanner configuration information, I/O file information, and G and M file descriptions
Chapter 5
Information on module control and status word
Chapter 6
RIO block transfer information, M file block transfer buffer layout, block transfer examples
Chapter 7
Switchover considerations
Chapter 8
Programming techniques
Chapter 9
Backup scanner and system specifications
Appendix A
Information and usage of M and G files
Appendix B
Worksheets for configuring the scanner’s I/O image
Appendix C
Definitions of terms used in this manual
Glossary
Publication 1747-6.22
14
Related Documentation
The table below provides a listing of publications that contain
important information about Allen-Bradley SLC products.
For
Read this document
Document number
An overview of the SLC 500 family of products
SLC 500 System Overview
1747-2.30
A description on how to install and use your Modular SLC 500
programmable controller
Installation & Operation Manual for
Modular Hardware Style Programmable
Controllers
1747-6.2
A reference manual that contains status file data and instruction set
information for the SLC 500 processors.
SLC 500™ and MicroLogix 1000™
Instruction Set Reference Manual
1747-6.15
Installation guide for the Backup Scanner Module
Backup Scanner Module Installation
Instructions
1747-5.38
An article on wire sizes and types for grounding electrical equipment
National Electrical Code
A complete listing of current Allen-Bradley documentation, including
ordering instructions. Also indicates whether the documents are
available on CD-ROM or in multi-languages.
Allen-Bradley Publication Index
SD499
A glossary of industrial automation terms and abbreviations
Allen-Bradley Industrial Automation
Glossary
AG-7.1
In-depth information on grounding and wiring Allen-Bradley
programmable controllers.
Allen-Bradley Programmable Controller
Grounding and Wiring Guidelines
Published by the
National Fire Protection
Association of Boston,
MA.
1770-4.1
If you would like a manual, you can:
• download a free electronic version from the internet at
www.theautomationbookstore.com
• purchase a printed manual by:
– contacting your local distributor or Rockwell Automation
representative
– visiting www.theautomationbookstore.com and placing
your order
– calling 1.800.963.9548 (USA/Canada) or 001.330.725.1574
(Outside USA/Canada)
Publication 1747-6.22
15
Conventions Used in
This Manual
The following conventions are used throughout this manual:
• Bulleted lists (like this one) provide information not procedural
steps.
• Numbered lists provide sequential steps or hierarchical
information.
• Italic type is used for emphasis.
• Text in this font indicates words or phrases you should type.
Allen-Bradley Support
Allen-Bradley offers support services worldwide, with over 75 Sales/
Support Offices, 512 authorized distributors and 260 authorized
Systems Integrators located throughout the United States alone, plus
Allen-Bradley representatives in every major country in the world.
Local Product Support
Contact your local Allen-Bradley representative for:
• sales and order support
• product technical training
• warranty support
• support service agreement
Technical Product Assistance
If you need to contact Allen-Bradley for technical assistance, please
review the information in Chapter 6, Module Diagnostics and
Troubleshooting first. Then call your local Allen-Bradley
representative.
Your Questions or Comments on the Manual
If you find a problem with this manual, please notify us using the selfmailer Publications Problem Report in the front of this manual.
If you have any suggestions for how this manual could be made more
useful to you, please contact us at the address below:
Allen-Bradley Company, Inc.
Control and Information Group
Technical Communication, Dept. A602V, T122
P.O. Box 2086
Milwaukee, WI 53201-2086
Publication 1747-6.22
16
Publication 1747-6.22
Chapter
1
Overview
This chapter contains the following information:
• system overview
• how the scanner interacts with the SLC processor
• how the scanner interacts with adapter modules
• scanner I/O image concepts
• extended node capability
• complementary I/O
• scanner features
• compatible network devices
• backup concepts for the SLC-500 system
System Overview
The 1747-BSN Backup Scanner provides redundancy for:
• Remote I/O (RIO)
• RS232 channel switchover for communications to devices such
as operator interface
• DH+
The backup scanner also provides a High Speed Serial Link (HSSL)
to write any retentative data from a primary to a secondary processor.
In addition, the module has a Local Serial Link (LSL) to pass status
information between multiple BSN modules located in the same
chassis (optional).
The 1747-BSN is a complementary set of modules, with one module
residing in the primary system and another module in the secondary
or backup system. The primary module controls the operation of
remote I/O, while the secondary module is available to take over
control in the event of a fault in the primary.
The backup scanner has the capability to switch between two
communication channels. The first channel is configurable as RIO or
DH+. The second channel is used to switch the RS232/485 channel in
order to provide connection for electronic operator interfaces.
The Remote I/O (RIO) scanner, Catalog Number 1747-SN, is the
remote I/O scanner for the SLC 500. It enables communication
between an SLC processor (SLC 5/02 or later) and remotely located
(3,048 meters [10,000 feet] maximum) 1746 I/O chassis and other
RIO-compatible Allen-Bradley operator interface and control
devices. The 1747-SN scanner communicates with remotely located
devices using the A-B Remote I/O link. The RIO link consists of a
single master (scanner) and multiple slaves (adapters).
Publication 1747-6.22
1-18
Overview
Communication between devices occurs over twisted-pair cable with
the devices daisy-chained together. The scanner can reside in any slot
of the local SLC chassis except for slot 0. The 1747-BSN includes the
same functionality as the 1747-SN scanner, as well as the backup
features.
RIO Scanner (Master
of the RIO LInk)
SLC 5/02 or
later Processor
The scanner transfers input and output data between
itself and all configured network devices over twisted-pair
cable. Note that the end-to-end length of the cable can be
a maximum of 3,048 meters (10,000 feet)
1747-ASB Module (Adapter/
Slave)
Local SLC Chassis
Remote Chassis
Remote Expansion Chassis
Dataliner Message Display
(Adapter/Slave)
PanelView-Operator Terminal
(Adapter/Slave)
RediPANEL(Adapter/Slave)
The scanner can be configured for and transfer a maximum of 4
logical racks of discrete data on the RIO link. The scanner provides
discrete I/O and block transfers. Configurations allowed are any
combination of quarter, half, three quarter, or full logical rack
devices.
SLC 5/02 or
Later Processor
RIO Scanner
The scanner transfers discrete input and output data between itself,
remote adapters, and the SLC processor. Remote adapters consist of
1746 chassis and other Allen-Bradley operator interface and control
devices.
Adapter 1
Half Logical
Rack
Device
Publication 1747-6.22
Adapter 2
Quarter Logical
Rack
Device
Adapter 3
Half
Logical Rack
Device
Adapter 4
Three Quarter
Logical Rack Device
Adapter 5
Full
Logical Rack
Device
Adapter 6
Full
Logical Rack
Device
Overview
1-19
The SLC processor transfers the scanner’s 4 logical racks (32 input
image and 32 output image words) of discrete remote I/O image data
into the SLC input and output image files. You can adjust the size of
the scanner input and output image file during configuration of your
SLC system so that the scanner only transfers the discrete I/O data
your application program requires. Configuration is done through the
configuration file (G file). Refer to chapter 4, Configuration and
Programming, for more information.
Important: The SLC 500 processor (SLC 5/02 or later) supports
multiple scanners in its local I/O chassis. The maximum
number is dependent on the following:
• backplane power requirements (power supply dependent)
• SLC 500 processor I/O data table limit (4,096 I/O)
Based on SLC processor I/O capacity only, a maximum of eight
scanners may be used when no local I/O exists.
• processor memory to support the application (SLC 500
processor dependent)
Scanner I/O Image Division
The scanner allows each adapter to use a fixed amount (user-defined)
of the scanner’s input and output image. Part of the SLC processor’s
image is used by local I/O; the other portion is used by the scanner for
remote I/O.
The scanner remote I/O image is divided into logical racks and
further divided into logical groups. A full logical rack consists of
eight input and eight output image words. A logical group consists of
one input and one output word in a logical rack. Each logical group is
assigned a number from 0-7.
Local I/O
Logical Rack 0
Remote I/O
Logical Rack 1
Logical Group 0
Logical Rack 2
Logical Group 7
Processor I/O Image
Scanner I/O Image
Adapter
Image
The scanner image contains the image of each adapter on the RIO
link. The adapter is assigned a portion of the scanner image, which is
referred to as the adapter image.
Publication 1747-6.22
1-20
Overview
How the Scanner
Scans Remote I/O
The scanner communicates with each logical device in a sequential
fashion. First, the scanner initiates communication with a device by
sending output data to the device. The device then responds by
sending its input data back to the scanner, as illustrated below. You
refer to this exchange as a discrete I/O transfer. After the scanner
completes its discrete I/O transfer with the last configured network
device, it begins another discrete I/O transfer with the first device.
It is important to understand that the scanner transfers RIO data on a
logical device basis not on an adapter basis. A logical device is a full
logical rack or portion of a logical rack assigned to an adapter.
RIO Scanner Scan
Scanner Input Output Device
Image File
3
Input
Device 1
The scanner updates its input image
file each time it scans a logical device.
Input Device
3
Output
Device 2
Scanner Output Image
File
Publication 1747-6.22
Output Device
1
Input Device
2
Overview
SLC and Scanner
Asynchronous
Operation
1-21
The SLC processor scan and RIO scanner scan are independent
(asynchronous) of each other. The SLC processor reads the scanner
input image file during its input scan and writes the output image file
to the scanner during its output scan. The RIO scanner continues
reading inputs and writing outputs to the scanner I/O image file,
independent of the SLC processor scan cycle.
Depending on your SLC processor, RIO link configuration, and
application program size, the scanner may complete multiple scans
before the SLC processor reads the scanner’s input image file. The
RIO scanner updates its I/O files on a per logical rack basis.
The figure below illustrates the asynchronous operation of the SLC
processor and RIO scanner.
SLC Processor Scan Cycle
The SLC processor reads the
scanner input image file into the
SLC input image file, processes
it, and creates an SLC output
image file. The SLC processor
transfers its output file to the
scanner.
SLC Input
Image File
Output
Scanner Image
Input
Device 3
Image File
Input
Image
Device 3
Program
Output
Image
Device 2
SLC Processor
SLC Output
Image file
Scanner
Output Image
File
Input
Image
Device 1
RIO Scanner Scan Cycle
Output
Image
Device 1
Input
Image
Device 2
The scanner updates its input
image file each time it scans a
logical device. The scanner
may scan all of its configured
logical devices several times
before the SLC processor
reads the scanner’s input
image file
Important: The outputs of the RIO are updated after the end of the
first SLC processor scan.
Publication 1747-6.22
1-22
Overview
How the Scanner
Interacts with
Adapters
The scanner’s function is to continuously scan the adapters on the
RIO link in a consecutive manner. This scan consists of one or more
RIO discrete transfers to each adapter on the RIO link.
RIO discrete transfers consist of the scanner sending output image
data and communication commands to the adapter that instruct the
adapter on how to control its output. (These include run, adapter reset,
and reset decide commands.) The adapter responds by sending input
data to the scanner. The scanner performs as many RIO discrete
transfers as necessary to update the entire adapter image. If RIO
discrete transfers do not occur, data is not exchanged between the
scanner and adapter. RIO discrete transfers are asynchronous to the
processor scan.
Processor
Scanner
RIO Discrete
Transfers with
Adapter 1
SLC Local Chassis
RIO Discrete
Transfers
with Adapter 2
PanelView Operator Terminal
RIO Discrete Transfers
with Adapter 3
RIO Discrete
Transfers
with Adapter 4
RediPANEL
Scanner I/O Image Concepts
The scanner’s I/O image consists of RIO logical racks and I/O
groups. A full RIO logical rack consists of eight input image and
eight output image words. (A word consists of 16 bits of data.) Each
word within an RIO logical rack is assigned an I/O group number
from 0 to 7.
You assign devices on the RIO link a portion of the scanner’s image.
Devices can occupy a quarter logical rack (2 input and output words),
half logical rack (4 I/O words), three quarter logical rack (6 I/O
words), or full logical rack. You may configure devices to start at any
even I/O group number within an RIO logical rack. More than one
physical device’s (adapter) I/O information can reside in a single
logical rack. Also, by crossing logical rack boundaries a device can
consist of more than one logical rack.
Important: The illustration below shows only the input image
configuration of the scanner’s I/O image. The output
image configuration is the same.
Publication 1747-6.22
Overview
1-23
Input Image Half of a Scanner’s I/O Image
RIO
Logical
Rack 0
RIO
Logical
Rack 1
RIO
Logical
Rack 2
RIO
Logical
Rack 3
Bit Number (decimal)
Rack 0 Group 0 Word 0
Rack 0 Group 1 Word 1
Rack 0 Group 2 Word 2
Rack 0 Group 3 Word 3
Rack 0 Group 4 Word 4
Rack 0 Group 5 Word 5
Rack 0 Group 6 Word 6
Rack 0 Group 7 Word 7
Rack 1 Group 0 Word 8
Rack 1 Group 1 Word 9
Rack 1 Group 2 Word 10
Rack 1 Group 3 Word 11
Rack 1 Group 4 Word 12
Rack 1 Group 5 Word 13
Rack 1 Group 6 Word 14
Rack 1 Group 7 Word 15
Rack 2 Group 0 Word 16
Rack 2 Group 1 Word 17
Rack 2 Group 2 Word 18
Rack 2 Group 3 Word 19
Rack 2 Group 4 Word 20
Rack 2 Group 5 Word 21
Rack 2 Group 6 Word 22
Rack 2 Group 7 Word 23
Rack 3 Group 0 Word 24
Bit Number (octal)
15
14
13
12
11
10
9
8
7
6
5
4
3
2
1
0
Quarter Logical
Rack
Not Used In This
Example
Half Logical
Rack
Not Used In This
Example
Three Quarter
Logical Rack
Not Used In This
Example
Full Logical
Rack
178
168
158
148
138
128
118
108
78
68
58
48
38
28
18
08
Example Scanner I/O Image
The illustrations below show a scanner’s input image of 4 RIO link
devices.
SLC 5/02 or
Later
Processor
RIO
Scanner
Device 1
Full Logical Rack
Device
Begins at Logical Rack
0, Group 0
Device 2
Three Quarter Logical Rack
Device
Begins at Logical Rack 1,
Group 0
Device 3
Half Logical Rack
Device
Begins at Logical Rack
2, Group 0
Device 4
Quarter Logical Rack
Device
Begins at Logical Rack 2,
Group 4
Publication 1747-6.22
1-24
Overview
Important: The illustration below shows only the scanner’s input
image. The output image looks the same.
RIO
Logical
Rack 0
RIO
Logical
Rack 1
RIO
Logical
Rack 2
RIO
Logical
Rack 3
Bit Number
Rack 0 Group 0Word 0
Rack 0 Group 1 Word 1
Rack 0 Group 2Word 2
Rack 0 Group 3 Word 3
Rack 0 Group 4Word 4
Rack 0 Group 5 Word 5
Rack 0 Group 6Word 6
Rack 0 Group 7 Word 7
Rack 1 Group 0Word 8
Rack 1 Group 1 Word 9
Rack 1 Group 2Word 10
Rack 1 Group 3 Word 11
Rack 1 Group 4Word 12
Rack 1 Group 5 Word 13
Rack 1 Group 6Word 14
Rack 1 Group 7 Word 15
Rack 2 Group 0Word 16
Rack 2 Group 1 Word 17
Rack 2 Group 2Word 18
Rack 2 Group 3 Word 19
Rack 2 Group 4Word 20
Rack 2 Group 5 Word 21
Rack 2 Group 6Word 22
Rack 2 Group 7 Word 23
Bit Number (octal)
15
178
14
168
13
158
12
148
11
138
10
128
9
118
8
108
7
78
6
68
5
58
4
48
3
38
2
28
1
18
0
Input File
Address
I:e.0
I:e.1
I:e.2
I:e.3
I:e.4
I:e.5
I:e.6
I:e.7
I:e.8
I:e.9
I:e.10
I:e.11
I:e.12
I:e.13
I:e.14
I:e.15
I:e.16
I:e.17
I:e.18
I:e.19
I:e.20
I:e.21
I:e.22
I:e.23
Device 1
Device 2
Not Used
Device 3
Device 4
Not Used
08
e = slot number of the SLC chassis containing the scanner
Transferring Data with RIO Discrete and Block Transfers
Input and output image data and command information are quickly
exchanged between a scanner and adapter using RIO discrete
transfers. RIO discrete transfers are the simplest and fastest way a
scanner and adapter communicate with each other. RIO discrete
transfers, which are transparent to the user, consist of the scanner
sending the output image data to the adapter, and the adapter
transmitting input data to the scanner. Each RIO discrete transfer also
contains scanner commands for the adapter.
Through your control program you command the SLC processor to
initiate RIO block transfers, which directs the scanner to exchange
large amounts of data to/from an adapter. Block Transfers (BTs) use
the basic RIO discrete transfer mechanism of the RIO link. However,
the actual transfer of data occurs asynchronous to the discrete
transfers. It is possible for several discrete transfers to occur before
the scanner processes a block transfer. Refer to chapter 5, RIO Block
Transfer for more details.
Publication 1747-6.22
Overview
1-25
Physical and Logical RIO Link Specifications
The maximum number of adapters with which your scanner can
communicate is determined by the scanner’s and adapter’s physical
and logical specifications, as described below:
• Physical Specifications are the maximum number of adapters
that can be connected to the scanner. For more information, see
Extended Node Capability below.
• Logical Specifications for the scanner are the maximum number
of logical racks the scanner can address, how the logical racks
can be assigned, and whether the scanner can perform block
transfers.
Extended Node Capability
Extended node functionality allows you to connect up to 32 physical
devices on an RIO link. You must use 82 Ohm termination resistors in
an extended node configuration. You can only use extended node if
all RIO link devices have extended node capability. (Refer to the
Compatible Devices table at the end of this chapter, or to the
specifications of your device.) The 1747-BSN Scanner has extended
node capability. However, the smallest logical rack division is 1/4
logical rack and the scanner image size is 4 logical racks. Therefore,
the scanner is limited to 16 devices unless complementary I/O is used.
Refer to the following section for more information on
complementary I/O.
Complementary I/O
Complementary I/O is very useful when portions of your input and
output images are unused because it allows the images of two
adapters to overlap each other in the scanner’s I/O image. To use
complementary I/O, the I/O image from one adapter must be the
mirror (complement) of the other. This means that if there is an input
module in the primary chassis, there must be an output module in the
same slot of the complementary chassis. This enables total use of the
scanner’s 32 input and 32 output word image for I/O addressing of up
to 1024 discrete points.
!
ATTENTION: Because the primary and
complementary chassis images overlap, input and
specialty combination I/O modules must never share
the same image location. Inputs received by the scanner
may be incorrect and RIO block transfers will not be
serviced properly.
If an output module shares its output image with another output
module, both output modules receive the same output information.
Publication 1747-6.22
1-26
Overview
If you want to use complementary I/O, two adapters that support this
function are required (e.g., 1747-ASB modules). One adapter is
configured (via its DIP switches) as a primary chassis, the other as a
complementary chassis. If a primary chassis exists, it is scanned first.
Primary and complementary chassis cannot have the same logical
rack number. The logical rack numbers must be assigned to the
primary and complementary racks as shown below:
Primary Chassis
Complementary Chassis Logical Rack Number
Logical Rack Number
Decimal
Octal
0
8
108
1
9
118
2
10
128
3
11
138
!
ATTENTION: If the logical rack numbers are not
properly assigned, unpredictable operation of both ASB
modules results. No ASB module errors occur. Refer to
your ASB module user manual for specific information
on setting the address of the complementary chassis.
(For example, in the 1771-ASB manual the addresses
for the complementary chassis are referred to as
complementary chassis 0-3.)
Guidelines for Configuring Complementary I/O
When you configure your remote system for complementary I/O,
follow these guidelines:
• You can place an output module in the primary chassis opposite
another output module in the complementary chassis; they use
the same bits in the output image table. However, we do not
recommend this placement of modules for redundant I/O.
• You cannot use complementary I/O with a chassis that uses
32-point I/O modules and 1-slot addressing or 16-point I/O
modules with 2-slot addressing.
• Do not place an input module in the primary chassis opposite an
input module in the complementary chassis because they use the
same bits in the input image table.
Publication 1747-6.22
Overview
1-27
Complementary I/O: Placing Modules with 2-Slot Addressing
The figures below illustrate a possible module placement to configure
complementary I/O using 2-slot addressing.
I
I
8
8
O
8
O
8
I
O
16
16
O
8
BT
1
0
O
8
1
O
8
I
2
I
8
8
1
O
8
O
I
16 16
16
0
O
I
16 16
1
O
16
2
4
E
M
P
T
Y
O
8
1
1
I
O
8
8
O
8
BT
3
E
M
P
T
Y
E
M
P
T
Y
I
O
8
I
2
3
E
M
P
T
Y
E
M
P
T
Y
O
8
2
O
I
16 16
16
5
2
O
I
16 16
4
2
O
16
5
Outputs in the complementary chassis would use the same bits in the output image
table as the outputs in the primary chassis. You cannot place inputs in the
complementary chassis.
1 = Output modules use the same output image table bits. This is not
recommended.
2 = Must be empty if corresponding primary slot is a block transfer
module.
Important: With 2-slot addressing, if an input module resides in
either slot, associated with a logical group, of the
primary chassis, an input module cannot reside in that
logical group’s complementary chassis.
Publication 1747-6.22
1-28
Overview
Complementary I/O: Placing Modules with 1-Slot Addressing
The figure below illustrates a possible module placement to configure
complementary I/O using 1-slot addressing.
I
I
16
16
O
16
O
16
I
16
O
16
O
16
BT
I
O
16
O
16
I
16
0
1
2
3
O
16
I
I
O
16
I
I
16
1
0
O
16
1
O
16
2
I
3
I
16
16
4
O
16
5
I
16
6
O
16
7
E
M
P
T
Y
I
I
I
I
I
I
16
2
1
I
16
I
I
I
16
16
16
16
16
16
16
16
16
16
16
16
0
1
2
3
4
5
6
7
0
1
2
3
O
16
O
16
O
16
O
16
O
16
O
16
O
16
O
16
O
16
O
16
O
16
O
16
I = Input Module (8- or 16-point) O = Output Module (8- or 16-point)
BT = Block Transfer Module
1 = Output modules use the same output image table bits. This is not
recommended.
2 = Must be empty if corresponding primary slot is block transfer.
Publication 1747-6.22
Overview
1-29
Complementary I/O: Placing Modules with 1/2-Slot Addressing
The figure below illustrates a possible module placement to configure
complementary I/O using 1/2-slot addressing.
I
I
O
O
I
O
O
BT
O
I
01
23
I
O
1
01
O
23
O
45
I
67
I
01
O
23
I
45
67
E
M
P
T
Y
O
2
1
I
I
I
I
I
I
I
I
I
I
01
23
45
67
01
23
45
67
01
23
O
O
O
O
O
O
O
O
O
O
I = Input Module (8-, 16-, or 32-point) O = Output Module (8-, 16-, or
32-point) BT = Block Transfer Module
1 = Output modules use the same output image table bits. This is not
recommended.
2 = Must be empty if corresponding primary slot is block transfer.
Summary for Placing Modules Used In Complementary I/O
Discrete Modules
Addressing Method
Types of Modules used
2-slot
8-point
1-slot
8-point, 16-point
1/2-slot
8-point, 16-point, 32-point
Placement
Install input modules
opposite output modules,
and output modules
opposite input modules.1
1. If an input module resides in either slot, associated with a logical group, of the primary chassis, an
input module cannot reside in that logical group’s complimentary chassis.
Publication 1747-6.22
1-30
Overview
Block Transfer Modules
Addressing Method
Placement
The right slot of the primary I/O group can be another block
transfer module, or an 8-point input or output module.
2-slot
The left slot of the complementary I/O group must be
empty.
In the right slot of the complementary I/O group, you can
place an 8-point output module; this slot must be empty if
the corresponding slot in the primary I/O group is a block
transfer module.
1-slot
1/2-slot
Leave the corresponding I/O group in the complementary
chassis empty.
The following example illustrates how I/O modules requiring two
words of the input or output image can leave unused image space.
Publication 1747-6.22
Overview
O I
I O I O I O I O
1-31
O I O I O I
I = Input Module
O= Output Module
0
1 2
Slot Pair 1
3
4
2
5
6
7
3
8
0
Slot Pair
4
Primary Chassis I/O Image
Input Image
Output Image
from Primary Chassis
from Primary Chassis
Slot 1
Slot 1
Slot 2
Slot 2
Slot 3
Slot 3
Slot 4
Slot 4
Slot 5
Slot 5
Slot 6
Slot 6
Slot 7
Slot 7
Slot 8
Slot 8
7
7
0
0
Slot 1
Slot 1
Slot 2
Slot 2
Slot 3
Slot 3
Slot 4
Slot 4
Slot 5
Slot 5
Slot 6
Slot 6
Slot 7
Slot 7
Slot 8
Slot 8
3
4
5
2
6
7
3
8
4
Complementary Chassis Configured
As:
8 (decimal)
Logical Rack Number
0
Logical Group Number
Image Size (logical groups) 16
1/2-slot
Addressing Mode
Complementary
Primary/Complementary
Primary Chassis Configured As:
Logical Rack Number
0
Logical Group Number
0
Image size (logical groups) 16
Addressing Mode
1/2 -slot
Primary/Complementary
Primary
10
8
1
Complementary Chassis
Primary Chassis
17
15
1 2
Octal
Decimal
1
2
Slot Pair
3
4
17
15
10
8
Slot 1
Slot 1
Slot 2
Slot 2
Slot 3
Slot 3
Slot 4
Slot 4
Slot 5
Slot 5
Slot 6
Slot 6
Slot 7
Slot 7
Slot 8
Slot 8
7
7
0
0
Slot 1
Slot 1
Slot 2
Slot 2
Slot 3
Slot 3
Slot 4
Slot 4
Slot 5
Slot 5
Slot 6
Slot 6
Slot 7
Slot 7
Slot 8
Slot 8
Complementary Chassis I/O Image
Input Image
Output Image
from Complementary Chassis
from Complementary Chassis
17
15
Octal
Decimal
10
8
7
7
Slot 1
Slot 1
Slot 2
Slot 2
Slot 3
Slot 3
Slot 4
Slot 4
Slot 5
Slot 5
Slot 6
Slot 6
Slot 7
Slot 7
Slot 8
Slot 8
1
2
Slot Pair
3
4
0
0
Slot 1
Slot 1
Slot 2
Slot 2
Slot 3
Slot 3
Slot 4
Slot 4
Slot 5
Slot 5
Slot 6
Slot 6
Slot 7
Slot 7
Slot 8
Slot 8
Octal
Decimal
1
2
Slot Pair
3
4
17
15
10
8
Slot 1
Slot 1
Slot 2
Slot 2
Slot 3
Slot 3
Slot 4
Slot 4
Slot 5
Slot 5
Slot 6
Slot 6
Slot 7
Slot 7
Slot 8
Slot 8
7
7
0
0
Slot 1
Slot 1
Slot 2
Slot 2
Slot 3
Slot 3
Slot 4
Slot 4
Slot 5
Slot 5
Slot 6
Slot 6
Slot 7
Slot 7
Slot 8
Slot 8
Octal
Decimal
1
2
Slot Pair
3
4
= unused image
space
Input Image
Scanner’s I/O Image
Group 0
Both images are overlapped in the
Group 1
scanner. The overlapped image appears
Group 2
where the primary chassis image is
configured to reside.
Group 3
In this case, the primary chassis image is LogicalGroup 4
configured as starting logical rack 0 and Rack 0 Group 5
Group 6
starting logical group 0.
Group 7
Group 0
Group 1
Group 2
Group 3
Logical Group 4
Rack 1 Group 5
Group 6
Group 7
17
15
10
8
Slot 1
Slot 1
Slot 2
Slot 2
Slot 3
Slot 3
Slot 4
Slot 4
Slot 5
Slot 5
Slot 6
Slot 6
Slot 7
Slot 7
Slot 8
Slot 8
7
7
Output Image
0
0
Slot 1
Slot 1
Slot 2
Slot 2
Slot 3
Slot 3
Slot 4
Slot 4
Slot 5
Slot 5
Slot 6
Slot 6
Slot 7
Slot 7
Slot 8
Slot 8
Octal
Decimal
1
2
Slot Pair
3
4
17
15
10
8
Slot 1
Slot 1
Slot 2
Slot 2
Slot 3
Slot 3
Slot 4
Slot 4
Slot 5
Slot 5
Slot 6
Slot 6
Slot 7
Slot 7
Slot 8
Slot 8
7
7
0
0
Slot 1
Slot 1
Slot 2
Slot 2
Slot 3
Slot 3
Slot 4
Slot 4
Slot 5
Slot 5
Slot 6
Slot 6
Slot 7
Slot 7
Slot 8
Slot 8
Octal
Decimal
1
2
Slot Pair
3
4
Publication 1747-6.22
1-32
Overview
Complementary I/O Application Considerations
If you configure a complementary device to use more I/O image
space than an associated primary device, then block transfers can only
be performed to locations in the complementary device that have
associated I/O image space in the primary device. For example, if a
primary device is 1/2 logical rack and a complementary device is a
full logical rack, block transfers can be performed only in the first 1/2
logical rack of the complementary device. Attempting block transfers
in the last half of the complementary device results in a BT error
(error 11 - device not configured).
Word 0
Word 1
Logical Word 2
Rack 0 Word 3
Word 4
Word 5
Word 6
Word 7
1/2 logical rack
configured and
usable
1/2 logical rack not
configured
Logical
Rack 8
Word 0
Word1
Word 2
Word 3
Word 4
Word 5
Word 6
Word 7
1/2 logical rack
configured and
usable
1/2 logical rack configure
but not usable for BT sin
Words 4-7 are not
configured for the primar
device.
Complementary 1771 I/O Module Details
Use the following modules in either primary or complementary I/O
chassis opposite any type of module:
• Communication Adapter Module (1771-KA2)
• Communication Controller Module (1771-KE)
• PLC-2 Family/RS-232-C Interface Module (1771-KG)
• Fiber Optics Converter Module (1771-AF)
• DH/DH+ Communication Adapter Module (1785-KA)
• DH+/RS-232C Communications Interface Module (1785-KE)
Use the following modules in either primary or complementary I/O
chassis opposite any type of module. However, these modules do not
work as standalone modules; each one has an associated master
module. Use care when placing the master modules in the I/O chassis:
• Analog Input Expander Module (1771-E1, -E2, -E3)
• Analog Output Expander Module (1771-E4)
• Servo (Encoder Feedback) Expander Module (1771-ES)
• Pulse Output Expander Module (1771-OJ)
Publication 1747-6.22
Overview
1-33
Hardware Features
Note the backup scanner’s hardware features in the following
illustration.
BACKUP SCANNER
PRI
SEC
ERR
RIO
FLT
Status LEDs
High-Speed Serial Link (HSSL)
HSSL
Local Status
Link (LSL)
Status LEDs
The table below describes the six LEDs located on the module’s front
panel. To ensure that they are operating correctly, all LEDs are
illuminated during power up.
LED
Definition
Status & Color
Indication
PRI
Primary
Steady Green
The module is in the primary
mode.
SEC
Secondary
Steady Amber
The module is in the
secondary mode.
RIO
RIO Communication
Steady Green
The RIO link is working
properly.
Flashing Green
A remote device is not
configured or connected
correctly, or is faulted.
Flashing Red
The RIO link has a fault. The
scanner is connected
incorrectly, or all devices are
configured improperly, have no
power, or are faulted.
Steady Red
There is a configuration error.
Off
The communication channel is
not configured as RIO.
Flashing Red
The module is not ready for
switchover.
Off
The module is ready for
switchover.
Flashing Green
The link is operating with no
errors.
Off
A communications error has
been detected on the HSSL.
Steady Red
A hardware fault has occurred.
Flashing Red
The module is not configured
properly.
ERR
HSSL
FLT
Backup Module Error
High-Speed Serial
Link Communication
Fault
Publication 1747-6.22
1-34
Overview
Configuration Switch
Module Address Switch
O
N
O
N
1 2 3 4 5 6
1 2 3 4
1 2 3 4 5 6
1 2 3 4
Configuration Dip Switch Settings
The six-position Configuration DIP Switch is used to select the baud
rate, configure the communication channel and identify each
individual BSN module and the last BSN module. The tables below
define the DIP switch configuration settings.
DIP Switch
Position
Definition
1 and 2
Setting
Set the communication channel baud rate
See the table below
3
Channel configuration
DH+ = ON
RIO = OFF
4
This user identification switch differentiates
between BSN modules in the primary system and
BSN modules in the secondary system, helping
determine if switchover has occurred. This switch
is user-configurable and will not affect the
operation of the module.
User selectable
5
Reserved
6
Identifies the last module in the local status link, if
multiple BSN modules are used in each chassis. If
only one module is used in each chassis, turn this
switch to ON.
Last module = ON
All others = OFF
Baud Rate Settings
Publication 1747-6.22
Position 1
Position 2
Baud Rate
ON
ON
57.6K
ON
OFF
115.2K
OFF
ON
230.4K
OFF
OFF
Disabled
Overview
1-35
Module Address Switch
The four-position Module Address DIP switch configures the BSN
address in the LSL. The following table shows the address that
corresponds to each setting.
Switch Position
1747-BSN Address
1
2
3
OFF
OFF
OFF
1
ON
OFF
OFF
2
OFF
ON
OFF
3
ON
ON
OFF
4
OFF
OFF
ON
5
ON
OFF
ON
6
OFF
ON
ON
7
ON
ON
ON
8
Note:
Switch position 4 is not used.
Compatible Devices
The 1747-BSN is compatible with all Remote I/O adapter devices.
Publication 1747-6.22
1-36
Overview
Backup Concepts for
the SLC 500 System
Why Use a Backup System?
The objective of any redundant system (backup system) is to improve
the amount of up-time of a machine or process by ensuring consistent
availability of that machine, and by reducing costs associated with
equipment failure. By using this backup system, you can guard your
application against shutdowns caused by the programmable
controller.
!
ATTENTION: Backup does not protect you from
faults caused by programming errors or system
timeouts because such an error or timeout also occurs in
the secondary processor.
The backup option is used where you must transfer the control of the
process to a secondary system, without thereby interrupting the
machine/process operation.
To guard against system shutdown, a backup system must provide:
• equipment with exceptional reliability
• automatic fault isolation
• minimal disturbance of the process when switching from the
primary to the secondary system
Applying 1747-BSN Backup Scanner Modules to the SLC-500
Programmable Controller
A SLC 500 system configured with 1747-BSN modules provides
high-speed backup communication and switchover of the Data
Highway Plus, remote I/O links, and RS232 channel (on 5/03 and
later processors). In this section we:
• show a typical SLC 500 backup configuration
• explain how the backup system works
• describe the role of the 1747-BSN module
Publication 1747-6.22
Overview
1-37
A Typical SLC 500 Backup Configuration
A SLC 500 backup system contains a minimum of two each of the
following hardware components:
• SLC 500 processor module
Processor: * Catalog Number:
SLC 5/02 1747-L524
SLC 5/03 1747-L531, -L532
SLC 5/04 1747-L541, -L542, -L543
SLC 5/05 1747-L551, -L552, -L553
Contact your Allen-Bradley Sales Office or your Allen-Bradley
distributor for additional SLC 500 processors that can be configured
with the 1747-BSN modules.
• 1747-BSN module
• power supply
• local chassis
Publication 1747-6.22
1-38
Overview
How the SLC 500 Backup System Works
In the SLC 500 backup configuration, one system (consisting of one
SLC 500 processor, 1747-BSN module, power supply, and chassis)
controls the operation of the remote I/O. This system is referred to as
the primary system. The other system is ready to take control of the
remote I/O in the event of a fault in the primary system. This is
referred to as the secondary system. The SLC 500 backup system
does not back up local I/O; therefore, do not install I/O in the local
chassis.
The system provides high-speed data table transfer from the primary
system to the secondary system. This guarantees that the data tables
of the two processors track each other. To provide the possibility of
backing up a large number of I/O points, a backup system supports up
to eight 1747-BSN modules in each processor chassis linked by a
local status link (LSL).
The high-speed serial link (HSSL) has the following functionality:
• Send the network commands from the primary to the secondary
1747-BSN and the replies from the secondary to the primary
when the communication channel is configured as DH+.
• Transfer a limited number of SLC 5/0x data table files from
primary to the secondary processor. This data table transfer is
done through an application program in the SLC 5/0x processor.
Although data transfer between the primary and secondary processors
is done as fast as possible, there is no guarantee that a switchover
from the primary to the secondary will be bumpless. The data rate is 2
Mbits/second.
The local status link (abbreviated LSL) is a 57.6 KBaud serial link
provided for exchanging status between the 1747-BSNs that are in the
same chassis.
Data Transfer
During normal operation, the primary system sends remote input and
retentative data table data to the secondary system so that in the event
of a switchover, the secondary system (which becomes the new
primary system) has the same data.
Remote I/O data is automatically transferred over the High-Speed
Serial Link. This transfer is independent of the application program.
Each 1747-BSN is capable of transferring up to 2 KWord of the SLC
500 data table. This capacity is increased as the number of 1747-BSN
modules per local chassis is increased in a redundant system. For
example, a system with eight 1747-BSNs in each chassis is capable of
transferring up to 16 KWord of synchronizing data table information.
Publication 1747-6.22
Overview
1-39
Data table values are transferred from the primary to the secondary
system with M0 and M1 files and the HSSL. You copy the data to and
from M files via your ladder program.
You do not have to transfer data table values if not necessary for your
application.
For detailed information about data transfer from the primary to the
secondary system, refer to Chapter 5, “Operating Your SLC 500
Backup System”.
Switchover
Should a fault occur in the primary processor, control switches to the
secondary system in less than 50 ms (maximum). When a switchover
occurs, the outputs in the remote I/O maintain their last state until
they come under the control of the secondary processor.
The program scans of the two processors are not synchronized. This
means that the secondary processor may be in a different place in the
scan cycle than the primary processor. This manual explains the
switchover process and provides guidelines for developing programs
for your SLC 500 backup system. (For more information about
switchover, refer to “Switchover Considerations” on page 8-1.)
Role of the 1747-BSN Module
As an integral part of the backup system, the 1747-BSN modules
enable high-speed communication between the two SLC processors
and permit the secondary processor to assume control of the process.
In addition, the 1747-BSN module provides:
• high-speed transfer of the data table values from the primary to
the secondary system (HSSL), to ensure that the secondary
system’s data table is a copy of the primary system’s (2K words
maximum per BSN module pair)
• exchange of information on the status of the primary and
secondary systems (LSL)
• automatic transfer to the secondary system of the remote input
(discretes and analog values, etc.)
• transfer of control from the primary processor to the secondary
processor when one of the following conditions occur:
— power failure or power loss
— major processor fault
— 1747-BSN module fault, including communications timeout in the RIO link
— change in the primary processor’s mode from:
• RUN to PROGRAM (manual switchover)
• REM RUN to REM PROG
Publication 1747-6.22
1-40
Overview
• REM RUN to REM TEST
• transfer of control from the primary processor to the secondary
when one of the following conditions is detected by the
secondary processor:
— communication timeout in the HSSL between the two
1747-BSN modules and primary system is not updating the
remote I/O
— transfer of control command from the primary 1747-BSN
module
• substitution of equipment without interruption of the process;
that is, the faulted system can be repaired while the other system
is controlling the process
• connections for remote I/O and Data Highway Plus network (the
1747-BSN module routes the remote I/O network and the Data
Highway Plus network to the primary processor)
• isolation of the systems, in order to guarantee that a fault in one
system does not affect the other
• diagnostics information
• remote programming capability for secondary processor. The
secondary processor is in the DH+ network
• the capability of switching two communication channels (one
configurable as RIO or DH+ and one RS-232/485 for DH485)
• minimal user programming impact
• use of standard SLC 5/02 or later and 1746 platform (no need for
special chassis or processor)
• no added cost if you are not using backup
Publication 1747-6.22
Chapter
2
Quick Start for Experienced Users
This chapter helps you to get started using the Backup Scanner. We
base the procedures here on the assumption that you have a basic
understanding of SLC 500 products.
You must:
• understand electronic process control
• be able to interpret the ladder logic instructions for generating
the electronic signals that control your application
Because it is a start-up guide for experienced users, this chapter does
not contain detailed explanations about the procedures listed. It does,
however, reference other chapters in this book where you can get
more detailed information. It also references other documentation that
may be helpful if you are unfamiliar with programming techniques or
system installation requirements.
If you have any questions, or are unfamiliar with the terms used or
concepts presented in the procedural steps, always read the
referenced chapters and other recommended documentation before
trying to apply the information.
This chapter:
• tells you what tools and equipment you need
• lists preliminary considerations
• describes when to address, configure and program the module
• explains how to install and wire the module
• discusses system power-up procedures
Required Tools and
Equipment
Have the following tools and equipment ready:
• medium blade screwdriver
• programming equipment
• termination kit (package of resistors and ring lug included with
the scanner)
• approximately 15 inches of #20 AWG for grounding the drain
shield to the SLC chassis (for Series A retrofits)
• an adequate length of RIO communication cable (Belden 9463)
for your specific application
Publication 1747-6.22
2-42
Quick Start for Experienced Users
Procedures
1. Ensure your chassis supports placement of the 1747-BSN
module.
Review the power requirements of your system to see that your
chassis supports placement of the scanner module. The scanner
consumes 800 mA at 5V dc.
2. Configure the module using the DIP switches.
Set the DIP switches located on the printed circuit board. The sixposition Configuration DIP Switch is used to select the baud rate,
configure the communication channel, and identify each BSN module
and the last BSN module.
Important: Note that all RIO devices must be configured for the
same baud rate.
Refer to Chapter 3, “Installation and Wiring” to configure the
switches.
3. Insert the 1747-BSN module into the chassis.
!
ATTENTION: Never install, remove, or wire modules
with power applied to the chassis or devices wired to the
module.
Make sure system power is off; then insert the scanner module into
your 1746 chassis.
In this example procedure, local slot 1 is selected.
Top and Bottom
Module Release
Card
Guide
4. Connect all RIO link devices.
Ensure that you:
• Daisy chain each RIO link device.
• Ground the shield drain wire to the nearest chassis mounting
bolt.
• Connect the appropriate termination resistors on each end of the
link.
Publication 1747-6.22
Quick Start for Experienced Users
2-43
5. Configure the system.
Set up your system I/O configuration for the particular slot in which
you installed the scanner (slot 1 in this example). If the 1747-BSN is
not yet listed in your version of programming software, select
“Other” and type in a module ID code of 13608.
6. Enter the number of scanned words.
Enter the number of Scanned Input and Output Words using the
Specialty I/O and Advanced Setup menus. The default value is 32 I/O
words. You can specify less than 32 and reduce the processor scan
time by transferring only the part of the input and output image that
your application requires. It is important that you do not set either of
these values to 0. If you do, the scanner does not work correctly.
7. Set the M0-M1 and G file sizes.
Using the Specialty I/O Configuration menu, set the M1 and M0 file
sizes to 32 words (48 words if using complementary I/O). 32 words is
the minimum required for operation. If you do not set the M1 and M0
file sizes to at least 32 words, the programming device does not allow
you to access the M files in the SLC control program. The maximum
M file sizes are 5547 words for complete capability. There is no
penalty to set the M file lengths to this maximum.
Set the G file size to 3 (5 if using complementary I/O) using the
Specialty I/O Configuration menu.
Write your ladder code to address discrete I/O from the 32 input and
output image words and the M files for control and status of the RIO
network as well as block transfer and the HSSL, if needed. Refer to
Appendix B, “M0-M1 Files and G Files” on page B-1 before
completing this selection.
8. Go through the system start-up procedure.
A. Apply power.
B. Download your program to the SLC.
C. Place the SLC in Run mode.
The backup scanner's FAULT and ERROR LEDs are off, the RIO
LED is green, the HSSL LED is blinking and the two PRI and SEC
shows each processor Mode at this time. (This is the valid LED
pattern when in Run mode or after a Run mode to Program mode
transition.)
Publication 1747-6.22
2-44
Quick Start for Experienced Users
Publication 1747-6.22
Chapter
3
Installation and Wiring
This chapter contains the information necessary to:
• select the baud rate
• configure the Backup Scanner
• insert the Backup Scanner into the SLC chassis
• wire the RIO and communication links
Compliance to European Union Directives
If this product has the CE mark it is approved for installation within
the European Union and EEA regions. It has been designed and tested
to meet the following directives.
EMC Directive
This product is tested to meet Council Directive 89/336/EEC
Electromagnetic Compatibility (EMC) and the following standards,
in whole or in part, documented in a technical construction file:
• EN 50081-2
EMC - Generic Emission Standard, Part 2 - Industrial
Environment
• EN 50082-2
EMC - Generic Immunity Standard, Part 2 - Industrial
Environment
This product is intended for use in an industrial environment.
Configuration
Selection
The six-position Configuration DIP Switch is used to select the baud
rate, configure the communication channel, and identify each
individual BSN module and the last BSN module. The tables below
define the DIP switch configuration settings.
DIP Switch
Position
Definition
Setting
1 and 2
Set the communication channel baud rate.
See the table on
page 2
3
Channel configuration.
DH+ = ON
RIO = OFF
4
This user identification switch differentiates between
BSN modules in the primary system and BSN
modules in the secondary system, helping determine
if switchover has occurred.
User selectable
5
Reserved.
6
Identifies the last module in the local status link.
Last module = ON
All others = OFF
Publication 1747-6.22
3-46
Installation and Wiring
Baud Rate Settings
Position 1
Position 2
Baud Rate
ON
ON
57.6K
ON
OFF
115.2K
OFF
ON
230.4K
OFF
OFF
Disabled
Module Address Switch
The four-position Module Address DIP switch configures the BSN
address in the LSL. The table below shows the address that
corresponds to each setting.
Switch Position
1747-BSN Address
1
2
3
OFF
ON
OFF
ON
OFF
ON
OFF
ON
OFF
OFF
ON
ON
OFF
OFF
ON
ON
OFF
OFF
OFF
OFF
ON
ON
ON
ON
Note:
1
2
3
4
5
6
7
8
Switch position 4 is not used.
The figure below shows the location of the DIP switches on the
Backup Scanner.
Important: For proper RIO link system operation, all devices must
be configured for the same baud rate.
Configuration Switch
O
N
Module Address Switch
O
N
1 2 3 4 5 6
1 2 3 4
1 2 3 4 5 6
Publication 1747-6.22
1 2 3 4
Installation and Wiring
3-47
Backup Scanner Installation
Installation procedures for this module are the same as for any other
discrete I/O or specialty module. Refer to the illustration below to
identify chassis and module components listed in the procedures
below.
!
ATTENTION: Disconnect system power before
attempting to install, remove, or wire the scanner.
Important: Make sure you have set the DIP switches
properly before installing the scanner.
Important: Before installation, ensure that your modular SLC
power supply has adequate reserve current capacity. The
scanner requires 800 mA at 5V dc.
Insertion
1. Disconnect power.
2. Align the full-sized circuit board with the chassis card guides.
The first slot (slot 0) of the first rack is reserved for the SLC 500
processor.
3. Slide the module into the chassis until the top and bottom latches
catch.
4. Attach the RIO link cable to the connector on the front of the
module, behind the door. Ground the cable’s shield wire to a
chassis mounting bracket. Refer to the RIO link wiring
illustration.
5. Insert the cable tie in the slots.
6. Route the cable down and away from module, securing it with
the cable tie.
7. Cover all unused slots with the Card Slot Filler, Catalog Number
1746-N2.
Publication 1747-6.22
3-48
Installation and Wiring
Module Release
Card Guide
Cable Tie
Removal
1. Disconnect power.
2. Remove all cabling.
3. Press the releases at the top and bottom of the module and slide
the module out of the chassis slot.
4. Cover all unused slots with the Card Slot Filler, Catalog Number
1746-N2.
Wiring
Terminal Wiring
The Backup Scanner module contains a green removable terminal
block. The terminal pinout is shown below.
!
Publication 1747-6.22
ATTENTION: Disconnect power to the SLC before
attempting to install, remove or wire the removable
terminal wiring block.
Installation and Wiring
LSL (Line 1 - Blue)
LSL (Shield)
LSL (Line 2 - Clear)
232 / 485 (A) to CPU
3-49
Release Screw
HSSL (Line 1- Blue)
HSSL (Shield)
HSSL (Line 2 - Clear)
232 / 485 (A) to Link
232 / 485 (B) to CPU
232 / 485 (B) to Link
232 / 485 (COM) to CPU
232 / 485 (COM) to Link
DH+ (Line 1) to CPU
DH+ (Shield) to CPU
DH+ (Line 2) to CPU
RIO / DH+ (Line 1) to Link
RIO / DH+ (Shield) to Link
RIO / DH+ (Line 2) to Link
Release Screw
Terminal screws accept a maximum of two #14 AWG (2mm 2) wires.
Tighten terminal screws only tight enough to immobilize wires.
Maximum torque on terminal screws is 0.9 Nm (8 in-lbs.).
HSSL Wiring
Connect the HSSL to establish communication between the primary
and secondary systems. Maximum cable length for the HSSL is 4.5 m
(15 ft.).
Local Status Link Wiring
If you have more than one 1747-BSN module in the same chassis,
connect the LSL in series between modules in the same chassis.
RIO Link Wiring
The backup module is connected to other devices on the RIO link in a
daisy chain (serial) configuration. There are no restrictions governing
the space between each device, provided the maximum cable distance
(Belden 9463) is not exceeded.
A 1/2 watt terminating resistor (included with the module) must be
attached across line 1 and line 2 of the connectors at each end
(scanner and last physical device) of the RIO link. The value of the
resistor depends on the baud rate and extended node capability, as
shown in the table that follows.
Important: To use extended node, all devices on the RIO link must
support it. Refer to each device’s user manual.
Publication 1747-6.22
3-50
Installation and Wiring
Using
Extended Node
Capability
Not Using
Extended Node
Capability
Baud Rate
Max. Cable Distance
(Belden™ 9463)
57.6K baud
3048 m (10,000 ft.)
115.2K baud
1524 m (5,000 ft.)
230.4K baud
762 m (2,500 ft.)
57.6K baud
3048 m (10,000 ft.)
115.2K baud
1524 m (5,000 ft.)
230.4K baud
762 m (2,500 ft.)
Resistor Size
82Ω 1/2 Watt
Gray-Red-Black-Gold
150Ω 1/2 Watt
Brown-Green-BrownGold
82Ω 1/2 Watt
Gray-Red-Black-Gold
Status LEDs
The table below describes the six LEDs located on the module’s front
panel. To ensure that they are operating correctly, all LEDs are
illuminated during power-up.
LED
Status & Color
Indication
PRI
Primary
Steady Green
The module is in the primary
mode.
SEC
Secondary
Steady Amber
The module is in the
secondary mode.
RIO
RIO Communication
Steady Green
The RIO link is working
properly.
Flashing Green
A remote device is not
configured or connected
correctly, or is faulted.
Flashing Red
The RIO link has a fault. The
scanner is connected
incorrectly, or all devices are
configured improperly, have
no power, or are faulted.
Steady Red
There is a configuration error.
Off
The communication channel
is not configured as RIO.
Flashing Red
The module is not ready for
switchover.
Off
The module is ready for
switchover.
Flashing Green
The link is operating with no
errors.
Off
A communications error has
been detected on the HSSL.
Steady Red
A hardware fault has
occurred.
Flashing Red
The module is not configured
properly.
ERR
HSSL
FLT
Publication 1747-6.22
Definition
Back-up Module
Error
High-Speed Serial
Link Communication
Fault
Chapter
4
Operating Your SLC 500 Backup
System
Chapter Objectives
In this chapter we describe how the primary system transfers data to
the secondary system. We do this by describing the operation of the:
• 1747-BSN module
• SLC 500 backup system
In addition, we provide procedures for:
• starting your system
• powering up your system
• disconnecting a faulted system
• restarting a repaired system
• changing the processor’s operating mode
• editing a program on-line
How the 1747-BSN
Module Operates
In a SLC 500 backup system, the 1747-BSN module performs three
distinct functions:
• automatic transfer of remote input data over the High-Speed
Serial Link (HSSL)
• transfer of data in the data table by data transfer using M files
• secondary processor remote programming capability
Automatic Transfer of Remote Input Data Over the HSSL
With automatic transfer, the primary 1747-BSN module is continually
updating a copy of the remote input image table in an interface
located in the secondary 1747-BSN module. This remote input data
includes discrete and analog data. Automatic transfer of input image
is carried out over the High-Speed Serial Link (HSSL) and is
independent of the application program.
The secondary 1747-BSN module responds with current data to the
remote I/O scan requests of the secondary processor, making the
secondary processor “think” that it is communicating with remote I/O
chassis. This response prevents remote I/O faults in the secondary
processor, since the secondary BSN module is not physically
connected to the remote I/O link.
In addition to providing the secondary processor a copy of the remote
discrete input image table, the 1747-BSN modules in both systems
work together to provide the secondary processor a copy of block
transfer data read from the remote I/O chassis.
Publication 1747-6.22
4-52
Operating Your SLC 500 Backup System
The 1747-BSN automatically exchanges system status information
when communicating with another 1747-BSN through the HighSpeed Serial Link (HSSL). Both modules are continuously
communicating with each other, even when both processors are not in
Run mode. This is achieved by sending and receiving the system
status words. This information can be read from either module at any
time and provides for both SLC 5/0x (primary and secondary) the
“other side status”. HSSL is also used to transfer user data table data,
up to 2K total per BSN module.
RS-232/485 Communication Channel
The RS-232/485 channel is a dumb communication channel which is
used to switch the connection to one operator interface or other DF1
device (through RS-232/485). The communication channel relays are
closed when the module is primary; otherwise the relays are open as
shown in the figure below.
Secondary
Primary
SLC 5/04
1747-BSN
1747-BSN
SLC 5/04
To Operator Interface
RIO/DH+ Communication Channel
The RIO/DH+ communication channel has a relay that is closed when
the 1747-BSN module is in the primary mode; otherwise the relay is
open. The communication channel supports the following
configurations (The illustration on the next page shows the channel
block diagram):
1. RIO: Supports the 57.6, 115.2 and 230.4 KBaud configurations.
When the module is in primary mode, it emulates all the
1747-SN Series B functionality. When the module is in
secondary mode, the channel receives the input data from the
primary 1747-BSN module and sends it to the SLC 5/0x,
emulating the 1747-SN Series B backplane communication. As a
result, the secondary SLC 5/0x “thinks” that it is really
connected to the remote racks;
Publication 1747-6.22
Operating Your SLC 500 Backup System
4-53
2. DH+: Works under 57.6, 115.2 and 230.4 KBaud configurations.
The primary 1747-BSN enters into the DH+ network using the
DH+ node address assigned to both processors. The secondary
processor will effectively assume node address n+1 for
programming purposes. The commands that the primary
processor receives are sent through the HSSL to the secondary
1747-BSN and then to the secondary processor (the secondary
1747-BSN emulates the DH+ network for the secondary SLC 5/
04). The replies come back to the primary 1747-BSN (again
through the HSSL) and are sent to the DH+ network. This link
has a functionality similar to that found in the 1785-BCM series
B and C. The link is designed to make remote programming
possible for the secondary SLC 5/04. The primary SLC 5/04 is
connected to the DH+ network through the primary 1747-BSN
communication channel relays and sends/receives messages
without any intervention of the 1747-BSN module;
3. Dumb: In this mode the communication channel is disabled and
is used only as a relay that is closed when the 1747-BSN is in the
primary mode and otherwise is open.
HSSL
(1)
Secondary
Primary
SLC 5/04
1747-SN
emulation
1747-SN
emulation
1747-BSN
1747-BSN
SLC 5/04
Remote I/0 Link
(2)
HSSL
Secondary
Primary
SLC 5/04
1747-BSN
1747-BSN
SLC 5/04
DH+ Network
Publication 1747-6.22
4-54
Operating Your SLC 500 Backup System
Secondary Processor Remote Programming
Important: The programming device must be connected through the
DH+ network and must not bypass the relay in the
1747-BSN module (if the programs in both processor
are identical;e.g., if both DH+ mode addresses are the
same). If you were to connect the device directly to a
processor, it must be connected to the primary processor.
Therefore, if your system were to switch to the
secondary system, you must then move your device to
your new primary processor.
In the 1747 backup system, only the primary processor is connected
to the link. The secondary processor is not physically connected, but
it communicates with the secondary 1747-BSN module making this
processor think that it is on the DH+ network. This separate link
prevents Data Highway faults in the secondary processor.
The 1747-BSN backup module provides remote programming
capability for your secondary processor. This means that even with
the programming device directly connected to the primary processor,
the secondary SLC-500 processor memory can be programmed and/
or monitored.
The primary 1747-BSN module provides an access point for a
programming device to access the secondary processor. Using the
1747-BSN module, you can communicate from a programming
device across the backup modules to the secondary processor. You
must assign both the primary and the secondary processor the same
node address in the DH+ link. The 1747-BSN module reserves the
subsequent node address as an access-point address to the secondary
processor; that is, this address is accessed by a programming device
in order to program the secondary processor.
This means that if you set both processors node addresses to n, the
programming device can communicate with the secondary processor
with the node address n+1. Therefore, do not use node address n+1
for any other device on the DH+ network.
For example, a primary processor with node number 16 on DH+
network has the same address switch setting as the secondary
processor node.
However, in this situation, the terminal addressed to station 16
attaches to the primary processor and the terminal addressed to
station 17 attaches to the secondary processor.
Important: It is recommended to assign the same node address (n)
for both processors (primary and secondary) in a
redundant system. You must also reserve the next node
address (n+1) because this address is the access-point
address to the secondary processor.
Publication 1747-6.22
Operating Your SLC 500 Backup System
4-55
The figure below shows how the programming device sees the
secondary processor which is not physically connected to the DH+
link.
Important: The DH+ connection to the secondary processor is
meant for remote programming only. Also, only one
terminal at a time may connect to the secondary
processor. No DH+ messages can be sent to or from the
secondary processor.
Node address = n
Node address = n+1
SLC500
BSN
HSSL
BSN
SLC500
DH+
Programming
Device
Data Table Transfer
Each 1747-BSN is capable of transferring up to 2 KWord of the SLC
5/0x data table. This capacity is increased as the number of
1747-BSN modules per chassis is increased in a redundant system.
For example, a system with eight 1747-BSN’s in each chassis is
capable of transferring up to 16 KWord of synchronizing data table
information.
The 2 KWord that can be transferred by a single module is divided
into 16 blocks of 128 words (that is equal to the maximum length of a
COP instruction). The address space M0:s.3500 through M0:s.5547 is
used by the primary SLC 5/0x to send the data. The address space
M1:s.3500 through M1:s.5547 is used by the secondary SLC 5/0x to
read the data from the secondary 1747-BSN. In addition, the address
spaces M0:s.3400 through M0:s.3499; and M1:s.3400 through
M1:s.3499 are used for status and control exchange between the SLC
5/0x and the 1747-BSN.
How the Backup
System Operates
Some amount of support ladder program is necessary to make both
modules operate properly in a backup system.
Both processors have a transmitter program and a receiver program.
At system startup, the processor reads the Module Status Word
(MSW) and the System Status Word (SSW) from the 1747-BSN to
determine its state. If the processor is in the primary state, it executes
the transmitter program. If the processor is in the secondary state, it
executes the receiver program.
Publication 1747-6.22
4-56
Operating Your SLC 500 Backup System
Primary Program
Each data block that can be transferred from the primary to secondary
SLC 5/0x is identified by its address in the M0/M1 files. The
application program must transfer each block using the following
procedure.
A MOV instruction is used to get the Data Transfer Status Word
(DTSW) and to see if the block can be transferred from the SLC 5/0x
to the 1747-BSN (if the data block status bit is clear). When this bit is
clear, the new data block must be copied to this corresponding M0
address. Then the data block control bit in the Data Transfer Control
Word (DTCW) must be set to advise the 1747-BSN that this new data
block is ready to transfer to the secondary system. This bit must be
held set until the corresponding bit in the DTSW is set by the
1747-BSN. The bit must then be cleared.
Secondary Program
For each block that can be received by the secondary SLC 5/0x, its
application program must do the following procedure.
A MOV instruction is used to get the Data Transfer Status Word
(DTSW) and to see if new data for the block is ready for reading in
the secondary 1747-BSN module. When this bit is set, the new data
block must be copied from the 1747-BSN M1 file. Then its
corresponding bit in the Data Transfer Handshake Word (DTHW)
must be set to advise the 1747-BSN that the data block was already
received. This bit must be held set until the corresponding bit in
DTSW is cleared by the 1747-BSN module. The bit must then be
cleared.
Backup System Theory of Operation
A redundant system using the 1747-BSN can be initially defined as
an “Asynchronized Data Transfer” system. While the Input Image
Table is automatically acquired from the RIO link by the secondary
system, the Data Table is transferred by an application program
written by the user. It is recommended that you minimize the amount
of data to be transferred from the primary to the secondary processor
because the program logic generates the same outputs based on the
same inputs.
All timer and counter values must be transferred at least once because
the primary and backup processors may have started at different times
and are not synchronized. Therefore, timer and counter data may be
different in the two processors. For example, after a faulted processor
is repaired and reinstalled as a backup, the timer and counter
accumulated values, as well as the control words, in the two
processors are different.
The number of data table words to be transferred from a primary to a
secondary processor is dependent on the user program and/or user
architecture.
Publication 1747-6.22
Operating Your SLC 500 Backup System
4-57
Startup Sequencing
When the system is powered up for the first time, the following
sequence must be followed:
1. Disconnect both the primary and secondary SLC 5/0x from DH+
or DH485
2. Download programs containing the desired DH+ or DH485 node
address to each processor. Leave both SLC 5/0x in program
mode, and power down both systems.
3. Apply power to the system that is intended to be primary;
4. Apply power to the system that is intended to be secondary;
5. Change the primary SLC processor to Run mode;
6. Change the secondary SLC processor to Run mode.
Power-up Sequencing
To determine the primary and secondary systems, use the following
powerup sequence:
1. Apply power to the system that is intended to be primary;
2. After the primary SLC 5/0x has been powered-up and is
operating correctly, apply power to the system that is intended to
be secondary.
If both systems are powered-up at the same time, they use a “talkand-listen algorithm” to determine which system is going to be
primary and which is going to be secondary. The RIO and DH+ relays
remain open until only one of the systems assumes primary status.
This ensures that only one of the SLC 5/0x processors takes control
over the RIO and DH+ links.
Processor Mode
Change Sequencing
The 1747-BSN does not control the operating mode of the SLC 5/0x
in either the primary or the backup systems. If a processor mode
change is required, it should be done primarily in the secondary
system. After that, if required, the processor mode change should also
be done in the primary processor.
If the primary operating mode is changed from Run mode to Program
mode, the secondary system takes control.
!
ATTENTION: Use the processor mode change key to
change the primary operating mode. Unexpected
operation or system shutdown could occur if you use a
programming terminal to change the primary operating
mode from Remote Run to Remote Program.
Publication 1747-6.22
4-58
Operating Your SLC 500 Backup System
Fail-over Sequencing
When the primary system fails, the communications relays are
opened immediately. The primary 1747-BSN ceases its data transfer
function and sends switching commands to the secondary 1747-BSN.
After all the RIO communications terminate, the secondary
communication channel relays are closed. Then the former secondary
SLC is ready to take control of the system.
Since the secondary’s input image table has been loaded on-line with
real data from the Smart Switch, the application program does not
have to delay the use of its input image table until the completion of
at least one complete RIO scan. The secondary’s (now primary) input
image table always has valid data.
Power Down
Sequencing
No special considerations (beyond the standard precautions for a
programmable controller) are required when powering down the
system. Power down should begin with the secondary system and
proceed to the primary. If the primary system is powered down first, a
switchover occurs.
Restarting a failed
system
A failed system (that has been repaired) can be restarted as described
in the following sequence. It is not necessary to power-down or
change the mode of primary SLC 5/0x.
1. Set the secondary SLC 5/0x (processor of the repaired system) to
program mode;
2. Apply power to the secondary system;
3. Download the applications program to the secondary SLC 5/0x;
4. Change the backup processor mode of operation from Program
mode to Run mode.
Publication 1747-6.22
5
Chapter
Scanner Configuration and
Programming
This chapter contains information necessary to:
• understand remote I/O image files
• understand RIO configuration using G files
• control and view RIO devices using the M0 and M1 files
• understand slot addressing
• quickly configure the RIO Scanner
Understanding Remote
Input and Output
Image Files
The SLC system allows you to assign up to 32 words of input and
output image data to a scanner. This allows your scanner to access a
maximum of four full logical racks (512 input and output points) of
data from remote devices.
The illustration below shows how logical racks, logical groups, and
words are allocated within the I/O image files. Note that this
illustration describes the input image file. The scanner’s output image
file is the same, except that its addressing scheme starts with O:e.O
and ends with O:e.31.
15
Logical
Rack 0
Logical
Rack 1
Logical
Rack 2
Logical
Rack 3
Logical Rack 0 Group 0
Logical Rack 0 Group 1
Logical Rack 0 Group 2
Logical Rack 0 Group 3
Logical Rack 0 Group 4
Logical Rack 0 Group 5
Logical Rack 0 Group 6
Logical Rack 0 Group 7
Logical Rack 1 Group 0
Logical Rack 1 Group 1
Logical Rack 1 Group 2
Logical Rack 1 Group 3
Logical Rack 1 Group 4
Logical Rack 1 Group 5
Logical Rack 1 Group 6
Logical Rack 1 Group 7
Logical Rack 2 Group 0
Logical Rack 2 Group 1
Logical Rack 2 Group 2
Logical Rack 2 Group 3
Logical Rack 2 Group 4
Logical Rack 2 Group 5
Logical Rack 2 Group 6
Logical Rack 2 Group 7
Logical Rack 3 Group 0
Logical Rack 3 Group 1
Logical Rack 3 Group 2
Logical Rack 3 Group 3
Logical Rack 3 Group 4
Logical Rack 3 Group 5
Logical Rack 3 Group 6
Logical Rack 3 Group 7
14
13
12
11
10
9
8
7
6
5
4
3
2
1
0
Word 0
Word 1
Word 2
Word 3
Word 4
Word 5
Word 6
Word 7
Word 8
Word 9
Word 10
Word 11
Word 12
Word 13
Word 14
Word 15
Word 16
Word 17
Word 18
Word 19
Word 20
Word 21
Word 22
Word 23
Word 24
Word 25
Word 26
Word 27
Word 28
Word 29
Word 30
Word 31
I:e.0
I:e.1
I:e.2
I:e.3
I:e.4
I:e.5
I:e.6
I:e.7
I:e.8
I:e.9
I:e.10
I:e.11
I:e.12
I:e.13
I:e.14
I:e.15
I:e.16
I:e.17
I:e.18
I:e.19
I:e.20
I:e.21
I:e.22
I:e.23
I:e.24
I:e.25
I:e.26
I:e.27
I:e.28
I:e.29
I:e.30
I:e.31
178
168
158
148
138
128
118
108
78
68
58
48
38
28
18
08
Publication 1747-6.22
5-60
Scanner Configuration and Programming
The 1747-BSN module’s I/O image structure is described below:
• The I/O image file consists of four logical racks (numbered 0, 1,
2, and 3) of input image and four logical racks of output image.
• Each logical rack consists of eight logical groups (numbered 0,
1, 2, 3, 4, 5, 6, and 7).
• Each logical group consists of two words (an input word and an
output word).
• Each word consists of two bytes (a high and a low byte). Low
byte is bits 0-7 and high byte is bits 8-15.
• Each byte consists of eight bits, with each bit having the ability
to control one discrete I/O point.
RIO Configuration Using G Files
When you program your SLC system, use the G file to configure the
scanner’s I/O image file. The Backup Scanner’s G file configuration
is based on the devices that you have on the RIO link. G file
configuration consists of setting logical device starting addresses and
the logical device image size of each physical device/adapter with
which the scanner communicates.
You enter G file configuration information using programming
software. See “M0-M1 Files and G Files” on page B-1 for further
details.
Neither your application program nor your programming device can
access or alter the G file while on-line with the processor. To change
the G file you must go off-line into the program file, make any
necessary changes, and download the program containing the altered
configuration. The G file consists of five words which are described
below.
Word 0 - contains scanner information for the SLC processor. Your
programming device automatically sets up Word 0. Do not attempt to
alter word 0.
Important: The term “primary” is used in conjunction with the term
“complementary,” when referring to a complementary
I/O configuration. Primary refers to I/O image space
found in Logical Racks 0 through 3 when in
complementary I/O mode. Normal refers to the same
image space (racks 0-3) when not in complementary I/O
mode.
Publication 1747-6.22
Scanner Configuration and Programming
5-61
Word 1, Primary/Normal Logical Device Address - specifies the
logical starting address of each primary/normal RIO link device. The
logical address consists of the logical rack number (0, 1, 2, or 3) and
starting logical group (0, 2, 4, or 6). Each bit in this word represents a
logical address. To specify an address, place a 1 at the bit
corresponding to the starting logical address of each logical device.
Word 2, Primary/Normal Device Logical Image Size - specifies the
logical image size (amount of scanner I/O image) of the devices set in
word 1. As with word 1, these bits correspond to RIO logical rack and
logical group numbers. To specify image size, place a 1 at each group
a device occupies.
Word 3, Complementary Logical Device Address - specifies the
logical starting address of each complementary RIO link device. The
logical address consists of the logical rack number (8, 9, 10, or 11
because a complementary device is always 8 above its primary) and
starting logical group (0, 2, 4, or 6). Each bit in this word represents a
logical address. To specify an address, place a 1 at the bit
corresponding to the starting logical address of each logical device.
Word 4, Complementary Device Logical Image Size - specifies the
logical image size (amount of scanner I/O image) of the
complementary devices set in word 3. As with word 3, these bits
correspond to RIO logical rack and logical group numbers. To specify
image size, place a 1 at each group a device occupies.
Important: Setting device addresses in word 3 of the G file
configures the system to operate in the complementary
I/O mode. Not setting device addresses in word 3 causes
the system to operate only in the primary/normal mode.
If you wish to operate in the complementary mode and
you only have primary devices configured, word 3 of the
G file must be set to a decimal “1,” and word 4 of the G
file must be equal to zero.
Publication 1747-6.22
5-62
Scanner Configuration and Programming
Bit Number
I/O Mix, Word 0
Primary/Normal Logical
Device Address,
Word 1
15
14
13
12
11
10
9
8
7
6
5
4
3
2
1
0
0
0
1
0
0
0
0
0
0
0
1
0
0
0
0
0
RIO Logical Rack 3 Starting RIO Logical Rack 2
Starting Logical Group
Logical Group
6
4
2
0
6
4
2
0
0
0
1
0
0
Complementary Logical
Device Address
Word 3
0
0
0
1
1
RiO Rack 1
Image Size
0
0
1
2
0
6
4
2
0
6
4
2
0
6
4
2
0
1
1
1
0
0
1
1
0
1
1
1
1
1
0
0
1
RIO Logical Rack 10
Starting Logical Group
RIO Logical Rack 11
Starting Logical Group
Specifies the logical image
size assigned to primary/
normal logical devices set
in Word 1.
RIO Logical Rack 9 Starting RIO Logical Rack 8 Starting
Logical Group
Logical Group
6
4
2
0
6
4
2
0
6
4
2
0
0
0
1
0
0
0
1
0
0
0
0
1
RIO Rack 10
Image Size
RIO Rack 11
Image Size
Specifies the RIO starting
addresses of primary/
normal logical devices.
RIO Rack 0
Image Size
4
6
1
RIO Rack 9
Image Size
4
2
0
0
0
1
Specifies the RIO starting
addresses of
complementary logical
devices.
RIO Rack 8
Image Size
6
4
2
0
6
4
2
0
6
4
2
0
6
4
2
0
1
1
1
0
0
1
1
0
1
1
1
1
1
0
0
1
Note: A complementary logical rack is always numbered 8 above its
primary logical rack. Also, logical racks 8, 9, 10, and 11 are sometimes
referred to as complementary logical racks 0, 1, 2, and 3.
Publication 1747-6.22
0
6
Complementary Logical
Image Size,
Word 4
1
RIO Logical Rack 1 Starting RIO Logical Rack 1 Starting
Logical Group
Logical Group
6
4
2
0
6
4
2
0
RIO Rack 2
Image Size
RIO Rack 3
Image Size
Primary/Normal Logical
Image Size
Word 2
0
Contains scanner
information for the SLC.
Your programming device
automatically sets the
scanner Information.
Specifies the logical
image size assigned to
complementary logical
devices set in Word 3.
Quarter Logical Rack Device
Full Logical Rack Device
Half Logical Rack Device
Three Quarter Logical Rack Device
Scanner Configuration and Programming
Rules for Configuring
the Scanner
5-63
General
• The smallest portion of the scanner’s I/O image that can be
allocated to a single RIO device is two logical groups (1/4
logical rack).
• If a device is configured in word 1, there must be image
allocated to it in word 2. This rule also applies to words 3 and 4
with the following exception: if word 3 = 1 and word 4 = 0, the
complementary mode is selected even though no complementary
devices are configured.
• A logical device’s starting group must begin at even group
numbers (0, 2, 4, or 6). Each bit in words 2 and 4 represent an
even logical group number.
Concerning Complementary I/O
• It is valid for you to have a complementary device configured
even if no associated primary device exists. Also,
complementary devices do not have to be the same logical image
size as the primary device.
• G file words 1 and 2 can both be zero (no primary devices).
However, in this case there must be at least one complementary
device configured in G file words 3 and 4.
• If there is at least one primary device configured in G file words
1 and 2, then words 3 and 4 can both be zero, or the G file size
can be set to 3 (complementary mode not selected).
• The starting group of the primary and complementary chassis
should be the same if they share the same image space. If the
starting group is not the same, the image of the complementary
device must not “cross over” into the space of a primary device.
For example, if a primary device exists at Logical Rack 1,
Logical Group 4, the maximum size of a complementary device
at Logical Rack 9, Logical Group 0 is a half logical rack. The
image does not cross over into Logical Group 4.
• A complementary device cannot be configured at locations
where primary devices are configured unless they both start at
the same location.
• If you configure your system so that complementary I/O is not
selected (words 3 and 4 are zero), you must not set up any of the
actual devices to be in the primary mode. If you do, the system
flags the device as faulted and prevents the device from running.
• Control functions (i.e., device inhibit, device reset, and device
output reset) are only selectable for the primary device, but also
apply to the complementary device. Control functions for
complementary devices cannot be exclusively enabled.
Publication 1747-6.22
5-64
Scanner Configuration and Programming
Example G File Showing Primary and Complementary Device Configurations
In the example that follows, the scanner is configured to
communicate with primary and complementary devices. Below are
the device addresses and image sizes:
• Logical Racks 0/8, Logical Group 2 contain a primary 3/4
logical rack device and a complementary 3/4 logical rack device.
• Logical Racks 1/9, Logical Group 0 contain no primary device
and a complementary 1/2 logical rack device.
• Logical Racks 1/9, Logical Group 6 contain a primary 1/4
logical rack device and a complementary 1/4 logical rack device.
• Logical Racks 2/10, Logical Group 0 contain a primary 3/4
logical rack device and a complementary 1/4 logical rack device.
• Logical Racks 3/11, Logical Group 2 contain a primary 1/4
logical rack device and a complementary 1/2 logical rack device.
• Logical Racks 3/11, Logical Group 6 contain a primary 1/4
logical rack device and no complementary device.
Bit Number
I/O Mix, Word 0
Primary/Normal Logical
Device Address,
Word 1
15
14
13
12
11
10
9
8
7
6
5
4
3
2
1
0
0
0
1
0
0
0
0
0
0
0
1
0
0
0
0
0
RIO Logical Rack 3 Starting RIO Logical Rack 2
Starting Logical Group
Logical Group
6
4
2
0
6
4
2
0
6
4
2
0
6
4
2
0
1
0
1
0
0
0
0
1
1
0
0
0
0
0
1
0
RIO Rack 2
Image Size
RIO Rack 3
Image Size
Primary/Normal Logical
Image Size
Word 2
Complementary Logical
Device Address
Word 3
Complementary Logical
Image Size,
Word 4
RIO Logical Rack 1 Starting RIO Logical Rack 0 Starting
Logical Group
Logical Group
6
1
4
0
2
1
0
0
RIO Logical Rack 11
Starting Logical Group
6
0
4
1
RIO Rack 0
Image Size
RiO Rack 1
Image Size
2
1
0
1
6
1
4
0
2
0
0
0
6
4
2
0
1
1
1
0
RIO Logical Rack 9 StartingRIO Logical Rack 8 Starting
Logical Group
Logical Group
RIO Logical Rack 10
Starting Logical Group
6
4
2
0
6
4
2
0
6
4
2
0
6
4
2
0
0
0
1
0
0
0
0
1
1
0
0
1
0
0
1
0
RIO Rack 10
Image Size
RIO Rack 11
Image Size
6
0
4
1
2
1
0
0
6
0
4
0
RIO Rack 8
Image Size
RIO Rack 9
Image Size
2
0
0
1
6
1
4
0
2
1
0
1
6
4
2
0
1
1
1
0
Illegal Configuration Examples
Having a primary device configured at Logical Rack 1, Logical
Group 2 (bit 5) would be illegal since this image space is already
being used by a complementary device. Having a complementary
device configured at Logical Rack 10, Logical Group 2 (bit 9) would
also be illegal since this image space is already being used by a
primary device.
Publication 1747-6.22
Scanner Configuration and Programming
5-65
Note that the complementary device at Logical Rack 8, Logical
Group 2 could be an ASB using 10 words (1-1/4 logical racks) of
data, and thereby cross into RIO Logical Rack 9.
The G file configuration above would provide the primary and
complementary input images to the scanner, which are illustrated on
the following pages. Note that the output images would be the same.
Example Scanner Input Image of the Primary Devices
Below are the primary device addresses and sizes. The following
figure contains complementary device addresses and sizes.
• Device 1 - starting at Logical Rack 0, Logical Group 2 is a
primary 3/4 logical rack device.
• Logical Rack 1, Logical Group 0 contains no primary device.
• Device 2 - starting at Logical Rack 1, Logical Group 6 is a
primary 1/4 logical rack device.
• Device 3 - starting at Logical Rack 2, Logical Group 0 is a
primary 3/4 logical rack device.
• Device 4 - starting at Logical Rack 3, Logical Group 2 is a
primary 1/4 logical rack device.
• Device 5 - starting at Logical Rack 3, Logical Group 6 is a
primary 1/4 logical rack device.
e= slot number of the SLC chassis containing the scanner.
15
Logical
Rack 0
Logical
Rack 1
Logical
Rack 2
Logical
Rack 3
14
13
12
11
10
9
8
7
6
5
4
3
2
1
0
Word 0
Word 1
Word 2
Word 3
Word 4
Word 5
Word 6
Word 7
Word 8
Word 9
Word 10
Word 11
Word 12
Word 13
Word 14
Word 15
Word 16
Word 17
Word 18
Word 19
Word 20
Word 21
Word 22
Word 23
Word 24
Word 25
Word 26
Word 27
Word 28
Word 29
Word 30
Word 31
I:e.0
I:e.1
I:e.2
I:e.3
I:e.4
I:e.5
I:e.6
I:e.7
I:e.8
I:e.9
I:e.10
I:e.11
I:e.12
I:e.13
I:e.14
I:e.15
I:e.16
I:e.17
I:e.18
I:e.19
I:e.20
I:e.21
I:e.22
I:e.23
I:e.24
I:e.25
I:e.26
I:e.27
I:e.28
I:e.29
I:e.30
I:e.31
178
168
158
148
138
128
118
108
78
68
58
48
38
28
18
Device 1
Device 2
Device 3
Device 4
Device 5
08
Publication 1747-6.22
5-66
Scanner Configuration and Programming
Example Scanner Input Image of the Complementary Devices
Below are the complementary device addresses and sizes. The
following figure contains primary device addresses and sizes.
• Device 6 - starting at Logical Rack 8, Logical Group 2 is a
complementary 3/4 logical rack device.
• Device 7 - starting at Logical Rack 9, Logical Group 0 is a
complementary 1/2 logical rack device.
• Device 8 - starting at Logical Rack 9, Logical Group 6 is a
complementary 1/4 logical rack device.
• Device 9 - starting at Logical Rack 10, Logical Group 0 is a
complementary 1/4 logical rack device.
• Device 10 - starting at Logical Rack 11, Logical Group 2 is a
complementary 1/2 logical rack device.
• Logical Rack 11, Logical Group 6 has no complementary device.
Bit Number(Decimal)
Logical
Rack 0
Logical
Rack 1
Logical
Rack 2
Logical
Rack 3
Bit Number (octal)
Publication 1747-6.22
15
14
13
12
11
10
9
8
7
6
5
4
3
2
1
0
Word 0
Word 1
Word 2
Word 3
Word 4
Word 5
Word 6
Word 7
Word 8
Word 9
Word 10
Word 11
Word 12
Word 13
Word 14
Word 15
Word 16
Word 17
Word 18
Word 19
Word 20
Word 21
Word 22
Word 23
Word 24
Word 25
Word 26
Word 27
Word 28
Word 29
Word 30
Word 31
I:e.0
I:e.1
I:e.2
I:e.3
I:e.4
I:e.5
I:e.6
I:e.7
I:e.8
I:e.9
I:e.10
I:e.11
I:e.12
I:e.13
I:e.14
I:e.15
I:e.16
I:e.17
I:e.18
I:e.19
I:e.20
I:e.21
I:e.22
I:e.23
I:e.24
I:e.25
I:e.26
I:e.27
I:e.28
I:e.29
I:e.30
I:e.31
178
168
158
148
138
128
118
108
78
68
58
48
38
28
18
08
Device 6
Device 7
Device 8
Device 9
Device 10
Scanner Configuration and Programming
Considerations When
Configuring Remote I/
O
5-67
The following sections contain information that you should
understand before you configure your scanner’s G file.
G File Considerations
• You can only change the RIO configuration by modifying the G
file while offline in your program file. Your application program
cannot access the G file, nor can you access it while online with
your programming device. However, your SLC control program
can dynamically inhibit and uninhibit RIO devices via the M0
file.
• RIO devices larger than 1 logical rack appear as multiple devices
on the RIO link. Refer to the Crossing Logical Rack Boundaries
section below.
• The address and size of the devices you list in the G file must
match the settings of each RIO device.
Crossing Logical Rack
Boundaries
You express remote I/O image boundaries in an even number of
groups. For example, the 1747-ASB image can be any size from two
logical groups up to 32 logical groups (four logical racks), in 2logical group increments.If the scanner image assigned to an adapter
is greater than 8 logical groups (one logical rack), the image crosses
logical rack boundaries. If the scanner image assigned to an adapter is
less than 8 logical groups, it too can cross a logical rack boundary
depending upon the starting logical group number. The significance
of crossing logical rack boundaries is discussed in the next section.
Examples of Crossing Logical Rack Boundaries
Examples 1 and 2 that follow show adapters with logical image sizes
that cross logical racks 0 and 1. The image size of the adapter in
example 1 consumes all of logical rack 0 (eight logical groups) and
half of logical rack 1 (four logical groups). The image size of the
adapter in example 2 consumes two groups in logical rack 0 and four
groups in logical rack 1.
Crossing Logical Rack Boundries - Example 1
Scanner Input or Output Image
15
Logical
Rack 0
Logical
Rack 1
Group 0
Group 1
Group 2
Group 3
Group 4
Group 5
Group 6
Group 7
Group 0
Group 1
Group 2
Group 3
Group 4
Group 5
Group 6
Group 7
8 7
Crossing Logical Rack Boundries - Example 2
Scanner Input or Output Image
0
15
Logical
Rack 0
Adapter
Image
Adapter image is 12 logical groups in size and crosses a
logical rack boundary due to its size.
Logical
Rack 1
Group 0
Group 1
Group 2
Group 3
Group 4
Group 5
Group 6
Group 7
Group 0
Group 1
Group 2
Group 3
Group 4
Group 5
Group 6
Group 7
8 7
0
Adapter
Image
Adapter image is 6 logical groups in size and crosses a logical rack
boundary due to its starting logical group number.
Publication 1747-6.22
5-68
Scanner Configuration and Programming
Creating More than One Logical Rack Device
RIO discrete transfers occur on a logical device basis, not on an
adapter basis. A logical device is any portion of a logical rack that is
assigned to a single adapter.
When the scanner image assigned to an adapter is more than one
logical device, the scanner sees the single physical device as multiple
logical devices on the RIO link. The scanner communicates with each
logical device independently, even if the logical devices are all
assigned to one adapter. If a physical device image is more than one
logical device, the following is true:
• The scanner does not update all of the adapter image at the same
time. The number of logical devices determines the number of
RIO discrete transfers that are needed to update the entire
adapter image.
• The adapter may receive different communication commands for
each logical device. In this case, the adapter decides which
command it responds to.
Scanner Input or Output Image
15
In this example the adapter is
configured to start at Logical Rack 0,
Logical Group 0, and uses 14 words
of I/O image. Note that two RIO
discrete transfers are required for
the scanner to update the adapter
image containing two logical
devices.
Understanding M Files
Logical
Rack 0
Logical
Rack 1
Group 0
Group 1
Group 2
Group 3
Group 4
Group 5
Group 6
Group 7
Group 0
Group 1
Group 2
Group 3
Group 4
Group 5
Group 6
Group 7
8 7
0
Logical
Device
Adapter
Image
Logical
Device
M Files Overview
The scanner provides RIO device control and status information
through the M0 and M1 files. The M0 file is a control file. The M1
file is a status file.
There is no image for M file data in SLC processors as there is for I/O
data. The M files are buffers in the BSN module, accessible only via
ladder logic instructions that address them. Each occurrence of a
ladder instruction addressed with an M-file address is an interrupt to
the ladder program scan. This is similar to the way Immediate I/O
Instructions operate.
Instructions with the M0 file addressed write data to the M0 file in the
BSN. Instructions with the M1 file addressed read data from the M1
file in the BSN.
Publication 1747-6.22
Scanner Configuration and Programming
5-69
M-file bits/words in the ladder program, therefore, impact the ladder
scan time. If scan time is critical, use COP instructions to copy blocks
of M1 file data to processor data file addresses throughout the
program. It is more efficient to do one large M-file transfer than to do
many small transfers.
It is also more efficient to address instructions in the ladder program
using internal data files (binary, integer, etc.). Then use COP
instructions to copy this data file to the M0 file in one large block at
the end of the program. Refer to the ladder example that follows. For
more information on M files, refer to appendix B. You can find M file
information relating to Block Transfer operations in chapter 7, RIO
Block Transfer.
Publication 1747-6.22
5-70
Scanner Configuration and Programming
Rung 2:0
To decrease program scan time, copy the first four words of the M1 file to a binary file and use
these addresses throughout the program to access block transfer done, error, data, etc.
information without interrupting the program scan many times.
|
+COP±±±±±±±±±±±±±±±±+ |
|±±±±±±±±±±±±±±±±±±±±±±±±±±±±±±±±±±±±±±±±±±±±±±±±±+COPY FILE
| |
|
|Source
#M1:1.100| |
|
|Dest
#B3:0| |
|
|Length
4| |
|
+±±±±±±±±±±±±±±±±±±±+ |
Rung 2:1
Examine B3/13 (B3: 0/13), an internal storage bit, to determine when a block transfer is done. Note that
examining multiple individual M-file bits directly (every scan) can measurably increase processor scan time
| BT DONE
|
B3
+COP±±±±±±±±±±±±±±±±+
|±±±±] [±±±±±±±±±±±±±±±±±±±±±±±±±±±±±±±±±±±±±±±±±±+COPY FILE
|
|
13
|Source
#M1:1.110|
|
|Dest
#N10:0|
|
|Length
64|
|
+±±±±±±±±±±±±±±±±±±±+
|
Rung 2:2
Examine B3/12 (an internal storage bit) to determine if a BT error occurred. Buffer the BT status
from B3:3 if an error does occur.
|
|
|
|
|
|
|
|
B3
+MOV±±±±±±±±±±±±±±±±+ |
|±±±±] [±±±±±±±±±±±±±±±±±±±±±±±±±±±±±±±±±±±±±±±±±±+MOVE
|
|
12
|Source
B3:3| |
|
|
0000000000000000| |
|
|Dest
N10:64| |
|
|
0| |
|
+±±±±±±±±±±±±±±±±±±±+ |
Rung 2:3
|
|
|±±±±±±±±±±±±±±±±±±±±±±±±±±±±±±±±±±±±±+END+±±±±±±±±±±±±±±±±±±±±±±±±±±±±±|
|
|
Important: If you are using an SLC 5/02 processor M file data
cannot be directly monitored. To monitor M files, you
must move the M file words into an SLC file that can be
monitored, e.g., an integer “N” file. SLC 5/03 or later
processors allow you to monitor M files directly.
However, do not address M file bits more than necessary
throughout your application program. The processor
accesses M files like immediate I/O. Therefore,
excessive addressing of M files can greatly increase SLC
processor scan time. For more information on M files,
refer to Appendix B.
Publication 1747-6.22
Scanner Configuration and Programming
5-71
M0 Control File Description
You can control the operation of individual devices on the RIO link
with M0 word 8 through M0 word 27 (M0:e.8 through M0:e.27).
Through your application program, you can use the M0 file to:
• Device Inhibit - command the 1747-BSN module to stop
scanning an RIO device by using words 8 - 11.
• Device Reset - command an RIO device’s outputs to reset while the
SLC processor is in Run or Test mode by using words 16 - 19.
• Remote Output Reset - command an RIO device’s outputs to
reset upon the SLC processor leaving Run mode (regardless of
the RIO device’s Hold Last State setting), or while in Test mode
by using words 24 - 27.
If you do not modify the Device Reset and Remote Output Reset
words, the device outputs reflect the scanner output image whenever
the SLC processor is in Run mode. If the SLC processor is in
Program, Test, or Fault mode, it instructs the device to reset its
outputs.
M file data is nonretentive. Upon entering Run or Test modes, the
SLC processor sets the M0 file to a default state. The processor does
not use the M0 file until a full program scan occurs (after entering
Run mode). This allows you to change the M file settings before they
take effect.
Important: The 1747-BSN module does not use M0 words 0 - 7.
MO (Control) File- RIO Device Control Words
Device
Inhibit
Control
Device
Reset
Control
Output
Reset
Control
15
14
13
12
11
10
9
8
7
6
5
4
3
2
1
0
Logical Rack 0 Device Inhibit Word 8
Logical Rack 1Device Inhibit Word 9
Logical Rack 2 Device Inhibit Word 10
Logical Rack 3 Device Inhibit Word 11
x
x
x
x
x
x
x
x
x
x
x
x
0
1
1
0
x
x
x
x
x
x
x
x
x
x
x
x
0
0
0
0
x
x
x
x
x
x
x
x
x
x
x
x
1
0
0
1
x
x
x
x
x
x
x
x
x
x
x
x
0
0
0
1
Logical Rack 0 Device Inhibit Word 16
Logical Rack 1 Device Inhibit Word 17
Logical Rack 2 Device Inhibit Word 18
Logical Rack 3 Device Inhibit Word 19
x
x
x
x
x
x
x
x
x
x
x
x
0
0
0
0
x
x
x
x
x
x
x
x
x
x
x
x
0
0
0
0
x
x
x
x
x
x
x
x
x
x
x
x
0
0
0
0
x
x
x
x
x
x
x
x
x
x
x
x
0
0
0
0
x
x
x
x
x
x
x
x
x
x
x
x
1
0
0
1
x
x
x
x
x
x
x
x
x
x
x
x
0
0
0
1
x
x
x
x
x
x
x
x
x
x
x
x
0
0
1
0
x
x
x
x
x
x
x
x
x
x
x
x
0
0
1
0
Logical Rack 0 Remote Output Reset Word 24
Logical Rack 1 Remote Output Reset Word 25
Logical Rack 2 Remote Output Reset Word 26
Logical Rack 3 Remote Output Reset Word 27
e = slot number of the SLC rack containing the scanner
x = bit not used/defined
Important: Control functions (i.e., device inhibit, device reset, and
device output reset) are only selectable for the primary
device, but also apply to the complementary device.
Control functions for complementary devices cannot be
exclusively enabled.
Publication 1747-6.22
5-72
Scanner Configuration and Programming
M0 File - RIO Device
Inhibit Control
M0 Words 8 through 11 - you use these words to command the
scanner to stop scanning logical racks 0, 1, 2, and 3. Bits 0 - 3 in each
word correspond to I/O group locations within logical racks 0, 1, 2,
and 3.
To stop scanning (inhibit) a device listed in the configuration (G) file,
set the bit corresponding to the starting group address of the device to
1. Setting bits that do not correspond to the device logical starting
group address does not inhibit the device. To resume scanning a
device, reset the bit (which corresponds to the starting group address
of the device) to 0.
Inhibiting a device does not affect the current settings of the Device
Fault Status (words 12 - 15 of the M1 file). Inhibited devices
eventually time out and either return to their last state or reset
(depending on the device’s last state setting).
Default: When the processor enters the Run mode, the scanner
automatically inhibits any device not configured in the G file (bit set
to 1). Attempting to inhibit an unconfigured device has no effect.
MO (Control) File Words 8 through 11
Not Defined
Bit Number (decimal)
Logical Rack 0 Device Inhibit Word 8
Logical Rack 1Device Inhibit Word 9
Logical Rack 2 Device Inhibit Word 10
Logical Rack 3 Device Inhibit Word 11
Starting Group
6
4
2
0
15
14
13
12
11
10
9
8
7
6
5
4
3
2
1
0
x
x
x
x
x
x
x
x
x
x
x
x
0
1
1
0
x
x
x
x
x
x
x
x
x
x
x
x
0
0
0
0
x
x
x
x
x
x
x
x
x
x
x
x
1
0
0
1
x
x
x
x
x
x
x
x
x
x
x
x
0
0
0
1
M0 File
M0:e.8
M0:e.9
M0:e.10
M0:e.11
e = slot number of the SLC rack containing the scanner
x = not used/defined
Example of Device Inhibit Control
The 1747-BSN Scanner inhibits (sets to 1) the bits in M0:e.8 through
M0:e.11 (by default) wherever there are no configured devices
present. The illustration below compares the configured devices
(G file word 2) to the groups that the scanner automatically inhibits.
G File
Device Address, Word 1
RIO Logical Rack 1
Starting Group
RIO Logical Rack 2
Starting Group
RIO Logical Rack 3
Starting Group
RIO Logical Rack 0
Starting Group
6
4
2
0
6
4
2
0
6
4
2
0
6
4
2
0
1
1
1
0
0
1
1
0
1
1
1
1
1
0
0
1
15
14
13
12
11
10
9
8
7
6
5
4
3
2
1
0
x
x
x
x
x
x
x
x
x
x
x
x
0
1
1
0
x
x
x
x
x
x
x
x
x
x
x
x
0
0
0
0
x
x
x
x
x
x
x
x
x
x
x
x
1
0
0
1
x
x
x
x
x
x
x
x
x
x
x
x
0
0
0
1
MO (Control) File
Bit Number (decimal)
Logical Rack 0 Device Inhibit Word 8
Logical Rack 1Device Inhibit Word 9
Logical Rack 2 Device Inhibit Word 10
Logical Rack 3 Device Inhibit Word 11
e = slot number of the SLC rack containing the scanner
x = not used/defined
Publication 1747-6.22
M0 File
M0:e.8
M0:e.9
M0:e.10
M0:e.11
Scanner Configuration and Programming
M0 File - RIO Device
Reset Control
5-73
M0 Words 16 through 19 - you use these words to command a reset
(0) of RIO device outputs when the SLC processor is in Run or Test
mode. This allows you to selectively reset logical device outputs
based on a previous condition(s) that you defined. Bits 0 - 3
correspond to the logical I/O group locations within logical racks 0, 1,
2, and 3.
To command an RIO device to a reset (0) condition (from Run or Test
mode), set the bit corresponding to the starting logical address of the
device to 1. Setting bits that do not correspond to a device starting
address does not force a reset. To remove the reset condition, reset the
bit (corresponding to the device logical starting address) to 0. Refer to
the mode table below.
Default: The SLC processor resets all bits in this field to 0 when it
enters Run or Test mode.
MO (Control) File Words 16 through 19
Not Defined
Logical Rack 0 Device Inhibit Word 16
Logical Rack 1Device Inhibit Word 17
Logical Rack 2 Device Inhibit Word 18
Logical Rack 3 Device Inhibit Word 19
Starting Group
6
4
2
0
15
14
13
12
11
10
9
8
7
6
5
4
3
2
1
0
x
x
x
x
x
x
x
x
x
x
x
x
0
0
0
0
x
x
x
x
x
x
x
x
x
x
x
x
0
0
0
0
x
x
x
x
x
x
x
x
x
x
x
x
0
0
0
0
x
x
x
x
x
x
x
x
x
x
x
x
0
0
0
0
M0 File
M0:e.16
M0:e.17
M0:e.18
M0:e.19
e = slot number of the SLC rack containing the scanner
x = bit not used/ defined
Example of Device Reset Control
The application has commanded the device starting at Logical Rack
0, Group 0 (M0:e.16/0) to a reset condition (bit set to 1). The default
setting for all device reset bits is 0.
G File
RIO Logical Rack 3
Starting Group
Device Address, Word 1
RIO Logical Rack 2
Starting Group
RIO Logical Rack 0
Starting Group
RIO Logical Rack 1
Starting Group
6
4
2
0
6
4
2
0
6
4
2
0
6
4
2
0
0
0
1
0
0
0
1
0
0
0
0
1
1
0
0
1
15
14
13
12
11
10
9
8
7
6
5
4
3
2
1
0
x
x
x
x
x
x
x
x
x
x
x
x
0
0
0
1
x
x
x
x
x
x
x
x
x
x
x
x
0
0
0
0
x
x
x
x
x
x
x
x
x
x
x
x
0
0
0
0
x
x
x
x
x
x
x
x
x
x
x
x
0
0
0
0
MO (Control) File
Bit Number (decimal)
Logical Rack 0 Device Inhibit Word 16
Logical Rack 1Device Inhibit Word 17
Logical Rack 2 Device Inhibit Word 18
Logical Rack 3 Device Inhibit Word 19
M0 File
M0:e.16
M0:e.17
M0:e.18
M0:e.19
e = slot number of the SLC rack containing the scanner
x = bit not used/defined
Publication 1747-6.22
5-74
Scanner Configuration and Programming
M0 File - Remote
Output Reset Control
M0 Words 24 through 27 - use these words to command a logical
device to reset all of its outputs when the SLC processor leaves the
Run mode and enters the Test, Program, or Fault mode (regardless of
the device’s Hold Last State setting).
Resetting the bit (corresponding to the starting address of a device) to
0 allows the Hold Last State switch on the logical device to determine
output operation when the SLC processor leaves the Run mode.
Setting the bit to 1 commands all outputs off (regardless of the
device’s Hold Last State setting).
Only the device’s logical starting address bit matters. Setting other
bits has no effect. Bits 0 - 3 correspond to I/O group locations within
logical racks 0, 1, 2, and 3.
Default: When the processor enters Run or Test mode, the scanner
sets the starting address bit of each device configured in the G file to
1.
ATTENTION: The use of the device’s Hold Last State
switch can result in its outputs remaining energized
when not under control of the SLC processor. Only
experienced SLC programmers should use this
function.
!
MO (Control) File Words 24 through 27
Starting Group
Not Defined
Bit Number (decimal)
6
4
15
14
13
12
11
10
9
8
7
6
5
4
3
2
1
0
x
x
x
x
x
x
x
x
x
x
x
x
1
0
0
1
x
x
x
x
x
x
x
x
x
x
x
x
0
0
0
1
x
x
x
x
x
x
x
x
x
x
x
x
0
0
1
0
x
x
x
x
x
x
x
x
x
x
x
x
0
0
1
0
Logical Rack 0 Device Inhibit Word 24
Logical Rack 1Device Inhibit Word 25
Logical Rack 2 Device Inhibit Word 26
Logical Rack 3 Device Inhibit Word 27
2
0
M0 File
M0:e.24
M0:e.25
M0:e.26
M0:e.27
e = slot number of the SLC rack containing the scanner
x = not used/defined
Example of Remote Output Reset Control
By default the scanner sets the bits in M0:e.24 through M0:e.27 to 1
wherever there are configured devices present. This commands all
devices’ outputs to reset regardless of their Hold Last State switch.
The application program can remove commanded reset of devices by
resetting bits to 0.
RIO Logical Rack 3
Starting Group
G File
Device Address, Word 1
RIO Logical Rack 2
Starting Group
RIO Logical Rack 1
Starting Group
RIO Logical Rack 0
Starting Group
6
4
2
0
6
4
2
0
6
4
2
0
6
4
2
0
0
0
1
0
0
0
1
0
0
0
0
1
1
0
0
1
15
14
13
12
11
10
9
8
7
6
5
4
3
2
1
0
x
x
x
x
x
x
x
x
x
x
x
x
1
0
0
1
x
x
x
x
x
x
x
x
x
x
x
x
0
0
0
1
x
x
x
x
x
x
x
x
x
x
x
x
0
0
1
0
x
x
x
x
x
x
x
x
x
x
x
x
0
0
1
0
MO (Control) File
Bit Number (decimal)
Logical Rack 0 Device Inhibit Word 24
Logical Rack 1Device Inhibit Word 25
Logical Rack 2 Device Inhibit Word 26
Logical Rack 3 Device Inhibit Word 27
e = slot number of the SLC rack containing the scanner
x = not used/defined
Publication 1747-6.22
M0 File
M0:e.24
M0:e.25
M0:e.26
M0:e.27
Scanner Configuration and Programming
5-75
Device Reset and Remote Output Reset Considerations From this mode
The 1747-BSN Scanner Device Reset words (M0:e.16 to M0:e.19)
and the Remote Output Reset words (M0:e.24 to M0:e.27) operate in
conjunction with each RIO device to determine the state of that RIO
device’s outputs. The output control information that the scanner
sends to the RIO device depends on how you configure these bits.
The RIO device acts on the output control information in accordance
with its functionality and configuration. To fully understand how a
specific device responds to the Device Reset and Remote Output
Reset words, you must determine the operation of the RIO device. To
determine RIO device output operation, refer to that device’s user
manual.
!
ATTENTION: When using the Device Reset and
Remote Output Reset words, you must completely
understand and fully test all device output operations
before beginning normal system operation.
To properly use the Device Reset and Remote Output Reset words,
you must consider the output control information sent to the devices
during two SLC processor operating conditions:
• Τhe SLC processor is in any given mode (Run, Program, Test, or
Fault).
• The SLC processor is leaving any mode and entering another.
If you do not modify the Device Reset and Remote Output Reset
words, the device outputs reflect the scanner output image whenever
the SLC processor is in Run mode. If the SLC processor is in
Program, Test, or Fault mode, it instructs the device to reset its
outputs.
If you modify the default settings, the Device Reset and Remote
Output Reset words change. The table on the following page contains
examples of what changes occur. The information in the table is
based on the assumption that the scanner’s slot is always enabled and
the RIO link device is communicating with the scanner.
To determine how the Device Reset and Remote Output Reset words
operate, locate the box where the row and column are headed by the
modes in question. The shaded boxes represent the Device Reset and
Remote Output Reset word operation while in that mode.
Example 1 - When powering up into Run mode, the scanner, by
default, resets the appropriate bit in the Device Reset word to 0. The
appropriate bit in the Remote Output Reset word is set to 1. As a
result, the RIO link device outputs reflect the scanner’s output image.
Publication 1747-6.22
5-76
Scanner Configuration and Programming
Example 2 - Once the SLC processor is in Run mode, the bits in the
Remote Output Reset word have no effect on the RIO link device’s
outputs. Setting the appropriate bits in the Device Reset Word to 1
instructs the RIO link device to reset its outputs.
Example 3 - When going from Run to Program mode, if both of the
appropriate bits in the Device Reset and Remote Output Reset words
are reset to 0 before leaving Run mode, the RIO link device is
instructed to decide whether to hold its last output state or to reset its
outputs.
To this mode
Run
Power-up
Test
DR = 0
ROR = 1
DR = X
ROR = X
Default values are set
automatically. Outputs reflect
those of the scanner output image.
Run
DR = 0 In this instance, the last DR = 0 In this instance, the last
ROR = X
DR = 0 Outputs are unchanged. ROR = 0 state switch setting is ROR = 0 state switch setting is
valid.
DR = 1 Outputs are turned OFF. valid.
DR = X
ROR = 1 These two
From this mode
Program
DR = X
ROR = 1 These two
combinations reset device outputs. combinations reset device
outputs.
DR = 1
ROR = X
Test
DR = 0
ROR = 1
Default values are set
automatically.
Outputs reflect those of the
scanner output image.
DR = 1
ROR = X
DR = 0 In this instance, the last Outputs remained unchanged.
ROR = 0 state switch setting is
valid.
Once these outputs are reset, they
remain reset regardless of the DR
and ROR settings.
DR = X
ROR = 1 These two
combinations reset device
outputs.
DR = 1
ROR = X
Program DR = 0
ROR = 1
DR = 0
ROR = 1
Default values are set
These default values are set
automatically. Outputs reflect
automatically. Outputs are reset,
those of the scanner output image. unless ROR is changed to 0 on the
first scan.
Publication 1747-6.22
DR = X
ROR = X
Scanner Configuration and Programming
M1 Status File
Description
5-77
M1 file words 0 through 47 contain the status of all devices on the
scanner’s RIO link. M1 is a read only file; do not write to this file.
Words 0-47 of the M1 file provide the following information:
• Word 0 (M1:e.0) - general communication status (overall device
fault and communications attempted)
• Word 2 (M1:e.2) - RIO baud rate status
• Word 3 (M1:e.3) - complementary device starting address status
• Word 4 (M1:e.4) - complementary logical image size status
• Word 5 (M1:e.5) - complementary active device status
• Word 8 (M1:e.8) - primary/normal device starting address status
• Word 9 (M1:e.9) - primary/normal logical image size status
• Word 10 (M1:e.10) - active device status
• Words 12-15 (M1:e.12 -15) - device fault status
• Words 16-31 (M1:e.16-31) - primary/normal device retry
counters
• Words 32-47 (M1:e.32-47) - complementary device retry
counters
General
Communication Status
- Enable Device Fault
Bit
Word 0, bit 0 - is the Enabled Device Fault status bit. When any
enabled device is faulted, this bit is set to 1. A fault may be caused by
a communication problem with a remote device.
M1 (Status) File Word 0
Bit Number (decimal)
General Communication Status Word, Word 0
15
14
13
12
11
10
9
8
7
6
5
4
3
2
1
0
x
x
x
x
x
x
x
x
x
x
x
x
x
x
1
1
M1 File
M1:e.0
Enabled Device
Fault Bit
Publication 1747-6.22
5-78
Scanner Configuration and Programming
General
Communication Status
- Communication
Attempted Bit
Word 0, bit 1 - is the Communications Attempted status bit. When
RIO communication has been attempted with all configured devices,
this bit is set to 1. There are no further transitions of this bit until a
processor change of state occurs (i.e., Program mode to Run mode or
Test mode, or Test mode to Run mode).
Until this bit is set, all devices in M1 file word 10 (active device
status) appear to be inactive. This bit can be used to condition the
Enabled Device Fault bit. If the Communications Attempted bit is 1,
the Enabled Device Fault bit is valid.
M1 (Status) File Word 0
Bit Number (decimal)
General Communication Status Word, Word 0
15
14
13
12
11
10
9
8
7
6
5
4
3
2
1
0
x
x
x
x
x
x
x
x
x
x
x
x
x
x
1
1
Communications
Attempted Status Bit
RIO Baud Rate Status
M1 File
M1:e.0
Enable Device
Fault Bit
Word 2, bits 0 to 1 - displays the RIO communication/baud rate you
have set the scanner to via its DIP switch. Writing to word 2 does not
change the scanner baud rate.
M1 (Status) File - Word 2
Bit Number (decimal)
RIO Baud Rate, Word 2
15
14
13
12
11
10
9
8
7
6
5
4
3
2
1
0
x
x
x
x
x
x
x
x
x
x
x
x
x
x
0
1
Baud Rate
As illustrated by the table below, bit 0 = SW1 and bit 1 = SW2.
Publication 1747-6.22
Bit 1-0
Baud Rate
SW 1-2
11
5736K Baud
11
01
115.2K Baud
10
10
230.4K Baud
01
00
230.4K Baud
00
Scanner Configuration and Programming
Logical Device
Starting Address
Status
5-79
Word 8 - provides status/feedback of the logical device starting
addresses you configured in word 1 of the G file (primary/normal
logical devices). Writing to M1 file word 8 does not alter the contents
of the G file.
M1 (Status) File-Word 8
Bit Number (decimal)
15
14
13
12
11
10
0
0
1
0
0
0
Primary Logical Device Address, Word 8
9
8
1
7
0
6
0
5
0
4
0
3
1
2
1
1
0
0
0
1
M1 File
M1:e.3
G File-Word 1
Starting Group
Primary Logical Device Address, Word 1
Starting Group
6
4
2
0
6
0
0
1
0
0
RIO Logical Rack 3
Starting Group 2
4
0
Starting Group
Starting Group
2
0
6
4
2
0
6
4
2
0
1
0
0
0
0
1
1
0
0
1
RIO Logical Rack 2
Starting Group 2
RIO Logical Rack 0
Starting Group 0
RIO Logical Rack 0
Starting Group 6
RIO Logical Rack 1
Starting Group 0
Word 3 - provides status/feedback of the logical device starting
addresses you configured in word 3 of the G file (complementary
devices). Writing to M1 file word 3 does not alter the contents of the
G file.
M1 (Status) File-Word 3
Bit Number (decimal)
15
Complementary Logical Device Address, Word 3
14
13
12
11
10
0
1
0
0
0
9
8
1
7
0
6
0
5
0
0
4
1
3
1
2
1
0
0
0
1
M1 File
M1:e.3
G File-Word 3
Starting Group
Complementary Logical Device Address, Word 3
6
4
0
0
2
0
1
RIO Logical Rack 11
Starting Group 2
Logical Device Image
Size Status
Starting Group
0
6
0
0
4
0
Starting Group
Starting Group
2
0
6
4
2
0
6
4
2
0
1
0
0
0
0
1
1
0
0
1
RIO Logical Rack 9
Starting Group 2
RIO Logical Rack 10
Starting Group 2
RIO Logical Rack 8
Starting Group 0
RIO Logical Rack 8
Starting Group 6
Word 9 - provides status/feedback of the logical device image size
you configure in word 2 of the G file (primary/normal devices). A bit
set to 1 shows the logical image size of each logical device. Writing
to word M1 file word 9 does not alter the contents of the G file.
M1 (Status) File-Word 9
Primary Logical Device Address, Word 9
15
1
14
1
13
1
12
0
11
0
10
1
9
1
8
0
7
1
6
1
5
1
4
1
3
1
2
0
1
0
0
1
M1 File
M1:e.3
G File-Word 2
RIO Rack 3
Image Size
Primary Logical Device Address, Word 2
6
1
4
1
2
1
RIO Rack 2
Image Size
0
0
6
0
4
1
2
1
RIO Rack 0
Image Size
RIO Rack 1
Image Size
0
0
6
1
4
1
2
1
0
1
6
1
4
0
2
0
0
1
Publication 1747-6.22
5-80
Scanner Configuration and Programming
Word 4 - provides status/feedback of the logical device image size
you configure in word 4 of the G file (complementary devices). A bit
set to 1 shows the logical image size of each logical device. Writing
to word M1 file word 4 does not alter the contents of the G file.
M1 (Status) File-Word 4
15
1
Complementary Logical Device Address, Word 4
14
1
13
1
12
0
11
0
G File-Word 4
RIO Rack 11
Image size
6
1
Complementary Logical Device Address, Word 4
Active Device Status
4
1
10
1
9
1
8
0
7
1
RIO Rack 10
Image Size
2
1
0
0
6
0
4
1
6
1
5
1
4
1
3
1
RIO Rack 9
Image Size
2
1
0
0
6
1
4
1
2
0
1
0
0
1
M1 File
M1:e.3
RIO Rack 8
Image Size
2
1
0
1
6
1
4
0
2
0
0
1
Word 10 - provides active device status for primary/normal devices.
When a RIO device is communicating with the scanner the bit
corresponding to the device’s logical starting group is set to 1.
Devices that are inhibited in the M0 file (M0:e.8 - M0:e.11) are
represented by a 0. Unless devices are inhibited, not responding to
communications, or configured to an incorrect logical rack size, this
word is identical to the device configuration (M1:e.8).
M1 (Status) File-Word 10
Bit Number (decimal)
15
14
13
12
RIO Rack 3
Starting Group
Primary Logical Device Address, Word 8
Primary Logical Image Size, Word 9
Primary Active Device Status, Word 10
11
10
9
8
RIO Rack 2
Starting Group
7
6
5
4
RIO Rack 1 Starting
Group
3
2
1
RIO Rack 0
Starting Group
0
6
4
2
0
6
4
2
0
6
4
2
0
6
4
2
0
0
0
1
0
0
0
1
0
0
0
0
1
1
0
0
1
1
1
1
0
0
1
1
0
1
1
1
1
1
0
0
1
0
0
0
0
0
0
1
0
0
0
0
1
1
0
0
1
A 0 indicates that the device is inhibited, not
responding to communications, or configured to an
incorrect logical rack size.
M1 File
M1:e.8
M1:e.9
M1:e.10
A 1 indicates that the configured device is
active.
Word 5 - provides active device status for complementary devices.
When a RIO device is communicating with the scanner the bit
corresponding to the device’s logical starting group is set to 1.
Devices that are inhibited in the M0 file are represented by a 0.
Unless devices are inhibited, not responding to communications, or
configured to an incorrect logical rack size, this word is identical to
the device configuration (M1:e.3).
Important: When a primary device is inhibited, its complementary
device is also inhibited. A complementary device cannot
be exclusively inhibited.
Publication 1747-6.22
Scanner Configuration and Programming
5-81
M1 (Status) File-Word 5
Bit Number (decimal)
15
14
13
12
RIO Rack 11
Starting Group
Primary Logical Device Address, Word 3
Primary Logical Image Size, Word 4
Primary Active Device Status, Word 5
11
9
8
7
6
5
4
RIO Rack 9
Starting Group
3
2
1
0
RIO Rack 8
Starting Group
6
4
2
0
6
4
2
0
6
4
2
0
6
4
2
0
0
0
1
0
0
0
1
0
0
0
0
1
1
0
0
1
1
1
1
0
0
1
1
0
1
1
1
1
1
0
0
1
0
0
0
0
0
0
1
0
0
0
0
1
1
0
0
1
A 0 indicates that the device is inhibited
not responding to communications, or
configured to an incorrect logical rack size.
Logical Device Fault
Status
10
RIO Rack 10
Starting Group
M1 File
M1:e.3
M1:e.4
M1:e.5
A 1 indicates that the configured
device is active
Words 12 through 15, bits 0 to 7 - indicate the device fault status for
logical racks 0, 1, 2, 3, 8, 9, 10, and 11. Bits 0 through 3 are for
primary/normal devices and bits 4 through 7 are for complementary
devices. Each bit corresponds to a quarter logical rack location. If a
device is not responding to communications, has gone offline, or is
configured to an incorrect logical rack size, all bits corresponding to
the device are set to 1. This is highlighted in the example below.
Publication 1747-6.22
5-82
Scanner Configuration and Programming
M1 (Status) File Primary/Normal Device Fault Status
Bit Number (decimal)
15
14
13
12
RIO Rack 3
Starting Group
Primary Device Address, Word 8
Primary Device Size, Word 9
Primary Active Device Status, Word 10
11
10
9
8
RIO Rack 2
Starting Group
7
6
5
4
RIO Rack 1
Starting Group
3
2
1
0
RIO Rack 0
Starting Group
6
4
2
0
6
4
2
0
6
4
2
0
6
4
2
0
0
0
1
0
0
0
1
0
0
0
0
1
1
0
0
1
1
1
1
0
0
1
1
0
1
1
1
1
1
0
0
1
0
0
0
0
0
0
1
0
0
0
0
1
1
0
0
1
M1 File
M1:e.8
M1:e.9
M1:e.10
The information contained in words 8, 9, and 10 indicates a 3/4 logical
rack device beginning at Logical Rack 3 Logical Group 2 is faulted or
configured to an incorrect logical rack size. This device status is
confirmed in bits 1, 2, and 3 of Device Fault Status Word 15.
M1 File
Logical Rack 0 Device Fault Status Word 12
Logical Rack 1 Device Fault Status Word 13
Logical Rack 2 Device Fault Status Word 14
Logical Rack 3 Device Fault Status Word 15
x
x
x
x
x
x
x
x
x
x
x
x
0
0
0
0
x
x
x
x
x
x
x
x
x
x
x
x
0
0
0
0
x
x
x
x
x
x
x
x
x
x
x
x
0
0
0
0
x
x
x
x
x
x
x
x
x
x
x
x
1
1
1
0
M1:e.12
M1:e.13
M1:e.14
M1:e.15
e = slot number of the SLC rack containing the scanner
x = not use/defined
M1 (Status) File Complementary Device Fault Status
Bit Number (decimal)
15
14
13
12
11
RIO Rack 11
Starting Group
Primary Device Address, Word 3
Primary Device Size, Word 4
Primary Active Device Status, Word 5
10
9
8
7
6
5
4
3
2
1
0
RIO Rack 9 Starting RIO Rack 8
Group
Starting Group
RIO Rack 10
Starting Group
6
4
2
0
6
4
2
0
6
4
2
0
6
4
2
0
0
0
1
0
0
0
1
0
0
0
0
1
1
0
0
1
1
1
1
0
0
1
1
0
1
1
1
1
1
0
0
1
0
0
0
0
0
0
1
0
0
0
0
1
1
0
0
1
M1 File
M1:e.3
M1:e.4
M1:e.5
The information contained in word 3, 4, and 5 indicates a 3/4
logical rack device beginning at group 2 is inhibited, faulted, or
configured to an incorrect logical rack size. this device is
confirmed in bits 5, 6, and 7 of Device Fault Status Word 15.
M1 File
Logical Rack 0 Device Fault Status Word 12
Logical Rack 1 Device Fault Status Word 13
Logical Rack 2 Device Fault Status Word 14
Logical Rack 3 Device Fault Status Word 15
x
x
x
x
x
x
x
x
0
0
0
0
x
x
x
x
x
x
x
x
x
x
x
x
0
0
0
0
x
x
x
x
x
x
x
x
x
x
x
x
0
0
0
0
x
x
x
x
x
x
x
x
x
x
x
x
1
1
1
0
x
x
x
x
e = slot number of the SLC rack containing the scanner
x = not used/defined
Publication 1747-6.22
M1:e.12
M1:e.13
M1:e.14
M1:e.15
Scanner Configuration and Programming
RIO Status Example
5-83
The following example illustrates an M1 status file example. It shows
a typical M1 file and the G file used to configure the scanner. There
are no inhibited devices specified in the M0 file (not shown). Notice
that:
• M1:e.8 is an image of word 1 (primary/normal logical device
address) of the G file.
• M1:e.3 is an image of word 3 (complementary logical device
address) of the G file.
• M1:e.9 is an image/copy of word 2 (primary/normal logical
device size) of the G file.
• M1:e.4 is an image/copy of word 4 (complementary logical
device size) of the G file.
• The three quarter logical rack device located in logical rack 3
(M1:e.9/13) is not active. The fault is indicated by the Enabled
Device Fault status bit, bit 0, word 0 (M1:e.0/0).
• The three quarter logical rack device located in logical rack 11
(M1:e.4/13) is not active. The fault is indicated by the Enabled
Device Fault status bit, bit 0, word 0 (M1:e.0/0).
Because the device at M1:e.8/13 is faulted, bit 13 of word 10
(M1:e.10/13) is 0. M1:e.15/1 through M1:e.15/3, which correspond to
M1:e.9/13 through M1:e.9/15 are also set to 1, indicating a problem
with the device in logical rack 3.
Because the device at M1:e.3/13 is faulted, bit 13 of word 5
(M1:e.5/13) is 0. M1:e.15/5 through M1:e.15/7, which correspond to
M1:e.4/13 through M1:e.4/15 are also set to 1, indicating a problem
with the device in logical rack 11.
M1 (Status) File Primary/Normal
Bit Number (decimal)
15
14
13
12
11
10
9
8
7
6
5
4
3
2
1
0
Status Word, Word 0
x
x
x
x
x
x
x
x
x
x
x
x
x
x
1
1
M1 File
M1:e.0
Baud Rate, Word 2
x
x
x
x
x
x
x
x
x
x
x
x
x
x
0
1
M1:e.2
RIO Logical
Rack 2
RIO Logical Rack
3
Primary Device Address, Word 8
Primary Device Size, Word 9
Primary Active Device Status, Word 10
Logical Rack 0 Device Fault Status Word 12
Logical Rack 1 Device Fault Status Word 13
Logical Rack 2 Device Fault Status Word 14
Logical Rack 3 Device Fault Status Word 15
RIO Logical
Rack 1
RIO Logical
Rack 0
0
0
1
0
0
0
1
0
0
0
0
1
1
0
0
1
1
1
1
0
0
1
1
0
1
1
1
1
1
0
0
1
0
0
0
0
0
0
1
0
0
0
0
1
1
0
0
1
x
x
x
x
x
x
x
x
x
x
x
x
0
0
0
0
x
x
x
x
x
x
x
x
x
x
x
x
0
0
0
0
x
x
x
x
x
x
x
x
x
x
x
x
0
0
0
0
x
x
x
x
x
x
x
x
x
x
x
x
1
1
1
0
M1:e.3
M1:e.4
M1:e.5
M1:e.12
M1:e.13
M1:e.14
M1:e.15
e = slot number of the SLC rack containing the scanner x = not
used/defined
G File
RIO Logical Rack 3
Starting Group
6
Primary Logical Device Address, Word 1
Primary Logical Image Size, Word 2
4
2
RIO Logical Rack 2 RIO Logical Rack 1
Starting Group
Starting Group
0
6
4
2
0
6
4
RIO Logical Rack 0
Starting Group
2
0
6
4
2
1
0
0
1
1
0
0
1
0
0
1
0
0
0
1
0
0
0
0
1
1
1
1
0
0
1
1
0
1
1
1
1
0
Publication 1747-6.22
5-84
Scanner Configuration and Programming
M1 (Status) File Complementary
Bit Number (decimal)
15
14
13
12
11
10
9
8
7
6
5
4
3
2
1
0
Status Word, Word 0
x
x
x
x
x
x
x
x
x
x
x
x
x
x
1
1
M1 File
M1:e.0
x
x
x
x
x
x
x
x
x
x
x
x
x
x
0
1
M1:e.2
Baud Rate, Word 2
RIO Logical
Rack 10
RIO Logical
Rack 11
Primary Device Address, Word 3
Primary Device Size, Word 4
Primary Active Device Status, Word 5
Logical Rack 0 Device Fault Status Word 12
Logical Rack 1 Device Fault Status Word 13
Logical Rack 2 Device Fault Status Word 14
Logical Rack 3 Device Fault Status Word 15
RIO Logical
Rack 9
RIO Logical
Rack 8
0
0
1
0
0
0
1
0
0
0
0
1
1
0
0
1
1
1
1
0
0
1
1
0
1
1
1
1
1
0
0
1
0
0
0
0
0
0
1
0
0
0
0
1
1
0
0
1
x
x
x
x
x
x
x
x
0
0
0
0
x
x
x
x
x
x
x
x
x
x
x
x
0
0
0
0
x
x
x
x
x
x
x
x
x
x
x
x
0
0
0
0
x
x
x
x
x
x
x
x
x
x
x
x
1
1
1
0
x
x
x
x
M1:e.3
M1:e.4
M1:e.5
M1:e.12
M1:e.13
M1:e.14
M1:e.15
e = slot number of the SLC rack containing the scanner x = not
used/defined
G File
Complementary Logical Device Address, Word 3
Complementary Logical Image Size, Word 4
RIO Logical Rack 11
Starting Group
RIO Logical Rack 10
Starting Group
RIO Logical Rack 8
Starting Group
RIO Logical Rack 9
Starting Group
6
4
2
0
6
4
2
6
4
2
0
6
4
2
0
0
0
1
0
0
0
1
0
0
0
0
0
1
1
0
0
1
1
1
1
0
0
1
1
0
1
1
1
1
1
0
0
1
Important: Individual quarter logical racks within a device cannot
be faulted. Therefore, only the starting logical group of
the device needs to be monitored.
RIO Communication Retry Counter (M1:e.16 - 47)
M1 File Status Words 16 through 47 - indicate how many RIO
communication retries the scanner makes to each adapter on the RIO
link if communication problems occur. Each word (16-47) contains a
retry counter for each configured quarter logical rack (words 16-31
are for primary logical racks, 0-3, and 32-47 are for complementary
racks, 8-11). Retry counters are useful for troubleshooting
communication problems (such as electrical noise or poor
communication line connections) between the scanner and any
adapters. The scanner clears the retry counters when going from
Program to Run mode, Test to Run mode, and Program to Test mode.
Note that the display (in words M1:e.16 -31) of retry counters
corresponds to the bits set in the Primary Logical Device Address Word 1 of the G file. Likewise, the display (in words M1:e.32-47)
correspond to the bits set in the Complementary Logical Device
Address - Word 3 of the G file.
Important: Your SLC control program cannot initialize/clear retry
counters.
Publication 1747-6.22
Scanner Configuration and Programming
5-85
Retry Counter Example for Primary Devices
The scanner’s I/O image tables are configured as shown with M1
status files displaying the corresponding retry counters:
G File Primary
Bit Number
15
14
13
12
RIO Logical Rack 3
Starting Group
Primary Logical Device Address, Word 1
1
0
0
11
10
9
8
1
7
6
5
4
RIO Logical Rack 1
Starting Group
RIO Logical Rack 2
Starting Group
0
0
1
0
11
10
9
8
3
2
1
0
RIO Logical Rack 0
Starting Group
0
0
0
1
0
1
0
1
7
6
5
4
3
2
1
0
Specifies RIO
addresses for
primary logical
devices
G File Complementary
Bit Number
15
14
13
12
RIO Logical Rack 10
Starting Group
RIO Logical Rack 11
Starting Group
RIO Logical Rack 9
Starting Group
RIO Logical Rack 8
Starting Group
0
0
Complementary Logical Device Address, Word 3
0
0
1
1
0
0
0
1
0
0
1
0
0
1
Specifies RIO
addresses for
complementary
devices.
M1:e.16 - communication retry counter for RIO logical rack 0, group 0
M1:e.17 - not used in this example
M1:e.18 - communication retry counter for RIO logical rack 0, group 4
M1:e.19 - not used in this example
M1:e.20 - communication retry counter for RIO logical rack 1, group 0
M1:e.21 - not used in this example
M1:e.22 - not used in this example
M1:e.23 - not used in this example
M1:e.24 - not used in this example
M1:e.25 - communication retry counter for RIO logical rack 2, group 2
M1:e.26 - not used in this example
M1:e.27 - not used in this example
M1:e.28 - communication retry counter for RIO logical rack 3, group 0
M1:e.29 - not used in this example
M1:e.30 - not used in this example
M1:e.31 - communication retry counter for RIO logical rack 3, group 6
M1:e.32 - communication retry counter for RIO logical rack 8, group 0
M1:e.33 - not used in this example
M1:e.34 - not used in this example
M1:e.35 - not used in this example
M1:e.36 - communication retry counter for RIO logical rack 9, group 0
M1:e.37 - not used in this example
M1:e.38 - not used in this example
M1:e.39 - not used in this example
M1:e.40 - communication retry counter for RIO logical rack 10, group 0
M1:e.41 - not used in this example
M1:e.42 - not used in this example
M1:e.43 - not used in this example
M1:e.44 - communication retry counter for RIO logical rack 11, group 0
M1:e.45 - communication retry counter for RIO logical rack 11, group 2
M1:e.46 - not used in this example
M1:e.47 - not used in this example
Publication 1747-6.22
5-86
Scanner Configuration and Programming
Understanding Slot Addressing
This section provides information about:
• 2-slot addressing
• 1-slot addressing
• 1/2-slot addressing
Understanding slot addressing is critical to most efficiently allocate
your scanner’s I/O image files.
Slot addressing refers to how each remote chassis slot is assigned a
specific amount of the I/O image. The amount depends on which type
of slot addressing you choose at your adapter; 2-slot, 1-slot, and
1/2-slot addressing is available, as shown below:
2-Slot
Addressing
Two slots are addressed as one logical group.
Output Image
Input Image
Remote Chassis
15
15
15
8 7
Slot 2
1-Slot
Addressing
Remote Chassis
88 77
0
15
00 15 15
Slot 1
8 887 77
000
Slot 1
Slot 2
One slot is addressed as one logical group.
15
15
15
Input Image
8 7
88 77
0
00
15
15
15
Output Image
88 77
8 7
Slot 1
Slot 1
1/2-Slot
Addressing
00
0
One slot is addressed as two logical groups.
15
15
15
Input Image
8 7
88 77
00
0
15
15
15
Output Image
88 77
8 7
00
0
Remote Chassis
Slot 1
Slot 1
For more information on slot addressing, refer to your ASB module
user manual.
Note that slot addressing (e.g., 1/2-, 1-, and 2-slot) may not apply to
all types of RIO devices. Refer to each RIO device’s user manual to
determine the type of slot addressing required.
Publication 1747-6.22
Scanner Configuration and Programming
SLC/Scanner
Configuration
5-87
Your SLC processor can be programmed with an HHT1 (Hand-Held
Terminal. Although the configuration steps are similar, they are not
identical. Therefore, the following basic steps are provided. For
specific instructions, refer to the user manual included with your
programming device. For more information on M and G files, refer to
Appendix B.
1. Locate an open slot in your SLC chassis. Remember that you
must use an SLC 5/02 or later processor.
2. Assign the scanner to a physical slot in the SLC processor’s
chassis by selecting Scanner from the list. If the scanner
selection is not available, select OTHER from the I/O
Configuration Screen and enter the Code ID number: 13609.
3. Enter the number of Scanned Input and Output Words using the
Specialty I/O and Advanced Setup menus.
The default value is 32 I/O words. You can specify less than 32
and reduce the processor scan time by transferring only the part
of the input and output image that your application requires.
Important: Do not set either of these values to 0. If you do, the
scanner will not work correctly.
4. Using the Specialty I/O Configuration menu, set the M1 and M0
file sizes to 32 words (48 words if using complementary I/O). 32
words is the minimum required for operation. If you do not set
the M1 and M0 file sizes to at least 32 words, the programming
device does not allow you to access the M files in the SLC
control program.
If you are using the block transfer (BT) function, you should set
the M1 and M0 file sizes to 3,300. Refer to chapter 5 before
completing this selection.
5. Set the G file size to 3 (5 if using complementary I/O) using the
Specialty I/O Configuration menu.
6. Enter your setup information using the Modify G File menu.
Important: SLC 5/02 processors scan chassis I/O slots left to right
starting at slot 1, regardless of the module type. SLC 5/
03 and later processors scan slots with discrete I/O
modules first, left to right starting at slot 1, and then
slots with specialty modules, left to right starting at slot
1.
1. The SLC 5/03 and SLC 5/04 processors cannot be programmed with the HHT.
Publication 1747-6.22
5-88
Scanner Configuration and Programming
Publication 1747-6.22
Chapter
6
Module Control and Status Word
The addresses M0:s.400 through M0:s.3499 and M1:s.3400 through
M1:s.3499 are used for status and control exchange between the SLC
5/0x and the 1747-BSN. This item contains the initial definition for
these words. The table below shows the address allocation for these
words.
Control Word Description
M0 Address
Start
End
Reserved
3400
3409
Data Transfer Control Word - DTCW
3410
3410
Data Transfer Handshake Word - DTHW
3411
3411
Reserved
3412
3499
Status Word Description
M1 Address
Start
End
System Status Word - SSW
3400
3400
Module Status Word - MSW
3401
3401
Switch Assemblies Status Word - SASW
3402
3402
Reserved
3403
3409
Data Transfer Status Word - DTSW
3410
3410
Reserved
3411
3419
Module Status Counters
3420
3426
Reserved
3427
3429
Data Block Counters
3430
3445
Reserved
3446
3499
Publication 1747-6.22
6-90
Module Control and Status Word
System Status Word
15 14
M1:s.3400
The System Status Word (SSW) presents a synthesis of the backup
system status. The primary objective of this word is to provide a fast
way to see if the system is working well. The status words described
in the following sections provide additional details about the BSN
module and system. The SSW status bits have the following meaning:
13 12
11 10
9
8
7
6
5
4
3
2
1
0
0 0 0 0 0 0 0 0 0 0 0 0 0 0 0 0
HSSL
LSL
Buffer Full
System Ready to Switch Over
Remote I/O Communication
Processor Fault
Primary System
Secondary System
Number of BSN Modules
Reserved
Reserved
Reserved
Switchover Diagnostic
• HSSL: High-Speed Serial Link status: This bit is set when the
HSSL is faulted or when it has communication errors in one or
more 1747-BSN module in the backup system. The normal state
of this bit is OFF;
• LSL: Local Status Link status: This bit is set when the Local
Status Link is not working well in either the local or the remote
system. If the system has only one 1747-BSN module in each
chassis, the LSL is not be used and is always reset. The normal
state of this bit is OFF;
• Buffer Full: This bit is set when the secondary 1747-BSN is
receiving a second block of data. This occurs before the reading
of the first block by the secondary SLC 5/0x. The normal state of
this bit is OFF;
• System Ready to Switchover: This bit is set when the backup
system is ready to switchover. It is reset when there is one or
more errors occurring in the backup system and the system
cannot switchover. The normal state of this bit is ON;
• Remote I/O Link: This bit is set when one or more of the RIO
links in the system is faulted or has communication errors. The
normal state is OFF;
• Processor Fault: This bit is set when either the local or remote
processor is in failure, in Program mode, or in Test mode. The
normal state of this bit is OFF;
• Primary System: This bit is set when the local system is in
primary state;
Publication 1747-6.22
Module Control and Status Word
6-91
• Secondary System: This bit is set when the local system is in
the secondary state. If the primary bit is set, the secondary
system bit is not set. The reverse is also true. When the
secondary bit is set, the primary bit is not set. At powerup and
during switchover, these primary and secondary bits could be
reset at the same time;
• Number of 1747-BSN Modules: This bit indicates the number
of 1747-BSN modules in the system.
• Switchover Diagnostic: This bit is set when a 1747-BSN
module tests the functionality of the Remote I/O detector circuit
when the processor changes form Run to Program mode. If the
test fails, this bit is set until the next power down. In this case the
module must be replaced.
System Status Word Bits
Number of 1747-BSN’s
11
10
9
8
0
0
0
0
1
0
0
0
1
2
0
0
1
0
3
0
0
1
1
4
0
1
0
0
5
0
1
0
1
6
0
1
1
0
7
0
1
1
1
8
Publication 1747-6.22
6-92
Module Control and Status Word
Module Status Word
15 14
M1:s.3401
The Module Status Word (MSW) shows the status of the 1747-BSN
module itself and its counterpart in the remote system. Bits 0 through
7 show the local status while bits 8 through 15 show the remote
status. The module status bits have the following meaning:
13 12
11 10
9
8
7
6
5
4
3
2
1
0 0 0 0 0 0 0 0 0 0 0 0 0 0 0
0
0
LOCAL MODULE BITS
HSSL
LSL
Buffer Full
DH+ Communication
RIO Communication
Processor Fault
Primary/Secondary System
Reserved
REMOTE MODULE BITS
HSSL
LSL
Buffer Full
DH+ Communication
RIO Communication
Processor Fault
Primary/Secondary System
Reserved
• HSSL: High-Speed Serial Link status: This bit is set when the
HSSL is faulted or has communication errors in the local 1747BSN module (bit 0) or in the remote one (bit 8). The normal state
of this bit is OFF;
• LSL: Local Status Link status: This bit is set when the Local
Status Link is not working well in the local system (bit 1) or
remote system (bit 9). If the system has only one 1747-BSN
module in each chassis, then the LSL is not used and this bit is
reset. The normal state of this bit is OFF;
• Buffer Full: This bit is set when the secondary 1747-BSN is
receiving a second block of data before the reading of the first
block by the secondary SLC 5/0x. It could be occurring in the
local system (bit 2) or remote system (bit 10);
• DH+ Communication: This bit is set when a problem occurs
with the DH+ network in the local (bit 3) or remote (bit 11)
1747-BSN module. The type of problem that may occur is
different for primary and secondary systems (as shown below).
The normal state of this bit is OFF):
1. Primary mode: the network is down or the channel is
seeing communication errors;
0. Secondary: communication errors to the secondary SLC
5/04;
Publication 1747-6.22
Module Control and Status Word
6-93
• RIO Communication: This bit is set when a problem occurs
with the RIO link in the local (bit 4) or remote (bit 12) 1747BSN module. The type of problem that may occur is different for
primary and secondary systems (as shown below). The normal
state of this bit is OFF):
1. Primary mode: the channel is faulted or has
communication errors;
0. Secondary: no communication could be seen by this
module in the RIO link. This indicates that the primary
RIO link is not working or that a problem exists in the
RIO connection to the secondary 1747-BSN module;
• Processor Fault: This bit is set when one of the processors
(SLC 5/0x), either the local (bit 5) or remote (bit 13), is in failure
or is in Program or Test mode. The normal state of this bit is
OFF;
• Primary/Secondary System: This bit is set when the local (bit
6) or remote (bit 14) system is in the primary mode, otherwise
the system is in the secondary mode. Bits 6 and 14 are never set
at the same time. During power-up or switchover time, these bits
can be clear at the same time. The normal operation is with one
bit set for the primary system and one bit clear for the secondary
system.
Transferring Data over
the High-Speed Serial
Link (HSSL)
Two M0 file words and one M1 file word are used to control the
transfer of data from the primary SLC processor to the secondary
SLC processor. This link should be used to transfer internal processor
data that must be kept current in the secondary processor in the event
that a switchover takes place, making the secondary processor the
primary processor. Actual input data from remote I/O chassis need
not be transferred over this link since the secondary BSN allows the
secondary processor to receive this data from the remote I/O network
in a “listen mode”. Outputs are only controlled by the primary
processor.
The three words used to accomplish data transfer over the HSSL are:
1. M0:s.3410: Data Transfer Control Word (DTCW)
This word is used by the primary processor to initiate the transfer
of data to the primary BSN. This data is ultimately transferred to
the secondary BSN over the HSSL, then to the secondary
processor.
2. M1:s.3410: Data Transfer Status Word (DTSW)
This word is used in both the primary system and the secondary
system to affect the transfer of data on the HSSL.
Publication 1747-6.22
6-94
Module Control and Status Word
• Primary System - The word must be monitored by the
primary processor because this word is used by the primary
BSN to acknowledge that the BSN has received the data block
from the processor and is ready for the next transfer for that
particular data block number.
• Secondary System - The word is used by the BSN to let the
processor know that a new data block is ready for transfer
from the secondary BSN to the secondary processor. The
ladder program in the secondary processor must monitor the
bits in this word to know when to copy new HSSL data from
the BSN to the processor data table.
3. M0:s.3411: Data Transfer Handshake Word (DTHW)
This word is used by the secondary processor to inform the
secondary BSN that it has received the latest data block and is
ready for the next transfer for that particular data block number.
Data Transfer Control
Word
The Data Transfer Control Word (DTCW) is used to control the data
table transfer from primary to the secondary system. Each bit
corresponds to a block in the 1747-BSN module.
If the primary SLC 5/0x writes a new block into the primary 1747BSN, then one bit corresponding to this block must be set in the
DTCW word to advise the backup module that a new valid block is
ready to be transferred to the secondary SLC 5/0x. The figure below
shows the meaning of the bits in this word.
15 14
M0:s.3410
13 12
11 10
9
8
7
6
5
4
3
2
1
0
0 0 0 0 0 0 0 0 0 0 0 0 0 0 0 0
Block # 1
Block # 2
Block # 3
Block # 4
Block # 5
Block # 6
Block # 7
Block # 8
Block # 9
Block # 10
Block # 11
Block # 12
Block # 13
Block # 14
Block # 15
Block # 16
DTCW Word
Publication 1747-6.22
Module Control and Status Word
Data Transfer Status
Word
6-95
The Data Transfer Status Word (DTSW) is used in the data table
transfer from primary to the secondary system. Each bit corresponds
to a block in the 1747-BSN module.
When the primary SLC 5/0x writes a new block into the primary
1747-BSN and sets the bit corresponding to this block in DTCW, the
BSN module transfers the block to the secondary backup module. The
1747-BSN also sets the corresponding bit in DTSW to advise the
SLC 5/0x that the block has been transferred and the block area is free
to transfer a new data block. This bit is held set until the
corresponding bit in DTCW is cleared by the primary processors.
When the secondary 1747-BSN receives a new data block from the
primary system, it writes the block into the M1 area to be read by the
secondary SLC 5/0x and sets its corresponding bit in DTSW to advise
that this new block is ready to read. After reading the block, the SLC
5/0x must set the corresponding bit in DTHW. Then the 1747-BSN
module clears the bit in DTSW. The following figure shows the
meaning of the bits in this word.
15 14
M1:s.3410
13 12
11 10
9
8
7
6
5
4
3
2
1
0
0 0 0 0 0 0 0 0 0 0 0 0 0 0 0 0
Block # 1
Block # 2
Block # 3
Block # 4
Block # 5
Block # 6
Block # 7
Block # 8
Block # 9
Block # 10
Block # 11
Block # 12
Block # 13
Block # 14
Block # 15
Block # 16
DTSW Word
Publication 1747-6.22
6-96
Module Control and Status Word
Data Transfer
Handshake Word
The Data Transfer Handshake Word (DTHW) is used in the data table
transfer from primary to the secondary system. Each bit corresponds
to a block in the 1747-BSN module.
When the secondary 1747-BSN receives a new block from the
primary system, it writes the block to the M1 area to be read by the
secondary SLC 5/0x. The secondary 1747-BSN also sets its
corresponding bit in DTSW to advise that this new block is ready to
read. After reading the block, the SLC 5/0x must set the
corresponding handshake bit in DTHW. Then the 1747-BSN module
clears the bit in DTSW.
15 14
M0:s.3411
13 12
11 10
9
8
7
6
5
4
3
2
1
0
0 0 0 0 0 0 0 0 0 0 0 0 0 0 0 0
Block # 1
Block # 2
Block # 3
Block # 4
Block # 5
Block # 6
Block # 7
Block # 8
Block # 9
Block # 10
Block # 11
Block # 12
Block # 13
Block # 14
Block # 15
Block # 16
DTHW Word
Publication 1747-6.22
Module Control and Status Word
6-97
The following ladder program example shows how to monitor the
status bits in the System Status Word (SSW) and in the Module Status
Word (MSW) that indicate which processor is in the primary mode
and which is in the secondary mode. This information is needed in
order to determine whether the local processor needs to execute the
primary system or the secondary system HSSL data transfer ladder
logic.
File 2 monitors the appropriate SSW and MSW bits and executes
subroutine 4 if the local system is in primary mode.
It is recommended that the M1 and M0 file lengths for
Note:
the BSN be set to the maximum (5548). There is no
memory or speed penalty for creating the maximum
buffer size for these files in the BSN modules.
Program File 2
0000
0001
0002
0003
Copy the System Status Word (SSW) and the Module Status Word (MSW) from the BSN module to internal storage words in the SLC
processor every program scan. Bits 6 and 7 of the SSW word indicate whether this processor is Primary or Secondary at any given time.
Bits 6 and 14 of the MSW word indicate whether the local or remote system is in the Primary or Secondary mode respectively. Virtual
SSW and MSW words/bits are used to minimize M-file transfers, thereby minimizing their effects on the program scan time.
COP
Copy File
Source #M1:1.3400
Dest
#B3:1
Length
2
This rung executes subroutine number 3 when the Local System is in the Secondary Mode. Subroutine 3 contains the logic which must
be executed to properly transfer HSSL data from the Secondary BSN Module to the Secondary SLC Processor.
Virtual SSW Bit:
when = 1, indicates
Virtual MSW Bit:
Virtual MSW Bit:
the local system is
when = 1, indicates
when = 1, indicates
in the Secondary
the Local System is
the Remote System is
Mode
in the Primary Mode
in the Primary Mode
B3:1
B3:2
B3:2
JSR
Jump To Subroutine
7
6
14
SBR File Number
U:3
This rung executes subroutine number 4 when the Local System is in the Primary Mode. Subroutine 4 contains the logic which must be
executed to properly transfer HSSL data from the Primary SLC Processor to the Primary BSN Module.
Virtual SSW Bit:
Virtual MSW Bit:
Virtual MSW Bit:
when = 1, the Local
when = 1, indicates
when = 1, indicates
System is in the
the Local System is
the Remote System is
Primary Mode
in the Primary Mode
in the Primary Mode
B3:1
B3:2
B3:2
JSR
Jump To Subroutine
6
6
14
SBR File Number
U:4
END
Publication 1747-6.22
6-98
Module Control and Status Word
Program File 3
0000
0001
The following rungs are meant to be executed only when this processor/BSN is in the Backup Mode. When it is acting as the Backup Processor, this rung copies the DTSW
(Data Table Status Word) to an internal storage word within the SLC processor, B3:3 in this example.
Virtual & Actual
DTSW Words
MOV
Move
Source
M1:1.3410
?<
Dest
B3:3
0000000000000000<
This rung copies the "new" Data Block #1 data from the secondary BSN to a file within the secondary processor. When the COPy is complete, the DTHW (Data Table
handshake Word) bit for Data Block #1 (B3:4/0 = M0:1.3411/0) must be set to inform the secondary BSN that the secondary processor has received the latest Data Block and is
now ready for the next block of data via Data Block #1.
Virtual DTSW Bit for
Data Block #1
B3:3
COP
Copy File
0
Source #M1:1.3500
Dest
#N12:0
Length
128
Virtual DTHW Bit for
Data Block #1
B3:4
0
0002
This rung copies the "new" Data Block #2 data from the secondary BSN to a file within the secondary processor. When the COPy is complete, the DTHW (Data Table
handshake Word) bit for Data Block #2 (B3:4/1 = M0:1.3411/1) must be set to inform the secondary BSN that the secondary processor has received the latest Data Block and is
now ready for the next block of data via Data Block #2.
Virtual DTSW Bit for
Data Block #2
B3:3
COP
Copy File
1
Source #M1:1.3628
Dest
#N12:128
Length
128
Virtual DTHW Bit for
Data Block #2
B3:4
1
0003
This rung copies the Virtual DTHW word (B3:4) to the actual DTHW word (M0:1.3411) located in the 1747-BSN module. M-file accesses are interrupts to the processor and
using virtual words minimizes M-file accesses and therefore minimizes the effects of these transfers on the ladder program scan time.
Virtual & Actual
DTHW Words
MOV
Move
Source
B3:4
0000000000000000<
Dest
M0:1.3411
?<
0004
Publication 1747-6.22
END
Module Control and Status Word
6-99
Program File 4
0000
The following 6 rungs are meant to be executed only when this processor/BSN is in the Primary Mode. When it is acting as the Primary Processor, this rung copies the DTCW
and DTSW words to internal storage words within the SLC processor, B3:5 and B3:6 respectively, for this example.
Virtual & Actual
DTCW Words
MOV
Move
Source
M0:1.3410
?<
Dest
B3:5
0000000000000000<
Virtual & Actual
DTSW Words
MOV
Move
Source
M1:1.3410
?<
Dest
B3:6
0000000000000000<
0001
This rung monitors the DTCW and DTSW bits for Data Block #1. When a transfer of data using Data Block #1 is not in progress, copy up to 128 words to the appropriate
M-file location for Data Block #1 in the BSN module.
Virtual DTCW Bit for
Virtual DTSW Bit for
Data Block #1
Data Block #1
B3:5
B3:6
COP
Copy File
0
0
Source
#N13:0
Dest
#M0:1.3500
Length
128
Virtual DTCW Bit for
Data Block #1
B3:7
L
0
0002
0003
Unlatch the virtual DTCW bit for Data Block #1 when the comparable virtual DTSW bit is set by the BSN module to indicate that it has received the last data via data Block
#1. when B3:7/0 has been unlatched, the BSN module is ready for the next data transfer via Data Block #1.
Virtual DTSW Bit for
Virtual DTCW Bit for
Data Block #1
Data Block #1
B3:6
B3:7
U
0
0
This rung monitors the DTCW and DTSW bits for Data Block #2. When a transfer of data using Data Block #2 is not in progress, copy up to 128 words to the appropriate
M-file location for Data Block #2 in the BSN module.
Virtual DTCW Bit for
Virtual DTSW Bit for
Data Block #2
Data Block #2
B3:5
B3:6
COP
Copy File
1
1
Source
#N13:128
Dest
#M0:1.3628
Length
128
Virtual DTCW Bit for
Data Block #2
B3:7
L
1
0004
0005
0006
Unlatch the virtual DTCW bit for Data Block #2 when the comparable virtual DTSW bit is set by the BSN module to indicate that it has received the last data via data Block
#2. when B3:7/1 has been unlatched, the BSN module is ready for the next data transfer via Data Block #2.
Virtual DTSW Bit for
Virtual DTCW Bit for
Data Block #2
Data Block #2
B3:6
B3:7
U
1
1
This rung copies the Virtual DTCW word (B3:7) to the actual DTCW word (M0:1.3410) located in the 1747-BSN module. M-file accesses are interrupts to the processor and
using virtual words minimizes M-file accesses and therefore minimizes the effects of these transfers on the ladder program scan time.
Virtual & Actual
DTCW Word
MOV
Move
Source
B3:7
0000000000000000<
Dest
M0:1.3410
?<
END
Publication 1747-6.22
6-100
Module Control and Status Word
Switch Assemblies
Status Word
15 14
M1:s.3402
13 12
The Switch Assemblies Status Word (SASW) shows the switch
assemblies configuration status for both the six-position (SW1) and
the four-position (SW2) dip switch. Bits 0 through 3 show the fourposition dip switch status, while bits 8 through 13 show the sixposition dip switch status.
11 10
9
8
7
6
5
4
3
2
1
0
0 0 0 0 0 0 0 0 0 0 0 0 0 0 0 0
SW-2.1
SW-2.2
SW-2.3
SW-2.4
Reserved
Reserved
Reserved
Reserved
SW-1.1
SW-1.2
SW-1.3
SW-1.4
SW-1.5
SW-1.6
Reserved
Reserved
4-pos. dip switch
status
6-pos. dip switch
status
The six-position dip switch is used to configure the communication
channel and other miscellaneous information. The switches have the
following definition:
• SW-1.1 and SW-1.2: Define the communication channel baud
rate as showed in table 4;
• SW-1.3: when ON means that the channel is configured as DH+.
When OFF means that the channel is configured as RIO;
• SW-1.4: User identification SW. This switch can be used by the
customer to differentiate one BSN from its counterpart and help
on identifying that a switchover occurred. It is only a user
switch; the BSN module doesn’t care about the state of this
switch;
• SW-1.5: reserved;
• SW-1.6: Last Module in LSL: The BSN module that the user
intends to be the last in the Local Status Link must have this
switch ON. All the other BSN modules must have this switch
OFF. If a backup system have only one BSN in each processor
chassis, this switch must be ON in this module.
Publication 1747-6.22
SW-1.1
SW-1.2
Baud Rate (KBaud)
1
1
57.6
1
0
115.2
0
1
230.4
0
0
Disabled
Module Control and Status Word
6-101
The four-position dip switch is used to configure the BSN address in
the Local Status Link. The table below shows the meaning of bits 0
through 2 of SASW. Switch SW-2-4 is not used.
Switch Assemblies Status Word Bits
Module Status
Counters
1747-BSN Address
SW-2.3
SW-2.2
SW-2.1
0
0
0
1
0
0
1
2
0
1
0
3
0
1
1
4
1
0
0
5
1
0
1
6
1
1
0
7
1
1
1
8
The1747-BSN module counts the changes in the local module’s
significant status and indicates the changes in its Module Status
Word. The counters show all the errors and status changes since the
last power-up and cannot be cleared by the user without powering
down the chassis.
Address
Counter
M1:s.3420
HSSL Error Counter
M1:s.3421
LSL Error Counter
M1:s.3422
Buffer Full Counter
M1:s.3423
Reserved
M1:s.3424
RIO Comm. Error Counter
M1:s.3425
Processor Fault Counter
M1:s.3426
Switchover Counter
Publication 1747-6.22
6-102
Module Control and Status Word
Data Block Counters
To help verify the functionality of the data transfer application
program, the 1747-BSN module has a counter for each data block that
can be transferred.
Each time that a block is transferred from the primary SLC 5/0x to the
primary 1747-BSN, the data block counter that corresponds to this
block is incremented once in the primary 1747-BSN. When the
secondary SLC 5/0x reads a block from the secondary 1747-BSN, the
corresponding counter is incremented once in the secondary
1747-BSN.
Address
Publication 1747-6.22
Data Block Counter
M1:s.3430
Block # 1
M1:s.3431
Block # 2
M1:s.3432
Block # 3
M1:s.3433
Block # 4
M1:s.3434
Block # 5
M1:s.3435
Block # 6
M1:s.3436
Block # 7
M1:s.3437
Block # 8
M1:s.3438
Block # 9
M1:s.3439
Block # 10
M1:s.3440
Block # 11
M1:s.3441
Block # 12
M1:s.3442
Block # 13
M1:s.3443
Block # 14
M1:s.3444
Block # 15
M1:s.3445
Block # 16
Chapter
7
RIO Block Transfer
This chapter contains the following information:
• RIO block transfer theory of operation
• RIO block transfer general functional overview
• scanner’s block transfer buffer layout
• detailed operation of RIO block transfer
• RIO block transfer application considerations
• steps for setting up a block transfer
• quick reference for using status and control bits
• block transfer control logic examples
RIO Block Transfer
Theory of Operation
This section provides a conceptual overview of block transfer as it
pertains to SLCs, RIO scanners, and remote devices. For specific
functionality details, refer to the RIO Block Transfer General
Functional Overview section on page 7-5.
What Is RIO Block Transfer?
RIO Block Transfer is a data transfer mechanism that allows you to
control the transfer of up to 64 words of data to or from a remote
device over the Allen-Bradley RIO link. A Block Transfer Read
(BTR) is used when a remote device transfers data to the SLC. A
Block Transfer Write (BTW) is used when an SLC processor writes
data to a remote device.
The diagrams on the following pages illustrate the concepts of how
block transfers occur using an SLC processor, an RIO scanner, and a
remote device. The first diagram illustrates the path a block transfer
follows. The second and third diagrams illustrate in greater detail the
theory of operation of a BTR and a BTW, respectively.
Publication 1747-6.22
7-104
RIO Block Transfer
RIO Block Transfer Theory of Operation-Path of a Block Transfer
Refer to the diagrams on the following pages for more
details on BTR and BTW sequence of operation.
Chassis Backplane
SLC
Processor1
RIO
Scanner
M
Files
Block Transfer Write (BTW) data travels from the SLC
processor across the chassis backplane via the
scanner’s M files. The scanner then sends the data
across the RIO link to the adapter of intelligent I/O
module.
M Files
I/O
Image
RIO Link
Block Transfer Read (BTR) data travels from the
adapter of intelligent I/O module over the RIO link to
the scanner. The chassis backplane then transfers BTR
data via the scanner’s M files to the SLC processor.
The SLC control program processes the data once the
SLC receives it from the scanner.
_ _ _ = path of a Block Transfer (BT)
1
SLC 5/02 processor or above
Adapter or
Intelligent I/O
Module
Publication 1747-6.22
RIO Block Transfer
7-105
RIO Block Transfer Theory of Operation-Block Transfer Read (BTR)
In this example, Logical Rack 0, Logical Group 0, Logical Slot 1 is used.
SLC
Processor
One byte is consumed from the input
and output images file for "handshake"
purposes.
Chassis Backplane
➀
Group 0
Group 1
Group 2
Logical Group 3
Rack 0 Group 4
Group 5
Group 6
Group 7
Group 0
Group 1
1747 RIO
Scanner
M0 file
M
Files
M1 file
I/O
Image
Group 7
Group 0
1
Logical Group
2
Rack 3 Group
Group 3
Group 4
Group 5
Group 6
Group 7
RIO Link
Input Image Output Image
Word 0
Word 1
Word 2
Word 3
Word 4
Word 5
Word 6
Word 7
Word 8
Word 9
Word 23
Word 24
Word 25
Word 26
Word 27
Word 28
Word 29
Word 30
Word 31
_ _ _ = path of the BTR
1
SLC 5/02 processor or later
1.
Slot 0
Adapter or
Intelligent I/O
Module
Slot 1
Slot 0
Slot 1
The steps below detail a successful Block Transfer Read (BTR):
1. The MO file contains BTR control information which controls
(initiates) the scanner BTR operation. (Refer to the Block
Transfer Buffer Layout section for details on control
information.)
2. The SLC control program initiates a block transfer read by
commanding the scanner to perform the read operation. The
adapter/intelligent I/O module sends BTR data across the RIO
link to the RIO scanner.
3. The scanner writes the BTR data to a unique M1 file location
that you specify. Also, one byte of the scanner’s I.O image file is
used for "handshake" purposes between the scanner and the
adapter/intelligent I/O module. Note that the SLC control
program must never read of write to this "handshake" image
space.
4. Using the M1 file and a COP instruction in the control program
the scanner transfers the BTR data to the SLC processor via the
chassis backplane. The M1 file also contains BTR status
information. (Refer to the Block Transfer Buffer Layout section
for details on status information.)
5. The SLC control program processes the BTR information.
Publication 1747-6.22
7-106
RIO Block Transfer
RIO Block Transfer Theory of Operation-Block Transfer Write (BTW)
In this example, Logical Rack 3, Logical Group 7, Logical Slot 1
is used.
Slot 0
Slot 1
Slot 0
Slot 1
Input ImageOutput Image
Chassis Backplane
SLC
➀
Logical
Rack 0
1747 RIO
Scanner
M0 file
M
Files
Processor1
M1 file
I/O
Image
Logical
Rack 3
_ _ _ = path of the BTW
Group 0
Group 1
Group 2
Group 3
Group 4
Group 5
Group 6
Group 7
Group 0
Group 1
Group 7
Group 0
Group 1
Group 2
Group 3
Group 4
Group 5
Group 6
Group 7
Word 0
Word 1
Word 2
Word 3
Word 4
Word 5
Word 6
Word 7
Word 8
Word 9
Word 23
Word 24
Word 25
Word 26
Word 27
Word 28
Word 29
Word 30
Word 31
RIO Link
1
SLC 5/02 processor or later
One byte is consumed from the input
and output image file for
"handshake" purposes.
Adapter or
Intelligent I/O
Module
The steps below detail a successful Block Transfer Write (BTW):
1. The user’s control program executes a MOV or COP instruction
to the MO file to initiate a BTW. The SLC processor sends
BTW data (via the chassis backplane) to the scanner’s MO block
transfer control and write data file. (Refer to the Block Transfer
Buffer Layout section for details on control information.
2. The scanner reads the BTW data and control data from the MO
file. One byte of the scanner’s I/O image file is used for
handshake purposes. Note that the SLC user program must
never read or write to this image space.
3. The M1 file contains BTW status information. Refer to the
Block Transfer Buffer Layout section for details on status
information.
4. The RIO scanner transfers BTW information across the RIO link
to the adapter.
5. The adapter transfers the BTW information to the appropriate
adapter or intelligent I/O module.
Publication 1747-6.22
RIO Block Transfer
RIO Block Transfer
General Functional
Overview
7-107
The RIO scanner performs block transfers through control/status
buffers that you allocate in the scanner’s M0 and M1 files. For BTWs,
the M0 BT buffer contains BTW control data and BTW data, while a
corresponding M1 BT buffer contains only BTW status information.
For BTRs, the M0 BT buffer contains only BTR control data, while a
corresponding M1 BT buffer contains BTR status information and
BTR data. Block transfers occur asynchronous to RIO link discrete
transfers. Note that block transfers occur as RIO scan time allows –
discrete I/O transfers have first priority.
A total of 32 block transfer control/status buffers exist in the M0
(output/control) and the M1 (input/status) files. Block transfer buffers
consist of:
• 3 BT control words in an M0 file BT buffer
• 4 BT status words in an M1 file BT buffer
• 64 words of BTW data in an M0 file and 64 words of BTR data
in an M1 file. Refer to the diagrams on the following pages.
M0 Control Buffers 1...32
M0:e.3200
M0:e.100
Words
100...109
3 words for
control and 7
reserved
Words
110...173
64 words for BT
Write Data
Words
3200...3209
3 words for
control and 7
reserved
Words
3210...3273
64 words for BT
Write Data
M1 Status Buffers 1...32
M1:e.100
M1:e.3200
Words
100...109
4 words for
status and 6
reserved
Words
3200...3209
4 words for
status and 6
reserved
Words
110..173
64 words for BT
Read Data
Words
3210...3273
64 words for BT
Read Data
You use an M0 file BT control
buffer to initiate a BT. The
corresponding M1 file displays
the status of the block transfer.
BT buffers reside on 100 word
boundaries in the M0/M1 files
starting at word 100. For
example, BT buffer 1 resides at
M0:e.100 and M1:e.100; BT
buffer 2 resides at M0:e200 and
M1:e.200; while BT buffer 16
resides at M0:e.1600 and
M1:e.1600. Note that the "e" in
these examples refers to the
physical chassis slot number in
which the scanner resides.
All block transfer buffers (M0
and M1) are cleared (set to zero)
either when the RIO scanner
goes through a power cycle or
when the SLC processor
commands the scanner to change
mode from Program to Test
mode, Program to Run mode, or
Test to Run mode.
Publication 1747-6.22
7-108
RIO Block Transfer
Scanner I/O Image Allocation For Block Transfer
Block transfer operations (BTR and BTW) consume only one byte of
the RIO scanner’s I/O image file, independent of what type of I/O slot
addressing is used. This one byte image is reserved for
communication “handshake” purposes between the remote device
(adapter or intelligent I/O module) and the scanner. SLC control
programs must never read/write to these image locations because
unpredictable operations may result.
Block transfer operations (BTR and BTW) can be addressed to any
logical slot within the RIO scanner’s four logical racks. See the
examples below and on the following page.
Examples of BT I/O Image File Allocation
Example
1
1747-SN
Logical
Rack 0
RIO Scanner’s I/O Image Files
Word 0 Input Image Output Image
Word 1
Word 2
Word 3
Word 4
Word 5
Word 6
Word 7
Word 8
Word 9
Group 0
Group 1
Group 2
Group 3
Group 4
Group 5
Group 6
Group 7
Group 0
Group 1
Group 7
Group 0
1
Logical Group
Group 2
Rack 3 Group 3
Group 4
Group 5
Group 6
Group 7
Word 23
Word 24
Word 25
Word 26
Word 27
Word 28
Word 29
Word 30
Word 31
Logical Slot 0
Logical Slot 1
The minimum portion of the scanner’s
image that can be assigned to an
adapter is 1/4-logical rack. Each
logical device that you assign BT
operations (BTR or BTW) consumes
one byte from the scanner’s input and
output image file. The one byte can
come from either the "low" byte
(Logical Slot 0) or the "high" byte
(Logical Slot 1). Logical Slot 1 only
applies for 2 slot addressing.
In this example there are two block
transfer operations mapped to the
scanner’s I/O image. One BT
operation is mapped to Logical Rack 0,
Logical Group 4, Logical Slot 1. The
other is mapped to Logical Rack 3,
Logical Group 4, Logical Slot 0.
Note that the logical address of you
RIO devices (i.e., adapter and
intelligent I/O modules) determine
where the block transfer gets mapped.
Publication 1747-6.22
RIO Block Transfer
7-109
Example 2
In this example, the remote adapter is configured for 2-slot addressing. It is assigned 1/4-logical
rack or the scanner’s I/O image files starting at RIO Logical Rack 3, Logical Group 4. The remote
adapter controls four analog modules that are configured for block transfer operations. Note that
each module uses both the input and output byte of the logical slot to which it is assigned.
1747-SN RIO Scanner’s I/O Image Files
Input Image Output Image
Logical
Rack 0
Group 0
Group 1
Group 2
Group 3
Group 4
Group 5
Group 6
Group 7
Group 0
Group 1
Group 7
Group 0
Logical Group 1
Rack 3 Group 2
Group 3
Group 4
Group 5
Group 6
Group 7
Word 0
Word 1
Word 2
Word 3
Word 4
Word 5
Word 6
Word 7
Word 8
Word 9
Word 23
Word 24
Word 25
Word 26
Word 27
Word 28
Word 29
Word 30
Word 31
Adapter
Mod. Mod. Mod. Mod.
#1
#2
#3
#4
I/O
Image
#2
#4
#1
#3
#2
#4
Modules’ "handshake" bytes map to these I/O
image addresses.
#1
#3
These are all analog modules
that are assigned block
transfer operations.
Logical Slot 0
Logical Slot 1
Example 3
In this example, the remote adapter is using 2-slot addressing. It is assigned 1/4-logical rack of the
scanner’s I/O image files starting at RIO Logical Rack 3, Logical Group 4. The remote adapter
controls two analog devices, which are configured for block transfer operations and two discrete
devices (8-point input and 8-point output). Note that each analog module uses both the input and
output byte of the logical slot to which it is assigned, while the discrete modules use only the input or
output byte.
1747-SN RIO Scanner’s I/O Image Files
These are all analog modules
that are assigned block
transfer operations.
Input Image Output Image
Logical
Rack 0
Group 0
Group 1
Group 2
Group 3
Group 4
Group 5
Group 6
Group 7
Group 0
Group 1
Group 7
Group 0
Group 1
Logical Group 2
Group 3
Rack 3 Group 4
Group 5
Group 6
Group 7
Word 0
Word 1
Word 2
Word 3
Word 4
Word 5
Word 6
Word 7
Word 8
Word 9
Word 23
Word 24
Word 25
Word 26
Word 27
Word 28
Word 29
Word 30
Word 31
Adapter
Mod. Mod. Mod. Mod.
#2
#4
#1
#3
I/O
Image
not used
#4
#1
#3
#2
not used
Modules’ "handshake" bytes map to
these I/O image addresses.
#1
#3
These are discrete modules.
Module #2 is an8-point output
module and module #4 is an8point input module.
Logical Slot 0
Logical Slot 1
Publication 1747-6.22
7-110
RIO Block Transfer
Scanner’s Block
Transfer Buffer Layout
This section describes the scanner’s M0 (output/control) and
M1(input/status) block transfer buffers.
M0 File - Block Transfer Output/Control Buffers
There are 32 BT output/control buffers allocated in the M0 file. These
buffers contain BTR/BTW control information and BTW output data.
The following explains the layout of BT buffer 1.
Important: The general layout below of buffer 1 is the same for all
32 M0 BT buffers. The "e" in the examples refers to the
physical chassis slot number in which the scanner
resides. Remember that buffers start on 100 word
boundaries.
M0:e.100 - Contains BTR/BTW control flags that control block
transfers. Control flags are explained on the following page.
M0:e.101 - Used to configure BTR/BTW length information (0 to
64). Length is the number of BTR/BTW words read from or written to
the end device. If length = 0, then the RIO device informs the SLC
processor as to how much data to transfer. The M0/M1 BT buffers
cannot overflow because they each reserve 64 words of data area.
Input Image
Logical
Rack 0
Logical
Rack 3
Word 0
Word 1
Word 2
Word 3
Word 4
Word 5
Word 6
Word 7
Word 8
Word 9
Group 0
Group 1
Group 2
Group 3
Group 4
Group 5
Group 6
Group 7
Group 0
Group 1
Group 7
Group 0
Group 1
Group 2
Group 3
Group 4
Group 5
Group 6
Group 7
M0:e.102 - Contains the logical address of the BTR/BTW operation
in logical rack, group, and slot number format. The logical rack,
group, and slot are combined into one word, which you enter in
decimal form.
M0:e.102 Logical Address Example
Output Image
The "Slot Number" (0 or 1) in M0:e.102
indicates the logical slot number within a logical
group. 0 designates the least significant image
byte and 1 designates the most significant image
byte.
Word 23
Word 24
Word 25
Word 26
Word 27
Word 28
Word 29
Word 30
Word 31
Which Slot Number To Use
When your adapter is configured for 2-slot
addressing, 0 is the left slot and 1 is the right slot.
For both 1-slot and 1/2-slot addressing the slot
number is always 0.
Logical Slot 0
Low Byte
Logical Slot 1
High Byte
Example M0:e.102 Configurations
Logical Rack 0, Group 0, Slot 0 = 0)Logical
Rack 0, Group 0, Slot 1 = 1
Logical Rack 2, Group 3, Slot 1 = 231
Logical Rack 0, Group 7, Slot 0 = 70
M0:e.103 through M0:e.109 - These words are reserved.
M0:e.110 through M0:e.173 - BTW data Words 0 through 63.
Publication 1747-6.22
RIO Block Transfer
7-111
M0 File BT Control Buffer Layout
Important: The buffer layout below is the same for all 32 BT
buffers. Buffer 1 = M0:e.100... buffer 32 = M0:e.3200.
BT Control Buffer Function
M0 Address where x = buffer # from 1 to
32
Control Flags - See Control Flag
Definitions table below
M0:e.x00
BT Length - 0 through 64
M0:e.x01
BT Address (logical rack, group, and slot)
M0:e.x02
Reserved
M0:e.x03 through M0:e. x09
BTW Data Locations 0 through 63
M0:e.x10 through M0:e.x73
BT Control Flag Definitions
Definition
Control flags where x = buffer # from 1 to
32
These bits are reserved.
M0:e.x00/0 through M0:e.x00/6
Type of BT operation (1 = BTR and 0 =
BTW) 1
M0:e.x00/7
Block Transfer Timeout (TO) = 1 =
Cancel the BT operation.2
M0:e.x00/8
These bits are reserved.
M0:e.x00/9 through M0:e.x00/14
Block Transfer Enable (EN) = 1 =
Enable the BT operation.3
M0:e.x00/15
1. Bit 7 indicates whether the SLC control program is initiating a BTR or a BTW.
2. You set bit 8 (timeout bit - TO) = 1 to cancel a BT. You can cancel a BT operation (by timing out)
once the Enabled Waiting (EW) bit sets and before the RIO scanner’s internal four second BT timer
times out or the BT completes. Cancelling a BT causes an error (ER) bit to set and an error code to
display in the M1 BT buffer. Note that the Timeout (TO) flag must be cleared before initiating a new
BT. (You can initiate a new BT by clearing the EN flag, waiting for the ER flag to clear, and then
setting the EN bit.) The RIO scanner ignores a BT request if both TO and EN flags are set at the
same time.
3. You set bit 15 = 1 to Enable (EN) a BT operation. You set this bit after you have entered all other
control information i.e., bits 7 and 8 in the M0 BT buffer. You clear this bit after either the Done
(DN) or Error (ER) bits are set in the M1 Status file. See the M1 file BT Buffer Layout section for
more details on the DN and ER bits.
M1 File - Block Transfer Input/Status Buffers
There are 32 BT status buffers allocated in the M1 file. These buffers
indicate the status for all BTR and BTW operations and also contain
BTR input data. Below is the layout of BT buffer 1.
Important: The layout below is the same for all 32 M1 file BT
buffers.
M1:e.100 - Status flags that describe the status of the BTR and BTW
operations. Status flags are described in detail on the following page.
M1:e.101 - Status of actual number of BTW words sent or the
number of BTR words received.
Publication 1747-6.22
7-112
RIO Block Transfer
M1:e.102 - Contains the logical address you have selected in the
M0:e.102 file in rack, group, and slot number format. The logical
rack, group, and slot are combined into one word.
M0:e.102 Logical Address Example
Input Image Output Image
Logical
Rack 0
Logical
Rack 3
Word 0
Word 1
Word 2
Word 3
Word 4
Word 5
Word 6
Word 7
Word 8
Word 9
Group 0
Group 1
Group 2
Group 3
Group 4
Group 5
Group 6
Group 7
Group 0
Group 1
Group 7
Group 0
Group 1
Group 2
Group 3
Group 4
Group 5
Group 6
Group 7
The "Slot Number" (0 or 1) in M0:e.102
indicates the logical slot number within a logical
group. 0 designates the least significant image
byte and 1 designates the most significant image
byte.
Which Slot Number To Use
When your adapter is configured for 2-slot
addressing, 0 is the left slot and 1 is the right slot.
For both 1-slot and 1/2-slot addressing the slot
number is always 0.
Word 23
Word 24
Word 25
Word 26
Word 27
Word 28
Word 29
Word 30
Word 31
Example M0:e.102 Configurations
Logical Slot 0
Low Byte
Logical
Logical Slot 1
Logical
High Byte
The first
Rack 0, Group 0, Slot 0 = 0 number
Rack 0, Group 0, Slot 1 = 1 (reading from
Logical Rack 2, Group 3, Slot 1 = 231right to left )is
Logical Rack 0, Group 7, Slot 0 = 70 the "Slot
Number."
M1:103 - The BTR/BTW error code. Refer to the M1 File Error
Codes table on the following page.
M1:e.104 through M1:e.109 - These words are reserved.
M1:e.110 through M1:e.173 - BTR data Words 0 through 63.
M1 File - Input/Status BT Buffer Layout (M1:e.100... M1:e.3200)
M1 File - BTR/BTW Error Codes (M1:e.103 ... M1:e.3203)
M1 Address where
x = buffer # from 1
to 32
M0 Address for
BT buffer 1
...M0 Address
for BT buffer 32
Status Flags - Refer to the status
flags table on the following page.
M1:e.x00
M1:e.100
...M1:e.3200
Actual Length Status- Number of
words that were transferred during
BT.
M1:s.e.x01
M1:e.101
...M1:e.3201
Logical Address Status - logical
rack, group, and slot
M1:e.x02
M1:e.102
...M1:e.3202
Block Transfer error code - Refer to
the Error Codes table below.
M1:e.x03
M1:e.103
...M1:e.3203
Reserved
M1:e.x04 through
M1:e.x09
M1:e.104
through
M1:e.109
...M1:e.3204
through
M1:e.3209
BTR Data Locations 0 through 63
M1:e.x10 through
M1:e.x73
M1:e.110
through
M1:e.173
...M1:e.3210
through
M1:e.3273
BT Status Buffer Function
Publication 1747-6.22
RIO Block Transfer
Error Code
7-113
Description
-0
The BT completed successfully.
-6
Illegal BT length requested.
-7
BT communication error occurred when BT request was initiated.
-8
Error in BT protocol.
-9
BT timeout - either the SLC user program cancelled the BT or the
scanner’s BT timer timed out. Note that a timeout error occurs if a
BT is attempted at a location that is not configured for BT operation
(e.g., requesting a BT for a location that is an output module).
- 10
No RIO channel configured.
- 11
Attempted a BT either to a nonconfigured BT Device (i.e., an invalid
logical rack, group, or slot), or at a complementary device location
where there is no corresponding primary image space allocated.
- 12
Attempted a BT to an inhibited device.
M1 File - BTR/BTW Status Flag Definitions (M1:e.100 ... M1:e.3200)
Status Flag
Description
M1:e.100/0
through
M1:e.100/9
These bits are reserved.
M1:e.100/10
Block Transfer Enabled and Waiting for block transfer to start - (EW =
Enable Waiting) 1
M1:e.100/11
This bit is reserved.
M1:e.100/12
Block Transfer Error - (ER = Error) 2
M1:e.100/13
Block Transfer Successful - (DN = Done) 3
M1:e.100/14
Block Transfer Started - (ST = Started) 4
M1:e.100/15
This bit is reserved.
1. When set to a -1" (with bit 14 set to a -0"), bit 10 indicates that a BT operation is pending. You can
program a timer in your SLC control program to cancel a BT prior to bit 14 being set. Note that bit
10 must be set to -1" before your SLC user program can cancel the BT operation.
2. When set to a -1", bit 12 indicates that an error occurred while the BT was being processed.
M1:e.103 contains an error code that is useful in determining the cause of an error. Once this bit is
set, the SLC user program can reset the Enable (EN) bit in the M0 BT buffer so that a new BT can
occur.
3. When set to a -1", bit 13 indicates the successful completion of a BT operation. If the operation was
a BTR, the BT data is available in the M1 BT buffer. Once this bit is set, the SLC user program can
reset the Enable (EN) bit in the M0 BT buffer so that a new BT can occur.
4. When set to a -1", bit 14 indicates that a BT operation has started. Once the BT operation starts, an
RIO system 4 second timer begins counting down. You can program a timer in your SLC user
program to cancel a Started (bit 14) BT.
Publication 1747-6.22
7-114
RIO Block Transfer
Detailed Operation of
RIO Block Transfer
You use the 1747-BSN Scanner M0 file BTR/BTW output control
buffers to set up and control BT operations. Status information
regarding the progress and completion of BTR/BTW operations
displays in corresponding M1 file input status buffers.
This section describes step-by-step how the RIO scanner uses M0/M1
files to accomplish block transfer operations. The steps below are
based on the following assumptions:
• The size of the M0 and M1 files has already been set to 3,300
words. (You set the M file sizes while in off-line programming
mode.)
• No pending BT operation utilizing a particular M0 output/
control and M1 status/control buffer is in progress.
• Both the M0/M1 control/status buffers are completely empty.
Important: Timing diagrams describing BT control and status flag
operation follow this section.
1. You set up a BTR or BTW by filling in control information
(about block transfer length, logical rack, logical group, and
logical slot address) in an M0 output/control buffer. If you want
to set up a BTW, then you must place your write data in the
BTW data area of the M0 output control buffer. You set up M0
buffer information in an integer file and a COP instruction
copies the information into the M0 output control file.
2. Your SLC control program initiates a BTR/BTW operation by
filling in the BT control field (M0:e.100/7) of the M0 BT buffer.
This indicates whether a BTR or BTW is initiated (0 = BTW and
1 = BTR). Your SLC control program also sets the EN (Enable)
flag (M0:e.100/15) which signals the RIO scanner that a new
block transfer operation is to begin.
3. The scanner processes the BTR/BTW when it detects that the
SLC control program has set the EN flag. If the RIO scanner
detects any problem at this point (such as invalid BT control
field, or unconfigured device) the M1 input status buffer’s error
code field fills in and the ER (Error) flag in the status field sets.
If no problems occur, the EW (Enable Waiting) flag and ST
(Start) flag set in the status field. (Note that the ST flag will not
set if the scanner is already in the process of block transferring
data to a location within the same logical rack. The ST flag sets
only after any previous pending BTs to the same logical rack
have been completed and the BT request has been scheduled on
the RIO link.)
Publication 1747-6.22
RIO Block Transfer
7-115
Your SLC control program can monitor the block transfer by
examining the M1 status flags. They indicate when the scanner
has started processing (EW and ST flags) the BT and whether
the BT operation completed successfully (DN flag) or failed (ER
flag). Your SLC control program takes different actions based on
these status flags.
4. If the BT completes successfully, the scanner fills in the M1 BT
length status field. If it was a BTW operation, the BTR data area
of the M1 BT buffer is not updated. If it was a BTR operation,
the new BTR input data (based on length) is placed in the BTR
data area of the M1 BT buffer and the unused buffer area clears.
The DN status flag then sets to indicate to the SLC control
program that the BT operation completed successfully and that
the M1 input status buffer has been completely updated.
5. If the BT fails, the length field and BTR data area are not
updated (length remains cleared). The error code field indicates
the problem type. The ER flag sets to indicate to the SLC control
program that the BT operation was unsuccessful.
6. The SLC control program must indicate to the scanner when it is
done processing the M1 input/status buffer (because DN or ER
was set) so the corresponding M0 output/control buffer can be
re-used for another BT operation. The SLC control program
indicates that it is through processing when it clears the EN flag.
7. When the RIO scanner detects that the EN flag has been cleared
by the SLC control program, it then clears the EW, ST and DN or
ER flags. This ensures that the status flags in the M1 input status
buffer are not reflecting the results of the previous BT operation.
Note that the other M1 BT Status buffer fields, such as length,
error code, and BTR data are not cleared when the scanner clears
the status flags. These fields are only updated when the scanner
has processed a BT operation as indicated by the DN or ER flag.
For example, if there was a problem with a BT operation, the
error code will remain in the M1 BT buffer until the next BT
operation causes it to be changed (cleared if DN is set or an error
code if ER is set). Therefore, the SLC control program should
precede the examination of the error code field with the ER flag.
Publication 1747-6.22
7-116
RIO Block Transfer
Block Transfer Timing Diagrams
The following pages contain timing diagrams that illustrate the effects
of different control flags on a BT operation.
Successful Block Transfer
Control
1
EN
4
M0 Control Information
TO
M1 Status Information
Status
5
EW
5
2
2
ST
ER
3
5
DN
Successful Block Transfer Read/Write
This example illustrates a successful BT operation.
1. The SLC control program fills in the M0 BT output/control
buffer and sets the enable (EN) flag.
2. The scanner detects that the EN flag is set, validates the control
information, puts the BT request on the RIO link successfully,
and since no other BTs are pending for the same logical rack,
sets the enable waiting (EW) and start (ST) flag in M1 status
field.
3. The scanner receives a BT reply (with no errors) from the RIO
link device, fills in any requested BTR data, and sets the done
(DN) flag.
4. The SLC control program detects the DN flag, processes the BT
data, and clears the enable (EN) flag.
5. The scanner detects that the SLC control program has completed
processing (because the EN flag is clear) and clears the EW, ST
and DN flags. At this point the SLC control program could
initiate another BT operation in the same M0 BT buffer by
setting the EN flag.
Publication 1747-6.22
RIO Block Transfer
7-117
Block Transfer Failure at Startup
M0 Control Information
Control
EN
1
3
TO
M1 Status Information
Status Flag
EW
ST
? 2
4
ER
DN
Block Transfer Failure at Startup
In the above example, the scanner found invalid control information
(e.g., an improper logical address) in the M0 block transfer control
buffer.
1. The SLC control program fills in the M0 BT buffer and sets the
EN flag.
2. The scanner detects that the EN flag is set, determines that there
is some invalid information in the M0 control buffer, fills in the
M1 BT buffer status error code field, and sets the ER flag.
3. The SLC control program detects the ER flag, examines the M1
BT status buffer error code, and clears the EN flag after
processing the error.
4. The scanner detects that the SLC control program has processed
the error and clears the ER flag.
Note that in this example the EW and ST flags never set. Also, the
SLC control program must clear the EN flag in order to start a new
BT after the error has been corrected.
Publication 1747-6.22
7-118
RIO Block Transfer
Block Transfer Failure After Startup of Transmission Across RIO Link
Control Flag
1
M0 Control Information
4
EN
TO
M1 Status Information
Status Flag
5
2
EW
5
2
ST
3
5
ER
DN
Block Transfer Failure after Startup of Transmission Across the RIO
Link
This example illustrates control and status changes when a BT fails
after it starts.
1. The SLC control program fills in the M0 BT output/control
buffer and sets the EN flag.
2. The scanner detects the EN flag, validates the M0 information,
puts the BT request on the RIO link successfully, and sets the
EW and ST flags in the M1 BT input status buffer.
3. The scanner receives a BT reply (with some error) from the RIO
link device, fills in the M1 BT buffer’s error code field, and sets
the ER flag.
4. The SLC control program detects the ER flag, examines the M1
BT buffer error code, and clears the EN flag after processing the
error.
5. The scanner detects that the SLC control program has processed
the reply in the M1 BT buffer and clears the EW, ST and ER
flags.
Publication 1747-6.22
RIO Block Transfer
7-119
SLC Control Program Cancelling a Block Transfer Once Transmitted
Across RIO Link
M0 Control Information
4
Control Flag
EN
4
TO
M1 Status Information
Status Flag
EW
1
5
5
1
ST
3
5
ER
DN
SLC Control Program Canceling a BT Once Transmitted Across RIO
Link
This example illustrates an SLC control program cancelling a BT
operation.
1. In this example, the SLC control program wants a BT timeout
value less than the four second default value that the scanner
uses. When the SLC control program detects that the ST flag has
set, a timer in the SLC control program starts.
2. If the timer expires before the scanner returns a BT response
(DN or ER), then the program sets the TO flag.
3. The scanner fills in the error code field and sets the ER flag. The
SLC control program must still clear the EN flag to complete the
BT operation. Note that because of the asynchronous nature of
cancelling a transmission to a device that has a BT in progress,
the BT reply may indicate either a successful completion or an
error.
4. The SLC control program clears the TO and EN flags. Note that
if the SLC control program later attempts to initiate another BT
and the TO flag is still set, the scanner ignores the BT request.
5. Finally, the EW, ST and ER bits are reset.
Publication 1747-6.22
7-120
RIO Block Transfer
SLC Control Program Cancelling a Block Transfer Prior To
Transmission Across RIO Link
M0 Control Information
Control Flag
4
2
EN
4
TO
M1 Status Information
Status Flag
1
5
1
5
EW
ST
3
5
ER
DN
SLC Control Program Canceling a BT Prior to Transmission Across RIO
Link
In this example, the SLC control program cancels a BT that has been
pending (EW = 1, ST = 0) for a specific amount of time.
1. When the SLC control program detects that the EW has set, a
timer in the SLC control program starts.
2. If the timer expires before the scanner begins transmitting across
the RIO link (ST = 1), then the SLC control program sets the TO
flag. Note that the cancellation will not occur until all previously
scheduled BTs to the same logical rack have been completed
(i.e., when the ST bit would normally have been set).
3. The scanner fills in the error code field and sets the ER flag.
Also, the ER bit is not set until any previously pending BTs to
that device have been completed. The SLC control program must
clear the EN flag to complete the BT operation. Note that
because of the asynchronous nature of cancelling a device that
has a BT in progress, the BT reply may indicate either a
successful completion or an error.
4. The SLC control program clears the TO and EN flags. Note that
if the SLC control program later attempts to initiate another BT
and the TO flag is still set, the scanner will ignore the BT
request.
5. Finally, the EW, ST (if set) and ER bits are reset.
Publication 1747-6.22
RIO Block Transfer
7-121
Below are points to consider when implementing BT operations:
• The minimum amount of scanner image that can be assigned to a
device on the RIO link is 1/4-logical rack in the G file
configuration. This allows up to four separate devices per logical
rack. Each device could have a maximum of four BTs configured
to it. Thus, up to 16 BTRs and/or 16 BTWs could be assigned to
each logical rack.
• If a BT device is a 1747-ASB RIO Adapter, then multiple SLC
500 modules (such as analog modules) could be scanned by the
1747-ASB and the data block transferred to the RIO scanner.
Since the RIO network handles one BT request per logical rack
at a time, there will be a delay before all devices in the 1747ASB rack can be accessed. Therefore you should only perform
BTs as necessary (i.e., “on demand”).
• Inhibiting a device on the RIO network (via control words
M0:e.8...11) precludes that device from block transfer
operations. Attempting to initiate a BT to an inhibited device
results in an error reply. The scanner cancels a BT that is in
progress if it detects that the device is inhibited. Because of the
asynchronous nature of inhibiting a device that has a BT in
progress, the BT reply may indicate either a successful
completion or an error. In either case, the SLC control program
must still clear the Enable flag.
• All M0 and M1 BT buffers are cleared (set to all zeros) after a
power cycle and when the SLC processor goes from Program to
Run mode, Program to Test mode, or Test to Run mode.
When using complementary I/O, if you configure a complementary
device to use more I/O image space than an associated primary
device, then block transfers can only be performed to locations in the
complementary device that have associated I/O image space in the
primary device. For example, if a primary device is 1/2 logical rack
and a complementary device is a full logical rack, block transfers can
be performed only in the first 1/2 logical rack of the complementary
device. Attempting block transfers in the last half of the
complementary device results in a BT error (error - 11 - device not
configured).
Complementary I/O Image
Primary I/O Image
Bit Number Octal 17
Bit Number Decimal 15
Logical
Rack 0
Word 0
Word 1
Word 2
Word 3
Word 4
Word 5
Word 6
Word 7
10 7
8 7
0
0
Bit Number Octal 17
Bit Number Decimal 15
1/2 logical rack
configured and usable Logical
Rack 8
1/2 logical rack not
configured
Word 0
Word 1
Word 2
Word 3
Word 4
Word 5
Word 6
Word 7
10 7
87
0
0
1/2 logical rack configured
and usable
1/2 logical rack configured, but
not usable for BT since Words
4-7 are not configured for the
primary device.
Publication 1747-6.22
7-122
RIO Block Transfer
Setting Up A Block
Transfer
Follow the steps below to set up your scanner and SLC control
program for either BTWs or BTRs.
1. To use the BT functionality, you must increase the size of the M0
and M1 files. The size depends on the number of BT buffers
your applications requires. Note that setting the buffers to
maximum size (3300) will not affect system performance.
However, addressing M-files in your SLC control program does
affect system performance.
2. Set the control flags in M0:e.x00. Where x = block transfer
buffer number. See the tables below for read/write settings.
If You Want to Transfer Data:
Use:
To the scanner from the adapter
BTR (Block Transfer Read)
From the scanner to the adapter
BTW (Block Transfer Write)
If You Want to specify a:
Do this to the M0:e.x00/7 file:
BTR (Block Transfer Read)
Set the bit to 1 to specify a read operation
BTW (Block Transfer Write)
Set the bit to 0 to specify a write operation
3. Specify the length of the data you wish to block transfer in word
M0:e.x01. Note that maximum length is 64 words.
4. Specify the device’s logical rack, group, and slot in word
M0:e.x02.
5. Set up your SLC control program to set the EN bit.
Quick Reference to
Status and Control
Bits
The tables below provide a quick reference for block transfer status
and control bits. In the tables, x = the block transfer file.
Status Bits
This Bit:
Publication 1747-6.22
Is Set:
Enable Waiting EW M1:e.x00/10
upon the scanner’s first detection of EN being set. The EW
bit gets reset when the EN flag resets.
Error ER - M1:e.x00/12
when the scanner detects that the block transfer failed. The
ER bit is reset when the EN flag resets.
Done DN - M1:e.x00/13
at completion of the block transfer, if the data is valid. The
DN bit is reset when the EN flag resets.
Start ST - M1:e.x00/14
when the scanner schedules the BT for the adapter. The
data transfers may not start for some time. The ST bit is
reset when the EN flag resets.
RIO Block Transfer
7-123
Control Bits
This Bit:
Block Transfer Read
Control Logic Example
Is Set:
Read-Write RW M0:e.x00/7
by your SLC control program. A 0 indicates a write operation;
a 1 indicates a read operation.
Timeout TO - M0:e.x00/8
if you leave the timeout bit reset, the scanner repeatedly tries
to send a block transfer request to an unresponsive module
for four seconds before setting the ER bit. If you set the TO bit
through your SLC program the scanner attempts to cancel the
BT request.
Enable EN - M0:e.x00/
15
by your SLC control program to initiate a BT request.
The following pages contain generic BTR and BTW control logic
examples.
Publication 1747-6.22
7-124
RIO Block Transfer
Block Transfer Read Control Logic Example
Rung 2:0
Configure the BTR operation type, length and rio address at power-up. Bit b3:100/7 must be set prior to run to
indicate a BTR operation.
|
|
| POWER±UP
BTR
| BIT
CONTROL
|
S:1
+COP---------------+
|-+----] [-----+------------------------------------------+COPY FILE
|
15
|Source
#B3:100|
|
|Dest
#M0:1.100|
|
|Length
3|
|
+------------------+
Rung 2:1
|
|
|
|
|
|
|
|
|
|
Copy the BTR status area to a binary file which will be used throughout the program. This avoids addressing the M1 file multiple times
during each program scan. Each time an instruction containing an M1 file bit, word or file is scanned by the processor, an immediate
data transfer to the module occurs and will impact the overall processor scan time.
|
SERVICE
|
|
THE BTR
|
|
STATUS/
|
|
BTR
|
|
PENDING
BTR STATUS
|
|
B3:5
+COP---------------+ |
|-+----] [-----+------------------------------------------+COPY FILE
|
|
0
|Source
#M1:1.100| |
|
|Dest
#B3:0| |
| |
| |
|
|Length
4| |
| |
|
+------------------+ |
| | CHECK BTR |
|
| | STATUS
|
|
| | UNTIL DN
|
|
| | OR ER BIT |
|
| | IS OFF
|
|
| |
B3:5
|
|
| +----] [-----+
|
|
1
|
Rung 2:2
Unlatch the bit that continues to check the btr status. When a BTR is complete, the done bit is set. The ladder program must then
unlatch the enable bit, then wait for the SN module to turn off the done bit before another BTR to the same M-file location can be initiate
This is one complete BTR cycle.
| |
|
CHECK BTR |
| |
|
STATUS
|
| | VIRTUAL
|
UNTIL DN
|
| | BTR DONE |
OR ER BIT |
| | BIT
|
IS OFF
|
|
B3:0
B3:5
|
|----]/[-------------------------------------------------------------(U)-------|
13
1
| |
|
| | VIRTUAL
|
| | BTR ERROR |
| | BIT
|
| |
B3:0
|
| +----]/[-----+
|
12
Publication 1747-6.22
RIO Block Transfer
7-125
Rung 2:3
When a BTR successfully completes, buffer the BT data and unlatch the BT enable bit. Also, unlatch the BTR pending
bit and latch the bit that continues checking the BTR status until the SN module turns off the done bit.
|
|
|
|
| VIRTUAL
|
| BTR DONE
|
| BIT
BTR DATA
|
|
B3:0
+COP---------------+
|
|----] [------------------------------------------------+COPY FILE
+-+|
13
| |Source
#M1:1.110| | |
|
| |Dest
#N7:10| | |
|
| |Length
64| | |
|
| +------------------+ | |
|
| SERVICE
| |
|
| THE BTR
| |
|
| STATUS/
| |
|
| BTR
| |
|
| PENDING
| |
|
|
B3:5
| |
|
+----(U)-------------+ |
|
|
0
| |
|
|
| |
|
|
| |
|
| VIRTUAL
| |
|
| BT ENABLE
| |
|
| BIT
| |
|
|
B3:100
| |
|
+----(U)-------------+ |
|
|
15
| |
|
| CHECK BTR
| |
|
| STATUS
| |
|
| UNTIL DN
| |
|
| OR ER BIT
| |
|
| IS OFF
| |
|
|
B3:5
| |
|
+----(L)-------------+ |
Rung 2:4
If a BTR error occurs, unlatch the enable bit and buffer the BT error code. Also, unlatch the BTR pending bit and
latch the bit that continues checking the BTR status until the SN module turns off the error bit.
|
|
|
|
| VIRTUAL
|
| BTR ERROR
BTR ERROR
|
| BIT
CODE
|
|
B3:0
+MOV---------------+
|
|----] [----------------------------------------------+-+MOVE
+-+-|
|
12
| |Source
B3:3| | |
|
| | 0000000000000000| | |
|
| |Dest
B3:4| | |
|
| | 0000000000000000| | |
|
| +------------------+ | |
|
|
| |
|
| SERVICE
| |
|
| THE BTR
| |
|
| STATUS/
| |
|
| BTR
| |
|
| PENDING
| |
|
|
B3:5
| |
|
+----(U)-------------+ |
|
|
0
| |
|
|
| |
|
|
| |
|
| VIRTUAL
| |
|
| BT ENABLE
| |
|
| BIT
| |
|
|
B3:100
| |
|
+----(U)-------------+ |
|
|
15
| |
|
| CHECK BTR
| |
|
| STATUS
| |
|
| UNTIL DN
| |
|
| OR ER BIT
| |
|
| IS OFF
| |
|
|
B3:5
| |
|
+----(L)-------------+ |
|
1
|
Publication 1747-6.22
7-126
RIO Block Transfer
Rung 2:5
When user logic initiates a new BTR, latch the enable bit, as long as a BTR is not in progress. Also, latch the BTR
pending bit, so the BTR status file will be read by the ladder program.
|
|
|
|
SERVICE
|
| USER LOGIC|
|
|
THE BTR
|
| TO
|VIRTUAL
|VIRTUAL
|VIRTUAL
STATUS/
|
| INITIATE A|BT ENABLE |BTR DONE |BTR ERROR
BTR
|
| BTR
|BIT
|BIT
|BIT
PENDING
|
|
I:2.0
B3:100
B3:0
B3:0
B3:5
|
|----] [--------]/[--------]/[--------]/[-----------------------+----(L)-----+|
0
15
13
12
|
0
| |
|
|
| |
|
|
| |
|
| VIRTUAL
| |
|
| BT ENABLE | |
|
| BIT
| |
|
|
B3:100 | |
|
+----(L)-----+ |
|
15
|
Rung 2:6
Move the virtual control word to the M0 file for the SN module whenever a transition of the BTR enable bit occurs.
|
|
|
|
|
VIRTUAL
|
|
BT ENABLE
|
|
BIT
|
|
B3:100
+MOV---------------+ |
|-+----] [-----+------------------------------------------+MOVE
+-|
| |
15
|
|Source
B3:100| |
| |
|
| 0000000000000000| |
| |
|
|Dest
M0:1.100| |
| |
|
|
*| |
| |
|
+------------------+ |
| |
|
|
| |
|
|
| | VIRTUAL
|
|
| | BTR DONE
|
|
| | BIT
|
|
| |
B3:0
|
|
| +----] [-----+
|
| |
13
|
|
| |
|
|
| |
|
|
| | VIRTUAL
|
|
| | BTR ERROR |
|
| | BIT
|
|
| |
B3:0
|
|
| +----] [-----+
|
|
12
|
Rung 2:7
|
|
|-------------------------------------+END+-----------------------------------|
|
Block Transfer Write Control Logic Example
Rung 2:0
Configure the BTW length and RIO address at power-up. Also, be sure the block transfer operation bit is a "0"
indicating a BTW. All these parameters must be entered prior to placing the processor in the run mode.
|
|
|
|
|
|
| POWER±UP
|
| BIT
|
|
S:1
+COP---------------+ |
|----] [--------------------------------------------------+COPY FILE
+|
15
|Source
#B3:100| |
|
|Dest
#M0:1.100| |
|
|Length
3| |
|
+------------------+ |
Publication 1747-6.22
RIO Block Transfer
7-127
Rung 2:1
Copy the BTW status area to a binary file which will be used throughout the program, only when a BTW is pending.
This avoids accessing the M1 file multiple times during each program scan. Each time an instruction containing an
M1 file bit, word or file is scanned by the processor, an immediate data transfer to bit, word or file is scanned by the
processor, an immediate data transfer to the module occurs and therefore will impact the processor scan time.
|
SERVICE
|
|
THE BTW
|
|
STATUS/
|
|
BTW
|
|
PENDING
BTW STATUS
|
|
B3:5
+COP---------------+ |
|-+----] [-----+------------------------------------------+COPY FILE
+-|
| |
0
|
|Source
#M1:1.100| |
| |
|
|Dest
#B3:0| |
| |
|
|Length
4| |
| |
|
+------------------+ |
| |
|
|
| | CHECK BTW |
|
| | STATUS
|
|
| | UNTIL DONE |
|
| | BIT IS OFF |
|
| |
B3:5
|
|
| +----] [-----+
|
|
1
|
Rung 2:2
Unlatch the bit that continues to check the BTW status. when a BTW is complete, the done bit is set. The ladder
program must then unlatch the enable bit. Then wait for the SN module to turn off the done bit before another BTW to
the same M-file location can be initialized. This is one complete BTW cycle.
|
|
CHECK BTW |
|
VIRTUAL
|
STATUS
|
|
BTW DONE |
UNTIL DONE |
|
BIT
|
BIT IS OFF |
|
B3:0
B3:5
|
|-+----]/[-----+-------------------------------------------------------(U)-----|
| |
13
|
1
|
| |
|
|
| | VIRTUAL
|
|
| | BTW ERROR |
|
| | BIT
|
|
| |
B3:0
|
|
| +----]/[-----+
|
|
12
|
Rung 2:3
When a BTW successfully completes, unlatch the BTW enable bit. Also, unlatch the BTW pending bit and latch the
bit that continures checking the BTW status until the SN module turns off the done bit.
|
SERVICE
|
|
THE BTW
|
| VIRTUAL
STATUS/
|
| BTW DONE
BTW
|
| BIT
PENDING
|
|
B3:0
B3:5
|
|----] [--------------------------------------------------------+----(U)-----+-|
|
13
|
0
| |
|
|
| |
|
|
| |
|
| VIRTUAL
| |
|
| BTW ENABLE | |
|
| BIT
| |
|
|
B3:100 | |
|
+----(U)-----+ |
|
|
15
| |
|
|
| |
|
| CHECK BTW | |
|
| STATUS
| |
|
| UNTIL DONE | |
|
| BIT IS OFF | |
|
|
B3:5
| |
|
+----(L)-----+ |
|
1
|
Publication 1747-6.22
7-128
RIO Block Transfer
Rung 2:4
If a BTW errors, unlatch the enable bit, the BTW pending bit and buffer the BTW error code. Also, latch the bit that
continues checking the BTW status until the SN module turns off the error bit.
|
|
|
|
| VIRTUAL
|
| BTW ERROR
BUFFER BTW
|
| BIT
ERROR CODE
|
|
B3:0
+MOV---------------+
|
|----] [----------------------------------------------+-+MOVE
+-+-|
|
12
| |Source
B3:3| | |
|
| | 0000000000000000| | |
|
| |Dest
B3:4| | |
|
| | 0000000000000000| | |
|
| +------------------+ | |
|
| SERVICE
| |
|
| THE BTW
| |
|
| STATUS/
| |
|
| BTW
| |
|
| PENDING
| |
|
|
B3:5
| |
|
+----(U)---------------+ |
|
|
0
| |
|
|
| |
|
| VIRTUAL
| |
|
| BTW ENABLE
| |
|
| BIT
| |
|
|
B3:100
| |
|
+----(U)---------------+ |
|
|
15
| |
|
|
| |
|
| CHECK BTW
| |
|
| STATUS
| |
|
| UNTIL DONE
| |
|
| BIT IS OFF
| |
|
|
B3:5
| |
|
+----(L)---------------+ |
|Rung 2:5
1
|
When user logic initiates a new BTW, copy the data to the M0 file data area and latch the virtual BTW enable bit,
provided that a BTW is not in progress. Also, latch the BTW pending bit, so the BT status file will be read by the
ladder program.
|
|
|
|
|
| USER LOGIC|
|
|
|
| TO
|VIRTUAL
|VIRTUAL
|VIRTUAL
|
| INITIATE A|BTW ENABLE|BTW DONE |BTW ERROR
|
| BTW
|BIT
|BIT
|BIT
BTW DATA
|
|
I:2.0
B3:100
B3:0
B3:0
+COP---------------+
|
|----] [--------]/[--------]/[--------]/[-------------+-+COPY FILE
+-+-|
|
0
15
13
12
| |Source
#N7:110| | |
|
| |Dest
#M0:1.110| | |
|
| |Length
64| | |
|
| +------------------+ | |
|
| SERVICE
| |
|
| THE BTW
| |
|
| STATUS/
| |
|
| BTW
| |
|
| PENDING
| |
|
|
B3:5
| |
|
+----(L)---------------+ |
|
|
0
| |
|
|
| |
|
|
| |
|
| VIRTUAL
| |
|
| BTW ENABLE
| |
|
| BIT
| |
|
|
B3:100
| |
|
+----(L)---------------+ |
|
15
|
Publication 1747-6.22
RIO Block Transfer
7-129
Rung 2:6
Move the virtual control word to the M0 file for the SN module whenever a transition of the BTW eneble bit occurs.
|
|
|
VIRTUAL
|
|
BTW ENABLE
|
|
BIT
|
|
B3:100
+MOV---------------+ |
|-+----] [-----+------------------------------------------+MOVE
+-|
| |
15
|
|Source
B3:100| |
| |
|
| 0000000000000000| |
| |
|
|Dest
M0:1.100| |
| |
|
|
*| |
| |
|
+------------------+ |
| |
|
|
| |
|
|
| | VIRTUAL
|
|
| | BTW DONE
|
|
| | BIT
|
|
| |
B3:0
|
|
| +----] [-----+
|
| |
13
|
|
| |
|
|
| |
|
|
| | VIRTUAL
|
|
| | BTW ERROR |
|
| | BIT
|
|
| |
B3:0
|
|
| +----] [-----+
|
|
12
|
| Rung 2:7
|
|-------------------------------------+END+-----------------------------------|
|
Directional Continuous Block Transfer Example
The following rungs demonstrate a directional continuous block
transfer. As long as the BTR precondition bit is true, block transfer
reads execute continuously. Use the same method for a BTW.
Publication 1747-6.22
7-130
RIO Block Transfer
Rung 2:0
Configure the BTR operation type, length and RIO address at power-up. Bit b3:100/7 must be set prior to going to ru
to indicate a BTR operation.
|
|
|
|
|
|
| POWER±UP
BTR
|
| BIT
CONTROL
|
|
S:1
+COP---------------+ |
|----] [--------------------------------------------------+COPY FILE
+|
15
|Source
#B3:100| |
|
|Dest
#M0:1.100| |
|
|Length
3| |
|
+------------------+ |
Rung 2:1
Copy the BTR status area to a binary file which will be used throughout the program. This avoids addressing the
M1 file multiple times during each program scan. Each time an instruction containing an M1 file bit, word or file is
scanned by the processor an immediate data transfer to the module occurs and therefore will impact the overall
processor scan time.
|
|
|
|
|
|
|
BTR
|
|
PENDING
BTR STATUS
|
|
B3
+COP---------------+ |
|-+----] [-----+------------------------------------------+COPY FILE
+| |
80
|
|Source
#M1:1.100| |
| |
|
|Dest
#B3:0| |
| |
|
|Length
4| |
| |
|
+±±±±±±±±±±±±±±±±±±+ |
| |
|
|
| |
|
|
| |
|
|
| | CHECK BTR |
|
| | STATUS
|
|
| |
B3
|
|
| +----] [-----+
|
|
81
|
Rung 2:2
When the error or done bit is set indicating that the BTR completed either unsuccessfully or successfully, the enable
bit must be unlatched by the ladder program. The 1747-SN scanner then unlatches the error/done bit to complete
the block transfer hand-shake process at this time the "check BTR status" bit must be unlatched to avoid
|
|
| unnecessary M-file accesses.
|
|
VIRTUAL
|
|
BTR DONE
CHECK BTR |
|
BIT
STATUS
|
|
B3
B3
|
|-+----]/[-----+-------------------------------------------------------(U)----| |
13
|
81
|
| |
|
|
| |
|
|
| |
|
|
| |
|
|
| | VIRTUAL
|
|
| | BT ERROR
|
|
| | BIT
|
|
| |
B3
|
|
| +----]/[-----+
|
|
12
|
Publication 1747-6.22
RIO Block Transfer
7-131
Rung 2:3
When a BTR successfully completes, buffer the BTR data and unlatch the BTR enable bit. Also, unlatch the
BTR pending bit and latch the bit that continues checking the BTR status until the SN turns off the done bit.
|
|
| VIRTUAL
| BTR DONE
| BIT
BTR DATA
|
B3
+COP---------------+
|----] [----------------------------------------------+-+COPY FILE
+-+
|
13
| |Source
#M1:1.110| |
|
| |Dest
#N7:10| |
|
| |Length
64| |
|
| +------------------+ |
|
|
|
|
|
|
|
|
|
|
| BTR
|
|
| PENDING
|
|
|
B3
|
|
+----(U)---------------+
|
|
80
|
|
|
|
|
|
|
|
| VIRTUAL
|
|
| BTR ENABLE
|
|
| BIT
|
|
|
B3
|
|
+----(U)---------------+
|
|
1615
|
|
|
|
|
|
|
|
|
|
|
| CHECK BTR
|
|
| STATUS
|
|
|
B3
|
|
+----(L)---------------+
|
81
Rung 2:4
When a BTR unsuccessfully completes, buffer the error code and unlatch the BTR enable bit and the BTR
pending bit. Also, latch the check BTR status bit in order to continue reading the status information from the
scanner until it turns the error bit off, completing the handshake process.
|
|
| VIRTUAL
| BT ERROR
BTR ERROR
| BIT
CODE
|
B3
+MOV---------------+
|----] [----------------------------------------------+-+MOVE
+-+
|
12
| |Source
M1:1.103| |
|
| |
*| |
|
| |Dest
N7:9| |
|
| |
0| |
|
| +------------------+ |
|
|
|
|
|
|
|
|
|
|
| BTR
|
|
| PENDING
|
|
|
B3
|
|
+----(U)---------------+
|
|
80
|
|
|
|
|
|
|
|
| VIRTUAL
|
|
| BTR ENABLE
|
|
| BIT
|
|
|
B3
|
|
+----(U)---------------+
|
|
1615
|
|
|
|
|
|
|
|
|
|
|
| CHECK BTR
|
|
| STATUS
|
|
|
B3
|
|
+----(L)---------------+
|
81
Publication 1747-6.22
7-132
RIO Block Transfer
Rung 2:6
Block transfer reads execute continuously as long as the BTR precondition bit is true.
|
|
|
|
|
|
|
|
|
|
| BTR PRE± |VIRTUAL
|VIRTUAL
|VIRTUAL
|
| CONDITION |BTR ENABLE|BTR DONE |BT ERROR
BTR
|
| BIT
|BIT
|BIT
|BIT
PENDING
|
|
B3
B3
B3
B3
B3
|
|----] [--------]/[--------]/[--------]/[-----------------------+----(L)-----+-|
|
83
1615
13
12
|
80
|
|
|
|
|
|
|
|
|
|
|
|
|
|
| VIRTUAL
|
|
| BTR ENABLE |
|
| BIT
|
|
|
B3
|
|
+----(L)-----+
|
1615
Rung 2:7
Move the virtual control word to the M0 file for the SN module while a BTR is in progress, and continue doing so until
the enable, done and error bits are all turned off, completing the hand-shake process.
|
|
|
VIRTUAL
BTR
|
BTR ENABLE
CONTROL
|
BIT
WORD
|
B3
+MOV---------------+
|-+----] [-----+------------------------------------------+MOVE
+| |
1615
|
|Source
B3:100|
| |
|
| 0000000000000000|
| |
|
|Dest
M0:1.100|
| |
|
|
*|
| |
|
+------------------+
| |
|
| |
|
| | VIRTUAL
|
| | BTR DONE
|
| | BIT
|
| |
B3
|
| +----] [-----+
| |
13
|
| |
|
| |
|
| | VIRTUAL
|
| | BT ERROR
|
| | BIT
|
| |
B3
|
| +----] [-----+
|
12
|
|-------------------------------------+END+-----------------------------------|
Publication 1747-6.22
RIO Block Transfer
7-133
Directional Repeating Block Transfer Example
The following example shows a directional repeating block transfer.
This means that block transfer reads are sent repeatedly, as fast as
possible. Use the same method for a BTW.
Rung 2:0
Configure the BTR operation type, length and RIO address at power-up. Bit B3:100/7 must be set prior
| to going to run to indicate a BTR operation.
|
|
|
|
|
| POWER±UP
BTR
|
| BIT
CONTROL
|
|
S:1
+COP---------------+ |
|----] [--------------------------------------------------+COPY FILE
+|
15
|Source
#B3:100| |
|
|Dest
#M0:1.100| |
|
|Length
3| |
|
+------------------+ |
Rung 2:1
Copy the BTR status area to a binary file, which is used throughout the program. This avoids addressing the M1 file
multiple times during each program scan. Each time an instruction containing an M-file bit, word or file is scanned by the
| processor, an immediate data transfer to the module occurs and therefore will impact the overall processor scan time. |
|
|
|
|
|
BTR
|
|
PENDING
BTR STATUS
|
|
B3
+COP---------------+ |
|-+----] [-----+------------------------------------------+COPY FILE
+| |
80
|
|Source
#M1:1.100| |
| |
|
|Dest
#B3:0| |
| |
|
|Length
4| |
| |
|
+------------------+ |
| |
|
|
| |
|
|
| |
|
|
| | CHECK BTR |
|
| | STATUS
|
|
| |
B3
|
|
| +----] [-----+
|
|
81
|
Rung 2:2
Unlatch the bit that continues to check the BTR status. When a BTR is complete, the done or error bit is set. The
ladder program must then unlatch the enable bit, then wait for the SN module to turn off the done/error bit before
| another BTR to the same M-file location can be initiated. this is one complete BTR cycle.
|
|
|
|
VIRTUAL
|
|
BTR DONE
CHECK BTR |
|
BIT
STATUS
|
|
B3
B3
|
|-+====]/[-----+-------------------------------------------------------(U)----| |
13
|
81
| |
|
| |
|
| |
|
| |
|
| | VIRTUAL
|
| | BT ERROR
|
| | BIT
|
| |
B3
|
| +----]/[-----+
|
12
Publication 1747-6.22
7-134
RIO Block Transfer
Rung 2:3
When a BTR successfully completes, buffer the BTR data and unlatch the BTR enable bit. Also, unlatch the BTR
pending bit and latch the bit that continues checking the BT status unil the SN turns off the done bit.
|
|
|
|
| VIRTUAL
|
| BTR DONE
|
| BIT
BTR DATA
|
|
B3
+COP---------------+
|
|----] [------------------------------------------------+COPY FILE
+-+|
13
| |Source
#M1:1.110| | |
|
| |Dest
#N7:10| | |
|
| |Length
64| | |
|
| +------------------+ | |
|
|
| |
|
|
| |
|
|
| |
|
| BTR
| |
|
| PENDING
| |
|
|
B3
| |
|
+----(U)---------------+ |
|
|
80
| |
|
|
| |
|
|
| |
|
| VIRTUAL
| |
|
| BTR ENABLE
| |
|
| BIT
| |
|
|
B3
| |
|
+----(U)---------------+ |
|
|
1615
| |
|
|
| |
|
|
| |
|
|
| |
|
| CHECK BTR
| |
|
| STATUS
| |
|
|
B3
| |
|
+----(L)---------------+ |
|
81
|
Rung 2:4
|
|
|
|
| VIRTUAL
|
| BT ERROR
|
| BIT
|
|
B3
+MOV---------------+
|
|----] [------------------------------------------------+MOVE
+-+-|
|
12
| |Source
M1:1.103| | |
|
| |
*| | |
|
| |Dest
N7:9| | |
|
| |
0| | |
|
| +------------------+ | |
|
|
| |
|
|
| |
|
|
| |
|
| BTR
| |
|
| PENDING
| |
|
|
B3
| |
|
+----(U)---------------+ |
|
|
80
| |
|
|
| |
|
|
| |
|
| VIRTUAL
| |
|
| BTR ENABLE
| |
|
| BIT
| |
|
|
B3
| |
|
+----(U)---------------+ |
|
|
1615
| |
|
|
| |
|
|
| |
|
|
| |
|
| CHECK BTR
| |
|
| STATUS
| |
|
|
B3
| |
|
+----(L)---------------+ |
|
81
|
Publication 1747-6.22
RIO Block Transfer
7-135
Rung 2:5
Block transfer reads will repeat as fast as possible as long as these rungs are scanned.
|
|
|
|
|
|
|
|
| VIRTUAL
|VIRTUAL
|VIRTUAL
|
| BTR ENABLE|BTR DONE |BT ERROR
BTR
|
| BIT
|BIT
|BIT
PENDING
|
|
B3
B3
B3
B3
|
|----]/[--------]/[--------]/[----------------------------------+----(L)-----+|
1615
13
12
|
80
| |
|
|
| |
|
|
| |
|
| VIRTUAL
| |
|
| BTR ENABLE | |
|
| BIT
| |
|
|
B3
| |
|
+±±±±(L)±±±±±+ |
|
1615
|
Rung 2:6
Move the virtual control word to the M0 file for the SN module while a BTR is in progress and continue
doing so until the scanner turns the done/error bit off.
|
|
|
|
|
VIRTUAL
|
|
BTR ENABLE
|
|
BIT
|
|
B3
+MOV---------------+ |
|-+----] [-----+------------------------------------------+MOVE
+-|
| |
1615
|
|Source
B3:100| |
| |
|
| 0000000000000000| |
| |
|
|Dest
M0:1.100| |
| |
|
|
*| |
| |
|
+------------------+ |
| |
|
|
| |
|
|
| | VIRTUAL
|
|
| | BTR DONE
|
|
| | BIT
|
|
| |
B3
|
|
| +----] [-----+
|
| |
13
|
|
| |
|
|
| |
|
|
| | VIRTUAL
|
|
| | BT ERROR
|
|
| | BIT
|
|
| |
B3
|
|
| +----] [-----+
|
|
12
|
Rung 2:7
|
|
|-------------------------------------+END+-----------------------------------|
|
Publication 1747-6.22
7-136
RIO Block Transfer
Directional Non-Continuous Block Transfer Example
The following rungs demonstrate a directional non-continuous block
transfer. The block transfer executes once for every false-to-true
transition of the input. Please note that the input bit I:2.0/0 was
chosen randomly for this example and can be any address in your
program used to initiate a BTR. Also note that this same method may
be used for a BTW.
Rung 2:0
Configure the BTR operation type, length and rio address at power-up. Bit B3:100/7 must be set prior to going to
run to indicate a BTR operation.
|
|
|
|
|
|
| POWER±UP
BTR
|
| BIT
CONTROL
|
|
S:1
+COP---------------+ |
|----] [--------------------------------------------------+COPY FILE
+|
15
|Source
#B3:100| |
|
|Dest
#M0:1.100| |
|
|Length
3| |
|
+------------------+ |
Rung 2:1
Copy the BTR status area to a binary file, which is used throughout the program. This avoids addressing the M1 file
multiple times during each program scan. Each time an instruction containing an M1 file bit, word or file is scanned b
the processor, an immediate data transfer to the module occurs and therefore will impact the overall processor scan
time.
|
|
|
|
|
|
|
BTR
|
|
PENDING
BTR STATUS
|
|
B3
+COP---------------+ |
|-+----] [-----+------------------------------------------+COPY FILE
+| |
80
|
|Source
#M1:1.100| |
| |
|
|Dest
#B3:0| |
| |
|
|Length
4| |
| |
|
+------------------+ |
| |
|
|
| |
|
|
| |
|
|
| | CHECK BTR |
|
| | STATUS
|
|
| |
B3
|
|
| +----] [-----+
|
|
81
|
Rung 2:2
Unlatch the bit that continues to check the BTR status. When a BTR is complete, the done or error bit is set. The
ladder program must then unlatch the enable bit, then wait for the SN module to turn off the done/error bit before
| another BTR to the same M-file location can be initiated. This is one complete BTR cycle.
|
|
|
|
VIRTUAL
|
|
BTR DONE
CHECK BTR |
|
BIT
STATUS
|
|
B3
B3
|
|-+----]/[-----+-------------------------------------------------------(U)-----|
| |
13
|
81
|
| |
|
|
| |
|
|
| |
|
|
| |
|
|
| | VIRTUAL
|
|
| | BTR ERROR |
|
| | BIT
|
|
| |
B3
|
|
| +----]/[-----+
|
|
12
|
Publication 1747-6.22
RIO Block Transfer
7-137
Rung 2:3
When BTR successfully completes, buffer the BTR data and unlatch the BTR enable bit. Also, unlatch the BTR
pending bit and latch the bit that continues checking the BTR status until the SN turns off the done bit.
|
|
|
|
| VIRTUAL
|
| BTR DONE
|
| BIT
BTR DATA
|
|
B3
+COP---------------+
|
|----] [------------------------------------------------+COPY FILE
+-+-|
|
13
| |Source
#M1:1.110| | |
|
| |Dest
#N7:10| | |
|
| |Length
64| | |
|
| +------------------+ | |
|
|
| |
|
|
| |
|
|
| |
|
| BTR
| |
|
| PENDING
| |
|
|
B3
| |
|
+----(U)---------------+ |
|
|
80
| |
|
|
| |
|
|
| |
|
| VIRTUAL
| |
|
| BTR ENABLE
| |
|
| BIT
| |
|
|
B3
| |
|
+----(U)---------------+ |
|
|
1615
| |
|
|
| |
|
|
| |
|
|
| |
|
| CHECK BTR
| |
|
| STATUS
| |
|
|
B3
| |
|
+----(L)---------------+ |
|
81
|
Rung 2:4
|
|
|
|
| VIRTUAL
|
| BTR ERROR
|
| BIT
|
|
B3
+MOV---------------+
|
|----] [------------------------------------------------+MOVE
+-+-|
|
12
| |Source
M1:1.103| | |
|
| |
*| | |
|
| |Dest
N7:9| | |
|
| |
0| | |
|
| +------------------+ | |
|
|
| |
|
|
| |
|
|
| |
|
| BTR
| |
|
| PENDING
| |
|
|
B3
| |
|
+----(U)---------------+ |
|
|
80
| |
|
|
| |
|
|
| |
|
| VIRTUAL
| |
|
| BTR ENABLE
| |
|
| BIT
| |
|
|
B3
| |
|
+----(U)---------------+ |
|
|
1615
| |
|
|
| |
|
|
| |
|
|
| |
|
| CHECK BTR
| |
|
| STATUS
| |
|
|
B3
| |
|
+----(L)---------------+ |
|
81
|
Publication 1747-6.22
7-138
RIO Block Transfer
Rung 2:5
Initiate a BTR for each false-to-true transition of the user input.
| USER LOGIC
|
| TO
|
| INITIATE A
|
| BTR
|
|
I:2
B3
B3
|
|----] [------[OSR]-------------------------------------------------------(L)--|
|
0
82
83 |
Rung 2:6
When user logic initiates a new BTR, latch the enable bit as long as a BTR is not in progress. Also, latch the BTR
pending bit so the BTR status file will be read by the ladder program.
|
|
|
|
|
|
|
|
|
VIRTUAL
|VIRTUAL
|VIRTUAL
|
|
BTR ENABLE|BTR DONE |BTR ERROR
BTR
|
|
BIT
|BIT
|BIT
PENDING
|
| B3
B3
B3
B3
B3
|
|--] [-----]/[--------]/[--------]/[----------------------------+----(L)------|
83
1615
13
12
|
80
| |
|
|
| |
|
|
| |
|
| VIRTUAL
| |
|
| BTR ENABLE | |
|
| BIT
| |
|
|
B3
| |
|
+----(L)-----+ |
|
|
1615
| |
|
| B3
| |
|
+--(U)-------+ |
|
83
|
Rung 2:7
Move the virual control word to the M0 file for the SN module while a BTR is in progress, and continue doing so until
| the enable, done and error bits are all turned off, completing the BTR handshake process.
|
|
|
|
VIRTUAL
BTR
|
|
BTR ENABLE
CONTROL
|
|
BIT
WORD
|
|
B3
+MOV---------------+ |
|-+----] [-----+------------------------------------------+MOVE
+-|
| |
1615
|
|Source
B3:100| |
| |
|
| 0000000000000000| |
| |
|
|Dest
M0:1.100| |
| |
|
|
*| |
| |
|
+------------------+ |
| |
|
|
| |
|
|
| | VIRTUAL
|
|
| | BTR DONE
|
|
| | BIT
|
|
| |
B3
|
|
| +----] [-----+
|
| |
13
|
|
| |
|
|
| |
|
|
| | VIRTUAL
|
|
| | BTR ERROR |
|
| | BIT
|
|
| |
B3
|
|
| +----] [-----+
|
|
12
|
|
|
|-------------------------------------+END+------------------------------------|
|
|
Publication 1747-6.22
RIO Block Transfer
7-139
Bidirectional Continuous Block Transfer Example
The following rungs demonstrate a bidirectional continuous block
transfer. The BTR and BTW each execute as fast as possible,
continuously and independently of one another.
Rung 2:0
Configure the BT operation type, length and RIO address (R, G, S in decimal) at power-up. Bit N7:50/7 must
|
| be set to a "1" to indicate a btr and bit N7:53/7 must be a local "0" to indicate a BTW operation.
|
|
|
|
| POWER±UP
BTR
|
| BIT
CONTROL
|
|
S:1
+COP---------------+
|
|----] [----------------------------------------------+-+COPY FILE
+-+-|
|
15
| |Source
#N7:50| | |
|
| |Dest
#M0:1.100| | |
|
| |Length
3| | |
|
| +------------------+ | |
|
|
| |
|
|
| |
|
|
| |
|
|
BTW
| |
|
|
CONTROL
| |
|
| +COP---------------+ | |
|
+-+COPY FILE
+-+ |
|
|Source
#N7:53|
|
|
|Dest
#M0:1.200|
|
|
|Length
3|
|
|
+------------------+
|
Rung 2:1
| Copy the BTR status area to an integer file only when a BTR is in progress. This status information is then
| used throughout the program and limits the number of M-file accesses.
|
|
|
|
|
BTR
|
|
PENDING
BTR STATUS
|
|
B3
+COP---------------+ |
|-+----] [-----+------------------------------------------+COPY FILE
+-|
| |
0
|
|Source
#M1:1.100| |
| |
|
|Dest
#N7:60| |
| |
|
|Length
4| |
| |
|
+==================+ |
| |
|
|
| |
|
|
| |
|
|
| | CHECK BTR |
|
| | STATUS
|
|
| |
B3
|
|
| +----] [-----+
|
|
2
|
Rung 2:2
Unlatch the bit that continues to check the BTR status. When a BTR is complete, the done or error bit is set. The
ladder program must then unlatch the enable bit, then wait for the SN module to turn off the done/error bit before
| another BTR to the same M-file location can be initiated. This is one complete BTR cycle.
|
|
|
|
VIRTUAL
|
|
BTR DONE
CHECK BTR |
|
BIT
STATUS
|
|
N7:60
B3
|
|-+----]/[-----+-------------------------------------------------------(U)-----|
| |
13
|
2
|
| |
|
|
| |
|
|
| | VIRTUAL
|
|
| | BTR ERROR |
|
| | BIT
|
|
| |
N7:60
|
|
| +----]/[-----+
|
|
12
|
Publication 1747-6.22
7-140
RIO Block Transfer
Rung 2:3
| Copy the BTW status area to an integer file only when a BTW is in progress. This status data is then used
| throughout the program and limits the number of M-file accesses.
|
|
|
|
|
BTW
BTW
|
|
PENDING
STATUS
|
|
B3
+COP---------------+ |
|-+----] [-----+------------------------------------------+COPY FILE
+-|
| |
1
|
|Source
#M1:1.200| |
| |
|
|Dest
#N7:64| |
| |
|
|Length
4| |
| |
|
+------------------+ |
| |
|
|
| |
|
|
| |
|
|
| | CHECK BTW |
|
| | STATUS
|
|
| |
B3
|
|
| +----] [-----+
|
|
3
|
Rung 2:4
Unlatch the bit that continues to check the BTW status. When a BTW is complete, the done or error bit is set. The
ladder program must then unlatch the enable bit, then wait for the SN module to turn off the done/error bit before
| another BTW to the same M-file location can be initiated. This completes one BTW cycle.
|
|
|
|
VIRTUAL
|
|
BTW DONE
CHECK BTW |
|
BIT
STATUS
|
|
N7:64
B3
|
|-+----]/[-----+-------------------------------------------------------(U)-----|
| |
13
|
3
|
| |
|
|
| |
|
|
| | VIRTUAL
|
|
| | BTW ERROR |
|
| | BIT
|
|
| |
N7:64
|
|
| +----]/[-----+
|
|
12
|
Publication 1747-6.22
RIO Block Transfer
7-141
When a BTR successfully completes, buffer the BTR data and unlatch both the BTR virual enable bit and the BTR
|pending bit. Also, latch the bit that continues checking the BTR status until the SN module turns off the done bit. |
|
|
| VIRTUAL
|
| BTR DONE
|
| BIT
BTR DATA
|
|
N7:60
+COP---------------+
|
|----] [------------------------------------------------+COPY FILE
+-+-|
|
13
| |Source
#M1:1.110| | |
|
| |Dest
#N7:0| | |
|
| |Length
10| | |
|
| +------------------+ | |
|
|
| |
|
|
| |
|
|
| |
|
| BTR
| |
|
| PENDING
| |
|
|
B3
| |
|
+----(U)---------------+ |
|
|
0
| |
|
|
| |
|
|
| |
|
| VIRTUAL
| |
|
| BTR ENABLE
| |
|
| BIT
| |
|
|
N7:50
| |
|
+----(U)---------------+ |
|
|
15
| |
|
|
| |
|
|
| |
|
|
| |
|
|
| |
|
|
| |
|
| CHECK BTR
| |
|
| STATUS
| |
|
|
B3
| |
|
+----(L)---------------+ |
|
2
|
Rung 2:6
When a BTR unduccessfully completes, buffer the error code and unlatch the BTR enable bit and the BTR pending
bit. Also, latch the check BTR status bit in order to continue reading the status information from the scanner until it
| turns off the error bit, completing the handshake process.
|
|
|
| VIRTUAL
|
| BTR ERROR
BTR ERROR
|
| BIT
CODE
|
|
N7:60
+MOV---------------+
|
|----] [----------------------------------------------+-+MOVE
+-+-|
|
12
| |Source
M1:1.103| | |
|
| |
*| | |
|
| |Dest
N7:0| | |
|
| |
0| | |
|
| +------------------+ | |
|
|
| |
|
|
| |
|
|
| |
|
| BTR
| |
|
| PENDING
| |
|
|
B3
| |
|
+----(U)---------------+ |
|
|
0
| |
|
|
| |
|
|
| |
|
| VIRTUAL
| |
|
| BTR ENABLE
| |
|
| BIT
| |
|
|
N7:50
| |
|
+----(U)===============+ |
|
|
15
| |
|
|
| |
|
|
| |
|
|
| |
|
| CHECK BTR
| |
|
| STATUS
| |
|
|
B3
| |
|
+----(L)---------------+ |
|
|
Publication 1747-6.22
7-142
RIO Block Transfer
Rung 2:7
When a BTW successfully completes unlatch the BTW enable bit and the BTW pending bit to complete a BTW
| sequence. Also, latch the bit that continues checking the BTW status until the SN module turns the done bit off.
|
|
|
| VIRTUAL
|
| BTW DONE
BTW
|
| BIT
PENDING
|
|
N7:64
B3
|
|----] [========================================================+----(U)-----+-|
|
13
|
1
| |
|
|
| |
|
|
| |
|
| VIRTUAL
| |
|
| BTW ENABLE | |
|
| BIT
| |
|
|
N7:53
| |
|
+----(U)=====+ |
|
|
15
| |
|
|
| |
|
|
| |
|
|
| |
|
| CHECK BTW | |
|
| STATUS
| |
|
|
B3
| |
|
+----(L)-----+ |
|
3
|
Rung 2:8
When a BTW unsuccessfully completes, buffer the error code and unlatch the BTW enable bit and the BTW
pending bit. Also, latch the check BTW status bit in order to continue reading the status information from the
| scanner until it turns off the error bit, completing the handshake process.
|
|
|
| VIRTUAL
|
| BTW ERROR
BTW ERROR
|
| BIT
CODE
|
|
N7:64
+MOV===============+
|
|----] [----------------------------------------------+-+MOVE
+-+-|
|
12
| |Source
M1:1.203| | |
|
| |
*| | |
|
| |Dest
N7:1| | |
|
| |
0| | |
|
| +------------------+ | |
|
|
| |
|
|
| |
|
|
| |
|
| BTW
| |
|
| PENDING
| |
|
|
B3
| |
|
+----(U)---------------+ |
|
|
1
| |
|
|
| |
|
|
| |
|
|
| |
|
|
| |
|
|
| |
|
| VIRTUAL
| |
|
| BTW ENABLE
| |
|
| BIT
| |
|
|
N7:53
| |
|
+----(U)===============+ |
|
|
15
| |
|
|
| |
|
|
| |
|
|
| |
|
| CHECK BTW
| |
|
| STATUS
| |
|
|
B3
| |
|
+----(L)---------------+ |
|
3
|
Publication 1747-6.22
RIO Block Transfer
7-143
Rung 2:9
This rung executes block transfer reads continuously, as fast as possible.
|
|
|
|
|
|
|
|
| VIRTUAL
|VIRTUAL
|VIRTUAL
|
| BTR ENABLE|BTR DONE |BTR ERROR
BTR
|
| BIT
|BIT
|BIT
PENDING
|
|
N7:50
N7:60
N7:60
B3
|
|====]/[========]/[========]/[==================================+----(L)-----+-|
|
15
13
12
|
0
| |
|
|
| |
|
|
| |
|
| VIRTUAL
| |
|
| BTR ENABLE | |
|
| BIT
| |
|
|
N7:50
| |
|
+±±±±(L)±±±±±+ |
|Rung 2:10
15
|
This rung executes block transfer writes continuously, as fast as possible.
|
|
|
|
|
|
|
|
| VIRTUAL
|VIRTUAL
|VIRTUAL
|
| BTW ENABLE|BTW DONE |BTW ERROR
|
| BIT
|BIT
|BIT
BTW DATA
|
|
N7:53
N7:64
N7:64
+COP===============+
|
|----]/[--------]/[--------]/[--------------------------+COPY FILE
+-+-|
|
15
13
12
| |Source
#N7:10| | |
|
| |Dest
#M0:1.210| | |
|
| |Length
11| | |
|
| +------------------+ | |
|
|
| |
|
|
| |
|
|
| |
|
|
| |
|
|
| |
|
| VIRTUAL
| |
|
| BTW ENABLE
| |
|
| BIT
| |
|
|
N7:53
| |
|
+----(L)---------------+ |
|
|
15
| |
|
|
| |
|
|
| |
|
|
| |
|
| BTW
| |
|
| PENDING
| |
|
|
B3
| |
|
+----(L)---------------+ |
|
1
|
Rung 2:11
Move the virtual BTR control word to the M0 file for the SN module while a BTR is in progress, and continue doing so un
| the enable, done, and error bits are all turned off, completing the handshake process.
|
|
|
|
VIRTUAL
BTR
|
|
BTR ENABLE
CONTROL
|
|
BIT
BITS
|
|
N7:50
+MOV---------------+ |
|-+----] [-----+------------------------------------------+MOVE
+-|
| |
15
|
|Source
N7:50| |
| |
|
|
0| |
| |
|
|Dest
M0:1.100| |
| |
|
|
*| |
| |
|
+================+ |
| |
|
|
| |
|
|
| | VIRTUAL
|
|
| | BTR DONE
|
|
| | BIT
|
|
| |
N7:60
|
|
| +====] [=====+
|
| |
13
|
|
| |
|
|
| |
|
|
| | VIRTUAL
|
|
| | BTR ERROR |
|
| |
|
|
Publication 1747-6.22
7-144
RIO Block Transfer
Rung 2:12
Move the virtual BTW control word to the M0 file for the SN module while a BTW is in progress, and continue doing so
| until the enable, done and error bits are all turned off, completing the hand-shake process.
|
|
|
|
VIRTUAL
BTW
|
|
BTW ENABLE
CONTROL
|
|
BIT
BITS
|
|
N7:53
+MO----------------+ |
|-+----] [-----+------------------------------------------+MOVE
+-|
| |
15
|
|Source
N7:53| |
| |
|
|
0| |
| |
|
|Dest
M0:1.200| |
| |
|
|
*| |
| |
|
+------------------+ |
| |
|
|
| |
|
|
| | VIRTUAL
|
|
| | BTW DONE
|
|
| | BIT
|
|
| |
N7:64
|
|
| +----] [-----+
|
| |
13
|
|
| |
|
|
| |
|
|
| | VIRTUAL
|
|
| | BTW ERROR |
|
| | BIT
|
|
| |
N7:64
|
|
| +----] [-----+
|
|
12
|
|Rung 2:13
|
|-------------------------------------+END+------------------------------------|
|
|
Bidirectional Alternating Block Transfer
The following rungs demonstrate a bidirectional alternating block
transfer. Using these rungs ensures the block transfer requests are
executed in the order in which they are sent to the queue. This
example also ensures that the block transfer read and block transfer
write alternate. The XIO conditions prevent the BTR and BTW from
queueing simultaneously. The block transfers continue as long as the
XIC precondition bit is true.
Rung 2:0
Configure the BT operation type, length, and RIO address (R, G, S in decimal) at power-up. N7:50/7 must be set to a
| "1" to indicate a BTR and N7:53/7 must be a logical "0" to indicate a BTW operation.
|
|
|
|
|
| POWER±UP
BTR
|
| BIT
CONTROL
|
|
S:1
+COP---------------+
|
|----] [----------------------------------------------+-+COPY FILE
+-+-|
|
15
| |Source
#N7:50| | |
|
| |Dest
#M0:1.100| | |
|
| |Length
3| | |
|
| +------------------+ | |
|
|
| |
|
|
| |
|
|
| |
|
|
BTW
| |
|
|
CONTROL
| |
|
| +COP---------------+ | |
|
+-+COPY FILE
+-+ |
|
|Source
#N7:53|
|
|
|Dest
#M0:1.200|
|
|
|Length
3|
|
|
+------------------+
|
Publication 1747-6.22
RIO Block Transfer
7-145
Rung 2:1
Copy the BTR status area to an integer file only when a BTR is in progress. This status data will then be used
|
| throughout the program and limit sthe number of M-file accesses.
|
|
|
|
|
BTR
|
|
PENDING
BTR STATUS
|
|
B3
+COP---------------+ |
|-+----] [-----+------------------------------------------+COPY FILE
+-|
| |
0
|
|Source
#M1:1.100| |
| |
|
|Dest
#N7:60| |
| |
|
|Length
4| |
| |
|
+------------------+ |
| |
|
|
| |
|
|
| |
|
|
| | CHECK BTR |
|
| | STATUS
|
|
| |
B3
|
|
| +----] [-----+
|
|
2
|
Rung 2:2
Unlatch the bit that continues to check the BTR status. When a BTR is complete, the done or error bit is set. The
ladder program must then unlatch the enable bit, then wait for the SN module to turn off the done/error bit before
| another BTR to the same M-file location can be initiated. This is one complete BTR cycle.
|
|
|
|
VIRTUAL
|
|
BTR DONE
CHECK BTR |
|
BIT
STATUS
|
|
N7:60
B3
|
|-+----]/[-----+-------------------------------------------------------(U)-----|
| |
13
|
2
|
| |
|
|
| |
|
|
| | VIRTUAL
|
|
| | BTR ERROR |
|
| | BIT
|
|
| |
N7:60
|
|
| +----]/[-----+
|
|
12
|
Rung 2:3
| Copy the BTW status area to an integer file only when a BTW is in progress. This status data will then be used
|
| throughout the program and limits the number of M-file accesses.
|
|
|
|
BTW
BTW
|
|
PENDING
STATUS
|
|
B3
+COP---------------+ |
|-+----] [-----+------------------------------------------+COPY FILE
+-|
| |
1
|
|Source
#M1:1.200| |
| |
|
|Dest
#N7:64| |
| |
|
|Length
4| |
| |
|
+------------------+ |
| |
|
|
| |
|
|
| |
|
|
| | CHECK BTW |
|
| | STATUS
|
|
| |
B3
|
|
| +----] [-----+
|
|
3
|
Publication 1747-6.22
7-146
RIO Block Transfer
Rung 2:4
Unlatch the bit that continues to check the BTW status. When a BTW is complete, the done or error bit is set. The
ladder program must then unlatch the enable bit, then wait for the SN module to turn off the done/error bit before
| another BTW to the same M-file location can be ititiated. This completes one BTW cycle.
|
|
|
|
VIRTUAL
|
|
BTW DONE
CHECK BTW |
|
BIT
STATUS
|
|
N7:64
B3
|
|-+----]/[-----+-------------------------------------------------------(U)-----|
| |
13
|
3
|
| |
|
|
| |
|
|
| | VIRTUAL
|
|
| | BTW ERROR |
|
| | BIT
|
|
| |
N7:64
|
|
| +----]/[-----+
|
|
12
|
Rung 2:5
When a BTR successfully completes buffer the BTR data and unlatch both the BTR virtual enable bit and the BTR
| pending bit. Also, latch the bit that continues checking the BTR status until the SN module turns off the done bit. |
|
|
| VIRTUAL
|
| BTR DONE
|
| BIT
BTR DATA
|
|
N7:60
+COP---------------+
|
|----] [----------------------------------------------+-+COPY FILE
+-+-|
|
13
| |Source
#M1:1.110| | |
|
| |Dest
#N7:0| | |
|
| |Length
10| | |
|
| +------------------+ | |
|
|
| |
|
|
| |
|
|
| |
|
| BTR
| |
|
| PENDING
| |
|
|
B3
| |
|
+----(U)---------------+ |
|
|
0
| |
|
|
| |
|
|
| |
|
| VIRTUAL
| |
|
| BTR ENABLE
| |
|
| BIT
| |
|
|
N7:50
| |
|
+----(U)---------------+ |
|
|
15
| |
|
|
| |
|
|
| |
|
|
| |
|
|
| |
|
|
| |
|
| CHECK BTR
| |
|
| STATUS
| |
|
|
B3
| |
|
+----(L)---------------+ |
Publication 1747-6.22
RIO Block Transfer
7-147
Rung 2:6
When a BTR unsuccessfully completes, buffer the BTR error code and unlatch the BTR enable bit and the BTR
pending bit. Also, latch the check BTR status bit in order to continue reading the status information from the
| scanner until it turns the error bit off, completing the hand-shake process.
|
|
|
| VIRTUAL
|
| BTR ERROR
BTR ERROR
|
| BIT
CODE
|
|
N7:60
+MOV---------------+
|
|----] [------------------------------------------------+MOVE
+-+-|
|
12
| |Source
M1:1.103| | |
|
| |
*| | |
|
| |Dest
N7:21| | |
|
| |
0| | |
|
| +------------------+ | |
|
|
| |
|
|
| |
|
|
| |
|
| BTR
| |
|
| PENDING
| |
|
|
B3
| |
|
+----(U)---------------+ |
|
|
0
| |
|
|
| |
|
|
| |
|
| VIRTUAL
| |
|
| BTR ENABLE
| |
|
| BIT
| |
|
|
N7:50
| |
|
+----(U)---------------+ |
|
|
15
| |
|
|
| |
|
|
| |
|
|
| |
|
| CHECK BTR
| |
|
| STATUS
| |
|
|
B3
| |
|
+----(L)---------------+ |
|
2
|
Rung 2:7
When a BTW successfully or unsuccessfully completes, unlatch the BTW enable bit and the BTW pending bit to
complete a BTW sequence. Also, latch the bit that continues checking the BTW status until the BSN module turns
| the done/error bit off.
|
|
|
|
VIRTUAL
|
|
BTW DONE
BTW
|
|
BIT
PENDING
|
|
N7:64
B3
|
|-+----] [-----+--------------------------------------+----(U)---------------+-|
| |
13
|
|
1
| |
| |
|
|
| |
| |
|
|
| |
| | VIRTUAL
|
| VIRTUAL
| |
| | BTW ERROR |
| BTW ENABLE
| |
| | BIT
|
| BIT
| |
| |
N7:64
|
|
N7:53
| |
| +----] [-----+
+----(U)---------------+ |
|
12
|
15
| |
|
|
| |
|
|
| |
|
|
| |
|
| CHECK BTW
| |
|
| STATUS
| |
|
|
B3
| |
|
+----(L)---------------+ |
|
|
3
| |
|
|
| |
|
|
| |
|
|
| |
|
|
BTW ERROR
| |
|
|
CODE
| |
|
| +MOV---------------+ | |
|
+-+MOVE
+-+ |
|
|Source
M1:1.203|
|
|
|
*|
|
|
|Dest
N7:22|
|
|
|
0|
|
|
+------------------+
|
Publication 1747-6.22
7-148
RIO Block Transfer
Rung 2:8
This rung and the newt rung toggles between executing a BTR and a BTW while the user supplied BT precondition bit
(B3:0/11 is used in this example) is true.
|
|
|
|
|
|
|
|
|
|
|
|
| BT
|VIRTUAL
|VIRTUAL
|VIRTUAL
|VIRTUAL
|
| PRECON±
|BTR ENABLE|BTW ENABLE|BTR DONE |BTR ERROR
BTR
|
| DITION BIT|BIT
|BIT
|BIT
|BIT
PENDING
|
|
B3
N7:50
N7:53
N7:60
N7:60
B3
|
|----] [--------]/[--------]/[--------]/[--------]/[------------+----(L)-----+-|
|
11
15
15
13
12
|
0
| |
|
|
| |
|
|
| |
|
| VIRTUAL
| |
|
| BTR ENABLE | |
|
| BIT
| |
|
|
N7:50
| |
|
+----(L)-----+ |
|
15
|
Rung 2:9
|
|
|
|
|
|
| BT
|VIRTUAL
|VIRTUAL
|VIRTUAL
|VIRTUAL
|
| PRECON±
|BTR ENABLE|BTW ENABLE|BTW DONE |BTW ERROR
|
| DITION BIT|BIT
|BIT
|BIT
|BIT
BTW DATA
|
|
B3
N7:50
N7:53
N7:64
N7:64
+COP---------------+
|
|----] [--------]/[--------]/[--------]/[--------]/[|-+-+COPY FILE
+-+-|
|
11
15
15
13
12 | |Source
#N7:10| | |
|
| |Dest
#M0:1.210| | |
|
| |Length
11| | |
|
| +------------------+ | |
|
|
| |
|
|
| |
|
|
| |
|
|
| |
|
| VIRTUAL
| |
|
| BTW ENABLE
| |
|
| BIT
| |
|
|
N7:53
| |
|
+----(L)---------------+ |
|
|
15
| |
|
|
| |
|
|
| |
|
|
| |
|
| BTW
| |
|
| PENDING
| |
|
|
B3
| |
|
+----(L)---------------+ |
|
1
|
Publication 1747-6.22
RIO Block Transfer
7-149
Rung 2:10
Move the virtual BTR control word to the M0 file for the BSN module while a BTR is in progress, and continue
| doing so until the enable, done and error bits are all turned off.
|
|
|
|
VIRTUAL
BTR
|
|
BTR ENABLE
CONTROL
|
|
BIT
BITS
|
|
N7:50
+MOV---------------+ |
|-+----] [-----+------------------------------------------+MOVE
+-|
| |
15
|
|Source
N7:50| |
| |
|
|
0| |
| |
|
|Dest
M0:1.100| |
| |
|
|
*| |
| |
|
+------------------+ |
| |
|
|
| |
|
|
| | VIRTUAL
|
|
| | BTR DONE
|
|
| | BIT
|
|
| |
N7:60
|
|
| +----] [-----+
|
| |
13
|
|
| |
|
|
| |
|
|
| | VIRTUAL
|
|
| | BTR ERROR |
|
| | BIT
|
|
| |
N7:60
|
|
| +----] [-----+
|
|
12
|
Rung 2:11
Move the virual BTW control word to the M0 file for te BSN module while a BTW is in progress, and continue
| doing so until the enable, done and error bits are all turned off.
|
|
|
|
VIRTUAL
BTW
|
|
BTW ENABLE
CONTROL
|
|
BIT
BITS
|
|
N7:53
+MOV---------------+ |
|-+----] [-----+------------------------------------------+MOVE
+-|
| |
15
|
|Source
N7:53| |
| |
|
|
0| |
| |
|
|Dest
M0:1.200| |
| |
|
|
*| |
| |
|
+------------------+ |
| |
|
|
| |
|
|
| | VIRTUAL
|
|
| | BTW DONE
|
|
| | BIT
|
|
| |
N7:64
|
|
| +----] [-----+
|
| |
13
|
|
| |
|
|
| |
|
|
| | VIRTUAL
|
|
| | BTW ERROR |
|
| | BIT
|
|
| |
N7:64
|
|
| +----] [-----+
|
|
12
|
|
|
|-------------------------------------+END+------------------------------------|
|
|
Publication 1747-6.22
7-150
RIO Block Transfer
Bidirectional Alternating Repeating Block Transfer
The following rungs demonstrate a bidirectional alternating repeating
block transfer. Using these rungs ensures the block transfer requests
are executed in the order in which they are sent to the queue. This
example also ensures that the BTR and BTW repeatedly alternate.
The XIO conditions prevent the BTR and BTW from queuing
simultaneously. The BTs continue as long as the ladder rungs are
scanned.
Rung 2:0
Configure the BT operation type, length and RIO address (R, G, S in decimal) at power-up. Bit N7:50/7 must be set to a
|
|
| "1" to indicate a BTR and N7:53/7 must be a logical "0" to indicate a BTW operation.
|
|
|
| POWER±UP
BTR
|
| BIT
CONTROL
|
|
S:1
+COP---------------+
|
|----] [----------------------------------------------+-+COPY FILE
+-+-|
|
15
| |Source
#N7:50| | |
|
| |Dest
#M0:1.100| | |
|
| |Length
3| | |
|
| +------------------+ | |
|
|
| |
|
|
| |
|
|
| |
|
|
BTW
| |
|
|
OPERATION
| |
|
| +COP---------------+ | |
|
+-+COPY FILE
+-+ |
|
|Source
#N7:53|
|
|
|Dest
#M0:1.200|
|
|
|Length
3|
|
|
+------------------+
|
Rung 2:1
| Copy the BTR status area to an integer file only when a BTR is in progress. This status data is then used
|
| throughout the program and will limit the number of M-file accesses.
|
|
|
|
BTR
|
|
PENDING
BTR STATUS
|
|
B3
+COP---------------+ |
|-+----] [-----+------------------------------------------+COPY FILE
+-|
| |
0
|
|Source
#M1:1.100| |
| |
|
|Dest
#N7:60| |
| |
|
|Length
4| |
| |
|
+------------------+ |
| |
|
|
| |
|
|
| |
|
|
| | CHECK BTR |
|
| | STATUS
|
|
| |
B3
|
|
| +----] [-----+
|
|
2
|
Publication 1747-6.22
RIO Block Transfer
7-151
Rung 2:2
Unlatch the bit that continues to check the BTR status. When a BTR is complete, the done or error bit is set. Th
ladder program must then unlatch the enable bit, then wait for the BSN module to turn off the done/error bit befor
|
|
| another BTR to the same M-file location can be initiated. This is one complete BTR cycle.
|
|
VIRTUAL
|
|
BTR DONE
CHECK BTR |
|
BIT
STATUS
|
|
N7:60
B3
|
|-+----]/[-----+-------------------------------------------------------(U)-----|
| |
13
|
2
|
| |
|
|
| |
|
|
| |
|
|
| | BTR ERROR |
|
| | BIT
|
|
| |
N7:60
|
|
| +----]/[-----+
|
|
12
|
Rung 2:3
| Copy the BTW status area to an integer file only when a BTW is in progress. This status data will then be
|
| used throughout the program and will limit the number of M-file accesses.
|
|
|
|
BTW
BTW
|
|
PENDING
STATUS
|
|
B3
+COP---------------+ |
|-+----] [-----+------------------------------------------+COPY FILE
+-|
| |
1
|
|Source
#M1:1.200| |
| |
|
|Dest
#N7:64| |
| |
|
|Length
4| |
| |
|
-+------------------+ |
| |
|
|
| |
|
|
| |
|
|
| | CHECK BTW |
|
| | STATUS
|
|
| |
B3
|
|
| +----] [-----+
|
|
3
|
Rung 2:4
Unlatch the bit that continues to check the BTW status. When a BTW is complete, the done or error bit is set. T
ladder program must then unlatch the enable bit, then wait for the BSN module to turn off the done/error bit befo
|
|
| another BTW to the same M-file location can be initiated. This completes the hand-shake process.
|
|
VIRTUAL
|
|
BTW DONE
CHECK BTW |
|
BIT
STATUS
|
|
N7:64
B3
|
|-+----]/[-----+-------------------------------------------------------(U)-----|
| |
13
|
3
|
| |
|
|
| |
|
|
| | VIRTUAL
|
|
| | BTW ERROR |
|
| | BIT
|
|
| |
N7:64
|
|
| +----]/[-----+
|
|
12
|
Publication 1747-6.22
7-152
RIO Block Transfer
Rung 2:5
When a BTR successfully completes, buffer the BTR data and unlatch both the BTR virtual enable bit and the BTR
|
| pending bit. Also, latch the bit that continues checking the BTR status until the BSN module turns off the donebit.
|
|
| VIRTUAL
|
| BTR DONE
|
| BIT
BTR DATA
|
|
N7:60
+COP---------------+
|
|----] [----------------------------------------------+-+COPY FILE
+-+-|
|
13
| |Source
#M1:1.110| | |
|
| |Dest
#N7:0| | |
|
| |Length
10| | |
|
| +------------------+ | |
|
|
| |
|
|
| |
|
|
| |
|
| BTR
| |
|
| PENDING
| |
|
|
B3
| |
|
+----(U)---------------+ |
|
|
0
| |
|
|
| |
|
|
| |
|
| VIRTUAL
| |
|
| BTR ENABLE
| |
|
| BIT
| |
|
|
N7:50
| |
|
+----(U)---------------+ |
|
|
15
| |
|
|
| |
|
|
| |
|
|
| |
|
|
| |
|
|
| |
|
|
| |
|
| CHECK BTR
| |
|
| STATUS
| |
|
|
B3
| |
|
+----(L)---------------+ |
|
2
|
Rung 2:6
When a BTR unsuccessfully completes, buffer the error code and unlatch the BTR enable bit and the BTR pending
bit. Also, latch the check BTR status bit in order to continue reading the status information from the scanner until it
|
| turns the error bit off, completing the handshake process.
|
|
| BTR ERROR
|
| BIT
|
|
N7:60
+MOV---------------+
|
|----] [----------------------------------------------+-+MOVE
+-+-|
|
12
| |Source
M1:1.103| | |
|
| |
*| | |
|
| |Dest
N7:21| | |
|
| |
0| | |
|
| +------------------+ | |
|
|
| |
|
|
| |
|
|
| |
|
| BTR
| |
|
| PENDING
| |
|
|
B3
| |
|
+----(U)---------------+ |
|
|
0
| |
|
|
| |
|
|
| |
|
| VIRTUAL
| |
|
| BTR ENABLE
| |
|
| BIT
| |
|
|
N7:50
| |
|
+----(U)---------------+ |
|
|
15
| |
|
|
| |
|
|
| |
|
|
| |
|
| CHECK BTR
| |
|
| STATUS
| |
|
|
B3
| |
|
+----(L)---------------+ |
|
2
|
Publication 1747-6.22
RIO Block Transfer
7-153
Rung 2:7
When a BTW successfully or unsuccessfully completes, unlatch the BTW enable bit and the BTW pending bit to
complete a BTW sequence. Also, latch the bit that continues checking the BTW status until the BSN module tur
|
|
| the done/error bit off. In addition, buffer the BTW error code in case an error ocurs.
|
|
VIRTUAL
|
|
BTW DONE
BTW
|
|
BIT
PENDING
|
|
N7:64
B3
|
|-+----] [-----+--------------------------------------+----(U)---------------+-|
| |
13
|
|
1
| |
| |
|
|
| |
| |
|
|
| |
| | VIRTUAL
|
| VIRTUAL
| |
| | BTW ERROR |
| BTW ENABLE
| |
| | BIT
|
| BIT
| |
| |
N7:64
|
|
N7:53
| |
| +----] [-----+
+----(U)---------------+ |
|
12
|
15
| |
|
|
| |
|
|
| |
|
|
| |
|
| CHECK BTW
| |
|
| STATUS
| |
|
|
B3
| |
|
+----(L)---------------+ |
|
|
3
| |
|
|
| |
|
|
| |
|
|
| |
|
|
BTW ERROR
| |
|
|
CODE
| |
|
| +MOV---------------+ | |
|
+-+MOVE
+-+ |
|
|Source
M1:1.203|
|
|
|
*|
|
|
|Dest
N7:22|
|
|
|
0|
|
| Rung 2:8
+------------------+
|
This rung and the next rung toggles between executing a BTR and a BTW.
|
|
|
|
|
|
|
|
|
|
| VIRTUAL
|VIRTUAL
|VIRTUAL
|
|
| BTR ENABLE|BTW ENABLE|BTR DONE |BTR ERROR
BTR
|
| BIT
|BIT
|BIT
|BIT
PENDING
|
|
N7:50
N7:53
N7:60
N7:60
B3
|
|----]/[--------]/[--------]/[--------]/[-----------------------+----(L)-----+-|
|
15
15
13
12
|
0
| |
|
|
| |
|
+++
+++|
|
+++
+++|
|
|
| |
|
|
| |
|
|
| |
|
| VIRTUAL
| |
|
| BTR ENABLE | |
|
| BIT
| |
|
|
N7:50
| |
|
+----(L)-----+ |
|
15
|
Publication 1747-6.22
7-154
RIO Block Transfer
Rung 2:9
|
|
|
|
|
|
|
|
|
|
| VIRTUAL
|VIRTUAL
|VIRTUAL
|VIRTUAL
|
| BTR ENABLE|BTW ENABLE|BTW DONE |BTW ERROR
|
| BIT
|BIT
|BIT
|BIT
BTW DATA
|
|
N7:50
N7:53
N7:64
N7:64
+COP--------------+
|
|----]/[--------]/[--------]/[--------]/[-------------+-+COPY FILE
+-+-|
|
15
15
13
12
| |Source
#N7:10| | |
|
| |Dest
#M0:1.210| | |
|
| |Length
11| | |
|
| +------------------+ | |
|
|
| |
|
|
| |
|
| VIRTUAL
| |
|
| BTW ENABLE
| |
|
| BIT
| |
|
|
N7:53
| |
|
+----(L)---------------+ |
|
|
15
| |
|
|
| |
|
|
| |
|
|
| |
|
| BTW
| |
|
| PENDING
| |
|
|
B3
| |
|
+----(L)---------------+ |
|
1
|
Rung 2:10
Move the virtual BTR control word to the M0 file for the BSN module while a BTR is in progress, and continue
| doing so until the enable, done and error bits are all turned off, completing the handshake process.
|
|
|
|
VIRTUAL
BTR
|
|
BTR ENABLE
CONTROL
|
|
BIT
WORD
|
|
N7:50
+MOV---------------+ |
|-+----] [-----+------------------------------------------+MOVE
+-|
| |
15
|
|Source
N7:50| |
| |
|
|
0| |
| |
|
|Dest
M0:1.100| |
| |
|
|
*| |
| |
|
+------------------+ |
| |
|
|
| |
|
|
| |
|
|
| |
|
|
| | VIRTUAL
|
|
| | BTR DONE
|
|
| | BIT
|
|
| |
N7:60
|
|
| +----] [-----+
|
| |
13
|
|
| |
|
|
| |
|
|
| |
|
|
| | BTR ERROR |
|
| | BIT
|
|
| |
N7:60
|
|
| +----] [-----+
|
|
12
|
Publication 1747-6.22
RIO Block Transfer
7-155
Rung 2:11
Move the virtual BTW control word to the M0 file for the BSN module while a BTR is in progress, and
continue doing so until the enable, done and erroer bits are all turned off, completing the handshake
|
|
| process.
|
|
VIRTUAL
BTW
|
|
BTW ENABLE
CONTROL
|
|
BIT
WORD
|
|
N7:53
+MOV---------------+ |
|-+----] [-----+------------------------------------------+MOVE
+-|
| |
15
|
|Source
N7:53| |
| |
|
|
0| |
| |
|
|Dest
M0:1.200| |
| |
|
|
*| |
| |
|
+------------------+ |
| |
|
|
| |
|
|
| | VIRTUAL
|
|
| | BTW DONE
|
|
| | BIT
|
|
| |
N7:64
|
|
| +----] [-----+
|
| |
13
|
|
| |
|
|
| |
|
|
| | VIRTUAL
|
|
| | BTW ERROR |
|
| | BIT
|
|
| |
N7:64
|
|
| +----] [-----+
|
| Rung 12
|
|
|
|-------------------------------------+END+------------------------------------|
|
|
Publication 1747-6.22
7-156
RIO Block Transfer
Publication 1747-6.22
Chapter
8
Switchover Considerations
When planning programs for the SLC 500 backup system, you must
first consider that the program scans of the two processors are not
synchronized. This means that the program in the primary processor
is not executing the exact same instruction at the same time as the
program in the secondary processor. In addition, you must consider:
• timing
• divergence
• I/O forces
• Data Highway Plus switching
• remote I/O switching
• special sections of the data table
• data integrity
This chapter describes the switchover considerations listed above, as
well as switchover diagnostic. It also describes how to detect a
possible fault in the secondary module in order to avoid switchover
problems in the backup system.
Timing Requirements
Switchover from one processor to another takes less than 50 ms.
Note:
Total switchover time is a factor of the 1747-BSN
module delay and one program scan of the secondary
processor. The time required for one program scan is
added because the secondary processor technically has
not assumed control until it has completed one scan of
its program and remote I/O after a switchover.
When a failure occurs in the primary system, the remote outputs
remain in the state set by the primary processor prior to switchover.
while the secondary processor assumes control of the process.
Important: You must program the backup system to account for the
following time requirements:
• input signal update time
• time-out on remote I/O link
• data table transfer time over the HSSL
Publication 1747-6.22
8-158
Switchover Considerations
Input Signal Update Time
It is possible for the secondary processor to read different input
conditions immediately after the switchover. To avoid a sudden
change in the outputs during switchover, all of the input signals must
be present for an amount of time equal to the sum of the following:
• program scan
• I/O scan
• input module delay
• 1747-BSN switchover time
If these conditions are not met, outputs may be assigned different
states in the two processors. This can cause a sudden change of
operation when switchover occurs.
Time-out on Remote I/O Link
The remote I/O chassis are updated one at a time. The total remote
I/O update is 10 ms per chassis (typical) at 57.6K baud.
To keep the I/O chassis from faulting and losing control of the I/O,
the switchover in the remote I/O link is accomplished in less than 50
ms. (The remote I/O link switchover starts when the remote I/O relays
in the primary 1747-BSN module open and ends when the remote I/O
relays in the secondary 1747-BSN module close.)
This switchover time is less than the 100 ms for the remote I/O
adapter watchdog timeout. This permits continuous control of the I/O
from the backup system processors.
Data Table Transfer Time on HSSL
Data table transfer time refers to the amount of time it takes to
transfer critical data from the primary system to the secondary
system. This time is dependent on the amount of data to be sent
between the two systems, the number of remote I/O chassis, and the
number of remote I/O block transfers that are being executed.
The 1747-BSN module is capable of transferring up to 100K Word
per second (10 msec per K Word). This data rate is 2M bits/second.
Publication 1747-6.22
Switchover Considerations
Divergence
8-159
The synchronization of program execution in both processors limits
divergence between the two systems by ensuring that the resulting
output data in both processors is always identical.
Because the program scans of the processors are not synchronized, it
is possible that the two separate systems read the same input at
different times. Eventually, different input values are read, thus
different decisions are made and the internal states of the two systems
diverge. If the two systems diverge, the secondary system generates a
“bump” when it takes control over the process.The “bump” time is a
function of how fast the inputs of the machine or the process are
changing, as well the amount of data to send between the primary and
secondary units.
One possible method to avoid or reduce the bump is the “loosely
synchronized backup” approach. This method requires special user
programming techniques. With this approach, primary and the
secondary SLC 5/0x execute the same program and are synchronized
at a waiting point once per program scan.
To limit divergence, we recommend that the primary and secondary
processors execute the same programs.
Forcing I/O
Backup communication functions provided by the SLC 500 backup
system do not transfer the force tables from the primary to the
secondary processors. Therefore, if the SLC 500 backup system has
forces set in the primary processor, the forces do not transfer to the
secondary processor. For this situation, if a switchover occurs, the
secondary processor becomes active, but the forces set in the original
primary processor are not carried over.
!
ATTENTION: Set the forces in the secondary
processor first. Then set the forces in the primary
processor. Likewise, when removing forces, remove
forces in the secondary processor before removing the
forces in the primary processor. If a switchover occurs
and forces were not set in the secondary processor first,
the secondary processor does not recognize the forcedon input or output.
Publication 1747-6.22
8-160
Switchover Considerations
Data Highway Plus
Switching
The user can aggregate a 1747-BSN with the communication channel
configured as DH+ network to the system. In this situation, both
primary and secondary processors must be set to the same node
address. During normal operation, the other equipment in the DH+
network recognize the primary processor in its real node address and
the secondary processor in the node address which follows.
When a switchover occurs, the new primary SLC 5/04 assumes its
real node address in the DH+ network and the new secondary
processor assumes the next node address.
The DH+ smart switch is designed to provide remote programming
capability for the secondary processor with the following limitations:
• The secondary SLC 5/04 can be accessed only by one station in
the primary link each time. If more than one station tries to
access the secondary SLC 5/04 at the same time, the
communication performance with this node is degraded
significantly.
• The secondary SLC 5/04 only communicates with the secondary
1747-BSN. If a third device is connected to this link, it will not
work properly.
• The secondary SLC 5/04 only answers to commands. It cannot
start a MSG instruction.
• The primary SLC 5/04 cannot send messages through DH+ to
the secondary SLC 5/04.
The secondary processor can be programmed through an access-point
address which corresponds to the processor node address plus one
(n+1). The secondary processor becomes part of the link only after a
switchover. If the real node address is 5, the primary is the node 5 and
the secondary is node 6. If the real node address is 77, the primary is
node 77 and the secondary is node 0.
It is possible that the primary processor could have possession of the
token during a switchover from the primary to the secondary
processor. In this case, the token could be lost even though passage of
the token from one station to the next is done as quickly as possible.
If the token is lost, all the stations on the link have an internal
watchdog timeout (250 ms) and the nodes assume the token is lost.
The other stations on the link initiate a token recovery procedure
which includes:
• recreating the active node table
• rebuilding the link, including the new primary processor
• ensuring that one node gains control of the link
Publication 1747-6.22
Switchover Considerations
8-161
During this time, while the stations reconstruct the link,
communication is interrupted. The length of the interruption depends
on the number of stations involved in the link and the number of
messages received and/or transmitted. This time is typically less than
50 ms per station.
However, while the link is rebuilding, messages can collide,
increasing the amount of time needed to reconstruct the link. As a
result, on a typical DH+ link with 6 - 10 stations, the impact on the
link due to switchover could be the loss of communication for as
much as 1 - 3 seconds.
DH+ switching occurs whenever there is a transfer of control from
the primary to the secondary processor. The switchover could result
from a power failure or because of other system failures. The table
below shows what can happen to the link if the token is lost.
Important: Note that when a transfer of control from the primary to
the secondary processor occurs, the processor that is
now primary has the node address of n on the DH+ link.
The processor that is now secondary has the node
address of n +1.
If the new primary is:
the following could occur
Message packet from another
station disrupted
The source station turns on error bit in its MSG instruction You
provide programming at the source station to regain
synchronization with the receiving station. You can do this by
monitoring the message instruction error bit as a condition for
retransmitting the message.
Reply packet disrupted
Same as above
Token pass packet disrupted
The DH+ link times out and must rebuild. (250ms watchdog timeout)
+ (50 ms x number of stations on the link).
New primary processor takes
the token
The new primary processor has nothing in its active node table. The
DH+ link times out and must rebuild. (250 ms watchdog timeout) +
(50 ms x number of stations on the link).
New primary processor receives
a message from another station
The link continues working normally.
Polling the link
Listening to the link
causing this result
Important: In the recommended configuration, set both SLC 500
processors to the same station address. The backup
modules permit only one of the two processors to be
connected to the DH+ at a time. In this configuration,
remote PLC processors and operator stations
communicate to the processor that currently has primary
status. Note that the secondary processor can also be
accessed through the primary SLC 500 processor node
address plus one (n+1).
Publication 1747-6.22
8-162
Switchover Considerations
Remote I/O Switching
The communications protocol for the remote I/O link is a masterslave half-duplex type. This means that the master station (processor)
sends a command message addressed to a slave (remote I/O adapter),
and the slave responds with a reply message addressed to the master.
This is also called two-way alternating communication.
When the communication channel is configured as RIO, the primary
1747-BSN emulates a Series B 1747-SN module with all the features
that it provides to the user. Additionally, the secondary 1747-BSN
“spies” on the RIO link to acquire all the input data and use it to
emulate the 1747-SN functionality to the secondary SLC 5/0x.
In the secondary system, the 1747-BSN simulates the entire scanner
operation to the secondary SLC 5/04 with the following
characteristics:
• Real discrete input data is acquired by the secondary BSN from
the RIO network and transferred to the secondary SLC 5/04
through the input (I) file.
• Real BTR input data is acquired by the secondary BSN from the
RIO network and transferred to the secondary SLC 5/04 through
the M1 file. All the timing necessary for doing a BTR command
in the SLC 5/04 is simulated by the secondary BSN.
• The discrete output data sent by the secondary SLC 5/04 through
the output (O) file is stored in the output image table for using in
case of a switchover.
• The BTW output data sent by the secondary SLC 5/04 through
the M0 file is stored into the secondary BSN and all the timing
for the BTW operation is simulated by the secondary BSN.
• In case of RIO communication errors seen by the BSN in the
primary system (remote rack errors, BTR or BTW errors, etc.),
the secondary BSN simulates the same errors for the secondary
SLC 5/04. This simulation is done in order to assure that the
secondary SLC 5/04 knows the real status of the remote devices.
• If a switchover occurs, all the input and output data inside the
BSN is ready for the operation as the new primary scanner.
When the backup system is operating properly, the relays of the
primary 1747-BSN are closed and the relays of the secondary
1747-BSN are open. Should a failure occur in the primary system, the
relays of the primary 1747-BSN module open and the relays in the
secondary 1747-BSN module close.
Important: The smart-switch interface communicates with the
secondary processor only when the 1747-BSN module
belongs to the secondary system. When the module is
primary, the smart switch only monitors the remote I/O
link to obtain input/output data.
Publication 1747-6.22
Switchover Considerations
8-163
The smart switch interface also includes a carrier-detect circuit to
monitor the activity of the remote I/O link. The purpose of this circuit
is to detect an idle remote I/O link before the secondary relays are
closed. This guarantees that the former primary system was really
disconnected from the link and the remote adapters have completed
their response to the last poll from the primary scanner.
In addition, in the event of an HSSL break, the carrier-detect circuit
prevents the secondary system from taking control of the link along
with the primary system. The figure below shows the block diagram
of the remote I/O switch.
HSSL link
to primary
1747-BSN
1747-BSN
Copy of remote
I/O data
including block
transfers
Remote I/O link
Smart-switch interface
Secondary processor
I/O scanner/adaptor
Carrier-defect circuit
Publication 1747-6.22
8-164
Switchover Considerations
Publication 1747-6.22
Chapter
9
Programming Techniques
Chapter Objectives
Read this chapter to familiarize yourself with techniques used to
program your SLC 500 backup system.
In this chapter we describe:
• how to get started with a program to transfer data table values
• two methods you can use to program the SLC 500 backup
system to transfer data table values
• the behavior of specific instructions when used in your
application program, and give you suggestions for dealing with
these instructions.
Getting Started
The 1747-BSN modules control switchover and transfer remote I/O
data without additional programming. However, if you want to
transfer data table values from the primary to the secondary
processor, you must provide a ladder program. The following figure
shows the minimum ladder programming you must provide to
transfer 2 Kwords of the data table between the two 1747-BSN
modules, and to provide 1747-BSN module status. This program
constantly transfers data as fast as possible. 2K words is the
maximum per BSN module on the HSSL. With no local I/O, a 5/02 or
later processor supports up to 8 BSN modules for a maximum of 16K
words of retentive data transfer from primary processor to secondary
processor. Refer to the following section, Data Transfer Schemes, for
alternative approaches. You need to put this program in both
processors.
Publication 1747-6.22
9-166
Programming Techniques
Program File 2
0000
0001
0002
Copy the System Status Word (SSW) and the Module Status Word (MSW) from the BSN module to internal storage words in the SLC processor every program scan. Bits 6 and
7 of the SSW word indicate whether this processor is Primary or Secondary at any given time. Bits 6 and 14 of the MSW word indicate whether the local or remote system is in
the Primary or secondary Mode respectively. Virtual SSW and MSW words/bits are used to minimize M-file transfers, thereby minimizes their effects on the program scan time.
COP
Copy File
Source #M1:1.3400
Dest
#B3:1
Length
2
This rung executes subroutine number 3 when the Local System is in the Secondary Mode. Subroutine 3 contains the logic which must be executed to properly transfer HSSL
data from the Secondary BSN Module to the Secondary SLC Processor.
Virtual SSW Bit:
when = 1, indicates
Virtual MSW Bit:
Virtual MSW Bit:
the local system is
when = 1, indicates
when = 1, indicates
in the Secondary
the Local System is
the Remote System is
Mode
in the Primary Mode
in the Primary Mode
B3:1
B3:2
B3:2
JSR
Jump To Subroutine
7
6
14
SBR File Number
U:3
This rung executes subroutine number 4 when the Local System is in the Primary Mode. Subroutine 4 contains the logic which must be executed to properly transfer HSSL data
from the Primary SLC Processor to the Primary BSN Module.
Virtual SSW Bit:
Virtual MSW Bit:
Virtual MSW Bit:
when = 1, the Local
when = 1, indicates
when = 1, indicates
System is in the
the Local System is
the Remote System is
Primary Mode
in the Primary Mode
in the Primary Mode
B3:1
B3:2
B3:2
JSR
Jump To Subroutine
6
6
14
SBR File Number
U:4
0003
Publication 1747-6.22
END
Programming Techniques
9-167
Program File 3
0000
0001
The following rungs are meant to be executed only when this processor/BSN is in the Backup Mode. When it is acting as the Bac kup Processor, this rung copies the DTSW
(Data Table Status Word) to an internal storage word within the SLC processor, B3:3 in this example.
Virtual & Actual
DTSW Words
MOV
Move
Source
M1:1.3410
?<
Dest
B3:3
0000000000000000<
This rung copies the "new" Data Block #1 data from the secondary BSN to a file within the secondary processor. When the COPy is complete, the DTHW (Data Table
handshake Word) bit for Data Block #1 (B3:4/0 = M0:1.3411/0) must be set to inform the secondary BSN that the secondary processor has received the latest Data Block and is
now ready for the next block of data via Data Block #1.
Virtual DTSW Bit for
Data Block #1
B3:3
COP
Copy File
0
Source #M1:1.3500
Dest
#N12:0
Length
128
Virtual DTHW Bit for
Data Block #1
B3:4
0
0002
This rung copies the "new" Data Block #2 data from the secondary BSN to a file within the secondary processor. When the COPy is complete, the DTHW (Data Table
handshake Word) bit for Data Block #2 (B3:4/1 = M0:1.3411/1) must be set to inform the secondary BSN that the secondary processor has received the latest Data Block and is
now ready for the next block of data via Data Block #2.
Virtual DTSW Bit for
Data Block #2
B3:3
COP
Copy File
1
Source #M1:1.3628
Dest
#N12:128
Length
128
Virtual DTHW Bit for
Data Block #2
B3:4
1
0003
This rung copies the "new" Data Block #3 data from the secondary BSN to a file within the secondary processor. When the COPy is complete, the DTHW (Data Table
handshake Word) bit for Data Block #3 (B3:4/2 = M0:1.3411/2) must be set to inform the secondary BSN that the secondary processor has received the latest Data Block and is
now ready for the next block of data via Data Block #3.
Virtual DTSW Bit for
Data Block #3
B3:3
COP
Copy File
2
Source #M1:1.3756
Dest
#N13:0
Length
128
Virtual DTHW Bit for
Data Block #3
B3:4
2
0004
This rung copies the "new" Data Block #4 data from the secondary BSN to a file within the secondary processor. When the COPy is complete, the DTHW (Data Table
handshake Word) bit for Data Block #4 (B3:4/3 = M0:1.3411/3) must be set to inform the secondary BSN that the secondary processor has received the latest Data Block and is
now ready for the next block of data via Data Block #4.
Virtual DTSW Bit for
Data Block #4
B3:3
COP
Copy File
3
Source #M1:1.3884
Dest
#N13:128
Length
128
Virtual DTHW Bit for
Data Block #4
B3:4
3
Publication 1747-6.22
9-168
0005
Programming Techniques
This rung copies the "new" Data Block #5 data from the secondary BSN to a file within the secondary processor. When the COPy is complete, the DTHW (Data Table
handshake Word) bit for Data Block #5 (B3:4/4 = M0:1.3411/4) must be set to inform the secondary BSN that the secondary processor has received the latest Data Block and is
now ready for the next block of data via Data Block #5.
Virtual DTSW Bit for
Data Block #5
B3:3
COP
Copy File
4
Source #M1:1.4012
Dest
#N14:0
Length
128
Virtual DTHW Bit for
Data Block #5
B3:4
4
0006
This rung copies the "new" Data Block #6 data from the secondary BSN to a file within the secondary processor. When the COPy is complete, the DTHW (Data Table
handshake Word) bit for Data Block #6 (B3:4/5 = M0:1.3411/5) must be set to inform the secondary BSN that the secondary processor has received the latest Data Block and is
now ready for the next block of data via Data Block #6.
Virtual DTSW Bit for
Data Block #6
B3:3
COP
Copy File
5
Source #M1:1.4140
Dest
#N14:128
Length
128
Virtual DTHW Bit for
Data Block #6
B3:4
5
0007
This rung copies the "new" Data Block #7 data from the secondary BSN to a file within the secondary processor. When the COPy is complete, the DTHW (Data Table
handshake Word) bit for Data Block #7 (B3:4/6 = M0:1.3411/6) must be set to inform the secondary BSN that the secondary processor has received the latest Data Block and is
now ready for the next block of data via Data Block #7.
Virtual DTSW Bit for
Data Block #7
B3:3
COP
Copy File
6
Source #M1:1.4268
Dest
#N15:0
Length
128
Virtual DTHW Bit for
Data Block #7
B3:4
6
0008
This rung copies the "new" Data Block #8 data from the secondary BSN to a file within the secondary processor. When the COPy is complete, the DTHW (Data Table
handshake Word) bit for Data Block #8 (B3:4/7 = M0:1.3411/7) must be set to inform the secondary BSN that the secondary processor has received the latest Data Block and is
now ready for the next block of data via Data Block #8.
Virtual DTSW Bit for
Data Block #8
B3:3
COP
Copy File
7
Source #M1:1.4396
Dest
#N15:128
Length
128
Virtual DTHW Bit for
Data Block #8
B3:4
7
Publication 1747-6.22
Programming Techniques
0009
9-169
This rung copies the "new" Data Block #9 data from the secondary BSN to a file within the secondary processor. When the COPy is complete, the DTHW (Data Table
handshake Word) bit for Data Block #9 (B3:4/8 = M0:1.3411/8) must be set to inform the secondary BSN that the secondary processor has received the latest Data Block and is
now ready for the next block of data via Data Block #9.
Virtual DTSW Bit for
Data Block #9
B3:3
COP
Copy File
8
Source #M1:1.4524
Dest
#N16:0
Length
128
Virtual DTHW Bit for
Data Block #9
B3:4
8
0010
This rung copies the "new" Data Block #10 data from the secondary BSN to a file within the secondary processor. When the COPy is complete, the DTHW (Data Table
handshake Word) bit for Data Block #10 (B3:4/9 = M0:1.3411/9) must be set to inform the secondary BSN that the secondary processor has received the latest Data Block and
is now ready for the next block of data via Data Block #10.
Virtual DTSW Bit for
Data Block #10
B3:3
COP
Copy File
9
Source #M1:1.4652
Dest
#N16:128
Length
128
Virtual DTHW Bit for
Data Block #10
B3:4
9
0011
This rung copies the "new" Data Block #11 data from the secondary BSN to a file within the secondary processor. When the COPy is complete, the DTHW (Data Table
handshake Word) bit for Data Block #11 (B3:4/10 = M0:1.3411/10) must be set to inform the secondary BSN that the secondary processor has received the latest Data Block
and is now ready for the next block of data via Data Block #11.
Virtual DTSW Bit for
Data Block #11
B3:3
COP
Copy File
10
Source #M1:1.4780
Dest
#N17:0
Length
128
Virtual DTHW Bit for
Data Block #11
B3:4
10
0012
This rung copies the "new" Data Block #12 data from the secondary BSN to a file within the secondary processor. When the COPy is complete, the DTHW (Data Table
handshake Word) bit for Data Block #12 (B3:4/11 = M0:1.3411/11) must be set to inform the secondary BSN that the secondary processor has received the latest Data Block
and is now ready for the next block of data via Data Block #12.
Virtual DTSW Bit for
Data Block #12
B3:3
COP
Copy File
11
Source #M1:1.4908
Dest
#N17:128
Length
128
Virtual DTHW Bit for
Data Block #12
B3:4
11
Publication 1747-6.22
9-170
0013
Programming Techniques
This rung copies the "new" Data Block #13 data from the secondary BSN to a file within the secondary processor. When the COPy is complete, the DTHW (Data Table
handshake Word) bit for Data Block #13 (B3:4/12 = M0:1.3411/12) must be set to inform the secondary BSN that the secondary processor has received the latest Data Block
and is now ready for the next block of data via Data Block #13.
Virtual DTSW Bit for
Data Block #13
B3:3
COP
Copy File
12
Source #M1:1.5036
Dest
#N18:0
Length
128
Virtual DTHW Bit for
Data Block #13
B3:4
12
0014
This rung copies the "new" Data Block #14 data from the secondary BSN to a file within the secondary processor. When the COPy is complete, the DTHW (Data Table
handshake Word) bit for Data Block #14 (B3:4/13 = M0:1.3411/13) must be set to inform the secondary BSN that the secondary processor has received the latest Data Block
and is now ready for the next block of data via Data Block #14.
Virtual DTSW Bit for
Data Block #14
B3:3
COP
Copy File
13
Source #M1:1.5164
Dest
#N18:128
Length
128
Virtual DTHW Bit for
Data Block #14
B3:4
13
0015
This rung copies the "new" Data Block #15 data from the secondary BSN to a file within the secondary processor. When the COPy is complete, the DTHW (Data Table
handshake Word) bit for Data Block #15 (B3:4/14 = M0:1.3411/14) must be set to inform the secondary BSN that the secondary processor has received the latest Data Block
and is now ready for the next block of data via Data Block #15.
Virtual DTSW Bit for
Data Block #15
B3:3
COP
Copy File
14
Source #M1:1.5292
Dest
#N19:0
Length
128
Virtual DTHW Bit for
Data Block #15
B3:4
14
0016
This rung copies the "new" Data Block #16 data from the secondary BSN to a file within the secondary processor. When the COPy is complete, the DTHW (Data Table
handshake Word) bit for Data Block #16 (B3:4/15 = M0:1.3411/15) must be set to inform the secondary BSN that the secondary processor has received the latest Data Block
and is now ready for the next block of data via Data Block #16.
Virtual DTSW Bit for
Data Block #16
B3:3
COP
Copy File
15
Source #M1:1.5420
Dest
#N19:128
Length
128
Virtual DTHW Bit for
Data Block #16
B3:4
15
Publication 1747-6.22
Programming Techniques
0017
0018
9-171
This rung copies the Virtual DTHW word (B3:4) to the actual DTHW word (M0:1.3411) located in the 1747-BSN module. M-file accesses are interrupts to the processor and
using virtual words minimizes M-file accesses and therefore minimizes the effects of these transfers on the ladder program scan time.
Virtual & Actual
DTHW Words
MOV
Move
Source
B3:4
0000000000000000<
Dest
M0:1.3411
?<
END
Publication 1747-6.22
9-172
Programming Techniques
Program File 4
0000
The following rungs are meant to be executed only when this processor/BSN is in the Primary Mode. When it is acting as the Primary Processor, this rung copies the DTCW
and DTSW words to internal storage words within the SLC processor, B3:5 and B3:6 respectively, for this example.
Virtual & Actual
DTCW Words
MOV
Move
Source
M0:1.3410
?<
Dest
B3:5
0000000000000000<
Virtual & Actual
DTSW Words
MOV
Move
Source
M1:1.3410
?<
Dest
B3:6
0000000000000000<
0001
This rung monitors the DTCW and DTSW bits for Data Block #1. When a transfer of data using Data Block #1 is not in progress, copy up to 128 words to the appropriate
M-file location for Data Block #1 in the BSN module.
Virtual DTCW Bit for
Virtual DTSW Bit for
Data Block #1
Data Block #1
B3:5
B3:6
COP
Copy File
0
0
Source
#N13:0
Dest
#M0:1.3500
Length
128
Virtual DTCW Bit for
Data Block #1
B3:7
L
0
0002
0003
Unlatch the virtual DTCW bit for Data Block #1 when the comparable virtual DTSW bit is set by the BSN module to indicate that it has received the last data via data Block
#1. when B3:7/0 has been unlatched, the BSN module is ready for the next data transfer via Data Block #1.
Virtual DTSW Bit for
Virtual DTCW Bit for
Data Block #1
Data Block #1
B3:6
B3:7
U
0
0
This rung monitors the DTCW and DTSW bits for Data Block #2. When a transfer of data using Data Block #2 is not in progress, copy up to 128 words to the appropriate
M-file location for Data Block #2 in the BSN module.
Virtual DTCW Bit for
Virtual DTSW Bit for
Data Block #2
Data Block #2
B3:5
B3:6
COP
Copy File
1
1
Source
#N13:128
Dest
#M0:1.3628
Length
128
Virtual DTCW Bit for
Data Block #2
B3:7
L
1
0004
Unlatch the virtual DTCW bit for Data Block #2 when the comparable virtual DTSW bit is set by the BSN module to indicate that it has received the last data via data Block
#2. when B3:7/1 has been unlatched, the BSN module is ready for the next data transfer via Data Block #2.
Virtual DTSW Bit for
Virtual DTCW Bit for
Data Block #2
Data Block #2
B3:6
B3:7
U
1
1
Publication 1747-6.22
Programming Techniques
0005
9-173
This rung monitors the DTCW and DTSW bits for Data Block #3. When a transfer of data using Data Block #3 is not in progress, co py up to 128 words to the appropriate
M-file location for Data Block #3 in the BSN module.
B3:5
B3:6
COP
Copy File
2
2
Source
#N14:0
Dest
#M0:1.3756
Length
128
B3:7
L
2
0006
0007
Unlatch the virtual DTCW bit for Data Block #3 when the comparable virtual DTSW bit is set by the BSN module to indicate that it has received the last data via data Block
#3. when B3:7/2 has been unlatched, the BSN module is ready for the next data transfer via Data Block #3.
B3:6
B3:7
U
2
2
This rung monitors the DTCW and DTSW bits for Data Block #4. When a transfer of data using Data Block #4 is not in progress, copy up to 128 words to the appropriate
M-file location for Data Block #4 in the BSN module.
B3:5
B3:6
COP
Copy File
3
3
Source
#N14:128
Dest
#M0:1.3884
Length
128
B3:7
L
3
0008
0009
Unlatch the virtual DTCW bit for Data Block #4 when the comparable virtual DTSW bit is set by the BSN module to indicate that it has received the last data via data Block
#4. when B3:7/3 has been unlatched, the BSN module is ready for the next data transfer via Data Block #4.
B3:6
B3:7
U
3
3
This rung monitors the DTCW and DTSW bits for Data Block #5. When a transfer of data using Data Block #5 is not in progress, copy up to 128 words to the appropriate
M-file location for Data Block #5 in the BSN module.
B3:5
B3:6
COP
Copy File
4
4
Source
#N15:0
Dest
#M0:1.4012
Length
128
B3:7
L
4
0010
0011
Unlatch the virtual DTCW bit for Data Block #5 when the comparable virtual DTSW bit is set by the BSN module to indicate that it has received the last data via data Block
#5. when B3:7/4 has been unlatched, the BSN module is ready for the next data transfer via Data Block #5.
B3:6
B3:7
U
4
4
This rung monitors the DTCW and DTSW bits for Data Block #6. When a transfer of data using Data Block #6 is not in progress, copy up to 128 words to the appropriate
M-file location for Data Block #6 in the BSN module.
B3:5
B3:6
COP
Copy File
5
5
Source
#N15:128
Dest
#M0:1.4140
Length
128
B3:7
L
5
0012
Unlatch the virtual DTCW bit for Data Block #6 when the comparable virtual DTSW bit is set by the BSN module to indicate that it has received the last data via data Block
#6. when B3:7/5 has been unlatched, the BSN module is ready for the next data transfer via Data Block #6.
B3:6
B3:7
U
5
5
Publication 1747-6.22
9-174
Programming Techniques
-
0013
This rung monitors the DTCW and DTSW bits for Data Block #7. When a transfer of data using Data Block #7 is not in progress, copy up to 128 words to the appropriate
M-file location for Data Block #7 in the BSN module.
B3:5
B3:6
COP
Copy File
6
6
Source
#N16:0
Dest
#M0:1.4268
Length
128
B3:7
L
6
0014
0015
Unlatch the virtual DTCW bit for Data Block #7 when the comparable virtual DTSW bit is set by the BSN module to indicate that it has received the last data via data Block
#7. when B3:7/6 has been unlatched, the BSN module is ready for the next data transfer via Data Block #7.
B3:6
B3:7
U
6
6
This rung monitors the DTCW and DTSW bits for Data Block #8. When a transfer of data using Data Block #8 is not in progress, copy up to 128 words to the appropriate
M-file location for Data Block #8 in the BSN module.
B3:5
B3:6
COP
Copy File
7
7
Source
#N16:128
Dest
#M0:1.4396
Length
128
B3:7
L
7
0016
0017
Unlatch the virtual DTCW bit for Data Block #8 when the comparable virtual DTSW bit is set by the BSN module to indicate that it has received the last data via data Block
#8. when B3:7/7 has been unlatched, the BSN module is ready for the next data transfer via Data Block #8.
B3:6
B3:11
U
7
7
This rung monitors the DTCW and DTSW bits for Data Block #9. When a transfer of data using Data Block #9 is not in progress, copy up to 128 words to the appropriate
M-file location for Data Block #9 in the BSN module.
B3:5
B3:6
COP
Copy File
8
8
Source
#N17:0
Dest
#M0:1.4524
Length
128
B3:7
L
8
0018
0019
Unlatch the virtual DTCW bit for Data Block #9 when the comparable virtual DTSW bit is set by the BSN module to indicate that it has received the last data via data Block
#9. when B3:7/8 has been unlatched, the BSN module is ready for the next data transfer via Data Block #9.
B3:6
B3:7
U
8
8
This rung monitors the DTCW and DTSW bits for Data Block #10. When a transfer of data using Data Block #10 is not in progress, copy up to 128 words to the appropriate
M-file location for Data Block #10 in the BSN module.
B3:5
B3:6
COP
Copy File
9
9
Source
#N17:128
Dest
#M0:1.4652
Length
128
B3:7
L
9
0020
Unlatch the virtual DTCW bit for Data Block #10 when the comparable virtual DTSW bit is set by the BSN module to indicate that it has received the last data via data Block
#10. when B3:7/9 has been unlatched, the BSN module is ready for the next data transfer via Data Block #10.
B3:6
B3:7
U
9
9
Publication 1747-6.22
Programming Techniques
0021
9-175
This rung monitors the DTCW and DTSW bits for Data Block #11. When a transfer of data using Data Block #11 is not in progress, copy up to 128 words to the appropriate
M-file location for Data Block #11 in the BSN module.
B3:5
B3:6
COP
Copy File
10
10
Source
#N18:0
Dest
#M0:1.4780
Length
128
B3:7
L
10
0022
0023
Unlatch the virtual DTCW bit for Data Block #11 when the comparable virtual DTSW bit is set by the BSN module to indicate that it has received the last data via data Block
#11. when B3:7/10 has been unlatched, the BSN module is ready for the next data transfer via Data Block #11.
B3:6
B3:7
U
10
10
This rung monitors the DTCW and DTSW bits for Data Block #12. When a transfer of data using Data Block #12 is not in progress, copy up to 128 words to the appropriate
M-file location for Data Block #12 in the BSN module.
B3:5
B3:6
COP
Copy File
11
11
Source
#N18:128
Dest
#M0:1.4908
Length
128
B3:7
L
11
0024
0025
Unlatch the virtual DTCW bit for Data Block #12 when the comparable virtual DTSW bit is set by the BSN module to indicate that it has received the last data via data Block
#12. when B3:7/11 has been unlatched, the BSN module is ready for the next data transfer via Data Block #12.
B3:6
B3:7
U
11
11
This rung monitors the DTCW and DTSW bits for Data Block #13. When a transfer of data using Data Block #13 is not in progress, copy up to 128 words to the appropriate
M-file location for Data Block #13 in the BSN module.
B3:5
B3:6
COP
Copy File
12
12
Source
#N19:0
Dest
#M0:1.5036
Length
128
B3:7
L
12
0026
0027
Unlatch the virtual DTCW bit for Data Block #13 when the comparable virtual DTSW bit is set by the BSN module to indicate that it has received the last data via data Block
#13. when B3:7/12 has been unlatched, the BSN module is ready for the next data transfer via Data Block #13.
B3:6
B3:7
U
12
12
This rung monitors the DTCW and DTSW bits for Data Block #14. When a transfer of data using Data Block #14 is not in progress, copy up to 128 words to the appropriate
M-file location for Data Block #14 in the BSN module.
B3:5
B3:6
COP
Copy File
13
13
Source
#N19:128
Dest
#M0:1.5164
Length
128
B3:7
L
13
0028
Unlatch the virtual DTCW bit for Data Block #14 when the comparable virtual DTSW bit is set by the BSN module to indicate that it has received the last data via data Block
#14. when B3:7/13 has been unlatched, the BSN module is ready for the next data transfer via Data Block #14.
B3:6
B3:7
U
13
13
Publication 1747-6.22
9-176
Programming Techniques
-
0029
This rung monitors the DTCW and DTSW bits for Data Block #15. When a transfer of data using Data Block #15 is not in progress, copy up to 128 words to the appropriate
M-file location for Data Block #15 in the BSN module.
B3:5
B3:6
COP
Copy File
14
14
Source
#N20:0
Dest
#M0:1.5292
Length
128
B3:7
L
14
0030
0031
Unlatch the virtual DTCW bit for Data Block #15 when the comparable virtual DTSW bit is set by the BSN module to indicate that it has received the last data via data Block
#15. when B3:714 has been unlatched, the BSN module is ready for the next data transfer via Data Block #15.
B3:6
B3:7
U
14
14
This rung monitors the DTCW and DTSW bits for Data Block #16. When a transfer of data using Data Block #16 is not in progress, copy up to 128 words to the appropriate
M-file location for Data Block #16 in the BSN module.
B3:5
B3:6
COP
Copy File
15
15
Source
#N20:128
Dest
#M0:1.5420
Length
128
B3:7
L
15
0032
0033
Unlatch the virtual DTCW bit for Data Block #16 when the comparable virtual DTSW bit is set by the BSN module to indicate that it has received the last data via data Block
#16. when B3:7/15 has been unlatched, the BSN module is ready for the next data transfer via Data Block #16.
B3:6
B3:7
U
15
15
This rung copies the Virtual DTCW word (B3:7) to the actual DTCW word (M0:1.3410) located in the 1747-BSN module. M-file accesses are interrupts to the processor and
using virtual words minimizes M-file accesses and therefore minimizes the effects of these transfers on the ladder program scan time.
Virtual & Actual
DTCW Word
MOV
Move
Source
B3:7
0000000000000000<
Dest
M0:1.3410
?<
0034
Publication 1747-6.22
END
Programming Techniques
Data Transfer Schemes
9-177
This manual provides two possible methods for transferring data from
a primary to a secondary processor
The first programming alternative transfers a data block per program
scan. With this method, the application program defines the order that
is used for transferring the data blocks. This programming scheme
results in a lower overall data transfer throughput and has a minimal
impact in the program scan time.
The second programming alternative transfers each data block at its
maximum possible throughput. This method is shown in the ladder
program example earlier in this chapter. With this method, the
application program tries to make all the possible data transfers in
each program scan, according to the DTSW bits.
Data Transfer Method 1
With this alternative, the primary SLC 5/0x uses a counter to select
the 1747-BSN module to which the data block is sent. The primary
SLC 5/0x also uses a second counter to select which block is sent to
the BSN module. If the system has only one 1747-BSN, only one
counter is used. The following procedure is used in the primary SLC
5/0x for sending the data blocks:
1. Read all the DTSWs from the respective 1747-BSN modules.
2. Clear all DTCW bits corresponding to the data blocks that are
marked as already transferred to secondary system in the
DTSWs. Send the data blocks to their respective 1747-BSN
modules.
3. Look at the counters and DTSWs to check whether the next data
block that is sent is able to receive new data from the SLC 5/0x:
• If the next data block is not able to receive new data, increment
the data block counter and check whether it is time to select the
next 1747-BSN module.
• If the next data block is able to receive new data, increment the
module counter, restart the data block counter and repeat step 3.
(Repeat this step until all possible data blocks are scanned.)
4. Copy the data block from the SLC 5/0x to the 1747-BSN module
indicated by the module counter.
5. Advise the 1747-BSN module that the data block is ready
through the DTCW (set the bit corresponding to the data block in
this word).
6. Increment the data block counter and check whether it is time to
select the next 1747-BSN module. If it is time to select the next
module, increment the module counter and restart the data block
counter.
7. Start step 1 in the next program scan.
Publication 1747-6.22
9-178
Programming Techniques
To receive the data blocks, the secondary SLC 5/0x application
program uses the following procedure:
1. Read all the DTSWs from the respective 1747-BSN modules.
2. Clear all DTHW bits corresponding to the data blocks that were
previously read and that no longer have a data ready bit set for
them in the DTSWs. Send all the DTHWs to their respective
1747-BSN modules.
3. Look at the counters and DTSWs to check whether the next data
block that is received is ready in the 1747-BSN module
• If the next data block is not ready, increment the data block
counter and check whether it is time to select the next 1747BSN module.
• If the next data block is ready, increment the module counter,
restart the data block counter and repeat step 3. (Repeat this
step until all possible data blocks are scanned.)
4. Copy the data block from the 1747-BSN module to the
SLC 5/0x.
5. Advise the 1747-BSN module that the data block was already
read through the DTHW (set the bit corresponding to the data
block in this word).
6. Increment the data block counter and check whether it is time to
select the next 1747-BSN module. If it is time to select the next
module, increment the module counter and restart the data block
counter.
7. Start step 1 in the next program scan.
The worst scenario with this transfer method is a system that has eight
1747-BSN modules in which each one is transferring 16 data blocks.
The total number of data blocks is 128 and the backup system spends
128 program scans to transfer all the data blocks.
Data Transfer Method 2
With method 2, the application program in the SLC 5/0x considers
each data block independent from the other data blocks. This is
shown in the ladder program example earlier in this chapter for one
set of BSN modules. Reproduce this logic for additional sets of BSN
modules, being sure to update the slot number in the M-file addresses
for each set. The following procedure is used in the primary SLC 5/0x
for sending the data blocks:
1. Read all the DTSWs from the respective 1747-BSN modules.
2. Clear all DTCW bits corresponding to the data blocks that are
marked as already transferred to secondary system in the
DTSWs. Send the data blocks to their respective 1747-BSN
modules.
Publication 1747-6.22
Programming Techniques
9-179
3. For each data block, do the following:
• Check whether the block is free to receive new data from the
SLC 5/0x.
• Copy the data block from the SLC 5/0x to the 1747-BSN
module.
• Advise the 1747-BSN module that the data block is ready
through the DTCW (set the bit corresponding to the data block
in this word).
4. Start step 1 in the next program scan.
To receive the data blocks, the secondary SLC 5/0x application
program uses the procedure below:
1. Read all the DTSWs from the respective 1747-BSN modules.
2. Clear all DTHW bits corresponding to the data blocks that were
previously read and that no longer have a data ready bit set for
them in the DTSWs. Send all the DTHWs to their respective
1747-BSN modules. For each data block, do the following:
• Check whether the data block is ready in the 1747-BSN
module.
• Copy the data block from the 1747-BSN to the SLC 5/0x.
• Advise the 1747-BSN module that the data block was already
read through the DTHW (set the bit corresponding to the data
block in this word).
3. Start step 1 in the next program scan.
The worst scenario with this transfer method is a system with eight
1747-BSN modules in which each one is transferring 16 data blocks.
The total number of data blocks is 128. In each program scan, the
system transfers all 128 data blocks. Total transfer time is
approximately 700 msec.
Other transfer methods
Data transfer methods 1 and 2 were designed to be used as sample
methods. In a real application, the user would develop other methods
of transferring data. Theses alternatives would optimize the data
transfer throughput without causing an excessive loss of time due to
the M-file transfers.
Publication 1747-6.22
9-180
Programming Techniques
Accounting for
Instructions That
Could Cause Problems
During Switchover
Some instructions may operate unpredictably when a switchover
occurs if you fail to observe certain programming considerations. For
example, you must consider transferring the control element and data
elements for instructions that are also being executed in the secondary
processor. You also must consider transferring data files which
contain more than one word.
The following instructions are discussed in this section:
• timer
• counter
• logical, arithmetic, compare and move
• diagnostic, sequencing, file arithmetic and logic, file search and
compare, file
• copy and fill
• FIFO and bit displacement
• block transfer
• message
In the remainder of this chapter, we describe the behavior of these
instructions in the SLC 500 backup system.
Important: The primary and secondary systems do not necessarily
execute the same instructions at the same time (the
systems’ program scans are not synchronized). Note
also that the SLC 500 processor executes block transfers
to the program scan asynchronously. Therefore, the
processor interrupts the program scan asynchronously to
access block transfer write (BTW) and block transfer
read (BTR) files.
Timer Instructions
The SLC 500 processors maintain timers by keeping a copy of a
hardware timer in a portion of the three-word structure (timer byte)
used by each timer.
Control byte
Timer byte
Preset value
Accumulated value
1
2
3
Publication 1747-6.22
Programming Techniques
9-181
The hardware timer of the primary processor is completely
asynchronous to the hardware timer of the secondary processor. If the
whole three-word timer structure, including the timer-byte, is
transferred from the primary to the secondary processor during a
switchover, then the timer could encounter a large positive increment
in the timer accumulated value. The worst-case increment may be as
much as 2.55 seconds.
Follow the guidelines below to help avoid this type of increment in
the timer accumulated value:
• do not send the first word of the timer control structure
• transfer only the accumulated value. (Transfer the preset value
also, if you need to change it.)
Even though both processors are executing the same programs, your
program should transfer the timer accumulated value from the
primary processor to the secondary processor at least once after you:
• start the backup system
• switch the secondary SLC 500 from PROGRAM to RUN mode
• restart a repaired system
This allows the accumulated value in the secondary processor to track
the accumulated value in the primary processor.
Counter Instructions
Counter instructions are similar in structure to timer instructions.
However, when a switchover occurs, a counter that occurs once in a
program could increment or decrement twice in one program scan.
This problem arises when the following sequence of events occur:
1. The primary system executes a counter up/down instruction
conditioned by a rung transition of not-true to true. This
increments/decrements the counter accumulated value.
2. The 1747-BSN modules transfer this data into the counter file of
the backup processor before the secondary’s input image table is
updated with the input transition information.
3. The backup processor updates its input image table.
4. The processor in the secondary system (which was at a different
point in its program scan) executes the counter instruction again,
thus incrementing/decrementing the counter again.
Publication 1747-6.22
9-182
Programming Techniques
Programming Techniques
As with the timer instruction, your program should transfer the
counter accumulated value from the primary to the secondary
processor at least once after you:
• start the backup system
• switch the secondary SLC 500 from PROGRAM to RUN mode
• restart a repaired system
This allows the accumulated value in the secondary processor to track
the accumulated value in the primary processor.
Diagnostic, Sequencing, File Arithmetic and Logic, File Search
and Compare, File Copy and Fill Instructions
The type of data you are transferring, as well as how you transfer the
data to the secondary processor, determines the behavior of the
following file instructions:
• File Arithmetic and Logic instructions (FAL)
• File Search and Compare (FSC)
• File Copy (COP)
• File Fill (FLL)
• Diagnostic (FBC and DDT)
You should place the instruction’s control element data file within the
same 62 words of data. If this is not done, the 1747-BSN module
could transfer the control values responsible for control of the file at a
different point than when it transfers the file. A time lag between
when the file is updated and when the associated control element is
updated in the secondary processor. As a result, the following may
occur during switchover:
• file operation that was running may be off by one word
• a word could be operated on by the file twice
• a word could not even be operated at all.
FIFO and Bit Displacement Instructions
The type of data you are transferring, as well as how you transfer the
data to the secondary processor, determines the behavior of the FIFO
and Bit Displacement instructions.
If you are transferring only selected areas of the data files which do
not include data for FIFO and bit instructions, the instructions are
executed normally.
Publication 1747-6.22
Programming Techniques
9-183
However, if you are transferring all of the data table files over the
HSSL, you may encounter problems. For example, if you are shifting
four bits of BCD data through several words bit by bit, the data table
contains invalid data until each shift is complete. Should the 1747BSN module transfer one or more of these values to the backup
system and the primary system fails, the data table of the backup
system contains intermediate values for an indefinite amount of time.
The result is illegal BCD values.
Block Transfer Instructions
It is impossible to guarantee that both processors are executing a
given BTW or BTR at the same time. This is because the remote I/O
scans are not synchronized and the block transfer data is not
transferred instantaneously by both SLC 500 processors. The BTR
files in the secondary processor always reflect information contained
in the primary processor, except with a time delay.
To avoid the possibility of block transfer data changing during the
scan of the program, you can buffer data at the beginning of the
ladder program to ensure continuity.
Another potential problem with block transfer instructions is that
during switchover, the secondary scanner may skip one or more
remote adapters. This may happen because the “new” primary
scanner (previously the secondary) was in a different place in its
remote I/O chassis scan.
Message Instructions
In your backup system, the secondary processor is disconnected from
the Data Highway Plus link. Therefore, it cannot execute message
instructions. When programming, you must ensure that when a
switchover occurs, that any messages which were running in the
primary processor are subsequently enabled in the secondary
processor. You can do this by conditioning message instruction rungs
in both the primary and secondary processors using the primary/
secondary bit of the 1747-BSN status word. If necessary, you can pass
the results of a message addressed to the primary processor over the
HSSL to the secondary processor.
PRI/SEC
Message
Publication 1747-6.22
9-184
Programming Techniques
PID Control Files
When using PID instructions, you can send all or part of these control
files, based on how you back up your PID instructions and the total
amount of data to be sent by the BSN modules. Keep in mind that the
control files contain such things as your setpoint, gains, and words
that are used by the PID instruction for internal storage and should
not be manipulated unnecessarily.
Summary of
Programming
Considerations
When developing a program for the SLC 500 backup system, you
must always consider the following:
• non-synchronous I/O scans
• execution times of block transfer instructions
• time for transfer of data from the primary to the secondary
processor
• the need to reduce the quantity of data to be transferred, and
gathering all related data into a single block
• synchronization of discrete I/O data with regard to program
scans even though remote I/O scans are performed
asynchronously
• the need to disable message instructions in the secondary
processor using the primary/secondary bit
Publication 1747-6.22
Appendix
A
Specifications
Backup Scanner
Operating
Specifications
This appendix provides and system specifications, as well as
throughput information, for the Backup Scanner Module. Topics
include:
• scanner operating specifications
• network specifications
• throughput introduction
• calculating throughput
Backplane Current Consumption
800 mA at 5V
Operating Temperature
+32°F to +140°F (0°C to +60°C)
Storage Temperature
-40°F to +185°F (-40C to +85°C)
Humidity
Noise Immunity
Agency Certification
(when product or packaging is
marked)
5 to 95% without condensation
NEMA Standard ICS 2-230
UL listed
C-UL listed - Class I, Division 2, Groups A, B, C,
D Temp. Code T3C
CE compliant for all applicable directives
Network Specifications
Baud Rate Determination of Maximum Cable Length
and Terminating Resistor Size
Using
Extended Node
Capability
Not Using
Extended Node
Capability
Baud Rate
Max. Cable Distance
(Belden™ 9463)
57.6K baud
3048 m (10,000 ft.)
115.2K baud
1524 m (5,000 ft.)
230.4K baud
762 m (2,500 ft.)
57.6K baud
3048 m (10,000 ft.)
115.2K baud
1524 m (5,000 ft.)
150Ω 1/2 Watt
Brown-Green-BrownGold
230.4K baud
762 m (2,500 ft.)
82Ω 1/2 Watt
Gray-Red-Black-Gold
Resistor Size
82Ω 1/2 Watt
Gray-Red-Black-Gold
DIP Switch Position for Baud Rate Selection
Position 1
Position 2
Baud Rate
ON
ON
OFF
OFF
ON
OFF
ON
OFF
57.6K
115.2K
230.4K
Disabled
Publication 1747-6.22
A-186
Specifications
Throughput
Introduction
RIO throughput is defined as the time between when an input event
occurs at an I/O module in an RIO chassis to when an output event
occurs at an I/O module within the same RIO chassis. There are three
types of throughput concerning the 1747-BSN Backup Scanner
Module and its RIO network:
• discrete throughput (time from discretely mapped input to
discretely mapped output) without block transfers (BTs) present
• discrete throughput (time from discretely mapped input to
discretely mapped output) with BTs present
• BT throughput (time from when a BT is enabled to when the BT
successfully completes)
RIO Network Throughput Components
The following components affect RIO network throughput:
• the total SLC processor scan time
• the total RIO link scan time
• adapter(s) backplane scan time(s)
• the backup scanner’s output delay time
• the backup scanner’s input delay time
• input module delay times
• output module delay times
Processor Scan
Scanner Scan
ASB Backplane Scan
ASB Module
I/O Module
Scanner
I/O Module
Processor
RIO Scan
SLC Local
Chassis
Outputs to Modules
Remote Chassis
Remote Expansion
Chassis
Outputs from Modules
Inputs to Modules
Inputs to Modules
When the SLC control program detects that the remote input has
been turned on (via the scanner input image), it activates the
remote output device (via the scanner output image). Throughput
is then defined as the time between when the remote input device
is activated to when the remote output turns on.
Publication 1747-6.22
Output Device
Specifications
Calculating
Throughput
A-187
The 1747-BSN Backup Scanner’s throughput is determined by using
the formulas provided in this section.
Discrete I/O Throughput without Block Transfers (Tdm-nbt) Present
The information in this section is used to calculate the discrete
throughput of the 1747-BSN Backup Scanner if there are no BTs
occurring on the RIO link to any chassis.
If BTs are present on the RIO link you must use the Discrete I/O
Throughput with Block Transfers (Tdm-bt) Present section to
determine your throughput.
The formula to calculate the maximum backup scanner discrete I/O
throughput without BTs present is:
Tdm-nbt = 2Tps + 2TRIO + Tadp + TSNo + TSNi + Tid + Tod
Tdm-nbt = The maximum discrete throughput without BTs in
milliseconds (ms)
To calculate Tdm-nbt throughput, substitute values for the variables in
the formula above. Locate these values in the following documents:
Variable
Variable Description
Location of Variable
Tps
The total processor scan time
(ms)
APS reference manual
TRIO
The total RIO scan time (ms)
see the section RIO Scan Time
Calculation (TRIO) on page B-4
Tadp
The adapter throughput delay.
For a 1747-ASB, this is two ASB
backplane scan times.
adapter user manual
TSNo
The backup scanner module
output delay time (ms)
see the section Backup Scanner
Output Delay Time (TSNo) on
page B-11
TSNi
The backup scanner module
input delay time (ms)
5 ms (constant value for all
formulas in this appendix)
Tid
The input module delay time
(ms)
I/O product data and I/O
instruction sheets
Tod
The output module delay time
(ms)
I/O product data and I/O
instruction sheets
Publication 1747-6.22
A-188
Specifications
RIO Scan Time Calculation (TRIO)
The RIO scan time is calculated by identifying the baud rate and
image size of each logical device on the RIO link. Locate the
corresponding time value in the following table. If you are using
multiple logical devices, add the time values together to determine the
total RIO scan time (TRIO).
TRIO = Tadapter 1 + Tadapter 2 + Tadapter 3
RIO Scan Times for Adapters
Adapter
Size
Baud Rate
57.6K
115.2K
230.4K
1/4 logical
rack
6.0 ms
3.5 ms
2.5 ms
1/2 logical
rack
6.5 ms
4.0 ms
2.75 ms
3/4 logical
rack
7.5 ms
4.5 ms
3.0 ms
Full logical
rack
9.5 ms
5.5 ms
3.5 ms
Example Discrete I/O Throughput without Block Transfers
Present
An SLC 5/03 is controlling an RIO link running at 115.2K baud that
has the following adapters:
• One 1747-ASB module is configured as a 1/2 logical rack
starting at logical rack 0.
I/O chassis slot 1 contains 1746-IB16, 16 point input module
I/O chassis slot 2 contains 1746-OB16, 16 point output module
• Two adapters are each configured as full logical racks (logical
racks 1 and 2).
• Three adapters are each configured as 1/4 logical racks (logical
rack 3).
Publication 1747-6.22
Specifications
A-189
You need to calculate your Tdm-nbt: the RIO throughput time from
when the input closes on the 1746-IN16 until the output on the
1746-OB16 is on.
1. Use the throughput formula to calculate the maximum
throughput.
Tdm-nbt = 2Tps + 2TRIO + Tadp + TSNo + TSNi + Tid + Tod
Tps = 25.0 ms
TRIO = The total RIO scan time (ms)
TSNo = See value in the table on page B-13, TSNo without M0
File
Writes
(Normal Mode).
TSNi = 5.0 ms
Tid = 10.0 ms, which is from I/O module instruction sheets
Tod = 1.0 ms, which is from I/O module instruction sheets
Tdm-nbt = 2(25.0) + 2TRIO + 8.0 + TSNo + 5.0 + 10.0 + 1.0
2. Calculate the total RIO scan time (TRIO). Locate the baud rate
(115.2K) and adapter size, which is found in the table on page B4. Multiply the RIO scan times listed under the 115.2K heading
by the number of each different type of rack that you have. Add
those numbers together:
TRIO = Tadapter 1 + Tadapter 2 + Tadapter 3
TRIO = 1(4.0 ms) + 2(5.5 ms) + 3(3.5 ms)
TRIO = 25.5 ms
3. Find TSNo on page B-13 in the table TSNo without M0 File
Writes (Normal Mode). For this example Tupd > Thold, and
there are 4 logical racks configured. Therefore:
TSNo = 7.0 ms
4. Substitute all the values for variables in the throughput formula
and solve for throughput:
Tdm-nbt = 2Tps + 2TRIO + 2Tbp + TSNo + TSNi + Tid + Tod
Tdm-nbt = 2(25.0)+ 2(25.5) + 8.0 + 7.0 + 5.0 + 10.0 + 1.0
Tdm-nbt = 132.0 ms = maximum throughput
Publication 1747-6.22
A-190
Specifications
Discrete I/O Throughput with Block Transfers (Tdm-bt) Present
The information in this section is used to calculate the discrete
throughput of the 1747-BSN Backup Scanner if there are BTs
occurring on the RIO link to any chassis.
If BTs are not present on the RIO link, you must use the Discrete I/O
Throughput without Block Transfers (Tdm-nbt) Present section to
determine your throughput. See page B-3.
The formula to calculate discrete I/O throughput with BTs present is:
Tdm-bt = 2Tps + 2TRIO + 2Tbtx + Tadp + TSNo-bt + TSNi + Tid + Tod
Tdm-bt = The maximum discrete throughput with BTs in
milliseconds (ms)
To calculate Tdm-bt throughput, substitute values for the variables in
the formula above. Locate these values in the following documents:
Variable
Variable Description
Location of Variable
Tps
The total processor scan time
(ms)
APS reference manual
TRIO
The total RIO scan time (ms)
see the section RIO Scan Time
Calculation (TRIO) on page B-4
Tbtx
Additional time due to sending
any BT data on the RIO link.
see the section Determining
Tbtx on page B-7
Tadp
The adapter throughput delay.
For a 1747-ASB, this is two
ASB backplane scan times.
adapter user manual
TSNo-bt
Backup scanner output delay
see the section Determining
time with BTs present
TSNo-bt on page B-7
TSNi
The backup scanner module
input delay time (ms)
5 ms (constant value for all
formulas in this appendix)
Tid
The input module delay time
(ms)
I/O product data and I/O
instruction sheets
Tod
The output module delay time
(ms)
I/O product data and I/O
instruction sheets
Determining TSNo-bt
Use the following table to find TSNo-bt for your particular
configuration.
Important: The times shown are, to the best of our knowledge, the
maximum delay times of the backup scanner. However,
in instances that throughput is an important
consideration, test the application thoroughly first to
ensure proper operation. Note that in most situations the
average throughput is much better than the calculated
maximum throughput.
Publication 1747-6.22
Specifications
All Baud Rates
57.6K baud
115.2K
baud
A-191
230.4K
baud
1 Logical Rack
16.0
19.0
24.0
32.0
2 Logical Racks
19.0
23.0
27.0
36.0
3 Logical Racks
22.0
26.0
30.0
39.0
4 Logical Racks
25.0
28.0
34.0
42.0
Determining Tbtx
Before determining (Tbtx), you need to establish the maximum BT
write or read length that is to be processed by each logical rack on the
RIO link. RIO scan time is increased each time an BT is sent to any
logical device on the RIO network. The scan time increase depends
on the number of words sent in the BT and the selected baud rate.
RIO link protocol allows for a maximum of one BT to be sent to each
logical rack on the RIO link during any single RIO scan. Therefore,
if multiple BTs are sent to devices within the same logical rack, only
the longest BT to that logical rack needs to be considered to
determine your maximum throughput. The RIO scan time increase
(Tri) for each logical rack is:
Baud Rate
RIO Scan Time Increase (Tri)
57.6K baud
0.300 x BT length + 5.0 ms
115.2K baud
0.150 x BT length + 3.5 ms
230.4K baud
0.075 x BT length + 2.0 ms
The total increase in the RIO scan time (Tbtx) is equal to:
Tbtx = sum of Tri for all logical racks
Example Discrete I/O Throughput with Block Transfers Present
An SLC 5/03 is using a backup scanner to control a 115.2K baud RIO
link that has 3 adapters and 4 logical devices.
Adapter #1 (1747-ASB module):
• starting logical rack 0, logical group 0
• 12 logical groups (1 1/2 logical racks)
• one 8 word and two 4 word BT write/read modules in logical
rack 0
• one 2 word BT write/read module in logical rack 1
Publication 1747-6.22
A-192
Specifications
Adapter #2 (1771-ASB module):
• starting logical rack 2, logical group 0
• 2 logical groups (1/4 logical rack)
• one 64 word BT write/read module
Adapter #3 (1771-ASB module):
• starting logical rack 2, logical group 2
• 2 logical groups (1/4 logical rack)
• one 32 word BT write/read module
1. Use the throughput formula to calculate the maximum
throughput of the 1747-ASB module.
Tdm-bt = 2Tps + 2TRIO + 2Tbtx + Tadp + TSNo-bt + TSNi + Tid + Tod
Tps = 25.0 ms, which is from the APS reference manual (assume
for example)
TRIO = The total RIO scan time (ms)
Tbtx = Additional time due to sending any BT data on the RIO
link
Tadp = Two 1747-ASB module backplane scan times (calculated
from ASB
manual) = 2(4.5) = 9.0 ms
TSNo-bt = 22.0 ms from the table on page B-13, TSNo with
Block Transfers
(Normal Mode). There are 3 logical racks configured.
TSNi = 5.0 ms
Tid = 10.0 ms, which is from I/O module instruction sheets
Tod = 1.0 ms, which is from I/O module instruction sheets
Tdm-bt = 2(25.0) + 2TRIO + 2Tbtx + 9.0 + 22.0 + 5.0 + 10.0 + 1.0
2. Calculate the total RIO scan time (TRIO). Locate the baud rate
(115.2K) and adapter size which is found in the table on page B4. Multiply the RIO scan times listed under the 115.2K heading
by the number of each different type of rack that you have. Add
those number together.
TRIO = Tadapter1 + Tadapter2 + Tadapter3
TRIO = 1(5.5) + 1(4.0) + 2(3.5)
TRIO = 16.5 ms
Publication 1747-6.22
Specifications
A-193
3. Calculate the maximum Tri time for each logical rack. Do this by
determining the largest BT that occurs to any device within a
logical rack and calculating the transfer time using the table on
page B-7. Then add together the Tri times for each logical rack to
obtain Tbtx.
Tri for rack 0 = 0.150(8) + 3.5 = 4.7 ms (maximum BT to rack 0
is 8 words)
Tri for rack 1 = 0.150(2) + 3.5 = 3.8 ms (maximum BT to rack 1
is 2 words)
Tri for rack 2 = 0.150(64) + 3.5 = 13.1 ms (maximum BT to rack
2 is 64 words)
Tbtx = Tri0 + Tri1 + Tri2 = 4.7 + 3.8 + 13.1 = 21.6 ms
4. Substitute all the values for variables in the throughput formula
and solve for throughput.
Tdm-bt = 2(25.0) + 2(16.5) + 2(21.6) + 9.0 + 22.0 + 5.0 + 10.0 +
1.0
Tdm-bt = 173.2 ms = maximum throughput
Block Transfer Throughput
Block transfer throughput is the time from when the BT is enabled via
the EN bit, until the DN bit is processed. The following BT timing
explanations are based on the directional continuous BT example
shown on page, where a BT is re-triggered automatically upon each
completion.
BT throughput is always slower than discrete data transfer.
Completing a BT is dependent on the time involved for the:
• SLC control program to enable the BT via an M0 file write1
• backup scanner to detect that a BT has been requested2
• BT to be waiting in the queue due to another BT already being
processed on the same logical rack3
• backup scanner to schedule a pending bit2
• adapter to acknowledge the request4
• backup scanner to initiate the BT and transfer the data2
• SLC control program to detect that the BT has completed (DN
flag set)1
1. This is dependent on the SLC processor you are using.
2. Refer to the equations that follow.
3. The RIO network allows only one BT per logical rack (not logical device) per RIO scan. Therefore,
if multiple BTs are performed on devices within the same logical rack, BTs have to wait in the
queue until any previously scheduled BTs for the same logical rack are completed.
4. This is dependent on the RIO adapter.
Publication 1747-6.22
A-194
Specifications
The time to free up the BT buffer (by clearing the EN flag so another
BT can be performed) depends on the:
• instruction time of the M0 file write which clears the EN flag1
• time for the backup scanner to detect that the EN flag has been
cleared2
• time for SLC control program to detect that the DN flag has been
cleared1
The formula to calculate BT throughput is:
TM0 + TSNo-bt (number of BTs + 1) + Tbtwait + 2TRIO + 2Tbtx +
Tadp-bt + Tps
The equation for freeing up the BT buffer is:
TM0 + TSNo-bt (number of BTs) + Tps
Substitute values for the variables in the formulas above. Locate
these values in the following documents:
Variable
Variable Description
Location of Variable
TM0
Time to perform M0 file write to enable BT
appendix B
TSNo-bt
Backup Scanner Output Delay time with BTs
present. There must be an output delay time
added for each BT buffer that is being used
since the backup scanner processes only
one BT enable or disable every TSNo-bt (to
minimize the impact on discrete I/O
throughput).1
see the section
Determining TSNo-bt on
page B-7
Tbtwait
Equals the sum of the throughput times for
all BTs scheduled to the same logical rack
(time waiting is queue), + TSNo-bt (time to
schedule pending BT). If multiple BTs are
not being performed to the same logical
rack, this value equals zero.
calculated
TRIO
RIO scan time without BTs
see the section RIO Scan
Time Calculation (TRIO) on
page B-4
Tbtx
Amount that the RIO scan time can be
increased due to BTs. This includes the
time for the backup scanner to initiate the
BT and transfer the data.
see the section
Determining Tbtx on page
B-7
Tadp-bt
Time for the adapter to acknowledge the BT
request. For the 1747-ASB, the manual
defines this as no more than one (ASB)
backplane scan time and two RIO scans.
However, the two RIO scans are already
included in the above equation so only the
ASB scan time needs to be added.
adapter user manual
Tps
One processor scan time may occur before
the SLC control program detects that the DN
flag has been set or cleared
APS reference manual
1. When calculating BT throughput, one TSNo-bt is also required to handle the BT response
1. This is dependent on the SLC processor you are using.
2. Refer to the equations that follow.
Publication 1747-6.22
Specifications
A-195
Backup Scanner Output Delay Time (TSNo) Tables
The tables provided in this section show the maximum backup
scanner output delay time (TSNo) for specific applications. TSNo is
dependent on the following:
• processor scan time, or time between immediate outputs (if no
BTs are present)
• number of logical racks configured
• whether normal or complementary I/O mode is selected
• RIO baud rate (if complementary I/O is selected)
:
Variable
Variable Description
TSNo
The maximum scanner output
delay time
Tupd
The time between SLC
processor output scan updates
or immediate output updates
Thold
A constant time threshold that
is dependent on your
configuration. Refer to the
table on page B-12.
TSNo increases if the interval between Tupd decreases to the time
threshold (Thold). If Tupd is less than Thold, then the larger TSNo
number must be used. Otherwise, either number may be used.
Important: The times shown in this section are, to the best of our
knowledge, the maximum delay times of the backup
scanner. However, in instances that throughput is an
important consideration, test the application thoroughly
first to ensure proper operation. Note that in most
situations the average throughput is much better than the
calculated maximum throughput.
Determining the Number of Logical Racks Configured
The number of logical racks configured is determined by the number
of racks that contain configured devices. For example, if there are
four 1/4 rack devices in logical rack 0 and one full rack device in
logical rack 3, there would be two logical racks configured. Note that
the number of logical devices on the RIO network affects only TRIO,
and only affects TSNo when additional logical racks are used.
Publication 1747-6.22
A-196
Specifications
When complementary mode is selected, the number of configured
racks is also determined by the number of primary or complementary
racks configured, but not by both. (The maximum number of
configured racks is 4.) That is, if there is a primary rack configured
with a corresponding complementary rack, that is considered one
logical rack. If there is a primary rack configured without a
complementary rack (or vice versa), that also is considered one
logical rack.
TSNo without M0 File Writes
Normal Mode
Number of Logical
Racks Configured
Publication 1747-6.22
All Baud Rates
TSNo if Tupd_Thold
Thold
TSNo if Tupd >Thold
1 Logical Rack
5.0
5.0
2.5
2 Logical Racks
7.0
7.0
4.0
3 Logical Racks
9.0
9.0
5.5
4 Logical Racks
11.0
11.0
7.0
Appendix
B
M0-M1 Files and G Files
This appendix contains important information about M0-M1 files and
G files. The information is general in nature and supplements
specific information contained in earlier chapters of this manual.
Topics include:
• M0-M1 Files
• G Files
M0 and M1 files are data files that reside in specialty I/O modules
only. There is no image for these files in the processor memory. The
application of these files depends on the function of the particular
specialty I/O module. With respect to the SLC processor (SLC 5/02
or later), the M0 file is a module output file (a write only file) and the
M1 file is a module input file (a read only file). The opposite is true
for specialty I/O modules, where the M0 file is a read only file, and
the M1 file is a write only file.
M0-M1 Files
M0 and M1 files can be addressed in your ladder program and they
can also be acted upon by the specialty I/O module - independent of
the processor scan. It is important that you keep the following in
mind in creating and applying your ladder logic:
Important: During the processor scan, the ladder program can
address M0 and M1 data with bit, word, or file
instructions. Each time an M0-M1 file address is
encountered in the program, an immediate data transfer
to or from the specialty I/O module occurs. The impact
these immediate data transfers have on processor scan
time is described in appendix D of the SLC 500 and
MicroLogix 1000 Instruction Set Reference Manual,
Publication 1747-6.15.
Configuring M0-M1 Files
M0 and M1 files are configured as part of the I/O configuration
procedure for the processor file. After you have assigned the specialty
I/O module to a slot (the procedure is the same as assigning other
modules), the following functions appear at the bottom of the screen:
READ
CONFIG
ONLINE
CONFIG
F1
F2
MODIFY
RACKS
F4
MODIFY
SLOT
DELETE
SLOT
F5
F6
UNDEL
SLOT
F7
EXIT
F8
SPIO
CONFIG
F9
Publication 1747-6.22
B-198
M0-M1 Files and G Files
Complete the following steps to configure the M0 and M1 files:
1. Press [F9], Specialty I/O Configuration. The following
functions appear:
ISR
NUMBER
MODIFY
G FILE
F1
ADVNCD
SETUP
F3
G FILE
SIZE
F7
F5
2. Press [F5], Advanced Setup. The following functions appear:
OUTPUT
SIZE
INPUT
SIZE
SCANNED
INPUT
F2
F1
SCANNED
OUTPUT
F4
F3
M0 FILE
SIZE
F5
M1 FILE
SIZE
F6
3. Press [F5], then enter the number of M0 file words required (the
required number is listed in the user manual for the specific
specialty I/O module).
4. Press [F6], then enter the number of M1 file words required (the
required number is listed in the user manual for the specific
specialty I/O module).
The specialty I/O module may require that you also configure the G
file and specify an ISR (interrupt subroutine) number. These tasks are
accomplished with function keys F1, F3, and F7 shown in step 1
above. G files are discussed later in this appendix.
Addressing M0-M1 Files
The addressing format for M0 and M1 files is below:
Mf:e.s/b
Where
M
=
module
f
=
file type (0 or 1)
e
=
slot (1-30)
s
=
word (0 to max. supplied by module
b
=
bit (0-15)
Using M0-M1 Data File Addresses
M0 and M1 data file addresses can be used in all instructions except
the OSR instruction and the instruction parameters noted below:
Publication 1747-6.22
Instruction
Parameter (uses file indicator #)
BSL, BSR
File (bit array)
SQO, SQC, SQL
File (sequencer file)
LFL, LFU
LIFO (stack)
FFL, FFU
FIFO (stack)
M0-M1 Files and G Files
B-199
Monitoring Bit Addresses
For SLC 5/02 processors, the M0/M1 Monitoring option is always
disabled. (This processor does not allow you to monitor the actual
state of each addressed M0/M1 address.) For SLC 5/03 and SLC 5/04
processors, you can choose to disable or enable the monitoring option
by selecting [F6], System Config, from the main menu.
M0/M1 Monitoring Option Disabled
When you monitor a ladder program in the Run or Test mode with the
M0/M1 Monitoring option disabled, the following bit instructions,
addressed to an M0 or M1 file, are indicated as false regardless of
their actual true/false logical state.
Mf:e.s
] [
b
Mf:e.s
]/[
b
Mf:e.s
( )
b
Mf:e.s
(L)
b
Mf:e.s
(U)
b
f = file (0 or 1)
When you are monitoring the ladder program in the Run or Test
mod, the HHT display does not show these instructions as being
true when the processor evaluates them as true.
If you need to show the state of the M0 or M1 addressed bit, you can
transfer the state to an internal processor bit. This is illustrated below,
where an internal processor bit is used to indicate the true/false state
of a rung.
B3
] [
EQU
B3
] [
0
1
EQUAL
Source A
N7:12
Source B
N7:3
M0:3.0
( )
1
This rung will not show its true rung state because the EQU instruction is
always shown as true and the M0 instruction is always shown as false.
B3
] [
EQU
B3
] [
0
1
EQUAL
Source A
N7:12
Source B
N7:3
B3
( )
2
M0:3.0
( )
1
OTE instruction B3/2 has been added to the rung. This instruction shows the
true or false state of the rung.
Publication 1747-6.22
B-200
M0-M1 Files and G Files
M0/M1 Monitoring Option Enabled
Important: This option is not supported by the SLC 5/02 processor.
The SLC 5/03 and SLC 5/04 processors allows you to monitor the
actual state of each addressed M0/M1 address (or data table). The
highlighting appears normal when compared to the other processor
data files. The processor’s performance will be degraded to the
degree of M0/M1 referenced screen data. For example, if your screen
has only one M0/M1 element, degradation is minimal. If your screen
has 69 M0/M1 elements, degradation is significant.
Transferring Data Between Processor Files and M0 or
M1 Files
The processor does not contain an image of the M0 or M1 file. As a
result, you must edit and monitor M0 and M1 file data via instructions
in your ladder program. For example, you can copy a block of data
from a processor data file to an M0 or M1 data file or vice versa using
the COP instruction in your ladder program.
The COP instructions below copy data from a processor bit file and
integer file to an M0 file. For the example, assume the data is
configuration information affecting the operation of the specialty I/O
module.
S:1
] [
15
First scan bit. It makes
this rung true only for
the first scan after
entering Run mode.
COP
COPY FILE
Source
Dest
Length
#B3:0
#M0:1.0
16
COP
COPY FILE
Source
#N7:0
Dest
#M0:1.16
Length
27
The COP instruction below copies data from an M1 data file to an
integer file. This technique is used to monitor the contents of an M0
or M1 data file indirectly, in a processor data file.
COP
COPY FILE
Source
Dest
Length
Publication 1747-6.22
#M1:4.3
#N10:0
6
M0-M1 Files and G Files
B-201
Access Time
During the program scan, the processor must access the specialty I/O
card to read/write M0 or M1 data. This access time must be added to
the execution time of each instruction referencing M0 or M1 data.
For the SLC 5/03 and SLC 5/04 processors, the instruction types vary
in their execution times.
The following table shows approximate access times per instruction
or word of data for the SLC 5/02, SLC 5/03, and SLC 5/04
processors.
Processor
Instruction Type
Access Time per Bit
Instruction or Word
of Data
Access Time per
Multi-Word Instruction
SLC 5/02 Series B
All types1
1930 µs
1580 µs plus 670 µs per word
SLC 5/02 Series C
1
All types
1160 µs
950 µs plus 400 µs per word
SLC 5/03 (All
Series)
XIC or XIO
782 µs
--
OTU, OTE, or OTL
925 µs
--
SLC 5/04 OS400
COP to M file
--
772 µs plus 23 µs per word
COP from M file
--
760 µs plus 22 µs per word
FLL
--
753 µs plus 30 µs per word
MVM to M file
894 µs
--
any source or Destination M
file address
730 µs
--
XIC or XIO
743 µs
--
OTU, OTE, or OTL
879 µs
--
COP to M file
--
735 µs plus 23 µs per word
COP from M file
--
722 µs plus 22 µs per word
FLL
--
716 µs plus 30 µs per word
MVM to M file
850 µs
--
any source or Destination M
file address
694 µs
--
1. Except the OSR instruction and the instruction parameters noted on page C-2.
SLC 5/02 Processor Example
M0:2.1
] [
1
M1:3.1
]/[
1
M0:2.1
( )
10
If you are using a SLC 5/02 Series B processor, add 1930 µs to the
program scan time for each bit instruction addressed to an M0 or M1
data file. If you are using a SLC 5/03 Series C processor, add 1160
µs.
Publication 1747-6.22
B-202
M0-M1 Files and G Files
COP
COPY FILE
Source
Dest
Length
#B3:0
#M0:1.0
34
If you are using a SLC 5/02 Series B processor, add 1580 µs plus 670
µs per word of data addressed to the M0 or M1 file. As shown above,
34 words are copied from #B3:0 to M0:1.0. Therefore, this adds
24360 µs to the scan time of the COP instruction. If you are using a
SLC 5/02 Series C processor, add 950 µs plus 400 µs per word. This
adds 14550 µs to the scan time of the COP instruction.
SLC 5/03 Processor Example
COP
COPY FILE
Source
Dest
Length
#B3:0
#M0:1.0
34
The SLC 5/03 processor access times depend on the instruction type.
Consult the table on B-5 for the correct access times to add. As an
example, if you use a COP to M file instruction like the one shown
above, add 772 µs plus 23 µs per word. This adds 1554 µs to the SLC
5/03 processor scan time due to the COP instruction.
SLC 5/04 Processor Example
COP
COPY FILE
Source
Dest
Length
#B3:0
#M0:1.0
34
The SLC 5/04 processor access times depend on the instruction type.
Consult the table on B-5 for the correct access times to add. As an
example, if you use a COP to M file instruction like the one shown
above, add 735 µs plus 23 µs per word. This adds 1517 µs to the SLC
5/04 processor scan time due to the COP instruction.
Minimizing the Scan Time
You can keep the processor scan time to a minimum by economizing
on the use of instructions addressing the M0 or M1 files. For
example, XIC instruction M0:2.1/1 is used in rungs 1 and 2 of the
figure below, adding approximately 2 ms to the scan time if you are
using a SLC 5/02 Series B processor.
Publication 1747-6.22
M0-M1 Files and G Files
1
M0:2.1
] [
1
2
B3
] [
12
B-203
B3
( )
10
B3
( )
14
M0:2.1
] [
1
XIC instructions in rungs 1 and 2 are addressed to the M0 data file. Each
of these instructions adds approximately 1 ms to the scan time (SLC 5/02
Series B Processor).
In the equivalent rungs of the figure below, XIC instruction M0:2.1/1
is used only in rung 1, reducing the SLC 5/02 scan time by
approximately 1 ms.
1
M0:2.1
] [
1
2
B3
] [
12
B3
( )
10
B3
( )
14
B3
] [
10
These rungs provide equivalent operation to those of figure A by
substituting XlC instruction B3/10 for XlC instruction M0:2.1/1 in rung 2.
Scan time is reduced by approximately 1ms (Series B processor).
The following figure illustrates another economizing technique. The
COP instruction addresses an M1 file, adding approximately 4.29 ms
to the scan time if you are using a SLC 5/02 Series B processor. Scan
time economy is realized by making this rung true only periodically,
as determined by clock bit S:4/8. (Clock bits are discussed in
appendix B of the SLC 500 and MicroLogix 1000 Instruction Set
Reference Manual, Publication 1747-6.15.) A rung such as this might
be used when you want to monitor the contents of the M1 file, but
monitoring need not be on a continuous basis.
S:4/8 causes the #M1:4.3 file
to update the #N10:0 file
every 2.56 seconds.
S:4
] [
8
B11
[OSR]
0
COP
COPY FILE
Source
Dest
Length
#M1:4.3
#N10:0
6
Publication 1747-6.22
B-204
M0-M1 Files and G Files
Capturing M0-M1 File Data
The first two ladder diagrams in the last section illustrate a technique
allowing you to capture and use M0 or M1 data as it exists at a
particular time. In the first figure, bit M0:2.1/1 could change state
between rungs 1 and 2. This could interfere with the logic applied in
rung 2. The second figure avoids the problem. If rung 1 is true, bit
B3/10 captures this information and places it in rung 2.
In the second example of the last section, a COP instruction is used to
monitor the contents of an M1 file. When the instruction goes true,
the 6 words of data in file #M1:4.3 is captured as it exists at that time
and placed in file #N10.0.
Specialty I/O Modules with Retentive Memory
Certain specialty I/O modules retain the status of M0-M1 data after
power is removed. See your specialty I/O module user’s manual. This
means that an OTE instruction having an M0 or M1 address remains
on if it is on when power is removed. A “hold-in” rung as shown
below will not function as it would if the OTE instruction were nonretentive on power loss. If the rung is true at the time power is
removed, the OTE instruction latches instead of dropping out. When
power is again applied, the rung will be evaluated as true instead of
false.
B3
] [
0
M0:2.1
( )
1
M0:2.1
] [
1
!
ATTENTION: When used with a speciality I/O module
having retentive outputs, this rung can cause unexpected
start-up on powerup.
You can achieve non-retentive operation by unlatching the retentive
output with the first pass bit at powerup:
S:1
] [
15
M0:2.1
(U)
1
B3
] [
M0:2.1
( )
1
0
M0:2.1
] [
1
Publication 1747-6.22
This rung is true
for the first scan
after powerup to
unlatch M0:2.1/1.
M0-M1 Files and G Files
G Files
B-205
Some specialty I/O modules use G (configuration) files (indicated in
the specific specialty I/O module user’s manual). These files can be
thought of as the software equivalent of DIP switches.
The content of G files is accessed and edited offline under the I/O
Configuration function. You cannot access G files under the Monitor
File function. Data you enter into the G file is passed on to the
specialty I/O module when you download the processor file and enter
the REM Run or any one of the REM Test modes.
Configuring G Files
The G file is configured as part of the I/O configuration procedure for
the processor file. After you have assigned the specialty I/O module
to a slot (the procedure is the same as assigning other modules except
that you must specify the ID code of the specialty I/O module), the
following functions appear at the bottom of the screen:
READ
CONFIG
ONLINE
CONFIG
MODIFY
RACKS
F2
F4
F1
MODIFY
SLOT
F5
DELETE
SLOT
UNDEL
SLOT
F6
F7
EXIT
SPIO
CONFIG
F8
F9
This is the starting point for configuring the G file and other
parameters of the specialty I/O module. Complete the following steps
to create and monitor the G file:
1. Press [F9], Specialty I/O Configuration. A screen similar to the
following is displayed:
I/O CONFIGURATION FOR:EXAMPLE
RACK 1
RACK 2
RACK 3
=
=
=
SLOT
*0
*1
*2
*3
4
5
6
7
8
1746-A4
4-SLOT Backplane
SPECIAL CONFIG FOR SLOT:
C
Module's ID Code:
Maximum Input Words:
Maximum Output Words:
Scanned Input Words:
Scanned Output Words:
M0 Length:
M1 Length:
`G' File Size:
ISR Number:
1
12705
0
0
0
0
0
0
0
0
ESC exits
ESC exits
Press a function key
ISR
NUMBER
MODIFY
G FILE
ADVNCD
SETUP
G FILE
SIZE
F1
F3
F5
F7
2. Press [F7], G File Size, then specify the number of words
required for the specialty I/O module.
3. Press [F3], Modify G File. The content of the G file appears in
the display area. Data is shown in the default form, decimal:
Publication 1747-6.22
B-206
M0-M1 Files and G Files
address
G1:0
G1:10
0
xxxx
0
1
2
0
0
3
0
0
4
0
0
5
0
0
6
0
0
7
0
8
0
9
0
0
The function keys appearing below the data table indicate the three
data formats available to you - binary data, decimal data, and hex/bcd
data:
BINARY
DATA
DECIMAL
DATA
HEX/BCD
DATA
F1
F2
F3
The following figure illustrates the three G file data formats that you
can select. Word addresses begin with the file identifier G and the
slot number you have assigned to the specialty I/O module. In this
case, the slot number is 1. Sixteen words have been created
(addresses G1:0 through G1:15).
16-word G file, I/O slot 1, decimal format
address
G1:0
G1:10
0
xxxx
0
1
0
0
2
0
0
3
0
0
4
0
0
5
0
0
6
0
7
0
8
0
9
0
3
0000
0000
4
0000
0000
5
0000
0000
6
0000
7
0000
8
0000
9
0000
16-word G file, I/O slot 1, hex/bcd format
address
G1:0
G1:10
0
xxxx
0000
1
0000
0000
2
0000
0000
16-word G file, I/O slot 1, binary format
address
G1:0
G1:1
G1:2
G1:3
G1:4
G1:5
G1:6
G1:7
G1:8
G1:9
G1:10
G1:11
G1:12
G1:13
G1:14
G1:15
15
xxxx
0000
0000
0000
0000
0000
0000
0000
0000
0000
0000
0000
0000
0000
0000
0000
data
xxxx xxxx
0000 0000
0000 0000
0000 0000
0000 0000
0000 0000
0000 0000
0000 0000
0000 0000
0000 0000
0000 0000
0000 0000
0000 0000
0000 0000
0000 0000
0000 0000
0
xxxx
0000
0000
0000
0000
0000
0000
0000
0000
0000
0000
0000
0000
0000
0000
0000
Editing G File Data
Data in the G file must be edited according to your application and
the requirements of the specialty I/O module. You edit the data
offline under the I/O configuration function only. With the decimal
and hex/bcd formats, you edit data at the word level:
• G1:1 = 234 (decimal format)
G1:1 = 00EA (hex/bcd format)
Publication 1747-6.22
M0-M1 Files and G Files
B-207
With the binary format, you edit data at the bit level:
• G1/19 = 1
Important: Word 0 of the G file is configured automatically by the
processor according to the particular specialty I/O module.
Word 0 cannot be edited.
Publication 1747-6.22
B-208
M0-M1 Files and G Files
Publication 1747-6.22
C
Appendix
RIO Configuration Worksheet
This appendix provides a worksheet to help you configure your RIO
devices.
Directions
We recommend that you use a photocopy of the worksheet so you
retain a blank worksheet for future applications.
SLC Processor Input Image
High Byte
Bit Number-Decimal 15
Logical
Rack 0
Logical
Rack 1
Logical
Rack 2
Logical
Rack 3
Group 0
Group 1
Group 2
Group 3
Group 4
Group 5
Group 6
Group 7
Group 0
Group 1
Group 2
Group 3
Group 4
Group 5
Group 6
Group 7
Group 0
Group 1
Group 2
Group 3
Group 4
Group 5
Group 6
Group 7
Group 24
Group 25
Group 26
Group 27
Group 28
Group 29
Group 30
Group 31
8 7
SLC Processor Output Image
Low Byte
Bit Number-Decimal
15
0
I:e.0
I:e.1
I:e.2
I:e.3
I:e.4
I:e.5
I:e.6
I:e.7
I:e.8
I:e.9
I:e.10
I:e.11
I:e.12
I:e.13
I:e.14
I:e.15
I:e.16
I:e.17
I:e.18
I:e.19
I:e.20
I:e.21
I:e.22
I:e.23
I:e.24
I:e.25
I:e.26
I:e.27
I:e.28
I:e.29
I:e.30
I:e.31
Logical
Rack 0
Logical
Rack 1
Logical
Rack 2
Logical
Rack 3
Group 0
Group 1
Group 2
Group 3
Group 4
Group 5
Group 6
Group 7
Group 0
Group 1
Group 2
Group 3
Group 4
Group 5
Group 6
Group 7
Group 0
Group 1
Group 2
Group 3
Group 4
Group 5
Group 6
Group 7
Group 24
Group 25
Group 26
Group 27
Group 28
Group 29
Group 30
Group 31
High Byte
8 7
Low Byte
0
O:e.0
O:e.1
O:e.2
O:e.3
O:e.4
O:e.5
O:e.6
O:e.7
O:e.8
O:e.9
O:e.10
O:e.11
O:e.12
O:e.13
O:e.14
O:e.15
O:e.16
O:e.17
O:e.18
O:e.19
O:e.20
O:e.21
O:e.22
O:e.23
O:e.24
O:e.25
O:e.26
O:e.27
O:e.28
O:e.29
O:e.30
O:e.31
Publication 1747-6.22
C-210
SLC Processor Input Image
High Byte
Bit Number-Decimal 15
Logical
Rack 0
Logical
Rack 1
Logical
Rack 2
Logical
Rack 3
Group 0
Group 1
Group 2
Group 3
Group 4
Group 5
Group 6
Group 7
Group 0
Group 1
Group 2
Group 3
Group 4
Group 5
Group 6
Group 7
Group 0
Group 1
Group 2
Group 3
Group 4
Group 5
Group 6
Group 7
Group 24
Group 25
Group 26
Group 27
Group 28
Group 29
Group 30
Group 31
Publication 1747-6.22
SLC Processor Output Image
Low Byte
8 7
High Byte
Bit Number-Decimal 15
0
I:e.0
I:e.1
I:e.2
I:e.3
I:e.4
I:e.5
I:e.6
I:e.7
I:e.8
I:e.9
I:e.10
I:e.11
I:e.12
I:e.13
I:e.14
I:e.15
I:e.16
I:e.17
I:e.18
I:e.19
I:e.20
I:e.21
I:e.22
I:e.23
I:e.24
I:e.25
I:e.26
I:e.27
I:e.28
I:e.29
I:e.30
I:e.31
Logical
Rack 0
Logical
Rack 1
Logical
Rack 2
Logical
Rack 3
Group 0
Group 1
Group 2
Group 3
Group 4
Group 5
Group 6
Group 7
Group 0
Group 1
Group 2
Group 3
Group 4
Group 5
Group 6
Group 7
Group 0
Group 1
Group 2
Group 3
Group 4
Group 5
Group 6
Group 7
Group 24
Group 25
Group 26
Group 27
Group 28
Group 29
Group 30
Group 31
Low Byte
8 7
0
O:e.0
O:e.1
O:e.2
O:e.3
O:e.4
O:e.5
O:e.6
O:e.7
O:e.8
O:e.9
O:e.10
O:e.11
O:e.12
O:e.13
O:e.14
O:e.15
O:e.16
O:e.17
O:e.18
O:e.19
O:e.20
O:e.21
O:e.22
O:e.23
O:e.24
O:e.25
O:e.26
O:e.27
O:e.28
O:e.29
O:e.30
O:e.31
Glossary
The following terms are used throughout this manual. Refer to the Allen-Bradley
Industrial Automation Glossary, Publication Number AG-7.1, for a complete
guide to Allen-Bradley technical terms.
Adapter − Any physical device that is a slave on the RIO link.
Adapter Image − That portion of the scanner image assigned to an individual
adapter.
ASB Module − The Catalog Number 1747-ASB, 1771-ASB, or 1794-ASB
Remote I/O Adapter Module. The ASB module is an adapter.
ASB Module Chassis − The chassis directly controlled by the ASB module. This
includes the remote chassis and (if installed) two remote expansion chassis when
using the 1747-ASB.
Block Transfer (BT) − See RIO Block Transfer.
Block Transfer Read (BTR) − A form of block transfer that occurs when a
remote device transfers data to the SLC processor.
Block Transfer Write (BTW) − A form of block transfer that occurs when the
SLC processor transfers data to a remote device.
Complementary I/O − Functionality that allows you to maximize I/O usage by
pairing up I/O data from a primary and complementary chassis.
Discrete I/O − An input or output device that has corresponding bit locations in
the scanner’s input or output file.
Discrete I/O Module − An I/O module used to sense or control two–state (ON/
OFF) devices.
Data Transfer Control Word (DTCW) − This word is M0:s.3410 (where s=slot
number of the BSN) and is used by the primary processor to initiate data transfers
to the primary BSN. Eventually the primary processor initiates data transfers to
the secondary BSN over the HSSL, and then to the secondary processor.
Data Transfer Handshake Word (DTHW) − This word is M0:S.3411 (where
s=slot number of BSN) and is used by the secondary processor to inform the
secondary BSN that it has received the latest data block and is ready for the next
data block.
Data Transfer Status Word (DTSW) − This word is M1:s.3410 (where s=slot
number of BSN and is used in both the primary and secondary systems to affect
the transfer of data on the HSSL.
212
Glossary
Extended Node Capability − Functionality that allows you to use an
82 Ohm termination resistor at both ends of the RIO link for all baud
rates. This functionality also allows for up to 32 adapters to be
connected to the RIO link.
G file − The SLC file used to configure the scanner. You enter
configuration information into this file during SLC processor
programming. This file is loaded to the scanner by the SLC processor
upon entering run mode.
High-Speed Serial Link (HSSL) − 2 Mbit/second link between
primary and secondary BSN modules to provide the secondary SLC
processor with input, block transfer, and user retentive data. Network
status and control information are also transferred between BSN
modules on this link.
Inhibit − A function by which the scanner stops communicating with
a logical device. The logical device considers itself inhibited if it does
not receive communications from the scanner within a certain period
of time.
Input file − The scanner’s input image file that is updated during the
SLC processor input scan.
Local Expansion Chassis − A chassis that is connected to a local
SLC chassis using a 1747-C9 (91.4 cm [36 in.]) or 1747-C7 (15.2 cm
[6 in.]) cable.
Local SLC Chassis − The chassis that contains the SLC processor
and scanner.
Logical Device − Any portion of a logical rack that is assigned to a
single adapter. Adapters may appear as more than one logical device.
Logical Group − A logical group consists of one input and one
output word within a logical rack. A word consists of 16 bits, each bit
represents one terminal on a discrete I/O module.
Logical Rack − A fixed section of the scanner image comprised of
eight input image words and eight output image words.
Logical Slot − A logical slot consists of one input and one output
byte within a logical group. A byte consists of 8 bits, each bit
represents one terminal on a discrete I/O module.
M files − The SLC M0 and M1 data files that reside in the scanner. M
files contain RIO network status (M1) and control (M0) information.
The contents of these files can be directly accessed by your
application program. Also, the M files are used to control and monitor
RIO block transfer operations.
Publication 1747-6.22
Glossary
213
Module Status Word (MSW) − This word is M1:s.3401 (where
s=slot number of the BSN) and is used to monitor the status of the
1747-BSN itself and its counterpart in the remote system.
Output file − The scanner’s output file that is updated during the
SLC processor output scan.
Remote Chassis − The chassis containing an ASB module and
connected to the local SLC chassis via the RIO link.
Remote Expansion Chassis − A chassis that is connected to a remote
chassis using a 1747-C9 (91.4 cm [36 in.]) or 1747–C7
(15.2 cm [6 in.]) cable.
Reset, Adapter Decide − Commands sent by the scanner to a logical
device during an RIO discrete transfer. These commands instruct the
logical device to reset all of its discrete outputs if hold last state is not
selected, or to hold all of its discrete outputs in their last state if hold
last state is selected.
Reset, Adapter Reset − Commands sent by the scanner to a logical
device during an RIO discrete transfer. These commands instruct the
logical device to reset all of its discrete outputs, regardless of the hold
last state selection.
RIO Block Transfer − The exchange of up to 64 words of data
between the scanner and a remote device. RIO block transfers only
occur if you program them in your processor control program.
RIO Discrete Transfer − The exchange of image data between the
scanner and adapter. RIO discrete transfers occur continuously
whenever the scanner and adapter are communicating on the RIO
link.
RIO Link − An Allen-Bradley communication system supporting
high-speed serial transfer of Remote I/O (RIO) control information.
This link consists of one master and one or more slaves.
RIO Link Device − Refers to any Allen-Bradley or licensed third
party product that connects to the RIO link as an adapter or slave
device.
Scanner − The Catalog Number 1747-SN, Remote I/O Scanner,
which is the master on the RIO network.
Scanner Image − The data table area within the scanner, used to
exchange I/O information between the scanner and all the adapters on
the RIO link. The scanner image is a portion of the SLC processor
image.
Publication 1747-6.22
214
Glossary
SLC Chassis − A physical SLC rack that houses SLC processors and
1746 and 1747 I/O modules.
SLC Processor − The processor that controls the SLC chassis in
which the scanner is installed.
Slot − The physical location in any SLC chassis used to insert I/O
modules.
Specialty I/O Module − An I/O module other than a discrete I/O
module (e.g., an analog module).
System Status Word (SSW) − This word is M1:s.3400 (where s=slot
number of BSN and is used to monitor the status of the entire backup
system.
Publication 1747-6.22
Index
Numerics
9-19
1/2-slot addressing, 1-13,
Block transfer modules, 1-14
5-28
Block transfer read, 7-1, 7-2,
1-slot addressing, 1-12, 5-28
7-3, G-1
2-slot addressing, 1-11, 5-28,
Block transfer write, 7-1, 7-2,
7-7
7-4, G-1
C
A
Access-point address, 4-4
Active device status, 5-22
Adapter, G-1
Adapter image, 1-3, G-1
capturing M0-M1 file data,
B-7
Carrier detect circuit, 8-7
Code ID number, 5-29
Advanced Setup menu, 2-3
Communications attempted
status bit, 5-20
Agency certification, A-1
Compare instructions, 9-18
ASB module, G-1
Compatible devices, 1-9
ASB module chassis, G-1
Complementary chassis, 1-10
Asynchronized data transfer,
Complementary device, 5-8
4-6
Automatic transfer, 4-1
B
Backplane communication,
4-2
Backplane current
consumption, A-1
Backplane power
requirements, 1-3
Baud rate, 3-1
Baud rate selection, A-1
Baud rate settings, 1-18, 3-2
Complementary I/O, 1-9, 1-
11, 1-12, 1-13, 1-16, 5-5,
G-1
Complementary mode, 5-3
Configuration DIP switch,
2-2, 3-1
Configuring complementary
I/O, 1-10
Control buffer layout, 7-9
Control file, 5-10
Control flag definitions, 7-9
Counter instructions, 9-17
Bit displacement instructions,
9-18
Block transfer, 1-8, 1-16, 4-2,
D
Data block counters, 6-14
5-11, 7-1, G-1
Data Highway Plus switching,
block transfer
throughput, A-9
Data table transfer time, 8-2
Block transfer buffer layout,
Data transfer, 1-22
7-3
Data transfer control word,
Block transfer buffers, 7-5,
4-6, 6-5, 6-6, G-1
8-1, 8-4, 8-5
7-8
Data transfer handshake word,
Block transfer failure, 7-16
4-6, 6-6, 6-8, G-1
Block transfer instructions,
Data transfer status word, 4-6,
Publication 1747-6.22
I-ccxvi
Index
6-5, 6-7, G-1
definitions, G-1
HSSL wiring, 3-5
I
Device fault status, 5-14, 5-23
Device inhibit, 5-13
I/O image data, 1-3
Device reset, 5-13
Inhibit, G-2
Device reset words, 5-17
Input file, G-2
DH+ communication, 6-4
Input image data, 5-1
DH+ smart switch, 8-4
Input image file, 1-5
Diagnostic instructions, 9-18
Input signal update time, 8-2
Dip switch settings, 1-18
Input/status buffers, 7-9
Discrete I/O, G-1
Internal watchdog timeout,
Discrete I/O module, G-1
discrete I/O throughput with
block transfers present
example, A-7
discrete I/O throughput
without block transfers present
example, A-4
Discrete I/O transfer, 1-4
E
Enabled device fault status bit,
5-19
Extended node capability, 1-9,
3-6, A-1, G-2
F
8-4
L
Local expansion chassis, G-2
Local serial link, 1-1
Local SLC chassis, G-2
Local status link, 1-22, 6-2,
6-4
Local status link wiring, 3-5
Logic instructions, 9-18
Logical device, 1-4, G-2
Logical device address, 5-3,
5-26
Logical group, 1-3, G-2
Logical groups, 5-1, 5-2, 5-5
FIFO instructions, 9-18
Logical image size, 5-3
File Arithmetic instructions,
Logical rack, G-2
9-18
Logical racks, 1-3, 5-1, 5-2,
File Copy instructions, 9-18
5-5, 5-9
File Search instructions, 9-18
Logical slot, G-2
Logical specifications, 1-9
G
Logical words, 5-1, 5-2
G file, 5-2, 5-5, 5-7, 5-9,
Loosely synchronized backup,
5-21, G-2
8-3
editing G file data, B-10
Low byte, 5-2, 7-6
H
High byte, 5-2, 7-6
M files, G-2
High-speed serial link, 1-1,
M0 and M1 data files
capturing M0-M1 file
data, B-7
1-22, 4-1, 6-2, 6-4, G-2
Hold last state, 5-16
Publication 1747-6.22
M
Index
minimizing the scan time,
B-6
I-ccxvii
Remote output reset words,
5-17
specialty I/O modules with
retentive memory, B-8
M0 file, 6-5, 7-5
M0 files, 5-10
M1 file, 6-5, 7-3
M1 files, 5-10
Message instructions, 9-19
Module address switch, 1-19,
Remote programming, 4-4
Reserve current capacity, 3-3
Reset, adapter decide, G-3
Reset, adapter reset, G-3
Retentive memory, B-8
RIO block transfer, 7-1, G-3
RIO communication, 6-5
3-2
RIO discrete transfer, G-3
Module status word, 4-5, 6-4,
RIO link, G-3
6-9, 6-13, G-3
RIO link device, G-3
N
Noise immunity, A-1
O
RIO link wiring, 3-5
RIO scan time
throughput, A-4
RIO/DH+ Communication
Channel, 4-2
Operating temperature, A-1
S
Output delay time, A-11
Output file, G-3
Scanner, G-3
Output image file, 1-5
scanner
output delay time
P
Physical specifications, 1-9
PID instructions, 9-20
Primary chassis, 1-10
with block transfer,
A-6
without block transfer, A-11
Primary device, 5-7
Scanner asynchronous
operation, 1-5
Primary mode, 5-3, 6-4, 6-5
Scanner image, G-3
Primary module, 1-1
Secondary mode, 6-4, 6-5
Primary system, 1-22, 6-2,
Secondary module, 1-1
6-5, 6-6
Secondary system, 1-22, 6-3,
Processor fault, 6-2, 6-5
6-5, 6-6
R
Sequencing instructions, 9-18
SLC chassis, G-4
Receiver program, 4-5
SLC processor, G-4
Remote chassis, G-3
Remote expansion chassis,
Specialty I/O Configuration
menu, 2-3
G-3
Specialty I/O module, G-4
Remote I/O link, 6-2
Starting group address, 5-14
Remote I/O switching, 8-1
Status file, 5-10
Remote output reset, 5-13
Status flag definitions, 7-11
Publication 1747-6.22
I-ccxviii
Index
Status LEDs, 1-17, 3-6
Storage temperature, A-1
Switch assemblies status word,
6-12
Switchover diagnostic, 6-3
System status word, 4-5, 6-2,
6-9, G-4
T
Terminal wiring, 3-4
terms, G-1
throughput, A-2
calculating throughput,
A-3
block transfer, A-9
with block transfers
present, A-6,
A-10
without block transfers present,
A-3
introduction, A-2
Timer byte, 9-17
Timer instructions, 9-16
Timing diagrams, 7-14
Total switchover time, 8-1
Transmitter program, 4-5
Publication 1747-6.22
Index
I-ccxix
Publication 1747-6.22
Publication 1747-6.22
Publication 1747-6.22 — October 1999
© 1999 Rockwell International Corporation. All Rights Reserved. Printed in USA