Download Ground Penetrating Analyzer
Transcript
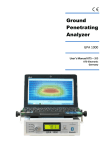
Ground Penetrating Analyzer GPA 1000 User’s Manual KTS – 3 D KTS-Electronic Germany Table of content 1 General guidelines ..............................................................................................4 1.1 Preface .......................................................................................................4 1.2 Important details .......................................................................................4 1.3 Scope of delivery ......................................................................................4 2 Hardware operation .............................................................................................6 2.1 Assembly of universal and super probe:................................................6 2.2 Front ..........................................................................................................7 2.3 Starting the electronic ..............................................................................8 3 Start of program ..................................................................................................9 3.1 Driver-reinstalling (with reinstalling of Windows) .................................9 3.2 Bluetooth pairing ......................................................................................9 4 Search process .................................................................................................. 11 4.1 Search with the universal probe ............................................................ 11 4.2 Search with the super probe.................................................................. 11 4.3 Live mode ................................................................................................ 12 4.4 3D-search mode ...................................................................................... 12 4.4.1 Preadjustment........................................................................................... 13 4.4.2 Start-button ............................................................................................... 13 4.4.3 Completion of measurement ..................................................................... 13 4.4.4 Transfer of measurement data.................................................................. 14 4.4.5 3D presentation ........................................................................................ 14 4.5 Search process (measurements) .......................................................... 14 4.5.1 Search in one direction ............................................................................. 15 4.5.2 Search in counter direction ....................................................................... 15 5 Program operations........................................................................................... 16 5.1 Main window ........................................................................................... 16 5.1.1 Toolbar ..................................................................................................... 16 5.1.2 Display range ............................................................................................ 16 5.2 Menu bar .................................................................................................. 17 5.2.1 Data menu ................................................................................................ 17 5.2.2 Display menu ............................................................................................ 17 5.2.3 Options menu ........................................................................................... 17 5.2.4 Info menu .................................................................................................. 17 5.3 Options window ...................................................................................... 17 5.3.1 Paths ........................................................................................................ 17 5.3.2 Colors and coordinates ............................................................................. 18 5.3.3 Languages ................................................................................................ 18 5.3.4 Serial Interface.......................................................................................... 19 6 Data recordings ................................................................................................. 19 6.1 Modulation before data recording ......................................................... 19 6.1.1 Display during data recording ................................................................... 20 6.1.2 Display after completion of data recording ................................................ 20 6.2 Display alternatives ................................................................................ 21 6.2.1 Representation proportional or quadratically ............................................ 21 6.2.2 Data presentation - absolute or relative .................................................... 21 6.3 Accumulator and charger ...................................................................... 21 7 System requirements and license agreements ............................................... 22 7.1 System requirements ............................................................................. 22 7.2 License agreements ............................................................................... 22 7.3 Utilization regulations ............................................................................ 22 7.4 Liability exclusions ................................................................................. 22 8 Warranty ............................................................................................................. 23 8.1 After expiration date ............................................................................... 23 8.2 Legal note ................................................................................................ 23 9 Contact ............................................................................................................... 24 1 General guidelines 1.1 Preface Congratulations on your purchase of one of the most advanced geophysical ground control units – the GPA 1000. Since the programs are already pre-installed, the assembly is quite simple. The instruction manual is written in plain style and furnished with numerous illustrations, so that the assembly will be problem-free. This instruction has been developed by the KTS-Electronic company. Any alterations or duplications are only allowed with written permission of KTS-Electronic. KTS-Electronic reserves the right to modify the instruction with new knowledge at anytime. The new instructions always can be downloaded gratuitously from our website. 1.2 Important details Please note: 1.3 Keep dry. Avoid conducting overhead lines Do not use cell phones during operation Do not process measurements during thunderstorms Accurate operation is only guaranteed with a fully charged accumulator For operation or loading only use the components enclosed or released by KTS. Scope of delivery Hardware: GPA 1000 electronic unit with Bluetooth® incl. installed lithium-ion accu Universal probe 45 cm (17.72") Super probe 60 cm (23.62") 2-part carbon telescope pole with armrest Tablet Computer with KTS software and operation system incl. lithium-ion accu Powerful quick-charger including 110 Volt adapter Transformer to charge in car Solid hard-top case Software: Newly developed KTS-3D software with 5 basic colors (pre-installed on PC) USB stick with software for processing data on other computers KTS-Electronic GPA 1000 4 Additionally: GOLD SCAN metal discrimination GOLD SCAN electronic unit with Bluetooth®, incl. installed lithium-ion accu, bag Powerful quick-charger (2800 mAh), incl. 110 Volt adapter 45 cm (17.72") Ø search coil (waterproof) with carbon telescope pole Service: English, German, French or Spanish user's manual 2 years manufacturer's warranty for the entire scope of delivery (incl. hardware and software) KTS-Electronic GPA 1000 5 2 Hardware operation 2.1 Assembly of universal and super probe: At first plug the bar into the mount of the probe. Then insert the remaining parts in the correct order. The universal or super probe can be attached to the holder now. Afterwards the sensor cable must be connected. Your device is now ready for use. Fig.: universal probe with demountable telescope bar Fig.: telescope bar KTS-Electronic GPA 1000 Fig.: telescope bar - disassembled 6 2.2 Front Turn-switch: The turn-switch has 4 switch positions: The device is switched off. Current battery voltage (should lie between 7 and max. 8.2 Volt). Display shows sensor values. Power save mode, display lighting is off. OFF BAT SENSOR ECO Toggle-switch: SENSOR/CALIBRATION SENSOR Shows battery voltage (BAT) or current value sensor (SENSOR or ECO). CALIBRATION Shows calibration value. The blue LED flashes after activation, constant light signifies the Bluetooth connection. Fig.: front of electronic unit (GPA 1000) KTS-Electronic GPA 1000 7 2.3 Starting the electronic The Bluetooth-connection allows a fast and save transfer of measured data from GPA 1000 to the PC – contrary to other devices, which record data via parallel interface. To control the current charge of battery turn the knob to BAT. The value must always lie over 7.5 Volt (otherwise charge the battery). Then switch to the position SENSOR or ECO to read the sensor or calibration data. The sensor data should always lie between 1-4, the calibration approx. 2.5 (before the calibration automatically is set it could temporarily show other values). Fig.: Complete electronic unit with PC KTS-Electronic GPA 1000 8 3 Start of program Boot up the PC and double-click on the KTS-3D icon, then start the KTS software. GPA 1000 automatically will be connected to the computer (be sure that GPA 1000 is activated before you start KTS 3D-Software). Should this not be the case, please see 3.2. 3.1 Driver-reinstalling (with reinstalling of Windows) In case you want to connect another laptop (with Bluetooth-connection) to the main unit or if you have to reinstal Windows please copy the entire data content from the provided USB stick to the hard disc. Additional software is not necessary. Now the device is operational. 3.2 Bluetooth pairing The Bluetooth symbol appears in the menu bar. With a right-click on this symbol the add a device–window will show all available Bluetooth functions (GPA must be activated and the blue LED must flash). KTS-Electronic GPA 1000 9 Select Ezurio Blu 2I. In the next window insert the password “1234” and go to “Next” (the device will automatically instal the suitable drivers). Finally click the Close-button to conclude the procedure. Click on the Bluetooth icon in Windows Taskbar, “Open Settings”, “COM Ports” – and keep the Outgoing COMPORT number in mind. After that open KTS 3D-Software, click on “Options” “Serial Interface”, select the memorized COMPORT and click “OK”. Restart the software and the device will automatically be connected to the computer. The LED lights up permanently and GPA 1000 is operational. For additional application see that Bluetooth is active and GPA 1000 is on (above proceedings must not be repeated). KTS-Electronic GPA 1000 10 4 Search process During soil analysis several search modes are selectable. 4.1 Search with the universal probe Wireless connection via Bluetooth from the computer to the electronic unit. Turn the probe in such a way that the arrow (see at the side of probe) points to the ground during the search (this way you will attain the highest search performance). After engaging the electronic and check-up of battery condition turn the turn-switch to sensor position. Check the calibration over the toggle-switch (approx. 2.5). Over toggle-switch turn back to sensor position. Assure yourself that the indicated value lies between 1-4. Should this not be the case, change the search direction slightly so that the value stands between 1-4. The further search process is decribed under 4.3. 4.2 Search with the super probe The super probe is similar to the universal probe, but has approx. 30% more depth performance. The search with the super probe requires a bit more complexity since the magnetic direction of the probe needs to be adapted. Beforehand it is absolutely necessary to select the search direction in such a way that values between 1-4 are displayed. KTS-Electronic GPA 1000 11 4.3 Live mode To mark relevant sectors, it is reasonable to scan large areas in the live mode at first so that afterwards controlling in the 3D is more precise. If the live mode stops unexpectedly, press the “start” button again and continue with the search. 4.4 3D-search mode For precise ground examinations the area must be divided into tracks. The tracks can be scanned in same direction or in alternate direction. The moving direction is selectable in the settings window. The track length can be determined differently (during the search after large objects or excavations longer track lengths can be selected;.for the search after small items shorter track lengths are recommended).. KTS-Electronic GPA 1000 12 4.4.1 Preadjustment With the "new" button on the screen the adjusting plane opens, the computer requires the input of track number, track length, values per track and measurement speed, etc. 4.4.2 Start-button By pressing the start button the search begins. On screen the results are displayed 2dimensional. After all values are measured, the program stops automatically and is ready for the next track. 4.4.3 Completion of measurement After completion of the last track, you are going to be asked, if you want to save the measurements. With the O.K.-button the measurement is stored automatically in a userdefined file. KTS-Electronic GPA 1000 13 4.4.4 Transfer of measurement data The provided USB-stick can also be used for the transfer of measurement data; you are able to transmit to other PCs and call up all informations for further processings. 4.4.5 3D presentation The measurement data is shown in 3D. The 3D presentation shows every modification and its dimension. 4.5 Search process (measurements) The GPA is a gauge, which can measure alterations of ground anomalies caused by metal objects, soil structure or excavations and can discriminate from normal ground magnetism. Correct results strongly depend on ground type and measuring method. Areas to be measured should not have electric fields (like high voltage cables or earth wires) or strong mineralising or wet grounds because they influence the measurement. The dryer the soil, the more precise the results. Split the area you want to measure into even tracks. You may choose between 2 methods: KTS-Electronic GPA 1000 14 4.5.1 Search in one direction If you have chosen the search in rectification, you should come back to the starting point after completion of each track and press the start button (for the measurements of the second track). 4.5.2 Search in counter direction If you have chosen the search in counter direction, you should turn around after completion of each track, step approx. 50 cm to the right and continue directly with the next track by pressing the start button. KTS-Electronic GPA 1000 15 For precise measurements the walking speed should be constant while pacing the tracks. Hereby objects can be detected at the same spot during counter direction. For exact measurements track lengths between 5 to 10 Meters are expedient. 5 Program operations The program serves as indication of magnet field data in colored, three dimensional representation. 5.1 Main window After start of program the main window appears with the menu bar, the tool bar, the adjustment and the indication area. When program starts display range is empty. 5.1.1 Toolbar Some buttons are combined for fast operation. These are from left to right: New Start Stop Live Open Save Peak Norm Prop Zoom Start of set-up for data acquisition starts a data acquisition stops the current data acquisition starts the live mode reads a stored file saves the current file switches between absolute and relative representation resets main-representation to basic setting switches between proportional and quadratic representation in and out with buttons [+] and [-] 5.1.2 Display range The display shows a 3-dimensional, colored presentation of the measured values. While moving the mouse with pressed left mouse button the presentation can be rotated. KTS-Electronic GPA 1000 16 5.2 Menu bar 5.2.1 Data menu The data menu indicates entries to open and store measurement data. The stored measurement data is marked through the ending GRD. New starts a data recording with connected external measurement hardware. A popup window appears for the adjustment of measurement conditions. Copy into clipboard copies the current view into the temporary storage, so that it can be inserted into every image editing application. End ends program. 5.2.2 Display menu In this menu you can switch between graphic and numeric view of measurements. 5.2.3 Options menu With the options menu item a new window for the adjustment of program options shows up. A description of various possibilities occurs there. 5.2.4 Info menu Delivers informations about the present version. 5.3 Options window The options window is divided into four categories. 5.3.1 Paths With the path modulation the index is defined for data storage. A selection dialogue appears after the [search] button is pressed. KTS-Electronic GPA 1000 17 5.3.2 Colors and coordinates Here colors for the coordinate display, graphic cursor and background can be selected. After the appropriate corresponding buttons have been activated, a color-selection dialogue shows up. 5.3.3 Languages For operation the program can completely be switched to languages shown below. KTS-Electronic GPA 1000 18 5.3.4 Serial Interface In case of a reinstallation you can select the utilized Comport (see 3.2 Bluetooth pairing). 6 Data recordings 6.1 Modulation before data recording Before data acquisition various settings must be carried out. The track length defines – together with the values per track – the distance (see field step width) between every single measurement. The values per track are limited to 100 maximum. KTS-Electronic GPA 1000 19 After pressing the [Start] button the measurement is activated; this can be carried out either manual or time-controlled (standard setting is 0.2 sec). With the [Cancel] button a program termination is possible at all times. The switch between consensual and contrasensual movement is also possible. 6.1.1 Display during data recording During data recording the display turns up two-dimensional and in colored grading. Of course, the shown colors are dependend on the selected modulation. The end of a track is displayed, after confirmation the new track will be measured. A storage request appears at the end of the last track; afterwards a switch to the three-dimensional representation takes place. 6.1.2 Display after completion of data recording Illustration results from the under 6.1.1 pictured two-dimensional representation. KTS-Electronic GPA 1000 20 6.2 Display alternatives 6.2.1 Representation proportional or quadratically With the button [prop.] the representation switches between proportional and quadratic view. In the quadratic representation the display occurs with square elements. Details partially are better recognized here. The relation between track length to field width is not taken into account. The proportional representation is displayed under consideration of the real track length and field width like it was adjusted in [data recording]. Note: The actual measured length / width is only given through the setting [data recording]. The correct input of the exact length and width is essential. 6.2.2 Data presentation - absolute or relative It is possible to switch between absolute or relative data presentation. With the absolute presentation the Z-axis is expanded to the full available measuring range. With the relative presentation the value range is based on the smallest resp. the largest measured value. This way a maximum detailed resolution is obtained which also has effect on the color representation. 6.3 Accumulator and charger Through the installed 2800 mAh lithium-ion accu a strong performance is guaranteed. With the lithium battery charger the accu can be fully loaded within 3 hours. The actual operating time is approx. 6-12 hours (depending on coil size and the use of headphones). The loading procedure is indicated by the orange light emitting diode, the green light signals the end of loading. After each loading the connecting cable for the battery charger should be removed. A voltage transformer enables loading in the car. KTS-Electronic GPA 1000 21 7 System requirements and license agreements 7.1 System requirements The program is a 32-bit-application, which is driven under Windows 98, Windows 2000, Windows NT, Windows XP or Windows 7 or 8. As minimum requirements for the expedient usage the PC should have the following configuration: 7.2 Processor with pulse frequency from 1000 MHz or more Hard disc with approx. 10..20 MByte free storage space Graphic card with a minimum resolution of 800 x 600 points Bluetooth ability to the connection of the external measuring hardware License agreements The KTS 3D program as well as the entire accompanied electronic or printed documentation is subject to the copyright of KTS-Electronic. Should parts of the present license regulations feature alterations or expansions in comparison to former program versions, they will also apply to prior versions. The present license regulations become effective on May 1st, 2007. Through the utilization of the software the user agrees to the present license regulations. The right of use automatically will expire if the license regulations are violated. 7.3 Utilization regulations After full payment of the invoice amount the customer is allowed to a not-exclusive right of usage of the program listed in the bill. This right is restricted to the owner of the original software. Consequently, the software can be used only on one single computer system at the same time. All present and future copyrights and/or industrial protection rights of the provided programs and of all programs derivative from it, program modules or in this context produced records remain at KTS-Electronic. 7.4 Liability exclusions Despite carefully conducted tests mistakes cannot be ruled out. No acceptance of guarantee for the utilization of the program to a certain purpose. Especially no liability is adopted for consequential damages as well as profit and asset losses, that could result from the application of the program and the affiliated documentation. Alterations in prices and modifications of all sorts in software or documentation shall remain reserved and do not require a separate notification.. KTS-Electronic GPA 1000 22 8 Warranty We grant repair work free of charge resulting from factory errors originated by mistakes and defects 24 months effective from date of purchase. According to the following conditions we remedy deficiencies free of charge, if they are evidently based on manufacturing errors or defects and are reported to us immediately after assessment of damage within 24 months after delivery to the ultimate buyer. Defective parts will be repaired gratuitous or will be replaced by efficient parts of our choice. KTS reserves the right to exchange a device by an equal valued replacement unit in case the returned product cannot be required in an appropriate budget time frame. On-site repairs cannot be demanded. Replaced, resp. exchanged parts will merge into our property. The guarantee claim expires in cases of improper handling, gross carelessness or when repairs, modifications, additionally installed parts or extentions are carried out from persons which are not authorized on our part to do so. Guarantee claims will neither effect an extention of the term nor they will implement a new time limit. Further requirements, in particular such through extraneous causes resulting damages are excluded, unless a commitment is not necessarily the case. We therefore are not liable for any accidential, indirect or other subsequent damages of any kind, which lead to limited use, data loss, profit setbacks or operating failures. 8.1 After expiration date KTS can agree upon a service after expiry of guarantee. In this case repairing and shipment will be charged. 8.2 Legal note Before you start searching please note that monument protection regulations as well as other legal standards are relevant. KTS-ELECTRONIC assumes no responsibility for possible legal violations. In case of doubts we recommend a comprehensive consultation with an attorney or national monument offices. KTS-Electronic GPA 1000 23 9 Contact KTS-Electronic Kurhessenstr. 1 D-64546 MÖRFELDEN-WALLDORF Tel: +49 - 6105 - 911150 Fax: +49 - 6105 - 911155 www.KTS-Electronic.com email: [email protected] Office hours: Mondays– Thursdays: 9:00 am to 16:30 pm Fridays: 9:00 am to 16:00 pm Copyright: KTS-Electronic, Mörfelden-Walldorf, Germany, 2013 A duplication or usage of graphics and/or text of this publication is not allowed without explicit consent. KTS-Electronic GPA 1000 24


