1
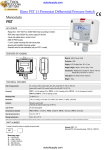
Impermeability special manometer for gas
network
MP 130
DESCRIPTION OF THE DEVICE
OK key
Backlight key
Select key
Male plug
Tap with 2 valves
and 3 channels
On/Off/Esc key
Hold/min/max key
Female plug
Female connector
Rubber pump
Male connector
PRIOR OPERATIONS FOR THE MP 130 USAGE WITH ITS SEAL KIT
➢
➢
Connect the most adapted conical adaptor to the tube cross-section, to the male connector of the seal kit, and the female
connector to the positive input of the manometer, as described below :
Isolate the installation : Close the counter tap and block the connectors provide at the installation.
Checkpoint
for the new
installations,
in renovation
or existing
Filter and limiter
Gas meter
Conical adaptor
Positive input of the manometer
Pump
➢
➢
➢
Connect the adaptation cone to the connector downstream of the gas meter.
Turn on the device by pressing on « On/Off/Esc ».
The device displays its name « MP 130 » then performs an autozero.
Inject air or gas to test the installation to the correct pressure :
●
During the air supply, put pressure on the system with the little rubber pump provides with the kit ; once the desired pressure is
reached, close the taps.
●
During the usage of fuel or inert gas, close the taps and put pressure on system.
PERFORM AN AUTOZERO
During a measurement :
●
Disconnect the pressure tubes.
➢
Press on « OK ».
« AutoZ » displays on screen and the device performs an autozero.
At the end of the autozero, the device returns to the measurement display.
FREEZE THE MEASUREMENT
During a measurement :
➢
Press on « Hold/min/max » to freeze the measurement.
« Hold » displays on screen and the measurements are frozen.
➢
Press on « On/Off/Esc » to exit the hold function.
The device returns to the measurements display.
DISPLAY THE MINIMUM AND THE MAXIMUM
Once the measurement is frozen :
➢
Press on « Hold/min/max ».
The device displays the maximum value of pressure measured since the last questioning at the top of the screen and the minimum
value of pressure since the last questioning at the bottom of the screen.
➢
Press on « On/Off/Esc » to return to the measurement display.
REGLER L'APPAREIL
●
Device drop-down menu
SEL.
SEL.
1x
UNIT
Select
2x
SEL.
AUTO
OFF
OFF
Select
mbar
3x
Select
BEEP
OFF
Select the measuring unit
The device is on and displays the measurement.
➢
Press on « Select ».
« UNIT » blinks on screen.
➢
Press on « OK ».
The unit currently used blinks on screen.
➢
Press on « Select » until the desired unit appears : mbar, mmHG, daPa, kPa and inWG.
➢
Press on « OK » to validate the unit selection.
« UNIT » blinks on screen.
➢
Press on « On/Off/Esc » to return to the measurement display.
SEL.
SEL.
1x
Select
UNIT
mbar
OK
UNIT
SEL.
mbar
Select
UNIT
SEL.
OK
UNIT
kPa
mbar / kPa...
0, 137
kPa
On/Off/
Esc
Adjust the auto shut-off
SEL.
2x
Select
AUTO
OFF
OFF
AUTO
OFF
OFF
OK
Select
AUTO
OFF
15 / 30mn...
SEL.
OK
0, 137
kPa
AUTO
OFF
30mn
On/Off/
Esc
Activate or deactivate the keys beep
The device is on and displays the measurement.
➢
Press on « Select » until « BEEP » blinks on screen.
➢
Press on « OK ».
« OFF » or « ON » blinks on screen.
➢
Press on « Select » to activate the keys beep « ON » or deactivate it « OFF ».
➢
Press on « OK » to validate.
« BEEP » blinks on screen.
➢
Press on « On/Off/Esc » to return to the measurement display.
SEL.
3x
Select
BEEP
OK
BEEP
SEL.
OFF
OFF
Select
BEEP
SEL.
OFF / ON
SEL.
OK
ON
0, 137
kPa
ACTIVATE THE BACKLIGHT
The device is on and displays the measurement.
➢
Press on « Backlight » :
to activate the backlight.
➢
To deactivate it press again on « Backlight ».
CHANGE THE BATTERIES
➢
➢
➢
Remove the front part at the back of the device.
Change the old batteries by AAA LR03 1.5V batteries.
Replace the front.
Once returned to KIMO, required waste collection will be assured in the respect of the environment in accordance to 2002/96/CE guidelines relating to WEEE
BEEP
On/Off/
Esc
NTang – portable-MP130 – 10/06/14 – RCS (24) Périgueux 349 282 095 Non-contractual document – We reserve the right to modify the characteristics of our products without prior notice.
The device is on and displays the measurement.
➢
Press on « Select » until « AUTO OFF » blinks on screen.
➢
Press on « OK ».
The time before device auto shut-off blinks on screen.
➢
Press on « Select » to select the time before device auto shut-off : 15, 30, 45, 60, 75, 90, 105, 120 or OFF.
➢
Press on « OK » to validate.
« AUTO OFF » blinks on screen.
➢
Press on « On/Off/Esc » to return to the measurement display.