1
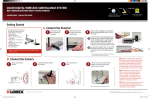
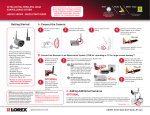
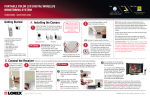
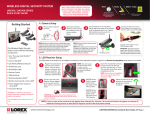
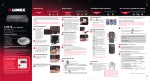
under 15 minutes under 30 minutes Hand Tools ULTRA DIGITAL WIRELESS VIDEO RECORDING SYSTEM Time NOTE: AVOID INSTALLING IN A LOCATION WHICH REQUIRES THE WIRELESS SIGNAL TO PASS THROUGH CEMENT, CONCRETE AND METAL STRUCTURES. THIS WILL REDUCE THE TRANSMISSION RANGE. LW2300 Series - quick start guide under 60 minutes Hardware Tools Skill HiLevel Speed Skills - Easy Under 20 Minutes* Router * Installation time may vary based on application and camera location over 60 minutes Hand Tools easy Plug & Play connections, On screen set up Skill Level A. Connect the Wireless Camera Getting Started 1 Mount camera stand to the wall. 2 * This Ultra Digital Wireless Video Recording System comes with the following components: • Color Outdoor Night Vision Camera* • Camera Stand* • Wireless Receiver • SD Memory Card • Audio/Video Cable • Remote Control • Wall Mounting Kits* • Wireless Antennas (for receiver and camera)* • Power Adapters (for receiver and camera)* • IR Extender • Instruction Manual * Number of cameras may vary by model. Check your package for specific content information. Attach the included Antenna to the camera by screwing it on to the back as shown below. NOTE: Before you install a camera, carefully plan where and how it will be positioned, and where you will route the cable that connects the camera to the power adaptor. Before starting permanent installation, verify its performance by observing the image on a monitor when the camera is positioned where it will be permanently installed. 3 Secure Camera to the mounting stand. Adjust the angle of the camera until the desired view is set. Tighten the thumbscrews to secure the desired camera position. easy 4 Intermediate advanced Connect one end of the camera Power Adapter to the camera and the other end to an electrical outlet. NOTE: Wireless cameras require a power source to operate. NOTE: When adding cameras that were not included in the original box, you will need to pair up the camera with the receiver. Please refer to the Camera Pairing Section of the User Manual. Connect power adaptor to local 120V AC power outlet. B. Connect the Receiver to a TV/Monitor 1 Connect the Black cable from the AV cable to AV Out port on the left panel of the receiver. Connect the Yellow video cable and White audio cable (mono) to your TV or monitor. 3 Connect one end of the Receiver Power Adaptor to the receiver and the other end to an electrical outlet. The receiver will power on automatically. OPTIONAL 4 Connect the included IR extender to the IR Extend port on the right panel of the receiver. Use the IR extender if you want to hide the receiver from plain sight. Place the IR Extender for example in a bookcase or above a cabinet and still fully control the system using the included remote control. NOTE: IR extender box needs to have direct line-of-sight with remote control. www.lorexcctv.com 2 Insert the included SD card into theSD Card slot on the right panel of the receiver until you hear a “click.” Place the receiver in a place that will have clear reception to your camera. NOTE: The receiver is compatible with most major brands of SD cards up to 16 GB. ATTENTION: Make sure to first connect and power on the camera before powering on the receiver; this will ensure a proper connection. LW2300 Series Quick Start Guide_R1 Page Intermed ULTRA DIGITAL WIRELESS VIDEO RECORDING SYSTEM LW2300 Series - quick start guide C. Product Overview D. How to begin Recording? Receiver Three recording modes are available on the system: Manual Recording, Schedule Recording, and Motion Recording. NOTE: The system can record video to an SD card one channel at a time. You should always format the SD card prior to initial recording. For details refer to the owner’s manual section “Format”. NOTE: Recording overrides other actions on the receiver. You must stop recording on the system in order to perform other actions, such as opening the Main Menu, Quad Mode, etc. 1. CHANNEL: Press M to change channels 1~4 manually; press A to enable Auto Sequence Viewing Mode. 2. RECORD: Press M for manual recording or A for Motion Recording. NOTE: The date and time must be set on the system prior to using Schedule Recording. For details refer to the owner’s manual section “Setting the Time”. 3. Channels, OK: QUAD MODE ONLY—Press 1 to view camera 1, 2 to view camera 2, 3 to view camera 3, and 4 to view camera 4; press OK to enter/confirm menu selections. NOTE: The OK button serves the same function as the Enter button on the remote control. 4. Quad: Press to change display view to Quad (4-way). 5. MENU: Press to open the Main Menu. 6. Del.: Press to delete, cancel. 7. LED Indicators: LED indicators for camera and receiver operations. For details refer to the owner’s manual section “LED indicators on the Wireless Receiver”. Remote Control 3 2 4 1 5 6 Mode Description HOW TO OPERATE Manual Recording • Continuous recording from one camera • Cannot record while in Quad mode • Cannot record while in Auto Sequence Viewing Mode • Press the RECORD—M button on the remote control or receiver to start/stop manual recording SCHEDULE RECORDING • Continuous recording from one camera or from Auto Sequence Viewing Mode (system will record from one camera at a time) • IMPORTANT: Turn off Manual Recording and Motion Recording to enable Schedule Recording • Enter a Start and Stop Time from Main Menu > Record > Schedule Record MOTION RECORDING (AUTO) • System only records when motion is detected by a camera • Compatible with Quad Mode (recommended) – enable Quad Mode BEFORE turning on Motion Recording • Press the Motion button on the remote control or RECORD—A on the receiver to start/stop Motion Recording 7 For information on viewing recordings, refer to the owner’s manual section “Viewing Recorded Video” The LW2300 series product is expandable up to 4 cameras To order additional cameras, please visit our website at www.lorexcctv.com On-Screen Display 1. 1/|| 2. Enter 3. 4/ : 4. MENU / Back 5. Record 6. Volume 7. Quad 8. 2/ 9. 3/ 10. Scan/Del 11. Channel 12. AV 1. Signal Indicator 2. Recording Indicator 3. File Name 4. Camera indicator 5. File Icon 6. SD Card icon 7. Time Stamp It’s all on the Web 1 4 2 5 3 6 www.lorexcctv.com/support Extending Your Wireless Signal 7 www.lorexcctv.com For detailed setup information, please refer to your User’s Manual. For additional information and accessory purchases, please visit our website Even with a clear line-of-sight between your camera(s) and your receiver, you may experience a lower frame rate simply due to the distance between your wireless devices. Accessory antennas are available that can help extend the range of your wireless signal. Visit www.lorexcctv.com for more details. ©2009 Lorex Technology Inc. As our product is subject to continuous improvement, Lorex Technology & subsidiaries reserve the right to modify product design, specifications, prices & warranty without notice and without incurring any obligation. E&OE LW2300 Series Quick Start Guide_R1 Page