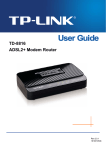
1
CONTENTS
Product overview .................................................................................................... 3
Package contents ................................................................................................... 4
Status LEDs ............................................................................................................ 4
LEDs description .................................................................................................... 5
Ports and buttons functionality................................................................................ 6
Router Installation ................................................................................................... 7
Configuring your router with Setup Wizard ............................................................. 9
Connecting to the Internet via ADSL ................................................................. 11
Connecting to the Internet via Ethernet ............................................................. 12
Connecting to the Internet via 3G/4G ................................................................ 13
Wireless network configuration .......................................................................... 14
Connection to your wireless network .................................................................... 16
Windows Vista, 7 and 8 ..................................................................................... 16
Windows XP ...................................................................................................... 18
Tips on wireless performance optimization........................................................... 20
Configuring your router through Web-interface .................................................... 21
Quick Installation .................................................................................................. 22
Web-interface guide ............................................................................................. 28
Connecting to the Internet via ADSL ................................................................. 29
Connecting to the Internet via Ethernet ............................................................. 35
Connecting to the Internet via 3G ...................................................................... 39
Interface setup > LAN ........................................................................................ 40
Interface setup > Wireless ................................................................................. 41
IPTV setup ......................................................................................................... 43
Maintenance > Administration ........................................................................... 47
Maintenance > Time zone ................................................................................. 48
Maintenance > Firmware ................................................................................... 50
Maintenance > SysRestart ................................................................................ 51
Status > System Log ......................................................................................... 52
Status > Statistics .............................................................................................. 54
Possible troubles while connecting and configuring the router. ............................ 55
Setting up your network adapter ........................................................................... 56
For Windows Vista, 7 and 8 ............................................................................... 56
For Windows XP ................................................................................................ 59
For Mac OS X .................................................................................................... 63
Specification ......................................................................................................... 66
FCC/CE Disclaimer .............................................................................................. 69
GPL/LGPL Information ......................................................................................... 72
Product overview
UR-104AN
4 ports ADSL2/2+ Router
10/100 Mbps Ethernet, IPTV and
Ipv6 support
UR-314AN
v2
Wireless N 4 ports ADSL2/2+ 150 Mbps 802.11n Wi-Fi, 10/100
Router 1x1
Mbps Ethernet, IPTV and Ipv6
support
UR344AN4G
Wireless N 4 ports ADSL2/2+ 3G/4G, 150 Mbps 802.11n Wi-Fi,
Router 1x1 + USB host with 10/100 Mbps Ethernet, IPTV and
3/4G Failover
Ipv6 support, 3G/4G backup, Samba
UR344AN4G+
Wireless N 4 ports ADSL2/2+
Router 1x1 + USB host w
3/4G Failover + 5dBi
antenna
UR354AN4G
Wireless N 4 ports ADSL2/2+ 3G/4G, 300 Mbps 802.11n Wi-Fi,
Router 2x2 + USB host with 10/100 Mbps Ethernet, IPTV and
3/4G Failover
Ipv6 support, 3G/4G backup, Samba
3
3G/4G, 150 Mbps 802.11n Wi-Fi,
10/100 Mbps Ethernet, IPTV and
Ipv6 support, 3G/4G backup,
Samba, 5 dBi antenna
UPVEL ADSL Modem Router
Package contents
• ADSL2+ Modem Router
• Quick Installation guide
• CD-ROM (Utility and User’s Guide)
• Power Adapter (please go to page 63 for specifications)
• Network Cable (Twisted Pair Cat5 1,5m/5ft)
• Telephone cable (x2)
• ADSL-splitter
• Warranty certificate
Status LEDs
Depending on your ADSL Modem Router model, features will differ, and
some LEDs may not be available as described below. This User Manual
provides you with notes (in italic), when certain features are only available
in specific models.
Power
Power
DSL
DSL connection
Internet
Internet connection
LAN1~LAN4
Connection to LAN1~LAN4 ports (PCs or other network devices)
WLAN
(all except
UR-104AN)
Wireless network
WPS
(all except
UR-104AN)
Wi-Fi Protected Setup function execution
USB
(UR-44AN4G, Connection to USB port (3G/4G modem or external storage
UR-344AN4G+ device)
& UR-45AN4G)
4
LEDs description
LED
Solid
Blinking
Off
Power
Power is supplied
–
Power is not
supplied
DSL
Connected to
DSLAM
Not connected to
DSLAM
–
Internet
Public IP address
has been obtained
Data is being
transmitted
Public IP address
hasn’t been
obtained
LAN1~LAN4
Device has been
connected
Data is being
transmitted
Device is not
detected
WLAN
(all except
UR-104AN)
Wireless unit
is on
Data is being
transmitted
Wireless unit
is of
WPS
(all except
UR-104AN)
–
USB
(UR-344AN4G,
UR-344AN4G+
&
UR-345AN4G)
3G/4G modem or
external hard drive
is connected
Waiting for WPS
function to be
WPS function is not
activated on the
being used
remote device you
are going to connect
(2 min)
Data is being
transmitted
5
USB port is not
being used
UPVEL ADSL Modem Router
Ports and buttons functionality
POWER
Power cable port
SWITCH
Power On/Off button
WPS
(all except
UR-104AN)
Wi-Fi Protected Setup activation
WiFi
(all except
UR-104AN)
Wireless unit activation/deactivation
USB
(UR-344AN4G,
Port to connect 3G/4G modem or external hard drive
UR-344AN4G+ &
UR-345AN4G)
LAN 1 ~ LAN4
DSL
RJ-45 ports to connect PCs and other device at your local
area network
RJ-11 telephone cable port
6
Router Installation
7
UPVEL ADSL Modem Router
If you connect to the Internet via ADSL:
1. Using the network cable from the package, connect your computer to LAN2 or
LAN3 port of the router. LAN4 port is for IPTV receiver connection.
2. Disconnect the phone cable from the outlet and connect in to the PHONE port
of the splitter.
3. Connect the splitter to your phone outlet.
4. Using the phone cable from the package, connect your router’s DSL port and
splitter’s MODEM port.
5. Plug in the power adapter and connect the power cable to the DC plug. Push
the SWITCH button to turn on your router. The power LED activates and your
router starts to load.
6. After loading is complete your router assigns an IP address to the PC you are
using. On the front panel the relevant LAN LED activates and a notification
appears in Windows tray, informing you that LAN connection established
successfully.
If you connect to the Internet via 3G/4G modem:
(UR-344AN4G, UR-344AN4G+ & UR-345AN4G)
1. Using the network cable from the package, connect your computer to LAN2 or
LAN3 port of the router. LAN4 port is for IPTV receiver connection.
2. Plug the 3G/4G modem to the USB port on the back side of your router.
3. Plug in the power adapter and connect the power cable to the DC plug. Push
the SWITCH button to turn on your router. The power LED activates and your
router starts to load.
4. After loading is complete your router assigns an IP address to the PC you are
using. On the front panel the relevant LAN LED activates and a notification
appears in Windows tray, informing you that LAN connection established
successfully.
If you connect to the Internet via cable/satellite modem or dedicated
Ethernet connection:
1. Using the network cable from the package, connect your computer to LAN2 or
LAN3 port of the router. LAN4 port is for IPTV receiver connection.
2. Connect your cable/satellite modem or your ISP's network cable to LAN1 port of
your router.
3. Plug in the power adapter and connect the power cable to the DC plug. Push
the SWITCH button to turn on your router. The power LED activates and your
router starts to load.
4. After loading is complete your router assigns an IP address to the PC you are
using. On the front panel the relevant LAN LED activates and a notification
appears in Windows tray, informing you that LAN connection established
successfully.
8
Configuring your router with Setup Wizard
1. Insert the CD from the package into your CD-ROM drive.
2. The configuration utility will start automatically and the window represented
below will appear. If it doesn’t, it most likely indicates that CD Autorun function
of your operating system is off. In that case please launch Explorer, open your
CD drive and then launch Autorun.exe.
3. Click Start configuration wizard button.
.
4. Please select your language.
5. In the following window click Configure
your router.
Note. Upvel recommends to upgrade the
Setup Wizard to the latest version before
connecting and configuring the router. If
Internet connection is established utility
will update automatically. The latest
version is available at:
http://www.upvel.com/support/software/u
pvel-master.html
9
UPVEL ADSL Modem Router
6. Establish all the connections according
to
instructions
in
the
window
represented to the right and click Next.
7. In the following window please click Next.
10
Connecting to the Internet via ADSL
1. Please click ADSL modem / WAN /
Ethernet button.
2. Enter the data from the agreement with
your ISP and click Next.
These settings can be clarified at your
ISP's support.
3. Please wait until the router setup is
completed.
4. The Internet connection setup is now
completed. Click the Next button..
11
UPVEL ADSL Modem Router
Connecting to the Internet via Ethernet
1. Please click the WAN/Ethernet
button.
2. Select your connection type, enter all
the necessary data from the
agreement with your ISP and click
Next.
These settings can be clarified at your
ISP's support.
3. Please wait until the router setup is
completed.
4. The Internet connection setup is now
completed. Click the Next button.
12
Connecting to the Internet via 3G/4G
(UR-344AN4G, UR-344AN4G+ & UR-345AN4G)
1. Please click 3G/4G (LTE) button.
2. Enter the data from the agreement with
your ISP and click Next.
These settings can be clarified at your
ISP's support.
3. Please wait until the router setup is
completed.
4. The Internet connection setup is now
completed. Click the Next button..
13
UPVEL ADSL Modem Router
Wireless network configuration
1. Please click on Wi-Fi button.
2. Please specify the SSID (your network’s
name).
3. Select the encryption type (WPA2-PSK
is recommended).
4. Specify the passphrase.
5. Then click Next.
6. Please wait until the wireless setup is
completed.
14
7. Wi-Fi setup is completed. Please click
Next.
8. Click
button to exit.
Congratulations! Your new Router is now operational. You can run the
installation CD anytime to make changes to your Router’s settings.
Note: You can change additional settings by entering http://192.168.10.1 into
your Web browser address line, and enter “admin” for username and “admin”
for password. More detailed explanations are in the user manual on your
CD ROM.
15
UPVEL ADSL Modem Router
Connection to your wireless network
Windows Vista, 7 and 8
1. Start ->ControlPanel ->Network and Internet ->Connect to a network
2. Or left-click on network connection button in Windows tray.
3. In the next window choose Wi-Fi network with the name you have specified,
and click Connect.
16
4. Enter the network key you have specified to the input box and click OK.
17
UPVEL ADSL Modem Router
Windows XP
1. Click the Start button, then follow to Control Panel. Double-click the Network
Connections.
2. Double-click on Wireless Network Connection
18
3. In the next window choose Wi-Fi network with the name you have specified,
and click Connect.
4. Enter the network key you have specified to the both input boxes and click
Connect.
19
UPVEL ADSL Modem Router
Tips on wireless performance optimization
A set of various factors can impact the range of wireless devices.
1. Adjust your wireless devices so that the signal is traveling in a straight path,
rather than at an angle. The more material the signal has to pass through the
more signal you will lose.
2. Keep the number of obstructions to a minimum. Each obstruction can reduce
the range of a wireless device. Position the wireless devices in a manner that
will minimize the amount of obstructions between them.
3. Building materials can have a large impact on your wireless signal. In an indoor
environment, try to position the wireless devices so that the signal passes
through less dense material such as dry wall. Dense materials like metal, solid
wood, glass or even furniture may block or degrade the signal.
4. Antenna orientation can also have a large impact on your wireless signal. Use
the wireless adapter’s site survey tool to determine the best antenna orientation
for your wireless devices.
5. Interference from devices that produce RF (radio frequency) noise can also
impact your signal. Position your wireless devices away from anything that
generates RF noise, such as microwaves, radios and baby monitors.
6. Any device operating on the 2.4GHz frequency will cause interference. Devices
such as 2.4GHz cordless phones or other wireless remotes operating on the
2.4GHz frequency can potentially drop the wireless signal. Although the phone
may not be in use, the base can still transmit wireless signals. Move the
phone’s base station as far away as possible from your wireless devices.
If you are still experiencing low or no signal, consider repositioning the wireless
devices or installing additional access points.
20
Configuring your router through Web-interface
Besides using the Configuration Wizard you are able to set up your router using
Web-interface.
Open your Web browser and go to http://192.168.10.1
Your router will prompt you for a user name and password.
Enter the default user name and password and then click Login.
Default User Name: admin
Default Password: admin
21
UPVEL ADSL Modem Router
Quick Installation
For quick installation through the router’s web-interface go to the main (Status)
page and click Quick Start tab .
22
Then click RUN WIZARD.
Click NEXT.
23
UPVEL ADSL Modem Router
Set a new password for admin account. Enter the same password into both boxes
and click NEXT.
Note: If you ever factory reset your router the default password will revert back to
“admin”.
Select the appropriate time zone from the dropdown list and click NEXT.
24
Select the connection type which your ISP uses and click NEXT. If you’re not sure
which connection type is yours please contact your ISP’s support.
25
Dynamic IP address
PPPoE/PPPoA
If VPI and VCI values are different then the default
ones please enter the actual values into the boxes.
Then please click NEXT.
Enter you username and password into the boxes. If
VPI and VCI values are different then the default ones
please enter the actual values into the boxes. Then
please click NEXT.
Note. All the necessary information generally can be
found in the agreement with your ISP. You may also
clarify it contacting with your ISP’s support.
Note. All the necessary information generally can be
found in the agreement with your ISP. You may also
clarify it contacting with your ISP’s support.
Static IP address
Bridge Mode
Enter your IP-address, subnet mask and gateway into
the boxes. If VPI and VCI values are different then the
default ones please enter the actual values into the
boxes. Then please click NEXT.
If VPI and VCI values are different then the default
ones please enter the actual values into the boxes.
Then please click NEXT.
Note. All the necessary information generally can be
found in the agreement with your ISP. You may also
clarify it contacting with your ISP’s support.
Note. All the necessary information generally can be
found in the agreement with your ISP. You may also
clarify it contacting with your ISP’s support.
технической поддержки Интернет-провайдера.
Please click NEXT and wait a little for your settings to take effect.
If you would like to change some settings please click BACK.
To discard all the settings and quit the Quick Start Master please click CANCEL.
Please click CLOSE to quit.
27
UPVEL ADSL Modem Router
Web-interface guide
After you enter to 192.168.10.1 with your web-browser you see the home page of your router’s
web-interface (Status). Here you are able to overview the state and settings of all the router’s
network interfaces as well as the firmware version.
28
Connecting to the Internet via ADSL
Please go to Interface Setup - Internet. Here you should specify your Internet connection
settings according to the agreement with your ISP.
In Trasfer Modes menu please select ATM.
29
UPVEL ADSL Modem Router
If VPI and VCI values (according to the agreement with the ISP) are different then the default
ones please enter the actual values into the boxes. Otherwise leave them unchanged.
Connecting with dynamic IP address
Leave settings unchanged unless otherwise stated in the agreement with the ISP.
Then click SAVE at the bottom.
30
Connecting with static IP address
Enter your IP-address, subnet mask and gateway into the boxes. Leave the other settings
unchanged unless otherwise stated in the agreement with the ISP.
Then click SAVE at the bottom.
31
UPVEL ADSL Modem Router
Connecting by PPPoA/PPPoE protocol with dynamic IP address
Enter your username and password into the boxes. Leave the other settings unchanged unless
otherwise stated in the agreement with the ISP.
Then click SAVE at the bottom.
32
Connecting by PPPoA/PPPoE protocol with static IP address
Enter your username and password as well as your IP-address, subnet mask and gateway into
the boxes. Leave the other settings unchanged unless otherwise stated in the agreement with
the ISP.
Then click SAVE at the bottom.
33
UPVEL ADSL Modem Router
Bridge mode
Leave the settings unchanged unless otherwise stated in the agreement with the ISP.
Then click SAVE at the bottom.
34
Connecting to the Internet via Ethernet
Please go to Interface Setup - Internet. In Trasfer Modes menu please select Ethernet.
Please mind the following settings:
Encapsulation. Select the connection type your ISP requires.
Note: for instructions on configuring PPTP and L2TP connection please refer to the next
chapter.
Username and password. If your ISP provided you with the login and password to connect the
Internet please enter them here. This information can be noted in the agreement with the ISP or
in its support.
IP commom options. Make sure the Default Route - Yes.
NAT. Select "Enable".
IGMP Proxy. Select "Enable".
Click SAVE.
(please see the image at the next page)
35
UPVEL ADSL Modem Router
36
Connecting to the Internet via L2TP and PPTP
If your ISP provides Internet access via PPTP or L2TP protocol, please apply the following
settings.
Please go to Interface Setup - Internet.
• In WAN Transfer Mode select Ethernet;
• In Encapsulation Select Dynamic or Static IP Address (depends on the configuration
your ISP requires).
Click SAVE.
37
UPVEL ADSL Modem Router
Then go to Interface Setup - VPN.
Select PPTP or L2TP protocol (depends on the configuration your ISP requires) and specify all
the necessary settings.
•
•
•
IP - enter the IP address or URL of the VPN server;
Username - enter the username provided by the ISP (the username you use for the
Internet access);
Password - enter the password you use for the Internet access.
These settings generally can be found in the agreement with your ISP or clafified in your ISP's
support.
Click SAVE.
38
Connecting to the Internet via 3G
Please go to Interface Setup - 3G.
To establish Internet connection via 3G/4G modem you should use the settings as stated below:
Status: Activated
3G Backup: Enabled
Default APN: Yes
Leave the other settings unchanged.
Then click SAVE at the bottom.
39
UPVEL ADSL Modem Router
Interface setup > LAN
Here you are able to set one alias IP address for creating an additional logical LAN interface
using the same physical one.
You are also able to set DHCP reservation function here. You should enter MAC address of a
certain device and IP address you want this device to obtain each time it connects your
network.
40
Interface setup > Wireless
Here you are able to adjust the settings of a wireless network. The default settings are
appropriate for most users.
However you can select the other wireless network modes. E.g. if your network does not
contain 802.11b and 802.11g devices you can choose 802.11n mode.
You can also change the SSID and passkey which is necessary to get access to the wireless
network.
41
UPVEL ADSL Modem Router
42
IPTV setup
To set up your router for co-working with IPTV you should state settings as represented below:
Go to Interface setup> Internet.
Choose PVC1 virtual channel. For VPI and VCI please use the values depending on your ISP's
requirements respectively.
For ATM QoS use UBR option.
Choose the connection type Bridge mode.
43
UPVEL ADSL Modem Router
Go to Interface setup >LAN.
In DHCP menu unmark the checkbox LAN4 (it will be used to connect an IPTV reciever).
44
Go to Advanced setup >PortBinding.
Choose Activated. For group 0 chose ATM VC port 0, Ethernet ports 2, 3, 4 and WLAN port
1. Please click SAVE.
45
UPVEL ADSL Modem Router
Select Group index 1. For Group 1 select ATM VC port 1 and Ethernet port 1.
Then click SAVE.
IPTV setup is complete.
46
Maintenance > Administration
Here you are able to set a new password for admin account. Please enter the same password
into both boxes and click SAVE.
47
UPVEL ADSL Modem Router
Maintenance > Time zone
Here you are able to set your router to synchronize time and date to NTP-server or to a
computer used to enter the router’s web-interface. You may as well set time and date manually.
Clock synchronization is essential for precise system logging and for correct Parental function
operating.
By default the router synchronizes time and date to the default NTP server. If you want to
synchronize to some other NTP server please select your time zone, enter the address of the
NTP server to relevant box and click SAVE.
48
To synchronize to a computer used to enter the router web-interface please select the relevant
option and click SAVE.
To set time and date manually please select the relevant option, specify time and date and then
click SAVE.
49
UPVEL ADSL Modem Router
Maintenance > Firmware
Here you are able to update your router’s firmware, save current settings to a file as well as load
them.
Firmware update
Download the latest firmware from www.upvel.com and select tclinux.bin option. Then click
Browse, specify a path to the firmware you have downloaded and click Open. After that click
UPGRADE at the bottom.
CAUTION! Firmware upgrade should be completed by connecting your router with
Ethernet cable to PC. It is not advised to flash firmware over wireless connection! The
firmware upgrade may take some time. Do not switch off power or remove cables while the file
is loaded and firmware is updated! This may result in serious damage to the router and even
non repairable hardware failure! After the upgrade router will reboot automatically and require
log-in authorization again.
Save settings
Click ROMFILE BACKUP In the following window select a folder to save romfile.cfg file and
click Save.
Load settings
Click Browse and specify a path to a romfile file. Then click Open and click UPGRADE at the
bottom.
CAUTION! ROMFILE update should be completed by connecting your router with
Ethernet cable to PC. It is not advised to load ROMFILE over wireless connection! The
settings upgrade may take some time. Do not switch off power or remove cables while the file is
loaded and firmware is updated! This may result in serious damage to the router and even non
repairable hardware failure! After the upgrade router will reboot automatically and require log-in
authorization again.
50
Maintenance > SysRestart
There are two restart options: with current settings saving and with restoring factory default
settings. Select what you want and click RESTART.
CAUTION! The reboot of the router may take some time. Do not switch off power or remove
cables while the file is loaded and firmware is updated! This may result in serious damage to the
router and even non repairable hardware failure! After the upgrade router will reboot
automatically and require the authorization again. If you choose factory default settings, please
use the default log-in settings from the Quick Installation Guide or run the Set-up wizard.
51
UPVEL ADSL Modem Router
Status > System Log
Here you are able to setup the registration of system events.
System logging is activated by default.
Select the events from the first dropdown menu to be logged.
Select the events from the second dropdown menu to be seen currently (system log
configuration).
If you want the log file to be stored on the remote server please enable the Remote Log option
and then specify the IP address and UDP port of the server.
To save changes please click APPLY.
To turn off the logging function please select Disable option and click APPLY.
To overview the log entries please click Viewlog.
52
Entries of the log are represented according to a configuration option chosen.
To save all the entries to a file please click Savelog, choose the destination in the opening
window and click Save.
53
UPVEL ADSL Modem Router
Status > Statistics
Here you can overview statistics on incoming and outgoing traffic for each of router’s interfaces.
54
Appendix 1
Possible troubles while connecting and configuring the
router.
1. If you insert your CD into your computer drive and wait for a while, but nothing seem to
happen, it most likely indicates that the CD Autorun function of your operating system is
turned off. In that case please launch the Configuration Wizard manually. Launch Explorer,
open your CD drive and then double-click Autorun.exe.
2. If the Configuration Wizard seem to launch successfully (on Windows 7) but nothing
happens when you click the buttons, please close the application, right-click the
Autorun.exe icon and left-click to Run as Administrator.
3. If you have no configuration CD please connect to the Internet without the router. Open your
Web-browser, go to http://www.upvel.com/support/upvel-master.html and download the
Configuration Wizard. Then connect the router according to this User Manual and launch
the Configuration Wizard from your computer.
You can also configure your router through the Web-interface (at 192.168.10.1). The
detailed instructions on using the Web interface are enclosed to this User Manual.
4. If you use a operation system different than Windows or MacOS, please configure your
router through the Web-interface (at 192.168.10.1).
5. If the router is not detected:
a. Please check the configuration of network interfaces in your computer according to
this User Manual.
b. If there are more than one active network connection on your computer, please
disable all of them except the one you use to configure the router.
c. Reset your router to factory default settings by pushing the RST/WPS button on the
back of the router for 20 seconds.
55
UPVEL ADSL Modem Router
Appendix 2
Setting up your network adapter
Before the router setup starts, please make sure your network adapter is set to
automatic IP and DNS obtain. Follow the instruction below.
For Windows Vista, 7 and 8
1. Please rightclick to the network conections icon in the bottom-right corner. Then
rightclick to Open Network and Sharing Center.
Or (in Windows Vista and Windows 7):
1a. Click the Start button, then follow to Control Panel. In the following window
click View network status and tasks.
56
2. In the next window click Change Adapter Settings (or Manage network
connections in Windows Vista).
3. Then please right-click the Local Area Connection icon and then click
Properties.
57
UPVEL ADSL Modem Router
4. In Local Area Connection – Properties window click Internet Protocol Version
4(TCP/IPv4) and then click Properties.
4. Click on Obtain an IP address automatically and Obtain DNS server
address automatically. Then click on OK.
58
For Windows XP
1. Click the Start button, then follow to Control Panel. Double-click the Network
Connections icon.
59
UPVEL ADSL Modem Router
2. In the following window please right-click the Local Area Connection icon and
then click Properties.
60
3. In Local Area Connection Properties window click Internet Protocol
(TCP/IP) and then click Properties.
61
UPVEL ADSL Modem Router
4. Click on Obtain an IP address automatically and Obtain DNS server
address automatically. Then click on OK.
62
For Mac OS X
1. Please click on System Preferences
63
UPVEL ADSL Modem Router
2. Then click on Network.
64
3. Choose the Ethernet interface, in Configure IPv4 menu select Using DHCP and then click
Apply.
65
UPVEL ADSL Modem Router
Appendix 3
Specification
Ethernet
• IEEE 802.3i 10Base-T
• IEEE 8023u 100Base-TX
Wi-Fi (all except UR-104AN)
• IEEE 802.11n
• IEEE 802.11g
• IEEE 802.11b
ADSL
Standards
• ITU-T G.992.1 (G.dmt), G.992.2 (G.lite), G.992.3 (ADSL2), G.992.4
(splitterless ADSL2), G.92.5 (ADSL2+) Annex A
• G.lite (G.992.2), 1,5 Mbps download, 512 Kbit/s upload
• Multi-Mode (automatic standard selection): ANSI T1.413, Issue 2; G.dmt
(G.992.1); G.994.1 и G.996.1 (for ISDN only); G.991.1; G.lite (G992.2)
• OAM cell support: F4/F5, AIS OAM и RDI OAM
• ATM Forum UNI 3.1/4.0 PVC
• Multiple Protocols over AAL5 (RFC 1483)
• PPP over AAL5 (RFC 2364)
• PPP over Ethernet (RFC 2516)
Protocols
NAT/NAPT, PPPoE, PPPoA, PPTP, L2TP, HTTP, DHCP (client/server), TCP/IP,
UDP, PAP, CHAP, RIP1, RIP2, DDNS, UPnP, SNMP, CWMP
Firewall
NAT, SPI, DoS attacks prevention, system logging, sending notifications
via e-mail
Access control
ACL, IP / MAC / URL filtering, application filter, parental control
Transit VPN session
РРТР, IPSec, L2TP (up to 100 sessions)
8 PVC support
VPI range: 0-255
VCI range: 32-65535
UBR/CBR/VBR support
Incapsulation:
• RFC2684 (RFC 1483 / 2684), Multi-protocol over ATM
ATM
• RFC2684 (RFC 1483 / 2684), Bridge
• RFC2225 (RFC 1577), IPoA
• RFC2364, PPPoA (CHAP, PAP)
• RFC2516, PPPoE
Autodetecting VPI/VCI and multiplexing procedure (VC-based, LLC-based)
Data throughput rate:
• download up to 24 Mbps
• upload up to 1 Mbps (up to 3,5 Mbps if ISP supports Annex М)
• Web configuration page (HTTP)
Management
• TR-069
• SNMP
• Telnet
66
WAN port
RJ-11 (DSL)
LAN ports
4 RJ-45 10/100 Mbps Auto-MDIX ports
USB port (UR-344AN4G, UR344AN4G+ & UR-345AN4G)
• 3G/4G modem or storage device support
• FTP and SAMBA support
• Reset: factory settings restoring
Buttons
• WPS: connecting to your wireless network with Wireless Protected Setup
function (all except UR-104AN), factory settings restoring when is being
pushed for 20 seconds.
• Wi-Fi: onboard wireless unit enabling/disabling (all except UR-104AN)
• Switch: power switch
• Power, DSL, Internet, LAN1~LAN4
Status LEDs
• WLAN, WPS (all except UR-104AN)
•
Dimensions (exclusive
antennas)
Temperature limits
Humidity limits
Certificates
USB (UR-344AN4G, UR-344AN4G+ & UR-345AN4G)
110 х 158 х 35 mm (43,3 x 62,2 x 13,77 inches)
• Operational: 0 ~ 40 °С (32 ~ 104 °F)
• Storage: -20 ~ 70 °С (-4 ~ 158 °F)
• Operational: from -10 to 90% (without condensation)
• Storage: from 5 to 95% (without condensation)
FCC, СЕ
67
UPVEL ADSL Modem Router
Wireless connection (all except UR-104AN)
• IEEE 802.11n
Standards
• IEEE 802.11g
• IEEE 802.11b
• 802.11b: DSSS (PBCC, CCK, DQPSK, DBPSK)
Modulation
• 802.11g: OFDM
• 802.11n: OFDM 64-QAM
• 80211b: 11 Mbps, 5.5 Mbps, 2 Mbps, 1 Mbps
Data throughput rate
• 802.11g: 54 Mbps, 48 Mbps, 36 Mbps, 24 Mbps, 18 Mbps, 12 Mbps, 9 Mbps,
6 Mbps
• 802.11n: 150 Mbps (UR-314AN v2, UR-344AN4 & UR-344AN4G+)
• 802.11n: 300 Mbps (UR-345AN4G only)
Frequency band
2,4-2,497 GHz
Channels
1-13
SSID
Up to four wireless networks.
WLAN partition and hidden SSID support.
• 1 undetachable antenna with 2 dBi gain (UR-314AN v2 & UR-344AN4)
Antenna(s)
• 1 undetachable antenna with 5 dBi gain (UR-344AN4G+ only)
• 2 undetachable antennas with 2 dBi gain (UR-345AN4G only)
• 64/128-bit WEP (Hex or ASCII).
Encryption
• WPA-PSK (TKIP/AES)
• WPA2-PSK (TKIP/AES)
• 802.11b: 18 dBm
Transmitter power
• 802.11g: 12-14 dBm
• 802.11n: 12-14 dBm
• -82 dBm on 11 Mbps
Receiver susceptibility
• -72 dBm on 54 Mbps
• -80 dBm on 150 Mbps (UR-314AN v2, UR-344AN4 & UR-344AN4G+)
• -80 dBm on 300 Mbps (UR-345AN4G only)
External power adapter
Your router model:
UR-104ANN
UR-314AN v.2
UR-344AN4G, UR-344AN4G+, UR-354AN4G
V (volt)
5,2
12
12
68
А (ampere)
1
0,5
1
FCC/CE Disclaimer
FCC STATEMENT
This equipment has been tested and found to comply with the limits for a Class B digital device,
pursuant to part 15 of the FCC Rules. These limits are designed to provide reasonable protection
against harmful interference in a residential installation. This equipment generates, uses and can
radiate radio frequency energy and, if not installed and used in accordance with the instructions,
may cause harmful interference to radio communications. However, there is no guarantee that
interference will not occur in a particular installation. If this equipment does cause harmful
interference to radio or television reception, which can be determined by turning the equipment off
and on, the user is encouraged to try to correct the interference by one or more of the following
measures:
- Reorient or relocate the receiving antenna.
- Increase the separation between the equipment and receiver.
- Connect the equipment into an outlet on a circuit different from that to which the receiver
is connected.
- Consult the dealer or an experienced radio/ TV technician for help.
This device complies with part 15 of the FCC Rules. Operation is subject to the following two
conditions:
1) This device may not cause harmful interference.
2) This device must accept any interference received, including interference that may
cause undesired operation.
Any changes or modifications not expressly approved by the party responsible for compliance
could void the user’s authority to operate the equipment.
Note: The manufacturer is not responsible for any radio or tv interference caused by unauthorized
modifications to this equipment. Such modifications could void the user’s authority to operate the
equipment.
FCC RF Radiation Exposure Statement
This equipment complies with FCC RF radiation exposure limits set forth for an uncontrolled
environment. This device and its antenna must not be co-located or operating in conjunction with
any other antenna or transmitter.
“To comply with FCC RF exposure compliance requirements, this grant is applicable to only
Mobile Configurations. The antennas used for this transmitter must be installed to provide a
separation distance of at least 20 cm from all persons and must not be co-located or operating in
conjunction with any other antenna or transmitter.”
69
UPVEL ADSL Modem Router
CE Mark Warning
This is a class B product. In a domestic environment, this product may cause radio interference, in
which case the user may be required to take adequate measures.
National restrictions
This device is intended for home and office use in all EU countries (and other countries following
the EU directive 1999/5/EC) without any limitation except for the countries mentioned below:
Country
Restriction
Reason/remark
Bulgaria
None
General authorization required for outdoor use and
public service
France
Outdoor use limited to 10
mW e.i.r.p. within the band
2454-2483.5 MHz
Military Radiolocation use. Reframing of the 2.4 GHz
band has been ongoing in recent years to allow
current relaxed regulation. Full implementation planned for 2012
Italy
None
If used outside of own premises, general authorization
Is required
Luxembourg
None
General authorization required for network and
Supply
Norway
Implemented
This subsection does not apply for the geographical
Area within a radius of 20 km from the centre of NyÅlesund
Russian Federation
None
Only for indoor applications
70
71
UPVEL ADSL Modem Router
GPL/LGPL Information
GPL/LGPL General Information
This UPVEL product includes free software written by third party developers. These codes are
subject to the GNU General Public License ("GPL") or GNU Lesser General Public License
("LGPL"). These codes are distributed WITHOUT WARRANTY and are subject to the copyrights
of the developers. UPVEL does not provide technical support for these codes. The details of the
GNU GPL and LGPL are included in the product CD-ROM. Please also go to
(http://www.gnu.org/licenses/gpl.txt) or (http://www.gnu.org/licenses/lgpl.txt) for specific terms of
each license. The source codes are available for download from UPVEL's web site
(http://www.upvel.com/downloads/gpl) for at least three years from the product shipping date.
You could also request the source codes by contacting UPVEL. 13139 Ramona Blvd.,
Irwindale, CA 91706, USA. Tel: +1-626-337-0162 Fax: +1-626-337-0167.
Informations générales GPL/LGPL
Ce produit UPVEL comprend un logiciel libre écrit par des programmeurs tiers. Ces codes sont
sujet à la GNU General Public License ("GPL" Licence publique générale GNU) ou à la GNU
Lesser General Public License ("LGPL" Licence publique générale limitée GNU). Ces codes
sont distribués SANS GARANTIE et sont sujets aux droits d'auteurs des programmeurs. UPVEL
ne fournit pas d'assistance technique pour ces codes. Les détails concernant les GPL et LGPL
GNU sont repris sur le CD-ROM du produit. Veuillez également vous rendre en
(http://www.gnu.org/licenses/gpl.txt) ou en (http://www.gnu.org/licenses/lgpl.txt) pour les
conditions spécifiques de chaque licence. Les codes source sont disponibles au
téléchargement sur le site Internet de UPVEL web site (http://www.upvel.com/downloads/gpl)
durant au moins 3 ans à partir de la date d'expédition du produit. Vous pouvez également
demander les codes source en contactant UPVEL.13139 Ramona Blvd., Irwindale, CA 91706,
USA. Tel: +1-626-337-0162 Fax: +1-626-337-0167.
Allgemeine Informationen zu GPL/LGPL
Diese UPVEL Produkt enthält freie Software, die von externen Entwicklern geschrieben wurde.
Diese Codes fallen unter die GNU General Public License ("GPL") oder GNU Lesser General
Public License ("LGPL"). Diese Codes werden ohne Gewähr verteilt
und unterliegen den Urheberrechten der Entwickler. UPVEL bietet keinen technischen Support
für diese Codes. Weitere Details der GNU GPL und LGPL sind in der Produkt-CD-ROM
enthalten. Bitte gehen Sie auch auf (http://www.gnu.org/licenses/gpl.txt) oder
(http://www.gnu.org/licenses/lgpl.txt) für spezifische Bedingungen der einzelnen
Lizenzvereinbarungen. Die Quellcodes sind zum Download zur Verfügung auf der
UPVEL Website (http://www.upvel.com/downloads/gpl) für mindestens drei Jahre nach Produkt
Versanddatum. Sie können die Quellcodes auch bei UPVEL direkt anfragen. 13139 Ramona
Blvd., Irwindale, CA 91706, USA. Tel: +1-626-337-0162 Fax: +1-626-337-0167.
Información general sobre la GPL/LGPL
Este producto de UPVEL incluye un programa gratuito desarrollado por terceros. Estos códigos
están sujetos a la Licencia pública general de GNU (“GPL”) o la Licencia pública general
limitada de GNU (“LGPL”). Estos códigos son distribuidos SIN GARANTÍA y están sujetos a las
leyes de propiedad intelectual de sus desarrolladores. UPVEL no ofrece servicio técnico para
estos códigos. Los detalles sobre las licencias GPL y LGPL de GNU se incluyen en el CD-ROM
del producto. Consulte también el (http://www.gnu.org/licenses/gpl.txt) ó el
(http://www.gnu.org/licenses/lgpl.txt) para ver las cláusulas específicas de cada licencia. Los
códigos fuentes están disponibles para ser descargados del sitio Web de UPVEL
(http://www.upvel.com/downloads/gpl) durante por lo menos tres años a partir de la fecha de
envío del producto. También puede solicitar el código fuente llamando a UPVEL. 13139
Ramona Blvd., Irwindale, CA 91706, USA. Tel: +1-626-337-0162 Fax: +1-626-337-0167
72
Общая информация о лицензиях GPL/LGPL
В состав данного продукта UPVEL входит бесплатное программное обеспечение,
написанное сторонними разработчиками. Это ПО распространяется на условиях
лицензий GNU General Public License ("GPL") или GNU Lesser General Public License
("LGPL"). Программы распространяются БЕЗ ГАРАНТИИ и охраняются авторскими
правами разработчиков. UPVEL не оказывает техническую поддержку этого программного
обеспечения. Подробное описание лицензий GNU GPL и LGPL можно найти на компактдиске, прилагаемом к продукту. В пунктах (http://www.gnu.org/licenses/gpl.txt) и
(http://www.gnu.org/licenses/lgpl.txt) изложены конкретные условия каждой из лицензий.
Исходный код программ доступен для загрузки с веб-сайта UPVEL
(http://www.upvel.com/downloads/gpl) в течение, как минимум, трех лет со дня поставки
продукта. Кроме того, исходный код можно запросить по адресу UPVEL. 13139 Ramona
Blvd., Irwindale, CA 91706, USA. Tel: +1-626-337-0162 Fax: +1-626-337-0167.
73
PRODUCT WARRANTY REGISTRATION
Please take a moment to register your new
UPVEL product online:
Go to www.upvel.com/registration
UPVEL
Irwindale, CA USA
www.upvel.com
Toll Free Support Hotline
USA/Canada: 1 (800) 457-3811
UPVEL is a registered Trademark.
All other trademarks belong to their respective proprietors.
Designed in USA / Assembled in China