1
AIR CONDITIONER
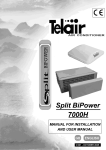
Split BIPOWER
7000
MANUAL FOR INSTALLATION
AND USER MANUAL
GB
ENGLISH
V001 - June 2005
SPLIT
GB
BIPOWER 7000
Via E. Majorana , 49 48022 Lugo (RA) ITALY
CE STATEMENT OF COMPLIANCE
Under the EEC Machine Directive 89/392, attachment II A
We hereby declare that the air conditioner, the data of which are provided below, has been
designed and built to comply with the essential requirements in terms of safety and health
laid down by the European Directive on Machine Safety.
This statement shall fail to be valid should any changes be made to the machine without
our approval in writing.
Machine: AIR CONDITIONER
Model: SPLIT BIPOWER 7000
Serial Number ……………………
Directive of reference:
Machine Directive (89/392/EEC) in the 91/31/EEC version.
Low Voltage Directive (73/23/EEC).
Electromagnetic compatibility (89/336/EEC) in the 93/31/EEC version.
Harmonized standards applied, especially: EN 292-1; EN 292-2; EN 60204-1.
DATE ……January 3rd, 2004
THE CHAIRMAN
Manual drawn up in the
office
-2-
technical
SPLIT
BIPOWER 7000
GB
INDEX
1
1.1
1.2
1.3
FOREWORD ------------------------------------------------------------------------------------------------------ pag. 4
Purpose and scope of application of this manual -------------------------------------------------------- pag. 4
Symbols and definitions ---------------------------------------------------------------------------------------- pag. 4
General information ---------------------------------------------------------------------------------------------- pag. 5
2
2.1
2.2
2.3
2.4
AIR CONDITIONER IDENTIFICATION --------------------------------------------------------------------- pag. 6
Components ------------------------------------------------------------------------------------------------------ pag. 6
ID plate ------------------------------------------------------------------------------------------------------------- pag. 6
Technical features ----------------------------------------------------------------------------------------------- pag. 7
Connection diagram --------------------------------------------------------------------------------------------- pag. 7
3
3.1
3.2
3.3
TRANSPORT, HANDLING, STORAGE -------------------------------------------------------------------- pag. 8
Storage ------------------------------------------------------------------------------------------------------------- pag. 8
Weight -------------------------------------------------------------------------------------------------------------- pag. 8
Handling ------------------------------------------------------------------------------------------------------------ pag. 8
4
4.1
4.2
4.3
4.3.1
4.3.2
4.4
INSTALLATION -------------------------------------------------------------------------------------------------- pag. 8
Preliminary information ----------------------------------------------------------------------------------------- pag. 8
Installation --------------------------------------------------------------------------------------------------------- pag. 8
Installing the condenser unit ---------------------------------------------------------------------------------- pag. 9
“A” type installation ---------------------------------------------------------------------------------------------- pag. 9
“B” type installation ---------------------------------------------------------------------------------------------- pag. 9
How to fasten the condenser unit ---------------------------------------------------------------------------pag. 13
5
5.1
5.2
5.3
5.4
INSTALLING THE EVAPORATING (AERATOR) UNIT ------------------------------------------------pag. 14
Using the ventilation port -------------------------------------------------------------------------------------- pag. 14
Opening a new hole --------------------------------------------------------------------------------------------pag. 14
Positioning the evaporating unit -----------------------------------------------------------------------------pag. 15
Installing the diffuser -------------------------------------------------------------------------------------------pag. 16
6
6.1
6.2
6.3
6.4
6.5
6.6
6.7
6.8
6.9
6.10
6.11
USER INSTRUCTIONS ---------------------------------------------------------------------------------------pag. 17
Foreword ----------------------------------------------------------------------------------------------------------pag. 17
Preliminary checks ---------------------------------------------------------------------------------------------pag. 18
Control panel -----------------------------------------------------------------------------------------------------pag. 18
Switching on -----------------------------------------------------------------------------------------------------pag. 18
Display ------------------------------------------------------------------------------------------------------------pag. 18
Setting fan speed -----------------------------------------------------------------------------------------------pag. 19
Thermostat -------------------------------------------------------------------------------------------------------pag. 19
Cooling mode ----------------------------------------------------------------------------------------------------pag. 19
Switching off -----------------------------------------------------------------------------------------------------pag. 19
Safety rules ------------------------------------------------------------------------------------------------------pag. 20
Troubleshooting -------------------------------------------------------------------------------------------------pag. 20
7
7.1
MAINTENANCE -------------------------------------------------------------------------------------------------pag. 21
Maintenance operations ---------------------------------------------------------------------------------------pag. 21
8
DISPOSAL -------------------------------------------------------------------------------------------------------pag. 21
WIRING DIAGRAM -----------------------------------------------------------------------------------------------------pag. 22
WRENCH KIT LIST FOR ASSEMBLING "SPLIT" CONDITIONERS ---------------------------------------pag. 23
GENERAL TERMS OF WARRANTY --------------------------------------------------------------------------------pag. 24
-3-
GB
1
SPLIT
BIPOWER 7000
FOREWORD
1.2 Symbols and definitions
MANUAL
Read this manual
carefully before carrying out any kind of
operation on the air conditioner.
1.1.
Purpose and scope of application of
this manual
This means you must be
careful to avoid serious consequences which could
lead to the death or injury of people.
This means a situation which
This manual has been drawn up by the
Manufacturer in order to provide the essential
information and instruction needed to carry out
every maintenance and use operation on the air
conditioner in a proper and safe manner.
It is an integral part of the equipment of the air
conditioner, and must be kept carefully throughout
its lifetime and protected against any agent which
might deteriorate it. It must follow the air conditioner
if this is reinstalled on another vehicle or if there is
a change of property.
The information contained in this manual is
addressed to the staff which must install the air
conditioner, and to all those involved in maintenance
and use.
This manual lays down the purpose for which the
machine was built and contains all the information
needed to ensure its safe and proper use.
Constant compliance with the instructions contained
in it ensure the safety of the user, economy of use
and longer machine life.
In order to make it easier to consult, it has been
subdivided into sections which identify the main
ideas; to consult it quickly, refer to the table of
contents.
The parts of the text which must not be ignored are
highlighted in bold type and preceded by symbols
which are explained below.
We strongly suggest reading the contents of this
manual and of the documents of reference carefully:
this is the only way to ensure proper operation of
the air conditioner through time, its reliability and
the prevention of any damage to people or things.
Note: the information provided here was correct at
the time of going to press, but may be modified at
any time without prior notice.
-4-
could take place within the lifetime of a product,
system or installation considered to be hazardous
in terms of injury to people, damage to property or to
the environment or financial loss.
This means you must pay
attention in order to incur serious consequences
which could lead to damage to material goods, such
as resources or the product.
This refers to information
which is especially important.
Drawings and photos are provided by way of
example only. Although the machine you actually
have may differ from the illustration in this manual,
its safety and the information provided for are
guaranteed.
The manufacturer, in order to pursue a policy of
constant development and updating of the product,
may make changes without giving prior notice.
SPLIT
BIPOWER 7000
GB
1.3 General information
Every SPLIT LINE air conditioner consists of two
separate units:
2) EVAPORATOR UNIT (or AERATOR)
which must be installed on the roof of the
vehicle in the place of a porthole (40 x 40
cm) or else on an opening of the same size
made on an area of your choice on the roof
itself. It has the purpose of cooling the air
inside the vehicle.
1) CONDENSER UNIT which can be installed
outside the vehicle, inside the double
bottom, inside the garage or a bench or a
cabinet. The purpose of this unit is to drive
out hot air.
Both units are connected to each other by two very
thin hoses (6 and 10 mm). The hoses are
connected to the units by quick coupling joints
(which do not require any special tool).
All the SPLIT BIPOWER air conditioners have been
designed for 230 Volt AC and 12 Volt DC feeding.
The 230 Volt feeder takes
priority; when you connect the SPLIT BIPOWER
air conditioner to a power source, the battery
disconnects automatically.
-5-
SPLIT
GB
2
BIPOWER 7000
AIR CONDITIONER IDENTIFICATION
2.1 Components (Fig. 1)
A)
B)
C)
D)
E)
F)
G)
H)
I)
2.2 ID plate
1 CONDENSER UNIT
4 SILENT BLOCKS
1 SUCTION CONVEYOR
1 EXTENSION 6 m TUBE D. 6 mm
1 EXTENSION 6 m TUBE D. 10 mm
1 EXTENSION CONTROL CABLE
1 EVAPORATOR UNIT
1 COLD AIR CONVEYOR
1 DIFFUSER WITH CONTROLS
1 Model
2 Machine code
3 Serial number
4 Compressor and fan consumption
5 Type and quantity of refrigerating gas
SPLIT
1
2
8
BIPOWER 7000
CODE : xxxxxx
S.N.xxxxxxxxxx
Refrigerating yeld : ............. 1,85 kW
Voltage : .. 12 Vdc e 230 V a.c./50Hz
Inlet Power : ..................... 650-920 W
Gas ............................. gr. 450 R134A
0
1
5 5 6 4
3
4
5
0 0 6 0 4 0 7
A
C
G
D
L
B
E
H
I
1
-6-
SPLIT
GB
BIPOWER 7000
2.3 Technical features
SPLIT BIPOWER 7000
Refrigerating power
Number of fan speeds
Feeding
Consumption
Absorbed power
Refrigerating gas
Air supply
Diffuser height
1.85 kW / 6500 BTU
2 + auto
12 VDC - 230 V 50 Hz
54A/12V 4,0A/230 V
650-920 W
R 134 A
300 m3/h
7 cm
2.4 Connection diagram (Fig. 2)
THERMOMETER
CABLE
CONTROL PANEL CABLE
D. 10 mm TUBE
D. 6 mm TUBE
CONTROL CABLE
CONTROL CABLE
230V~
12V
2
-7-
SPLIT
GB
BIPOWER 7000
4 INSTALLATION
3 TRANSPORT, HANDLING, STORAGE
4.1 Preliminary information
3.1 Storage
During transport, the air conditioner is protected by
a suitable carton packaging. The air conditioner
must be stored in a horizontal position, in a covered,
dry and ventilated environment.
The package is made to allow up to five (5)
condensing parts and up to five (5) evaporating parts
to be stacked.
Do not turn the package
upside down. The right position is shown by
the symbol stamped on the package ( ).
Stacking a larger number of
items than the number specified above,
complete with their packaging, is dangerous not
only for the integrity of the equipment, but is
also hazardous for people.
Before installing the air
conditioner, you must by all means read these
instructions in order not to make any mistake
while installing.
Improper installation of the
air conditioners may lead to irreparable damage
to the equipment and compromise the safety
of the user.
Should the air conditioners be installed in a manner
which does not comply with the instructions of this
manual, the Manufacturer shall not be held liable
for any failure or for the safety of the air conditioner,
according to the law DM 89/392/EEC. The
Manufacturer shall also not be liable, in such a case,
for any damage to things or injury to people.
Installation
3.2 Weight
must
be
performed only by qualified and properly
trained staff.
Weight not including packaging.
SPLIT BIPOWER 7000
4.2 Installation
26 kg for the condensing part
9 kg for the evaporating part
Before installing, you must
cut off all the power supply to the vehicle.
3.3 Handling
The air conditioners, complete with their packaging,
can be handled using ordinary hoisting and transport
means.
The boxes are fitted with spacers which allow you
to introduce transpallet forks.
When
hoisting
and
transporting, comply with accident prevention
and safety rules. Use hoisting and transport
equipment with a capacity greater than the load
to be hoisted.
-8-
•
•
•
Battery positive pole
Generator unit (if any)
Outside power source.
to comply with the above
instructions may lead to electrical discharge.
Before getting onto the roof
of the vehicle, make sure it is strong enough to
be walked on. Check with the provider of the
vehicle. Should it not be strong enough, you
must set up a special trestle with scaffolding.
SPLIT
GB
BIPOWER 7000
4.3 Installing the condenser unit
4.3.2 “B” type installation
When you install the condenser unit, remember it
must always communicate towards the outside via
at least two openings Fig. 3 Ref. (1) and (2).
In fact, the condenser unit sucks air in from the
outside via the opening Fig. 3 Ref. (1), then – after
having used it to cool the condenser inside – it again
drives the heated air out via the opening Fig. 3 Ref.
(2).
Two kinds of installations can be made:
The condenser unit sucks in the outside air from
the bottom and drives the hot air out towards the
bottom too. This kind of installation calls for greater
attention, since it is of the utmost importance that
the hot air which is driven out is not sucked back in
via the opening Fig. 3 Ref. (1), as this would
diminish the efficiency of the conditioner.
Should the condenser unit be installed outside the
vehicle, do not place the air inlet hole against a wall
which could limit the passage of air. If the unit is too
close to the ground (less than 40 cm), the hot air –
driven out from Fig. 3 Ref. (2) – as it springs back
from the ground could be sucked in again by the
opening Fig. 3 Ref. (1).
4.3.1 “A” type installation
The condenser unit sucks in the outside air from
the side and drives the hot air out towards the
bottom.
“A” type installation
“B” type installation
1
1
2
2
2
2
1 Outside cool air inlet
2 Hot air outlet
3
-9-
SPLIT
GB
If you install the condenser unit inside the vehicle,
you must be careful to keep the flow of the sucked
in outside air separate from that of the hot air driven
out, and also prevent the expelled hot air from getting
inside the vehicle.
To separate the two air flows, use a soft sponge
adhesive liner Fig. 4 Ref. (3), placing it against the
floor, in order to prevent the hot air coming out from
Fig. 4 Ref. (2) from being sucked in through the
opening Fig. 4 Ref. (1).
BIPOWER 7000
After having chosen the best position, first take off
the lid Fig. 5 Ref. (A) in order to access the inside
of the condenser unit and then take off one of the
other two lids: Fig. 5 Ref. (B), if you have chosen
the outlet on the long side Fig. 5 Ref. (2),
Fig. 5 Ref. (C ) if you chosen the outlet on the short
side Fig. 5 Ref. (3).
After having prepared the area of installation of the
condenser unit, you should connect the gas pipes
and the extension cables, before finally fastening
the unit in place.
The metal container has been set up so as to let
both gas pipes, the 2 extension cables and the 230
Volt feeding cable of the air conditioner out on 2
directions: on the long side Fig. 5 Ref. (2) and on
the short side Fig. 5 Ref. (3).
A
C
1
3
1
3
2
2
2
1 Outside cool air inlet
2 Hot air outlet
3 Soft adhesive sponge liner
- 10 -
B
4
5
SPLIT
GB
BIPOWER 7000
The extension cables and pipes are provided with
a through bush Fig. 6 Ref. (1) which must be fitted
into each of the sockets Fig. 6 Ref. (2) and then
locked in place via the nut Fig. 6 Ref. (3).
Connect the extension cable to the relevant
connector of the condenser unit, Fig. 7 Ref. (1).
Connect both pipes of the refrigerating gas to the
relevant quick couplings, screwing all the way down
using two wrenches Fig. 7 Ref. (2) and (3).
2
3
1
6
1
2
3
7
- 11 -
SPLIT
GB
Fit the through bushes into the socket and lock
them in place using the plastic nuts provided with
the supply.
Let the 230 Volt supply cable out locking the
through bush in place on the steel plate socket
Fig. 8 Ref. (7). Put the lids back on, fastening them
carefully Fig. 8 Ref. (6).
4
BIPOWER 7000
Insert the red and black 12 Volt feeder cables Fig.
8 Ref. (4) and (5) into the two through bushes and
fasten them on the connector provided with the
equipment. Now collect the connector to the inside
one.
5
7
2
3
1
6
6
8
- 12 -
SPLIT
GB
BIPOWER 7000
4.4 How to fasten the condenser unit
The condenser unit may be installed either
suspended on two brackets (not provided with the
supply) on the outside of the vehicle Fig. 9 Ref.
(1), or resting on the floor on the inside Fig. 9 Ref.
(2).
Every conditioner comes provided with 4 L-shaped
brackets and 4 silent-blocks Fig. 9 Ref. (3).
In order to avoid transmitting any vibrations from
the condenser unit to the floor, it is important to fasten
the unit onto the silent-blocks.
1
2
3
9
- 13 -
GB
5
INSTALLING THE EVAPORATING
(AERATOR) UNIT
SPLIT
BIPOWER 7000
5.2 Opening a new hole
The evaporator unit may be installed in either of two
ways:
• using the ventilation holes (ventilation portholes)
already present on the vehicle.
• opening a new hole.
On the roof, chose an central area between two
stanchions and use a felt pen to mark off a square
measuring 395 mm on each side Fig. 11 Ref. (1).
Use a small saw to carefully cut the opening on the
roof. Be careful not to cut any electric wires Fig. 10
Ref. (2).
Wear goggles and safety
gloves before using any electrical tools or
manual saws.
5.1 Using the ventilation port
This solution can be applied on condition that the
porthole measures 395x395 mm.
First remove the porthole after having taken out the
screws which fasten it to the roof of the vehicle.
Scrape away all the sealing material located around
the opening Fig. 10 Ref. (1) and suitable close the
holes of the screws and the joint lines using silicone
or putty of a kind easily available in specialized shops
Fig. 10 Ref. (2).
1
Every kind of scrap, glue,
silicon, liners and so on should not be disposed
of within the environment, but should be put in
special containers and delivered to Collection
and Disposal Centres.
2
1
2
10
- 14 -
11
SPLIT
GB
BIPOWER 7000
Place a reinforcing frame (Fig. 12) along the profile
of the opening; if necessary, drill a hole on the side
to let through the power cables and refrigerating
gas pipes.
Place the outside unit on
the roof as shown on the figure and centre it
over the 39,5 x 39,5 cm hole.
Connect the cable coming from the condensing unit
to the relevant cable on the control panel.
Connect both hoses, screwing the two quick
couplings all the way down using a wrench. First
connect the smaller tube (6 mm) Fig. 14 Ref. (3)
then the larger one (10 mm) Fig. 14 Ref. (4). Cover
the large tube and the coupling with anticondensation material.
FRONT
12
5.3 Positioning the evaporating unit
Before positioning the evaporating unit on the roof
of the vehicle, you must spread a proper amount of
slow-drying sealant around the edges of the
opening.
Put the evaporating unit onto the roof of the vehicle
and place it over the opening, previously treated with
the sealant. Make sure that the side holes (which
are on the bottom) Fig. 13 Ref. (1) face the driving
direction of the vehicle, while the rear holes Fig. 13
Ref. (2) face the rear of the vehicle.
The arrow on Fig. 13 shows the driving direction of
the vehicle
1
3
4
14
FRONT
2
1
13
- 15 -
SPLIT
GB
Introduce the aluminium air conveyor Fig. 15 Ref.
(1) into the plastic tube of the evaporator and push
it down until the 2 fastening brackets Fig. 15 Ref.
(2) to the roof of the vehicle, leading the 4 fastening
screws out of the holes Fig. 15 Ref. (3).
BIPOWER 7000
5.4 Installing the diffuser
After anchoring the evaporating unit to the roof of
the vehicle, take both cold air outlet flaps out of the
diffuser Fig. 16.
Note: The air conveyor has been designed to be
installed on vehicles with a roof having a thickness
between 30 and 60 mm. With thicker roofs, one
can ask for a suitable conveyor.
Do not crush the sealing
liner too much: it must not be less than 12 mm
thick.
If you crush the liner too much, this will
damage the supporting base of the air
conditioner, compromising the sealing of the
joint and generating loud noise inside the
vehicle when working.
FRONT
1
3
4
16
Fit the probe of the thermometer into the rubber tab
on one side of the aluminium conveyor Fig. 17 Ref.
(3). Connect the cable (1) coming from the
condensing unit to the connector of the control unit,
then the cable (2) (red/black) coming from the
evaporator to the other cable on the control unit.
1
2
15
2
3
17
- 16 -
SPLIT
BIPOWER 7000
GB
Apply the diffuser to the conveyor. Make sure that
the aluminium tunnel is properly placed at the very
centre of the diffuser.
6
USER INSTRUCTIONS
6.1 Foreword
Fasten the diffuser to the ceiling, using the selftapping screws provided with the supply Fig. 18.
Put the two cold air direction orientation flaps back
on Fig. 19.
18
19
The SPLIT BIPOWER 7000 air conditioner consists
of four basic sections:
• compressor: this makes the refrigerating gas
inside the system circulate and raises its
temperature;
• condenser: this cools the refrigerant, changing
its state from gaseous to liquid;
• injector: this changes the state of the refrigerant
from liquid to gaseous;
• evaporator: this receives the refrigerant in its
gaseous state, cooling the surrounding air. The
cooled air is spread inside the vehicle by a
variable speed fan.
The air temperature is controlled by a thermostat.
Before starting up the air conditioner – after a long
period during which the vehicle has been exposed
to the sun – it is good practice to open the doors
and windows to let out the heat which has been
accumulated inside. When the temperature inside
the vehicle has reached the same level as the
outdoor temperature, close the doors and windows
and start up the air conditioning system, opening
the doors and windows only in case of need.
The SPLIT BIPOWER 7000 air conditioner is able
to run at both 12 Volts (battery) and at 230 Volts
(power mains). The 12 Volt or 230 Volt power supply
is selected by a special circuit which, when a mains
voltage at 230 Volts is present, cuts the connection
to the 12 Volt battery off automatically and activates
the connection to the power mains. On the other
hand, when the plug is taken out of the 230 Volt
power source, the circuit automatically restores the
connection to the 12 Volt battery.
if the conditioner is made to
run at 12 Volts, with the vehicle parked, remember
that a good 100 Ah battery completely charged will
last for no more than one and a half hours. If the
battery is not in a good condition, or is smaller, this
time will diminish drastically. In any case, we
suggest you do NOT use the battery until it runs
out, as this would damage it irreparably and make
it unusable in the future.
- 17 -
SPLIT
GB
6.2 Preliminary checks
6.4 Switching on
Before switching on the air conditioner for the very
first time:
•
•
•
BIPOWER 7000
Check that condensate drainage holes are
unobstructed.
Check that power voltage and frequency are
as indicated in the previous section.
Check that air flow through relative ducts and
vents is unobstructed. To ensure maximum
efficiency always keep external ventilation
grilles clear.
To switch the air conditioner on press the on/off
key [fig. 20 ref. 3] and at the same time, the
display is active.
After switching on the
conditioner there is a 3-minute pause before
the compressor is started and cold air outflow
begins.
The conditioner features
an automatic thermostat with a minimum
working temperature of 16°C (+/- 1°C). Below
this temperature the thermostat does not
enable the compressor: this prevents ice
forming
inside the unit. Fans and the heating function
remain enabled.
6.3 Control panel (fig 20)
Fan speed key [fig. 20 ref. 1]
Thermostat adjuster knob [fig. 20 ref. 2]
On/off switch [fig. 20 ref. 3]
Menu key [fig. 20 ref. 4]
Display [fig. 20 ref. 5]
6.5 Display [fig.20 rif.5]
1
5
The display shows the temperature setting (SET).
Temperature is set via the thermostat knob [fig.
20 ref. 2].
4
3
Press the menu key
[fig. 20 rif.4] on the display and the ambient
temperature (TA) inside the vehicle is
displayed for a few seconds.
The display then reverts to the temperature
setting.In addition to temperature, the
Display [fig. 20 ref. 5] also shows the
following:
2
5
1
4
3
20
12
- 18 -
SPLIT
BIPOWER 7000
GB
6.6 Setting fan speed
Press the speed key
[fig. 20 rif. 1]
If pressed once the display shows the fan speed
setting: this is shown for a few seconds before the
display reverts to ambient temperature (TA). To
modify fan speed keep pressing the key: fan speed
will be adjusted according to the following sequence
In which F11, F12 and F13 are the three fixed
speeds and AUT is automatic speed. F11 indicates
slow fan speed, F12 medium speed and F13 high
speed.
If one of the three fixed speeds is set the control
panel always activates ventilation at that same
speed. If, instead, fan speed is set to AUT, the
control panel step by step
[fig. 20] automatically selects the most appropriate
fan speed in consideration of the temperature
setting and the temperature in the vehicle interior.
6.7 Thermostat [fig.20 rif.2]
6.8
Cooling mode
- When this symbol is displayed constantly the air
conditioner is generating cold air.
- When the symbol flashes, the air conditioner
is restoring gas pressures inside its interior and
will start producing cold air after 3 minutes.
- When neither the symbol not the heating symbol
appear this means that:
a) a) ambient temperature has reached the set
temperature so the compressor is off and
only the ventilation fans are working.
b) temperature is less than 16°C and the
thermostat is set to minimum.
In this case, as long as ambient temperature
remains below the 16°C threshold, only the fans
work; the compressor is shut down.
6.9 Switching off
To switch the air conditioner off press the on/off
key [fig. 20 ref. 3].
Rotate the thermostat to set the desired
temperature on the display.
The control panel [fig. 20] allows automatic control
of temperature in the vehicle interior.
If, for example, we set a temperature of 25°C the
conditioner will produce cold air as long as the
temperature inside the vehicle is higher than 25°C.
Correct use of the thermostat is very important. If
you set a temperature much lower than outdoor
temperature (more than 8°C lower) you run the risk
of falling ill (catching colds etc.) and energy
consumption increases.
- 19 -
SPLIT
GB
BIPOWER 7000
6.11 Troubleshooting
After turning off the air
conditioner, using the thermostat knob or else
the ON-OFF switch, you must wait at least 3
minutes before turning it back on again, in order
to allow the refrigerant to stabilize its pressure.
Failure to comply with this rule may lead to
irreparable damage to the compressor of the
air conditioner.
6.10 Safety rules
• Always use power sockets which are connected
to earth and are protected by differential cut-off
switches.
• Never use the air conditioner near flammable
liquids.
• Never use the air conditioner for any purpose
other than those provided for by the Manufacturer.
• Do not modify or tamper with any part of the air
conditioner.
• Use original spare parts.
• Maintenance and repairs must be carried out by
specialized personnel.
• Do not put your hands inside the ventilation grids.
• Do not put any foreign matter into the ventilation
outlets.
• Should the air conditioner suffer from any forceful
impact, have specialized technicians check it out
before using it again.
• In case of fire, never open the top lid of the air
conditioner, but use approved type fire
extinguishers.
• Do not use water to put out fire.
If the air conditioner fails to work properly, this
usually will not be due to a fault but simply to
improper use. For example:
• The air conditioner is undersized compared to
the volume of air to be conditioned.
• The walls of the vehicle are not sufficiently
insulated.
• The doors are opened too frequently.
• There are too many people inside the vehicle.
• Voltage is too low.
Following is a list of troubles which may come up,
their reasons and how to solve them.
If the air conditioner is
working poorly, first make sure:
• That the direct power supply is never less than
205 V, or else that the battery has not run out.;
• The suction filters are not jammed;
• The air diffusion outlets are open.
1) The air conditioner fails to start up:
• make sure that the cool air / warm air switch Fig.
20 Ref. (2) is not in “0” position and that the
thermostat is in its all-cool position Fig. 20 Ref. (3).
• Then make sure that the sockets are powered,
connecting a household appliance or using a
voltmeter.
2)The compressor does not work:
• for the compressor to work, the thermostat Fig.
20 Ref. (3) must be set at a temperature at least 5
degrees lower than that of the indoor environment
of the vehicle and the warm / cool selector must
be in cool position.
3) The evaporator fan does not work:
• make sure that the ON-OFF switch Fig. 20 Ref.
(2)is not in “0” position and that the fan speed
selector Fig. 20 Ref. (1) is not blocked in an
intermediate position.
4) The condenser fan does not work:
• call in a technician.
- 20 -
SPLIT
GB
BIPOWER 7000
5) The air conditioner has a poor yield:
• if the air conditioner has a poor yield, you must
clean the air filter, the condenser and the evaporator,
using specific detergents. We suggest washing the
air conditioner before using it, after a long period of
time during which it has not been used. If the air
conditioner does not recover its initial yield even
after the exchangers have been cleaned, check the
load of the refrigerating gas.
7
condition. In any case, it is good practice to replace
them at least once a year.
• Make sure that the insulation of the power cables
is intact and remove any trace of humidity.
• Make sure all the screws are tightly fastened.
• During winter storage in the garage, we suggest
you disconnect the air conditioner from the power
source and from the battery.
8
MAINTENANCE
DISPOSAL
To dispose of the air conditioner, please refer to
specialized shops.
7.1 Maintenance operations
In order to ensure proper efficiency of the air
conditioner, once a year you must carry out a
thorough cleaning of the condenser, or have a
technician carry it out.
The waste material must
not be disposed of in the environment, but
dispatched to special Collection Centres.
Before accessing the air
conditioner, you must by all means disconnect
the 230 V and 12 Volt power supply and wait for
every part to cool down.
Take off the outside lid and spray a specific
detergent on the heat exchangers (evaporator and
condenser) and rinse with water to remove all dirt.
• Make sure the condensate outlet holes on the
evaporator are free Fig. 13 Ref. (1) and (2).
• Make sure the sealing liners are in proper condition
and that no water is leaking into the vehicle.
• Make sure that both active carbon filters (Fig. 21
Ref. 1) on the diffuser inside the vehicle are in proper
1
1
21
- 21 -
SPLIT
BIPOWER 7000
GB
WRENCH KIT LIST FOR ASSEMBLING “SPLIT” CONDITIONERS
Open 24 wrench
Fastening ø10 pipe coupling
Open 22 wrench
Fastening ø10 pipe coupling
Open 19 wrench
Fastening ø6 pipe coupling
Open 13 wrench
Screwdriver
10 wrench
Screwdriver
8 wrench
Tightening fastening
vibration dampers
Tightening self-tapping screws for
condenser conveyor
The same key can be used for all
the nuts and bolts for closing the
plates/condenser.
Assembling brackets
on condenser.
- 23 -
GB
SPLIT
BIPOWER 7000
GENERAL TERMS OF WARRANTY
Telair guarantees that its products are without faults or defects in their
material and/or construction.
The effects of the warranty are understood to be limited to the right to
obtain replacement or repair free of cost of any part which should turn out
to be defective, within 12 months from the date of purchase of the product
and in Telair’s opinion.
It is understood that the purchaser has no right whatsoever:
- to terminate the contract;
- to claim damages for people or things;
- to demand an extension of the warranty in case of any product defect or
malfunction.
Any transport charges are on the account of the purchaser, as well as any
expenses for on-site checks requested by the purchaser and accepted by
Telair.
The warranty shall be valid only if the customer is able to show a document
evidencing the date of purchase (invoice or receipt).
This document must be kept whole and must be submitted to the Telair
after-sales centre when asking for operation under warranty.
- 24 -
SPLIT
BIPOWER 7000
GB
NOTES:
...................................................................................................................................................
...................................................................................................................................................
...................................................................................................................................................
...................................................................................................................................................
...................................................................................................................................................
...................................................................................................................................................
...................................................................................................................................................
...................................................................................................................................................
...................................................................................................................................................
...................................................................................................................................................
...................................................................................................................................................
...................................................................................................................................................
...................................................................................................................................................
...................................................................................................................................................
...................................................................................................................................................
...................................................................................................................................................
...................................................................................................................................................
...................................................................................................................................................
...................................................................................................................................................
...................................................................................................................................................
...................................................................................................................................................
...................................................................................................................................................
...................................................................................................................................................
...................................................................................................................................................
...................................................................................................................................................
- 25 -
GB
SPLIT
BIPOWER 7000
NOTES:
...................................................................................................................................................
...................................................................................................................................................
...................................................................................................................................................
...................................................................................................................................................
...................................................................................................................................................
...................................................................................................................................................
...................................................................................................................................................
...................................................................................................................................................
...................................................................................................................................................
...................................................................................................................................................
...................................................................................................................................................
...................................................................................................................................................
...................................................................................................................................................
...................................................................................................................................................
...................................................................................................................................................
...................................................................................................................................................
...................................................................................................................................................
...................................................................................................................................................
...................................................................................................................................................
...................................................................................................................................................
...................................................................................................................................................
...................................................................................................................................................
...................................................................................................................................................
...................................................................................................................................................
...................................................................................................................................................
- 26 -
SPLIT
BIPOWER 7000
GB
NOTES:
...................................................................................................................................................
...................................................................................................................................................
...................................................................................................................................................
...................................................................................................................................................
...................................................................................................................................................
...................................................................................................................................................
...................................................................................................................................................
...................................................................................................................................................
...................................................................................................................................................
...................................................................................................................................................
...................................................................................................................................................
...................................................................................................................................................
...................................................................................................................................................
...................................................................................................................................................
...................................................................................................................................................
...................................................................................................................................................
...................................................................................................................................................
...................................................................................................................................................
...................................................................................................................................................
...................................................................................................................................................
...................................................................................................................................................
...................................................................................................................................................
...................................................................................................................................................
...................................................................................................................................................
...................................................................................................................................................
- 27 -
Foto e disegni non contrattuali - Les photos et les dessins ne sont donnés qu’à titre indicatif.
We reserve the right to make technical changes without prior notice - Fotos und Zeichnungen
nicht vertraglich. Fotos y planos no indicados en contrato
IN EUROPE:
EUROPE:
IN
GREAT BRITAIN - SCAN TERIEUR LTD
AIR CONDITIONER
ITALY
Via E.Majorana 49
48022 LUGO( RA )
Tel. + 39 0545 25037
Fax.+ 39 0545 32064
Tel. Servizio Assistenza
899 899 856
E-mail: [email protected]
www.telecogroup.com
GREAT BRITAIN - SCAN TERIEUR LTD
30,The
TheMetro
Metro
Centre,
Tolpits
- Watford,
30,
Centre,
Tolpits
LaneLane
Herts - England - WD18 9XG
Watford,
Tel. 01923
800353
- Fax
Herts
- England
- WD18
9XG01923 220358
Tel. 01923 800353 - Fax 01923 220358
HOLLAND - KARMAN AGENTUREN
Emmastraat,
31
HOLLAND
- KARMAN
AGENTUREN
Emmastraat,
31
1213 AJ Hilversum
- Holland
1213
AJ Hilversum
Tel. 035
6240156- -Holland
Fax 035 6242141
Tel.
035 [email protected]
6240156 - Fax 035 6242141
e-mail:
FRANCE
FRANCE- GERARD
– BLEYSDURAND
ANTOINE – BLEYS JEAN-PHILIPPE
Lieu
dit Borde
19, Rue
de laRouge
Parcheminerie
31590 Verfeil - France
18700 Aubigny sur Nere - France
Tel. 05 61356238 - Fax. 05 61743502
Tel. 02 48580367- Fax. 02 48583585
[email protected]
Mobil. 06 78262186 Mobil. 06 07012634
e-mail: [email protected]
ESPAÑA
- NAUCCA ACCESORIOS Y- [email protected]
REPUESTOS
ESPAÑA
- NAUCCA
CARAVANING, S.A.
Calle
Pallars,
141 - 143 4°B
Poligono
Industrial
CAN ROQUETA 2 – Calle Can Lletget,2
08018
Barcelona
España
Tel.
093Sabadell
3099537 -(Barcelona)
Fax. 093 4850700
08202
- España
e-mail:
[email protected]
Tel. 0937
457 054 - Fax. 0937 254 484
e-mail: [email protected]
ÖSTERREICH - TELECO GmbH
82041
Deisenhofen
ÖSTERREICH
– TELECO
GmbH
Tel.
08031
98939 - Fax.- 08031 98949
82041
Deisenhofen
e-mail: [email protected]
Tel. +49 08031 98939 - Fax. +49 08031 98949
www.telecogroup.com
e-mail: [email protected]
www.telecogroup.com
IN
DEUTSCHLAND
IN DEUTSHLAND
TELECO
GmbH
82041 Deisenhofen - Tel. 08031 98939 TELECO GmbH
Fax. 08031 98949
82041
Deisenhofen
Mit
unserer
Servicenummer
sind Sie
Tel. 08031
98939 - Fax. 08031 98949
01805
006 857
e-mail:mit
[email protected]
direkt
dem Teleco-Vertreter
in
Ihrer Nähe verbunden.
www.telecogroup.com
Händler und Info in Ihrer Nähe:
01805 006857
Service für Teleco Anlagen in Deutschland:
09001000690
KUNDENDIENST
BEI
AUSGEWÄHLTEN
BOSCH SERVICE!