1
ImmunoComb
V. READING AND INTERPRETING THE RESULTS
®
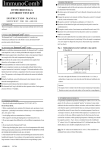
To determine the IgG titer of Chlamydophila specimens, compare the color intensity
of the Comb's appropriate teeth with the color spot series on the enclosed CombScale
table (see illustrations 9 & 10 for details).
BOVINE CHLAMYDOPHILA SP.
(CHLAMYDIA SP.)
ANTIBODY TEST KIT
The bottom spot on the ImmunoComb® tests for Chlamydophila. Evaluate the results
of each spot separately.
Compare the specimen's color intensity with that of the positive control (C+) included
INSTRUCTION MANUAL
in the kit, in order to determine its titer.
SUFFICINT FOR 30 ASSAYS
The positive control (C+) is calibrated to a 1:32 titer I.F.
Specimens with an identical or higher color intensity than the positive control are
I. INTENDED USE
considered positive.
This kit is designed to determine cow serum IgG antibody titers for
The negative control consists of non-immuned sera and should be read as zero (S=0).
Chlamydophila sp.(previously known as Chlamydia sp.).
Specimens with a color intensity lower than the positive control are considered
negative or non-immuned.
II. WHAT IS THE ImmunoComb® ASSAY?
To evaluate the titer, use the CombScale provided in the kit and determine the
The ImmunoComb® is a self-contained portable kit. A sensitive test
titer using Fig. A, as reference. The procedure is detailed in section VI.
which detects antibody levels in the blood or serum, the ImmunoComb®
provides results within 35 minutes.
Fig. A. Relationship between the CombScale's "S" value and the I.F.
III. HOW DOES THE ImmunoComb® WORK?
1: 256
Based on a solid phase immunoassay principle, the ImmunoComb® is a plastic
1: 128
I.F TITRE
card shaped like a comb, on which purified Chlamydophila antigen is attached.
Either immerse paper disks in cow blood or take a serum specimen. Deposit into
sample wells of the multi-compartment developing plate.
Insert Comb into the sample wells so that antibodies from samples bind themselves
1: 64
C+
1: 32
to the antigens on the Comb.
0
Non bound antibodies are washed out in the second compartment.
1
2
3
4
5
6
COMBSCALE VALUE
The next compartment contains an anti-cow IgG antibody labeled with an enzyme.
Immerse the Comb in this "conjugate." The bound antibodies will be labeled.
Important
Insert the Comb into a compartment where the enzyme reaction takes place. This
The margin of error is similar to that of other enzyme immunoassay kit procedures.
generates a color change which indicates the amount of antibodies present.
Therefore, an error in one color scale window will not result in a wrong diagnosis.
Using the CombScale, convert the spot's color intensity to the anti-chlamydophila
immunoglobulin level.
An internal control, the top spot indicates that the development is completed.
Example of a developed Comb
The ImmunoComb® may be divided into three separate sections. Each segment
processes between 1-4 samples.
ImmunoComb®
INTERNAL CONTROL
IV. HANDLING & STORAGE
Cat: 11BCP100
LOT:
S. N:
CHLAMYDOPHILA
1. Store the kit under normal refrigeration: 2°- 8° C (36° - 46° F).
Do not freeze the kit.
1
2
3
4
5
6
7
8
9
10
2. Before conducting the test, maintain all kit elements and specimens at room
temperature -- preferably for 60-120 minutes (or 22 minutes in 37° C). Perform
assay at room temperature of 20°- 25° C (68° - 77° F).
3. Avoid spillage and cross-contamination of solutions.
4. Mix reagents by inverting developing plate several times prior to use.
5. Do not mix reagents from different kits or from different compartments of one
kit.
TOOTH No.
1,5
2,6
6. Do not touch teeth of ImmunoComb® Card.
7. When using developing plate, pierce cover of each compartment while strictly
following test procedure instructions. DO NOT RIP OFF OR REMOVE COVER
RESULT & REMARKS
High positive reaction for Chlamydophila.
Positive reaction for Chlamydophila.
OF ENTIRE DEVELOPING PLATE ALL AT ONCE.
3
8. The ImmunoComb® kit contains inactivated biological material. Kit must be
4, 10
Verey Low reaction for Chlamydophila - Considered
negative.
Negative reaction for Chlamydophila.
7
8
Medium positive reaction for Chlamydophila.
No internal control - development failed.
9
11
12
High back ground color - no valid test.
Positive control.
Negative control.
handled and disposed of in accordance with accepted sanitary requirements. It is
recommended to incinerate kit after use. Use large amounts of water to flush kit
solutions down sewage/drainage system.
63BCP103
14/12/04
1
11
12
STEP-BY-STEP WITH ImmunoComb®
6
Remove one ImmunoComb® from its
protective wrapping and insert (print
side facing you) in compartments of
Row A. Gently move Comb up and
down several times, then let incubate in
Row A's compartments for 10 minutes.
B.
A.
C.
D.
c
4 3 2 1
+
6
E.
5
De
e
Comb Scal
ve
in
lop
la
gP
te
F.
De
The ImmunoComb® kit includes: A. 3 ImmunoComb® cards, each separately wrapped in an
aluminum envelope; B. 3 developing plates; C. 3 specimen papers with pre-punched disks; D.
One disposable tweezers; E. One calibrated CombScale color card; F. One tube of positive
control serum and one tube of negative control serum, a CombScore sheet and a user manual.
7
When using a paper disk
When using a serum
1
1
De
v
p
elo
ing
Pla
te
8
Pierce one of the cow's veins. Take a
specimen paper and saturate a prepunched disk with the blood.
Pla
t
After the Comb has completed the cycle
for Row F ,transfer it back to Row E .
Incubate in Row E for 2 minutes to fix
color .
Use a pipette or a capillary tube.
For testing a serum sample use 5 µl.
2
ing
Pierce the cover of the appropriate section
of compartment B with the tweezers.
Follow same procedure for remaining
rows at end of each incubation period.
Gently shake off excess liquid onto a
tissue. Insert Comb in row B's
compartment and let incubate for
2 minutes, shake-off and transfer Comb
to Row C and incubate for 10 minutes.
Similarly, the Comb is placed in Row D
for 2 minutes, Row E for 2 minutes, and
Row F for 10 minutes, allowing the color
reaction process to develop.
Perform assay at room temperature of 20° - 25° C (68° - 77° F).
10 Min - F
2 Min - E
2 Min - D
10 Min - C
2 Min - B
10 Min - A
v
p
elo
When using 1/3 or 2/3 of a
Comb, break the Comb by
folding back on notch 4 or 9
respectively. Keep the rest in
its original sleeve for further
use.
2
De
Slit open the protective aluminum
covering of compartment A with the
tweezers, one well for each sample.
Slit open the protective aluminum
cover of compartment A with the
tweezers, one well for each sample.
3
3
v
p
elo
ing
Pla
A I R D RY
AND READ
R E S U LT S
te
V I . R E A D I N G R E S U LT S W I T H T H E C o m b S c a l e
A. Adjust scale with
positive control:
9
When the Comb is completely dry align
it with the calibrated color CombScale.
Compare the color resulting from the
positive control (C+) sample to the
color scale : slide the yellow ruler until
the "C+" mark appears in the window
corresponding to the color.
c+
4 3 2 1
5
6
Comb Scale
2
3
4
5
6
Cat:
Lot
S. M:
7
8
9
10
11
12
Internal Control
4
Dispense a sample into each well.
When using the capillary tubes raise
and lower the piston several times to
achieve mixing.
When using a pipette, mix by
depressing the plunger a number of
times.
1
When using a paper disk
punch out a disk saturated with blood.
C+
Proceed to step 5.
3
Insert the disk into well #1 of compartment
A. Dip it well into the liquid. Proceed
with the other samples.
Wait 60 minutes for extraction of
antibodies.
B. Read each of the
spots separately:
10
Choose the most suitable color and read
the titer in the yellow windows.
5
6
For control serum open the next 2 consecutive wells.
c+
5
4 3 2 1
REMEMBER: A DIFFERENCE OF
ONE COLOR LEVEL WILL NOT
AFFECT DIAGNOSIS !!!
Comb Scale
1
2
Cat:
Lot
S. M
:
6
7
8
Intern
9
10
11
12
al Con
trol
2
5
Do the same with the negative control serum in the next well.
4
Mix the serum in the well
3
Take 5 µl positive control serum (C+) and insert into well A next to the last sample.
63BCP103 14/12/04
FINALLY, HOLD THE SLIDE IN
THIS POSITION DURING
READING.