1
Easy Start guide
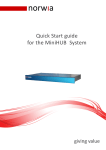
miniHUB Frame
The miniHUB frame uses the latest manufacturing and design technology plus a dash of innovative thinking
to give the user a positive experience.
We would like to give you a brief run through on important facts and features that you should know before
letting you loose on the miniHUB product.
The OUTSIDE of the frame
1. The front door on the miniHUB frames is a “PUSH TO RELEASE” mechanism. Please do not place excessive force by “PULLING” the door away from the unit. A gentle and even push from both sides of the frame
towards the rear of the unit will release the door, you should hear a click sound when this is activated. The
door is held in by side rails and will drop away from the miniHUB frame but stay attached. The door can be
removed totally if required by pressing the left and right rails towards the center of the frame while holding
the door up and pulling gently forward. Closing the door is identical to opening the door, “PUSH TO CLOSE”
2. PLEASE observe all ESD precautions when handling this unit and the electronics inside.
3. The miniHUB frame is supply with one external supply, a second supply can be purchased to provide full
redundancy for mission critical applications. Norwia have designed the miniHUB system with a single supply voltage (+24 Vdc), but it is possible to use any DC supply’s that can delivery between +12Vdc (60w) to
+24Vdc. Mixed supplies can be used, ie, Battery or Mains driven supplies at the same time! These are hot
swappable if a supply should fail.
4. The SYNC input will provide timing data to all cards in the system as long as all signals are of equal standard.
The INSIDE of the frame
1. The miniHUB frame will hold 4 cards such as the OC-4B-SDI and has room for two passive devices such a
8 port CWDM modules or 2 if required for a larger CWDM system. There is also a range of WDM and Splitter Optics to choose from.
2. All frames are delivered with the RCONmini (Rack Controller) but the controller has limited function in a
stand-a-lone mode. The RCONmini can be used later to provide SNMP functionality for control and monitoring and for custom applications, please contact Norwia directly.
3. The miniHUB has a specially designed card guide system called “Click & Go” this unique system allows
for a positive locking of the card once inserted, without the use of screws, springs or handle only mechanisms. The card should be positioned between the slide rail while pushing slightly (1mm) to the right hand
handle of the black card guide. Once the edge of the card is passed the point of the entry you can release
this handle and then use the red handle to lock the unit into its correct position. Once the card is pressed
into position you should hear a “Click” sound, this mean you are in position and can “go” onto your next
task. To release use the red handle to open the card guide lock and slide the card towards you.
4. To release RCONmini, press the extended portion of the PCB slightly down so its notch clears the top
cover of the miniHUB frame. With the PCB slightly down pull the unit towards you.