1
TEMPERATURE UPDATING FEATURE
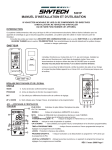
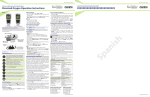
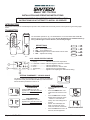
This remote control has a temperature updating feature built into its software. The transmitter reads the room temperature every 2 minutes, then updates the room temperature on the LCD screen.
RECEIVER
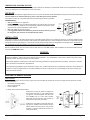
Install the 4 AA-size batteries supplied with the unit. It is recommended that ALKALINE batteries always be used for this product. Be
sure the batteries are installed with the (+) and (-) ends facing the correct direction.
Requires 4-AA 1.5V
alkaline batteries
Learning
button
ON
Slide
Switch
LEARN
REMOTE
ON
REMOTE
OFF
OFF
The remote receiver has a 3-position slide switch for selecting the mode of operation
ON/REMOTE/OFF
• ON: will manually turn on appliance.
• REMOTE: will allow use of handheld transmitter. If the system does not respond
to the transmitter on initial use, check the battery positions in the remote. If that
does not work, see the SECURITY CODE section.
• OFF: will disable the remote receiver.
• It is suggested that the slide switch be placed in the OFF position if you will
be away from your home for an extended period of time.
Bat
ter
y
e
cov
d
r sli
es
on/
off
Remote Receiver
INSTALLATION
The remote receiver can be either wall-mounted in a standard plastic switch box (not metal) or placed on or near the fireplace hearth.
Preferably, the remote receiver should be wall-mounted in a plastic switch box, as this will protect its electronic components from the
heat produced by the gas appliance. The remote receiver should be kept away from temperatures exceeding 130º F. Battery life is
also significantly shortened if batteries are exposed to temperatures 130ºF or higher.
Before installation make sure the remote receiver slide switch is in the OFF position. After installation be sure that the slide switch is
moved to the REMOTE position.
WARNING
This remote control system must be installed exactly as outlined in these instructions. Read all instructions completely before attempting installation. Follow instructions carefully during installation. Any modifications of this remote control or any of its components will void the warranty and may pose a fire hazard.
Consult gas appliance manufacturer’s instructions and wiring schematics for proper placement of all wires. All electronic modules
are to be wired to manufacturer’s specifications.
The following wiring diagrams are for illustration purpose only. Follow instructions from manufacturer of gas valve and/or electronic
module for correct wiring procedures. Improper installation of electric components can cause damage to electronic module, gas
valve and remote receiver.
MOUNTING THE REMOTE RECEIVER
WALL MOUNT
When wall mounting the remote receiver, longer wires (not included) are required to connect to the gas valve or electronic module.
These wires must:
• Be at least 18 Gauge (AWG)
• Be no longer than 20’
• Have no splices
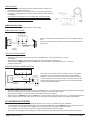
Position the cover plate so the word ON is facing up; then, install the remote receiver into the
plastic switch-box using the two long screws
provided. Push the white button over the receiver slide switch.
Skytech 1001T/LCD-A
L
WAL
Receiver
Slide
Button
LEARN
To attach Cover Plate to Receiver Box:
Position the receiver as shown in diagram to
the left with lower tab on cover plate inserted
into groove of receiver (Make sure ADJ hole
and LEARN hole on cover plate properly
aligns with remote receiver). Pull receiver up
and snap into top tab of cover plate.
ON
R
E
M
O
T
E
OFF
Cover Plate
Plastic Switch Box
REV 4/15/11 Page 2