1
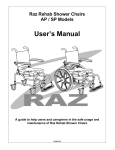
Raz Rehab Shower Chairs
AP / SP Models
User’s Manual
A guide to help users and caregivers in the safe usage and
maintenance of Raz Rehab Shower Chairs
20061110
Warning!
Safety Instructions
Failure to comply may cause injury or damage!
It is important that the user(s), and/or the caregivers of the user(s),
thoroughly learn the safe operation of the Raz Shower Commode Chair.
The following must be observed for safe operation:
•
The User’s Manual must be read and thoroughly understood before using the
Raz Shower Commode Chair. If there are any parts of the User’s Manual that
are not understood, clarification should be sought prior to using the product.
For clarification of any section of this manual, call the dealer that provided
the product. If the dealer is unable to address your concerns or answer any
of your questions, contact the Canadian distributor or manufacturer.
Dynamic Health Care Solutions
Bolton, Ontario Canada
905.951.8541 / 866.875.2877
[email protected]
•
Maximum user weight:
o AP/SP
o APHD/SPHD
Raz Design Inc.
Toronto, Ontario Canada
416.751.0400
[email protected]
300 lbs (136 kg)
450 lbs (204 kg)
•
Transfers to and from the chair can be dangerous. Consult a physical or
occupational therapist if safe, reliable transfer techniques have not been
learned. Individuals who have not learned this skill must have assistance
during transfers and may require the use of a mechanical lift.
•
The Raz Shower Chair is not intended for use as a transportation device or a
long-term seating system.
•
Users should never be left unattended in a Raz Shower Chair.
•
The Raz Shower Chair is not designed to be used as a pool chair. Do not
immerse the shower chair in whole or in part, in water or any other liquid or
damage to the shower chair components will result.
•
If it is ever felt that any aspect of the Raz Shower Chair is in need of
maintenance, contact your dealer. Any problems that could affect the safe
usage of the chair must be attended to immediately. The Raz chair must be
clearly identified as being in need of maintenance and as being unavailable
for use. The dealer that provided the product must be contacted so that
repairs can be made prior to using the product.
3
SAFETY INSTRUCTIONS
Wheel Locks, Forward Stability
The 5” casters are equipped with dual locks. The step-on lever activates both the roll lock
and the swivel lock. It is essential that the front casters be in the forward position
before engaging the locks. This will provide the most forward stability. If your chair is
equipped with rear self-propelling wheels (SP Model), the wheel locks for these wheels
must be engaged during transfers.
DO NOT lean forward as this may cause the chair to tip forward.
DO NOT wheel down a ramp (SP Model) without an attendant who can hold onto the
chair during the descent.
WHEEL LOCKS ARE NOT BRAKES! Never use the wheel locks to slow down your
commode when descending inclines as this could cause the chair to tip in the
direction of travel.
Lateral Stability
DO NOT lean over the edge of a Raz Shower Chair as this could cause the chair to tip.
DO NOT attempt to pick up objects from the floor by leaning over and reaching – use a
reacher or seek assistance from others.
DO NOT position the Shower Chair on a side slope as this could cause it to tip.
Rearward Stability
DO NOT wheel up an incline (SP Model) without ensuring that the optional rear antitippers are in place. The optional anti-tippers must be ordered with the Raz SP and
properly installed before wheeling on uneven surfaces.
Ramps and Other Inclines
Ramps and other surfaces that aren’t level – such as slopes into wheel-in showers –must
be tested with an attendant to ensure that they don’t compromise stability. A qualified
healthcare professional should be consulted to assist with this process.
Anti-Tippers (SP Model only)
Anti-tippers are an option of the Raz SP Shower Chairs. These are recommended
whenever the chairs are to be used on uneven surfaces such as ramps or sloped floors.
If there is any doubt as to the stability of the Raz SP, anti-tippers should be installed by
the dealer that supplied the chair.
IMPORTANT!
The rearward stability of the Raz SP is affected by the mounting location of the rear
wheels, the physical and clinical characteristics of the user and the angle of the
backrest. The need for anti-tippers should have been determined at the time of the
prescription of the Raz SP. It is recommended that a qualified health care
professional assist in the performance of a stability check (see above) in the
environment in which the product will be used in order to determine the need
and / or the required adjustment for anti-tippers.
4
Transfers
The most dangerous part of using any shower chair is the transfer. Since every chair has
different stability characteristics, it is essential to carefully review and test the transfer
technique to ensure that the procedure is safe. Test transfers should be performed with
an attendant who can prevent the chair from tipping. If you feel that the transfers cannot
be repeatedly performed safely, contact a physical or occupational therapist who is
familiar with transfer techniques and options.
The wheel locks are designed to prevent the self-propelling wheels from rotating. The
dual locks on the casters are designed to prevent the caster wheels from rotating and the
caster forks from swivelling. These do not and CANNOT prevent the tires from sliding if
the floor is slippery. A slippery floor can be caused by dust, water, soap or any substance
that doesn’t allow the tires to grip. Transfers should never be attempted with the
shower chair positioned on slippery surfaces since the wheel locks can only prevent
the wheels from rotating. Wheel locks cannot prevent the tires or casters from sliding on
slippery surfaces. It is recommended that transfers be performed on clean, dry nonslippery surfaces.
Transferring onto a Raz AP Shower Chair – always lock all four casters in their
out-bound position (front casters positioned in the forward and out position / rear casters
positioned to the rearward and out position) for maximum chair stability.
Transferring onto a Raz SP Shower Chair – always lock both front casters in their
out-bound position (positioned in the forward and out position) and fully apply both wheel
locks so that they securely engage the rear wheels.
NEVER use the footplates to assist in transfers. This could cause the chair to tip
forward. The footrests should be swung to the side or removed entirely during transfers to
provide unobstructed access to the shower chair.
Fasteners
The fasteners – the nuts, bolts, washers – should be checked periodically to ensure that
they are snug. All nuts used on your Raz Shower Chair are lock nuts or are used in
conjunction with a lock washer. Lock nuts that are removed for any reason should be
replaced rather than re-used. Your dealer should be called to check the fasteners and
other components at least once per year.
Pelvic Strap
An optional 2-piece pelvic strap can be attached to any Raz model. The backrest
mounting plates include slots that are intended for the strap attachment. The pelvic strap
can be ordered with your Raz Shower Chair or can be retrofitted. Only qualified dealers
should attach pelvic straps.
Chest Strap
An optional 1-piece chest strap can be attached to any Raz model. The back upholstery
includes loops that are intended as belt guides. A chest strap can be ordered with your
Raz Shower Chair or can be retrofitted.
5
ADJUSTMENTS
IMPORTANT!
ADJUSTMENTS SHOULD NEVER BE ATTEMPTED WITH THE USER IN THE CHAIR!
Your authorized Raz dealer can help you with any adjustments you may want to make on
the Shower Chair or can provide clarification on any of the information contained herein.
Seat Adjustment and Removal
The seat has approximately 2” of fore / aft adjustment. To adjust the seat position,
remove the seat by squeezing the spring clips that lock the front seat brackets to the chair
frame. Remove the seat by lifting up on the front edge and sliding the seat forward and
away from the chair. Loosen the 8 screws attaching the seat brackets to the underside of
the seat. Position the front brackets in the desired location and re-tighten the 4 front
screws. Slide the rear brackets all the way forward. With the spring clips in the unlocked
(forward) position, place the back of the seat onto the rear cross tube and then slide the
seat rearward so that the rear seat brackets catch the rear cross tube. Lower the front of
the seat at the same time until the front frame tubes are nestled into the front seat
brackets. Secure the seat in place by locking the spring clips under the front frame tubes.
Slide the rear seat brackets back until they are in firm contact with the rear cross tube.
Re-tighten the 4 rear screws.
Options available:
16” deep seat with open front
16” deep seat with bridged (closed) front
19” deep seat with open front
19” deep seat with bridged (closed) front
Backrest Angle Adjustment
Backrest angle can be set at 85°, 90° and 95°. The factory preset position is 90°. To
change the position, it is recommended that an authorized Raz dealer be contacted to
perform the work.
Options available:
17” back height with adjustable height and angle armrests
20” back height with adjustable height and angle armrests
Arm Height Adjustment (optional)
The arms are adjustable in height within a 3” range, in ½” increments. This adjustment
should be performed by an authorized Raz dealer.
Options available:
Arm locks
Flip-Up Locking Armrests (optional)
To flip up the locking armrests, release the arm lock by lifting the trigger then lifting the
armrest.
6
Seat Height Adjustment — AP Model
The Raz attendant-propelled models (AP, APHD) have telescopic caster extensions that
provide a height adjustment range of 3”. To adjust the height, position the chair on one
side. Remove the lock pins. Slide the caster assemblies to the desired position and reinsert the lock pins. Ensure that the pins are completely through the two tubes and that
the grey plastic clips are snapped securely around the outer tubes. Repeat for the
opposite side.
IMPORTANT!
ALL CASTER STEMS MUST BE ADJUSTED TO THE SAME HEIGHT. NEVER
ATTEMPT TO CHANGE THE FRAME ANGLE WITH THE CASTER POSITION.
UNEQUAL CASTER POSITION WILL REDUCE THE CHAIR’S STABILITY AND MAY
RESULT IN TIPPING.
Seat Height Adjustment — SP Model (Dealer Only)
The SP and SPHD models can be adjusted in height within a 3” range with 24” wheels
and a 2” range with 22” wheels. Please call your authorized Raz dealer to alter the height
on any self-propelling model.
Rear Wheel Fore / Aft Adjustment — SP Model (Dealer Only)
The 22” or 24” wheels have a fore/aft adjustment range of 3½”. With the axle plates in
the trailing position (lower edges of plates behind top edge), the axles position can be
adjusted infinitely from 2” to ½” behind the centre line of the back post. With the axle
plates in the leading position (lower edges of plates ahead of upper edges), the axles can
be adjusted infinitely from 1½” in front of the centre line of the back post to directly at the
centre line of the back post. Note: This adjustment must be performed by an authorized
Raz dealer.
Backrest Angle Adjustment (Dealer Only)
The factory position for the backrest (or hip) angle is 90° -- measured from the seat frame
to the backrest frame. Your authorized Raz dealer can adjust the backrest angle to one of
three positions: 85°, 90°, and 95°. Please note that the Adjusta Back Option is required
in order to level the armrests if the backrest angle is changed from the factory position.
IMPORTANT!
INCREASING THE SEAT HEIGHT, MOVING THE REAR WHEELS FORWARD AND
INCREASING THE BACKREST ANGLE WILL DECREASE REARWARD STABILITY.
IT IS ESSENTIAL THAT A STABILITY CHECK BE PERFORMED AFTER ANY OF
THESE ADJUSTMENT ARE MADE. STABILITY CHECKS SHOULD BE PERFORMED
WITH THE OPTIONAL ANTI-TIPPERS ATTACHED.
Armrest Height / Armrest Angle Adjustment — Optional (Dealer Only)
The armrest can be adjusted in height from 7 ½” to 9 ½” with the 17” Height Adjusta Back
Option and from 8 ½” to 10 ½” with the 20” Height – Adjusta Back Option.
The armrest angle can also be adjusted up 5° or down 5° if the backrest angle is adjusted
from the 90° factory position.
7