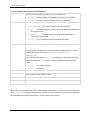
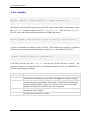
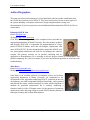
1
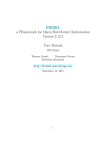
PEACE: Parallel Environment for
Assembly and Clustering of Gene
Expressions
A cDNA Clustering Tool
User Guide
Copyright (c) Miami University, Oxford, OHIO.
All rights reserved.
PEACE User Guide & Manual
COPYRIGHT & LICENSE
PEACE is free software: you can redistribute it and/or modify it
under the terms of the GNU General Public License as published by
the Free Software Foundation, either version 3 of the License, or (at
your option) any later version.
PEACE is distributed in the hope that it will be useful, but WITHOUT ANY WARRANTY;
without even the implied warranty of MERCHANTABILITY or FITNESS FOR A
PARTICULAR PURPOSE. See the GNU General Public License for more details.
You should have received a copy of the GNU General Public License along with PEACE. If not,
see <http://www.gnu.org/licenses/>.
Miami University makes no representations or warranties about the suitability of the software,
either express or implied, including but not limited to the implied warranties of merchantability,
fitness for a particular purpose, or non-infringement. Miami University shall not be liable for
any damages suffered by licensee as a result of using, result of using, modifying or distributing
this software or its derivatives.
By using or copying this Software, Licensee agrees to abide by the intellectual property laws,
and all other applicable laws of the U.S., and the terms of GNU General Public License (version
3).
Page 2 of 36
PEACE User Guide & Manual
CONTENTS
Copyright & License ...........................................................................................................................2
Contents ............................................................................................................................................3
Introduction ......................................................................................................................................5
Overview ................................................................................................................................................... 5
Contact information.................................................................................................................................. 6
Software Prerequisites for PEACE ............................................................................................................. 6
Serial/Parallel Clustering Installation: ................................................................................................... 6
PEACE QUICK START VIA GUI ..............................................................................................................8
PEACE GUI Details ............................................................................................................................11
Step 1: Download and run PEACE GUI .................................................................................................... 11
Step 2: Configuring a server .................................................................................................................... 12
Configuring Host File on personal machine(s) .................................................................................... 14
Step 3: Add new Data Set ....................................................................................................................... 16
Step 4: Starting a clustering job .............................................................................................................. 18
PEACE Runtime parameters .................................................................................................................... 20
Step 5.1: Data analysis (via tree-table) ................................................................................................... 22
Step 5.2: Analysis via cluster summary graph......................................................................................... 23
Non-graphical mode of PEACE ..........................................................................................................25
Installation Procedure............................................................................................................................. 25
Linux and OS-X ........................................................................................................................................ 25
Windows ................................................................................................................................................. 26
Details on configure options and influential environment variables ..................................................... 26
Known bugs/issues ................................................................................................................................. 29
Running/using PEACE .......................................................................................................................30
Simple command line.............................................................................................................................. 30
List of command line options and functionality ................................................................................. 31
--clusterMaker ............................................................................................................................... 31
Specify the clustering algorithm to use. The options are: ..................................................................... 31
--analyzer......................................................................................................................................... 31
Page 3 of 36
PEACE User Guide & Manual
Specify the EST similarity or distance measure to use. The options are: .............................................. 31
--heuristics .................................................................................................................................... 31
Name(s) of the heuristic(s) to use, in order (null for none) .................................................................... 31
--estIdx ............................................................................................................................................. 31
Index of reference EST in a EST file (default 0) ....................................................................................... 31
--output ............................................................................................................................................. 31
File to which output must be written ..................................................................................................... 31
--options ........................................................................................................................................... 31
Displays the list of options for the specified cluster & analyzer ............................................................. 31
--interactive ................................................................................................................................. 31
Launch PEACE interactive console .......................................................................................................... 31
A few examples ....................................................................................................................................... 32
Working with PEACE tools ................................................................................................................33
Brief overview of tools ............................................................................................................................ 33
List of tools, command lines, and figures generated .............................................................................. 33
Author Biographies ................................................................................................................................. 34
References.......................................................................................................................................36
Page 4 of 36
User Guide & Manual
INTRODUCTION
PEACE is an acronym for Parallel Environment for Assembly and Clustering of gene
Expressions. It is a software system for the clustering and analysis of cDNA and other types of
sequence data representing small segments of gene transcripts. It is applicable to data derived
from both next generation sequencing technologies and traditional Sanger sequencing. PEACE
takes transcript fragments obtain from across a genome, clusters them by gene association, and
enables easy analysis of the resulting clusters. It includes a versatile graphical user interface
(GUI) to manage installation, execution, and analysis of clusters. PEACE can be easily installed
and run on standalone machines running Windows, Linux, and OS-X. PEACE can also run
parallel mode on Linux clusters supporting MPI.
In the Quick Start chapter of this document we present a concise outline, without explanation, of
the steps needed to start PEACE with the intent of allowing a user to quickly install and use
PEACE. The remainder of the document then discusses the steps in more detail for those users
who wish to tailor their usage more specifically to their data or computing platform.
Overview
PEACE is a bioinformatics software system for the analysis and clustering of genetic sequences,
typically cDNA data sets obtained from next generation sequencing technologies o r traditional
Sanger sequencing. This manual does not deal with the background on this area and related
bioinformatics topics; for information on those, please see the related publications [1,2].
By default, and for optimal performance, PEACE makes use of the two-pass D2 algorithm for
pair-wise sequence comparison and a minimum spanning tree-based algorithm for clustering
[3,4]. PEACE, however, is built as an easily modifiable and extensible software system, and the
analyzer, cluster maker, and heuristics in use are interchangeable and can be swapped out for
different analyzers, cluster makers, or heuristics. This gives PEACE substantial utility as a
research platform for testing different clustering approaches.
PEACE is written in C++ and makes use of the MPI (Message Passing Interface) standard for
message-passing to support high performance on parallel machines and computing clusters. It
makes heavy uses of object oriented design patterns to provide a flexible and robust framework
for EST analysis and clustering. It has primarily been tested on a cluster consisting of 128 multiprocessor compute nodes. PEACE supports and has been tested on the Windows, Linux, and OSX operating systems.
Page 5 of 36
User Guide & Manual
Contact information
Support requests, bug reports, installation difficulties, and other issues, as well as ideas and
requests for additional features, may be emailed to the authors of PEACE. Contact information
for the various authors is available off PEACE website at: http://www.PEACE-tools.org.
Software Prerequisites for PEACE
In order to run the GUI component of PEACE on a computer, the computer needs to have just a
Java Virtual Machine (JVM) installed on it. The JVM is part of the Java Runtime Environment
(JRE) that is typically found on most machines. However, note that PEACE requires Java
version 1.6 to run.
Software
Minimum Description and additional information.
Version
The Java Runtime
1.6
This is the standard Java runtime environment that is
Environment (JRE) or
typically installed on most machines. JRE and JDK can
be obtained for free for all major operating systems from:
Java Development Kit
(JDK).
http://java.sun.com/javase/downloads/index.jsp. The JRE
is required to run the Graphical User Interface (GUI)
component of PEACE.
Serial/Parallel Clustering Installation:
The instillation of the clustering engine on a Linux, Unix, or OS-X machine requires some
software tools. All of these are components that should already be installed on almost all
standard distributions: the automake and autoconf programs, and gcc (the GNU C/C++
compiler). Here is an overview of various software tools that are necessary to install and run
PEACE:
Software
automake
autoconf
gcc (if using gcc)
Minimum Description and additional information.
Version
1.9.2
automake and autoconf are collectively used to
configure the build system of PEACE on Linux/Unix
machines. automake can be downloaded for free from
http://www.gnu.org/software/automake/.
2.59
automake and autoconf are collectively used to
configure the build system of PEACE on Linux/Unix
machines. The autoconf software tool can be obtained
for free from http://www.gnu.org/software/autoconf.
4.0.1
The GNU Compiler Collection is used to compile the
Page 6 of 36
User Guide & Manual
The Message Passing
Interface (MPI) library
and tools.
Windows
MPI API
version
1.1
XP
C++ code base of PEACE that runs in parallel on
supercomputing clusters. If the supercomputing cluster is
using GCC as the C++ compiler, then the minimum
supported GCC version is 4.0.1. For details please
referrer to GCC page at http://gcc.gnu.org/.
If you intend to run PEACE in parallel your cluster must
have MPI library and tools that support MPI API version
1.1. This version is a widely used standard and readily
available on most supercomputing clusters. However, if
you are running PEACE on your personal computer than
you may obtain a free, open-source implementation of
this standard from http://www.open-mpi.org/.
PEACE comes with a pre-built binary for Windows as
the platform is pretty consistent. However, PEACE
currently does not support parallel operation via MPI on
Windows platforms.
Currently PEACE supports only PBS compatible job submission systems that are
widely used on many supercomputing systems.
Figure 1: www.PEACE-tools.org. Main webpage (left) and download page (right).
Page 7 of 36
User Guide & Manual
PEACE QUICK START VIA GUI
In order to allow the user to immediately use PEACE, this chapter of the manual presents a
concise outline (without delving into details) of the steps needed to install and run a job. The
focus of this chapter to is to run PEACE via the Graphical User Interface (GUI). However,
PEACE can also be run as a standard text-mode software tool. For details on compiling and
using PEACE in text mode please refer to the chapter titled Non-graphical mode of PEACE.
Additional details on are discussed further in the manual.
Test Data: For purposes of testing, several data sets have been placed on the download page of
the http://www.PEACE-tools.org/ download page (see Figure 1). Using the smallest file
(chlamy_10pct.fa) will ensure the PEACE GUI can run with the default memory
allocations; instructions on how to increase memory for the larger files follow.
Step 1: Download and run the GUI (http://www.PEACE-tools.org/). The GUI tool can be
downloaded from the Downloads section (file PEACE.jar), and run on any Windows, Linux
or OS X in which Java is installed. The program can be executed by double-clicking on the icon
or from the Linux/Unix/OS-X command line (java –Xmx2G –jar PEACE.jar).
OS-X WARNING: On OS-X, by default the JVM is allotted considerably less heap memory
than when running on Windows or Linux. Thus while the default allocation is sufficient to
handle the chlamy_10pct.fa file on the later two operating systems, it is strongly
recommend that on OS –X the GUI be launched from the command line and allocated the extra
memory with the –Xmx2G switch (where 2G represents 2 gigabytes of memory, and can be
decreased as needed).
Upon successful startup PEACE will display a quick start guide. You may simply
click on the tool icons or hyperlinks in the quick start guide to perform the
various tasks summarized in Step 2 through Step 4.
Step 2: Install the PEACE Server (Server → Add New Server). After choosing Add New
Server option from the Server menu in the GUI (see Figure 4), follow the instructions to
install on either the local or a remote machine. If configuring a remote server, the target
platform must be running Linux/Unix/OS-X (Windows is fine for a local instillation). See the
earlier chapter for a listing of required software for a Linux/Unix/OS-X instillation.
Upon completion, the Servers window should list the machine as having status “Good”.
Once installed, PEACE will record and provide access to that server until deleted by the user.
Page 8 of 36
User Guide & Manual
Step 3: Load data set (File→ New Data Set) : After choosing New Data Set under the File
menu (see Figure 4), follow the instructions in the wizard to import a data file in FASTA format
into your workspace (e.g. the downloaded chlamy_10pct.fa file). Once the FASTA file is
successfully loaded, a corresponding data set will be listed in the Workspace window.
Double-clicking/left-clicking on it will display the sequences in the main view, while rightclicking on it will result in a pull-down menu of options.
Step 4: Start a clustering job (Job→ Job to Computer Clusters): After choosing Job to
Compute Clusters under the Job menu, follow instructions in the wizard. You will be
required to pick an appropriate data set (if more than one has been imported) and the server to be
used (if more than one has been added); see Figure 2. If running on a cluster, parallel mode can
be enabled by increasing the number of Compute Nodes and CPU Nodes allocated to the run.
All other options can be left at default values.
Once started, the job will be listed under the Jobs tab with status RUNNING or (eventually)
SUCCESS. Once the job has completed, PEACE will ask if it should copy the files back to the
local server – which is necessary to view the results and for further analysis.
Step 5: Data Analysis. When the job is finished, two files will be added to the Workspace list: a
.mst file and a .cls. For most purposes, only the .cls file will be useful: allowing the user
to view and save the clustering. Double-click/left-click on this file to load and view the cluster
information (See Figure 3). Right-click on the entry for other options, including the generation
of a “Clustering summary graph” to view the cluster size distributions and additional
classifications.
Page 9 of 36
User Guide & Manual
Figure 2: Starting jobs. Choosing a data set (left) and server (right).
Figure 3: Data analysis.
Page 10 of 36
User Guide & Manual
PEACE GUI DETAILS
Step 1: Download and run PEACE GUI
The GUI tool can be downloaded from the Downloads section from the PEACE website at
http://www.PEACE-tools.org (see Figure 1). The complete GUI is available in a file called
PEACE.jar. The Java Archive (jar) file contains a complete distribution of PEACE. It requires
only JRE 1.6 installed on your machine to run. Consequently, the GUI will run on any Windows,
Linux, or OS-X operating system in which Java 6 is installed. The program can be executed by
double-clicking on the icon or from the shell prompt in Linux/Unix/OS-X command line as
shown below:
java –Xmx2G –jar PEACE.jar
Increases heap memory available for Java use to 2 GB
so that large FASTA files can be opened in the GUI.
Upon initial startup you will be prompted through the following steps:
1. You will be prompt you to accept the GPL (version 3) license agreement under which
PEACE is distributed.
2. Once you accept the license PEACE will create an initial default directory in which it
stores system wide information.
3. Next, you will be prompted to select a Workspace. A workspace is a directory (or folder)
under which PEACE stores data for a specific session. You may choose to use a single
workspace for all tasks or use multiple workspaces (each workspace designated for a
specific data set or type of analysis).
Note that although PEACE is distributed under GPL (version 3), it does not limit
its use on private or proprietary data. PEACE can be used to analyze confidential
data and does not infringe on proprietary information.
Page 11 of 36
User Guide & Manual
Step 2: Configuring a server
In order to perform clustering via PEACE you must add a server to the workspace. A server
represents the machine on which PEACE will run jobs to compute clustering data. A server can
be just your local PC or a remote supercomputing cluster. You may add a Server entry by
clicking on corresponding tool bar or selecting the appropriate menu option from the main menu
as shown in Figure 4. This launches a wizard that will guide you through the process of adding a
new server entry to your workspace.
Figure 4: Screenshot of PEACE (GUI) illustrating the menu option to add a new server.
Currently, only Linux and Unix machines/clusters are supported as remote
servers. In addition you must be able to SSH the remote host and you need to
have a valid account on it. If you are unsure about this requirement contact your
system administrator for site-specific details. Windows machine can be used as a
local server.
Page 12 of 36
User Guide & Manual
Here is a summary of the various steps that the server wizard will guide you through in order to
create a new server entry in PEACE GUI:
1. First, review the information in the overview screen which provides a brief overview of
the process and then click the next button.
2. In the next screen, you will be prompted to first select the type of server. Local server is
your local PC on which PEACE (GUI) is currently running. A remote server is a different
computer to which you can SSH. PEACE already includes an SSH client to connect and
operate on a remote computer.
3. If you select a remote computer, you must enter its name or IP address. In addition, enter
your log in ID and password to log on to the remote machine. PEACE will attempt to
connect to the remote computer using the supplied credentials for verification when you
click the next button in the wizard.
4. On clicking the next button you will be prompted with SSH security certificate for cross
checking (this occurs only the first time you ever connect to a computer via PEACE).
Click the yes button to continue to connect. If your credentials are valid PEACE will
ensure the remote machine is a Linux or Unix system.
5. In the next step you may enter a description for this server for your future reference.
Ensure the install directory is valid. PEACE will validate the install directory when you
click the next button. The install directory cannot currently exist. If the specified path
already exists (or cannot be created), the wizard will not proceed further. The default
value (if filled-in) usually works fine.
Note that the install directory must be an absolute path (such as:
/home/userid/PEACE or C:\PEACE). In addition, the install path
cannot contain spaces (as spaces cause portability issues).
6. On clicking the next button PEACE will verify that the install directory does not exist
on the server. It will also do some basic checks to ensure that the server has all the
necessary tools for installing PEACE. Upon successfully passing the checks, PEACE will
show the detected information. Review and click the OK button.
7. The next screen displays summary information. You cannot backtrack or cancel
installation after this screen. So carefully verify the information and click the finish
button to proceed with full installation.
Page 13 of 36
User Guide & Manual
8. The full installation on the server will proceed in the background and the progress will be
displayed in a separate installation tab. PEACE automatically detects and uses MPI to run
in parallel if MPI is installed on the machine. If errors occur during install they will be
displayed in this window. Do not close PEACE until the install completes.
The configure script used by PEACE makes an effort to automatically
detect and use MPI if it is available on a supercomputing cluster or
machine. Consequently, it is important to ensure that your environment and
path are setup correctly so that configure can detect MPI. If your cluster
uses modules then contact your system administrator to ensure MPI module
is selected and enabled by default on the cluster.
9. Once the install completes you will notice a new server entry in the server tab. Its status
should be good to indicate it is ready to run jobs and perform other operations.
A video tutorial illustrating the operations in PEACE for the
aforementioned step is available off PEACE website at:
http://www.PEACE-tools.org
Configuring Host File on personal machine(s)
Several researchers (including Dr. Rao) run their own personal computational infrastructures.
Although such personal configurations tend to be small (Dr. Rao has a 32 core cluster in his
basement) they are convenient, particularly for debugging and troubleshooting. Such
configurations may require additional setup. Such setups are typically done by system
administrators of supercomputing clusters. There are diverse approaches for configuring MPI
installations based on the distribution being used. Consequently, this manual we merely provide
references to documentation that illustrate some of the configuration. There are two commonly
used open source implementation of MPI, namely openmpi and mpich. Here we document the
approaches for using PEACE clustering engine with these two MPI implementations.
•
MPICH: These are the If you are running a local install of MPICH
(http://www.mcs.anl.gov/research/projects/mpich2/) then you need to suitably configure
the set of hosts on which jobs are to be run. The hosts file typically is configured only
once and the set of hosts are automatically selected by MPICH via a daemon process
called mpd. This daemon process runs on all the machines on which MPI is to be run. In
order to facilitate deployment of mpd of a network of hosts, MPICH provides another
tool called mpdboot that uses the host file to automatically start mpd on the appropriate
set of hosts. In addition, MPICH includes several tools to ease deployment and
management of parallel processes. More details on configuring MPICH is available
Page 14 of 36
User Guide & Manual
online
via:
http://www.mcs.anl.gov/research/projects/mpich2/documentation/files/mpich2-1.2.1installguide.pdf.
•
OPEN MPI (http://www.open-mpi.org/): Open MPI is another commonly used MPI
implementation. Open MPI does not require any special configuration or setup when
running on a Symmetric Multi-Processor (SMP) machine – namely, standard multi-core
multi-processor machines. However, Open MPI does require additional configuration
when processes need to be run on a network of computers. Although a standard run via a
host file is possible, we recommend installing Torque (an open source implementation of
PBS) and running PEACE jobs.
Page 15 of 36
User Guide & Manual
Step 3: Add new Data Set
A data set consists of a FASTA file containing the cDNA or EST sequences to be analyzed and
clustered. Note that a data set can have only one FASTA file but can have many clustering files.
You may add a new data set entry by clicking on corresponding tool or selecting the appropriate
menu option from the main menu as shown in Figure 5. This launches a wizard that will guide
you through the process of adding a new data set entry to your workspace.
Figure 5: Screenshot of PEACE (GUI) illustrating the menu option to add a new data set to the workspace.
A summary of the various steps that the data set wizard will guide you through in order to create
a new entry are briefly summarized below:
1. The data set wizard commences with an overview screen that briefly describes the
process of creating a data set. Review the information in the overview panel and click the
next button.
2. In the second screen, click on the browse button and select the FASTA file to be used
for this data set. PEACE will verify the contents of the FASTA file when you click the
Page 16 of 36
User Guide & Manual
next button. You may also enter a brief description summarizing the contents of the
FASTA file. The description is for your future reference and comes in handy when
working with a large number of data sets in a workspace.
In order to handle large files you must permit Java to use sufficient
memory. PEACE checks to ensure sufficient memory is available prior to
loading a file. If memory appears to be insufficient, PEACE generates a
warning message along with instructions on how to increase memory
allocated to Java. Increasing Java heap memory requires restarting the GUI,
but will not require repeating earlier steps. Ignoring the warning may cause
JVM to run out of memory, causing the GUI to hang or crash.
3. Click the next button. PEACE will load and verify that the FASTA file you specified is
valid and display summary information about the sequences in the file for your review.
4. After you carefully review the information click the finish button to add a new data
set entry to your work space. If the upload is successful, the data set will be listed in the
Workspace window. Left-clicking (or double clicking) on it will display the sequences
in the main view, while right-clicking on it will result in a pull-down menu of options.
A video tutorial illustrating the operations in PEACE for the
aforementioned step is available off PEACE website at:
http://www.PEACE-tools.org
Page 17 of 36
User Guide & Manual
Step 4: Starting a clustering job
PEACE computes clustering for a FASTA file by running a suitable job on a server. The FASTA
file to be clustered must have been added to the workspace as a data set entry (as described in
Step 3). Moreover, the server on which the job is to be run must have been added to the
workspace and be in good status. You may create a new data set entry by clicking on
corresponding tool or selecting the Job to Compute Clusters menu option from the
main Job menu. This launches a wizard that will guide you through the following process to
create and submit a job on a server:
1. The wizard starts out by displaying a screen that summarizes the process of creating and
submitting a job. Review the information in the overview screen and click the next
button.
2. In the next screen, select the appropriate data set containing the FASTA file to be
clustered from the list of options provided. Enter an optional description summarizing the
job for future reference and click the next button.
3. The next screen permits you select algorithms and parameters PEACE uses for clustering.
The defaults are set to provide the best performance from PEACE. Refer to the sections
further below in this user manual for more details on these parameters. Once you have
configured the parameters and algorithms click the next button to proceed further.
4. In the next screen you are provided with options to fine-tune the heuristics used by
PEACE to improve performance. You may disable heuristics if you wish. However,
enabling the heuristics provides best performance without compromising clustering
quality. Information on fine-tuning the parameters is available in this user guide, but in
general the defaults work best.
5. In the next screen you may change the path where the intermediate MST file is to be
stored on your PC. In addition, select the server on which the job is to be run. You may
choose to run a parallel job if you know the server supports it. To run a parallel job, you
must choose more than 1 CPU or more than 1 cluster node. For this, you need to know
your cluster configuration, the number of nodes it has and CPUs per node. Contact your
cluster administrator for platform configuration. You also need to set the total memory
and estimated run time for the job. This information is needed to submit jobs on a
supercomputing cluster via PBS. You need more memory and run time to cluster large
FASTA files. More nodes or CPUs reduce run time but increase maximum memory used.
Page 18 of 36
User Guide & Manual
Note that you need to know your supercomputer platform configuration in
order to correctly set the nodes and CPUs per node values. The runtime and
memory usage options are typically fine tuned through experience
depending on your cluster’s configuration. Contact your system
administrator for details on your supercomputer configuration.
6. In the next screen you may change the path where the clustering data file is to be stored
on your PC. Enter brief description about the clustering and its purpose.
7. Finally, set the threshold value for clustering. The threshold value is important and the
user guide provides detailed information. Larger threshold values are less discriminatory
while smaller threshold values provide greater sensitivity. Once the threshold value has
been set click the next button.
8. On clicking the next button the job will be submitted to the server. The information to
run the job is created and progress is displayed in detail in the log pane. Once the job has
been submitted a new job entry is added to the workspace. PEACE will periodically
monitor the job and update status. For long running jobs you may close PEACE and it
will automatically restart monitoring the next time it is run using the same workspace.
9. Once the job is complete you will be prompted to copy the generated data files back to
your PC. Once you have copied the files you may view and analyze the clusters.
A video tutorial illustrating the operations in PEACE for the
aforementioned step is available off PEACE website at:
http://www.PEACE-tools.org
Page 19 of 36
User Guide & Manual
PEACE Runtime parameters
PEACE generates clusters based on a Minimum Spanning Tree algorithm using the d2 distance
pseudo-metric to weight edges. In short, it models the EST input as a graph, with each node
representing a single EST and edge weights calculated by the application of the d2 metric when
applied to the incident ESTs. Those not familiar with these concepts should be very careful
about adjusting parameters. Here we discuss each parameter, giving a both layman’s description
and more detailed comments for those with the appropriate computational background.
When starting a job, the user will be presented with the following options:
• Analyzer Setup screen:
o Data set: The data set to be clustered. Must have already been imported to
PEACE.
o Select analyzer for EST comparison: Allows for variations on the method for
assigning edge weights, including the “Two pass D2” heuristic optimization of the
traditional d2 method.” Anyone not familiar with these algorithms should use the
default two pass d2 [2, 3, 5, 6].
o Window size: d2 window size. At this point, it is highly recommended that the
default value of 100 be used. This provides the best balance between various
competing factors to yield good clustering for a broad range of data sets.
o Word size: d2 word size. Currently, PEACE’s d2 implementation allows only a
word size of 6.
o Cache type: PEACE includes several different distributed caching algorithms to
speedup analysis, MST construction, and clustering. Several different cache
management strategies have been developed over a period of several years to
identify the best possible configuration. The default heap-based cache was found
to provide the best performance for a wide range of data sets and is used as the
default. Unless you are experimenting in computational data structures, you are
strongly encouraged to use the heap-based caching approach.
o Cache size: The cache size represents the number of distance/similarity metrics
that are cached for a given pair of sequences. This value is a compromise between
the volume of main memory dedicated to maintaining caches versus the overhead
of having to re-compute d2 metric. Decreasing the cache size decreases memory
footprint but may cause higher cache misses resulting in additional computation.
We have found the default cache size of 128 to be sufficiently large to provide a
good balance minimizing cache misses and maximizing cache usage.
•
Setup Heuristics:
The u/v and t/v heuristics are used to heuristically skip the edge weight calculations of
edges that are unlikely to connect overlapping ESTs [2]. Adjusting these parameters will
affect sensitivity and runtime of the tool with an inverse relationship.
o u/v heuristic: A fast way of dismissing EST pairs that clearly do not need to be
considered. Disabling may improve sensitivity at a significant cost in runtime.
Users not familiar with the heuristic should not fiddle with the specific parameter
values.
Page 20 of 36
User Guide & Manual
o t/v heuristic: A more stringent method of filtering EST pairs. As with the u/v
heuristic, disabling it may improve sensitivity at a significant cost in runtime.
•
Server setup:
Allows user to specify details on the server. Additional details regarding these parameters
are discussed in the job submission process.
o Specify local MST file: Location of the minimum spanning tree file that will be
generated in the course of the computations. Most users will have no reason to
ever look at this file.
o Select a server: Select the server on which this job will run. Must have previously
been installed and added to the workspace. (see Quick Start, Step 2).
o Compute Nodes: Number of nodes to be used in a parallel run. Must be 1 unless
the MPI library was present when installing the selected server.
o CPUs per Nodes: Number of processors available on each node in a prallel run.
Must be 1 unless the MPI library was present when installing the selected server.
o Max Memory: Maximum amount of memory available on the server.
o Max Run time: Maximum number of hours PEACE will run a job before quitting.
•
Clustering setup: Details concerning the final clustering step.
o Specify local cluster file: The location of the cluster file generated by PEACE.
After generation, this can be easily moved to another location through the GUI.
o Threshold for clustering: The d2 threshold for detecting adjanency. (e.g.
Sequences s1 and s2 are assumed to be adjacent if d2(s1, s2) is less than the
threshold. Raising this value will improve sensitivity at the cost of specificity.
Page 21 of 36
User Guide & Manual
Step 5.1: Data analysis (via tree-table)
Each time a job successfully completes, two files are in the Workspace are updated. The first
file is an intermediate Minimum Spanning Tree (.mst) file and the second one is the cluster
information (.cls) data file. For most purposes (unless you are planning to enhance or modify
PEACE), only the .cls file will be useful. It contains the clustering information and allows the
user to view and save the clustering. Double-click/left-click on this file to load and view the
cluster in its default view called a “tree-table” (see Figure 6). The clusters are organized as
collapsible trees while individual sequences within a cluster are displayed horizontally as a table
(with each column displaying 100 base pairs).
This view provides the option to sort the data based on cluster sizes using the menu at the top of
this view. In addition, you may select several independent clusters or individual sequences (by
clicking with the mouse button while holding the control key down) and save the data as FASTA
file for your reference or further clustering and analysis.
Figure 6: Screenshot of PEACE (GUI) showing clustering results in a tree-table view.
Page 22 of 36
User Guide & Manual
Step 5.2: Analysis via cluster summary graph
The default view of clusters is via a tree-table display that provides detailed information about
clusters and sequences within clusters. However, when dealing with large number of clusters or
sequences, a graphical visualization of the clusters may identify outliers or provide a visual
confirmation of the overall quality of clustering. The cluster summary graph aims to provide an
alternative visual representation of the clusters. In order to view the cluster summary graph,
right-click on the cluster (.cls) file to be summarized. This displays a pop-up menu from which
the Clustering summary graph menu option can be chosen. On selecting this option the
cluster summary graph is displayed in a separate tab in the GUI.s
You may visually scale the graph by changing the x-scale and y-scale using the corresponding
sliders. You may also change the scale to a log scale by clicking on the log scale button in the
top tool bar. The summary graph also provides the option to color code sequences based on their
FASTA identifiers. Color coding sequences provides additional visual information about the
nature of the clusters generated. The color coding is performed by setting up EST or database
(the source of cDNA sequences) classifiers.
To configure classifiers, click on the EST Classifiers button in the tool bar. Clicking the
classifiers button cause the data base classifier editor to be displayed (see Figure 7). The
editor can be used to add, delete, or modify classifiers. To add a classifier, click on the add
button. This will add a default entry (with default values preset) to the classifier list.
Tailor the description by double-clicking/left-clicking on it. Next edit and update the regular
expression that is used to identify FASTA entries that belong that group. The regular expression
is applied to the complete FASTA identifier associated with each sequence entry in the source
FASTA file. Click on the color to set a color for this entry. Once you have updated the classifiers
click on the OK button to return back to the summary graph.
Page 23 of 36
User Guide & Manual
Figure 7: Screenshot illustrating the data base classifier editor with a few
classifiers configured with different regular expressions and colors.
Now click on the apply classifiers button to apply classifiers to your clustering and view
classifications. Figure 8 provides a comparative view of the cluster summary graph before and
after classifiers were applied. The classifications provide additional information to further
validate the overall quality of clustering and ensure it is satisfactory.
Figure 8: Screenshot of PEACE (GUI) illustrating a cluster summary graph before classifiers were applied (to the left)
and after color coded classifiers were applied (to the right).
A video tutorial illustrating the operations in PEACE for the
aforementioned step is available off PEACE website at:
http://www.PEACE-tools.org
Page 24 of 36
User Guide & Manual
NON-GRAPHICAL MODE OF PEACE
The earlier chapters discussed the use of PEACE through its Graphical User Interface (GUI).
The GUI essentially provides an user-friendly interface to the core backend clustering engine of
PEACE that runs as a standalone text-mode software tool. It is can run in batch mode (on a
supercomputing cluster) or in interactive mode in a terminal. Consequently, the clustering engine
can be independently used without the GUI if the need arises. This section describes the process
of installing the core PEACE clustering engine.
Installation Procedure
The following two sections describe the process of installing PEACE on Linux/Unix and
Windows machines. The software requirements for installing PEACE are described earlier in this
user manual in the section titled Software Prerequisites for PEACE.
Linux and OS-X
To install PEACE on a Linux or OS X machine, first extract the PEACE archive to the desired
location. Change directory to that location and issue the following commands at the shell
prompt:
autoreconf -i
./configure
make
The above sequence of commands will build PEACE in src/folder and PEACE can be directly
run from there with suitable command line parameters. However, you may also install PEACE
for use by all users on the system via the following command:
make install
The above command will install PEACE software in the default installation location suitable for
your Linux/Unix operating system. From there, you can begin working with the tool (see the
Running/using PEACE section below).
Page 25 of 36
User Guide & Manual
Windows
To install PEACE on a Windows ™ machine, first extract the PEACE archive to the desired
location.
The archive will contain a project and solution file (PEACE.sln and
PEACE.vcproj) for Microsoft Visual Studio 2008. Simply double click on the PEACE.sln
(solution) file to open the build files in Visual Studio. Once Visual Studio has loaded the
project, select the build type (Debug or Release) and build the software. This will compile
and build an executable called PEACE in the Debug or Release directory.
At this point, you will need to open a command prompt and run the PEACE executable from the
command line. Running PEACE on Windows is otherwise the same as running it on
Linux/Unix/OS-X.
Details on configure options and influential environment variables
You may configure several operational features of PEACE via standard configure options.
The options that can be used when running configure are shown below:
Usage: ./configure [OPTION]... [VAR=VALUE]...
To assign environment variables (e.g., CC, CFLAGS...), specify them as VAR=VALUE. See
below for descriptions of some of the useful variables. Defaults for the options are specified in
brackets.
Configuration:
-h, --help
--help=short
--help=recursive
-V, --version
-q, --quiet, --silent
--cache-file=FILE
C, --config-cache
-n, --no-create
--srcdir=DIR
display this help and exit
display options specific to this package
display the short help of all the included packages
display version information and exit
do not print `checking...' messages
cache test results in FILE [disabled]
alias for `--cache-file=config.cache'
do not create output files
find the sources in DIR [configure dir or `..']
Page 26 of 36
User Guide & Manual
Installation directories:
--prefix=PREFIX
--exec-prefix=EPREFIX
install architecture-independent files in PREFIX [/usr/local]
install architecture-dependent files in EPREFIX [PREFIX]
By default, `make install' will install all the files in `/usr/local/bin',
`/usr/local/lib' etc. You can specify an installation prefix other than `/usr/local'
using `--prefix', for instance `--prefix=$HOME'. For better control, use the options
below.
Fine tuning of the installation directories:
user executables [EPREFIX/bin]
--bindir=DIR
system admin executables [EPREFIX/sbin]
--sbindir=DIR
program executables [EPREFIX/libexec]
--libexecdir=DIR
read-only single-machine data [PREFIX/etc]
--sysconfdir=DIR
--sharedstatedir=DIR modifiable architecture-independent data [PREFIX/com]
modifiable single-machine data [PREFIX/var]
--localstatedir=DIR
object code libraries [EPREFIX/lib]
--libdir=DIR
C header files [PREFIX/include]
--includedir=DIR
C header files for non-gcc [/usr/include]
--oldincludedir=DIR
read-only arch.-independent data root [PREFIX/share]
--datarootdir=DIR
read-only architecture-independent data [DATAROOTDIR]
--datadir=DIR
info documentation [DATAROOTDIR/info]
--infodir=DIR
locale-dependent data [DATAROOTDIR/locale]
--localedir=DIR
man documentation [DATAROOTDIR/man]
--mandir=DIR
documentation root [DATAROOTDIR/doc/PEACE]
--docdir=DIR
html documentation [DOCDIR]
--htmldir=DIR
dvi documentation [DOCDIR]
--dvidir=DIR
pdf documentation [DOCDIR]
--pdfdir=DIR
ps documentation [DOCDIR]
--psdir=DIR
Program names:
--program-prefix=PREFIX
--program-suffix=SUFFIX
--program-transform-name=PROGRAM
prepend PREFIX to installed program names
append SUFFIX to installed program names
run sed PROGRAM on installed program names
Page 27 of 36
User Guide & Manual
Optional Features:
--disable-FEATURE
--enable-FEATURE[=ARG]
--disable-dependency-tracking
--enable-dependency-tracking
do not include FEATURE (same as --enableFEATURE=no)
include FEATURE [ARG=yes]
speeds up one-time build
do not reject slow dependency extractors
Optional Packages:
--with-PACKAGE[=ARG]
--without-PACKAGE
--with-mpi=PATH
--with-icc
--with-gcc
use PACKAGE [ARG=yes]
do not use PACKAGE (same as --with-PACKAGE=no)
path to mpicc
Code will be compiled with icc (Intel ® C/C++ compiler)
Code will be compiled with gcc (The GNU C/C++ compiler)
Some influential environment variables:
CC
C compiler command
CFLAGS
C compiler flags
LDFLAGS
linker flags, e.g. -L<lib dir> if you have libraries in a
nonstandard directory <lib dir>
LIBS
libraries to pass to the linker, e.g. -l<library>
CPPFLAGS
C/C++/Objective C preprocessor flags, e.g. -I<include dir> if you
have headers in a nonstandard directory <include dir>
CPP
C preprocessor
CXX
C++ compiler command
CXXFLAGS
C++ compiler flags
CXXCPP
C++ preprocessor command
Use these variables to override the choices made by `configure' or to help it to find libraries
and programs with nonstandard names/locations.
Page 28 of 36
User Guide & Manual
Known bugs/issues
Here is a brief list of some of the known issues with PEACE:
•
Currently, the Windows ™ build of PEACE does not support MPI. We are planning to
remedy this situation once we get our hands onto a good supercomputing cluster running
Windows ™ (i.e., not any time soon).
Page 29 of 36
User Guide & Manual
RUNNING/USING PEACE
Simple command line
To run PEACE from the command line, type ./peace [options] In order to run PEACE
on a high-performance computing configuration and take advantage of the multiple processor
functionality provided by MPI, run PEACE with the command mpiexec -n [desired
number of processors] ./peace [options]
Page 30 of 36
User Guide & Manual
List of command line options and functionality
--clusterMaker
Specify the clustering algorithm to use. The options are:
--analyzer
• mst (default) Minimum Spanning Tree-based cluster maker
• null No cluster maker (clusters will not be generated)
Specify the EST similarity or distance measure to use. The options are:
•
•
•
•
twopassD2 Two-pass d2 distance measure (default).
d2
d2 distance measure (loosely based on the implementation in
the program wcd).
d2zim
d2 distance measure, based on the algorithm as
outlined by Zimmerman.
clu CLU’s similarity metric generation algorithm.
--heuristics
Name(s) of the heuristic(s) to use, in order (null for none)
--estIdx
For this option, one heuristic can be entered, or multiple heuristics can be
entered as a chain of the form heuristic1-heuristic2-…heuristicN
The default for this option is uv-tv, meaning the u/v heuristic will be run
first, followed by the t/v heuristic if the u/v heuristic returns a positive
result.
• uv
u/v sample heuristic
• tv
tv heuristic
Index of reference EST in a EST file (default 0)
--output
File to which output must be written
--options
Displays the list of options for the specified cluster & analyzer
--interactive
Launch PEACE interactive console
There also exist parameters specific to the analyzer, cluster maker, and/or heuristics being used.
The --options command line parameter will list all of the parameters that can be specified at
the command line for the given analyzer, cluster maker and heuristics.
Page 31 of 36
User Guide & Manual
A few examples
mpiexec ./peace --estFile ESTs.fa --output clusters.out
Run PEACE with the default analyzer (two-pass D2), cluster maker (MST), and heuristics on the
file “ESTs.fa” and direct output to the file “clusters.out”. With the use of mpiexec,
PEACE will be run with the maximum number of available processors.
mpiexec ./peace --estFile ESTs.fa --output clusters.out --heuristics null
As above, but disable the heuristics used by PEACE. Note that this may result in a significant
slowdown and is not recommended for larger size data sets (i.e. more than 10,000 ESTs).
./peace --estFile ESTs.fa --interactive
Load ESTs from the data file “ESTs.fa” and open the PEACE interactive console. The
interactive console is a convenient interface to facilitate the analysis of data sets with PEACE. It
provides the following commands:
help
list
print
analyze
stats
exit
Shows this information
List brief information on all loaded ESTs
Print detailed information on a given EST (including the sequence of bases).
Run the currently loaded analyzer (e.g. two pass D2) on a given pair of ESTs,
and print the metric generated by that analyzer. If heuristics are enabled, the
heuristics will be run first. In this case, you may see a result of 400, which
indicates the heuristics rejected the pair wise comparison.
Print statistics on the set of loaded ESTs. Particularly useful for analyzing the
distribution of EST lengths.
Exit the PEACE interactive console.
Page 32 of 36
User Guide & Manual
WORKING WITH PEACE TOOLS
Brief overview of tools
PEACE Tools is a software suite accompanying the main PEACE software system and
consisting of several tools for EST analysis and visualization. PEACE Tools is accessed by
running the pTools executable and specifying the desired tool with the --tool option.
Running pTools without a tool selected brings up the list of tools. Running pTools with a
tool selected and no other options will bring up a list of the available parameters.
List of tools, command lines, and figures generated
Tool name
Align
ShowAlignment
ShowMST
Description
Simple tool to generate an alignment using data from the minimum
spanning tree produced by PEACE. This tool annotates an EST file
with data telling pTools how to align the ESTs.
Shows a graphical view of EST alignments. Before running this
tool, the Align tool should first be run on the EST data file.
Outputs an XFIG format file which can then be processed and
rendered in a variety of different graphical file formats by using, for
example, the program fig2dev.
Renders a PEACE-generated minimum spanning tree in a bracketed
graphical form. Like ShowAlignment, outputs a file in XFIG
format. The minimum spanning tree for a clustering can be
generated by running PEACE with the option --output-mstfile [desired filename] provided that the MST cluster
maker is in use.
Page 33 of 36
User Guide & Manual
Author Biographies
This page provides a brief summary of several individuals who have made contributions that
have led to the overall success of PEACE. They have been involved in one or more aspects of
the system including: conception, architecture, design, implementation, testing, and
documentation. If you have questions or need additional information about PEACE feel free to
contact them.
Dhananjai (DJ) M. Rao
Email: [email protected]
Web page: http://www.djrao.com
D. M. Rao was a visiting professor in the computer science and software
engineering department at Miami University. He is the primary architect
and designer of PEACE, is responsible for implementation of a large
portion of PEACE runtime, and is the sole designer, implementer, and
artist of PEACE GUI. He also designed and developed the PEACE web
site, and regularly administers the web site and manages the software
systems. His primary interests are in parallel computing and its
application to bioinformatics. He is working on diverse projects related to bioinformatics and
parallel computing. He is the best contact if you have any technical questions or need help with
troubleshooting.
John Karro
Email: [email protected]
Web page: http://www.eas.muohio.edu/people/karroje
John Karro is an assistant professor in computer science and software
engineering department at Miami University. He contributed to the
development of the algorithms underlying PEACE, consulted on the tool
development, provided background biological knowledge, and organized
and directed the testing, statistical analysis of results, and development of
methods for parameter optimization. He is currently conducting a
statistical analysis of the d2 distance metric for the purposes of parameter
optimization, and is directing efforts to extend PEACE into the problem of
transcript assembly and isoform differentiation.
Page 34 of 36
User Guide & Manual
Mufit Ozden
Email: [email protected]
Web page: http://www.eas.muohio.edu/people/ozdenm
Mufit Ozden, a professor in the computer science and software
engineering department at Miami University, was crucial in developing
the core MST approach underlying PEACE, and assisted in the
development and testing of the PEACE software tool.
Chun Liang
Email: [email protected]
Web page: http://www.cas.muohio.edu/botany/people/profiles/Liang.html
Chun Liang, an assistant professor in the botany department at Miami
University, provide the biological perspective and motivation for the
PEACE tool, as well as the data sets used for the testing.
James C. Moler
Email: [email protected]
Web page: N/A
James Moler is a graduate student in the computer science and software
engineering department at Miami University. He assisted Dr. Dhananjai
Rao in developing the PEACE software. Foremost among his
contributions is designing the two-pass D2 algorithm, a refinement of the
original D2 distance metric. He also contributed to efficient
implementations of heuristics, testing the software, and fixing errors. In
addition, he conducted statistical tests of the tool on simulated and real
data sets.
Yuan (Jenna) Zhang
Email: [email protected]
Web page: N/A
Yuan (Jenna) Zhang is a graduate student in the computer science and
software engineering department at Miami University. She assisted with
the analysis of PEACE results. She contributed to the design of software
for compiling and presenting statistics on PEACE performance and quality,
and is currently working on the extension of PEACE into the problem of
transcript assembly and isoform differentiation.
Page 35 of 36
User Guide & Manual
REFERENCES
[1] Nagaraj, S., Gasser, R., and Ranganathan, S. 2007. A hitchhiker's guide to expressed
sequence tag (EST) analysis. Brief Bioinformatics .
[2] Hazelhurst, S., Hide, W., Lipták, Z., Nogueira, R., and Starfield, R. 2008. An overview of the
wcd EST clustering tool. Bioinformatics 24: 1542-1546.
[3] Hazelhurst, S. 2004. D2 distance for EST clustering. 1-5.
[4] Wan, X., Ozden, M., and Lin, G. 2008. Ubiquitous reassortments in influenza A viruses.
Journal of bioinformatics and computational biology 6: 981-999.
[5] Burke, J., Davison, D., and Hide, W. 1999. d2_cluster: a validated method for clustering EST
and full-length cDNAsequences. Genome Res. 9: 1135-1142.
[6] Ptitsyn, A. and Hide, W. 2005. CLU: a new algorithm for EST clustering. BMC
Bioinformatics 6 Suppl 2: S3.
Page 36 of 36