Download Manual Mindball Trainer II
Transcript
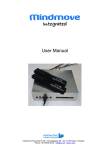
User Manual Interactive Productline IP AB ▪ Järnvägsgatan 36 ▪ SE-131 54 Nacka ▪ Sweden Phone +46 709 82 00 24 ▪ [email protected] ▪ www.i-p.se Safety Instructions for Mindball Trainer General Read all safety and operating instructions before operating Mindball Trainer Retain the safety and operating instructions for future reference. Heed all warnings Install in accordance with the instructions below. Follow all operating and use instructions. WARNING Electric chock or injury Mindball Trainer should be used with a grounded outlet power cord and plug. Make sure all connections to Mindball Trainer are made carefully and inserted into the correct locations only. Unplug from outlet when not in use and before servicing. Do not use this apparatus near water. Do not expose this apparatus to rain or moisture. No objects filled with liquids shall be placed on the apparatus. The apparatus shall not be exposed to dripping or splashing. Clean apparatus only with dry cloth. Turn off before unplugging. Do not unplug by pulling on cord. To unplug, grasp the plug, not the cord. Hold plugs straight when inserting them into a socket. Do not put any object into openings. Do not use with damaged cord or plug. Do not handle plug or appliance with wet hands. Do not pull or carry by cord, use cord as a handle, close a door on cord, or pull cord around sharp edges or corners. Protect the power cord for being walked on or pinched. Do not run appliance over cord. Keep cord away from heated surfaces. Refer all servicing to qualified service personnel. Mindball Trainer hardware precautions Do not install Mindball Trainer near any heat sources such as radiators, heat registers, stoves, or other apparatus that produce heat. Do not disassemble or try to repair the Mindball Trainer or components. Doing so voids the warranty. Do not store the Mindball Trainer in a humid place, on the floor or in any location where it may collect dirt, dust, lint, etc. Do not drop, hit or otherwise abuse the Mindball Trainer or components. Do not expose the Mindball Trainer or any of the Mindball Trainer components to extreme heat or cold. Do not rapidly turn the power switch on and off Do not wiggle the VGA contact up and down. When disconnecting a VGA contact, pull straight out and wiggle the contact gently sideways. Interactive Productline IP AB ▪ Järnvägsgatan 36 ▪ SE-131 54 Nacka ▪ Sweden Phone +46 709 82 00 24 ▪ [email protected] ▪ www.i-p.se Unpack One Mindball Trainer case One power cable One power supply unit One headband Two balls (one spare) One USB memory stick D E F A B C G I H IJ Figure 1. A. Power input, the mains plug B. Mains Power switch. Lit when connected. C. Input for headband D. E. F. G. Slot for USB memory VGA Connection Level control slider Start and reset button H. Starting Position I. Finishing Position Label plate with serial number is placed underneath the unit. Interactive Productline IP AB ▪ Järnvägsgatan 36 ▪ SE-131 54 Nacka ▪ Sweden Phone +46 709 82 00 24 ▪ [email protected] ▪ www.i-p.se Using Instructions Read the whole manual carefully before using Mindball Trainer. You should not use Mindball Trainer at all if you have any kind of medical condition. Do not use Mindball Trainer during more than two sessions per day at a maximum of 30 minutes per session (independent of how many “games” during one session). If you have any doubts what so ever, please contact a medical specialist. Assembling Mindball Trainer For all capital letter references in the text below, please see Figure 1 above. 1. Connect the power cord to the power supply unit and connect the supply unit to input A on your Mindball Trainer. 2. Connect the power cable to a grounded power outlet. Mindball Trainer works with power from 100V to 240V. Rated power consumption is 10 Watt. Maximum power consumption is 32 Watt. 3. Connect the headband to input C on the Mindball Trainer unit. Make sure that the connectors are inserted firmly and fasten them by turning the outer ring. 4. Connect your own monitor with a standard VGA connector to E. Start Mindball Trainer 1. Place your Mindball Trainer in a suitable place. 1 2. Start Mindball Trainer by turning on the power switch, B. It takes about one minute for Mindball Trainer to start up. 3. Place the ball at the starting position, H . 4. Make sure the level control slider, F, is at its lowest setting, which is nearest the Start and reset button, G. The level of difficulty is indicated at the bottom of the graphics/monitor. 5. If you want to extract data from your session, insert a USB memory stick (“USB”) at the USB memory input, D. Graphics with data from all sessions performed with this USB inserted will automatically be saved on the USB. You can watch the graphics if you move the USB to an external computer after your session. 6. Put on the headband; they should be placed horizontally above your eyebrows with the sensors against your forehead. Make sure there are no hair in between the sensors and your skin. You do not need to tighten the headband hard. Push the start 2 button, G. Your first session has now started! 1 Mindball Trainer registers brain waves, which are very weak electrical signals. Mindball Trainer may therefore be sensitive to EMC/EMI from other nearby electrical equipment. Please bear that in mind when choosing location for your Mindball Trainer. 2 If you have connected a monitor before turning on the power switch, B, the graphics will appear automatically. Interactive Productline IP AB ▪ Järnvägsgatan 36 ▪ SE-131 54 Nacka ▪ Sweden Phone +46 709 82 00 24 ▪ [email protected] ▪ www.i-p.se 7. You complete a session by being relaxed and focused enough to move the ball from the starting position to the finishing position, I. If you are able to complete a session on the current setting, increase the difficulty level with the level control, F, by pushing it a little away from you until you see the next level indicated on the attached monitor, 8. If you want to interrupt a session, press and hold the start and reset button, G for three seconds. The ball will return to the start position, H and Mindball Trainer is ready to use again. Mindball Trainer Graphics A monitor connected to Mindball Trainer before turning on the power switch, B, automatically presents graphs showing the user’s brain wave activity during a session. The software of Mindball Trainer premieres a focused and relaxed mindset. Your Mindball Trainer is set to show Standard Graphics or Classic Graphics depending on your choice when ordering the product. You can change the type of shown graphics, see manual Configure Mindball Trainer. Standard Graphics The net shows if you are relaxed or not. A green, calm net is the best. The shape of the ball shows if you are focused or not. A completely round ball is the best. The graph shows the result of your ability to relax and focus in another way. A high green line in a green graph is the best. Classic Graphics The graph shows your ability to focus. A high line above the midline is the best. Above the focus graph the energy level is shown. A green short vertical bar is the best. If the energy level is high, the bar is turned red. If your energy level is too high it will not be possible to achieve a high focus line. Name on presented graphics – both standard and classic. In order to present a name on the graphics: 1. Insert an empty USB stick into any PC. 2. Create a file on the USB named “name.txt”. 3. Edit the file and type the desired name on the first line in the file. 4. Save and Exit. 5. Move the USB stick to the USB port on Mindball Trainer. Interactive Productline IP AB ▪ Järnvägsgatan 36 ▪ SE-131 54 Nacka ▪ Sweden Phone +46 709 82 00 24 ▪ [email protected] ▪ www.i-p.se Mindball Trainer Graphics on USB If you attached a USB memory to the USB port data from sessions that you perform will be stored on the USB memory. The system produces ready made easy understandable graphics as well as raw data for your own analysis. Data from your previous sessions (if any) will be accumulated to the graphs. If you prefer to start fresh without any history data accumulated to the graphics; just delete the files on the USB. Move the USB to a computer in order to manage the files and see the graphics. Open the USB by double clicking on it. Files created on the USB are: Index.html – click this file to see the graphics presented in your web reader. Graphs – folder for picture files. Html – folder for html files. Logfiles – folder for logfiles. Rawdata – folder for personal data. Use these files if you prefer to create graphics of your own in e.g. Excel. Maintenance of Mindball Headbands To keep the headbands fresh, working and hygienic, there are a few tips to consider For cleaning the headbands, use a detergent, water and a cloth or a sponge. You can’t use alcohol. Soak the cloth or the sponge and rub the headbands to clean them. Rinse the cloth or sponge with clean water, and wipe the headbands clean. If the headbands are very dirty, they can be wetted, rubbed and left in open air to dry. The headbands have wires inside, be careful and do not bend them too much so that wires will disconnect from the sensors. When cleaning the headbands, do not wet the connector at the end of the cable. If the metal sensors are very dirty, you can use a common kitchen sponge aimed for sinks or tiles to rub the sensors. Trouble shooting Mindball Trainer Symptom: The ball is off the playing area and does not reposition itself. Reason: The ball is made of steel and is kept in place by a magnet under the tabletop. Action: Roll the ball slowly along the playing area and it will find the magnet again. Symptom: It seems impossible to move the ball at all, even on level 1. Reason 1: The headband is not correctly put on Action 1: Make sure there is no hair between the sensors and the forehead. Make sure the whole sensor is in contact with the forehead. (If you have a very steep forehead you might improve the connection by moving it down towards the eyebrows). Reason 2: The headband is not correctly connected Action 2: Make sure that the headband is firmly connected to the Mindball Trainer unit. Reason 3: The headband is broken Action 3: Replace the headband. You can measure the resistance between the sensors and the pins in the contact with an ohmmeter, If it never shows a momentarily value of 2 ohm or less the headband is broken. Interactive Productline IP AB ▪ Järnvägsgatan 36 ▪ SE-131 54 Nacka ▪ Sweden Phone +46 709 82 00 24 ▪ [email protected] ▪ www.i-p.se Reason 4: Other electrical equipment or cords are disturbing Mindball Trainer. Action 4: Move Mindball Trainer or the source of disturbance. Reason 5: You are extremely stressed – NB – the bar at the top of the graphics must be green in order to be able to move the ball at all. Action 5: Use your personal technique to relax before trying again. Reason 6: You have a medical condition or you are under the influence of drugs or alcohol Action 6: Do not use Mindball Trainer Disclaimer Mindball Trainer gathers and analyzes brain wave signals to provide visual feedback. Mindball Trainer is not a medical device and is not intended for use in clinical medical applications. Interactive Productline IP AB makes no warranties, express or implied, including but not limited to, any implied warranty of merchantability or fitness for a particular purpose. The User is responsible for determining whether this product is fit for a particular purpose. Interactive Productline IP AB makes no claims as to potential medical or therapeutic benefits. Interactive Productline IP AB reserves the right to make changes, corrections and/or improvements to the Information, and to the products and programs described in such information, at any time without notice. Patented Interactive Productline IP AB ▪ Järnvägsgatan 36 ▪ SE-131 54 Nacka ▪ Sweden Phone +46 709 82 00 24 ▪ [email protected] ▪ www.i-p.se


