1
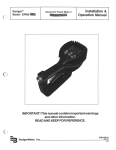
THIS IS A GENERIC MANUAL TO PROVIDE YOU WITH AN
EXAMPLE OF HOW TO ASSEMBLE A CYCLE 24 KIT ANTENNA.
ALL SPECIFIC ELEMENT SCHEDULES AND POSITIONS HAVE
BEEN REMOVED. MOST NUMBERS HAVE BEEN GIVEN THE
DESIGNATION XX. WHEN YOU PURCHASE AN ANTENNA YOU
WILL RECEIVE THE COMPLETE MANUAL WITH EXACT
DIMENSIONS AND NUMBERS. IN ORDER TO REDUCE YOUR
DOWNLOAD TIME, THIS GENERIC MANUAL WAS
COMPRESSED. YOU WILL RECEIVE A HIGHER QUALITY
MANUAL VIA EMAIL WHEN YOU PURCHASE AN ANTENNA.
Assembly Manual Kit Version
90 MPH KIT
Cycle 24 Model
Cycle 24 Limited Warranty and Liability
Cycle 24 (“Manufacturer”) warrants to the original purchaser that this product will
be free from defects in material, and workmanship for a period of one (1) year
from the date of purchase. The determination of whether any part or parts will be
covered under warranty and whether any part or parts will be repaired, replaced
or refunded will be solely determined by Cycle 24. Such determination will be
made following evaluation of claim of alleged defect and subject to evaluation of
possible misuse, abuse, unauthorized modifications, extreme weather conditions
or improper installation. This warranty does not cover transportation, installation
or any other costs that may be incurred from any defect whether known or
unknown.
The purchaser, final customer, installer and user of these products individually
and collectively acknowledge that these products can cause injury or death and
individually and collectively accept full responsibility and liability for any and all
personal and property damage (direct, indirect and punitive) caused during
installation and subsequent use.
Copyright Notice
This publication and corresponding antenna design, both electrical and
mechanical, is Copyright 2012, by Cycle 24. All rights reserved.
.
This publication contains proprietary information and no part of this publication
may be reproduced, stored in a retrieval system or transmitted in any form or by
any means, electronic, mechanical, photocopying, recording or otherwise,
without prior permission.
Warning
Installation of this antenna near power lines is dangerous. Contact with any
high voltage power lines could result in electric shock or loss of life. Do not
install this antenna where there is any possibility that the antenna or any
part of the supporting structure could come in contact with power lines.
Also ensure that no persons or pets can come in any contact with the
antenna after it is installed. Dangerous voltages can exist on the antenna
when it is in operation and no part of the system is insulated to prevent
shock.
Consult with FCC OET Bulletin 65 to properly evaluate whether the chosen
installation site for this antenna will comply with the FCC guidelines for
human exposure limits to radio frequency electro-magnetic fields.
VDX512
-2-
Revision 3-22-2013
Refer to the manufacturer’s user manual for all tools used during the
assembly and installation of this antenna. Cycle 24 is not responsible for
any injuries incurred during the assembly or installation of this antenna.
Contact
If you have any question regarding the assembly or operation of this antenna,
you may contact Cycle 24:
Cycle 24 - Antenna Products Co.
PO Box 2233
Harrison, AR 72602-2233
(870) 715-8228
(870) 416-9940
Email addresses:
[email protected]
[email protected]
[email protected]
VDX512
-3-
Revision 3-22-2013
PARTS LIST
Boom Assembly Parts
Part #
1
2
3
4
5
6
7
8
9
10
VDX512
Description
2.0” x 5/16” U-Bolt and Saddle
Clamps/ Nuts- 2 (Boom to Mast Plate)
1.5” x .058” x 72” (Boom Center)
1.25” x .058” x 72” (Boom Ends)
¼” x 20 x 2” Bolts and lock nuts- 2
(attachment of 1.25” to 1.5” boom
pieces)
Element to boom plate (2” x 6” x
3/16”)
Driven Element V Plate (4” x 11” x
3/16”)
Boom to Mast Plate (4” x 6” x 3/16”)
1.5” x 5/16” U-Bolt and Saddle
Clamps/ Nuts-2
(two element plates
and boom to mast plate)
1.25” x 5/16” U-Bolt and Saddle
Clamps/ Nuts- 2 (6 element plates)
End caps
-4-
Material
Quantity
Galvanized
2
Aluminum Tube
Aluminum Tube
Stainless Steel
1
2
4
Aluminum Plate
4
Aluminum Plate
1
Aluminum Plate
Galvanized
1
6
Galvanized
Rubber
Revision 3-22-2013
6
2
Element Assembly Parts List – Refer to part numbers by antenna model and part number
Part #
1
2
3
4
5
6
7
8
9
10
11
12
13
14
15
16
Description
Material
.625" x .058” x 72"
(All elements)
.5”
x .058” x 36”
(All elements)
.375” x .040” x 55.5” (Reflector)
.375” x .040” x 53.5” (Driven Element)
.375” x .040” x 48.5” (1st Director)
.375” x .040” x 44.25”(2nd Director)
.375” x .040” x 39.5” (3rd Director)
.625” Element Block Set (2 per set)
¼-20 x 2” Button head Allen Screw (all
element blocks)
¼-20 Lock Nuts (all element blocks)
¼-20 Flat Washer (all element blocks)
#8-32 x 1.0” Pan Head Bolt (included in
driven element assembly)
#8 Flat washer (included in DE center
section assembly)
#8-32 Keps Nut - integrated star washer (included in DE center section assembly)
Balun (optional)
Tie Wraps (attachment of Balun to boom)
5/32” Pop Rivets
VDX512
-5-
Total Quantity
Aluminum tube
Aluminum tube
Aluminum Tube
Aluminum Tube
Aluminum Tube
Aluminum Tube
Aluminum Tube
Polyamide
Stainless Steel
5
10
2
2
2
2
2
12
24
Stainless Steel
Stainless Steel
Stainless Steel
24
24
2
Stainless Steel
2
Stainless Steel
4
Aluminum
1
3
50
Revision 3-22-2013
ASSEMBLY HINTS AND TIPS
This antenna uses aluminum tubing and stainless steel fasteners. Although stainless
steel resists rust and corrosion which makes it ideal for antenna use, it is especially
prone to “galling” when being tightened or loosened. When galling occurs a nut can
become seized on the bolt requiring the bolt to be cut or drilled to be removed. Galling
most often occurs once a nut has been torqued at least once. The proper solution to
prevent galling is to coat the thread of the hardware with an “anti-seize” or “anti-galling”
compound designed to prevent galling.
If you are removing a nut that has been installed, especially if it was exposed to the
elements, even if the threads were pre-treated with an anti-seize compound, it can help
to apply a penetrating lubricant during removal of stainless steel nuts to prevent galling.
If during the removal or tightening of a nut, you feel the torque required to turn the nut
increasing rapidly, the best technique is to stop immediately, liberally apply a liquid
penetrating lubricant, work the hardware back in the opposite direction to allow the
penetrating lubricant to fully soak and lubricate the threads. If you force a stainless steel
nut on or off too far once galling begins, the nut will permanently seize.
Aluminum tubing sections telescope together in the element and boom assembly. To
prevent corrosion between the overlapping joints which increases electrical resistance
between sections and can cause the sections to seize together (preventing
disassembly), an anti-seize compound should be applied. Two suggested products are
“Penatrox A” manufactured by Burndy, or “Noalox Anti-Oxidant Compound”
manufactured by Ideal. This will ensure optimal long term electrical and mechanical
performance from your Cycle 24 antenna.
On all hardware, resist the urge to over-tighten (torque) the hardware. Especially
hardware that uses a nylon lock nut - extreme force is not required. Over-torquing will
distort mating surfaces and actually reduce the holding capability and/or strength of the
hardware. Once hardware begins seat firmly, it only takes a few more turns to properly
torque the hardware. Being consistent in applying torque across fasteners is also
important. For instance when applying torque to the two bolts that hold a single clamp on
the boom or to the mast, uneven torque between the bolts can reduce the holding power
of the clamp. When torquing bolts on a clamp, you should alternate between each bolt
applying an even amount to turns to each bolt keeping torque on each bolt as close as
possible. This keeps the clamp engaging squarely and maximizes clamping force. You
can use the exposed threads on bolts the visually gauge if two bolts have about the
same amount of torque.
VDX512
-6-
Revision 3-22-2013
TOOLS REQUIRED
This antenna uses all S.A.E standard tool sizes.
11/32” - Nut driver (for 8-32 nuts on driven elements)
7/16" - Nut driver or socket and ratchet (for ¼-20 nylon lock
nuts for boom bolts and mounting blocks)
1/2"
- Socket and ratchet (preferred), or combination wrench, or
adjustable wrench (for element and boom to mast saddle clamps)
5/32” – Allen Wrench (for ¼” Allen head bolts)
5/32” Drill Bit and Drill
Pop Rivet Gun
Tape Measure
Level
Permanent Marker
VDX512
-7-
Revision 3-22-2013
BOOM ASSEMBLY
TOOLS USED: 5/32” Allen Wrench, 7/16” SOCKET, Tape Measure
The boom consists of three aluminum pieces of tubing with a six foot length of
1.50 inch outer diameter in the center (with reducers pre-installed inside the
ends), and two end pieces that are 1.25 inch outer diameter. Boom pieces are
cut, and holes for the ¼-20 x 2” bolts are drilled at the factory. Identify the 1.5”
and 1.25” pieces of aluminum tubing using the tape measure. These will be the
three largest pieces of tubing that you receive.
Center section - 1.5” X 72”
End sections (2) - 1.25” X 72”*
Secure each end with two ¼-20 x 2.00 inch socket, button head screws and
¼-20 nylon lock nuts. There are two bolts per boom joint.
Attach the two rubber end caps on the end of the boom.
*Overall length of the 1.25” tubing is 72” while the exposed length is 68.5”
per piece.
BA1: BUTTON HEAD BOLT AND LOCK NUT
Boom Assembly and Element Block Assembly
VDX512
-8-
Revision 3-22-2013
ELEMENT SORTING
TOOLS USED: Tape Measure
Use a tape measure to determine the outside diameter and the length of each
piece of tubing. Sort the tubing into three piles – .625” (5/8”), .5” (1/2”), and .375”
(3/8”). If you feel comfortable, you can also identify the different pieces of tubing
visually based on its outside diameter and overall length. Your three piles should
have the following pieces:
O.D.
TOTAL LENGTH
QUANTITY
USE
5
10
2
2
2
2
2
2
All Element Center Pieces
All Elements
Reflector
Driven Elements
1st Director
2nd Director
3rd Director
DE
.625”
.5”
.375”
.375”
.375”
.375”
.375”
.375”
ES 1- Inventory of Element Tubing – 90 mph version
After you have your aluminum sorted into three piles, you are ready to
assemble the pieces together to make your elements.
The pieces in the table ES1 above that are in bold are the center sections
for their respective bands. These pieces will not telescope into any larger
tubing because they are the largest pieces per band and are the center
pieces.
POP RIVETING
TOOLS USED- POP RIVET GUN, DRILL, 5/32” DRILL BIT, SAFETY GOGGLES.
CAUTION: Follow all safety instructions when using pop rivet tools and other
potentially dangerous tools. Cycle 24 is not responsible for any injuries related to
assembly of this antenna.
This section is meant as a precussor to the next section titled “Assembling the
Elements”. Use the information that you learn from this section while following
the directions in the “Assembling Elements” section.
If you have experience using pop rivets, then skip this section and go to the
Assembling Elements section. If you do not have experience, then we suggest
that you go to Youtube and do a search for pop rivet or how to pop rivet. There
will be several simple examples of how to use a pop rivet gun. Below are step by
step instructions as well:
VDX512
-9-
Revision 3-22-2013
1. Using a hand drill or press, drill a 5/32 inch hole through one side of your
tubing junction. Do not drill through both sides of tubing.
2. Insert pop rivet into hole.
3. Squeeze rivet gun until you hear a POP.
Watch your mark to make sure it does not move while you are drilling your
hole. It is usually best to drill with one hand and hold the smaller diameter
tubing with the other hand.
ASSEMBLING THE ELEMENTS
TOOLS USED- MARKER, TAPE MEASURE, DRILL, 5/32” BIT, POP RIVET GUN
The following is our recommended procedure for marking, drilling, and
assembling elements.
1. Mark all .625” tubing in the center of the tubing at xx inches. This mark will be
used later when centering the element onto the element plate.
2. Mark all .5 inch tubing with a permanent marker at xx inches.
3. Slide one .5 inch tube into one side of .625 inch tube with xx inches exposed.
Drill and secure with pop rivets.
4. Continue this process until you have 5 elements (driven element and reflector)
that have a total of 72 inches of .625 inch tubing in the center with xx inches of .5
inch tubing on either end of your .625 inch tubing. The total length of each of
your 5 pieces of tubing is xx”.
5. Next mark all .375 inch tubing pieces xx from one end.
6. Find the two xx pieces of .375” material and insert one into one end of the .5”
inch piece. Drill and secure. Repeat this step for the other end of the .5” piece.
You should now have an element that is a total length of xx”. Mark this piece
with an R in the center of the element to designate it as the Reflector.
7. Continue step 5 for the remaining elements. When completed, the elements will
be completely assembled.
TAKE YOUR TIME AND MEASURE AS YOU ARE ASSEMBLING THE
ELEMENTS TO CONFIRM THAT THE OVERALL LENGTHS ARE CORRECT.
The diagram on the next page provides the EXPOSED and OVERALL
lengths along with a visual depiction of each elements taper schedule.
VDX512
- 10 -
Revision 3-22-2013
Note about the picture below.
You might be thinking why does it only show XX inches of .625 inch tubing for the
center section when I have XX inches of .625 inch material. This is because
there is XX inches of .625 inch on each side of the element for a total of XX
inches.
VDX512
- 11 -
Revision 3-22-2013
ELEMENT PLATE MOUNTING
TOOLS USED- TAPE MEASURE, LEVEL, ½” SOCKET.
The table below shows the position of each element in inches - measured from
center to center of each element with the reflector at Position 0. Measure the
total length of the boom to see that you have 17’ 4”.
Element
Reflector
Driven Element
1st Director
Boom to Mast Plate
2nd Director
3rd Director
Position in Inches
XX
XX
XX
XX
XX
XX
Position on Boom
1.25” Tubing
1.25” Tubing
1.5” Tubing
1.5” Tubing
1.25” Tubing
1.25” Tubing
EPM1: Element Boom Positions
EPM 4: Boom to Element Plate
EPM 2: Boom to Mast Plate
EPM 3: U-bolt Saddle Clamps
1. Mount the boom on a temporary mast or on saw horses so it is elevated off the
ground.
2. Sort out all the 1.25 inch U-bolt saddle clamps and all of the 1.5 inch U-bolt
saddle clamps. The 1.25” clamp and saddle is the smallest you will receive. The
1.5 inch clamp is the middle sized clamp you will receive.
3. Identify the boom to mast plate (EPM2) and install using 2 1.5 inch U-bolt saddle
clamps (EPM3) with the center of the plate at 81 inches.
4. Install the boom to mast plate at approximately 81 inches. As you install the
element plates in step 4 and 5, ensure that all of the element plates are
perpendicular to the boom to mast plate.
5. Refer to table EPM1 for exact positioning of the element plates. Loosely install
all the saddle clamps on the 4 element plates (EPM4) that will be mounted on the
VDX512
- 12 -
Revision 3-22-2013
1.25 inch boom end pieces. Continue this step for the plate that is mounted onto
the 1.5” tubing.
6. Position the reflector element plate with the saddle of the clamp nearest the end
of the boom against the end of the black end cap. Use a level and tighten the
saddle clamps evenly, so they are tight, using a 3/8 drive ratchet and ½ inch
socket (EPM5). Mark this plate as R, designating it as the reflector.
7. Use a tape measure hooked onto the back end of the reflector plate (EPM6) and
position the next plate so the measurement to the back end of that plate is 41”
for the driven element. Tighten that plate using a level so it will be in line with the
first one. Mark as DE designating it as the driven element.
8. Do the same thing for all the plates you have installed using the measurements
listed above and marking each plate for its corresponding element.
EPM 6: Tape measure attached to the rear
of the reflector element plate.
EPM 5: Level used on each element
plate.
EPM 7: Measuring element plate positions on the boom.
VDX512
- 13 -
Revision 3-22-2013
ELEMENT POSITIONS
ELEMENT POSITIONS
VDX512
- 14 -
Revision 3-22-2013
PLATE AND ELEMENT ATTACHMENT
TOOLS NEEDED- TAPE MEASURE, 5/32” ALLEN WRENCH, 7/16” SOCKET, ANTISEIZE LUBRICANT FOR STAINLESS STEEL NUTS AND BOLTS.
**Please note, while pictures PEA1 and PEA2 show the element plate to not be
mounted on the boom, at this point you should have all of the element plates
securely attached to the boom. These pictures are shown to illustrate the
attachment of the mounting blocks.
1. Place two halves of the XX inch mounting blocks onto the reflector plate and then
place the entire reflector element onto the two clamp halves (PEA 1).
PEA 1- Clamp halves with full element
PEA 2- Full clamp attached to element
2. Place your mark on the center of the
element plate (PEA4).
3. Next place the top two clamp halves onto
the element and use the ¼ x 20 x 2” socket
head bolts and washers to secure the clamps
together (PEA 2 & PEA 3). Apply anti galling
lubricant before attaching the nut to the bolt.
PEA 3- 2” socket head bolts with flat
washers.
VDX512
4. Repeat for all elements.
- 15 -
Revision 3-22-2013
PEA 4: Example element plate with attached mounting blocks. Element center is
marked and positioned on the middle of the plate
PEA 5: Driven element attached to the element plate.
BALUN ATTACHMENT
Install the optional balun or your own balun to the #8 bolts on the center of the
driven element. Position the balun leads between the bottom keps nut and the flat
washer. Secure the balun to the boom with the provided tie wraps.
VDX512
- 16 -
Revision 3-22-2013
ANTENNA FINAL CHECK AND TEST – PRIOR TO INSTALLATION
Dimensions:
Refer to figure EPM1 on page 12 and, if there is any question, check the end
dimensions of the elements to ensure they are correct. It is highly unlikely a
mistake could be made except for the installation of the 3/8” tips sections of the
elements.
Hardware Installation:
Verify that all the hardware has been tightened and there are no loose fasteners.
SWR Test
You may connect an analyzer with the antenna only a few feet off the ground to
make sure you do not have a short or extremely high SWR. The antenna will not
have the specified SWR curves unless it is installed at a height of at least 20 feet.
With the antenna at least 6 feet from the ground, you will start to see the SWR
“dip” below 2:1 somewhere in or near the specified frequency range. As long as
you start to see a dip somewhere around (above or below) the frequency range,
you may proceed with installation.
Installation
The antenna should be installed by a professional in a safe manner on a support
structure that is rated to handle the weight and wind load of this antenna, in all
expected weather conditions. The boom to mast plate is supplied with saddle
clamps to mount to a 1.5” or 2.0” outer diameter mast (user supplied). The
antenna is designed to be fed with 50 Ohm coaxial cable such as RG-8 or RG213. Pretest the entire run of coax cable with a 50 Ohm “dummy load” to ensure
there are no problems with either the coax or the coax connectors. Most SWR
issues are due to coax or connector issues and not related to the antenna itself.
Even if the coax was previously being used for another antenna, repositioning of
the cable can cause new connector issues to occur. You should also test the
cable at the full power you intend to run, if possible.
Surrounding metallic objects (other antennas, guy wires, etc.) can affect the
performance of the antenna. If the antenna is not interacting with anything, you
can expect the specified SWR curve, gain and front to rear performance.
VDX512
- 17 -
Revision 3-22-2013