1
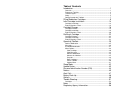
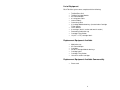
TabSafe User Manual
for the Home
Model 102
Revision E
10/10
Software version 10.10.10.0
A Word About Safety
A Personal Note to the Caregiver from TabSafe.
Dear Caregiver:
If you are uncertain as to whether the TabSafe Medication Reminder
System is appropriate or suitable for use by a person for whom you have
accepted “Caregiver” responsibilities, check with a physician or other
healthcare specialist familiar with the person’s current physical and
mental condition.
The TabSafe Medication Reminder System is provided to you at your
request to assist in the delivery of medications to a person for whom you
have accepted “Caregiver” responsibility. Its purpose is to assist in
medication management and notifying you and/or other persons when a
medication has not been taken or a message has not been answered.
TabSafe Medical Services, Inc. relies on you to provide timely and
accurate information to fulfill the medication delivery function of the
system.
Keep the machine locked at all times.
It is not the purpose of the TabSafe system to serve as an alternative
monitoring system for patient well-being or to take the place of a
caregiver. The TabSafe system can only provide its medication
management function with your careful assistance and follow up.
Thank you for choosing TabSafe to assist you in your healthcare.
TabSafe Medical Services, Inc.
The Caregiver
The most important element of the success of TabSafe is the caregiver.
The correct filling of cartridges and installing them in TabSafe in a timely
manner is the responsibility of the caregiver. Any problems reported by
TabSafe, such as missed medications, cartridge empty, etc. are also the
responsibilities of the caregiver to rectify.
BEFORE YOU USE THIS TABSAFE MEDICATION REMINDER
SYSTEM, BE SURE TO READ AND UNDERSTAND THIS SAFE USE
AND INSTUCTIONS USER MANUAL. IF YOU DO NOT
UNDERSTAND THESE INSTRUCTIONS, CALL CUSTOMER
SUPPORT AND YOUR QUESTIONS WILL BE ANSWERED. DO NOT
USE THE TABSAFE MEDICATION REMINDER SYSTEM UNTIL THE
PERSON REPSONSIBLE FOR LOADING AND SETTING UP THE
SYSTEM UNDERSTANDS THESE INSTRUCTIONS COMPLETELY.
The information in this document is subject to change without notice.
While the information contained is accurate to the best of our ability,
TabSafe assumes no liability or responsibility for omissions or errors.
Medication and drugs taken other than as prescribed by a medical
practitioner, pharmacy, or drug manufacturer may cause serious injury
and/or death. When multiple pharmacies are used, it is the responsibility
of the client, the caregiver and/or authorized healthcare provider to
observe drug-to-drug interactions before using the TabSafe Medication
Reminder System. If the TabSafe Medication Reminder System is not
used in conformity with the prescribed medication dosage, amount,
frequency of use, and medication instructions by the client, the caregiver,
and/or an authorized healthcare provider, serious injury or death may
result. TabSafe Medical Services, Inc. relies on the client’s caregivers to
ensure the accuracy, compatibility, completeness, and timeliness so that
the TabSafe Medication Reminder System may perform according to its
designed purpose.
This document contains important information and instructions for safe
use and operation. Save this manual. You may want to make
reference to it in the future as it contains important information about the
operation, safe use, and maintenance of the TabSafe Medication
Reminder System. The serial number for the TabSafe unit is located on
the back of the unit.
Save all original packaging. If the TabSafe unit must be returned for
any reason, it must be shipped in the original packaging. Failure to do
so will void all warranty claims.
Safe Use Instructions
Warning
•
Do not use this TabSafe Medication Reminder System to
release medication in any way that is not in compliance with the
prescription or directions of the prescribing medical practitioner,
pharmacy, or drug manufacturer.
•
Do not load any medication into this machine that is used for
emergency or life-threatening conditions, such as sublingual
nitroglycerin.
•
Please immediately report any malfunction of this TabSafe
system directly to Customer Support by calling 877-700-8600.
•
Please call Customer Support with any question about the
operation of this TabSafe Medication Reminder System.
•
Do not use the TabSafe to load any liquids, injectables, geltabs,
pills that may stick, or patches. Attempting to load these
substances will damage either the unit or the medication and will
void all warranty claims. Also, follow medication size guidelines
in this manual. Mediations that cannot be loaded in a cartridge
can have messages scheduled.
•
Always load and secure all medication cartridges according to
this User’s Manual.
•
Do not attempt to take apart, modify, or in any other way tamper
with or attempt to repair the TabSafe Medication Reminder
System other than what is outlined in this User’s Manual. Any
tampering or attempt to modify or repair this system will
immediately void the warranty.
•
Never permit children to have access to or tamper with the
TabSafe Medication Reminder System. Always keep TabSafe
out of the reach of children.
•
If TabSafe is used in a manner not specified by the
manufacturer, the protection provided by TabSafe may be
impaired.
•
Degree of safety in the presence of flammable anesthetic
mixture: Not suitable for use in the presence of flammable
anesthetic mixture with air or with oxygen or nitrous oxide.
Table of Contents
Introduction ...........................................................................1
Overview ...............................................................................................1
Features of TabSafe .............................................................................2
TabSafe Layout.....................................................................................3
Setup.....................................................................................................5
Getting Started with TabSafe................................................................7
Filling Medication Cartridges.................................................9
Initial Cartridge Installation..................................................14
Cartridge Installation ...........................................................................14
Entering Sections Filled ......................................................................16
Cartridge Changes..............................................................18
Cartridge Removal ..............................................................................18
Cartridge Installation ...........................................................................19
Entering Sections Filled ......................................................................20
Refilling a Cartridge ............................................................22
Cartridge Removal ..............................................................................22
Cartridge Installation ...........................................................................23
Entering Sections Filled ......................................................................23
Operating TabSafe..............................................................25
Release Medication ............................................................................25
Messages............................................................................................26
As Needed Medication........................................................................27
Menu Options......................................................................................28
View Cartridge ................................................................................30
View Messages ..............................................................................32
Advance Medication .......................................................................34
Advance As Needed.......................................................................35
Override ..........................................................................................36
Refill Cartridges ..............................................................................37
Pause TabSafe...............................................................................40
Support Menu .................................................................................41
Sleep Mode.........................................................................42
Update Button .....................................................................43
Personal Identification Number (PIN)..................................44
Notices................................................................................45
Alert Calls............................................................................47
Battery Back-Up..................................................................48
Options ...............................................................................49
Trouble Shooting.................................................................51
Cartridges ...........................................................................................54
Notes ..................................................................................56
Regulatory Agency Information...........................................58
Introduction
Overview
Congratulations and thank you for choosing the TabSafe Medication
Reminder System. With TabSafe, you have the latest technology to
assist in medication adherence. Medication cartridges and messages
are scheduled by entering scheduling information at the TabSafe
website. Username and password information will be supplied upon
ordering your TabSafe system. If an internet connection is not available,
the information can be scheduled by filling out the applicable forms. The
TabSafe system must be connected to a working analog phone line and
electrical outlet to accept and download the information entered.
Cartridges and messages will alert at the scheduled times. As needed
medications are scheduled with an allowed time range to prevent
overmedicating.
Medication cartridge inventory is maintained with each release.
Inventory information can be accessed on-line via the secure TabSafe
website.
Note:
Once a cartridge is empty, it can be refilled and the new number of
sections filled entered at the TabSafe system with no need to revisit
the website. Changes and additions to the medication schedule
should be entered on the TabSafe website.
The TabSafe system automatically downloads adherence information
every night to create useful reports including inventory reports and
electronic medication records, accessible via the secure TabSafe
website.
1
Features of TabSafe
•
•
•
•
•
•
•
•
•
•
•
•
•
•
•
•
•
•
•
Reminds user to take medications with visual and audio alerts
Improves adherence to medications, as prescribed by physician
Increases independence of the client
Provides “peace of mind” for families and caregivers by relieving the
stress, worry, and time associated with medication management
Informative Screen provides Ease of Use
Locked system for storing medication
Additional security with optional PIN for features
Medication is released at a time you set
With the touch of one button, scheduled medications are released
into an automatically opened drawer, including a removable cup
Battery Backup with low battery notification
Pause option for extended leave
Advance option to release medications ahead of time
Secure login access to cartridge/message scheduling, configuration
options and adherence reports
Alert Calls to up to three different phone numbers when medication
is not released
Alert Calls when an empty cartridge is not refilled and if drawer is not
closed
Cartridges:
o Each TabSafe unit holds 4 cartridges
o Cartridges come in both 16 and 32-section sizes
Capacity for up to 14 different messages
For those who require more than 4 cartridges, multiple TabSafe
Cartridge Modules can be connected to equal a total of 12
cartridges.
Up to 4 medication times can be scheduled for each cartridge.
2
TabSafe Layout
Cartridge Eject
Button
Door
Cartridge Button
Installed
cartridge
Cartridge Light
(green, red or off)
Screen
Medication Drawer
with removable cup
Large Blue Button
Keypad
(slides out from bottom)
Physical Description
The bottom front of the TabSafe Base Unit includes a message screen
and the large blue button. A keypad is accessible by sliding it from under
the bottom front. Cartridges are secured behind the hinged door with a
lock. Cartridge eject buttons are just above each cartridge and when
pressed, will eject the cartridge immediately below. Cartridge lights are
next to each cartridge on the right front along with the cartridge button
that allows that cartridge to be chosen or selected for a certain operation.
The medication drawer is on the bottom right just above the large blue
button.
3
List of Equipment
Each TabSafe system comes complete with the following:
•
•
•
•
•
•
•
•
•
•
•
•
TabSafe Base Unit
TabSafe Cartridge Module
AC Power Adapter
8 ft. telephone cable
Internal Battery
Connecting cable
2 Cartridge Module door keys (located under Cartridge
Filling Station)
User’s Manual
4 cartridges (two 16 section and two 32 section)
Removable medication cup
Cartridge Filling Station
12 (0.5” x 1.75”) cartridge labels
Replacement Equipment Available
•
•
•
•
•
•
•
Medication cup
AC Power Adapter
Cartridges
Set of 2 Cartridge Module door keys
Cartridge labels
Cartridge Filling Station
16 and 32 section cartridges
Replacement Equipment Available Commercially
•
Phone cord
4
Setup
•
Remove the TabSafe unit from the box and remove all
packaging materials. Save the box and packaging materials in a
dry area for future use.
•
If your TabSafe has been stored or kept in a place that is cold
(below 32°F/0°C) for longer than two or three hours please
unpack your TabSafe and let it sit at room temperature for three
to five hours before setting it up.
•
Place the TabSafe Base Unit on a sturdy surface no more than 5
ft. from an electrical outlet and no more than 5 ft. from a working
analog phone jack. Position the TabSafe so that the back of the
system is accessible and there is space in front to support the
keypad when open.
•
Do not locate in areas of high moisture (such as a bathroom.
•
See Training Videos on the TabSafe website for helpful visual
aides.
•
Remove the Base Unit lid and the Cartridge Filling Station and
set aside.
•
Place the TabSafe Cartridge Module on top of the Base Unit with
the Cartridge Module approximately ¼ inch farther back than the
Base Unit. Slide the Cartridge Module forward to allow latches
to engage, attaching the Base Unit to the Cartridge Module.
•
There are two phone outlets on the back of TabSafe. Facing the
back of the TabSafe, plug one end of the provided phone cord
into the phone outlet on the left. Plug the other end of the phone
cord into an analog phone jack.
•
If this phone jack is needed for a phone, use both phone outlets
on the back of the TabSafe. Connect the phone to the phone
jack on the right, facing the back of the TabSafe. Follow the
directions above to connect the TabSafe directly to the analog
phone outlet. The phone may be used normally. The TabSafe
will not be able to alert a caregiver if this phone is off the hook or
in use.
•
Connect the Base Unit to the Cartridge Module with the gray
connecting cable. The Primary OUT should be connected to the
first IN, as illustrated on the following page for a single Cartridge
Module.
5
•
Replace the Cartridge Filling Station and lid on top of the
Cartridge Module.
•
Plug the TabSafe power adapter into the TabSafe power
connector in the back of the TabSafe.
•
Plug the other end of the TabSafe into a standard 110V outlet on
the wall. It is recommended to use a surge protector for both the
phone and electrical, especially in areas prone to electrical
storms.
T
6
Getting Started with TabSafe
What you will need:
•
Username and password
•
TabSafe, fully assembled and connected to power and telephone
(see Set Up Section for more details)
•
Cartridges
•
Cartridge Filling Station
•
Medications
•
Cartridge Module door key
•
Computer with internet connection
See Training Videos on the TabSafe website for helpful visual aides on
each step in the Getting Started process.
What to do:
1. Group medications together as to what time of day they are
taken. Here is an example:
Morning: Medications A, B, C, and D
Afternoon: Medication A
Evening: Medication A
Bedtime: Medication A, B, and E
As Needed: Medication F
2. Determine if each individual medication fits the size
specifications outlined in the User Guide or Quick Guide. If they
do not, remove them from the group and plan to enter a
message to take that medication when scheduling the cartridges.
3. Determine if the groups of medication (morning and bedtime) will
fit within one section of the 16 section cartridge. Medication
must fit loosely within the section. See Filling Medication
Cartridges for more information.
4. Fill the cartridges, using the Cartridge Filling Station.
16 section cartridge with A, B, C, and D in each section
(Morning Medications)
16 section cartridge with A, B, E (Bedtime Medications)
32 section cartridge with A (Afternoon and Evening)
32 section cartridge with F (As Needed)
7
5. Schedule the cartridges at the TabSafe website, using your
secure username and password.
6. Schedule any messages for medication instructions, duties, or
activities of daily living.
7. Enter Configuration information, such as Time Zone and Alert
Call phone numbers.
8. Open TabSafe Cartridge Module door.
9. Press the UPDATE button on keypad to download schedule and
configuration information.
10. Install one cartridge. See Initial Cartridge Installation Section for
more details on the following steps.
11. Follow prompts to refill and enter number of sections filled.
12. Repeat with other cartridges.
13. Close Door.
14. The TabSafe is ready for operation.
8
Filling Medication Cartridges
Tablet and Capsule Size Specifications
Oval shaped tablets and capsules no longer than 0.875 inches will fit into
a TabSafe cartridge. Round tablets, with a diameter no wider than 0.51
inches, will fit in a TabSafe cartridge. Tablets must also have a
thickness of more than 0.077 inches or they may slip out the exit point in
the cartridge unintentionally.
See below for an approximate to-scale image of size limitations. If your
medication goes outside the lines below or is too thin, it will not fit in a
TabSafe cartridge. The medication must move freely within the section
without getting stuck in any position. Geltabs of any size cannot be filled
in a TabSafe cartridge, as the coating will cause these medications to
stick.
Oval size limitation
Round size limitation
Thickness limitation (must be thicker than below line)
If your medication does not fit the size parameters outlined above, it can
not be placed into a TabSafe cartridge. A message corresponding to this
medication can be scheduled. Please enter the message on the
TabSafe website at the schedules tab.
Note:
Medication must fit loosely in each cartridge section. Once
cartridge is filled, gently shake the cartridge to ensure that all pills
move freely and do not get stuck in any position.
Note:
It is not recommended to use tablets cut in halves or quarters, as
static and dust causes sticking.
9
16 and 32-Section Cartridges
The TabSafe System has the flexibility for both 16 and 32-section
cartridges. Either 16 or 32-section cartridges can be filled with one pill
per section or multiple pills per section. Choose whichever size cartridge
fits your needs. When scheduling the cartridge on the website, specify
whether it is a 16 or 32-section cartridge.
Single Pill Per Section
The single pill per section method provides a simple filling procedure:
place only one item in each section of the cartridge. If more than one pill
is taken at one time, schedule the cartridge to release two or more
sections on the TabSafe website. When scheduling a single pill per
section cartridge, it is possible to specify to release different amounts of
the same medication at different times of the day, for example one
section can be released in the morning in the morning and two sections
in the evening.
The single pill per section method also allows for easy changes. Simply
remove or change one medication cartridge without having to sort
through multiple pills to remove or change one pill. This is useful for
medications that change frequently. If the number of pills taken
changes, for example from one pill to two pills, simply make the change
in sections to release on the TabSafe website.
Multiple Pills Per Section
Multiple pills per section cartridges also have advantages. Both 32section cartridges and 16-section cartridges can be filled with multiple
pills per section, as long as the medication fits loosely. If four
medications are always taken on the same schedule, place all four pills
in each of the sections of the cartridge rather than using four separate
cartridges, one for each medication. The multiple pills per section
method uses fewer cartridges.
All sections of a multiple pill per section cartridge should contain
the same medications. If a different combination of medication is taken
at a different time, fill a separate cartridge with that combination, even if
that combination of pills includes some of the same medication as the
first cartridge. This is for ease of filling the cartridge and scheduling the
cartridge.
10
Note:
Although each section of the 16 section cartridge is larger to
accommodate multiple pills, the size limitations above still apply.
A combination of both multiple pills per section cartridges and single pill
per section cartridges can be used. For example, if a client takes a
medication that changes dosage or directions frequently, it may be more
convenient to fill that medication in a single pill per section cartridge, and
fill all other medications that are taken at the same time in a multiple pills
per section cartridge.
Identical Cartridges
Up to four identically filled cartridges can be scheduled together by
entering all identically filled cartridge serial numbers on one scheduling
screen on the TabSafe website. Only one cartridge will release until
empty and the TabSafe system will move on to the next cartridge. This
option allows for less frequent refilling of TabSafe cartridges and can be
used with both 16 and 32-section cartridges.
Example: The same 5 medications are taken every day at morning and
bedtime. These 5 pills fit into each section of a 16-section cartridge,
serial number 1234. In order avoid refilling this cartridge as often, fill
another 16 section cartridge, serial number 5678, with the same 5 pills in
each section. When scheduling these cartridges, enter 1234 and 5678 in
the serial number slots. The TabSafe system will know to release from
only one of the cartridges until it is empty and then release from the other
cartridge. Both cartridges will be empty and need refilling after 16 days,
whereas of only one cartridge was used, it would need refilling after 8
days.
See the TabSafe website for further explanation and examples.
11
Fill Medication Cartridges
To fill medication cartridges, lift the top off the TabSafe system to expose
the Cartridge Filling Station. It is recommended to fill cartridges with the
Cartridge Filling Station in place; however the Cartridge Filling Station
may be removed and placed on a flat surface.
Use the Cartridge Filling Station to open
the cartridge. Place the cartridge on the
Cartridge Filling Station. Press with
equal pressure on all four corners and
hold for two seconds to disengage the
latches. Lift the lid off the cartridge and
set aside.
Fill each section of the cartridge with the
medication. Do not skip sections, fill
sections in numerical order. It may be
helpful to make note of the sections
filled in each cartridge for use when the
cartridge is installed and the sections
filled number is entered.
Pictured to the left is an example of a
16-section cartridge with multiple pills
per section.
Notice how each section
contains an identical
combination of pills
(blue, yellow, tan.)
Home position
Home position
guide
Note:
The home position (smaller, partially
covered section of the cartridge
wheel) on 16-section cartridges must
always be over the home position
guide on the Cartridge Filling Station
when filling.
12
Pictured to the left is an example of a
32-section cartridge with multiple pills
per section.
Notice how each section
contains an identical
combination of pills
(yellow, tan.)
Replace the cartridge lid.
Lift the cartridge lid and base off the
Cartridge Filling Station together and
snap the lid in all four corners to secure.
Use the provided labels to write the cartridge name and directions. Then
place the label on the left front of the corresponding cartridge. Avoid
covering the seam of the cartridge so that the lid can be easily removed
for future refills.
Top right corner
Note:
Do not cover the serial number of the cartridge with the cartridge
label. This serial number will be used in the cartridge scheduling
process.
Match the serial number to the correct cartridge name when entering
schedule information on the TabSafe website. Once all cartridge and
message scheduling and configuration information has been entered on
the website, proceed with initial cartridge installation.
13
Initial Cartridge Installation
Note:
For initial installation, new medication or changes in cartridge
schedule be sure that all message and cartridge schedule
information has been entered on the TabSafe website.
Cartridge Installation
The door of the TabSafe system must
be open to install cartridges. Insert the
key into the lock and open the door.
Lock
Add or Refill
Choose cartridge or
UPDATE from web
Close door when done
All of the lights next to the cartridges will
flash.
14
Press UPDATE on the keypad to
download new schedule and
configuration information that has been
entered on the website in the following
situations:
• The first time cartridges are being
installed
• A new medication is installed
• A change to the schedule or
sections to release of an existing
medication
Schedules updated
Press CLEAR
After UPDATE has been pressed, the
scheduling information will download.
The screen will flash a series of
messages indicating that the information
is being transferred. The final message
will appear indicating that the schedules
have updated. Press CLEAR to exit.
If medication is scheduled to be given
and it is still within the available time
before it is declared missed (see Missed
Medication and Messages), the TabSafe
will prompt to release. To ignore this
active schedule, Pause the system (see
Pause TabSafe) and then resume.
After the scheduling information has
successfully downloaded, install the first
cartridge.
To install a cartridge, align the back of
the cartridge with the desired slot. Slide
the cartridge in and press firmly in the
center until a click is heard. The
cartridge can only be installed one way,
with the rounded side facing outward.
Gently Pull on the cartridge to assure
correct installation.
Press Here
15
Note:
It is recommended that all four
cartridge slots contain a cartridge. If
there are not four filled medication
cartridges, install empty cartridges
and schedule as blank.
Cartridge Name A
Serial Num 1234
ENTER to refill or
CLEAR to exit
The light next to the cartridge will flash
and the screen will display the cartridge
name, number remaining and schedule.
Press ENTER to refill. The process for
entering the number of sections filled
during the initial installation of cartridges
is the same as the process as refilling a
cartridge.
Entering Sections Filled
Entering the number of sections filled is
necessary for the TabSafe system to
release the medication(s) and to
maintain inventory within each cartridge.
Cartridge
Button
If the cartridge has just been installed, it
will automatically be selected, indicated
by the green light flashing next to the
cartridge button and the cartridge name
appearing on the screen.
If the desired cartridge is not selected,
choose the desired cartridge by
pressing the cartridge button.
Cartridge Name A
# Remain. Schedule
ENTER to refill
CLEAR to exit
The cartridge name, number remaining,
and the schedule of the chosen
cartridge will show on the screen. Press
ENTER to refill/enter sections filled.
(Number remaining will be 0 until the
number of sections filled has been
entered.)
16
Cartridge Name A
Cartridge Size 16
Items per section #
ENTER to continue
Cartridge Name A
Sections Filled __
ENTER to continue
The cartridge size (either 16 or 32) and
the number of items in each section will
appear on the screen. Press ENTER to
continue. If this information is incorrect,
changes must be entered on the
TabSafe website.
Enter the sections filled using the
keypad. For cartridges with multiple pills
per section, this is the number of
sections filled, not the total quantity of
pills. Press ENTER to continue.
Cartridge Name A
Sections Filled 16
ENTER to confirm
BACK if incorrect
Confirm the sections filled by pressing
ENTER. If the sections filled is
incorrect, press BACK to go back to the
previous step and enter the correct
number.
Cartridge Name A
Complete
Choose cartridge
or Close door
Once the sections filled has been
confirmed, the screen will show that the
process is complete for the selected
cartridge. Choose another cartridge or
close the door if finished.
Note:
Cartridge names, cartridge size,
number of items per section, and
cartridge schedules can only be
changed on the TabSafe website.
Good Evening
September 30, 2010
Wednesday 10:01am
Schedule at 4:00pm
Close the door when finished. The main
screen will appear with greeting, date
and time. The next time messages
and/or medication are scheduled will be
listed at the bottom of the screen.
17
Cartridge Changes
Note:
For changes in cartridge schedule,
be sure that all message and
cartridge schedule information has
been entered on the TabSafe website.
Cartridge Removal
The door of the TabSafe system must
be open to remove or install cartridges.
Insert the key into the lock and open the
door.
Lock
Press the Cartridge Eject Button
above the desired cartridge to eject and
remove.
Cartridge Eject
Button
If a medication will no longer be taken,
empty the cartridge of medication.
Change this cartridge to a blank
cartridge on the TabSafe website. If the
discontinued medication is replaced by
another medication, change the
cartridge name and/or scheduling
information on the website.
18
Cartridge Installation
Lock
The door of the TabSafe system must
be open to install cartridges. Insert the
key into the lock and open the door.
Add or Refill
Choose cartridge or
UPDATE from web
Close door when done
Schedules updated
Press CLEAR
All of the lights next to the cartridges will
be flashing red.
Press UPDATE on the keypad to
download new schedule information that
has been entered on the website in the
following situations:
• The first time cartridges are being
installed
• A new medication is installed
• A change to the schedule,
sections to release, or items per
section of an existing medication
After UPDATE has been pressed, the
scheduling information will download.
The screen will flash a series of
messages indicating that the information
is being transferred. The final message
will appear indicating that the schedules
have updated. Press CLEAR to exit.
19
After the scheduling information has
successfully downloaded, install the
changed cartridge.
To install a cartridge, align the back of
the cartridge with the desired slot. Slide
the cartridge in and press firmly in the
center until a click is heard. The
cartridge can only be installed one way,
with the rounded side facing outward.
Gently Pull on the cartridge to assure
correct installation.
Press Here
Note:
It is recommended that all four
cartridge slots must contain a
cartridge. If there are not four filled
medication cartridges, install empty
cartridges and schedule as blank.
Cartridge Name A
Serial Num 1234
ENTER to refill or
CLEAR to exit
The light next to the cartridge will flash
green and the screen will display the
cartridge name and serial number.
Press ENTER to refill, if applicable.
Otherwise, press CLEAR to exit.
Entering Sections Filled
Cartridge
Button
If the cartridge has just been installed, it
will automatically be selected, indicated
by the green light flashing next to the
cartridge button and the cartridge name
appearing on the screen.
If the desired cartridge is not selected,
choose the desired cartridge by
pressing the cartridge button.
20
Cartridge Name A
# Remain. Schedule
ENTER to refill
CLEAR to exit
Cartridge Name A
Cartridge Size 16
Items per section #
ENTER to continue
Cartridge Name A
Sections Filled __
ENTER to continue
The cartridge name, number remaining,
and the schedule of the chosen
cartridge will show on the screen. Press
ENTER to refill (or enter the number of
sections filled if this is the initial
installation of the cartridge.)
The cartridge size (either 16 or 32) and
the number of items in each section will
appear on the screen. Press ENTER to
continue. If this information is incorrect,
changes must be entered on the
TabSafe website.
Enter the sections filled using the
keypad. For cartridges with multiple pills
per section, this is the number of
sections filled, not the total quantity of
pills. Press ENTER to continue.
Cartridge Name A
Sections Filled 16
ENTER to confirm
BACK if incorrect
Confirm the sections filled by pressing
ENTER. If the sections filled is
incorrect, press BACK to go back to the
previous step and enter the correct
number.
Cartridge Name A
Complete
Choose cartridge
or Close door
Once the sections filled has been
confirmed, the screen will show that the
process is complete for the selected
cartridge. Choose another cartridge or
close the door if finished.
Good Evening
September 30, 2010
Wednesday 10:01am
Schedule at 4:00pm
Note:
Cartridge names, cartridge size,
items per section, and cartridge
schedules can only be changed on
the TabSafe website.
Close the door when finished. The main
screen will appear with greeting, date
and time. The next time messages
and/or medication are scheduled will be
listed at the bottom of the screen.
21
Refilling a Cartridge
Add or Refill
Choose cartridge or
UPDATE from web
Close door when done
Open the door. When the door is open,
the Add or Refill screen will appear
It is not necessary to press UPDATE in
the following situations:
• Refilling a cartridge with the same
medication and schedule with
which it was previously filled
• The cartridges were removed and
re-installed for any other reason
Cartridge Removal
Remove cartridges from the TabSafe
system to refill them with medication.
The door of the TabSafe system must
be open to remove or install cartridges.
Insert the key into the lock and open the
door.
Lock
Press the Cartridge Eject Button
above the desired cartridge(s) to eject
and remove.
Cartridge Eject
Button
Refill the cartridges, following the
directions and guidelines in the Filling
Cartridges section.
Install refilled cartridge(s) individually.
22
Cartridge Installation
To install a cartridge, align the back of
the cartridge with the desired slot. Slide
the cartridge in and press firmly in the
center until a click is heard. The
cartridge can only be installed one way,
with the rounded side facing outward.
Gently Pull on the cartridge to assure
correct installation.
Press Here
Note:
All four cartridge slots must have a
cartridge installed for the TabSafe to
work. If there are not four filled
medication cartridges, install empty
cartridges and schedule as blank.
Cartridge Name A
Serial Num 1234
ENTER to refill or
CLEAR to exit
The light next to the cartridge will flash
green and the screen will display the
cartridge name and serial number.
Press ENTER to refill. The process for
refilling a cartridge is the same as the
process for entering the number of
sections filled during the initial
installation of cartridges.
Entering Sections Filled
Entering the number of sections filled is
necessary for the TabSafe system to
release the medication(s) and to
maintain inventory within each cartridge.
Cartridge
Button
If the cartridge has just been installed, it
will automatically be selected, indicated
by the green light flashing next to the
cartridge button and the cartridge name
appearing on the screen.
If the desired cartridge is not selected,
choose the desired cartridge by
pressing the cartridge button.
23
Cartridge Name A
# Remain. Schedule
ENTER to refill
CLEAR to exit
Cartridge Name A
Cartridge Size 16
Items per section #
ENTER to continue
Cartridge Name A
Sections Filled __
ENTER to continue
The cartridge name, number remaining,
and the schedule of the chosen
cartridge will show on the screen. Press
ENTER to refill (or enter the number of
sections filled if this is the initial
installation of the cartridge.)
The cartridge size (either 16 or 32) and
the number of items in each section will
appear on the screen. Press ENTER to
continue. If this information is incorrect,
changes must be entered on the
TabSafe website.
Enter the sections filled using the
keypad. For cartridges with multiple pills
per section, this is the number of
sections filled, not the total quantity of
pills. Press ENTER to continue.
Cartridge Name A
Sections Filled 16
ENTER to confirm
BACK if incorrect
Confirm the sections filled by pressing
ENTER. If the sections filled is
incorrect, press BACK to go back to the
previous step and enter the correct
number.
Cartridge Name A
Complete
Choose cartridge
or Close door
Once the sections filled has been
confirmed, the screen will show that the
process is complete for the selected
cartridge. Choose another cartridge or
close the door if finished.
Good Evening
September 30, 2010
Wednesday 10:01am
Schedule at 4:00pm
Note:
Cartridge names, cartridge size,
items per section, and cartridge
schedules can only be changed on
the TabSafe website.
Close the door when finished. The main
screen will appear with greeting, date
and time. The next time messages
and/or medication are scheduled will be
listed at the bottom of the screen.
24
Operating TabSafe
Release Medication
Flashing Green
Cartridge Light
Large Blue Button
Medication is ready
Press Blue Button
When medication is due to be taken, the
TabSafe will flash a green light next to
the cartridge or cartridges to be
released. The volume of the beeping
and the voice prompts are adjustable
under Configuration on the TabSafe
website.
If there is more than one cartridge of the
same medication and schedule
(identical cartridges), the TabSafe will
release medication from the cartridge
installed closest to the top of the unit.
When that cartridge is empty, the
TabSafe will release from the next
cartridge of the same medication and so
on.
To release the medication, press the
Large Blue Button.
Releasing
Cartridge Name A
Please wait…
The medications will be dropped into the
drawer at the bottom of the TabSafe.
The screen will indicate which
medications are releasing and the
cartridge light next to the releasing
cartridge will blink. The drawer will open
once all medication for the scheduled
time has been released.
Note:
DO NOT PULL on the drawer. Wait
until the drawer pops open.
Remove items and
Close drawer…
Remove the medication, using the cup
inside the drawer. Replace the cup and
close the drawer. The cartridge lights
will return to steady green once the
drawer has been closed.
25
Messages
Messages for medications that cannot
be stored in a TabSafe cartridge such
as liquids, creams, or inhalants can be
entered on the TabSafe website.
Messages can also be entered for
medication related duties and activities
of daily living.
Messages are ready
Press Blue Button
Message 1
Press Blue Button
Message 2
Press Blue Button
Messages and
Medication are ready
Press Blue Button
The screen will indicate when messages
are ready. Press the Large Blue
Button to view the messages.
The message (as it was entered on the
website) will appear on the screen.
Press the Large Blue Button to
acknowledge the message and record
the action as complete.
Follow the directions; the medication
should be consumed at this time and/or
the instructions followed.
If there is another message available at
this time the next message will appear.
Repeat this process.
Note:
If messages and medications are due
at the same time, the screen will
prompt for messages first. Once all
messages have been completed,
medication will release.
26
As Needed Medication
As Needed
Choose Cartridge
or press Blue Button
to clear
Cartridge Name B
Press Blue Button
or Choose Cartridge
Releasing
Cartridge Name B
Please wait…
As Needed medication refers to
medication taken only when needed and
not on a regular schedule.
Press the Large Blue Button to access
As Needed medication. Any cartridge
scheduled with As Needed medication
will have a green cartridge light next to
it. All other cartridge lights will be off.
Choose the appropriate As Needed
cartridge by pressing the cartridge
button. The cartridge name of the
chosen cartridge will be displayed on
the screen. Press the Large Blue
Button again to release the cartridge
named on the screen.
If the cartridge name named on the
screen is not the desired As Needed
medication, choose another cartridge.
The medication will be dropped into the
drawer at the bottom of the TabSafe and
the drawer will open. Follow the
directions on the screen to remove the
item(s) and close the drawer.
Remove items and
Close drawer…
Cartridge Name B
Next at 10:48pm
Press Blue Button
Note:
The door must be closed to release
As Needed medication.
As Needed Medication Restrictions
As Needed cartridges should be
scheduled on the website according to
the physician’s orders or over-thecounter directions, including time
restrictions between doses. If it is too
soon to take the medication the screen
will display the next time the medication
can be taken. If the limit per day has
been met the screen will display the
next date the medication can be taken.
27
Menu Options
To access the menu options, slide the
keypad out from under the front of the
TabSafe. Press the MENU button on
the key pad. To exit an unwanted menu
option, press the CLEAR button on the
keypad.
To select the menu option with the
arrow, press ENTER. To move the
arrow to the next menu option, press
NEXT. To move the arrow back to a
previous menu option, press BACK. If
the menu option desired is not yet listed
on the screen, continue to press NEXT.
The following menu options are
available with the door closed. An
abbreviated menu is available when the
door is open.
The menu options are briefly listed here
and discussed in more detail within each
feature’s section.
Open Drawer
Choose the Open Drawer option to open
the Medication Drawer in case of
accidentally leaving medication in the
drawer or leaving the medication cup
out of the drawer.
•
Open Drawer
> View Cartridges
View Messages
Advance Medication
View Cartridges
View Cartridges will show the
information for each selected cartridge,
including the sections remaining, next
time it is available and the schedule
information.
•
View Messages
View Messages will show all messages
that have been scheduled along with the
corresponding schedule information.
•
28
Advance Medication
Advance As Needed
> Override
Refill Cartridges
Advance Medication
The Advance Medication will release the
next dosage or dosages ahead of the
available time.
•
Advance As Needed
Advance As Needed will release the
next dosage of an as needed
medication before the allowed time
range between doses has passed.
•
Override
Override will turn the cartridge wheel
and release one section; regardless of
the status of the cartridge (for example
the cartridge is not available for release,
perceived to be empty, or any other
issue).
•
Override
Refill Cartridges
Pause TabSafe
> Support Menu
Refill Cartridges
Refill Cartridges is used to enter the
number of sections filled contained in a
cartridge.
•
Pause TabSafe
Pause TabSafe will turn off all alerts and
alert calls. Pause TabSafe is used
when the client is known to be away
from the TabSafe and cannot answer
the alerts.
•
Support Menu
The Support Menu should be used with
the guidance of the TabSafe Support
Team.
•
Abbreviated Menu
When the door is open, an abbreviated
menu will be available with the following
options:
Open Drawer
View Messages
Override
Main Menu
Support Menu
•
29
View Cartridge
Open Drawer
> View Cartridge
View Messages
Advance Medication
Select Cartridge to
view
CLEAR to exit
Cartridge Name A
# remain. Schedule
NEXT for detail
CLEAR to exit
The TabSafe will display number of
sections remaining, the next available
time and the medication schedule when
selected. This information can be
viewed at any time. Use this feature to
confirm the cartridge schedule or to
check how many items remain in a
cartridge.
To view this information, press MENU to
access the Menu options. Press NEXT
until the arrow is next to View Cartridge.
Press ENTER to choose View Cartridge.
Then, press the desired cartridge
button to view.
The screen will display the cartridge
name, and the amount remaining and
the schedule for the cartridge. Press
NEXT for more details about this
cartridge.
Note:
Press the CLEAR button at any time
to exit the cartridge being viewed.
There are several types of scheduling:
• Daily—to be taken every day
• Days of the week (Day of Wk)—
taken on specified days of the
week, such as Monday,
Wednesday, and Friday
• Split days of the week (Split
DOW)—similar to Days of the
week, but can be split to be taken
at different times or in different
amounts on different days
• Skip Days—taken every other day
or every third day
• As needed—taken on an as
needed basis
30
View Cartridge Detail
Cartridge Name A
Sched.
Detail
NEXT or CLEAR
Cartridge Name A
Time 1 – # turns
Time 2 – # turns
NEXT or CLEAR
Cartridge Name A
# remain. Schedule
NEXT for detail
CLEAR to go back
Select cartridge to
view
The detail information will show the
schedule and any additional details of
the schedule, such as which days of the
week or the number of days to skip.
Press NEXT for more information or
press CLEAR to exit.
The next information displayed will be
the times and number of sections (or
turns of the wheel) to release at each
time. Only two scheduled times can be
displayed on the screen at once. Press
NEXT to view additional times and
numbers of wheel turns.
When all details have been displayed,
the main View Cartridges screen will
appear again. Choose another cartridge
by pressing its cartridge button or
press CLEAR.
Press CLEAR to exit and return to the
main screen.
CLEAR to exit
Good morning
September 30, 2010
Wednesday 10:10am
Schedule at 4:00 pm
31
View Messages
Use the View Messages option to see
the messages and corresponding
schedule that have been downloaded to
the TabSafe system.
Press the MENU button on the keypad
to display the menu options.
View Cartridges
> View Messages
Advance Medication
Advance As Needed
Message 1
> Message 2
Message 3
Press the NEXT button until the arrow is
next to View Messages.
Press the ENTER button to select View
Messages.
The messages will be shown on the
screen. Choose the message to view
by pressing NEXT or BACK. Press
ENTER to select the message with the
arrow.
Note:
To exit View Messages at any time,
press CLEAR.
Message 1
Schedule:
NEXT for detail
CLEAR to go back
Press NEXT for details regarding the
message displayed.
32
View Message Detail
Message 1
Sched.
detail
NEXT or CLEAR
Message 1
Time 1
Time 2
NEXT or CLEAR
Message 1
Schedule:
NEXT for detail
CLEAR to go back
Message 1
> Message 2
Message 3
The detail information will show the
schedule and any details of the
schedule such as which days of the
week or the number of days to skip.
Press NEXT for more information or
press CLEAR to exit.
The next information displayed will be
the times for the chosen message. Only
two scheduled times can be displayed
on the screen at once. Press NEXT to
view additional times and numbers of
items.
When all details have been displayed,
the main View Messages screen will
appear again. Press CLEAR to return
to the list of messages.
Press CLEAR to exit and return to the
main screen.
Good morning
September 30, 2010
Wednesday 10:10am
Schedule at 4:00 pm
33
Advance Medication
The Advance Medication Option is used
to advance the next medication release
ahead of the available time. The
TabSafe will allow the advance of up to
7 days of medication.
Note:
Once the medication time has been
advanced, the TabSafe system will
not alert for medication or messages
at the original scheduled time.
Note:
It is recommended to write down the
reminder time and all other important
information regarding the advanced
medication for reference.
Open Drawer
View Cartridges
View Messages
> Advance Medication
To advance medication Press the
MENU button on the keypad to display
the menu options. Press the NEXT
button until the arrow is next to Advance
Medication. Press the ENTER button to
select Advance Medication.
Advance
Nov 18 9:00am
ENTER for yes
CLEAR to exit
The next medication time will be
displayed on the screen and the
corresponding cartridge(s) for the time
being advanced will have a flashing
green light.
Remove items and
Close drawer…
The medication(s) will release and the
drawer will pop open, just as during a
regularly scheduled release.
Advance
Nov 18 1:00pm
ENTER for yes
CLEAR to exit
The screen will prompt to advance the
next medication time. Pay close
attention to the date and time on the
screen.
Press ENTER to release the next
medication time shown on the screen or
CLEAR to exit Advance Medication.
34
Advance As Needed
Use Advance As Needed if an As
Needed medication is needed before
the scheduled time between doses has
gone by. Up to 4 days worth of As
Needed medication may be advanced.
Note:
Use caution to take medication as
directed.
View Messages
Advance Medication
> Advance As Needed
__Override
To advance As Needed medication,
press the MENU button to display the
menu options. Press the NEXT button
until the arrow is next to Advance As
Needed. Press the ENTER button to
select Advance As Needed.
Advance As Needed
Choose cartridge
Any installed As Needed cartridge will
have a green light next to the cartridge.
Press the cartridge button next to the
desired As Needed cartridge to choose.
CLEAR to exit
Cartridge Name C
Aug 2 2:00pm
ENTER for yes
CLEAR to exit
Remove items and
Close drawer…
Cartridge Name C
Aug 2 6:00pm
ENTER for yes
CLEAR to exit
The cartridge name of the chosen
cartridge will appear on the screen.
The date and time displayed are the
next date and time a dosage of this
medication can be consumed, according
to the scheduling. Write down the date
and time displayed. Press the ENTER
button to advance this medication.
The TabSafe will prompt to release the
next available time for the same As
Needed medication just advanced.
Press CLEAR to Exit or press ENTER
to advance the same As Needed
medication again.
To advance a different As Needed
medication, press CLEAR to exit.
Repeat the process, choosing a different
As Needed medication.
35
Override
The Override option is useful in the
following circumstances:
• When the initial release is damaged or
unusable
• If a medication is missed, and the
physician approves the medication
being taken late
Note:
Use caution to take dosages of
medication as directed.
View Messages
Advance Medication
Advance As Needed
> Override
Select cartridge to
override
CLEAR to exit
Cartridge Name A
Press Blue Button to
override or
CLEAR to exit
Remove items and
Close drawer
Only one section will be released via
Override at a time. If more than one
section is needed, repeat the process.
Press the MENU button on the keypad
to display the menu options. Press
NEXT button until the arrow is next to
Override. Press the ENTER button to
select the Override Option.
Once Override has been selected from
the menu, press the cartridge button to
choose the cartridge to Override. The
cartridge name of the chosen cartridge
will appear on the screen.
Press the Large Blue Button to
Override the cartridge scheduling for the
chosen cartridge. If the incorrect
cartridge has been chosen, press a
different cartridge button to choose
another cartridge.
One section of the cartridge will release.
The main screen will appear once the
drawer is closed.
Repeat this procedure to Override
another medication cartridge or release
another section of the same cartridge.
36
Refill Cartridges
Cartridges can be refilled during
installation or by going through the
menu. It is not necessary to do both.
Advance Medication
Advance As Needed
Override
> Refill Cartridge
Add or Refill
Choose cartridge or
UPDATE from web
CLEAR to exit
Updating from web.
Please wait…
Calling web server.
Press ENTER to choose Refill
Cartridges from the menu. Refill
Cartridges is used for the following
circumstances:
Note:
For initial installation of cartridges
and additions of new medication,
schedules entered on the TabSafe
website.
The screen will ask if there is new
scheduling information to be updated.
Press UPDATE on the keypad to
download new schedule information that
has been entered on the website in the
following situations:
• The first time cartridges are
being installed
• A new medication is installed
• A change to the schedule of an
existing medication
After UPDATE has been pressed, the
information will download. The screen
will flash a series of messages
indicating that the information is being
transferred. The final message will be
that the update is complete.
Schedules updated.
Press CLEAR
37
It is not necessary to press UPDATE in
the following situations (proceed to
Entering Sections Filled/Refilling a
Cartridge:
• Changing quantity by refilling a
cartridge with the same
medication and schedule with
which it was previously filled
• The cartridges were removed
and re-installed for any other
reason
Entering Sections Filled for
Refilling a Cartridge
Add or Refill
Choose cartridge or
UPDATE from web
BACK when done
Cartridge Name A
# Remain. Schedule
ENTER to refill
BACK to go back
Cartridge NAme A
Cartridge Size 16
Items per section #
ENTER to continue
Cartridge Label A
Sections filled __
ENTER to continue
Entering sections filled is necessary for
the TabSafe system to release the
medication(s) and to maintain inventory
within each cartridge.
Choose the cartridge by pressing the
cartridge button. The cartridge name,
number remaining, and the schedule will
show on the screen. Press ENTER to
refill.
The cartridge size and number of items
per section will appear on the screen.
Press ENTER to continue. If incorrect,
visit website to make changes.
Enter the sections filled using the
keypad. For cartridges with multiple pills
per section, this is the number of
sections filled, not the total quantity of
pills. Press ENTER to continue.
38
Cartridge Name A
Sections Filled 16
ENTER to confirm
BACK if incorrect
Confirm the sections filled by pressing
ENTER. If the sections filled is
incorrect, press BACK to go back to the
previous step and enter the correct
number.
Cartridge Name A
complete
Choose cartridge
or Close door
Once the sections filled has been
confirmed, the screen will show that the
process is complete for the selected
cartridge. Choose another cartridge or
close the door if finished.
Note:
Cartridge names, cartridge
schedules, and items per section can
only be changed on the TabSafe
website.
39
Pause TabSafe
If the client will be away from the
TabSafe for an extended time period,
use the Pause TabSafe Option.
Advance As Needed
Override
Refill Cartridges
> Pause TabSafe
Press the MENU button on the keypad
to display the menu options.
Press the NEXT button until the arrow is
next to Pause TabSafe.
Press the ENTER button to select the
Pause TabSafe Option. The cartridge
lights will go dark and the screen will
read TabSafe Paused.
The TabSafe system will not release
medications or messages while it is
paused and no Alert Calls will be made.
The TabSafe may be paused when
medication cartridges and message are
active. Therefore, pause may also be
useful if an active empty cartridge is
awaiting refill, as the audio and visual
prompts and Alert Calls will stop once
the system is paused.
Resume Operation
TabSafe Paused
Press CLEAR to
resume normal
operations
Press the CLEAR button on the keypad
to return to normal operation and will
display the current date and current
time.
If the TabSafe is resumed after the time
a message or medication becomes
active, medication can be released via
the Override option. See the Override
section for instructions.
40
Support Menu
Override
Refill Cartridges
Pause TabSafe
> Support Menu
> Reboot System
Set Date and Time
Set Database Phone
Turn Battery Off
Set Database Phone
Turn Battery Off
Show Software Ver
> Firmware Update
The Support Menu should be used with
the guidance of the TabSafe Support
Team.
The Support Menu includes the
following options:
Reboot System
The keys 4, 8, and 0 all pressed
at the same time will also
Reboot the system in the event
that the screen is unavailable.
Set Date and Time
Set Database Phone
Turn Battery Off
Show Software Version
Firmware Update
To navigate the Support Menu, use the
NEXT and BACK buttons. Press
ENTER to choose the option with the
arrow.
41
Sleep Mode
Sleep Mode
Press Blue Button
to Wake Up
The TabSafe Medication Reminder
system will go into Sleep Mode when
using battery back up.
While the TabSafe is in Sleep Mode, the
light for the screen/display will be
dimmed and all cartridge lights will be
off.
If medication is scheduled to be
available while the TabSafe is in Sleep
Mode, this will automatically wake up
the Sleep Mode. The cartridge lights
will blink and the screen/display light will
be on until medication is released.
Pressing the Large Blue Button will
also wake up the Sleep Mode in the
event that an As Needed medication
must be released. See the As Needed
Medication section for further
instructions.
If woken up during Sleep Mode, the
TabSafe will automatically go back into
Sleep Mode after one minute of
inactivity.
Sleep Mode is also used in the event of
a power failure while the system is using
battery back up. See Notices Section or
Battery Back Up Section for more
details.
42
Update Button
The UPDATE button connects the
TabSafe system to the TabSafe servers
to download/update information such as
the messages and medication cartridge
schedules that have been entered on
the website.
This information is automatically
transmitted nightly to collect data for the
TabSafe Reports. To make updates
effective immediately, the UPDATE
button can be pressed.
Updating from web.
Please wait…
Calling web server.
Force Dial
Please wait…
Calling web server.
Schedules updated.
press CLEAR
Web update complete.
If UPDATE is pressed when the door is
open, only the cartridge schedules and
configuration information will be
updated.
If UPDATE is pressed when the door is
closed, all information will be
transmitted, updating all reports with
most recent operations.
The UPDATE button is useful in the
following situations:
• A change to the schedule of an
existing medication
• Update report information from the
last automatic nightly download to
the present
• Update the date and time on the
TabSafe system
After the UPDATE button is pressed,
the information will download. The
screen will flash a series of messages
indicating that the information is being
transferred. The final message will be
that the update is complete. Press
CLEAR to exit to the main screen.
Press CLEAR.
43
Personal Identification Number (PIN)
Additional security can be added with
the use of a Personal Identification
Number or PIN. PINs can be added on
the Configuration page on the TabSafe
website. PIN security can be added to
the following features:
• Release of regularly scheduled
medication and messages
• Release of As Needed
medication
• Menu and all menu functions
• Individual menu functions:
• Advance Medication
• Advance As Needed
• Override
• Refill Cartridges
• Pause TabSafe
• Support Menu and all
Support Menu functions
Enter pin: _
ENTER when done
If a function is protected by a PIN, the
screen will ask to enter the PIN before
access will be granted.
The PIN can be 4 – 8 digits and is
entered using the keypad.
44
Notices
Notices will appear on the screen in
place of the date, when applicable.
Good morning
POWER FAIL
Wednesday 8:15am
Schedule at 1:00pm
The Power Fail notice will appear when
there is no power to the TabSafe system
as in an electrical outage. If there is no
electrical outage, check whether the
system has become unplugged either at
the electrical outlet or the AC power
adapter at back of the TabSafe. If the
TabSafe system is plugged into an
electrical power strip, be sure that it is
turned on. Also be sure the electrical
outlet is in proper working order or that it
is not powered by a wall switch that is in
the off position.
While there is no power to the TabSafe
system, the Power Fail notice will
appear on the screen and the system
will use battery back up. After one
minute of inactivity, the system will go
into Sleep Mode. See Sleep Mode
Section for more details.
The system will beep every 5 minutes to
alert that there is no power.
Good afternoon
LOW BATTERY
Wednesday 12:15pm
Schedule at 1:00pm
After battery back up has been used for
four hours, the low battery notice will
appear on the screen in the place of
power fail. Restore power to the system
as soon as possible. The battery will
automatically recharge as soon as
power is restored. No information is lost
if the battery power is completely used.
See Battery Back Up Section for more
details.
45
Missed Medication and Messages
A medication or message is declared missed four hours after the
available time or when half the time between scheduled times for that
cartridge has passed, whichever comes first. Once a medication has
been missed, the medication can no longer be released by pressing the
Large Blue Button.
Example: If there is a cartridge scheduled for 12:00pm and 4:00pm,
between 12:00pm and 2:00pm, the opportunity to press the Large Blue
Button and receive the medication is available. The medication or
message is declared missed at 2:00pm.
The cartridge lights will no longer blink and will go back to steady green
when the medication has been missed.
This safeguard is in place to ensure that medication doses are not taken
too close together. If medication is missed and the physician approves
the taking of medication late, the cartridge may be released by using the
Override option. See the Override Section for more details.
Note:
Use caution to take medication as directed.
46
Alert Calls
The TabSafe will call for the following reasons:
• A medication or message is ready and has had no response
(Large Blue Button has not been pushed) beyond the
determined amount of time, set up in Configuration.
• A medication is scheduled and the cartridge is empty or has
insufficient medication for the release.
• The Medication drawer is left open beyond the determined
amount of time, set up in Configuration.
The timing of the Alert Calls and the numbers called will be customized
using the Configuration page on the TabSafe website.
The TabSafe system will dial alerts and will repeat if the TabSafe is not
addressed, the problem is not resolved or the alert call is not cleared.
Alert calls can be cleared by pressing 1, 5, and 9 on the telephone
keypad. Although the Alert Calls have stopped, the
medication/messages will still be available for release (and the audible
and visual alerts will continue) until the medication becomes missed.
Alert Calls will stop and audio and visual prompts will stop if the system
is paused. See Pause Section for more details.
The time that a medication or message becomes missed is dependent
upon the next available time for this medication or message. See
Missed Medication and Messages for more details.
After the medication or message is declared missed, the Alert Calls will
stop and the medication will no longer be available.
47
Battery Back-Up
The TabSafe will continue to remind and store information in the event of
a power failure; no information is lost. The length of the battery power
will depend upon the number of medication and/or message times and
whether multiple cartridge modules are used, but will last at least 12
hours. The battery automatically recharges as soon as power is restored
to the TabSafe. While the TabSafe system is using the battery back up,
the TabSafe system will go into Sleep Mode to conserve battery power.
The light on the screen/display will go out and all cartridge lights will be
off. See Notices Section for more details.
Available medication will wake up the Sleep Mode and all lights will be
on until medication is released. Release medication as soon after
available time as possible to conserve battery power. Pressing the
Large Blue Button will also wake up the TabSafe System from Sleep
Mode, in the event that an As Needed medication must be released
while the system is in Sleep Mode. The Sleep Mode will resume after
one minute of inactivity. See Sleep Mode section for additional details.
48
Options
Up to three TabSafe Cartridge Modules may be used with one
TabSafe Base Unit, allowing for up to 12 cartridges. Additional
Cartridge Modules can be ordered and will include 4 more
cartridges per Cartridge Module and the connecting cables
needed.
When additional Cartridge Modules are used, it is important to remove
the TabSafe label covering the medication chute on all but the top
Cartridge Module. After removing the aforementioned labels, attach
additional Cartridge Modules by placing the Cartridge Module on top of
the existing Cartridge Module approximately ¼ inch farther back. Slide
the Cartridge Module forward to allow latches to engage, similar to
attaching the original Cartridge Module to the Base Unit. See Set Up
Section for more details.
The Cartridge Modules will be linked together using the gray
cables on the back of the TabSafe. The second Cartridge
Module should be connected using the OUT port on the first
Cartridge Module and connected to the IN port on the second
cartridge module. A third Cartridge Module can be connected in
the same way.
49
Routine Maintenance
TabSafe recommends cleaning the chute inside the TabSafe system,
and the removable medication cup at least every three months.
To clean the chute, remove all cartridges. The chute will be visible along
the right hand side inside the TabSafe unit. Reach inside each cartridge
slot and wipe the chute with a lint-free damp cloth. This will remove any
medication residue that may have built up through regular releasing of
medication. Re-install the cartridges. See the Cartridge Installation
section for instructions.
To clean the removable medication cup, use the Open Drawer feature by
accessing the menu and selecting Open Drawer. Slide the drawer open
and remove the cup. Wipe the cup using a lint-free damp cloth. This will
remove any medication residue that may have built up through regular
release of medication or handling of the medication cup. Place the cup
inside the drawer and close the drawer.
Cartridges should be cleaned at least every three months or whenever a
medication is no longer to be taken. Remove the cartridge and open
using the Cartridge Filling Station. Remove any medication and remove
the wheel. Wipe with a lint free damp cloth to remove any medication
residue. Re-insert the wheel with the teeth of the wheel down. Do not
submerge in water. Fill or refill the cartridge as instructed in the Filling
Medication Cartridges section.
The outside of TabSafe can be cleaned with a lint-free damp cloth.
Avoid using cleaning agents or water directly on TabSafe. Do not
submerge any part of TabSafe in water.
50
Trouble Shooting
Problem
Indicator
Solution
Lights
dimmed
The TabSafe system
is working from
battery power and in
Sleep Mode.
Be sure the TabSafe system is
plugged into the electrical outlet
on the wall and also into the
back of the TabSafe system
Alert Calls
not working
The phone cord may
be disconnected.
Be sure the phone cord is
plugged into the phone jack in
the wall and also in the back of
the TabSafe unit. Also be sure
the phone line is in proper
working order.
Pill Drawer
open
The TabSafe system
will begin the Alert
Calls after 30
minutes.
Close the pill drawer.
Steady Red
Light
Indicates a possible
problem. Go to View
Cartridges in the
menu, choose the
cartridge with the red
light and read the
screen.
The screen will indicate the
specific problem. See the
following problems for specific
indications and solutions.
Cartridge
Empty
This cartridge is
empty or does not
have the full dosage
needed at the next or
current time
scheduled.
Refill the cartridge with
medication or change the
cartridge schedule to blank on
the TabSafe website if the
medication should no longer be
taken.
Expired
The cartridge has
gone past the stop
date scheduled. The
default stop date is
one year or can be
specified on website.
Change the cartridge Stop Date
on the TabSafe website to
change the Stop Date of the
cartridge. Change the cartridge
schedule to blank on the
TabSafe website if the
medication should no longer be
taken.
51
Problem
Indicator
Solution
Not Home
The wheel inside the
cartridge is not in the
proper place.
Remove the cartridge. Move
the wheel inside the cartridge
counterclockwise and re-install.
If medication falls out of the
cartridge, replace.
No Web
Program
This cartridge was
not scheduled on the
website, the
scheduling was not
downloaded, or the
schedule was not
recognized.
Enter cartridge schedule on the
TabSafe website. Press
UPDATE to download the
schedule to the cartridge. If the
schedule was previously
recognized, remove the
cartridge, wait 5 seconds and
reinstall.
Not
Installed
The chosen cartridge
is not installed.
Install the cartridge. Press in
the middle of the cartridge and
push until a click is heard.
As Needed
medication
will not
release
If the scheduled time
between doses has
not yet passed, the
As Needed
medication is not
available for regular
release.
Advance As Needed may be
used to release the As Needed
medication.
Messages
are
presented,
but not
medication
cartridges.
The cable connecting
the Base to the
Cartridge Module has
come loose or is not
fully engaged.
Check that the cables at the
back are secure. See
illustration in Set Up section.
WARNING:
CHECK
ITEMS
(blinking red
cartridge
light)
The wheel inside the
cartridge did not
make a complete turn
and may not have
released the section
of medication.
Follow prompts on screen. If
there are missing items, press
the cartridge button next to
the blinking red light to attempt
another release of the section.
If there are not missing items,
press the Large Blue Button to
exit. The cartridge light will go
back to steady green.
52
Problem
Indicator
Solution
No
medication
in drawer
after a
release
(without
above
WARNING
message)
The medication may
have gotten stuck in
the cartridge or in the
chute leading down
to the medication
drawer.
Remove the cartridge to be
sure the medication can move
freely within each section.
Refer to medication size
limitations. If the problem
persists, there may be
environmental factors such as
humidity or static which prevent
this particular medication from
being released from the
TabSafe system. Remove the
medication from the cartridge,
schedule a message for it and
change the cartridge to blank.
Medication
falling late
Medication may fall
after drawer has
been closed. Use
Menu option Open
Drawer, if necessary.
When filling multiple pills per
section cartridges, it is
recommended to place the
largest of the pills so that it will
fall last as the cartridge wheel is
turned.
Screen is
not visible
and system
beeps every
5 minutes
The TabSafe system
has a power fail and
is in sleep mode
Restore power. The system will
use battery back up until power
is restored.
Screen is
not visible
The TabSafe system
may have received a
static electric shock.
Press 4, 8, and 0 at the same
time to Reboot the system.
Continuing
issues with
medication
not releasing
Cartridge
components may out
of place
See Cartridges Section for
detailed instructions on proper
reassembling of a cartridge.
53
Cartridges
If a cartridge is unassembled, the following instructions will guide through
proper reassembly.
latch arm cover
Fully assembled 16-section cartridge on
Cartridge Filling Station, lid removed.
This is what the cartridge should look like,
with all parts in the proper position. The
following pictures will show components
removed to show what is underneath and
proper positioning of each component.
cartridge wheel
The latch arm cover is over the latch arm in
the upper right hand corner of the cartridge.
The cartridge wheel can either be 16 or 32 sections (16 section is
pictured) and fits inside the cartridge. The cartridge wheel has spokes
dividing the sections and teeth around the bottom outer edge. It is
important that the teeth of the wheel are down so that the latch arm
engages between them and the cartridge wheel will turn.
To the left is a picture of the
cartridge with the latch arm cover
removed. Notice how the latch arm
is between the teeth of the wheel
latch arm
teeth of wheel
In order for the wheel to function
properly, the latch arm must also be
in the correct position.
54
Cartridge post
computer
chip
spring
position
guide
home position
To the left is a close up of the latch
arm in the proper position. The spring
should be around the latch arm post
and in position against the side of the
cartridge, just under the computer
chip. The latch arm should pivot
slightly on the post of the cartridge
when pressed toward the computer
chip.
If the wheel is removed, the small
circular position guide in the bottom of
the cartridge will hold the latch arm in
place until the wheel is inserted.
Replace the wheel, making sure that
the teeth of the wheel are down and
that the latch arm goes between the
teeth. It is also important that the
home position of a 16-section
cartridge wheel be over the home
position guide of the Cartridge Filling
Station.
Replace the latch arm cover,
snapping into place over the cartridge
post.
55
Notes
For initial installation, new medication, or changes in cartridge schedules,
be sure that all information has been entered on the TabSafe website.
Once scheduling information has been transmitted, proceed with
cartridge installation.
Once a cartridge is empty, it can be refilled and the new quantity entered
at the TabSafe system with no need to revisit the website. Changes and
additions to the medication schedule should be entered on the TabSafe
website.
A cartridge can be refilled as often as necessary. As a convenience to
refill less often, it is possible to fill up to four different cartridges with the
same medication strength and schedule them all for the same schedule.
This is useful if the medication is taken multiple times per day and/or the
pharmacy dispenses more than a quantity of 30 pills at one time.
Do not cover the serial number of the cartridge with the cartridge label.
This serial number will be used in the cartridge schedule scheduling
process.
It is recommended that all four cartridge slots contain a cartridge. If
there are not four filled medication cartridges, install empty cartridges
and schedule as blank.
Medication must fit loosely in each cartridge section.
Although each section of the 16-section cartridge is larger to
accommodate multiple pills, the size limitations above still apply because
the exit point for medication in the bottom of the cartridge is the same.
Press the CLEAR button at any time to exit an option that has been
selected.
DO NOT PULL on the drawer. Wait until the drawer pops open to pull.
If messages and medications are due at the same time, the screen will
prompt for messages first.
Once the medication time has been advanced, the TabSafe system will
not alert for medication or messages at the original scheduled time.
When using the Advance Medication feature, it is recommended to write
down the reminder time for future reference.
Use caution to take medication as directed.
56
Specifications
Power Source
120 VAC 50/60 Hz
Battery Life
12 Hours
Display
LCD
Data Port
Yes
Size
11 7/8 in W x 14 in D x 14 in H
Weight
16.2 lbs (without cartridges)
Operating Ranges
For Indoor Use
Altitude
up to 2,000 m; (6,561 ft)
Temperature
5 °C to 40 °C; (41°F -104°F)
Humidity
maximum relative humidity 80 % for temperatures
up to 31 °C (87°F) decreasing linearly to 50 %
relative humidity at 40 °C
Mode of Operation
Continuous
57
Regulatory Agency Information
Telephone Connection Information
The Federal Communications Commission (FCC) has established rules
that permit the use of this device to be directly connected to the
telephone network. The unit is provided with two standardized plugs and
two standardized cables with jacks to be used to make this connection.
Non standard cables/jacks should not be used. The FCC also requires
that this unit not be used on party line or coin operated telephone lines.
Telephone Company Information
Should the telephone company request information about the devices
connected to their telephone lines, the following information pertains to
the TabSafe:
A. Telephone number Unit is connected to: Your telephone number
B. Ring Equivalence Number (REN): 0.2B
C. USOC jack required: RJ11C
In most areas, the sum of the RENs of all devices on the line should not
exceed five (5.0). If too many devices are attached, they may not ring
properly. The telephone company also may make changes in its
technical operations and procedures over time. If such changes affect
the compatibility of, or use, of this device, the telephone company is
required to give adequate notices of these changes.
58
FCC Emissions Compliance Statement
Warning: Changes or modifications to this unit not expressly approved
by the party responsible for compliance could void user’s authority to
operate this equipment.
NOTE: This equipment has been tested and found to comply with the
limits for a Class B digital device, pursuant to Parts 15 and 68 of the FCC
Rules. These limits are designed to provide reasonable protection
against harmful interference in a residential installation. This equipment
generates, uses, and can radiate radio frequency energy and, if not
installed and used in accordance with the instructions, may cause
harmful interference to radio communications. However, there is no
guarantee that interference will not occur in a particular installation. If this
equipment does cause harmful interference to radio or television
reception, which can be determined by turning the equipment off and on,
the user is encouraged to try to correct the interference by one or more
of the following measures:
- Re-orient or relocate the receiving antenna.
- Increase the separation between the equipment and receiver.
- Connect the equipment into an outlet on a circuit different from
that to which the receiver is connected.
- Consult the dealer or an experienced radio/TV technician for
help.
59