1
HandyAvi 4.3 User’s Manual
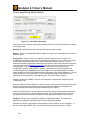
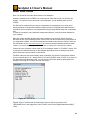
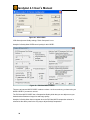
Note that the "Quality:" slider and the quality settings in some CODECs do not "cooperate". In
the case of the mjpg CODEC, the "Forced quality" slider determines the degree of JPEG
compression and the "Quality" slider in the "motion-detect Movie Setup" window has absolutely
no effect. Other CODECs we have tested do not override our "Quality:" slider.
When in doubt, you should test by setting the quality and capturing (for example) three frames of
the same scene (use Time-Lapse and take one frame every 3 seconds or so). Then change the
quality factor and make another movie. The size of the two resultant AVI movie files should be
different.
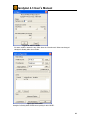
See Configure Window Examples for information on the Configure options of various CODECs.
See Video Codecs, Page 23.
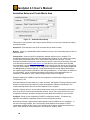
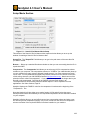
Quality: Adjust the quality of the compression scheme. Most compression schemes create
smaller files because they are actually discarding tiny image details. By discarding more and
larger image details, you can produce a smaller AVI file. If the Quality is set to 100, then little or
no image data is discarded and the resultant AVI file will be large. If the Quality is set to 0 then,
theoretically, all image data is discarded and the resultant AVI file will contain blank images! Of
course each codec is created by software people who may have thought about this and limited it
so they do not throw away all of the image data even if the Quality is zero.
Note that each codec is different and some may even ignore the Quality setting or not allow it to
be set. Also note that lossy compression schemes are used in many applications. JPEG is an
example of a lossy compression scheme that is used in MANY applications and the fact that
some of the image data has been discarded is practically unnoticeable. So compression with
slightly reduced quality is a very good thing in most cases. Learn more about video codecs here.
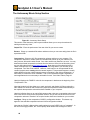
Sensitivity: This slider lets you set up the motion-detect sensitivity. Each frame taken by the
camera will be compared with the previously captured frame to see if it is different enough to be
stored in your video output file.
If the sensitivity is set to 0.0, then only the first frame will be captured when you "START" making
a video. Other frames cannot be different enough to be captured if the sensitivity is set to 0.0.
If the sensitivity is set to 100.0, then ALL frames will be captured after you "START" making a
video. Each frame will seem to be different from the previous frame so all frames will be captured.
If the sensitivity is set somewhere between 0.0 and 100.0, then not all frames will be captured.
Only frames "different enough", based on the sensitivity setting will be sent to the video output
file. (The first frame of course is always sent to the video output file when the capture session is
"START"ed.)
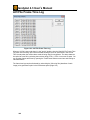
The sensitivity can be set during capture as well as before or after. This allows you to adjust the
sensitivity and test it while a video is being made. You will be able to see which frames are
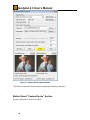
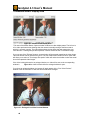
captured by looking at the "Last Motion Detect" frame window in the Motion-Detect Display Area.
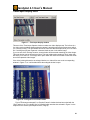
Each frame taken by the camera will appear the current "Live Video Preview"
frame visible in the Motion-Detect Display Area.
Each frame captured and sent to your video output file will appear in the "Last Motion Detect"
frame area visible in the Motion-Detect Display Area.
Additional frames to capture after motion has stopped: Enter the number of frames to add
(continue recording) after motion detection is no longer being triggered.
40