1
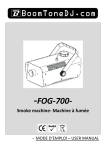
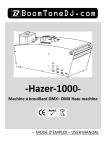
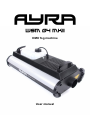
DMX fog machine
User manual
1
Safety precautions
WARNING: This unit may cause serious injury when used incorrect. It therefore is strongly advised to
read this user manual carefully, to get familiar with the functions of this device.
WARNING: This unit must be operated by, or under continuous supervision of an adult. This device is
not suitable for children. Keep the machine out of reach while using it amongst children.
WARNING: This device operates under high temperatures. Do not touch the fog machine while active
or directly after use. Do not block the fog exit with your hands. Incorrect use may cause serious first or
second degree burns.
WARNING: A cooling down time of 20 minutes is obligatory after use, to cool down the housing and
internal components.
WARNING: Do not physically move the machine while in use.
IMPORTANT: It is possible that small amounts of fog are produced during the warming-up time and
after use.
Installation requirements:
- Always check the power supply you want to connect the device to. If the voltage requirements do not
meet, do not connect the device as this may cause serious damage.
- This device must be installed by a professional technician, in a standing position. Always pay
attention to the positioning of the unit, as the housing and produced fog can reach high temperatures.
- The unit is not intended to be used in a hanging position. The provided brackets are not suitable for
rigging. Ayra is not responsible for any injuries or damage caused by improper use.
- It is recommended to use the provided safety eye when this device is placed on a high platform
- Make sure there are no flammable objects in the direct environment of the device.
- Do not block the fog nozzle with your hands, objects or cloths
- Keep a minimum distance of 0.5 meter from any walls to provide sufficient cooling
- Make sure the fog nozzle is not blocked by any objects in the near environment
- Always use the included power supply. Contact your local dealer for a replacement unit if necessary.
Maintenance and protection
- Keep the unit away from dusty environments. Clean the ventilation slots with a small, soft brush and
vacuum cleaner when needed. Clean the housing of the unit with a damp cloth. WARNING: Always
disconnect the unit from the power supply when cleaning the unit. Reconnect the unit only if any moist
on the fixture disappeared completely.
- Do not switch the power on and off too often, as this may cause serious damage to the unit.
- Avoid heavy shocks and collision during transport and use, as this might cause damage to the
internal components.
- Keep the device away from moisture, rain, water or any liquids as this may cause a short circuit
and/or electric shocks. If any liquid enters the unit, power supply or housing of the unit, disconnect the
unit immediately and do not reconnect the power supply. Contact your local dealer or technician to
inspect the unit for any damage. Only the liquid tank may contain liquid in the form of proper fog
machine fluids.
2
Box contents
Box contents
1x WSM04 MKII fog machine
1x power cable
1x wired timer controller
1x keychain wireless remote control
1x magnetic receiver for wireless remote control
Unit and accessory inspection
- Always use the supplied power cable to connect the unit to a power supply. If the cable appears
broken or has visible damage, do not use it.
- If the unit will not be used for a longer period of time, disconnect it from the power supply and store it
in a dust-free environment.
- Always check the unit for possible damage before use. If you suspect that something is wrong with
the unit, do not connect it to a power source! When you suspect that your unit is broken or damaged,
contact your local dealer or a certified technician to inspect the unit.
- When your device does not generate any fog when it should, turn off the device. Do not touch the
housing or fog nozzle while the machine is active or cooling down after being disconnected.
3
Device overview
1. Fog machine nozzle (fog output)
2. Transport handle
3. Ventilation slots
4. Safety eye
5. Liquid tank
6. Liquid hose
7. ON/OFF switch
8. IEC Power input
9. 5-pin DIN connector for wireless receiver
10. 5-pin XLR connector for wired timer remote
11. DMX in- and output (3P XLR)
12. DMX dipswitch panel with LED indicator
4
Setting up the unit
To make sure that you use this machine as intended, Ayra recommends to follow the steps described
below.
Liquid
Before turning on the machine, make sure there is enough fog liquid in the tank. This machine accepts
most fog liquids and various densities for light or heavy fog. Ayra recommends to use Ayra fog liquid
or JEM fluids as these give the best results. Proper fog liquid leaves less residue, is more
efficient/economical and creates almost odorless fog.
The liquid tank of your WSM device has a volume of approximately 8 liters. Fill the tank for
approximately ¾ of its capacity. Overfilling the tank may cause the liquid to spill during transport,
because of shocks, impact and tilting of the machine.
Fluid consumption depends on the type of fluid, the amount of fog that you wish to create and the
timespan of use.
Positioning
The WSM04 MKII fog is intended for use on the floor, or on a riser (platform). This machine is not
suitable for hanging operation. Ayra is not responsible for any injuries or damage caused by improper
use. When placed on a high platform, it is highly recommended to use a safety cable and attach it to
the provided safety-eye.
WARNING: Do not position this machine directly above your audience. It is possible that small drops
of heated fog liquid are generated and projected by the fog nozzle, which may cause injury. Ayra is not
responsible for any damage or injuries caused by improper use of this device.
WARNING: When using this machine positioned on the floor, keep it out of reach of children. When
used among children, this machine must be operated by and under continuous supervision of an adult.
Control
The WSM fog machines are controllable in several ways. You are able to use the included wired timer
remote, the included wireless keychain remote or you can control the device with a DMX controller
(not included).
Wired timer remote
Connect this controller with the 5-pin XLR connector on the rear of the machine.
1. Interval selection: Determines the timespan when the machine is activated.
2. Duration selection: Determines the duration if the timer activates the machine.
3. Output intensity: Output 0-100% (variable)
4. Timer functionality on/off
5. Continuous fog: Continuous operation with the selected output intensity
6. Manual fog: Fog projection at the selected output intensity, when pressed
Yellow LED: Timer function on/off
Red LED: Continuous fog function on/off
Green LED: Fog machine ready-indicator
5
Wireless keychain remote
The wireless keychain remote is compact and gives you flexibility. It operates
under a range of max. 25 meters, if not obstructed by objects or walls.
NOTE: When you wish to use the wireless remote, connect the included
receiver to the 5-pin DIN connector on the rear of the machine. The bottom is
magnetic and can be placed underneath the handle of the machine.
A receiver is built into the machine. The remote can be attached to your
keychain with the included miniature carabiner.
The keychain has a protective cover, making it impossible to press buttons
while you aren’t using the remote. The cover slides down easily, granting
access to the LED and buttons. When pressing a button, the LED will be lit,
indicating that a signal is sent to the receiver.
The keychain remote has an expandable three-stage antenna to improve the range and signal
transmission. To replace the internal battery, remove the three screws on the rear.
DMX control
When you are already in the possession of a DMX-controller, it is possible to integrate the
WSM fog machines in your light show. The output of the fog machine can be adjusted with
one DMX channel, from 0 to 100%.
For optimal use of the fog machine on DMX, some basic knowledge is needed. Contact your
local dealer for more information.
Connect the fog machine to your DMX-controller, using standard XLR male to XLR female
cables.
Select the correct DMX starting address by using the dipswitch panel just above the XLRconnectors. The dipswitch value is stated just above the panel. By adding several values
you are able to make combinations to reach the desired DMX value between 1 and 256.
For example, if you wish to set the device to channel 17, you need to select dipswitch 1 + 5.
A status LED is provided, indicating that the machine receives DMX-signal from your
controller.
Turning on the machine
Turn on the ON/OFF switch on the rear of the machine. When doing so, you will not have
instant smoke as the internal heating element needs to reach a certain temperature. The machine has
a built-in indication LED, which projects on the liquid tank. This way you can see the tank light up
when the fog machine is ready (indicated with a blue LED). Also the wired timer remote shows a
‘ready’ indication, with a green LED.
Projecting fog
After +/- 45 seconds (depends on the output volume) the fog machine will stop its output to reheat the
internal heating element. A built-in thermostat keeps the heating element on a proper temperature.
During the reheating time, the fog machine can not be used to project any fog.
6
Maintenance
Cleaning
Make sure to clean the exterior of the unit frequently, as the build-up of dust and dirt may have
negative influence on the cooling and optics of the fixture.
The exterior of the unit can be cleaned with a damp cloth. Allow some time for the machine to dry
before you use it again.
Clean the fan outlet and the cooling vents with a small brush, while using vacuum cleaner suction to
remove any loosening dust and/or dirt.
Clean the exterior of this fixture once a month. When using this fixture intensively, the frequency of
maintenance needs to be increased.
Transport
When using this fixture in mobile setups, provide sufficient protection during transport. Use the original
packaging of this unit, or use a professional flightcase with proper foam inlay. This way the electronics,
optics and housing are protected against severe shocks, exterior damage and failing electronics.
Make sure that the machine is being transported with the right side up, to prevent liquid spills. When
this can not be guaranteed, empty the liquid tank.
Make sure that the machine cools down properly to room temperature. It is possible that some small
fog bursts are visible directly after use. Allow the machine to cool down for at least 20 minutes. Do not
touch the housing before this time to prevent any burns.
Replacing the internal fuse
Always check your power supply for faults before changing the internal fuse. When you suspect that
the fuse is broken, remove the fuse cover, located just below the power inlet.
WARNING: Always disconnect the fixture from your wall outlet or any other power supply to prevent
electric shocks.
Always replace a broken fuse with a new fuse with the same type and rating. When the fuse is
replaced, always close the fuse-cover. Reconnect the fixture to your power supply to see if the
problem is solved. When this does not solve your problem, contact your local dealer for help.
Spare parts
This unit has no user serviceable parts inside. When any damage to internal components occur,
contact your local dealer or a specialized technician in order to repair the fixture.
Checkup
To prevent dangerous situations, make sure your fixture is in optimal condition before you use it.
Check your fixture frequently for the following points:
- All screws must be mounted tightly.
- Check all screws and metal parts for corrosion. No visible corrosion should be present.
- The exterior of your fixture must be in optimal condition. Check your fixture for dents, cracks or
missing parts.
- Your installation spot must be in optimal condition. Check your installation spot for corrosion, cracks,
dents and strength.
- Electrical components (connectors and cables) must be in optimal condition. Any form of damage
(cuts, exposed wire cores or any other visual deformities must be prevented.
7
If any visual or mechanical damage is detected, contact your local dealer or a specialized technician.
Do not use the fixture when damage or failure is discovered.
Connectors and wiring schematics:
DMX-connections:
Electrical wiring:
Clogged system
It is possible that the fog output of your machine decreases over time. This may be caused by a
congestion in the fluid pump system.
To solve this, you have to follow the steps described below first. Do not use special fog machine
cleaning solutions first, as these are the last expedients to save your fog machine.
- If there is any fog liquid left in your tank, remove it from the tank.
- Fill the fluid tank with demineralised/destilled water. You can buy this at your local supermarket,
drugstore, DIY-store, etc.
WARNING: Never use tap or normal botteled water as this contains chalk. This may clog your system,
causing permanent damage. Warranty is void when traces of chalk are found in the pump or pipes of
the system.
- Fill the tank with approximately 1 liter demineralised/distilled water.
- Turn on the machine and let the heating process take place
- When your fog machine is ready, let the machine work at 100% output, continuously. This can be
done through DMX or with the timer remote control.
- You will notice that the first couple of output-bursts the machine mainly produces fog. This is caused
due to the fog liquid that is still inside the pipes of the heating system. After several minutes you will
notice that the fog output smoothly transforms into a light steam solution. This means that the
demineralised or distilled water has been pumped around the machine.
- Let the machine perform at full output for approximately 20 minutes, to make sure any internal dirt is
removed when possible.
- Turn off the machine and let it cool down. Remove the demineralised/distilled water from the tank.
IMPORTANT: You can save the demineralised/distilled water that was not used, but only use it again
for fog machine cleaning purposes, as traces of fog liquid have mixed with the water inside the tank.
NOTE: When the machine will not be used in the near future, you may leave the tank empty. The
demineralised/distilled water will stay inside the machine, which is harmless.
- Fill the machine with fog liquid and turn it back on. Let the heating process take place. When the fog
machine is ready, let it perform at 100% output. You will notice that the machine produces steam,
which will smoothly transform into fog as the fog liquid is pumped through the system.
8
Technical specifications
Heating element
Pump
Output distance
Warm-up time
Tank capacity
Fog output
Ready-indicator inside tank
Wireless keychain remote included
Wired timer remote included
DMX control
Hanging bracket included
Safety eye
Power requirements
Internal fuse
Dimensions
Weight
WSM04 MKII
3000 Watt
55DCB
15m
Approximately 8 minutes
8 liters
1700 m³
Blue LED
Two-button remote with indication LED
Timer-remote, cable length approx. 7m
1 channel
No
Yes
110-230V AC, 50/60 Hz
20mm glass, 10A fast blow, 250V
670 x 355 x 260 mm (with tank)
8 kg
Connectors:
- DMX: 3p XLR male and female
- Power: IEC power connector
- Wired timer remote: 5-pin XLR
- Wireless remote receiver: 5-pin DIN
Included accessories:
- Power cable with Shucko & IEC connectors
- Wired timer remote
- Wireless keychain remote
- Wireless receiver
9