1
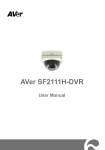
Introduction
Thank you for your purchasing this car safety series On-board
HD Digital Video Recorder. This product is specially developed and
aimed at evidence collection difficulty of today's car accidents. At the
same time, it meets the market needs on other occasions, allowing
you to realize one unit multiple uses and making your life carefree
and colorful.
This product has industry-leading functions like digital FULL
HD1080P camera shooting, HOLD key-press emergency store, voice
store, HDMI output, TV sync output and so on. This product has
unique humanized design, small and exquisite, and with the
multi-functional holder, it is applicable to meeting recording,
monitoring and evidence collection, outdoor shooting, forensics
recording and other extensive fields.
The user manual gives detailed description on use, operation,
installation, use notes and technical specifications. Please read and
fully understand this manual before use and take good care of this
manual for further reference. We sincerely hope that this product can
meet your requirements and offer long service to you!
Product features
1 Beautiful decoration and easy shooting in body design;
○
○
2 Motion detection feature; start the motion detection function and when
there is moving object within effective monitor area, the machine will
automatically start recording while if the moving object stays at rest or goes
beyond the effective area, the machine will automatically stop recording;
○
3 2.7-inch Sharp HD display to show the footage of the site in a clear way
and play back the video immediately at the scene of the accident so as to
sort out the accident responsibility and minimize disputes;
4 AVI format video recording, to meet a variety of players and easy
○
upload;
5 500W pixels Carl Zeiss certified ultra-wide-angle HD night vision lens;
○
the viewing angle is as wide as 140°to cover the sight on both sides of the
front end of a vehicle and provide a complete record of eight more lanes.
Either left or right, it records clearly and completely without any dead
corner;
6 High-speed dynamic video and instant response to light and shade;
○
○
7 Video output of 1280*720, 1440*1080P and 1920*1080P at 30 frames/sec;
○
8 TV sync display, always following the video image;
○
9 AV playback, to play back wonderful life anytime and anywhere;
10 HDMI output;
○
11 TF card storage device, exchangeable with digital cameras and
○
supporting maximum 32GB;
12 Imported high-speed quad-core CPU chip in original packing; real long
○
cycle video without frame missing, rather than the software modification
for avoiding frame missing. It is a true non-frame missing car video
recorder.
13 Dedicated car bracket for wide range of uses;
○
15 One-button emergency HOLD video key; in case of an emergency, press
○
this key, the record file created during the time will not be deleted and
overwritten by recycling.
16 Super night vision king; the exclusively original array dual-lamp far
○
infrared night vision has better night version effect;
17 Sync display of time and date;
○
Product structure:
○
1:
2.7-inch Sharp high-definition display.
Up arrow key.
○
2 : OK key. ○
3 : MODE key. ○
4 : HOLD key. ○
5:
10 : TF
○
6 : Indicator. ○
7 : MENU key. ○
8 : Down arrow key. ○
9 : TV OUT. ○
11 : POWER key/night vision switch. ○
12 : HDMI HD output interface. ○
13 : USB
card slot. ○
14 : Reset button. ○
15 ○
17 F8 night vision lamps. ○
16 :5 mega pixel Carl Zeiss certified
interface. ○
high-definition camera.
.
I: Operating Instructions
1. Plug in TF card (ensure the card is a genuine high-speed card
CLASS6 or more, low-speed card does not support record at 1080P) ,
short press the power button to boot. The blue light then keeps lit.
(formatting is recommended before use) .
2. Press the Mode key to select the desired mode after startup; modes of
video, camera and playback keep shift if you keep pressing the Mode
key.
3. Video: after power on, the record function is in standby mode; short
press OK key to start record, and short press it again to stop
recording.
4. Camera: in standby mode after power on, short press the Mode key to
switch to camera mode, and then short press the OK key to take
pictures (a sound will produced if photographing succeeds) .
5. Playback: in standby mode after power on, short double-click the
Mode key to switch to the playback mode, and press up and down
arrow keys to select to preview photo or video and then press OK key
to play.
6. Infrared startup/shutdown settings: short press the power key after
startup to start infrared startup/shutdown function, and short press
again to close the function; long press the power key to power off .
7. TV OUT: in the power-on state, plug in AV cable accompanied with
the machine to connect the television (TV transferred to video mode),
and the display on the screen of the machine will be transferred to the
TV; unplug the AV cable to switch to the screen.
8. HDMI: in the power-on state, plug in the HD cable to connect to the
TV HD port, the screen display will be transferred to the TV, and
unplug the HD cable it will switch to the screen.
9. Emergency recording HOLD key: after the machine is started, in any
mode (e.g. in case of emergency), you can manually open the
emergency recording system (documents will not be recycled
overwritten) , and press OK to save.
II: Menu Setting
1. Main menu:
In the standby mode after startup, short press the MENU key to display
the main menu video menu, press the down arrow key to select the option
to set, press OK to enter and again OK for confirmation. Short
double-click the MENU key to display setting menu, press the down
arrow key to select the option to set, press OK to enter and again OK for
confirmation.
⑪ Video menus:
① Resolution ② Loop recording ③ Exposure compensation ④ Motion
detection ⑤ Recording audio ⑥ Date label
⑫ Setting menus:
① Date and time (time setting : press OK key to enter, press OK key
move the cursor between year, month, day, hour, minute and second and
press up/down arrow key to set the current time) ②Automatic shutdown
③
Key
sound
④
Language
setting
(English/Korean/Spanish/German/Italian/French/Japanese/Russian/Simpli
fied Chinese/Traditional Chinese, total ten languages.) ⑤ TV mode ⑥
The G - sensor ⑦ Light frequency ⑧ Image rotation ⑨ Formatting ⑩
2. Camera menu
In camera mode, short press the MENU key to display the camera menu,
press the down arrow key to select the option to set, press OK to enter
and again OK for confirmation. Double-click the MENU key to display
setting menu (the same with the main menu setting menu functions)
⑪ Camera menu in camera mode:
○1 Resolution ② White balance ③ Exposure compensation ④ Anti-shake
⑤ Date label
3. Playback menu
In playback mode, short press the MENU key to display the playback
menu, press the down arrow key to select the option to set, press OK to
enter and again OK for confirmation. Double-click the MENU key to
display setting menu (the same with the main menu setting menu
functions)
Playback menu in playback mode:
○1 Delete ② Protection ③ Slide player
III: Additional information
1.Recording while charging: plug in the car charger, and after the car is
started, the machine automatically enters into recording mode; if TF
card is fully occupied, the machine will automatically overwrite old
files (G- sensor file and file created by emergency HOLD button will
not be overwritten). The automatic loop recording avoids full
occupation of TF card. In case of the car charger power-off, the
machine shuts down in 5 seconds and save the file.
2.Random adjustment of focal length: press up and down arrow keys in
the video and camera standby modes can achieve 4x digital zoom.
3.Indicator description: blue light: work indicator light. Red light:
charging indicator light, the red light is on when charging and off when
the battery is fully charged.
4.Support TF card ( high-speed 1-32G card)
5. Photo format: JPG format, adjustable photo resolution in the resolution
menu in the camera mode.